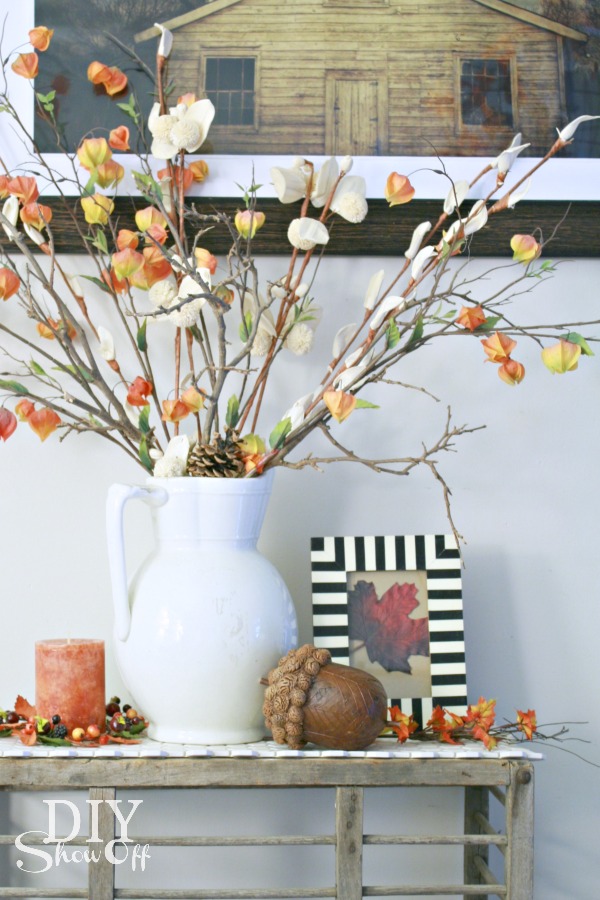
Fall is in the air! Mornings are crisp and chilly (back to school weather), days bright and sunny, and evenings cool and perfect for a cozy night’s sleep!
I decided to gather up and feature three favorite fall projects from the DIYShowOff archives. So here we go!
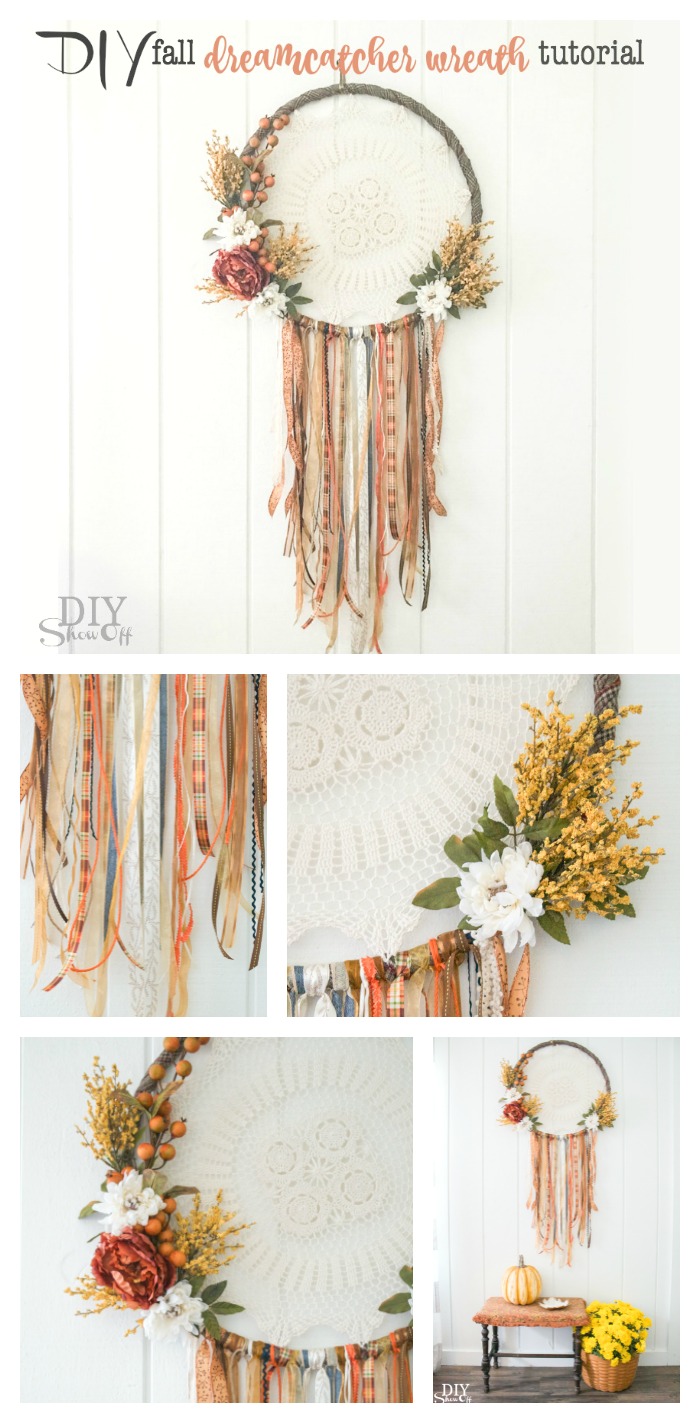
Fall Favorites:
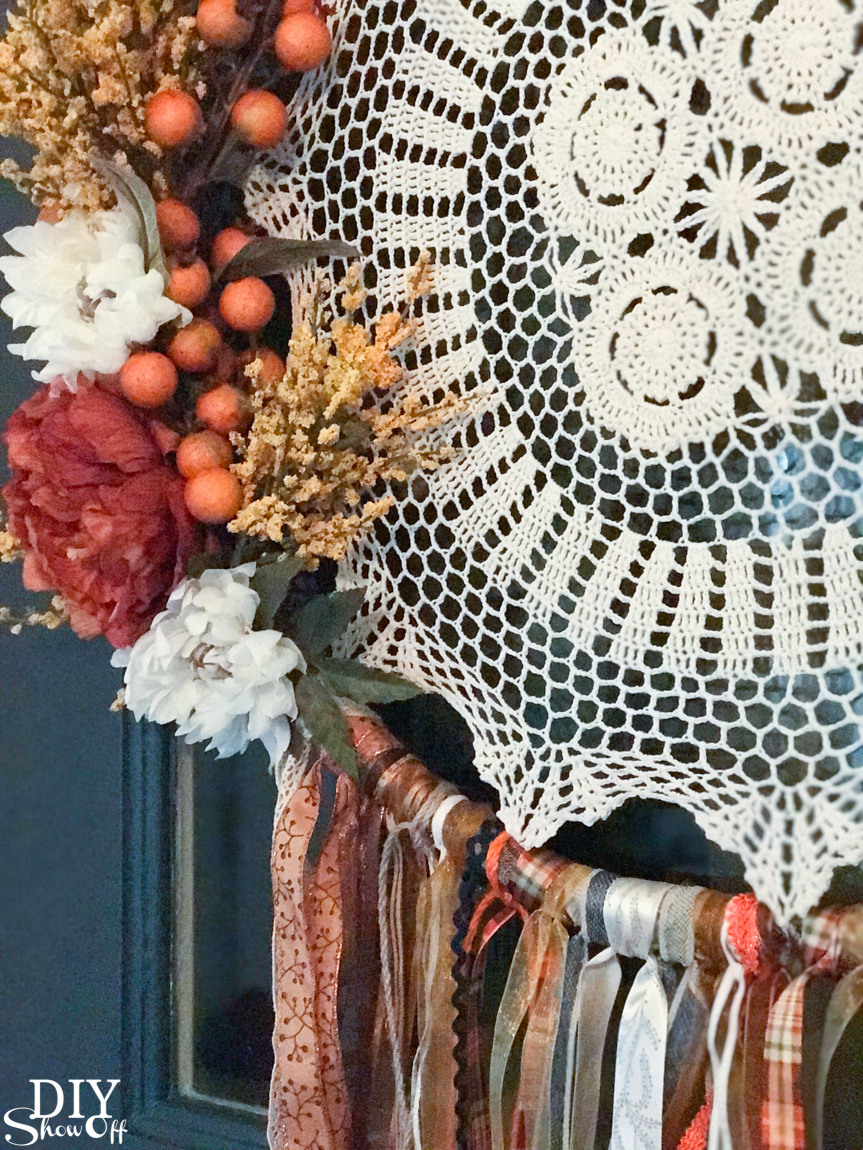
Fall dream catcher wreath tutorial: my all time favorite! Isn’t it beautiful? It’s large and in charge and a statement that doesn’t go un-noticed!
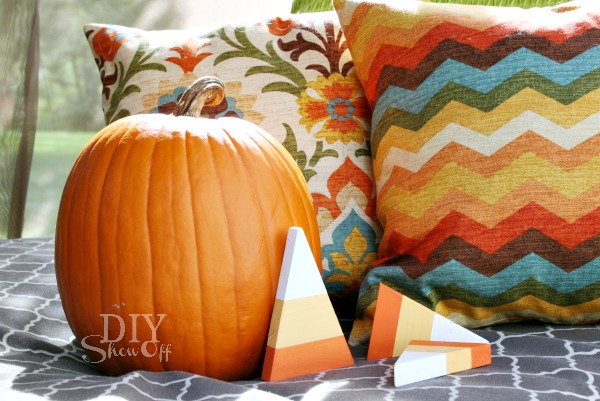
Wooden candy corn decorative accents. Cute and whimsical and so much better than there real thing! Well, at least in my opinion. What do you think? Are you addicted? I remember mom filling the candy dish. And I’m pretty sure they were purely decorative until they formed one hard mass at the end of the season. lol
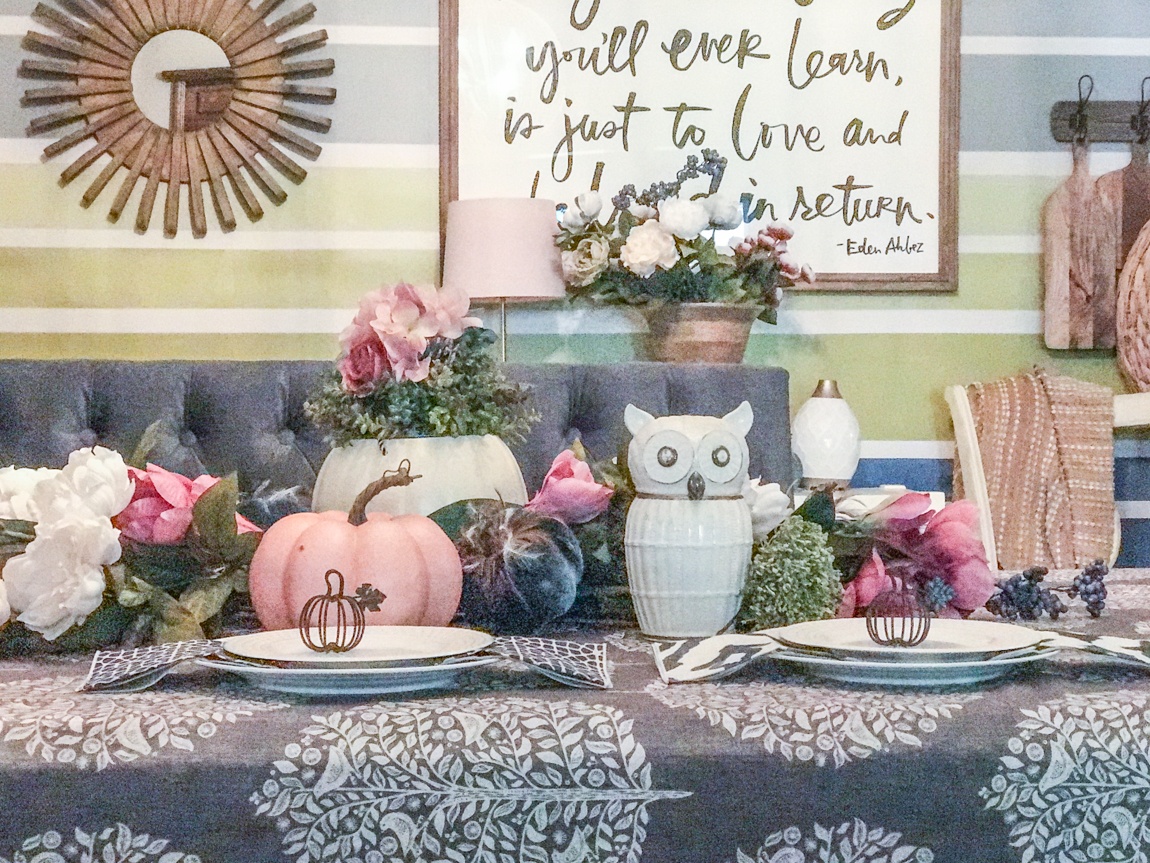
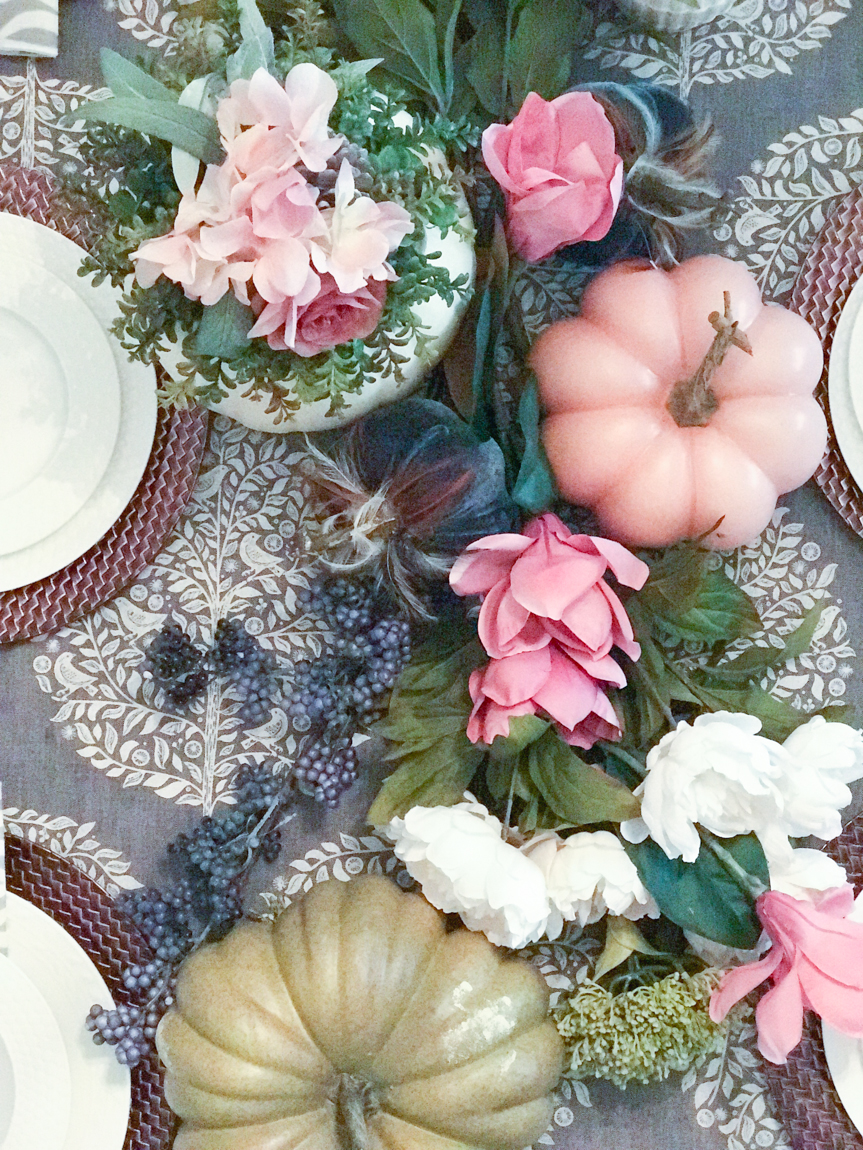
Decorating with non-traditional autumn colors can be a challenge but I can’t wait to tackle our dining room fall decorating again this year! The DIYShowOff 2017 fall home tour has lots of inspiration!
Those are DIYShowOff’s most popular fall blog posts and my favorite too! Are you ready for fall? Are you an all things pumpkin spice loving, mum planting, autumn leaf raking, sweater and boots, warm fuzzy throws and mulled cider fanatic? What’s your favorite thing about this time of year?
Isn’t it funny where inspiration comes from? At times, it’s somewhere completely random or even unknown. I’m thinking the inspiration for these DIY chocolate candy wedding party favor gifts may have been handmade soaps or even those beautiful yogurt bowls I’ve seen on Instagram. To be honest, I’m not sure – I’ve done some searching and haven’t stumbled across anything similar.
I made these up as a hostess party gift/favor and got drafted to make up some bridal shower favors. So here’s my DIY tutorial for beautiful chocolate/candy melts. They are so easy! Some affiliate links included.
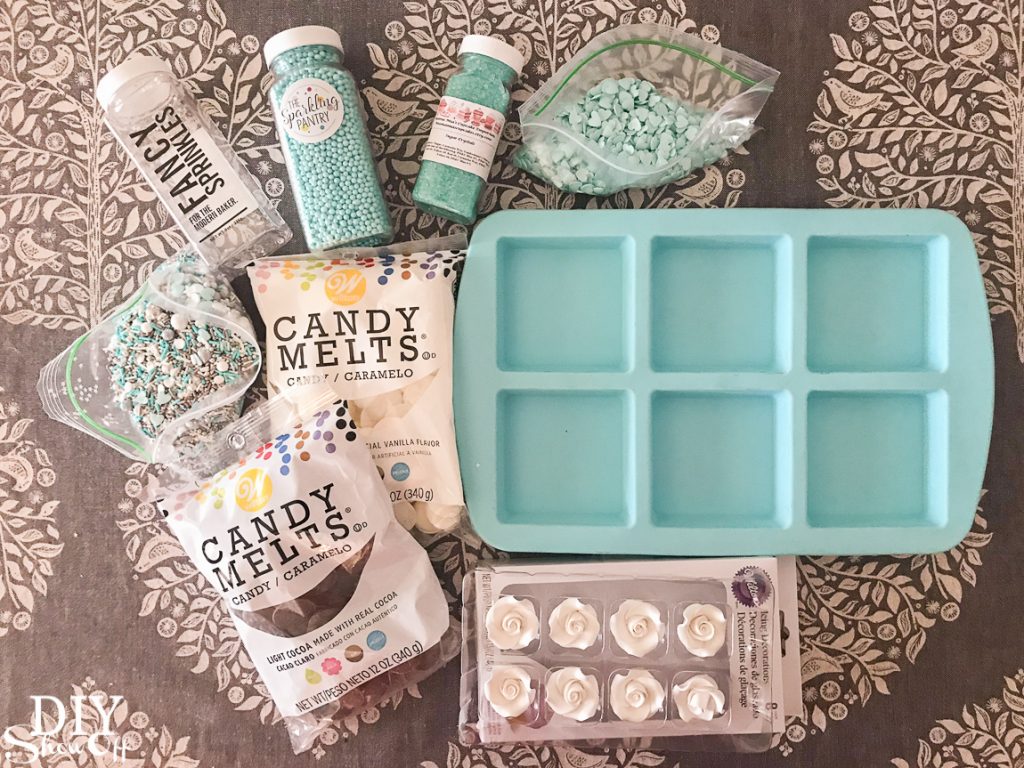
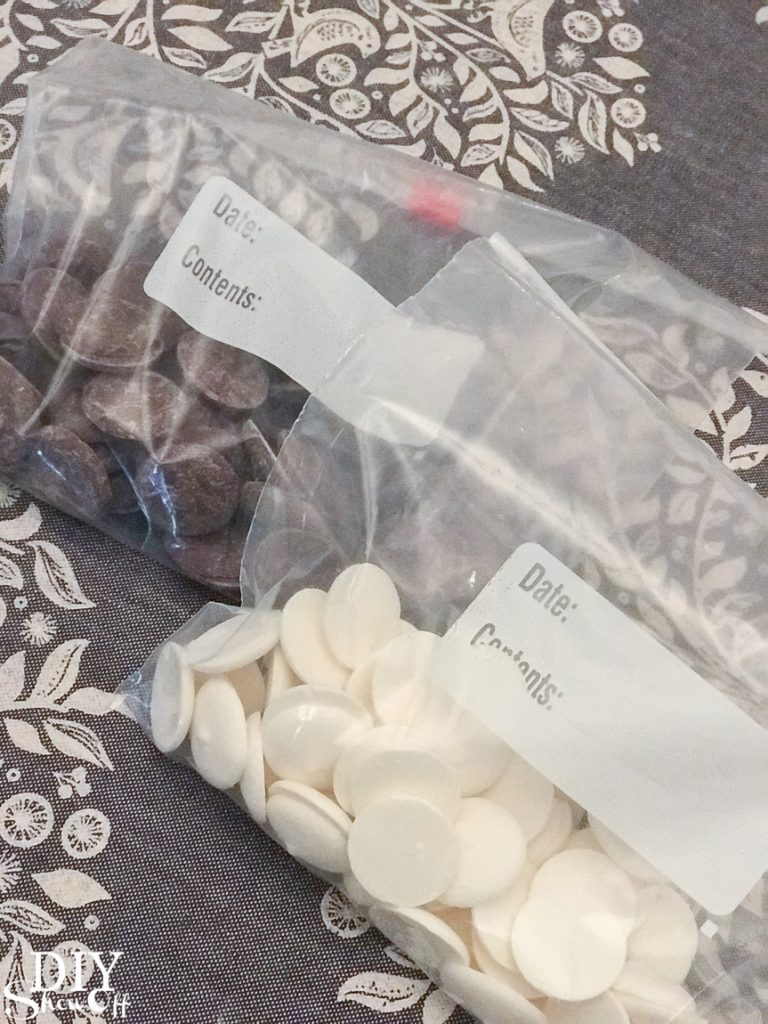
Serves: This silicone mold is a large size (3×3 inch). Two bags of melts makes 6.
What I did:
I transferred candy melts to quart sized baggy (I used two: light cocoa and white) and melted according to package instructions – either in the microwave or in a double boiler. My experience: I carefully set both bags (unzipped) into the microwave on ‘defrost’ for 50 seconds then checked and repeated and re-checked until melted. Instructions warn against overheating and I didn’t have any issue.
*Melted candy will be hot. Please use caution!
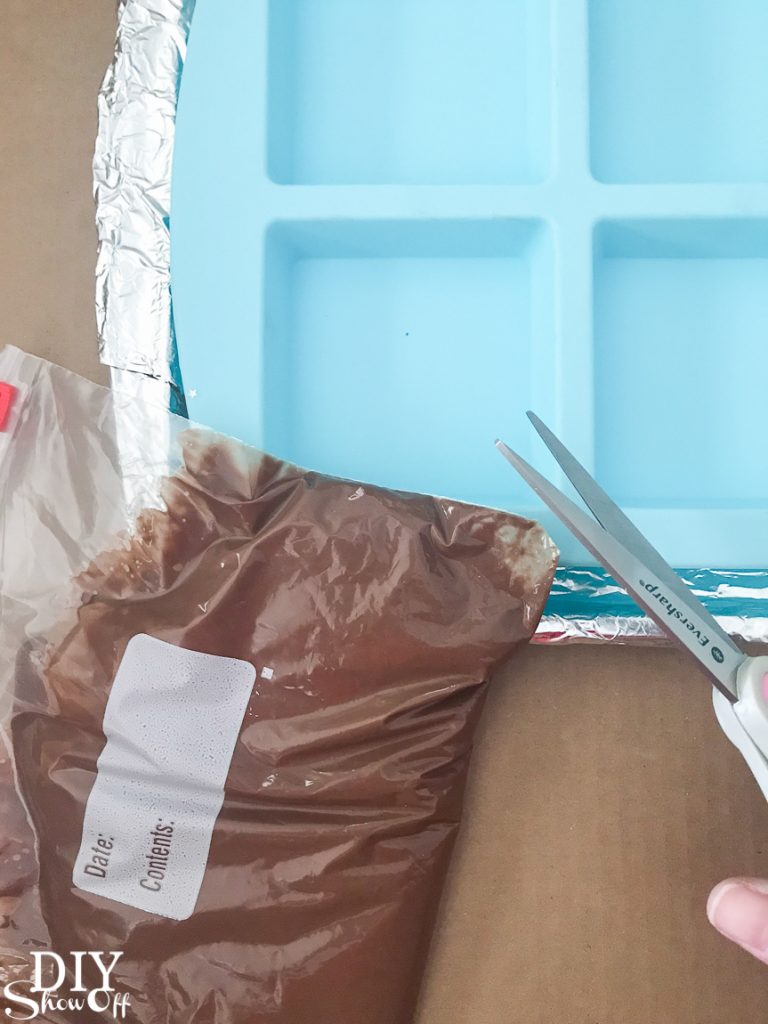
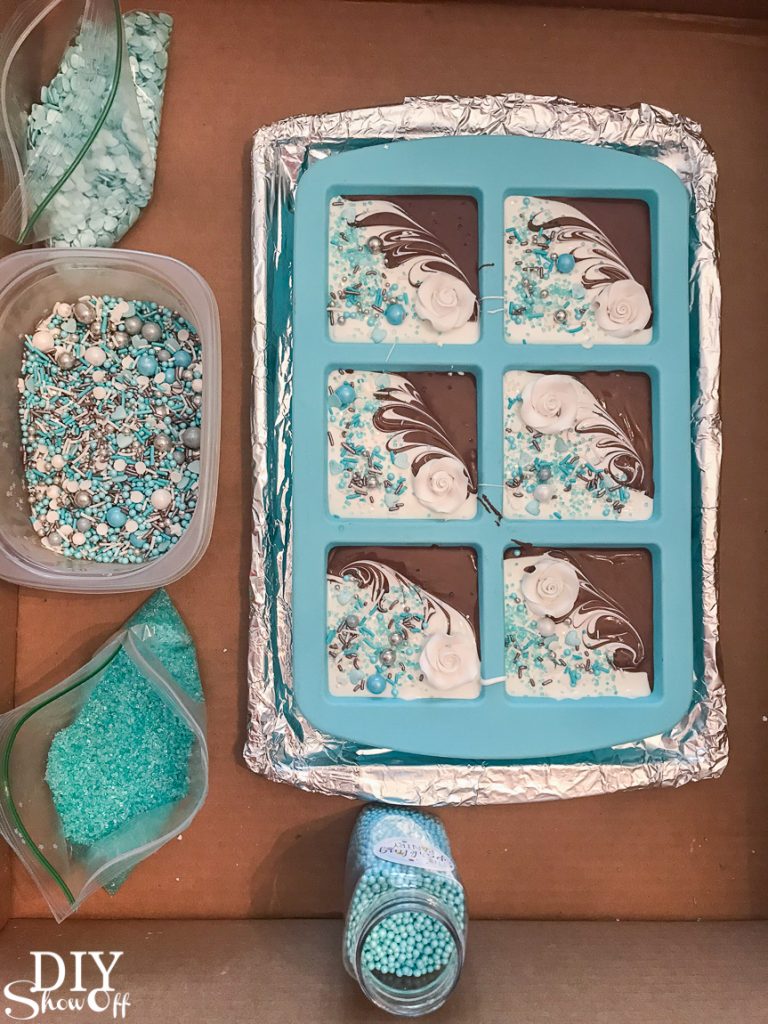
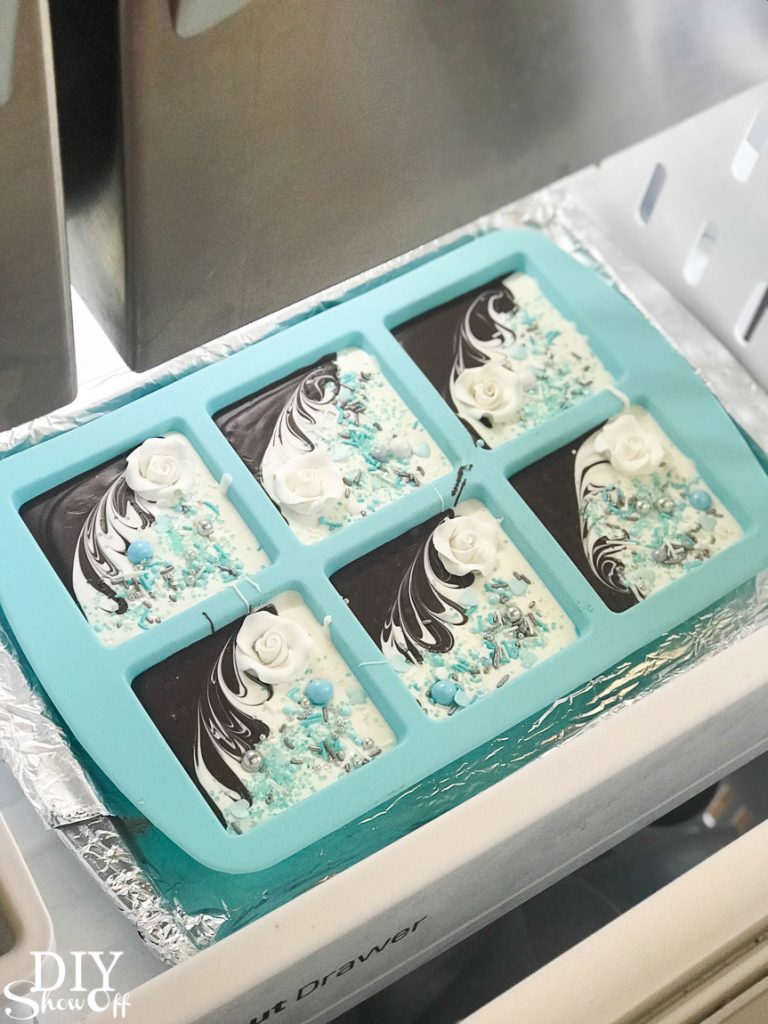
I set my silicone mold on a small cookie sheet (a tray or something that gives the mold support to be moved and that will fit into your freezer works).
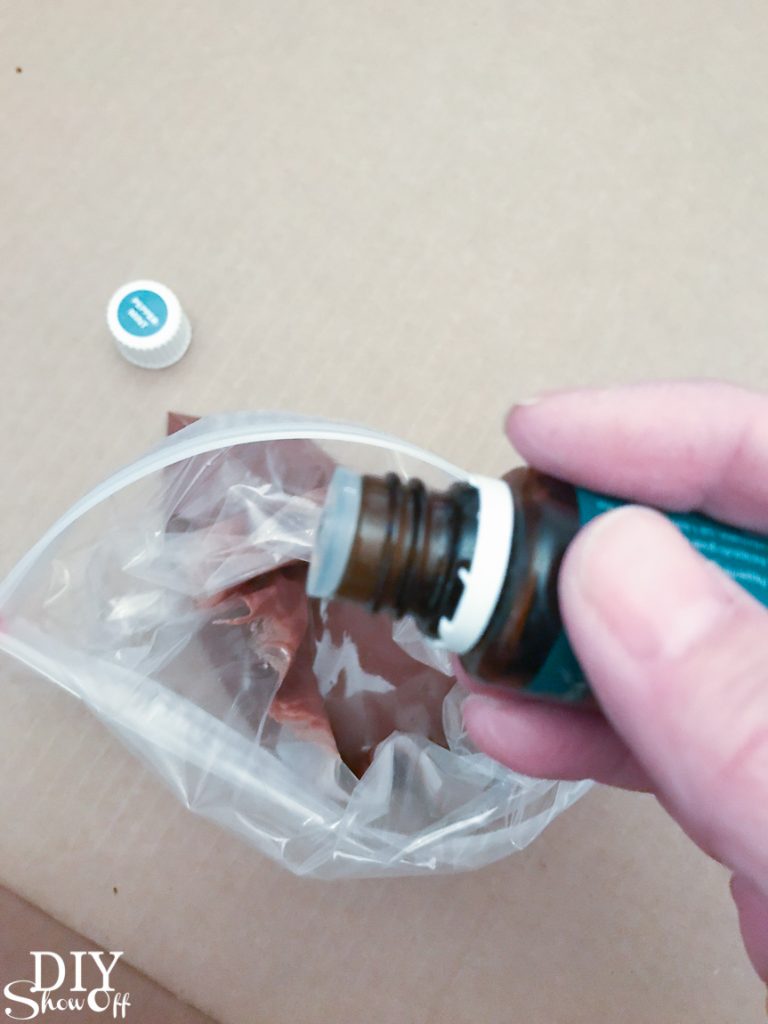
Once my candy was melted, I added 2-4 drops of Peppermint Vitality essential oil to the melted white candy, zipped the bag and kneaded the baggy to mix. I didn’t do it with both colors, just one.
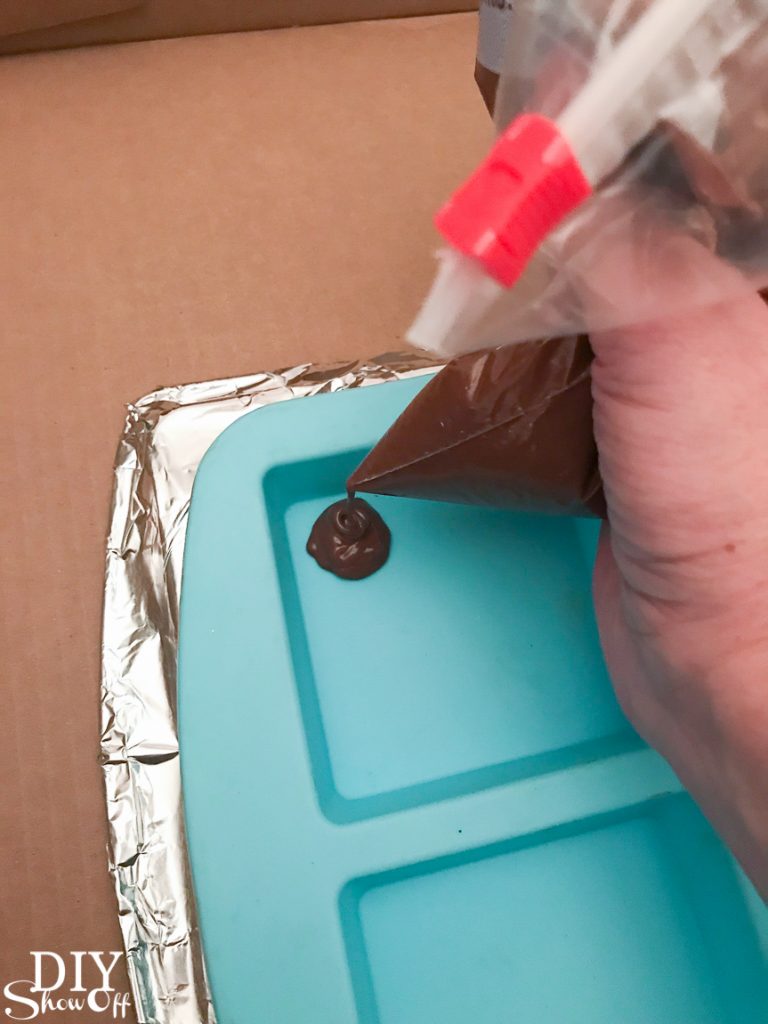
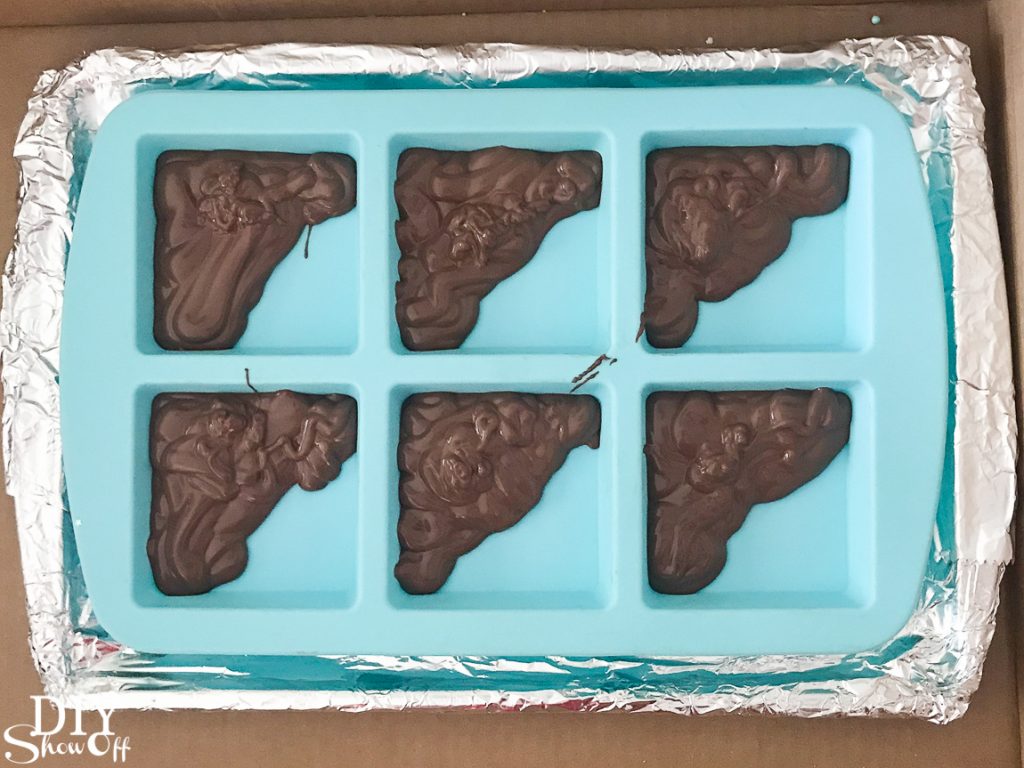
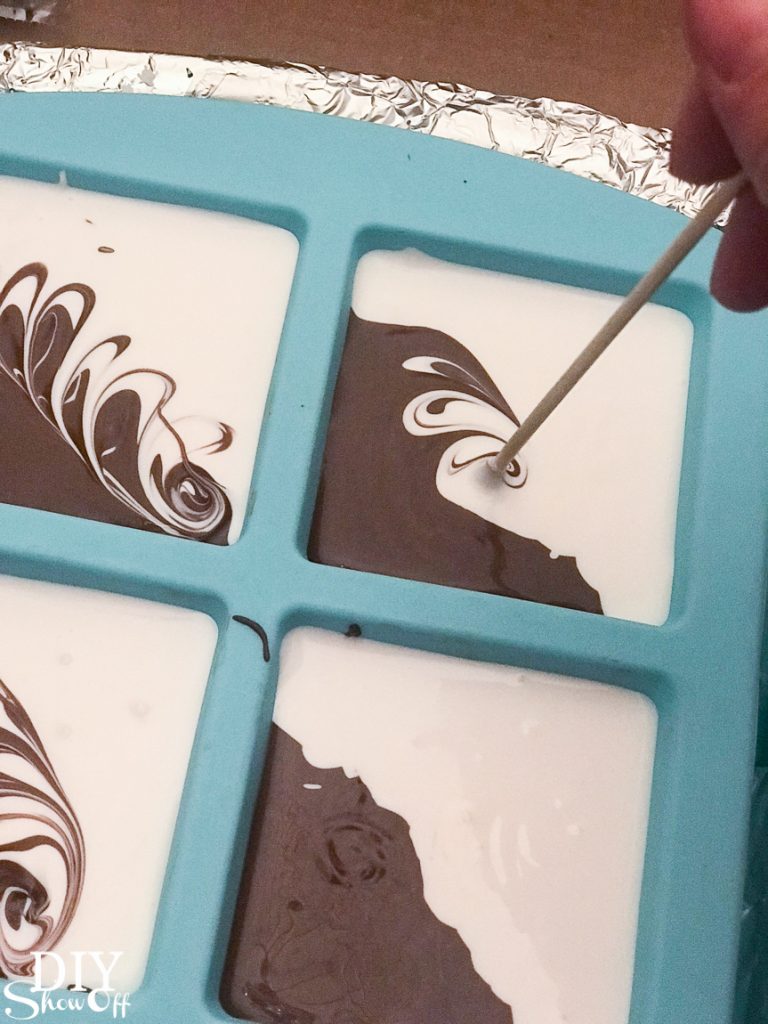
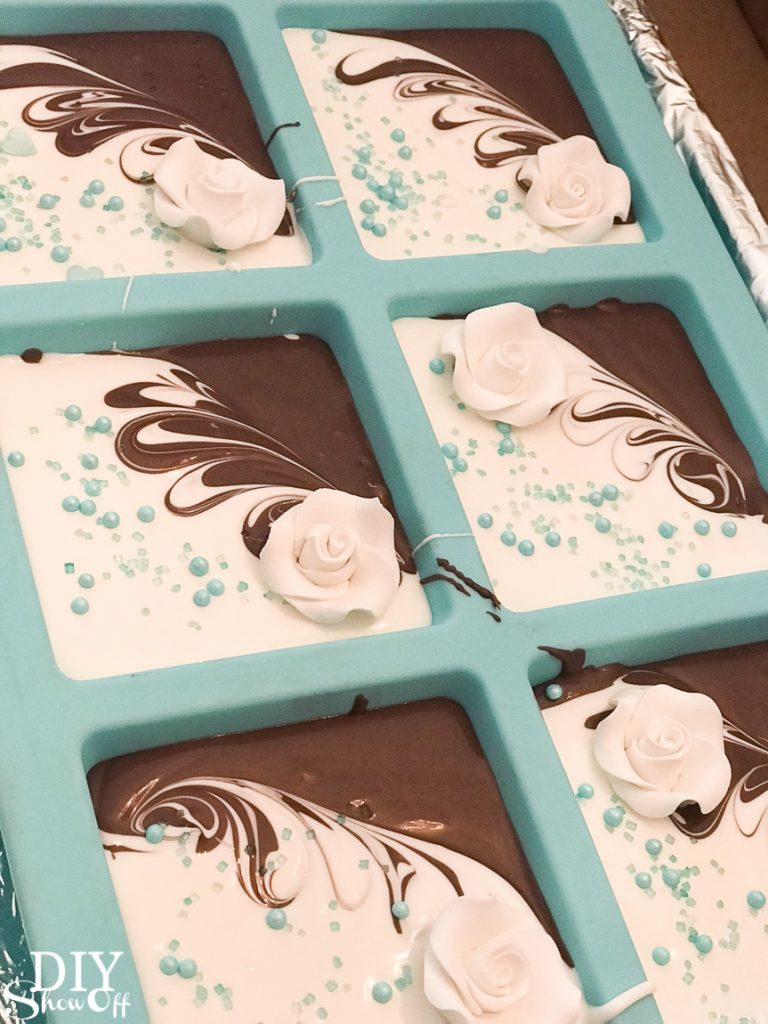
Then I snipped off a bottom corner of the baggy (very small snip!) with scissors and piped the candy into the silicone mold and repeated with the other color. I filled each silicone space with half and half of each candy into each square.
Next I gently shook/shimmied the mold to level the melted candy.
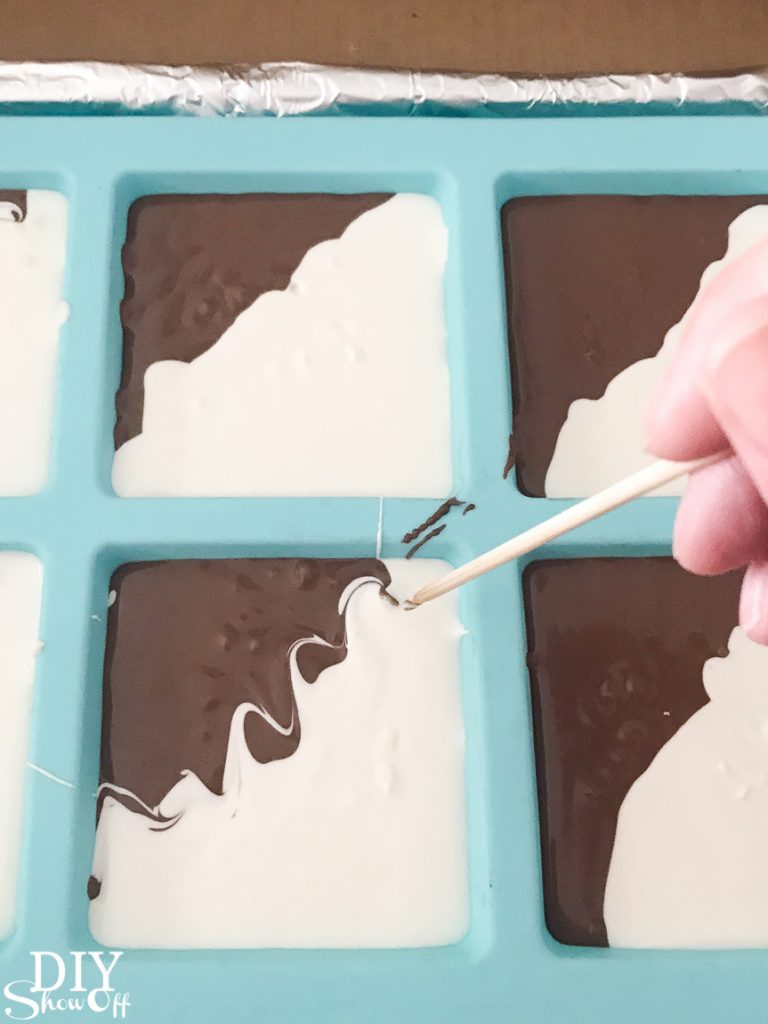
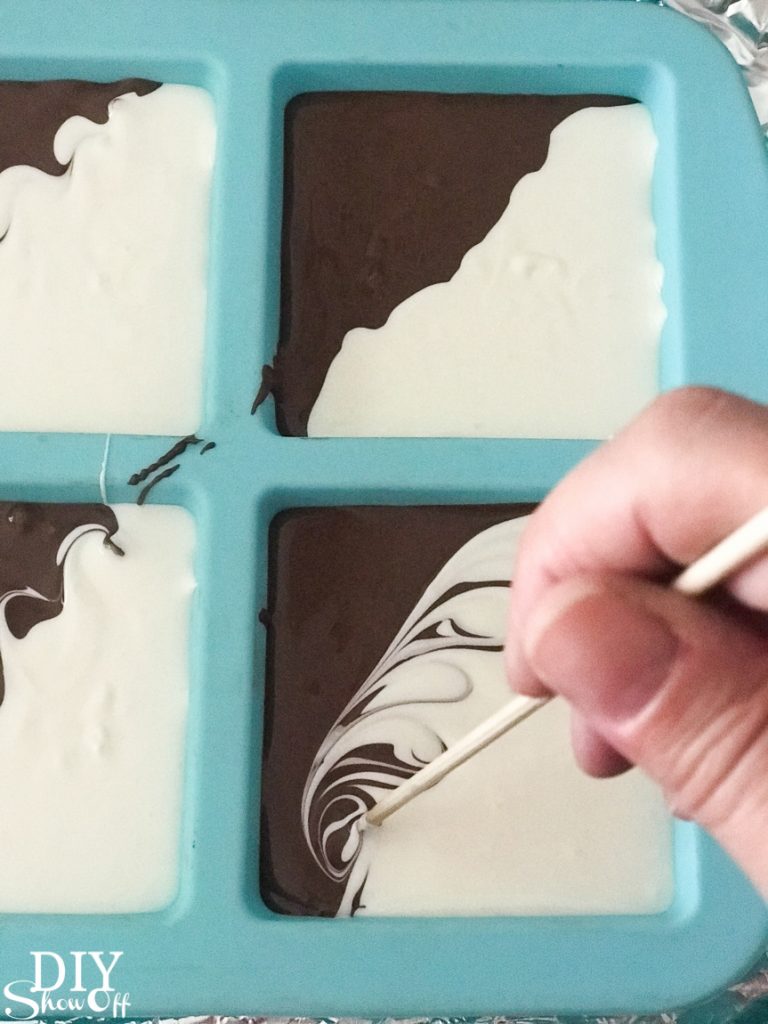
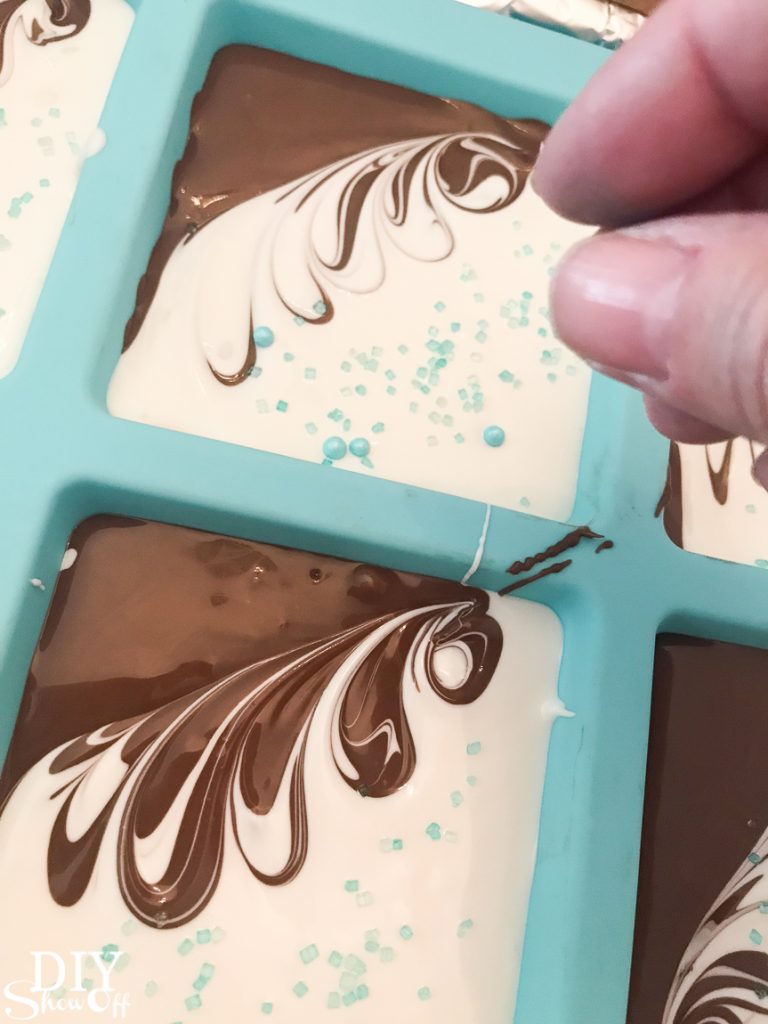
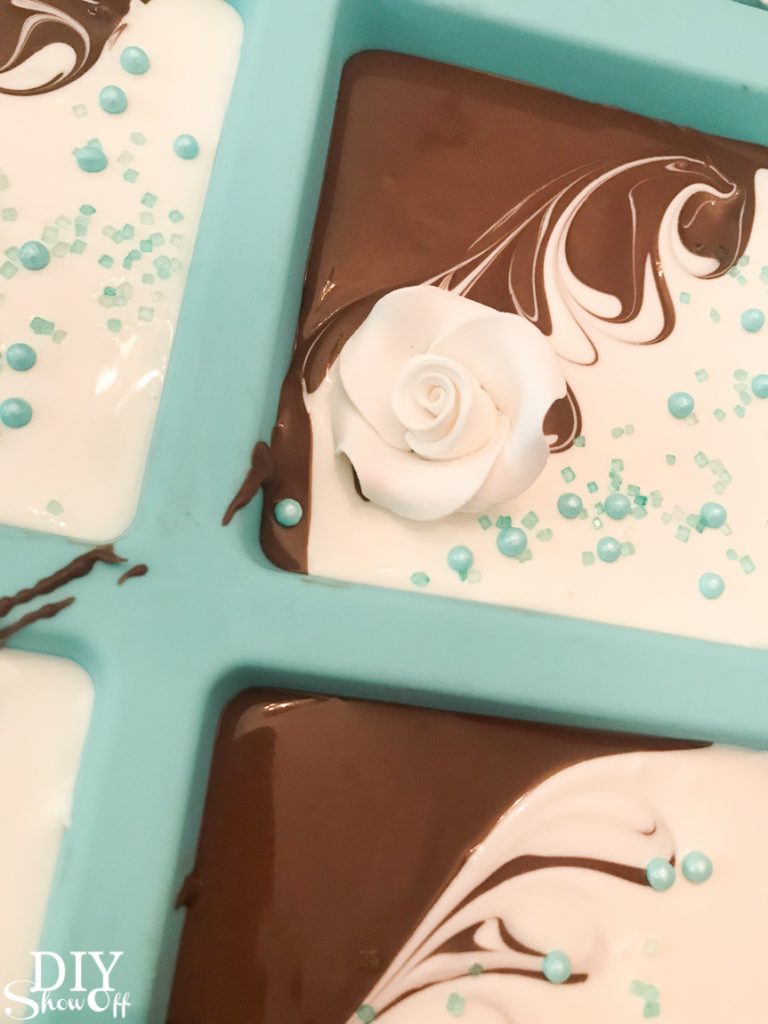
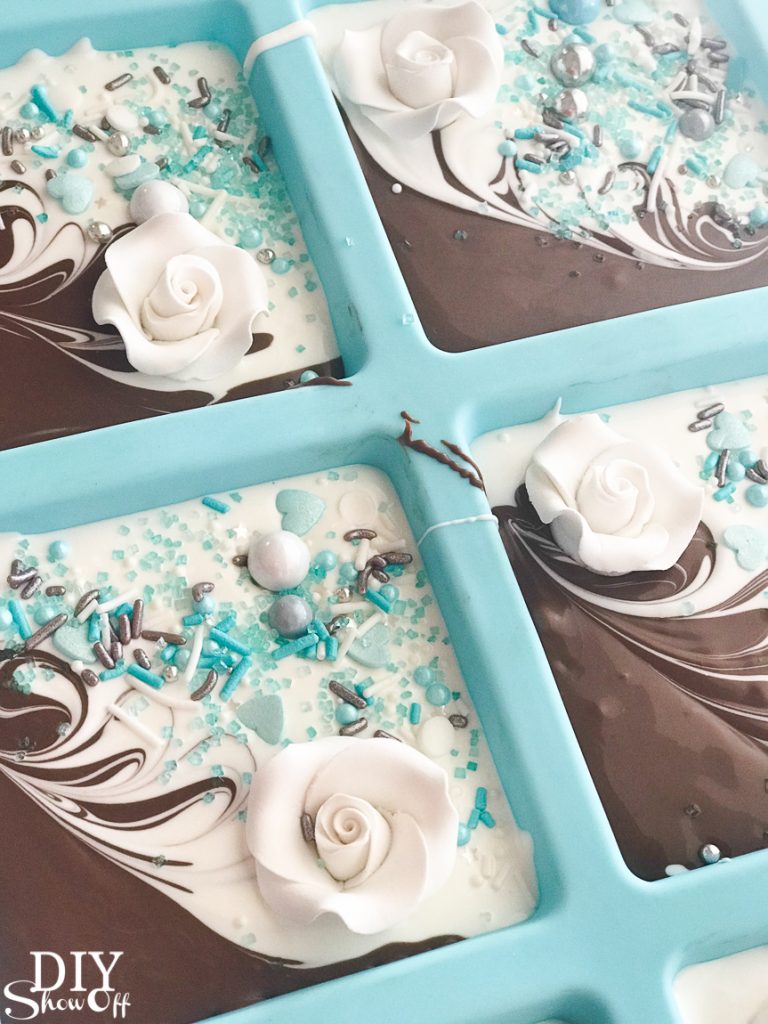
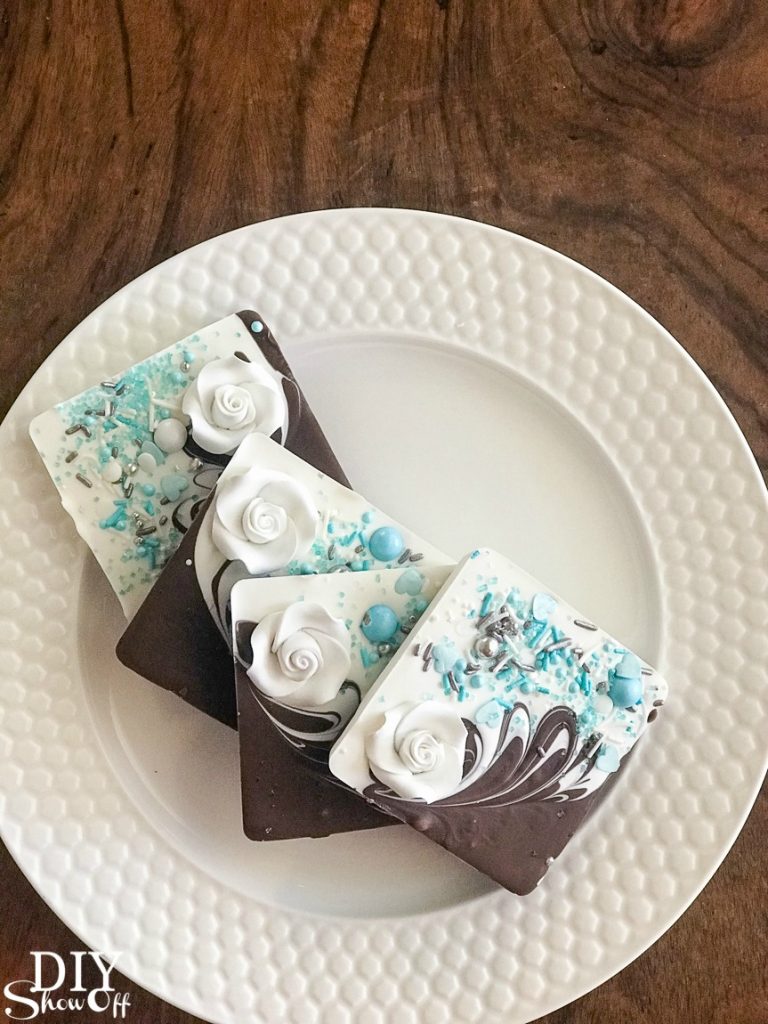
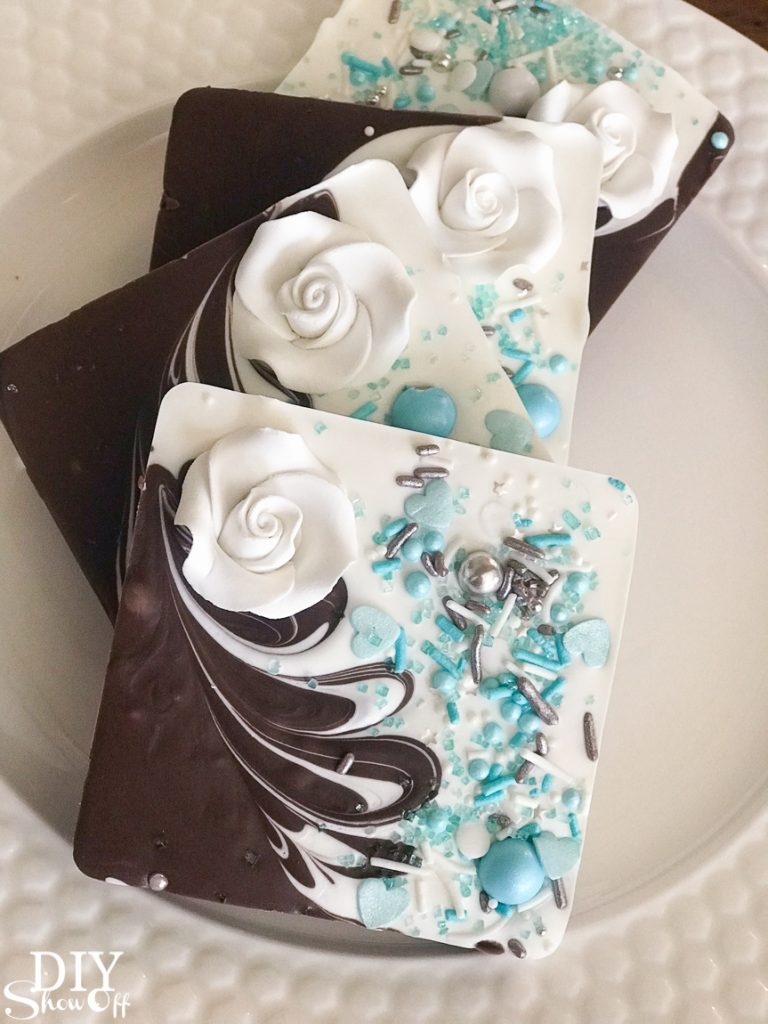
Using the skewer, while candy was still melted, I swirled the colors to create a beautiful unique design where the colors meet.
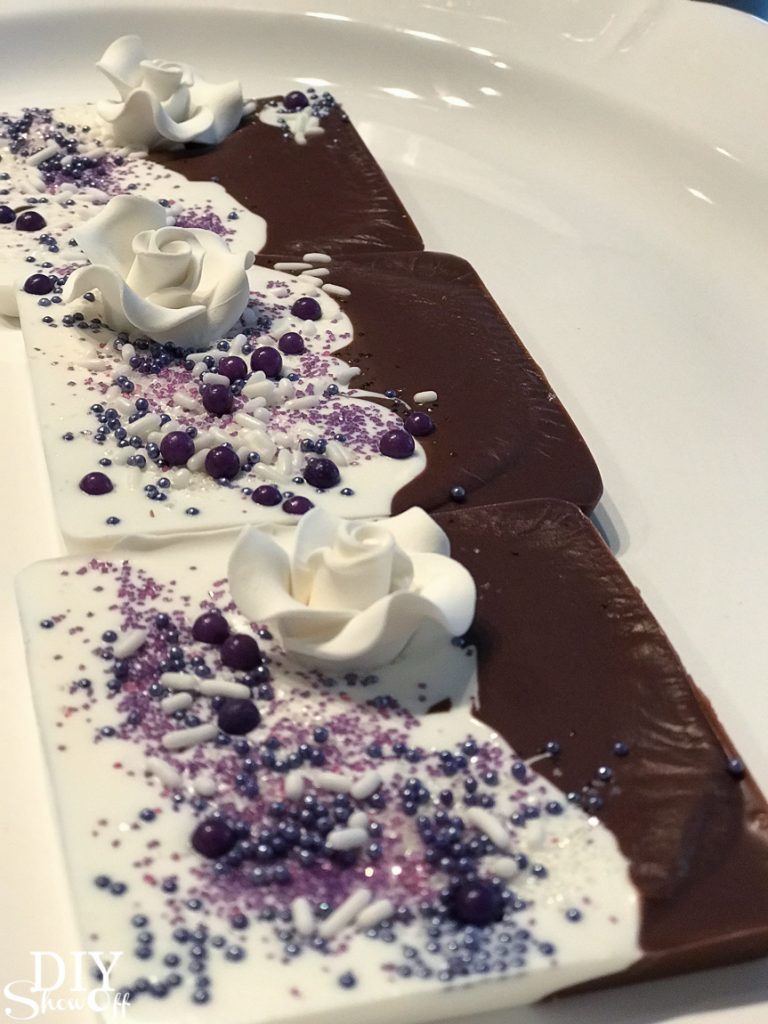
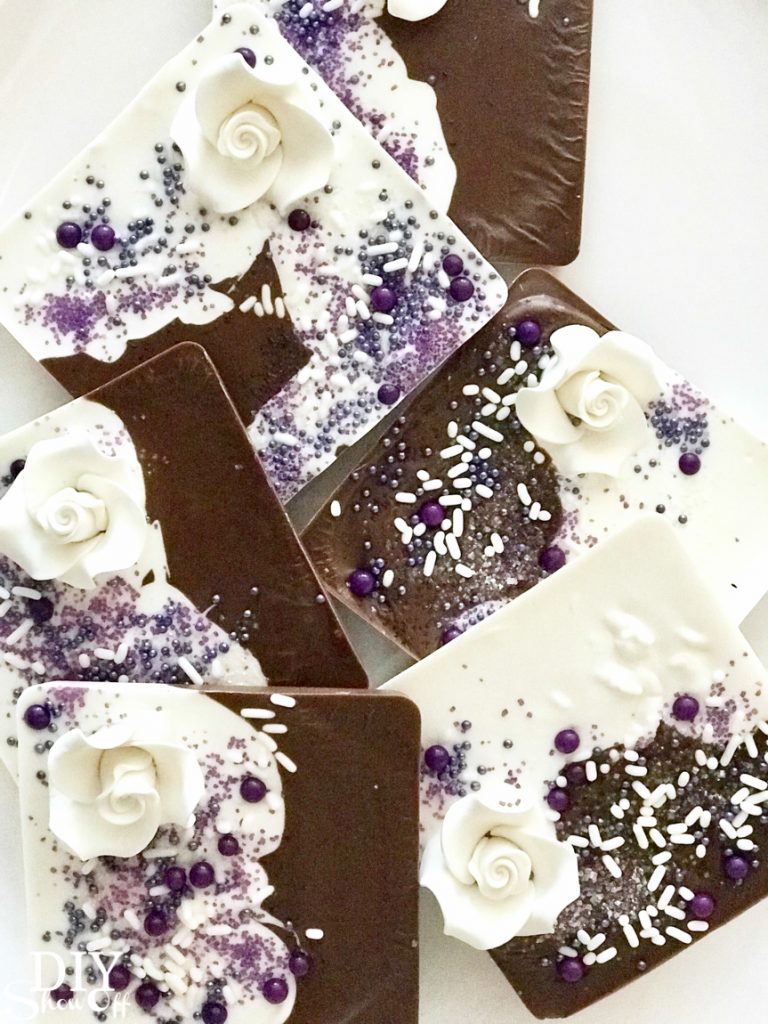
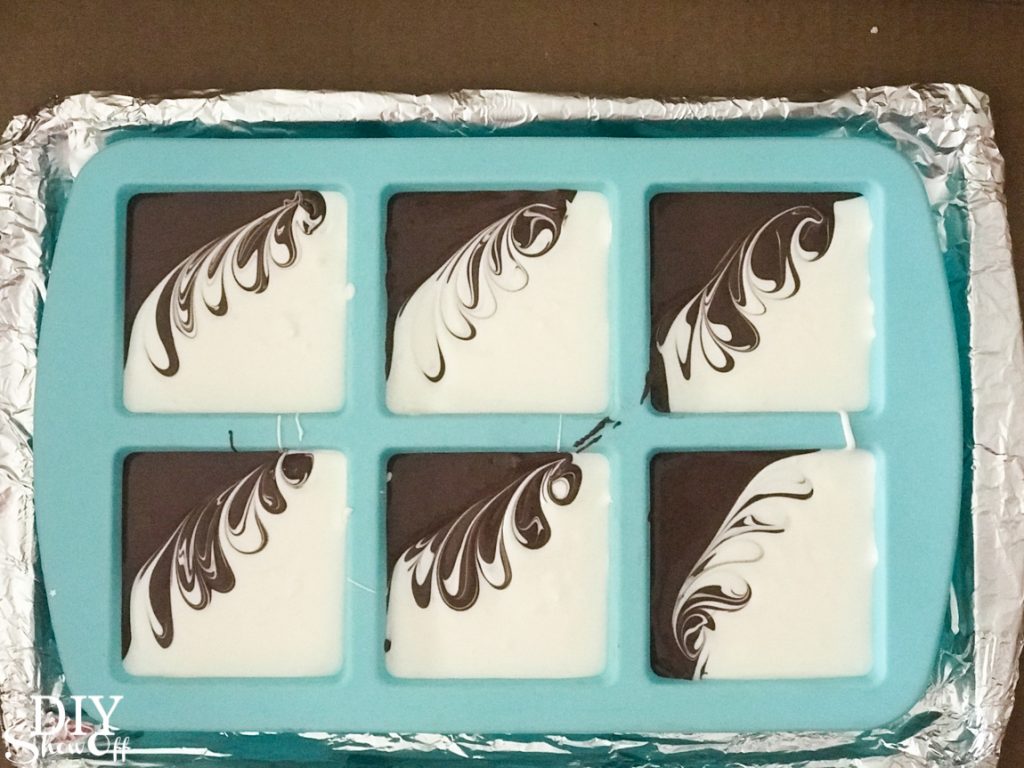
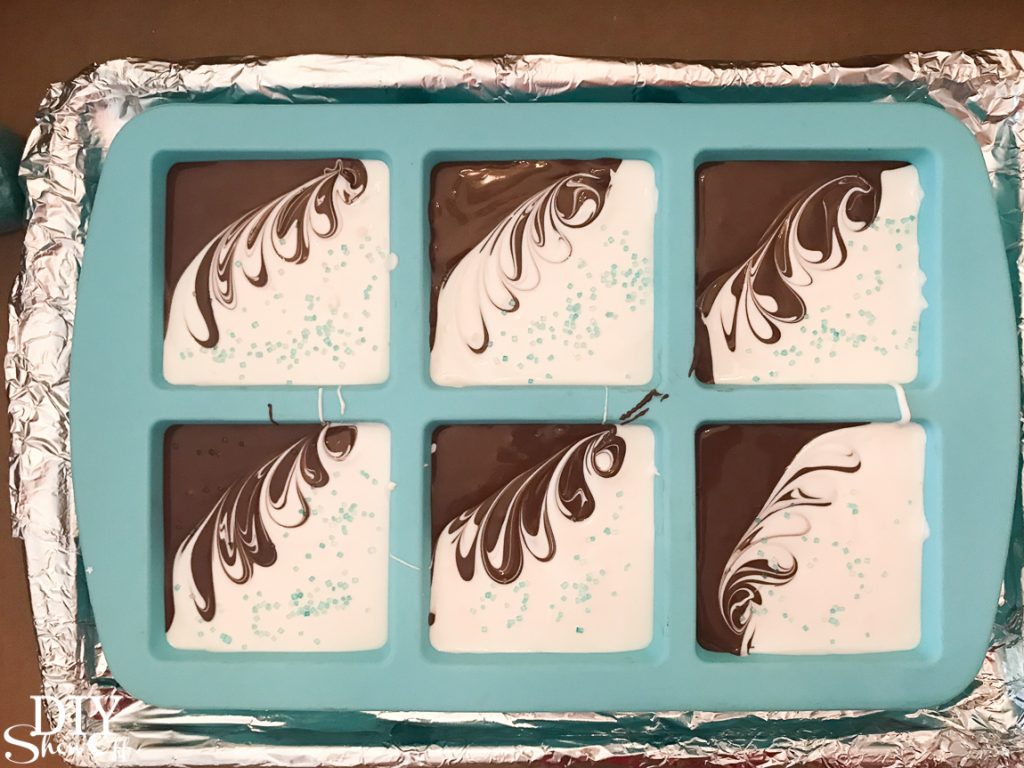
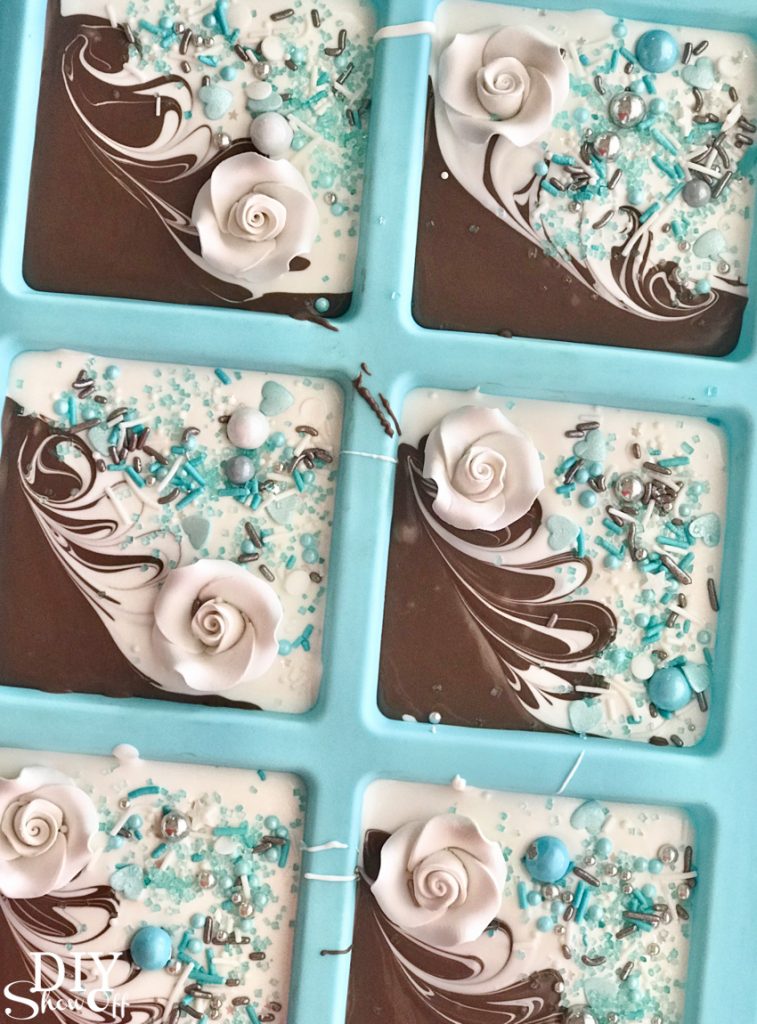
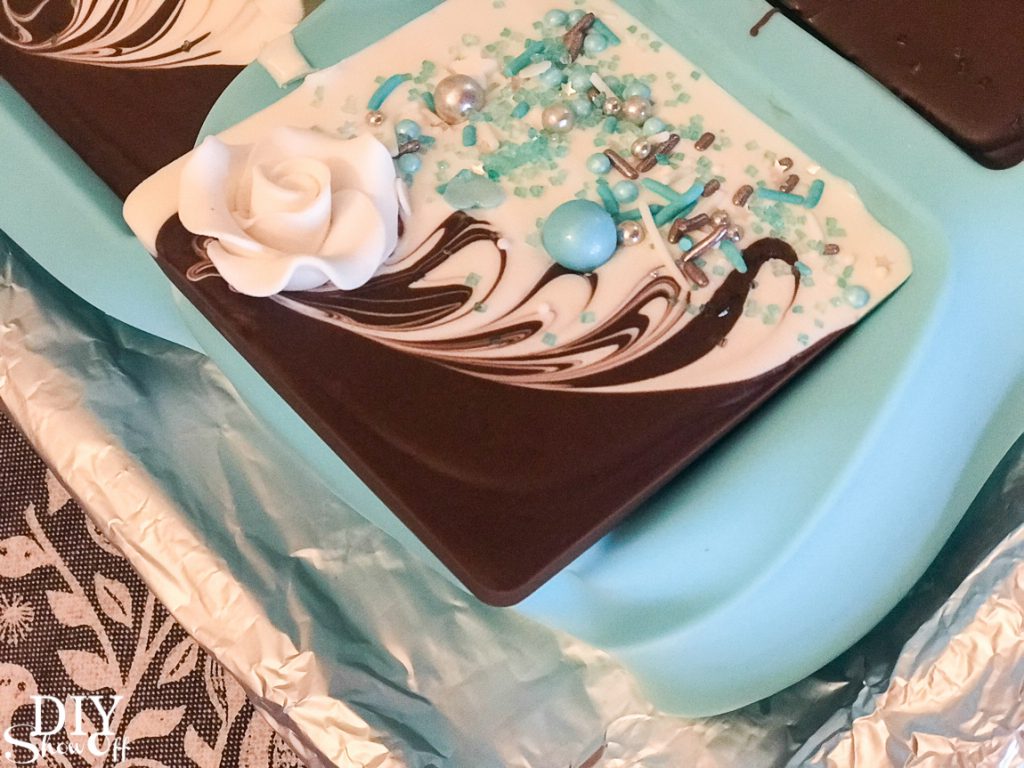
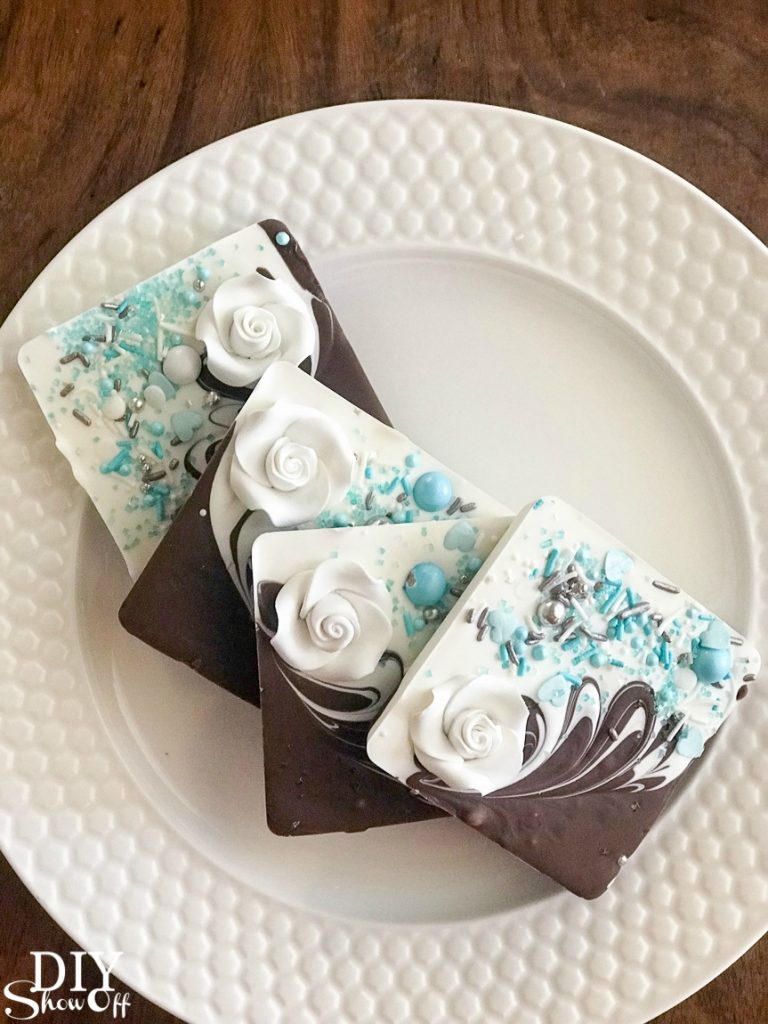
I am in LOVE with how each square is a unique and one of a kind design! I think this was my favorite step! I started out with just more of a zig zag but then discovered that the more swirly, the better.
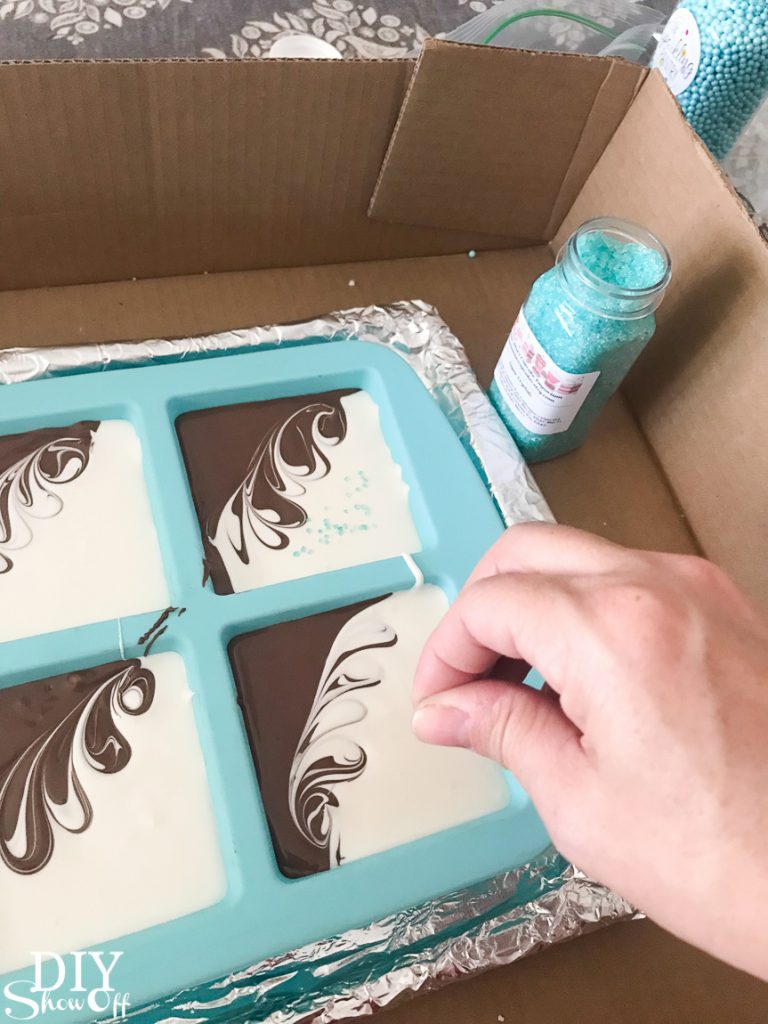
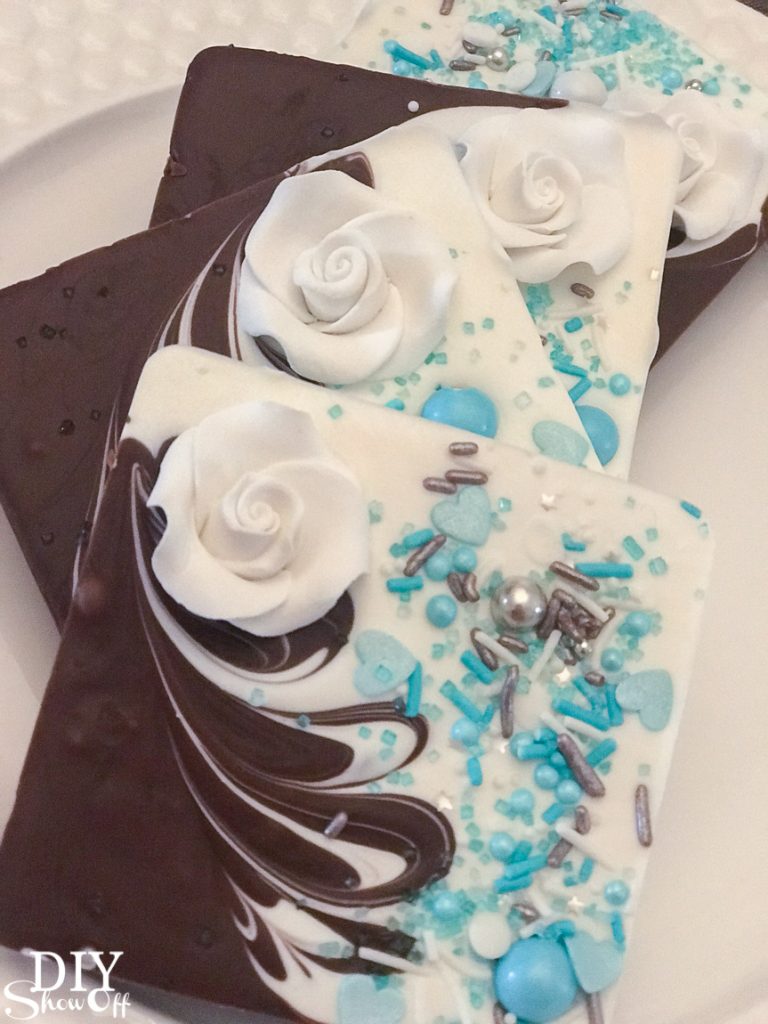
Then quickly decorated with icing roses, sprinkles, colored sugar, edible decorations, etc.
I placed the tray/silicone mold in freezer to set the candy. It didn’t seem to take long at all…probably about 15-20 minutes if that. Sometime I let it sit overnight if I got busy.
Then I removed them from freezer and carefully popped the bars out of silicone mold.
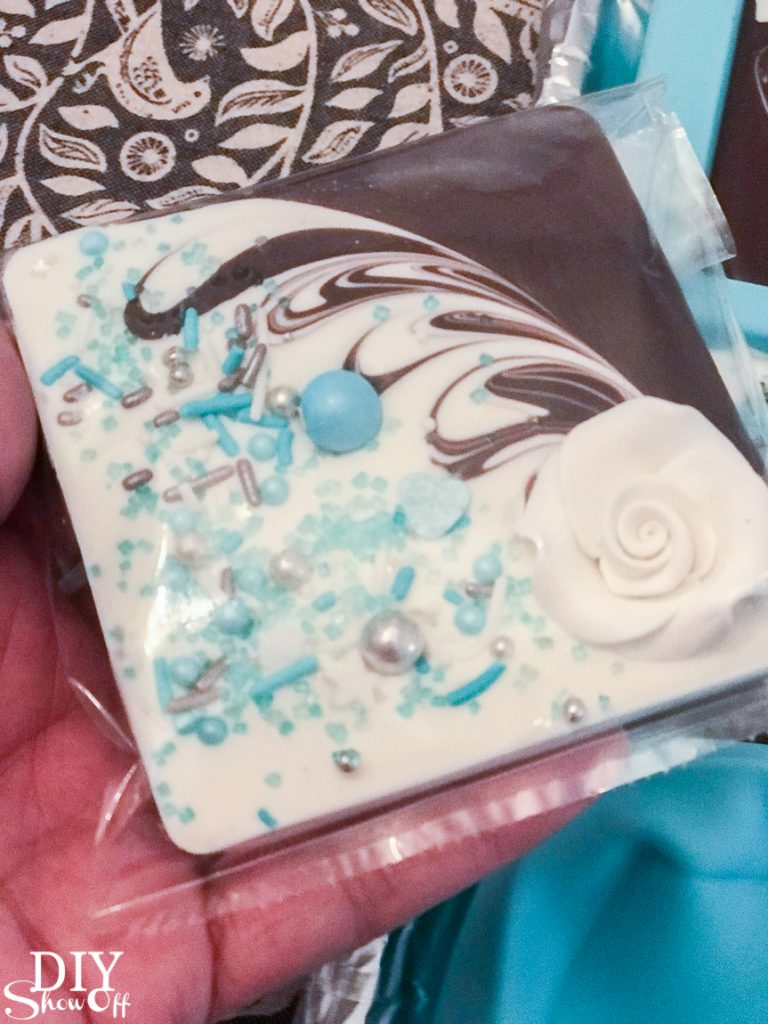
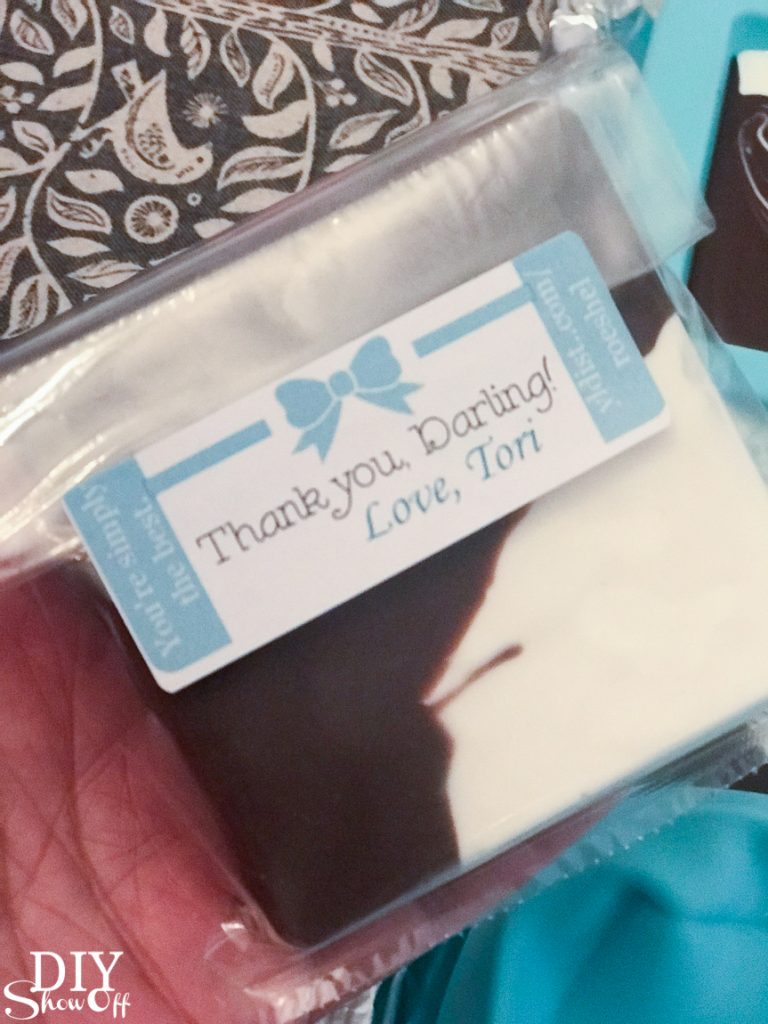
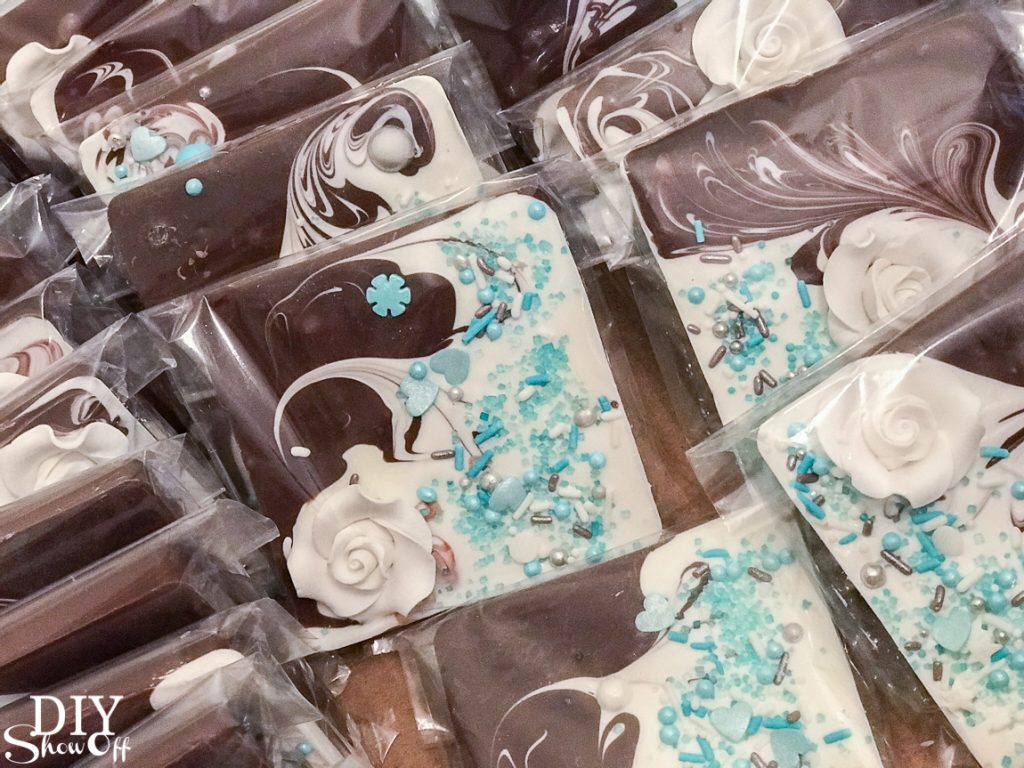
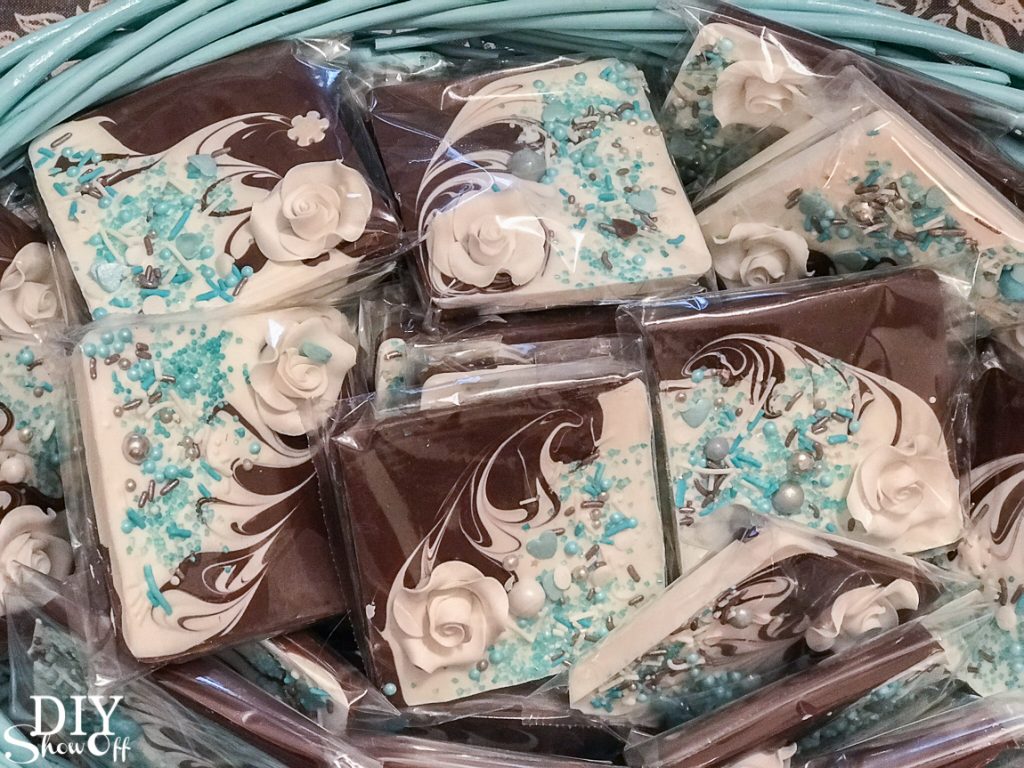
I placed them into a bag and secured with a personalized label.
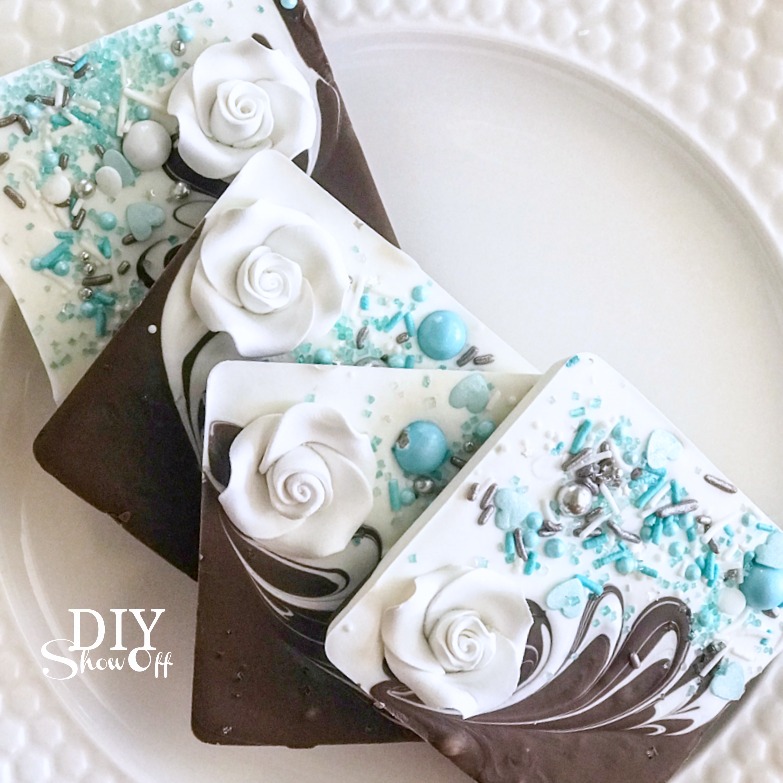
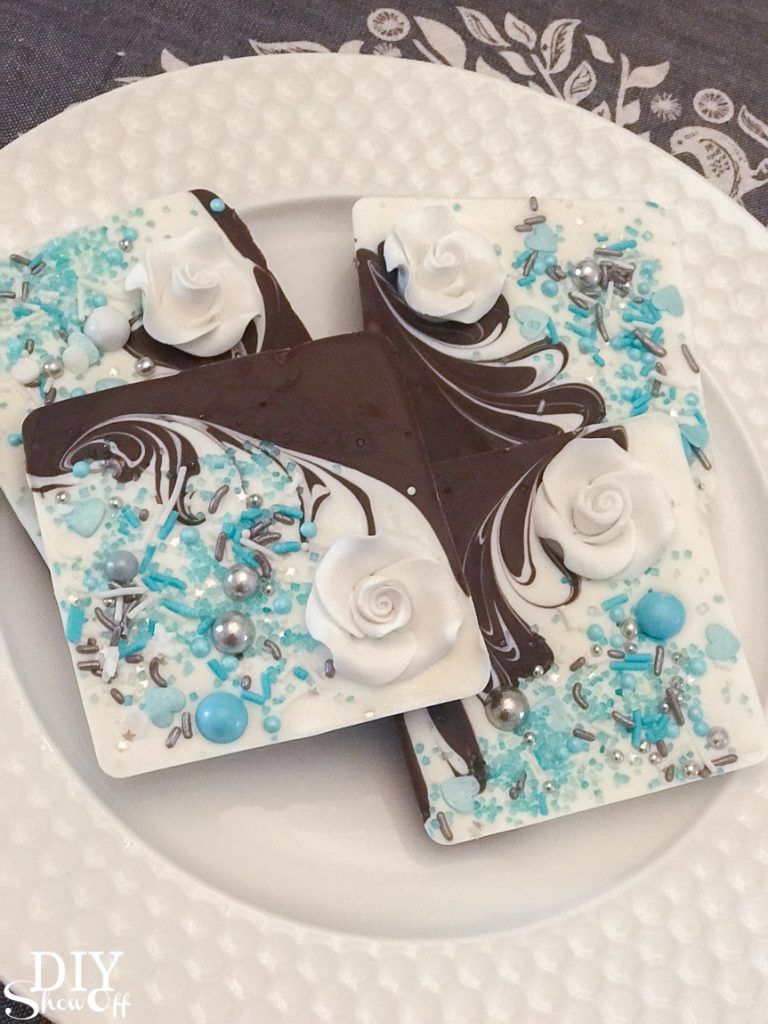
Beautiful! I love that each design is unique, don’t you? They’re so pretty, so professional and designer-looking but so easy to create! I can’t wait to make more!
So.many.photos! lol But I’m just so happy with how pretty they are!
This batch was a “Breakfast at Tiffany’s” theme.
I whipped up 60-70 of these for a bridal shower but since you can personalize them with any candy melts (so many colors!) and any deco ratings (so many colors and shapes and ideas!), they’d work for not only bridal showers but for Mother’s Day, baby showers, wedding favors, party favors, hostess and teacher gifts, prizes, etc. I made a few every evening over a couple of weeks’ time. I gave a few out as essential oil infused door prizes and at Easter to my family too. I even had my grandson helping me decorate a few!
Warning – not only are they a beautiful sweet treat, they’re so addicting to create! Here is the very first batch that started my madness (without the swirl technique)…
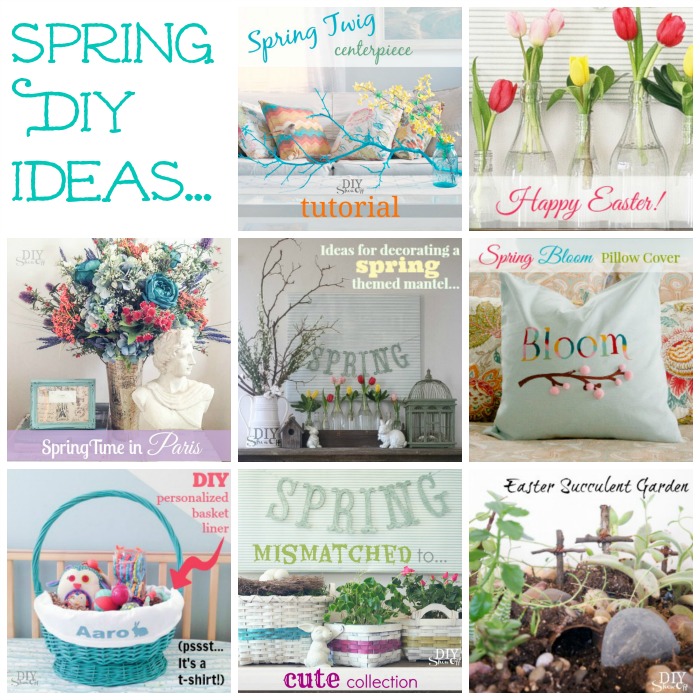
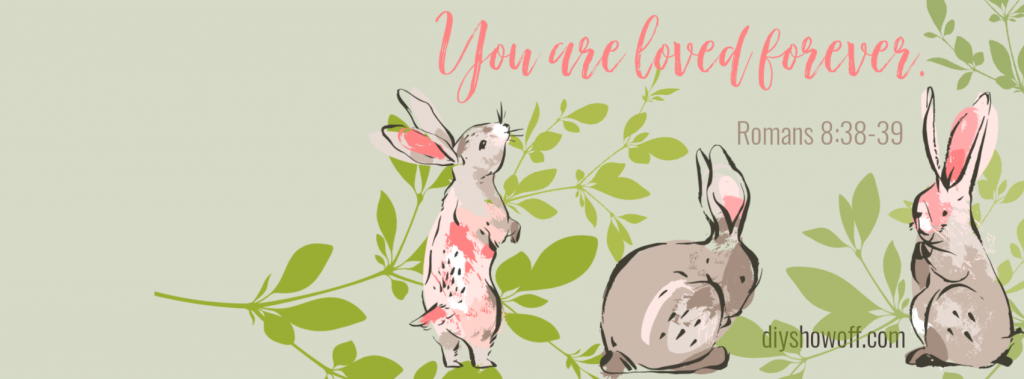
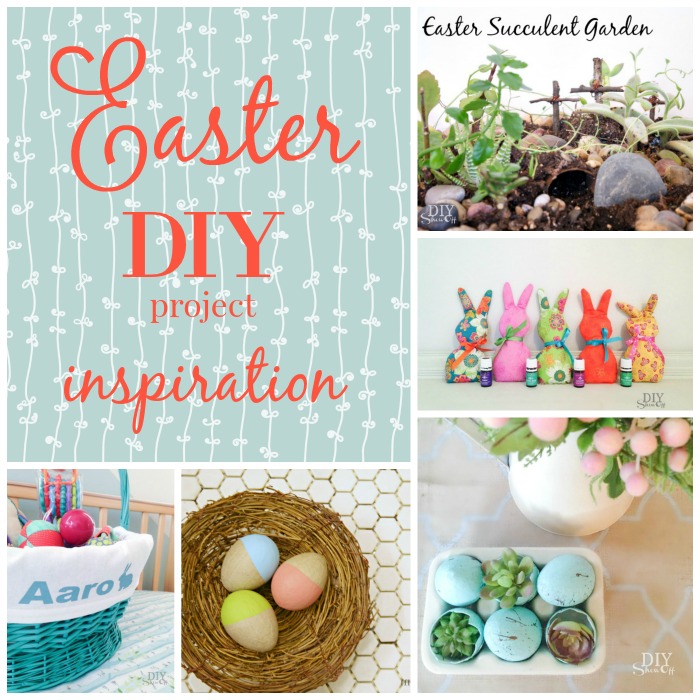
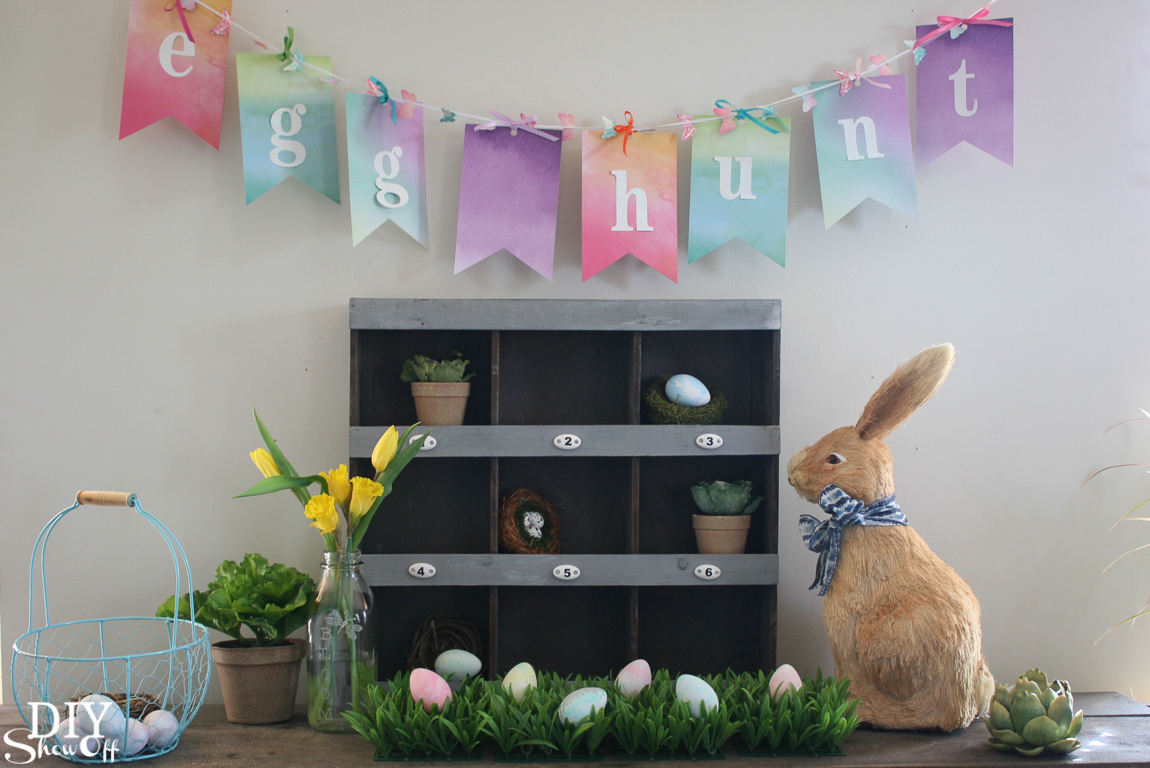
Happy Spring, DIY friends! Rounding up a collection of Easter DIY & decorating inspiration for my DIYShowOff friends.
I don’t know about you, but I feel renewed! These longer days and the bright sunshine just fill my soul with so much happiness and motivation! I’m so ready to put winter behind me! It’s the perfect day to take a walk down memory lane at some DIYShowOff Easter inspiration:
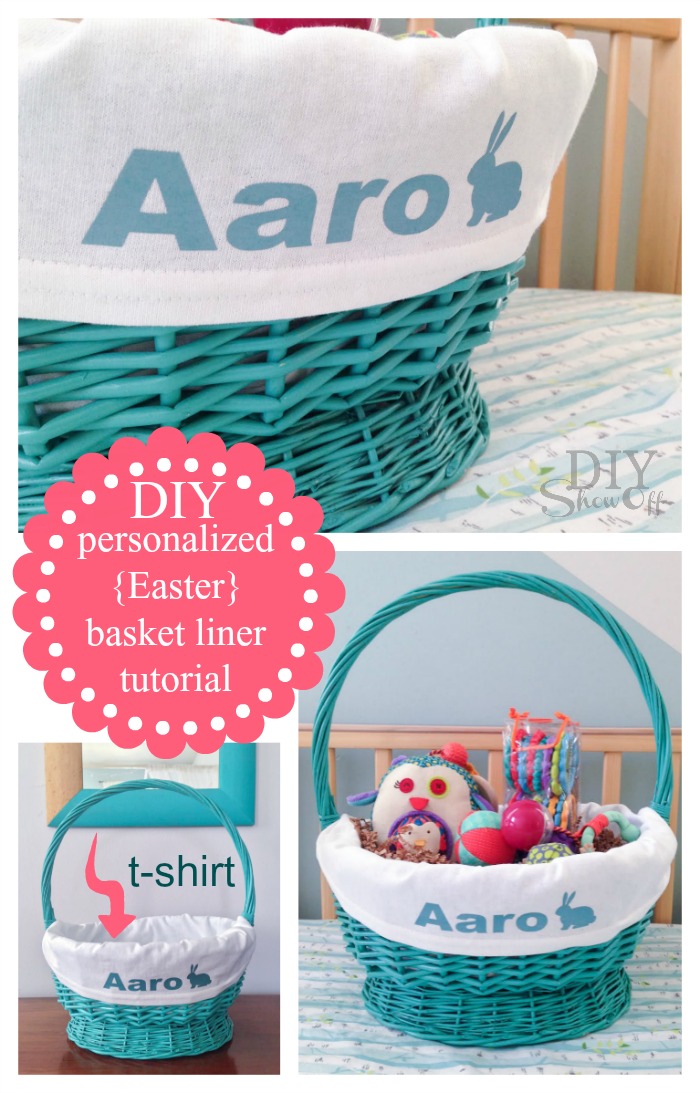
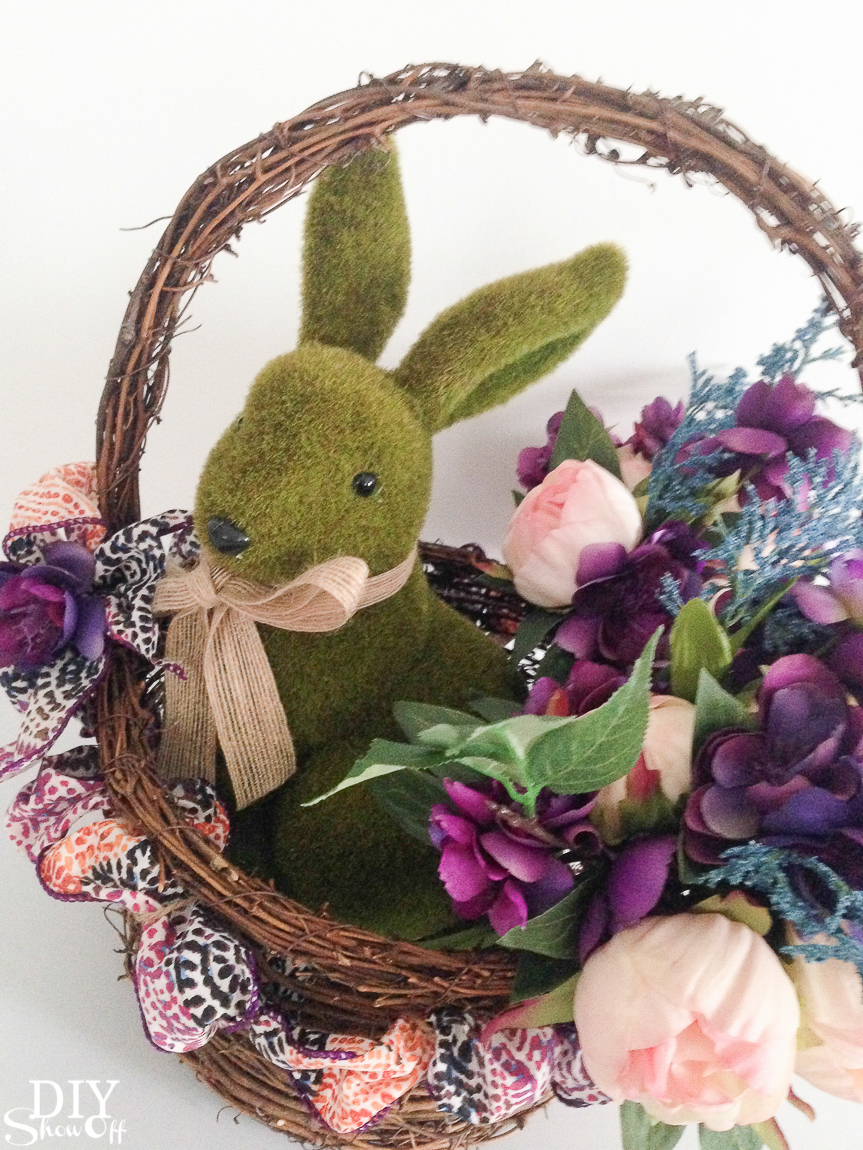
Time for some seasonal//holiday decorating! Do you set out some decorative bunnies, crosses or spring flowers this time of year? I love freshening up our home with seasonal decorative accessories.
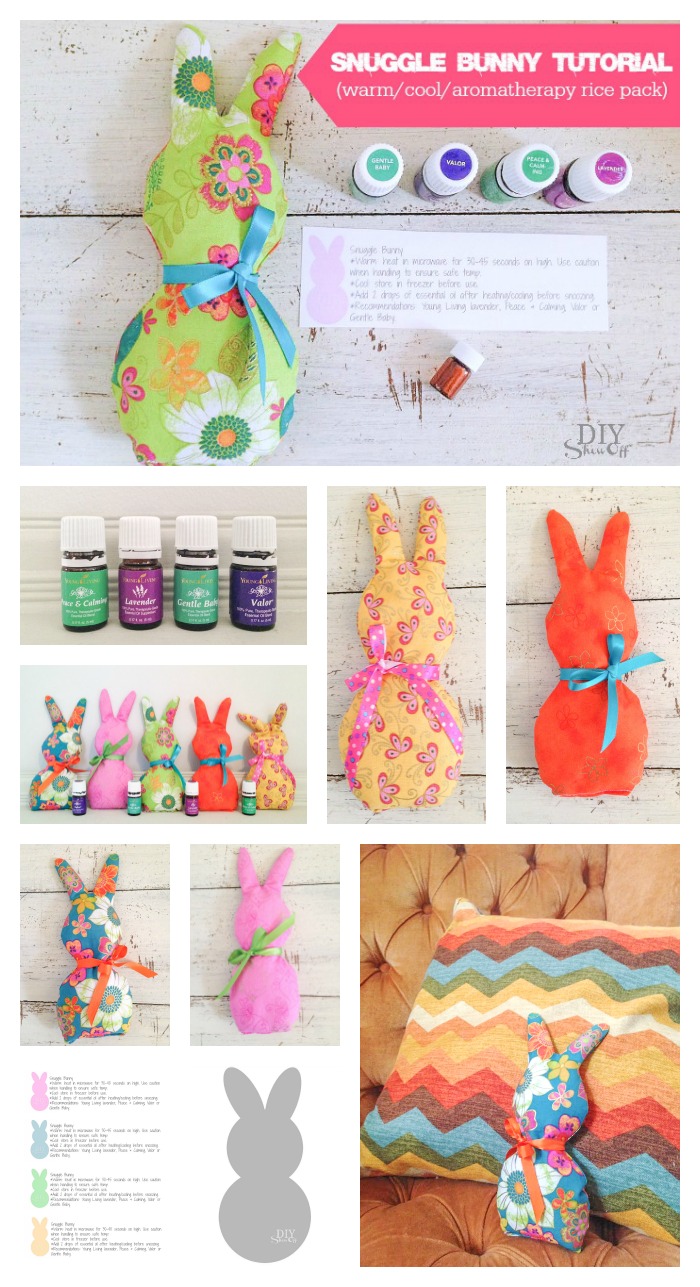
Do you love handmade gifts as much as I do? I love the thought and love behind gift giving. These snuggle bunnies are so cute. Tip: edit the tutorial to put a little pocket in the front with a felt carrot or flower for changing out the essential oils.
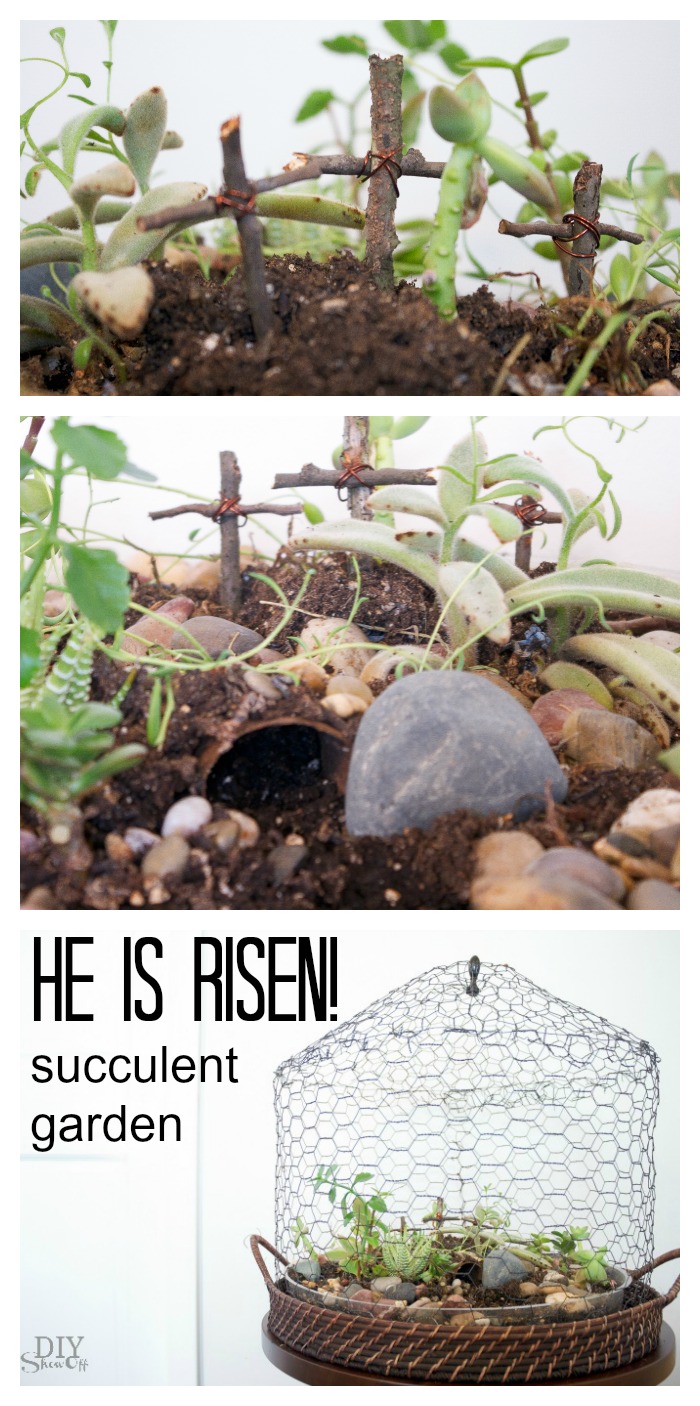
A couple of twigs, twine and a few rocks can give your container or succulent garden a faith based vignette and reminder of the reason for the season. xo
Entertaining? Hosting? A diffuser + some Stress Away or Lavender or Peace & Calming or Valor or Citrus Fresh … so many options to fill your home with inviting scents for a comfortable environment. When you purchase the Premium Starter Kit using Enroller/Sponsor #1836762 at YoungLiving.com, you’ll get a Spring Welcome bundle including a sweet mini USB bunny diffuser! Score!
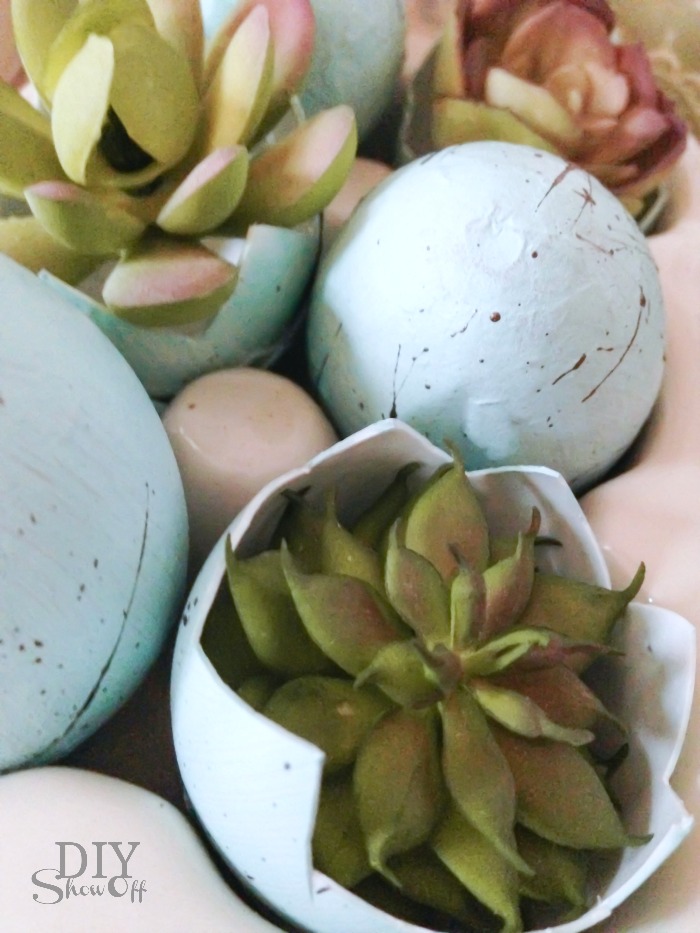
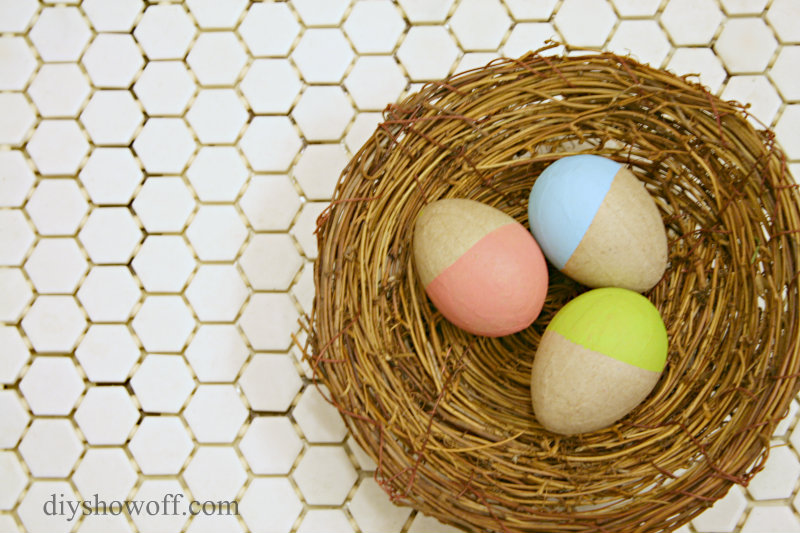
No green thumb? Tuck some faux-succulents into some pretty plastic eggs to decorate vignettes or use at place settings when hosting a family gathering.
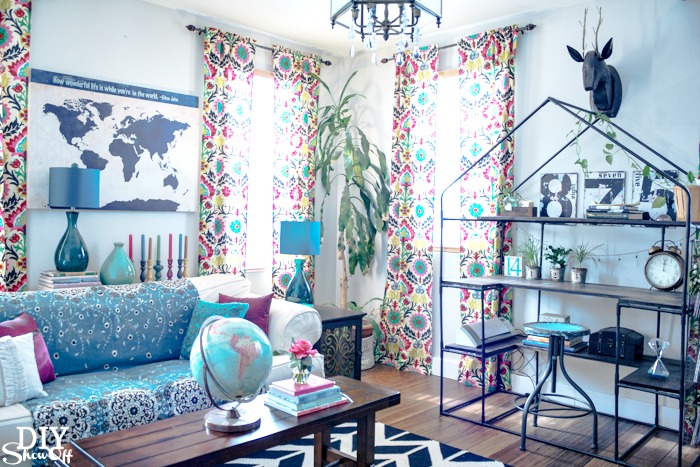
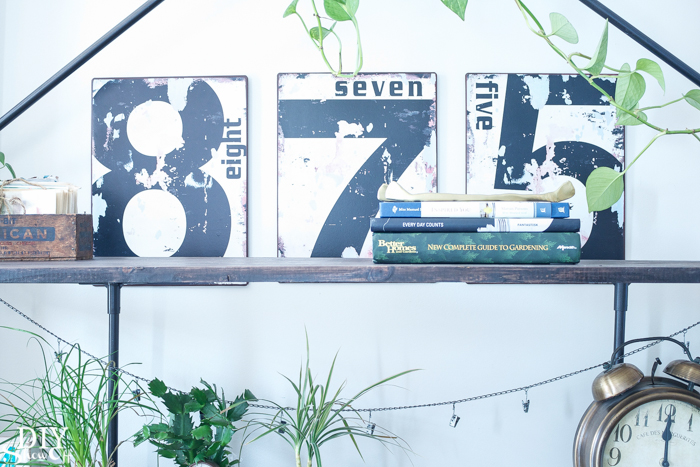
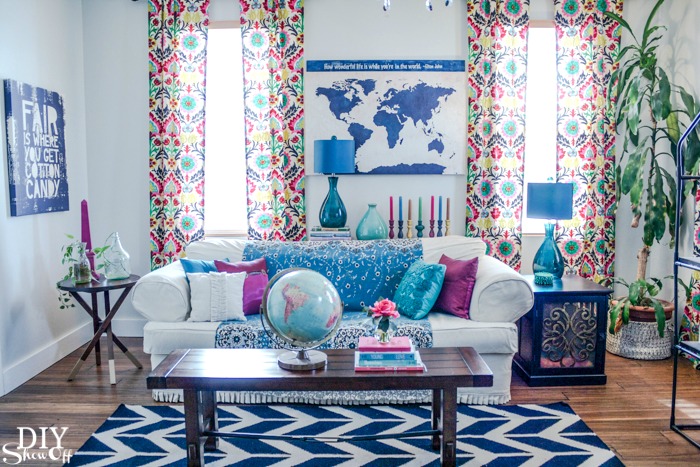
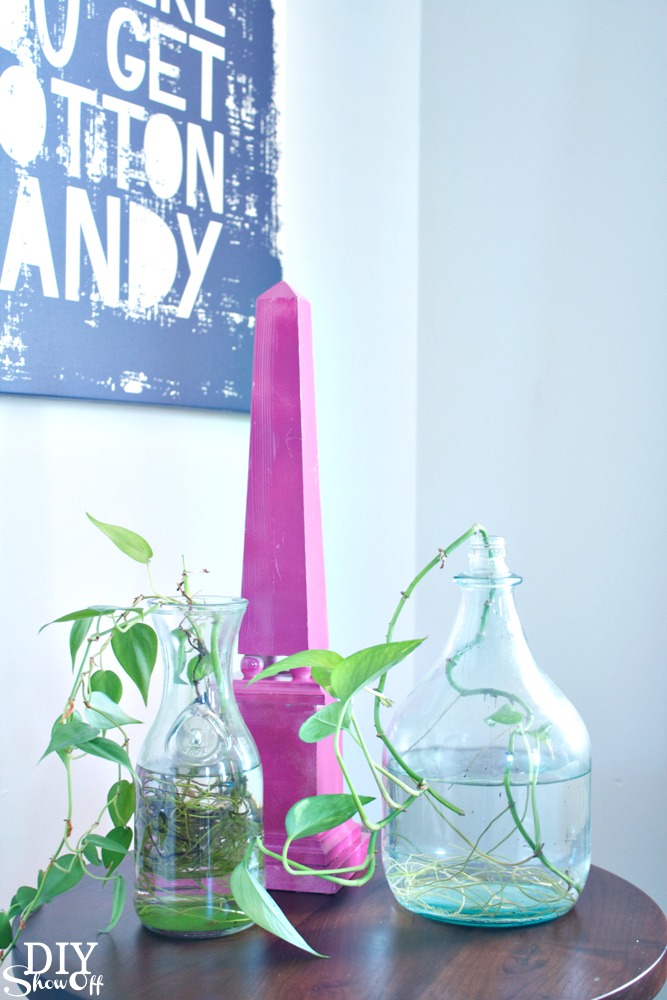
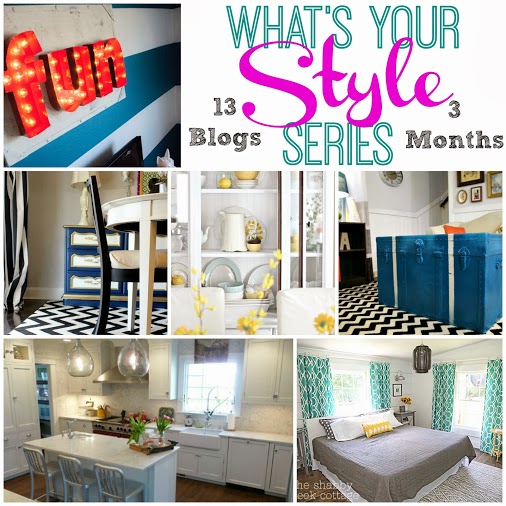
Today I’m discussing my decorating style as a part of the “What’s Your Style” series. What words describe the look and feel of your home’s decor? Sometimes it isn’t as simple as a one word definition or description.What I love about decorating for myself in my own home is that there are no rules, no titles, no terms, no laws. All that matters when it comes down to it is that we’re comfortable. And what makes me happy (in a decorating sense) is being surrounded by a mix and match of colors and styles and things that I love.I’ve never been able to pinpoint one specific design style (see my home tour) to describe the look of my home. It’s always evolving, ever changing. I can easily describe my style in one word: “mutt”. You’ll find rustic charm, vintage but modern too, a touch of cottage style here and there mixed with flea market and farmhouse inspired decor with a bit of fun and colorful and even industrial elements. Quite a mix, right?So it goes without saying that “eclectic” is one word that encompasses the mutt-mix of design style in my home. I really don’t give labeling my design style much thought. I just do what I love.But after walking through my rooms, I’d call my style “intrinsic eclectic”, short for “eclectic-vintage-modern-farmhouse-country-fleamarket-cottage-rustic-charm”. It really depends on which room you’re standing in around here and what time of the year it is. As a part of the “What’s Your Style” series, we’re taking a look at living spaces. If you’re visiting from the fabulous Danika at Gorgeous Shiny Things, welcome! I’m so glad you’re here! C’mon in, make yourself at home! You can find a list of all 13 bloggers’ living spaces at the end of this blog post along with an awesome Mohawk rug giveaway.Our family room is casual, fun and definitely eclectic. I’m never afraid to combine periods and styles and prefer to mix new with old and flea market finds to create a space that feels at home in our home.Summary: Because of my love for decorating, I find that I’m drawn to flea market finds and DIY accents that fit my style (and budget) best… a fun challenge that drives my creativity and results in a unique look that I love.“Intrinsic Eclectic” sums up my style. What about you? Next up in the What’s Your Style series is Michelle and her beautiful style at Iron & Twine. Start at the beginning and make your rounds using the schedule below:
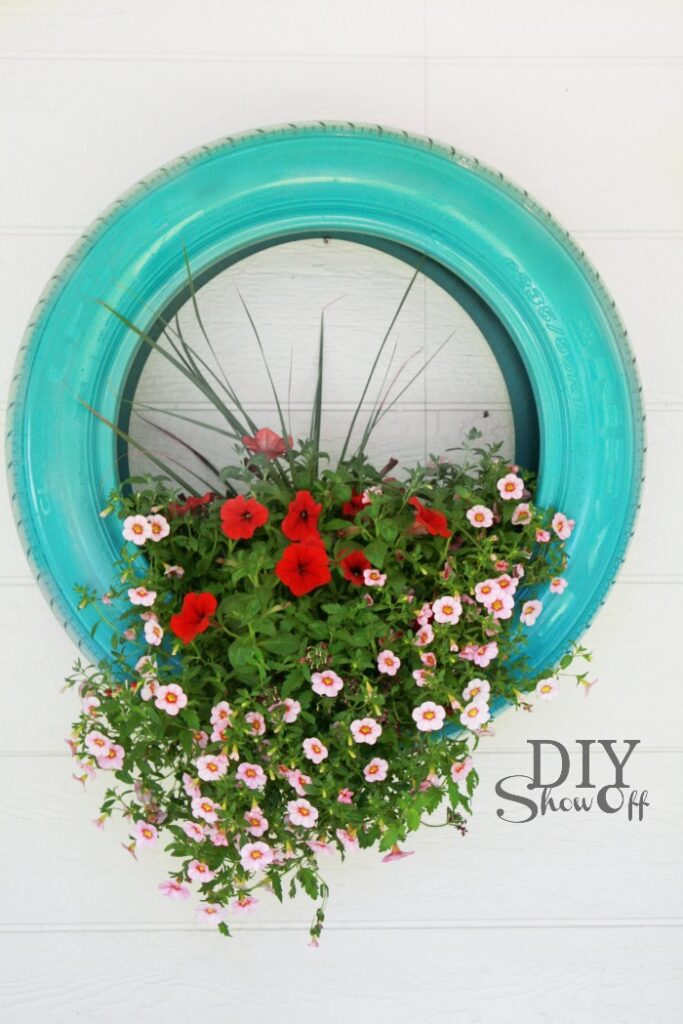
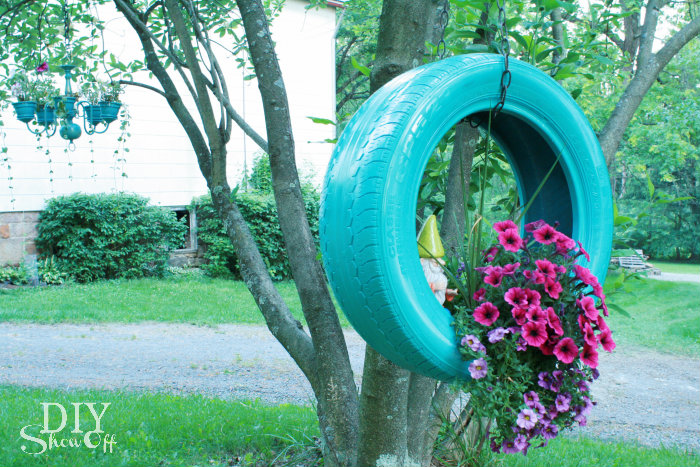
This is one of my favorite budget-friendly ways to add color to an outdoor space.
Looking for a creative and budget-friendly way to add color and charm to your outdoor space? This DIY tire planter tutorial walks you through the easy steps to transform an old recycled tire into a cheerful garden planter. It’s perfect for summer curb appeal! 🌸🌿
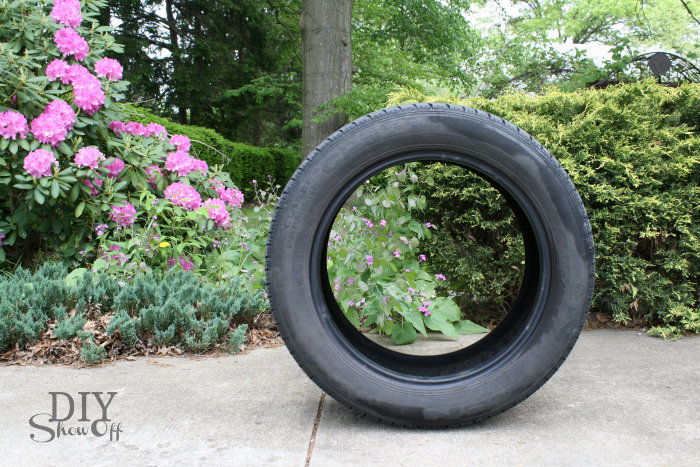
I recently needed new tires (don’t even look at the tread…it was bad)! This is a great idea for upcycling!
Why Make a DIY Tire Planter?
📌 Love this project? Save it for later!
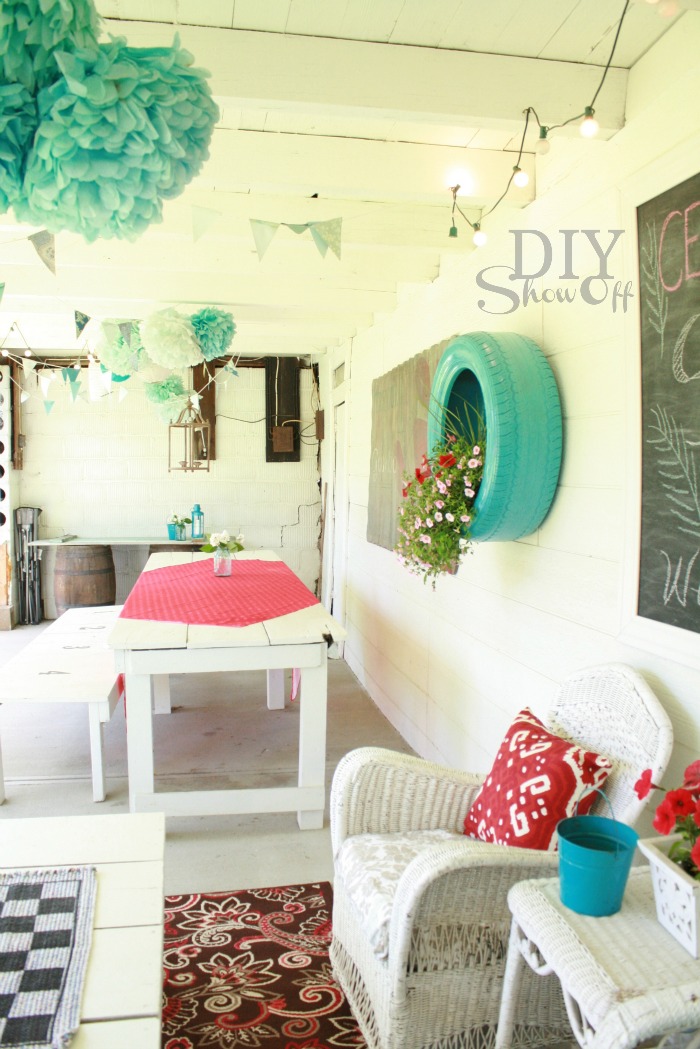
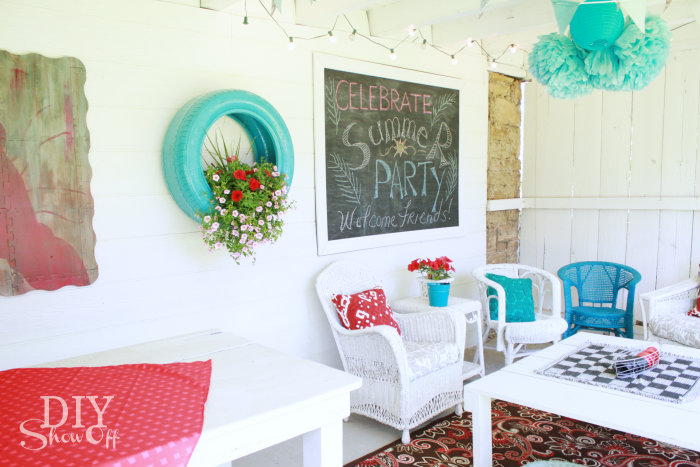
My summer home tour revealed a sneak peek of a super easy DIY outdoor decorating/planter. DIY tire planter…
See it?
There on the wall? Isn’t it happy?
What You’ll Need
This post contains affiliate links. If you click through and make a purchase, I may receive a small commission at no extra cost to you. Thank you for supporting DIYShowOff!
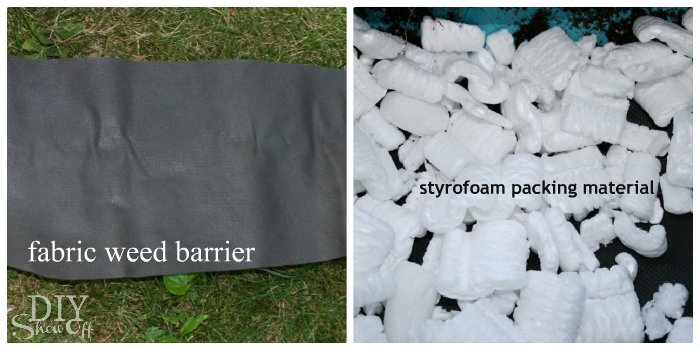
I already had some leftover fabric weed barrier from the pallet herb garden and some packing peanuts on hand.
Optional: chain and s-hook.
Step-by-Step: How to Make a Tire Planter
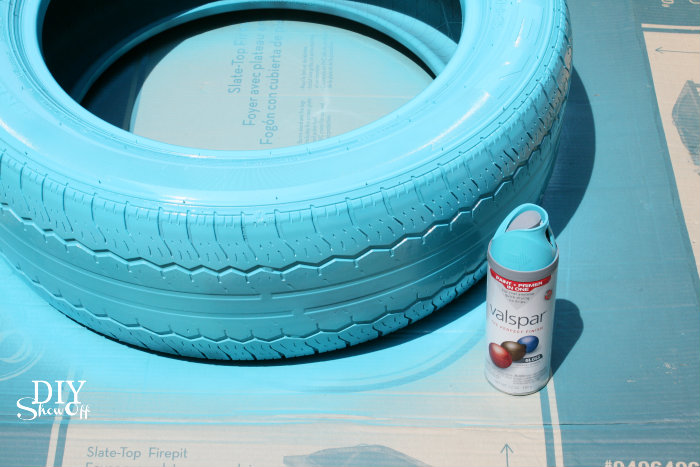
I gave the tire a good scrubbing with soap and water and let it dry.
Then gave it a couple of coats of spray paint (paint + primer). Let dry.
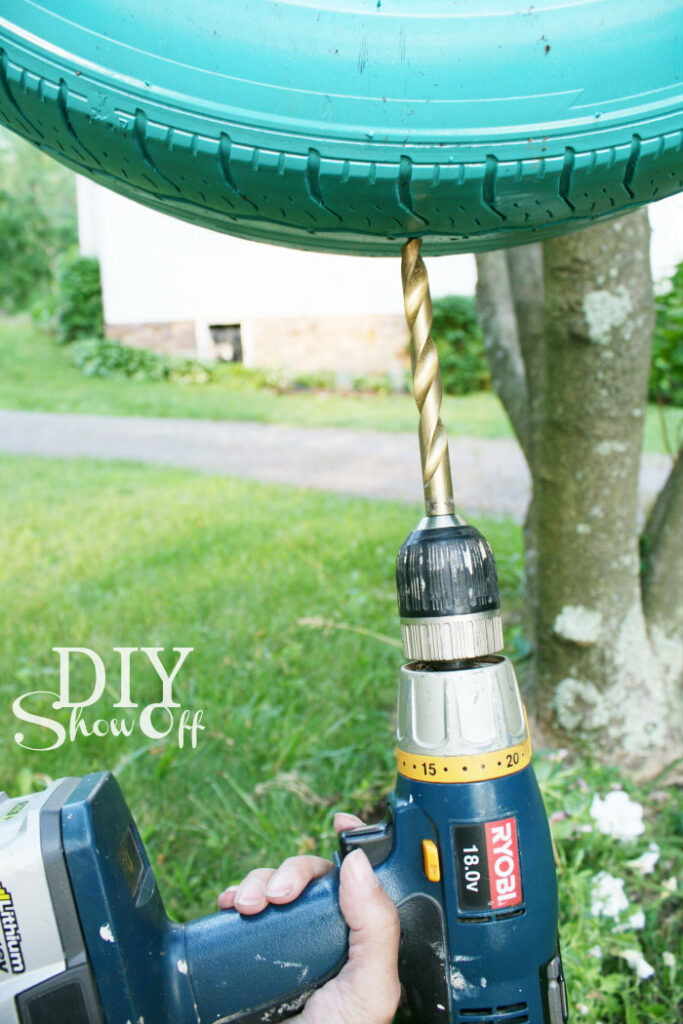
Next we used a 1/2 inch drill bit to drill 6 holes into the ‘bottom’ of the tire for drainage. This takes a sharp bit and a lot of pressure (as in I tried but had to have my husband take over). It also produces a little smoke.
Then lined the bottom with a piece of fabric weed barrier and a few styrofoam packing peanuts.
Planting and Finishing Tips
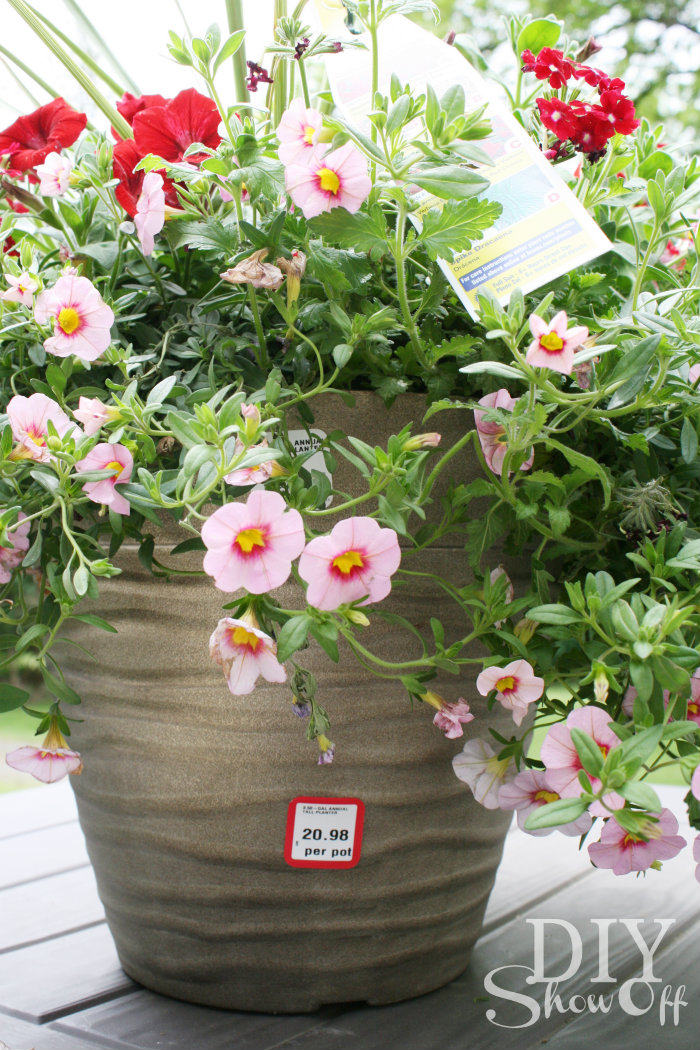
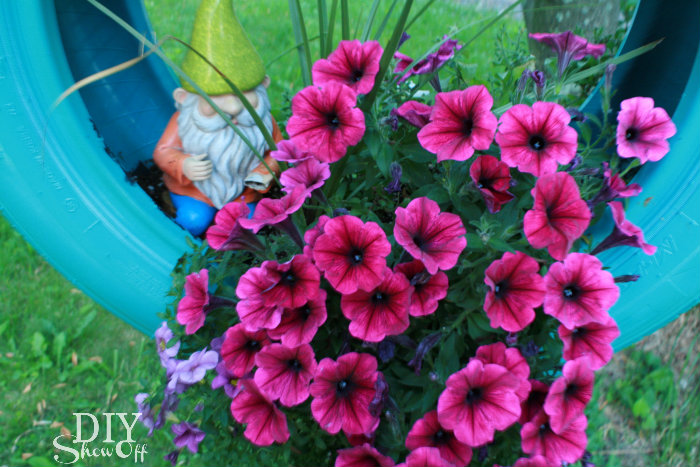
I used this arrangement for the wall mounted tire planter…
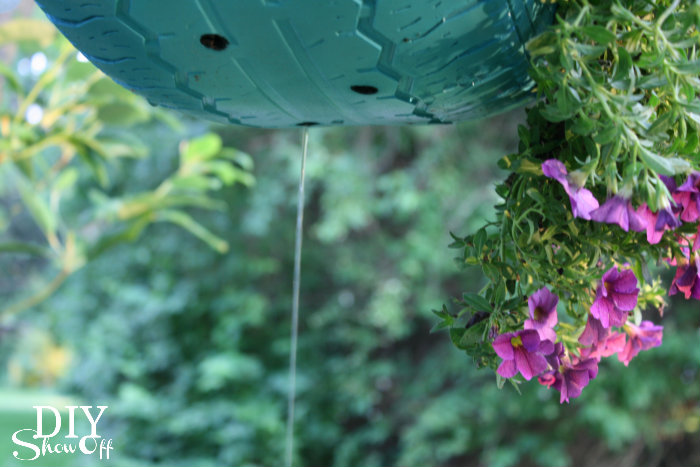
and these for the hanging tire swing flower planter:
The drainage holes work! Specifically one of the six really works…
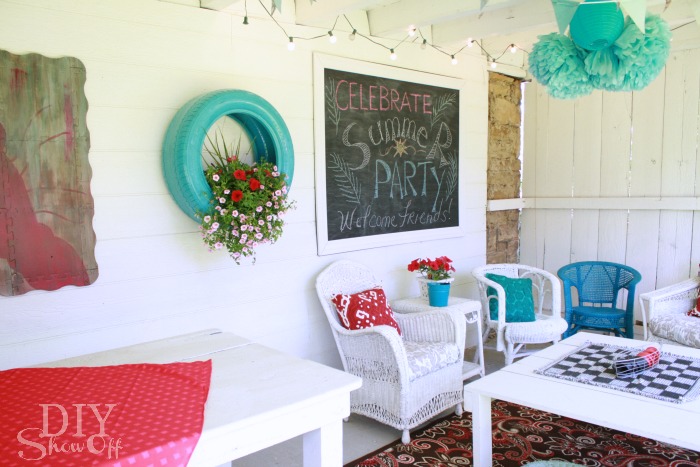
When we’re entertaining, I move the wall mounted tire flower planter to the interior wall of our covered patio. It’s simply hanging on a big humungous sturdy nail. When the party ends, the tire planter is moved to an exterior wall for sunshine and rain/watering. It’s awkward but not too heavy or difficult for moving around to maintain.
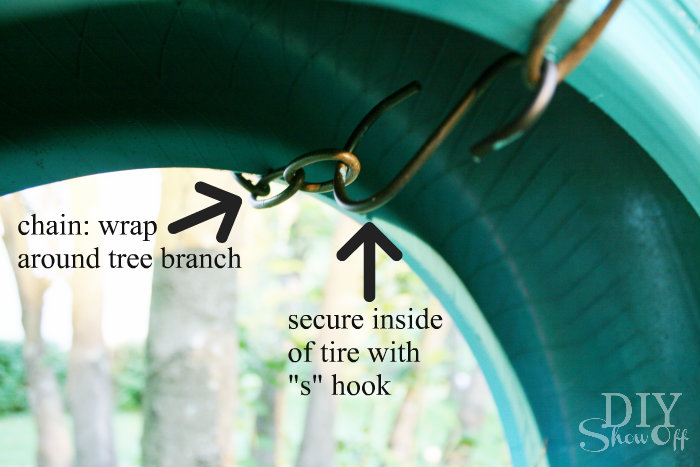
I loved it so much, I needed one to hang in our magnolia tree:
Use chain (double hanging length, add about 10″ for in the tire and more for the size of your tree limb). Wrap chain around tree branch and secure end pieces inside of the tire with an “s” hook.
Pretty!
Have you tried making your own upcycled garden planter? I’d love to see your version! Share your photos and project by submitting the DIYShowOff Feature Form or tag @DIYShowOff for a chance to be featured.
*Disclaimer: As a member of the Lowe’s Creative Ideas Creators and Influencers network, I received a Lowe’s gift card to complete this project. The tutorial images, instructions and opinions are my own. DIY results may vary.
What’s your favorite flower planter/container garden?
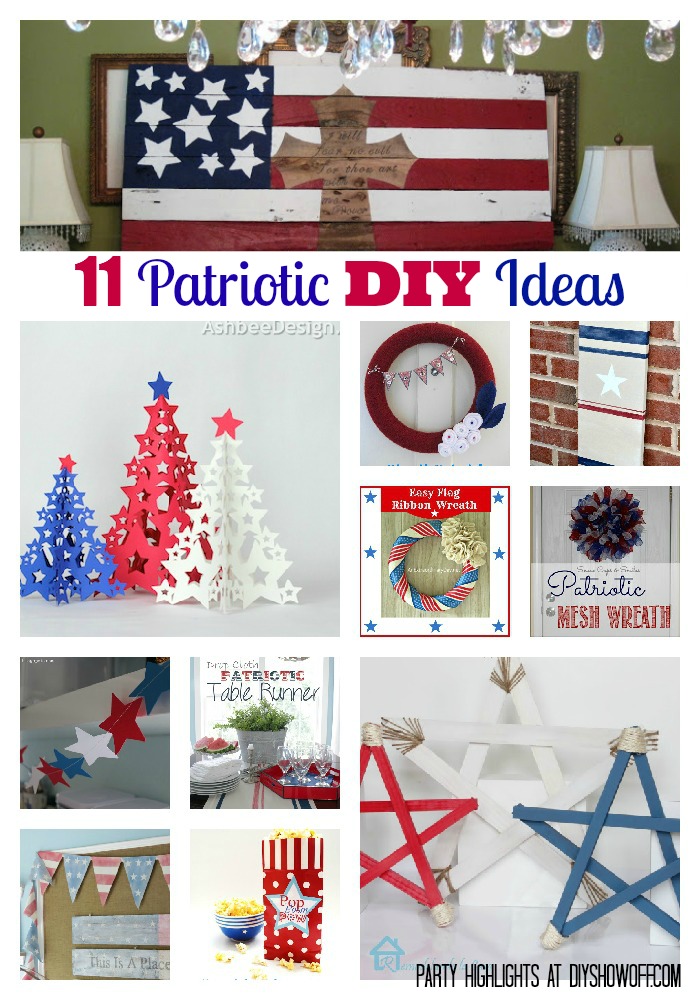
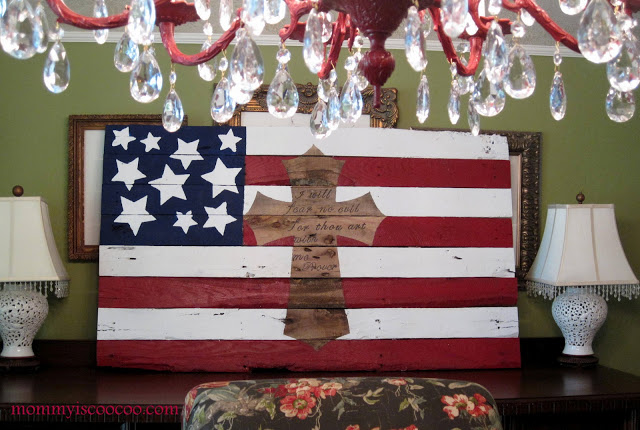
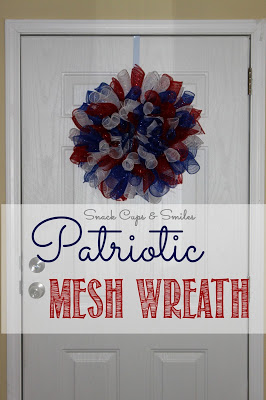
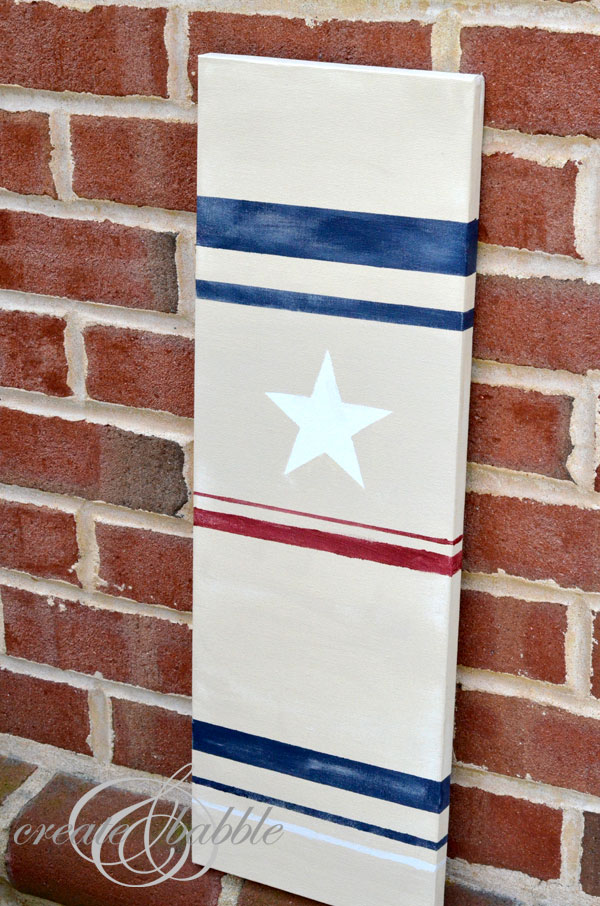
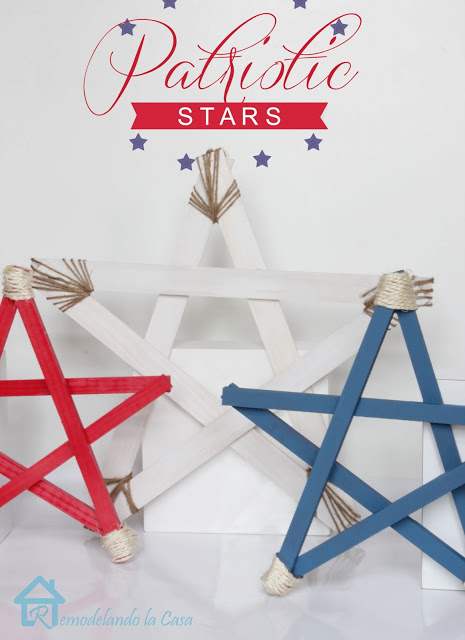
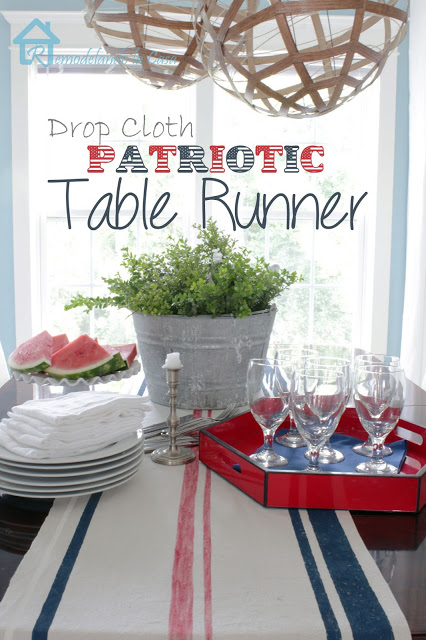
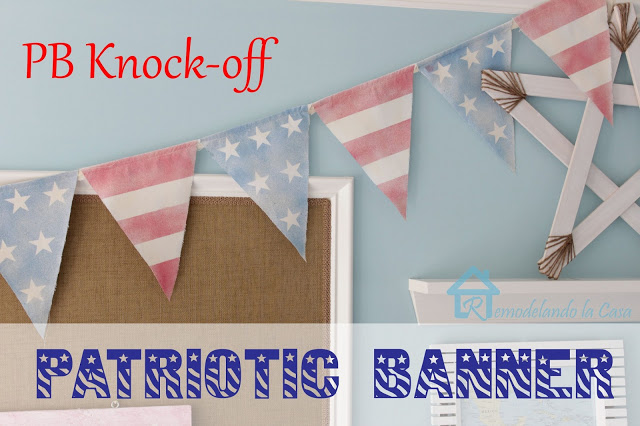
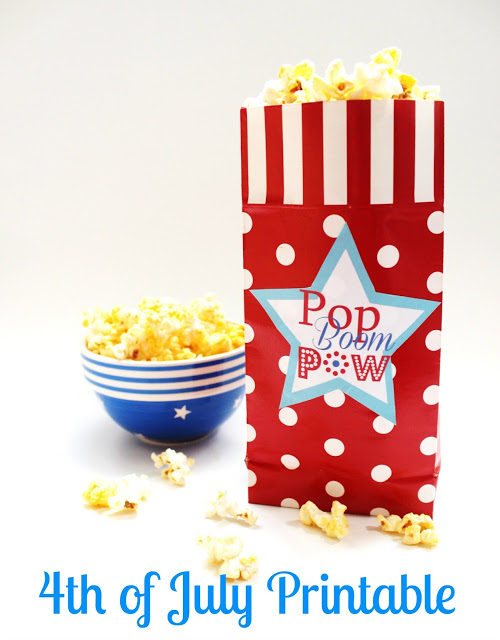
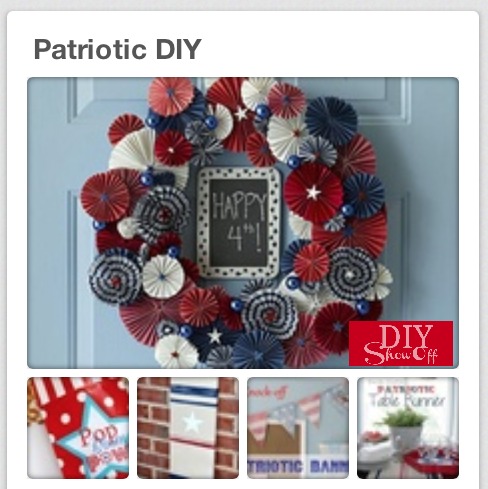
Looking for some patriotic DIY ideas? Look no further. I’ve gathered 11 easy patriotic DIY projects from show off submissions and That DIY Party links. These talented and crafty blog friends have some awesome do-it-yourself projects for decorating your home for the 4th of July.
I’m married to a former Marine. This time of year reminds me of how blessed I am to be an American and how thankful I am for the brave ones who defend our freedom. I love celebrating with family and friends, fireworks and good food.
Marji created this gorgeous paper star tree template for the Silhouette online store. Get the details at Ashbee Design – perfect patriotic centerpiece.
Thank you so much to the awesome ladies above for sharing their creativity! Do you have a red, white and blue patriotic DIY project to share? Head over to THAT DIY PARTY and link up…


 I whipped up 60-70 of these for a bridal shower but since you can personalize them with any candy melts (so many colors!) and any deco ratings (so many colors and shapes and ideas!), they’d work for not only bridal showers but for Mother’s Day, baby showers, wedding favors, party favors, hostess and teacher gifts, prizes, etc. I made a few every evening over a couple of weeks’ time. I gave a few out as essential oil infused door prizes and at Easter to my family too. I even had my grandson helping me decorate a few!
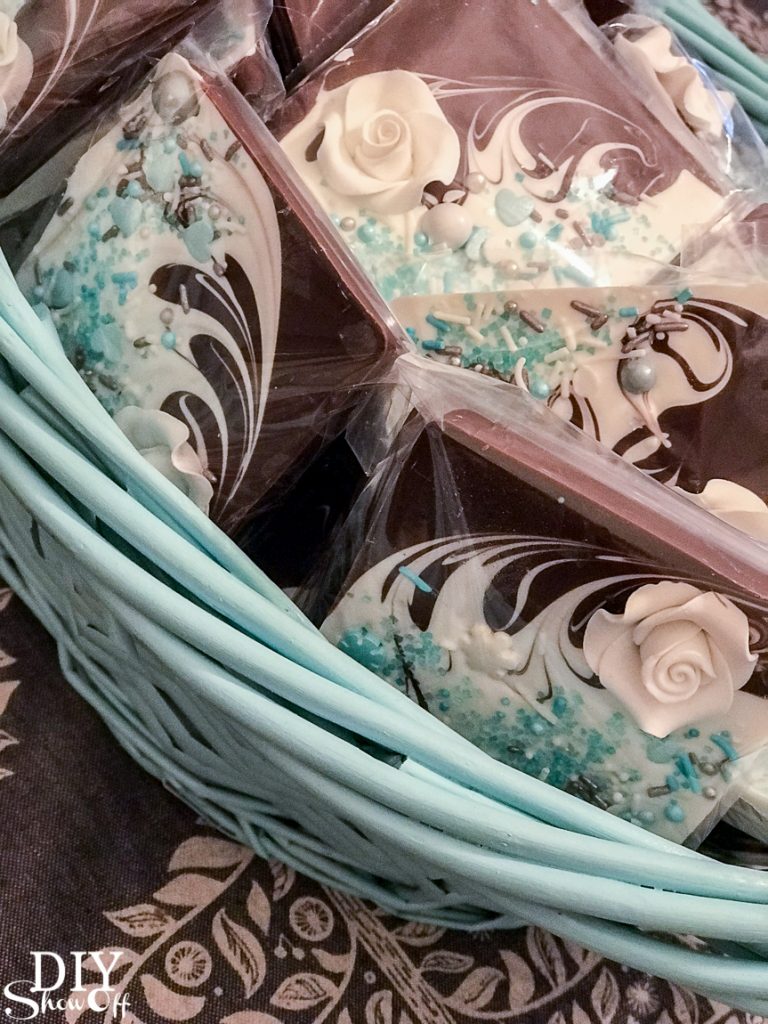 Warning – not only are they a beautiful sweet treat, they’re so addicting to create! Here is the very first batch that started my madness (without the swirl technique)…