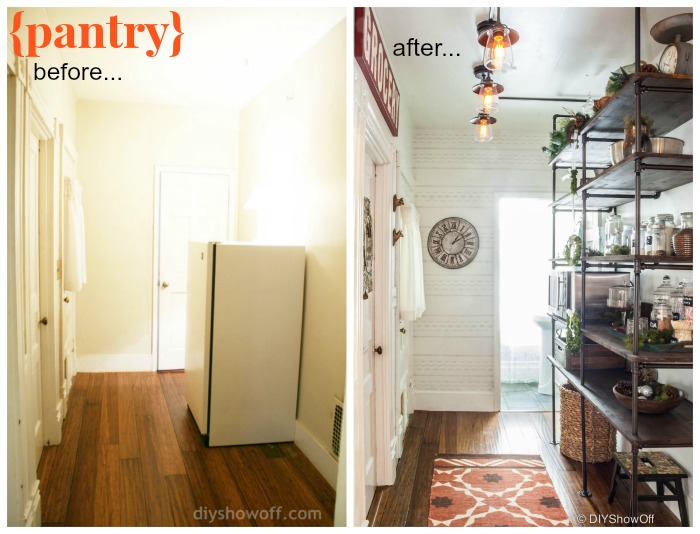
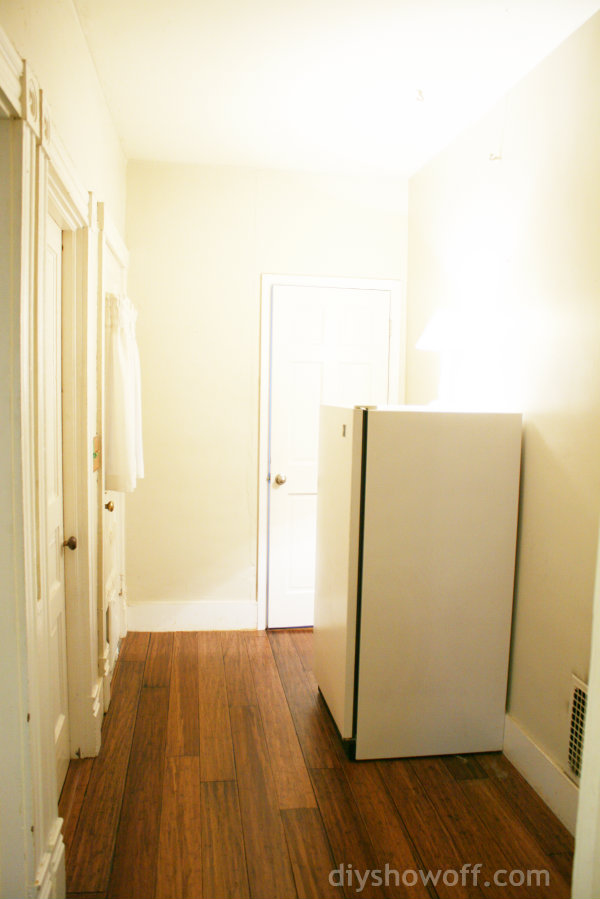
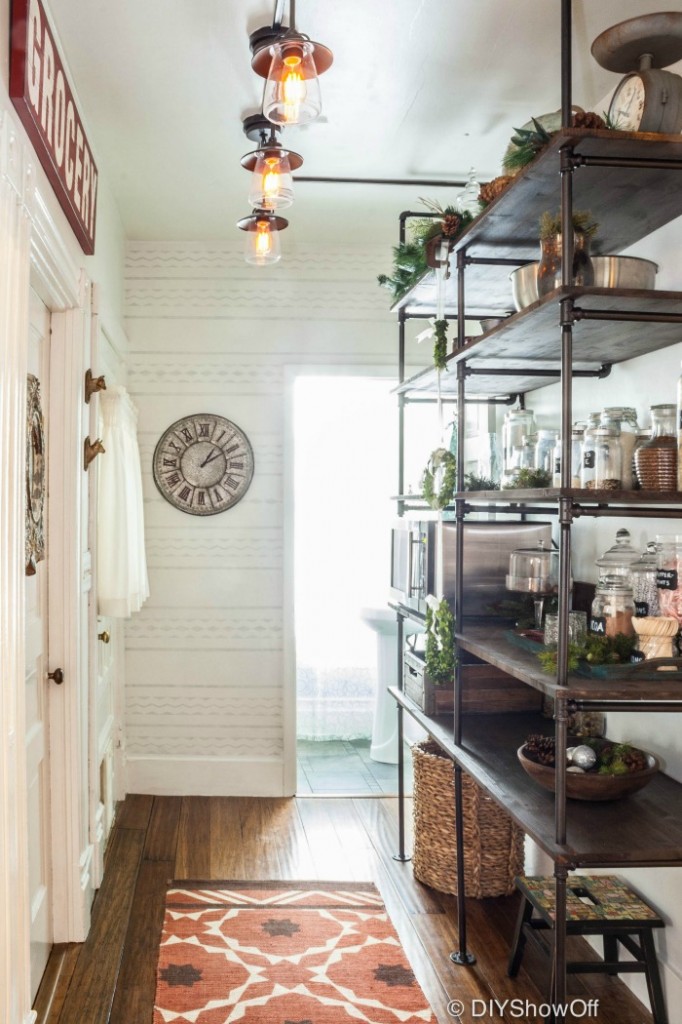
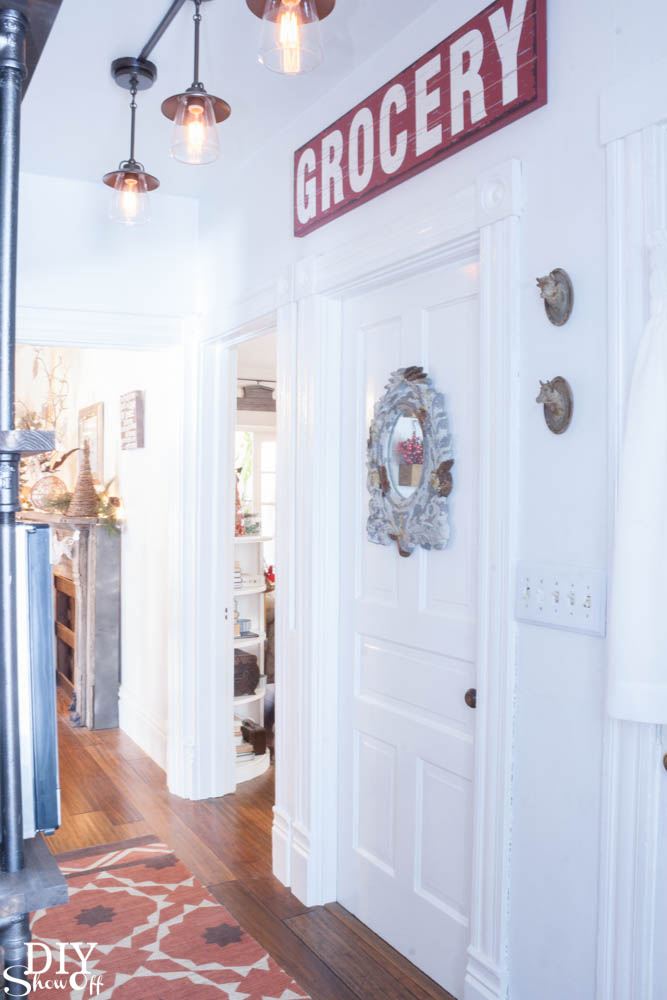
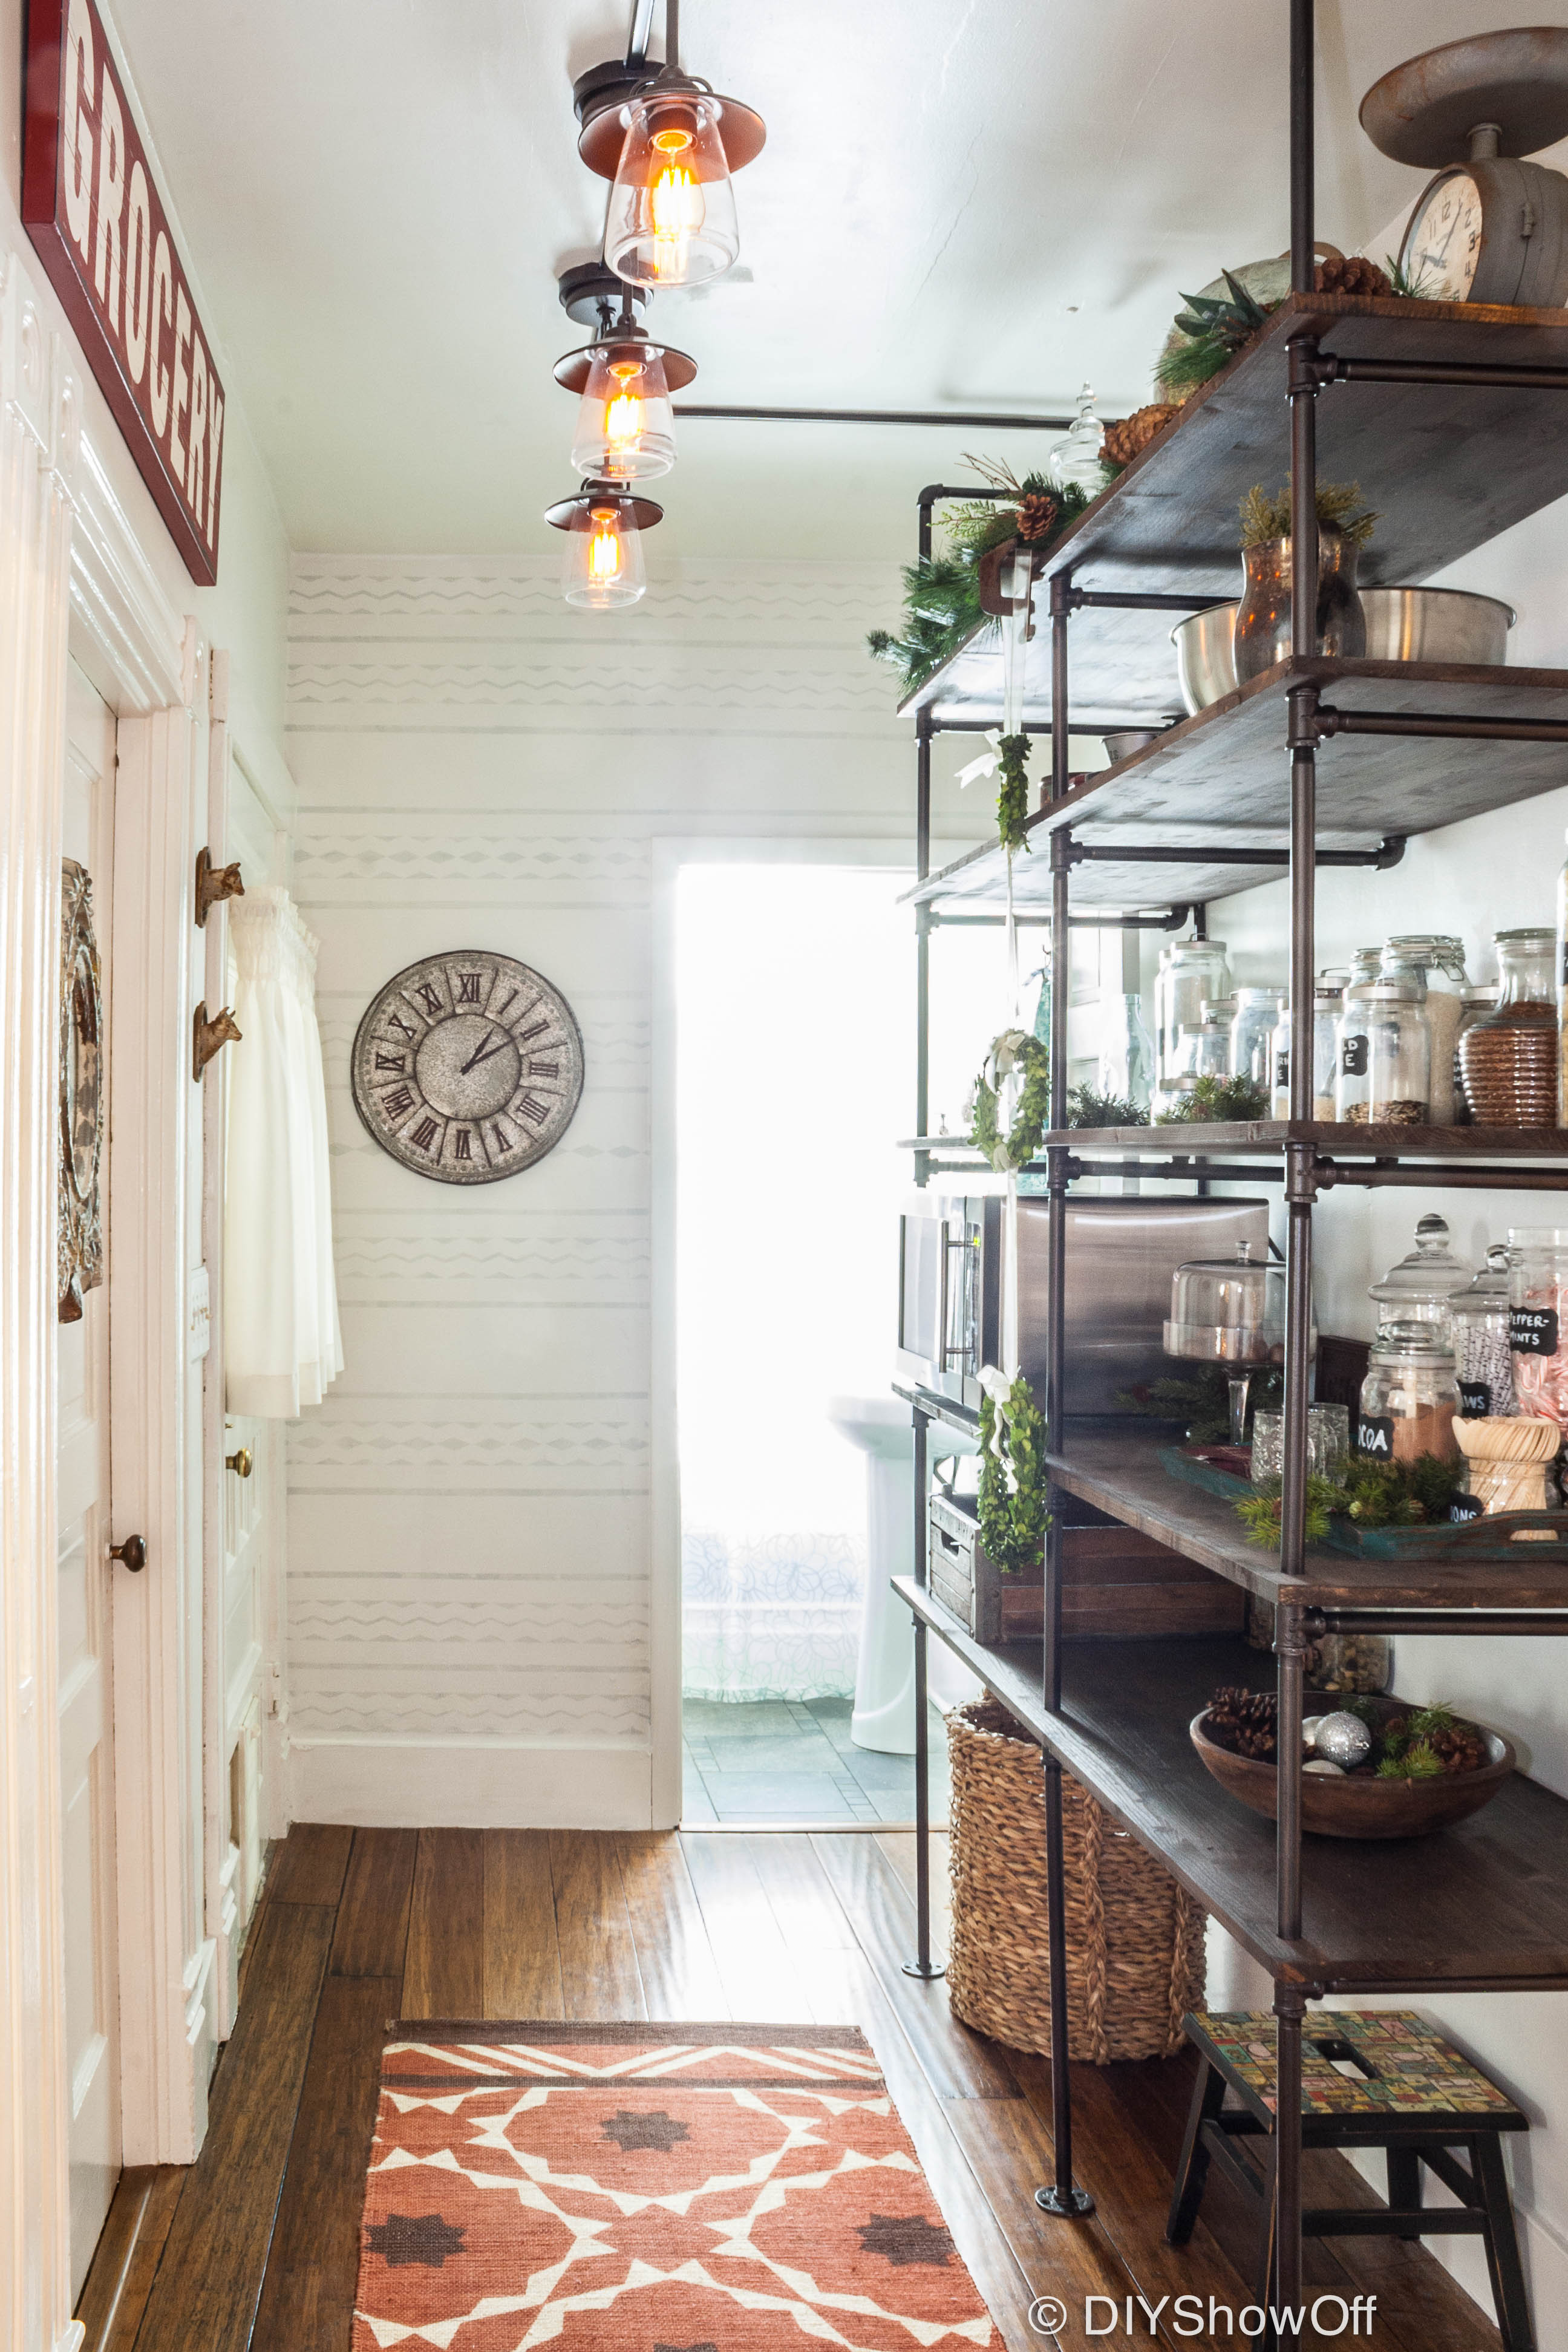
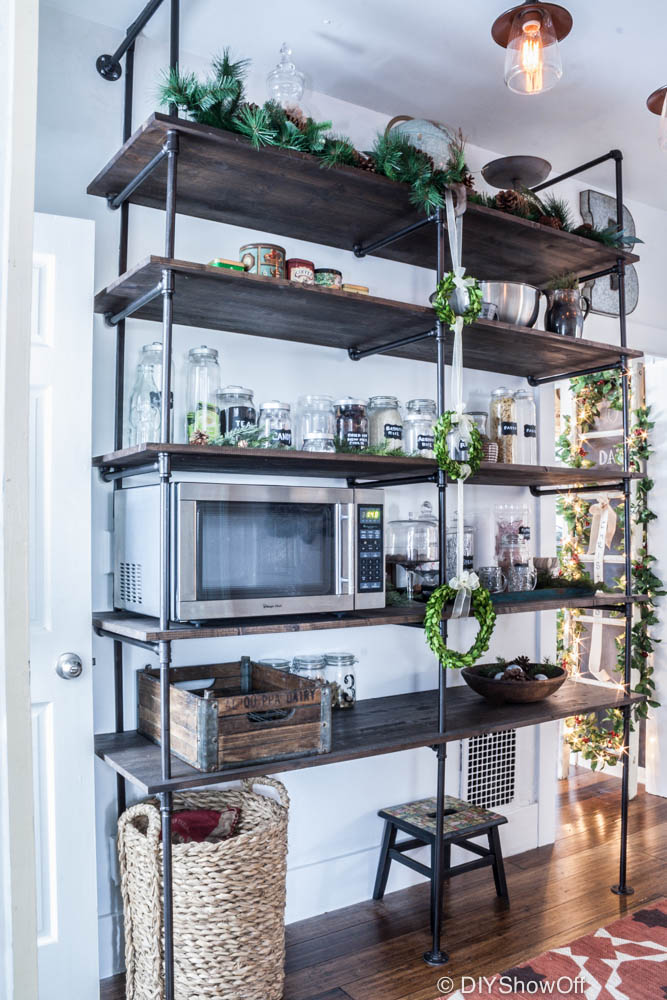
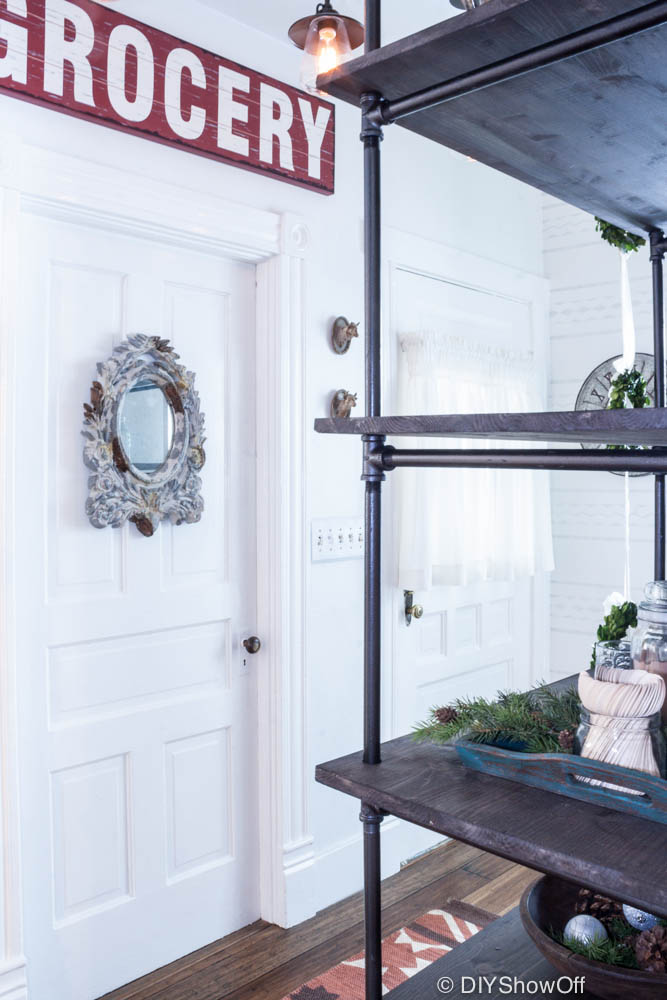
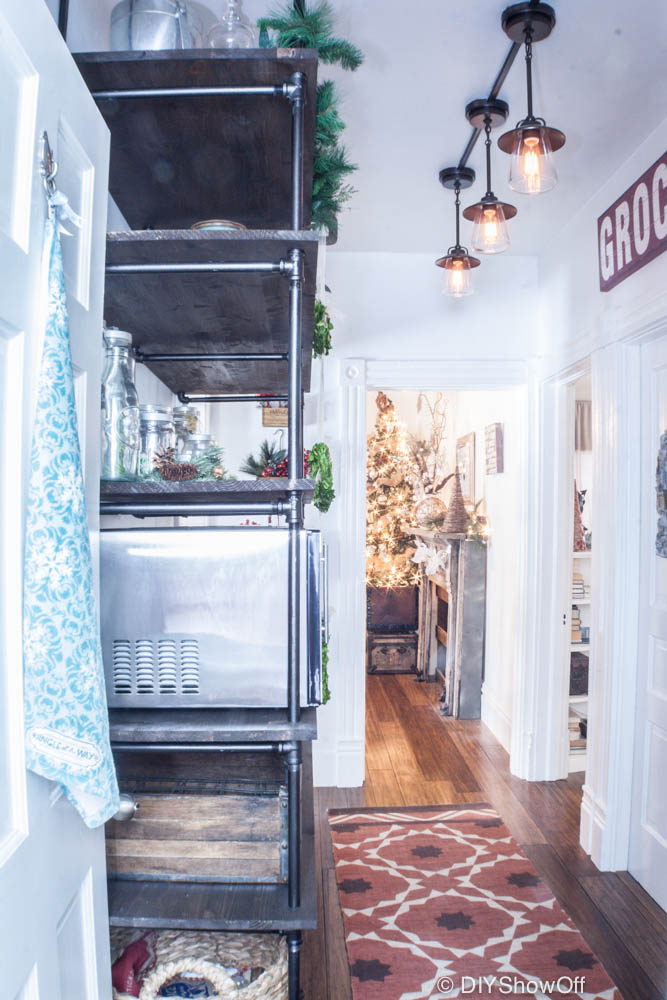
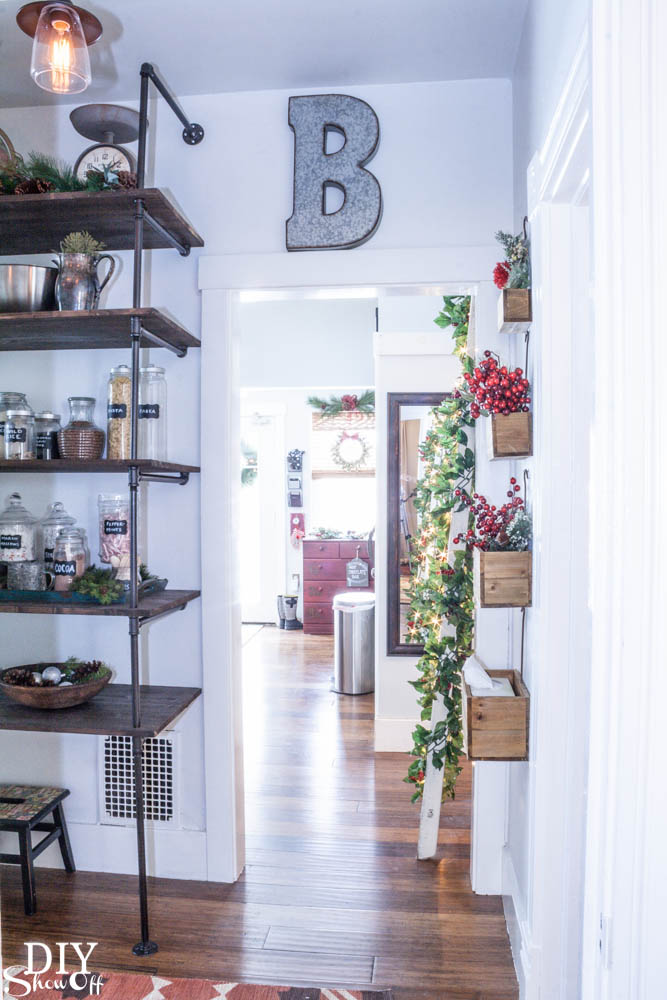
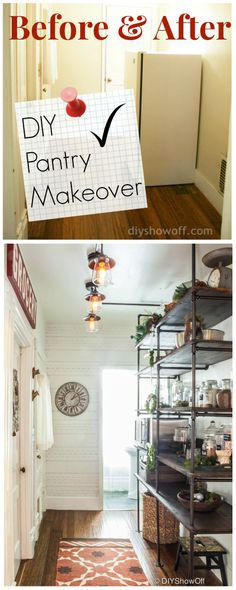
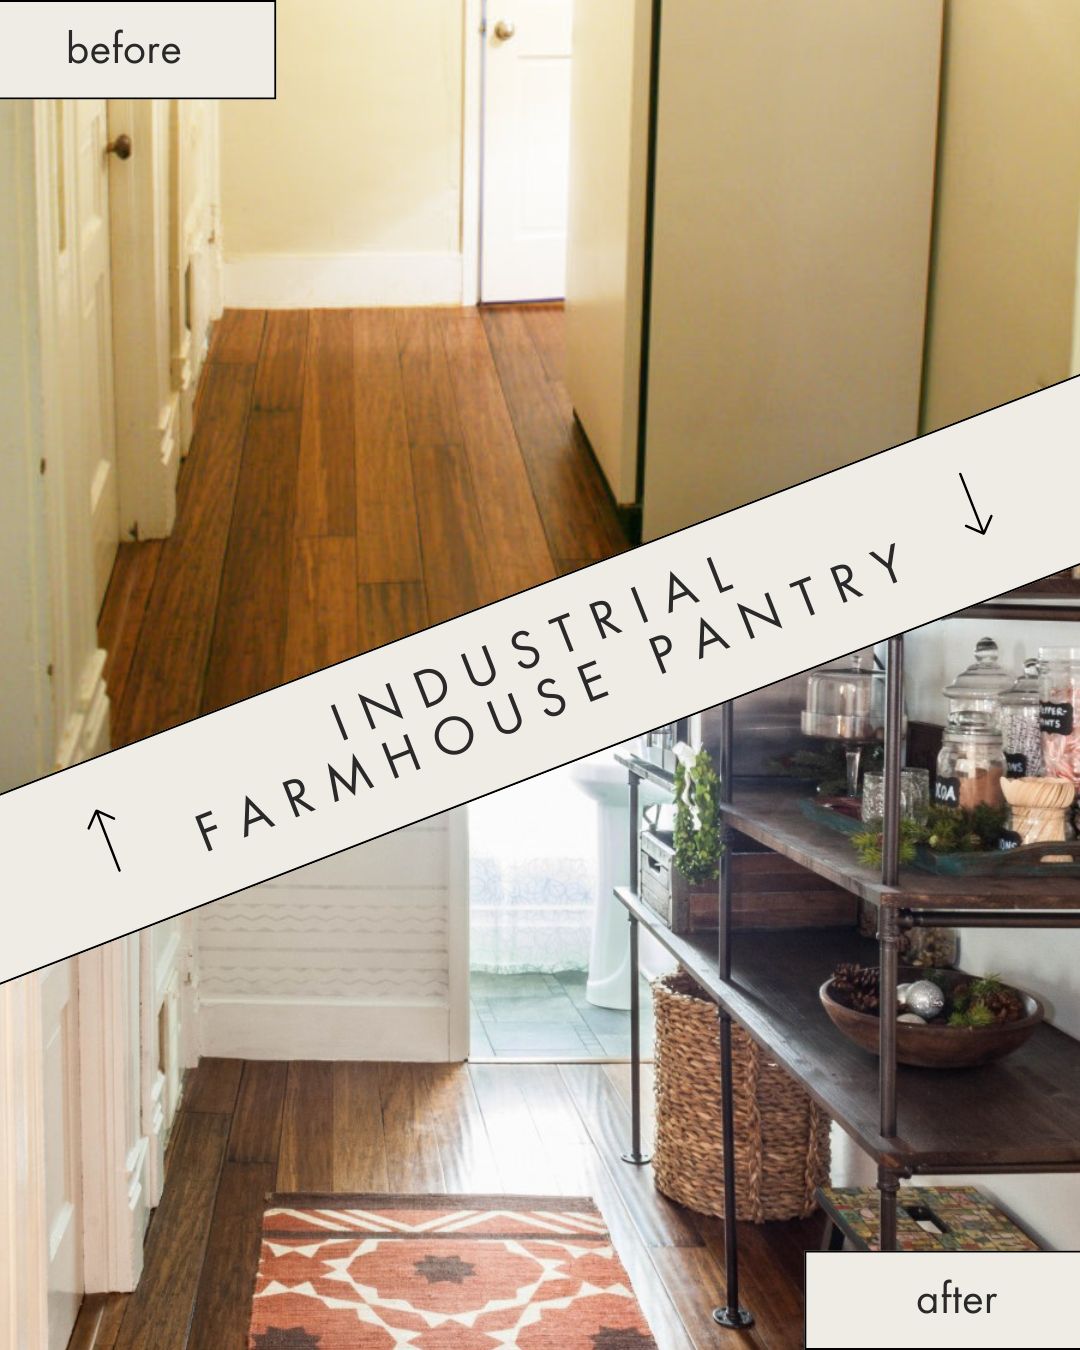
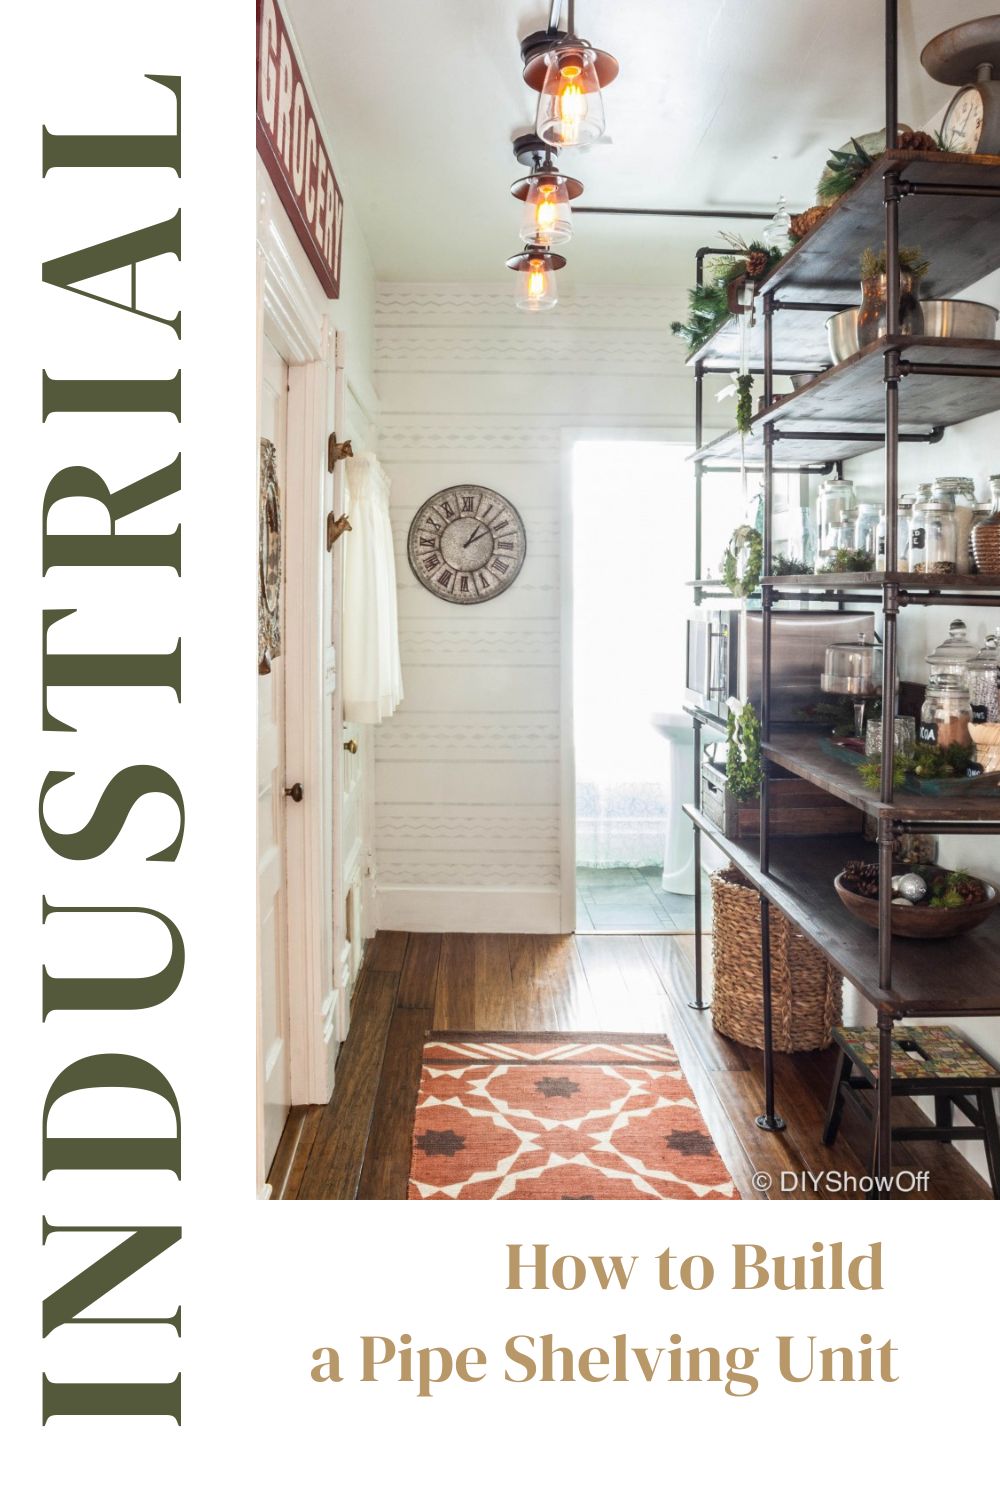
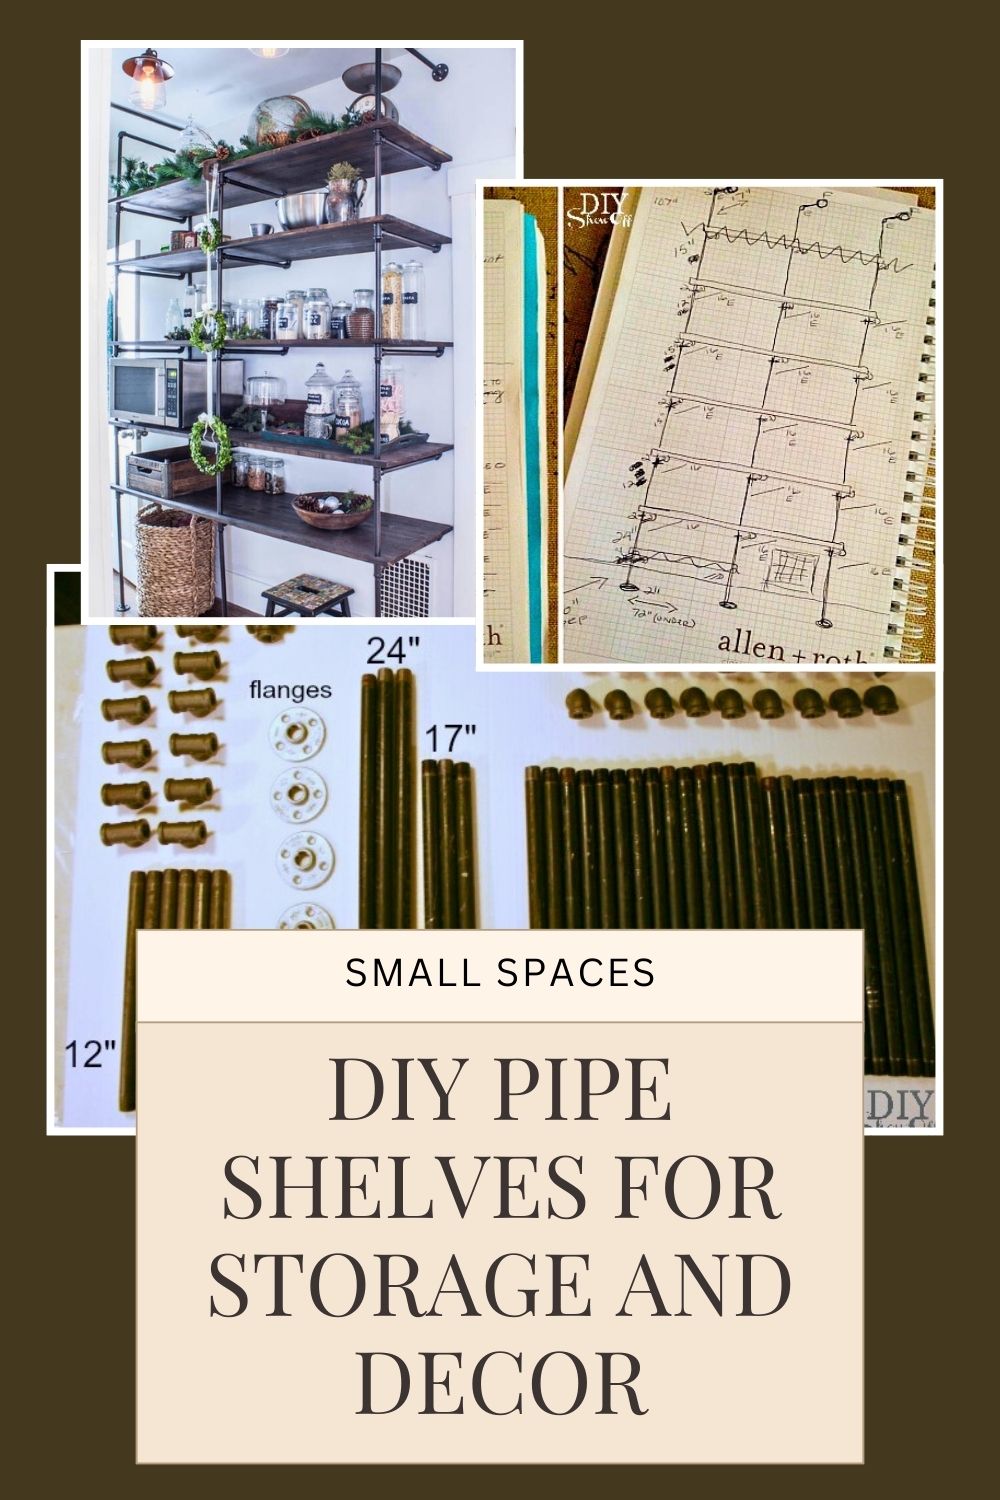
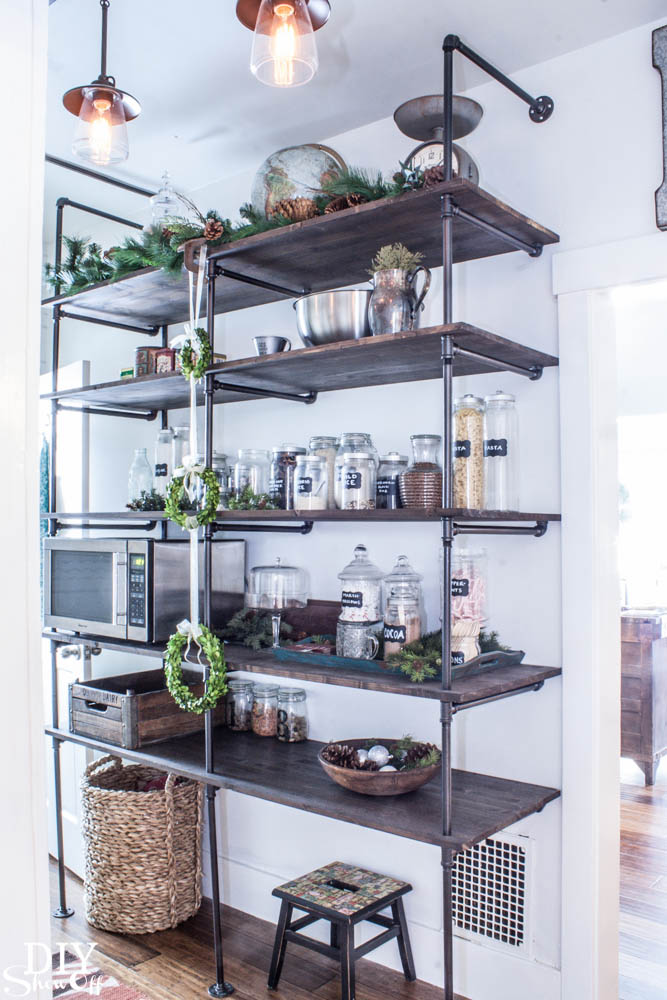
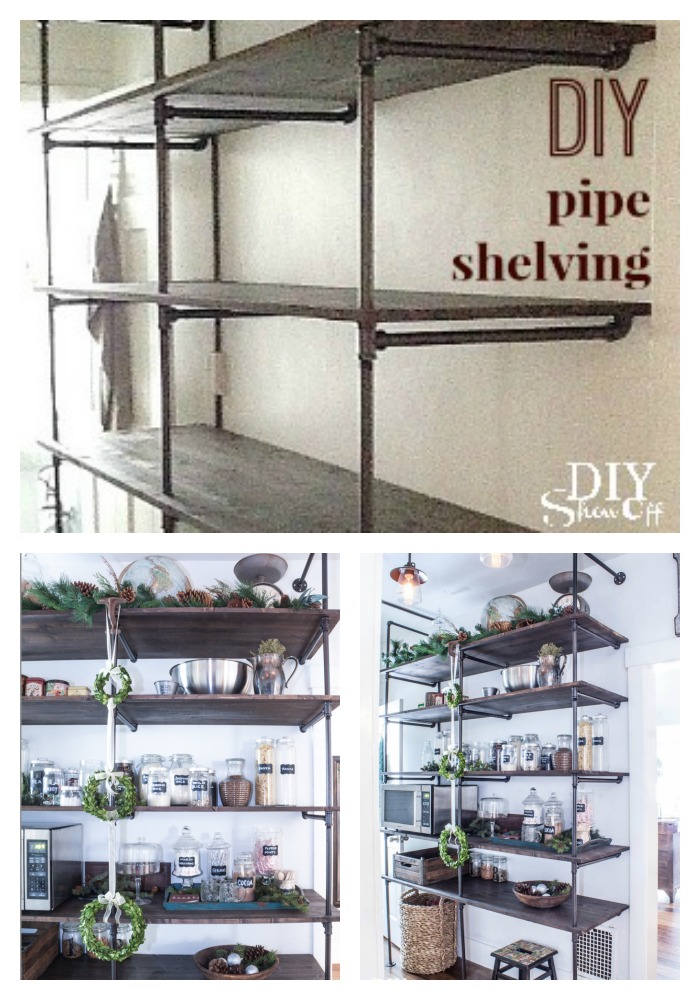
Industrial pipe shelving adds storage and character while fitting your space exactly. We designed and built ours for a small pantry area, and while it looks complicated, breaking it down step-by-step made it much easier than expected. I recently shared the open pantry before and after reveal and the star of that DIY ‘show off’ is definitely the industrial pipe shelving…
What to Know Before You Start
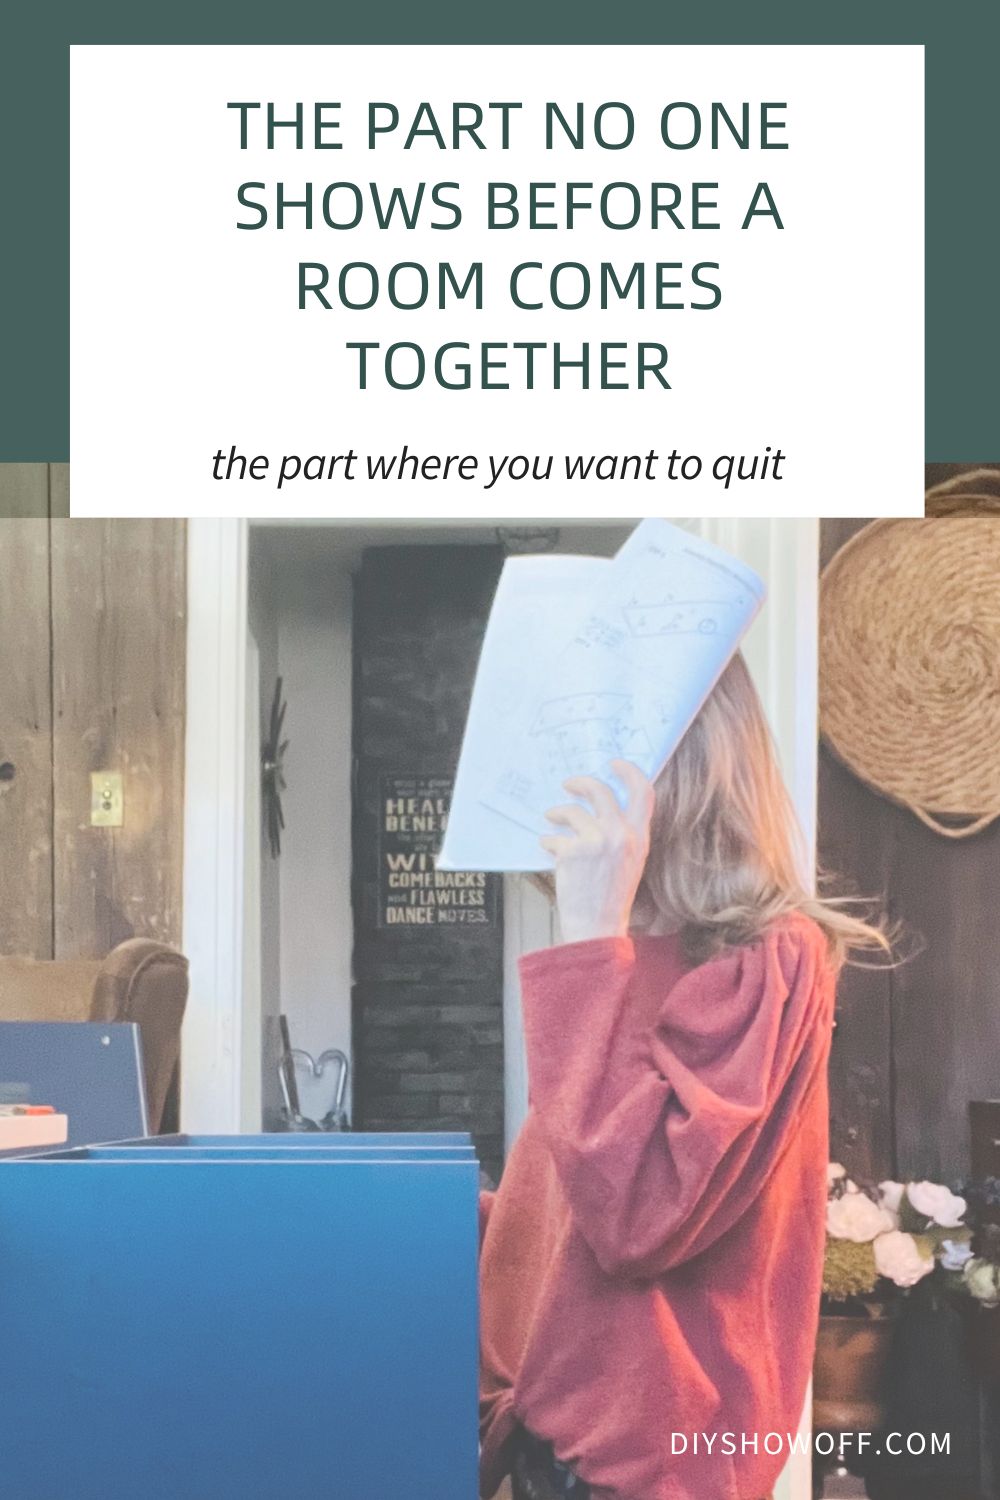
THIS IS LONG and sounds confusing BUT if you’re making one of your own, I think being detailed will help make the plan, design and build easier along with other tutorials and tips you may come across in your search for how to make DIY industrial pipe shelving.
Planning Your DIY Pipe Shelving
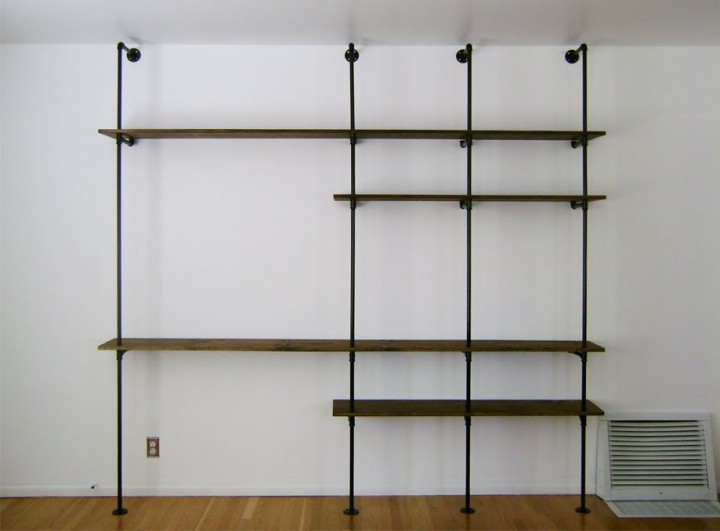
The most difficult step (and not really that difficult when sketching a visual to help ‘build’ the correct size) will be your measurements and design. I’m no architect or artist, so my sketch is rough without fancy drafting software but it gets the job done and I was able to see where I needed to make adjustments. Start with measuring the space where the shelving will go. Length, height and width. I just drew the shelving (not to scale) on a piece of paper and labelled the measurements. Keep in mind that stock pipe comes in 12″, 18″ and 24″ pieces…any other size pipe will need to be custom cut/threaded (done by a Lowe’s associate).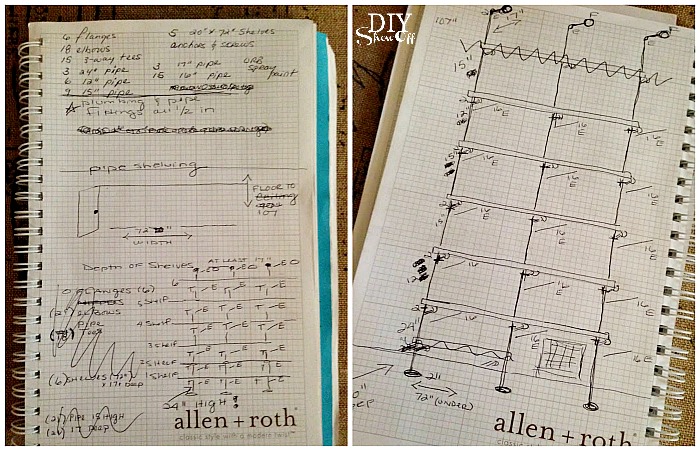
Understanding the Construction
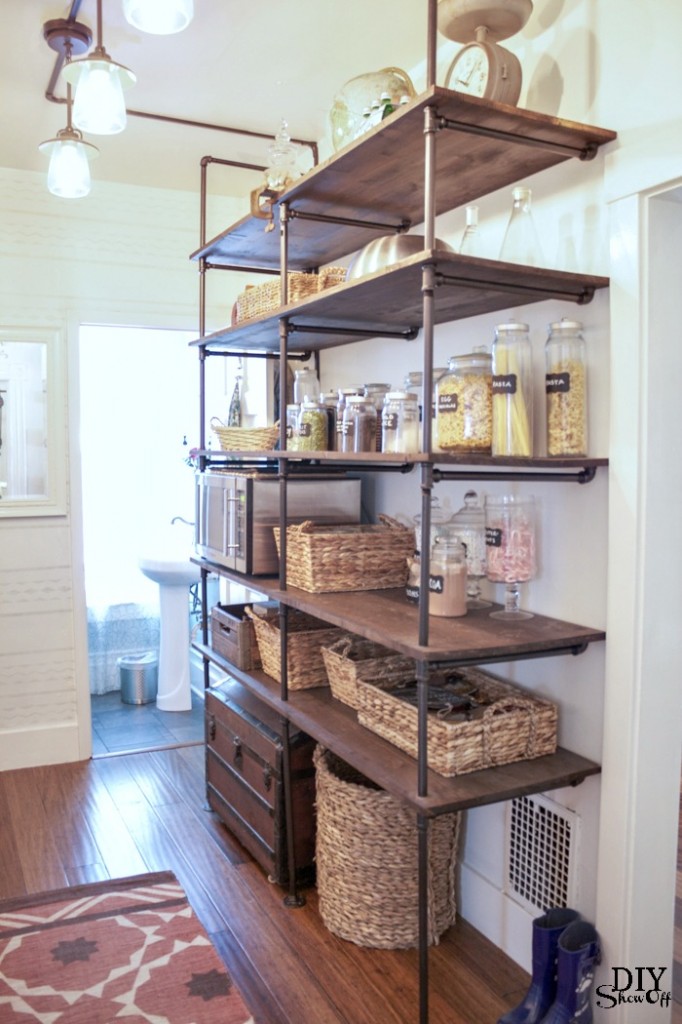
Once you understand how the pieces connect, it becomes much easier to customize. For 6 foot wide shelving, I wanted three supports for each shelf. Not enough support and the wood shelves may sag with weight over time.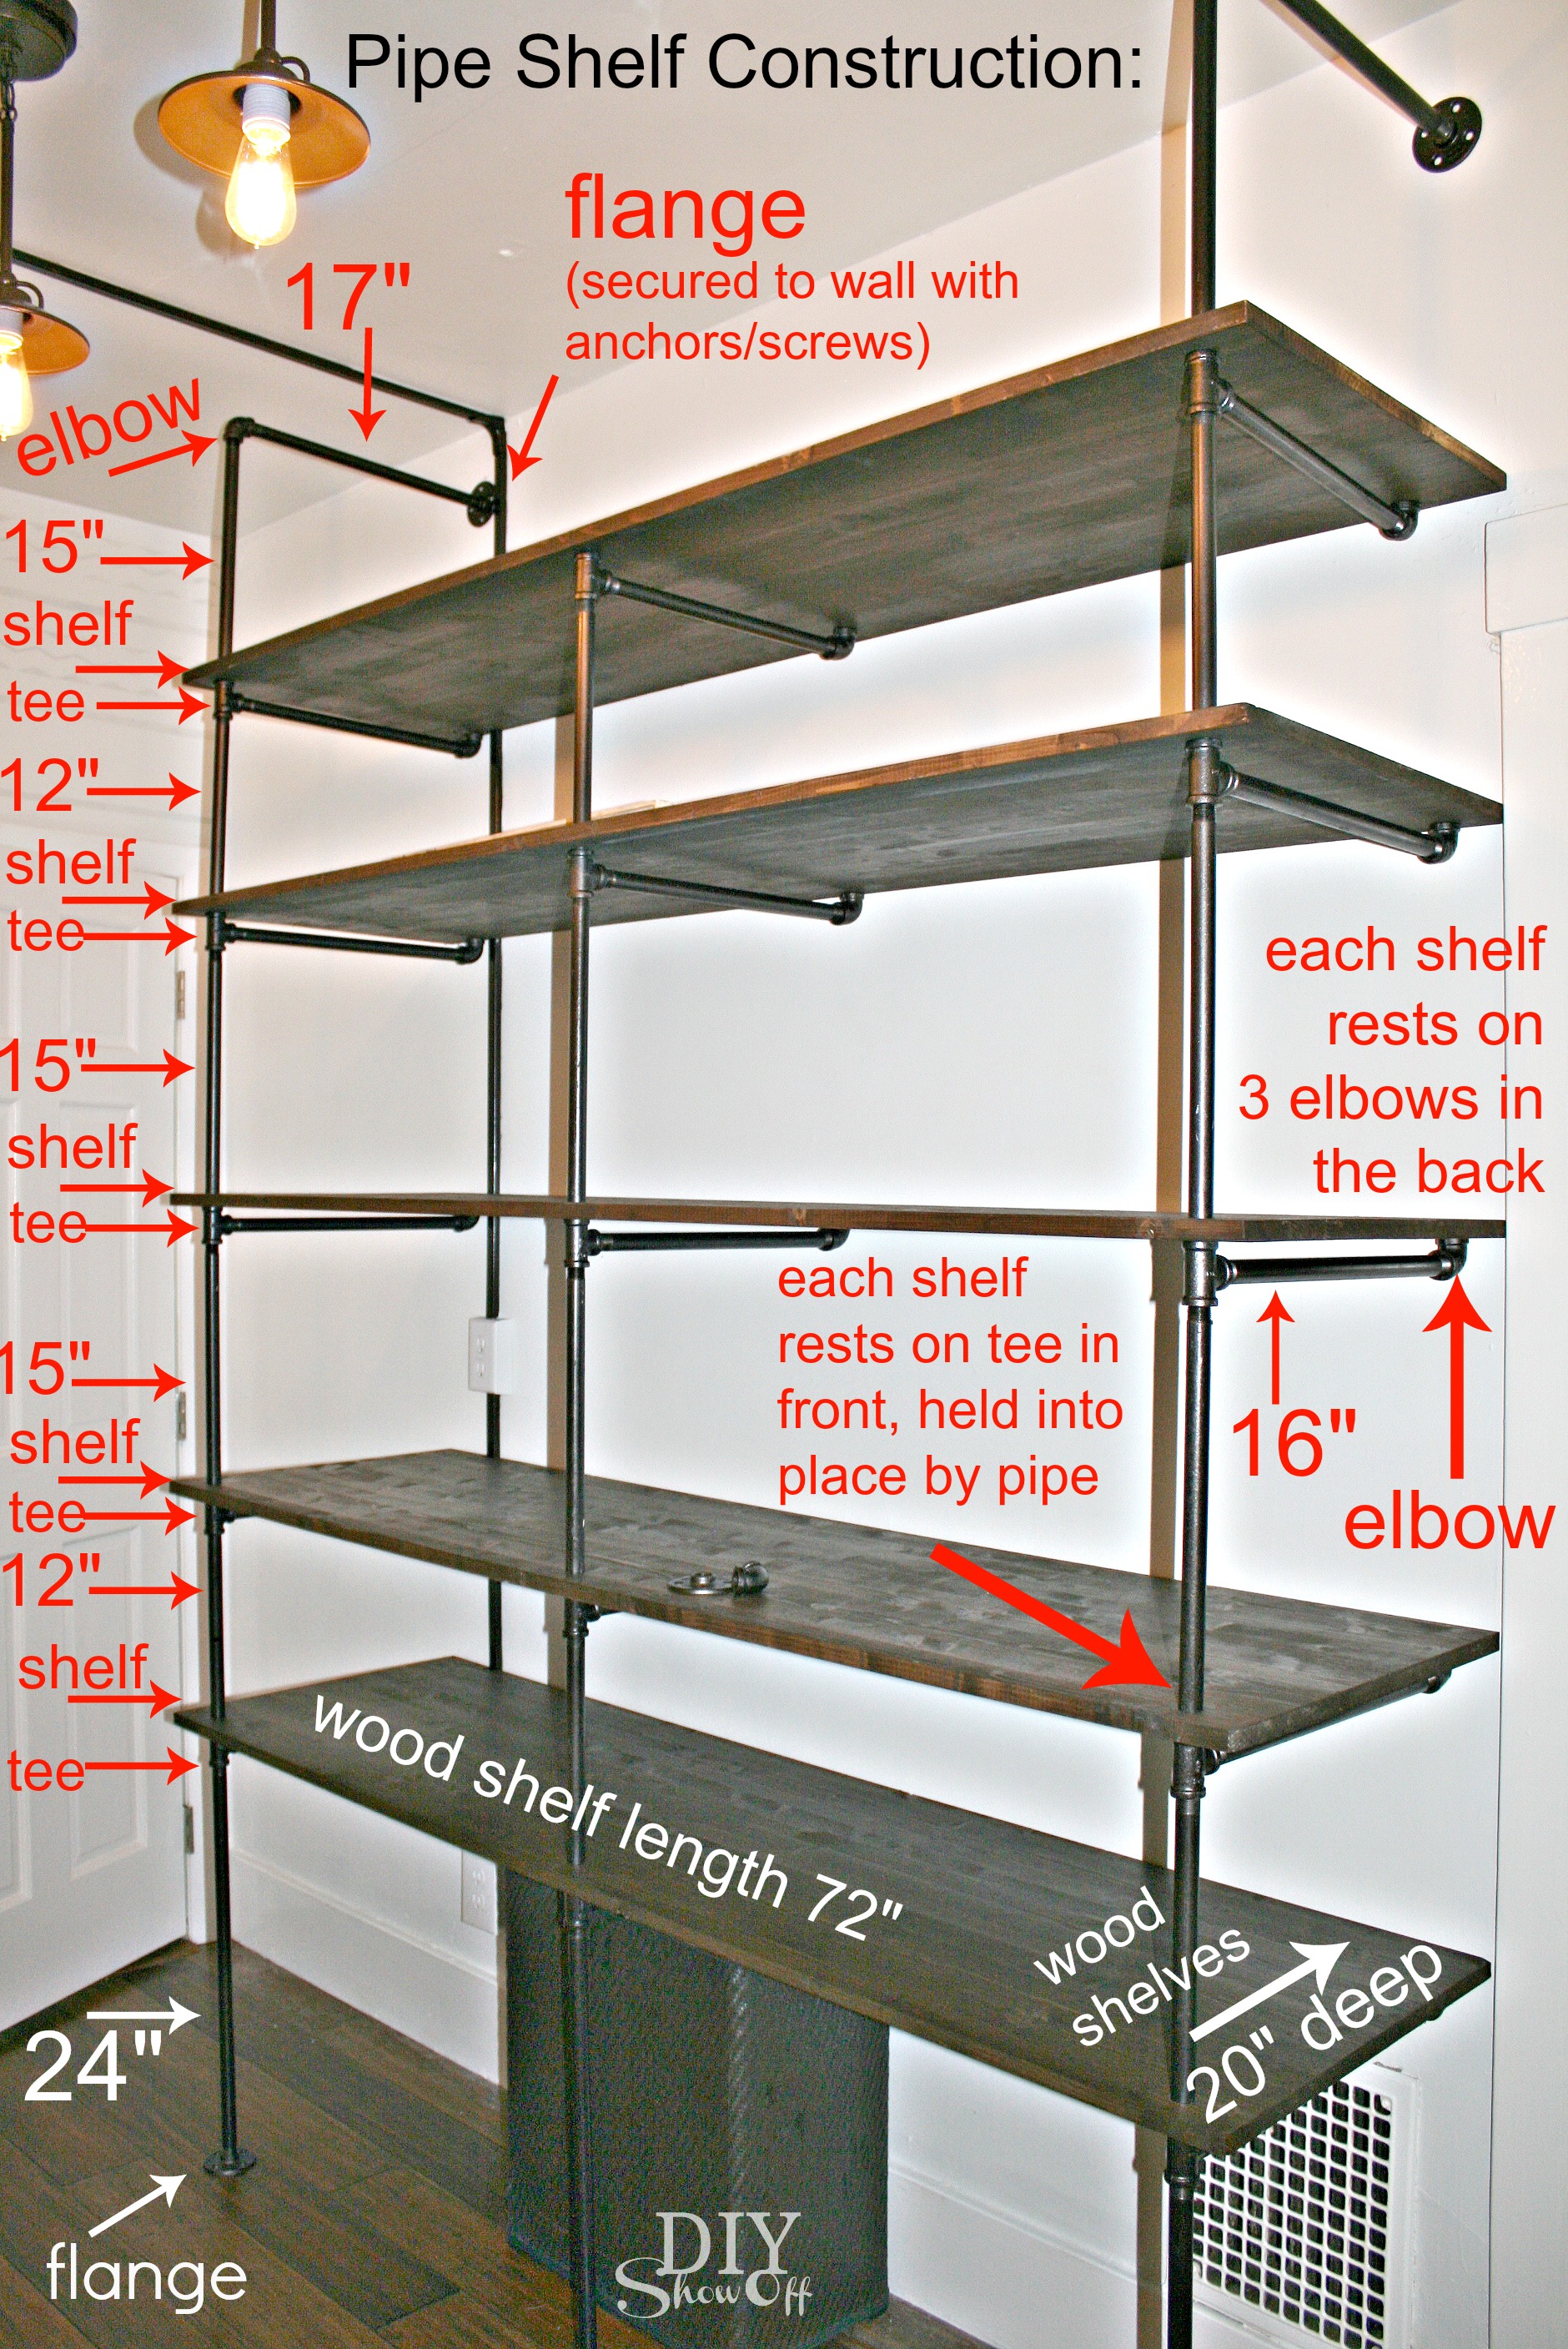 The pipe shelving frame is only connected horizontally by the wood shelving. Mine is only attached at the wall near the ceiling. I didn’t notice until assembling that my pipe cutting order was missing a piece so there should actually be another wall flange/pipe in the center top (and will be once I have more pipe cut). You could also screw it into the floor but we did not. It sounds as if it would be unsteady. Mr. DIY even had plans to add brackets for extra strength, however when installation was complete, even he was surprised by the how sturdy it is.
Each of the three built up/connected vertical pipe supports are individual and not connected to each other in any way. (Labeled on the left in the photo above as an example.)
Each wood shelf has three holes on the outer front edge (one on the left, one in the center, one in the right). Each shelf front is supported by resting on top of a tee in the front, threaded through a hole in the shelf with the vertical pipe. On the back, each wood shelf rests on an up-turned elbow. So each wood shelf is not anchored or screwed down in any way. It’s simply locked into place by the front pipe pieces through the holes in the shelf. Each shelf rests on a three tees in the front and three elbows in the back.
My (vertical) measurements are rough but I knew that I had a 107 inch cap (the height from floor to ceiling) and could not go higher. Adding the measurements visually helps with adding up the numbers. I estimated my fittings (the flanges, tees and elbows to be 2 inches – they’re actually smaller but it gave me wiggle room in my design so I knew my shelving would not be higher than 107″ and coming in a few inches lower is ideal). The wood shelving thickness does not come into play because it doesn’t add to the height of the unit. On my drawing, starting with the bottom of the shelving unit, I drew in the flanges and the number 2 for 2″. Then, because of heat vent placement, I knew my first shelf needed to be above that. I drew in the 24″ pipes. Then a tee (2 inches), then my next pipe length 12″, another tee (2 inches), 15″ pipe to accommodate our microwave height, another tee (2 inches), another 15″ pipe, another 2″ tee, a 12″ pipe, a 15″ pipe, 2″ elbow. Adding those up, my rough shelving unit height measured at 107. Exact in theory, but due to the varying heights of flanges, tees, elbows and pipe threads when assembling, actual finished shelving unit height came in at 102.5″ (so, overestimating measurements in the plan ensures that shelving unit will not be too tall for the space).
Horizontal: My wood shelves are 20″ deep. As shown in the photo above, in the front the shelving rests on 3-way tees, in the back, it rests on an upturned 90 degree elbow. I chose 16″ pipes for connecting the horizontal 3-way tee to the upturned elbow. (Because the tee sits 1″ in on the 20″ shelf, measures 2″, then 16″ pipe, then a 1″ elbow totaling 20 inches, meaning once threaded it won’t touch/rub/scratch the wall. Keep the total horizontal support measurement shorter than the shelf depth.) For my top three horizontal frame supports (only 2 shown in photos for now), I added an inch (17″) to reach threading the wall/flange.
Horizontal pipe pieces:
- 3 for each shelf (15 total for 5 shelves)
- 3 for top of industrial pipe shelving frame
Note: You may want to adjust pipe lengths to fit your own design. Maybe all one size or staggered shelving or a desk area. But once you understand the construction, you can customize each shelf’s height to fit your space. I used black iron pipe because the cost was a bit lower. Galvanized or maybe even PVC would work as well. All of my pipes and fittings are 1/2 inch. A Lowe’s associate made cuts and threads on pipes that were not an ‘in stock’ size.
Shop: Make a list of plumbing supplies by counting up each tee, pipe, elbow and flange in your sketch.

Materials
For a pipe shelving unit measuring 72 inches wide x approx. 102.5 inches tall x 20 inches deep.
Wood + Finishes
- (5) 1 x 20 x 72 inch stain grade pine planks
- Rust-Oleum Oil Rubbed Bronze spray paint
- Rust-Oleum Ultimate Wood Stain (I purchased 1 qt.) (color is Kona)
- Rust-Oleum Ultimate Polyurethane (matte finish)
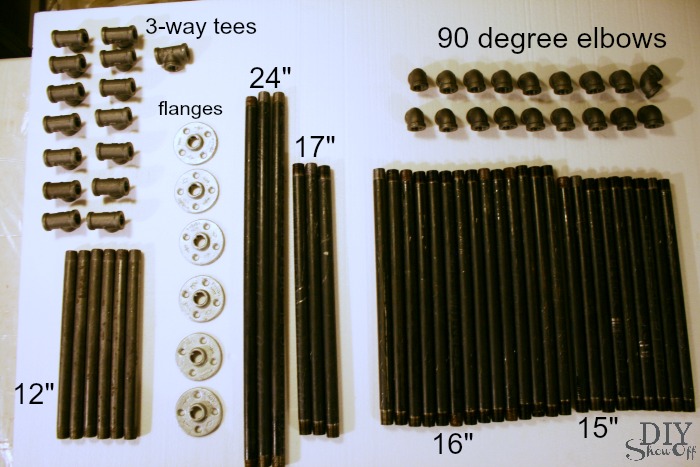
Pipe + Hardware
- (6) flanges (be sure to get the correct fitting size for 1/2 pipe)
- (18) 90 degree elbows (be sure to get the correct fitting size for 1/2 pipe)
- (15) 3-way tees (be sure to get the correct fitting size for 1/2 pipe)
- (3) 24″ pipes
- (3) 17″ pipes (custom cut/thread)
- (15) 16″ pipes (custom cut/thread)
- (9) 15″ pipes (custom cut/thread)
- (6) 12″ pipes
- screws and walls anchors
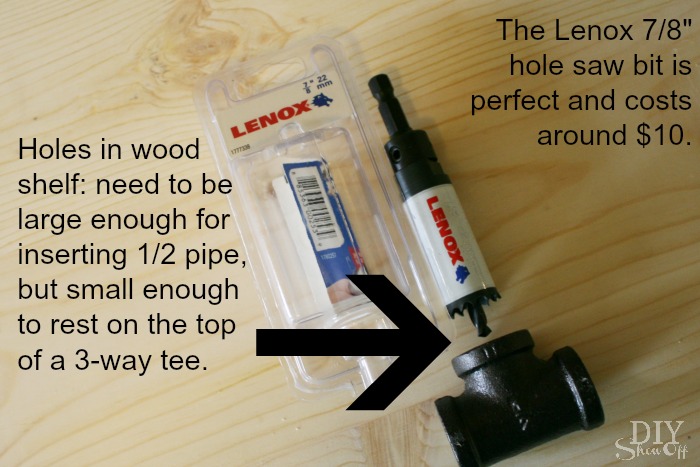
- 7/8″ hole saw bit (perfect circle cut for 15 holes)
What We Did (Step-by-Step Overview)
Prep the Pipes
First step will be to clean the pipes. Because oil is needed for the cutting process, they will be filthy, dripping with oil and there are likely going to be pieces of pipe that have that annoying super tacky glued price stickers protected by packaging tape that will need removed. Since I used iron pipe, I could not let the pipes soak in soapy water (they’d rust), so I used grease-fighting Lysol wipes, paper towels and lots of patience.
Paint: Next I spray painted all of the plumbing pieces Oil Rubbed Bronze. I did not use primer. Because I chose black iron instead of galvanized, scratches or poor coverage aren’t an issue. 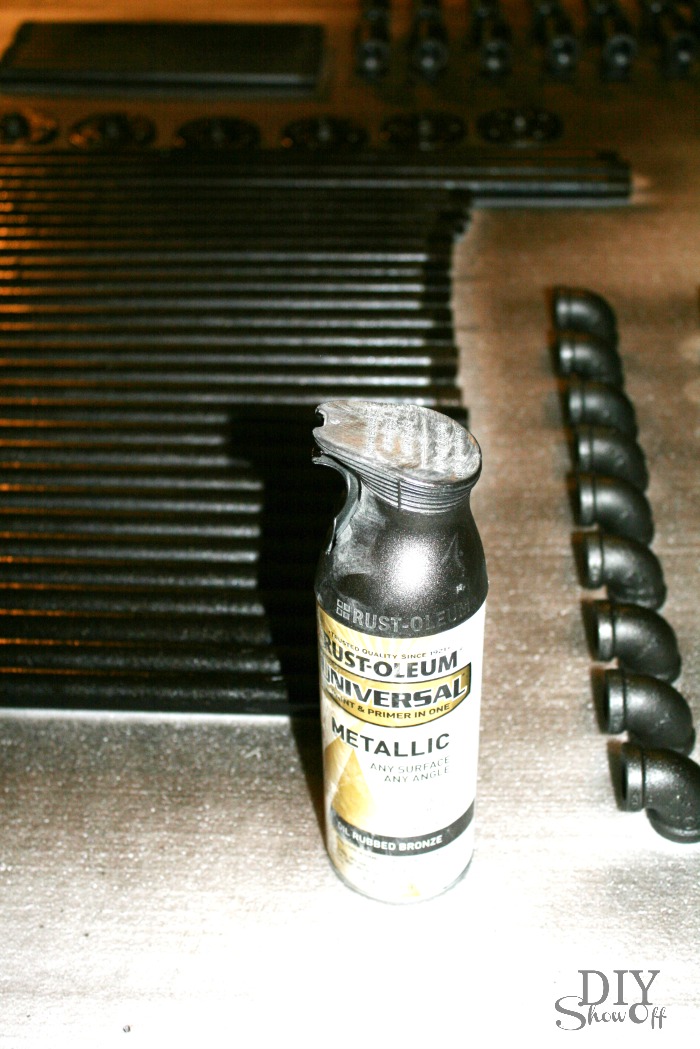
Prep the Wood Shelves
We cut 1 inch off of our 72 inch length so we’d be able to open the half bathroom door the entire way. This doesn’t affect anything. Decide where you want the holes (for the pipe supports) to be placed. I decided about 1 inch in from the front, 2 inches in from the sides. I created a template from a piece of cardboard. It looks like this: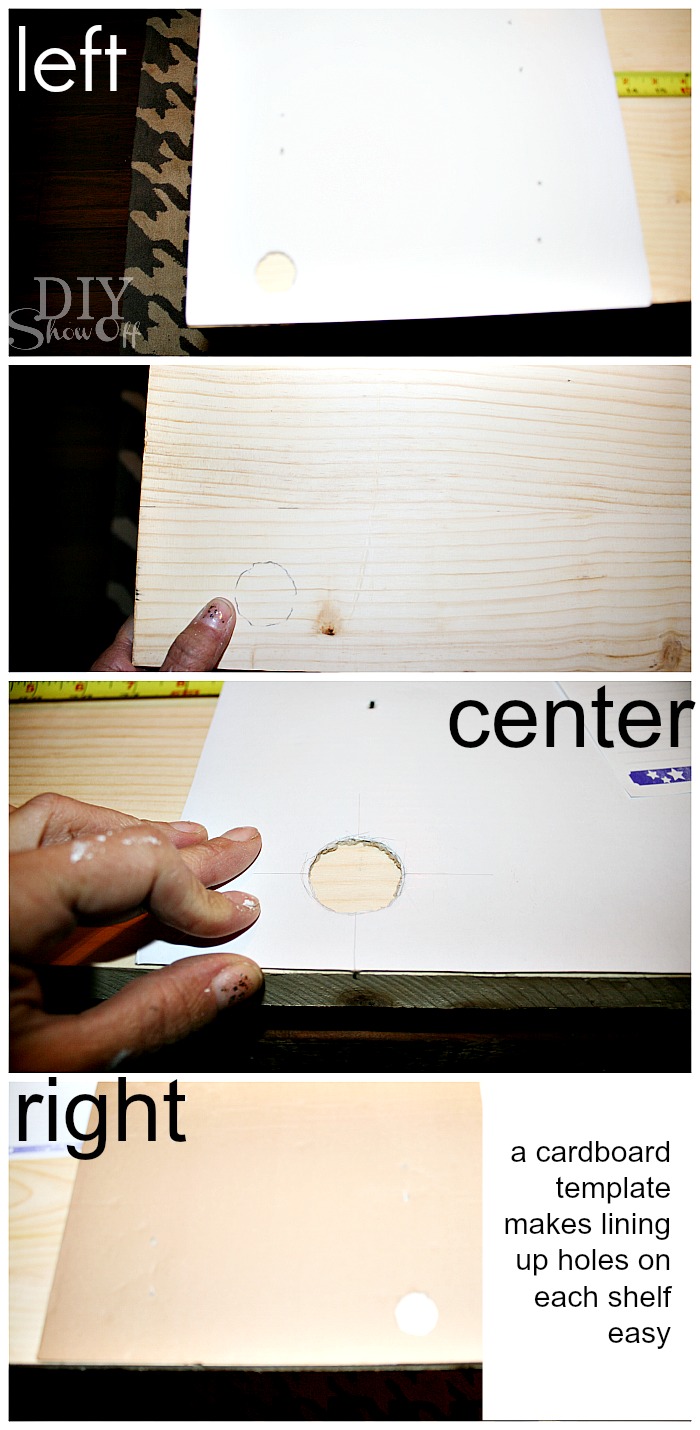
I simply lined up the edges of the cardboard with the left front edge of the wood shelf and marked my circle/cut mark with a pencil. Flip the cardboard and do the same for the right front edge. I measured the center of my 71″ length and pencilled in the circle/cut mark, lining it up with my template/stencil. I did this with each wood shelf.
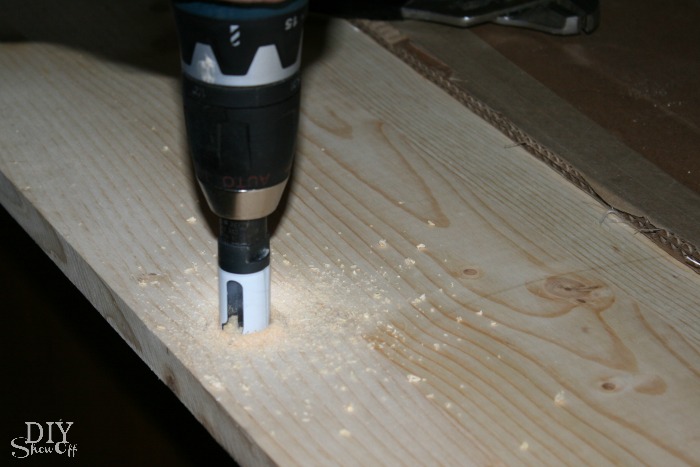
Cutting/drilling the holes: We drilled a tiny hole into the center of each penciled circle (made lining up the hole saw easier). We used the 7/8″ hole saw bit for perfect clean drilled holes. It made creating 15 holes all the same size a breeze! I lightly sanded and cleaned around the holes and our cut edge.
Because we have exterior wiring/conduit going up the wall behind the shelving, we had to create a notch on each wood shelf. We used our Dremel Multi-Max to to this. 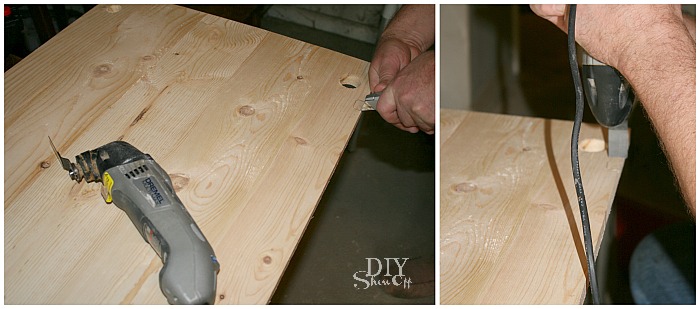
Staining and sealing each side of each wood shelf is the most time consuming part of the project. I love that Rust-Oleum’s Ultimate Wood Stain dries in about an hour. I only applied one coat…isn’t the color pretty? I did one side then flipped and did the other (the edges and inside of the holes too), applying with a foam brush and wiping off (rubber gloves and lots of rags are a must!). Watch for drips! Then I applied 5 coats of polyurethane to the top side (after this much work, you’re going to want to protect the finish on these shelves!), allowing to dry 2 hours between each coat. Again, watch for drips! No sanding between coats required. Once the one side was dry, I flipped the shelves and repeated brushing two coats to the bottom side, drying between each one. 
Assembly
Level & Adjust
I was super nervous about this part. The size of the room did not allow for us to connect and lift the shelving into place. So we propped up the first shelf using a hamper and books and assembled in place.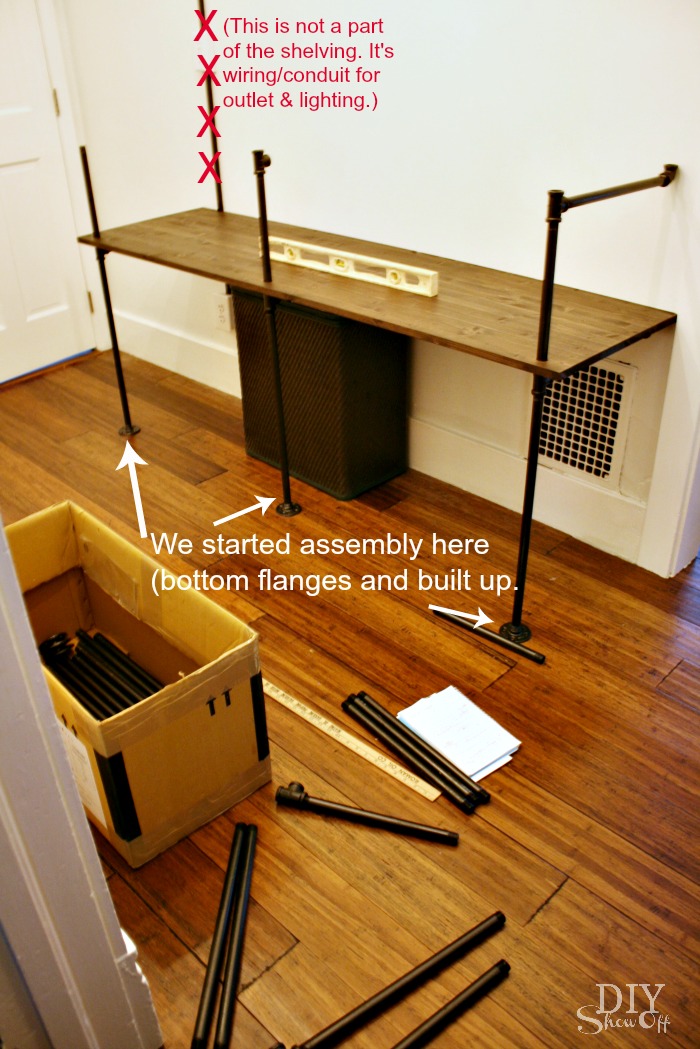
I can’t believe how easily and smoothly assembly went. I started by attaching flanges to the first three pipes. Then added a tee to each one. The tee should be placed in a direction with one opening facing up, another opening facing horizontal towards the wall. Next, attach a length of pipe (mine are the 17″ ones) to the horizontal facing tee. Attach an elbow at the end of the horizontal pipe. You’ll want the elbow to face up for supporting the wood shelf.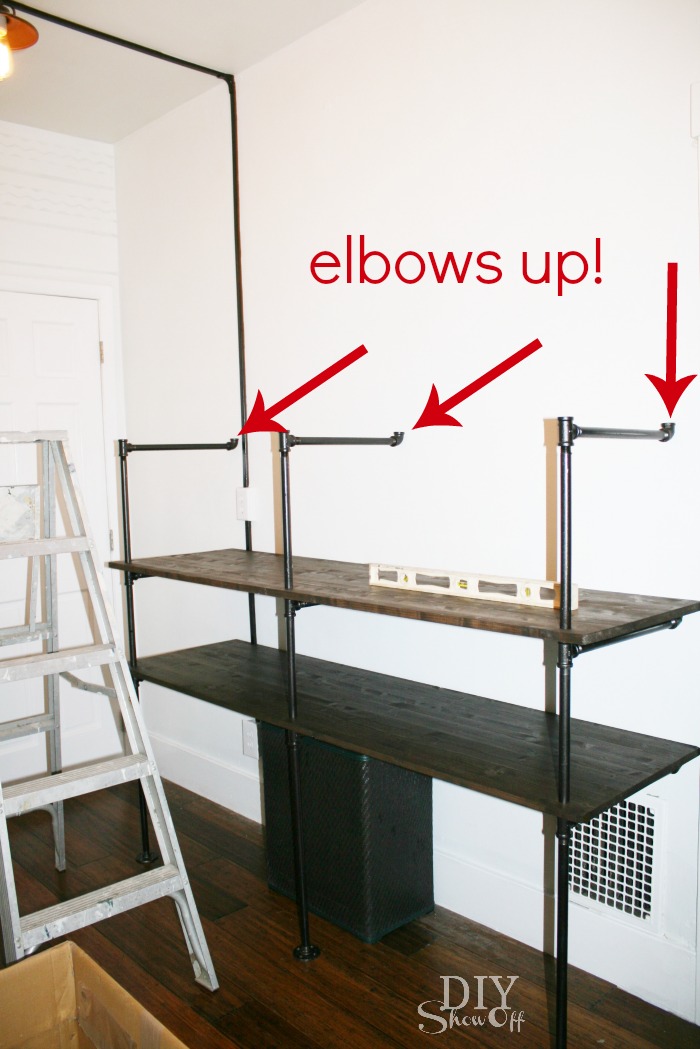
Hold that piece into place under the hole in the wood shelf. Thread the next length of pipe vertically (So starting order at the floor is flange, pipe, tee, wood shelf then next length of pipe). Continue building the shelf in this way. We kept the bar stools and books for support until the very end of the assembly process and securing the shelving to the wall.
Work with a level on the wood shelving to ensure everything is square and level. (Adjust threading as needed.)
Securing to the Wall
The top: securing the shelving unit. After the last shelf is in place, add the last three vertical lengths of pipe. Add an elbow to each one. Add a flange to each horizontal pipe piece and thread into the elbow. The flange should be touching the wall (threads will allow for adjusting).
Using a pencil, mark the wall where screws (into the flange) need to go. Our walls are plaster so we drilled pilot holes and added heavy duty wall anchors. If you designed your shelf to line up with the wall studs…you’re good to go. Screw flanges into place.
Sturdy. Beautiful! Ready to be stocked and decorated. 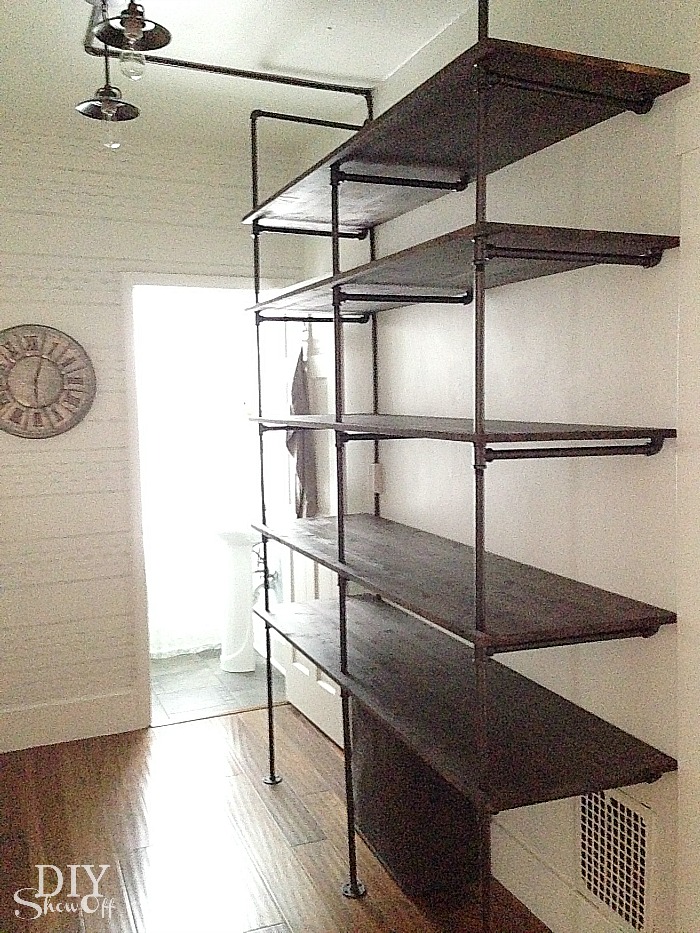
My cut pipe Lowe’s order was missing one of my top custom cut pipes so our shelving unit is only secured into the wall by the two outer pipe configurations and it’s still sturdy! But I do plan to add the top center piece to finish/secure it properly.
Final Reveal
A custom shelving unit that fits the space perfectly and looks better than anything we could buy.
What We Learned
-
design/planning is the hardest part
-
staining/sealing is most time-consuming
-
assembly easier than expected
-
fittings add up in cost
Whew! That sounds way too complicated and long, but I promise…I only wanted to include as many details as I could for your research into making your own. I was so happy that it was easier than I anticipated. The hardest part – the design and again, by drawing it out one piece at a time, even that isn’t so complicated. Trust me, math is not one of my strengths. The most time consuming part – the staining/sealing or maybe it was removing the sticker goo. But the reward? A gorgeous custom shelving unit way better than any manufactured piece. Wouldn’t you agree?
See the entire pantry before & after reveal here.
Have any questions? Let me know in the comments! Good luck!
Related Projects:
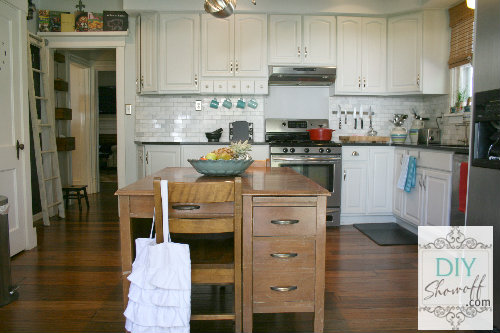
Pantry Before & After Reveal

Painted Accent Wall
Lighting Dilemma & Solution
More DIY Projects: