Blogger Stylin’ Home Tours – Favorite Room Edition {Kitchen & Pantry}

Following the Blogger Stylin’ Home Tours – Favorite Room Edition? ::gasp!:: So fun! So exciting! If you love looking at ‘real’ and ‘beautiful’ and ‘inspiring’ homes then you’re going to want to catch up on the series starting with Lindsay at The White Buffalo Styling Co.

Have you just popped over from The Chronicles of Home ? Welcome, friends! I’m so happy you’re here! Come in, come in! Make yourself at home!

Favorite Room Home Tours 

It’s the next to the last stop of a week long series of beautiful homes. I wish I had some sort of grand finale of “Holy smokes! They saved the best for last!” but our home is really still such a work in progress. And then there was a bonus favorite room added after me so I’m no longer last. But don’t you just want to gather all of these pretty rooms to create one big awesome house? That’s where I’ll live. 😉 

My favorite room is almost always the room we most recently completed. Know what I mean? All of the blood, sweat, tears and labor of love, to the finishing touches and I could sit in that room for hours just soaking up the feeling of the reward of a job well done. And well, JUST DONE! Ya know?

I am so SO in love with my bathroom, you guys! If you saw the ‘before’ pictures of what I lived with for so many years, you understand…now it’s just the prettiest soothing spa-like room. I’d move my bed or office in there if there was room. BUT anyway, that seems like such an odd room to choose. “Roeshel’s favorite room is the bathroom! hahahahahaha!” Ugh. 

DIYShowOff Bathroom Makeover before and after

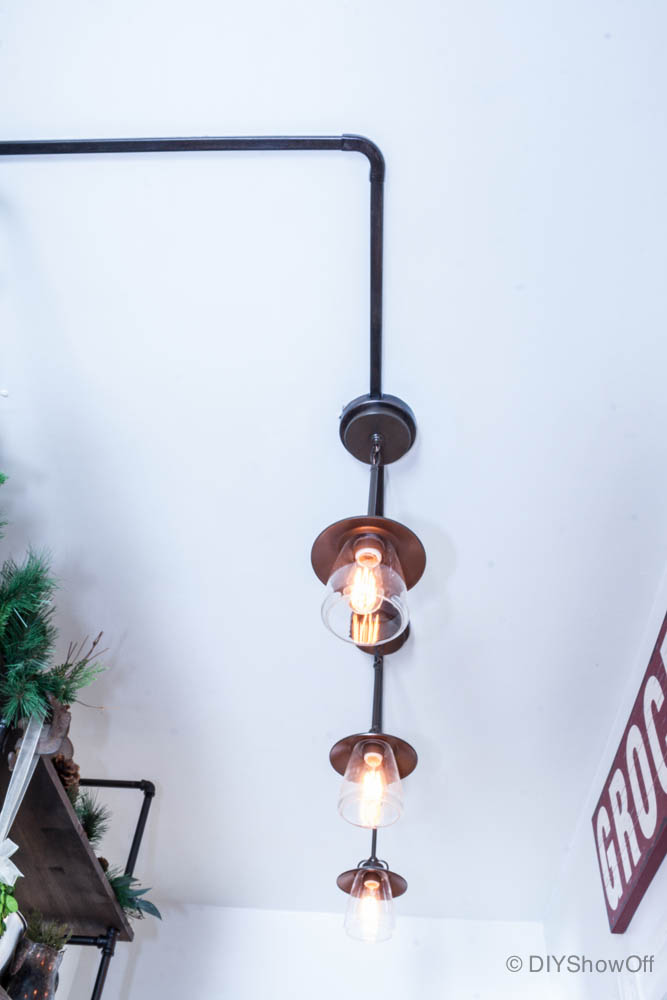
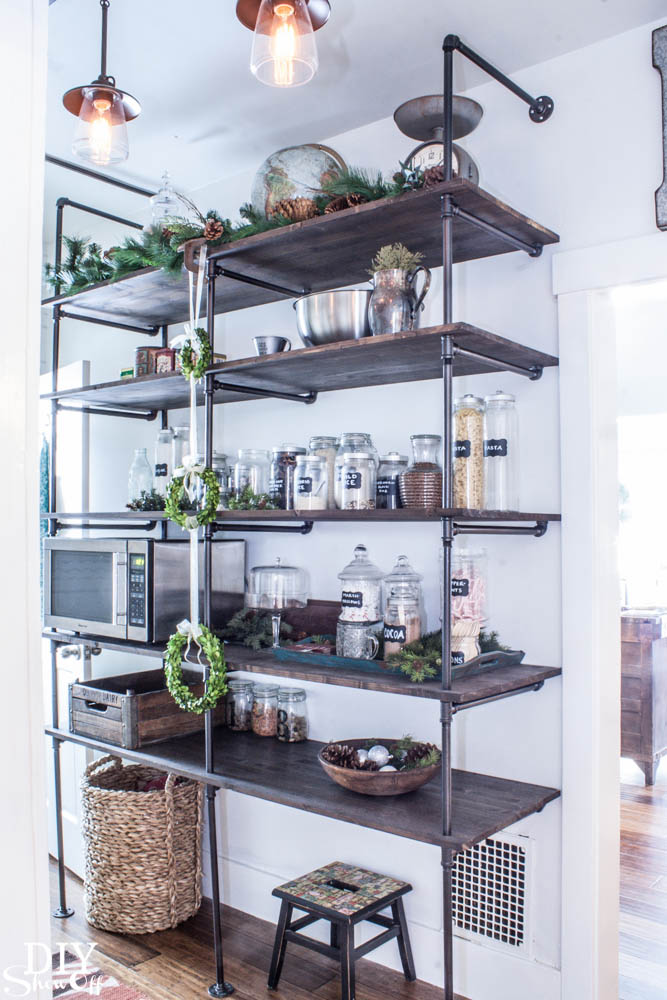
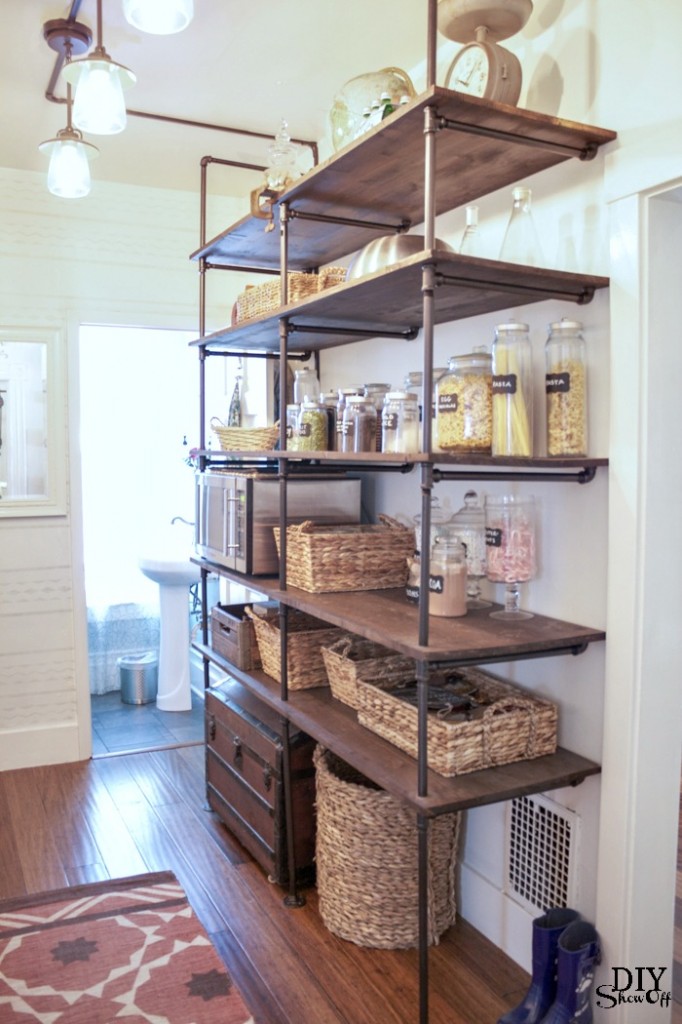
Plan B: I’ll go with our open pantry. Again, another odd choice so we’ll include the kitchen too since that makes it more like an entire room. Kitchen and pantry. It’s all related to cooking & food storage, right? Right! Ready? Let’s go!

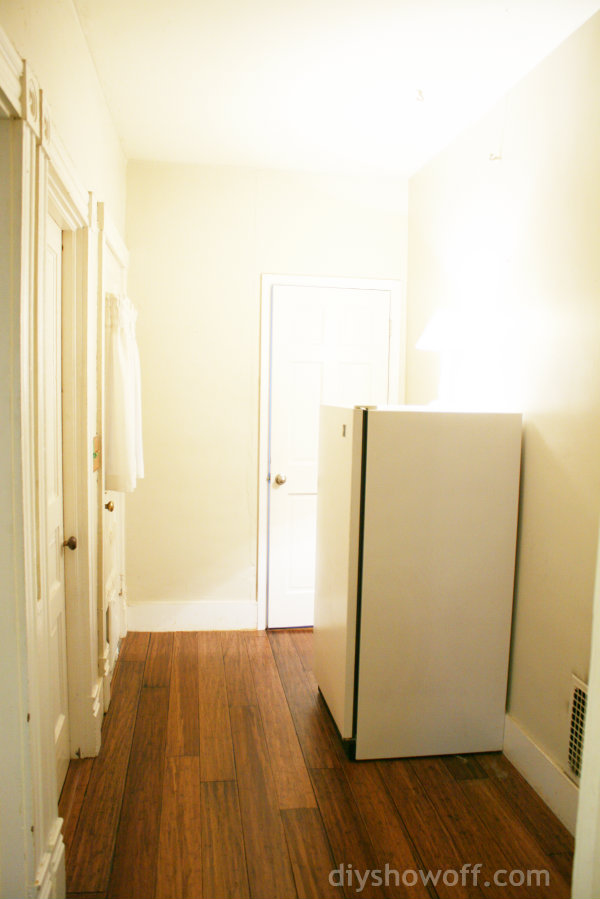
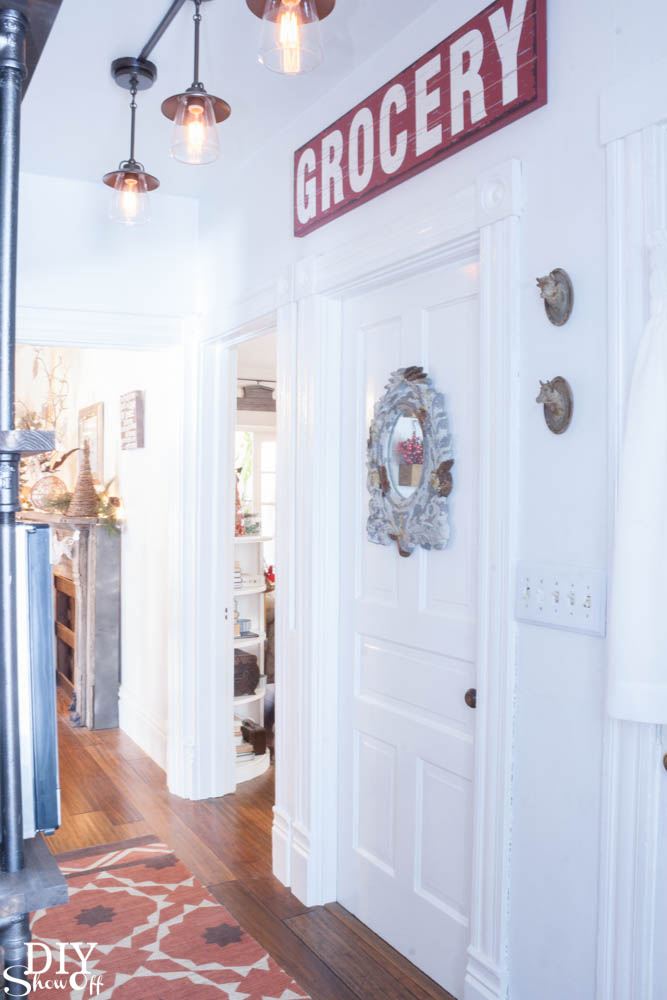
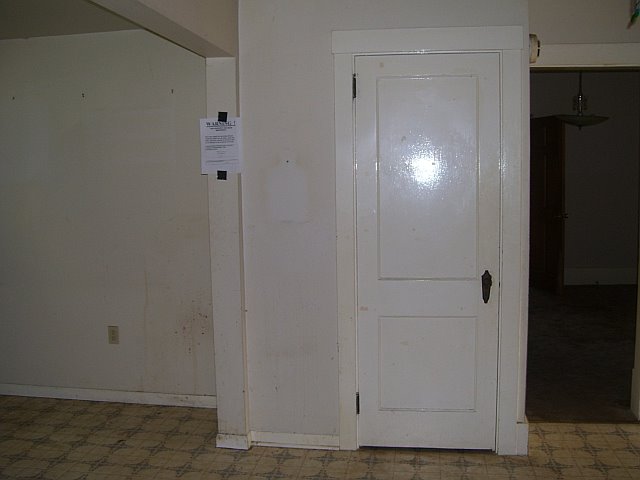
This is sort of what we had to start with (except the bamboo flooring is newer). A strange small room/hallway behind the kitchen that has SIX doorways. 

open pantry before

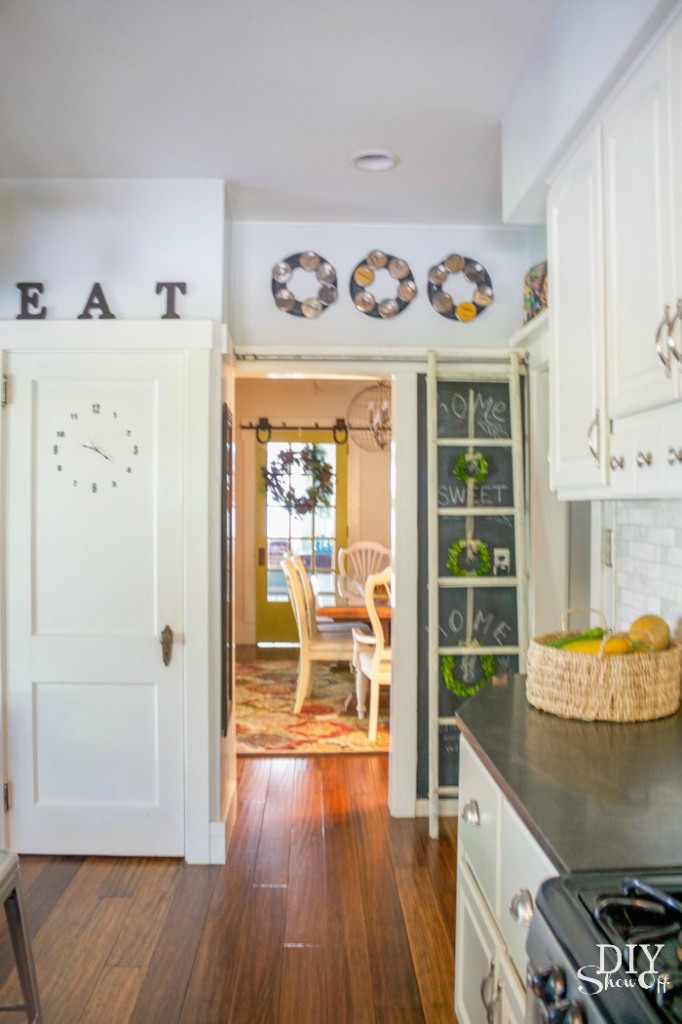
Now we utilize this area for extra food storage as well as a place to house our little-used microwave. It sits right next to the kitchen. This is from when we just finished before Christmas last year…

open pantry at diyshowoff.com

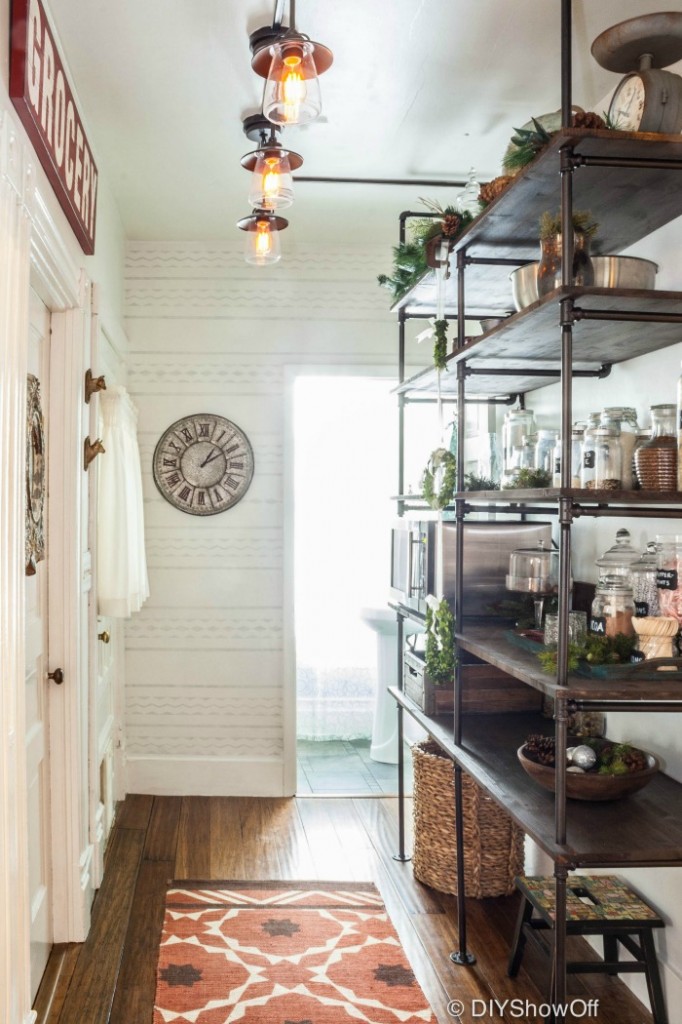
I keep this area organized and pretty with a little decorating and we’re slowly adding dried foods to the shelves in pretty glass containers. Canned foods and boxes get stored in baskets and other ‘not-so-pretties’ behind closed kitchen cabinets.

open pantry with pipe shelvingfarmhouse pantry decorDIYShowOff Pantry

Related blog posts: 

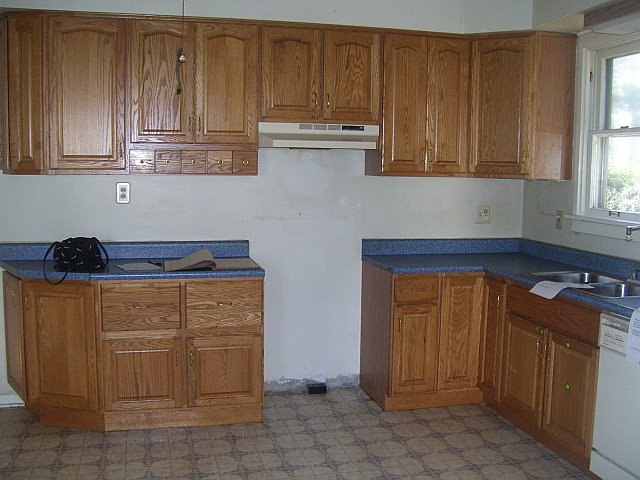
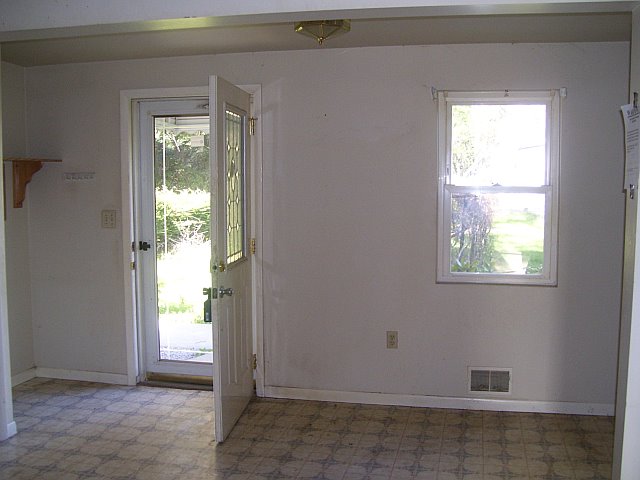
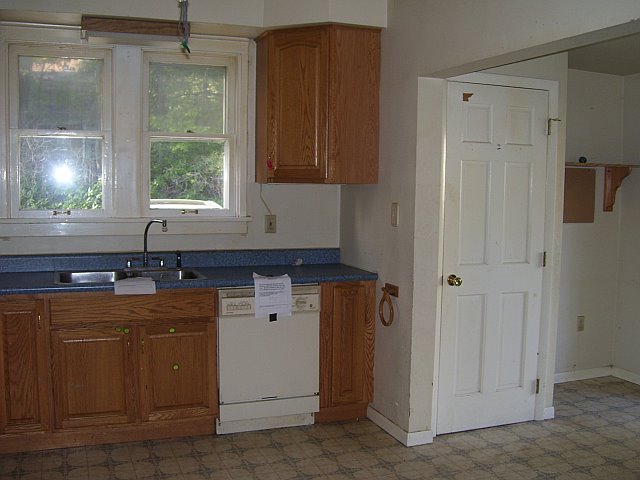
Our kitchen before screamed ‘OUTDATED!’ I love revisiting the before pictures. Sometimes I focus on what’s not done and forget how much we have accomplished. 

before

kitchen before

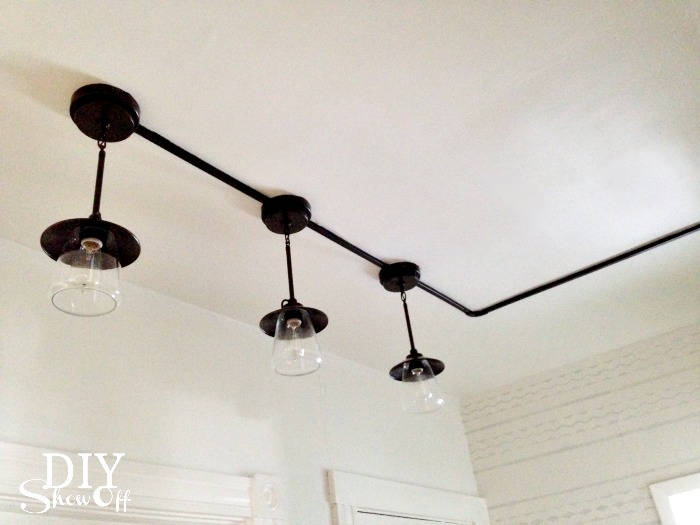
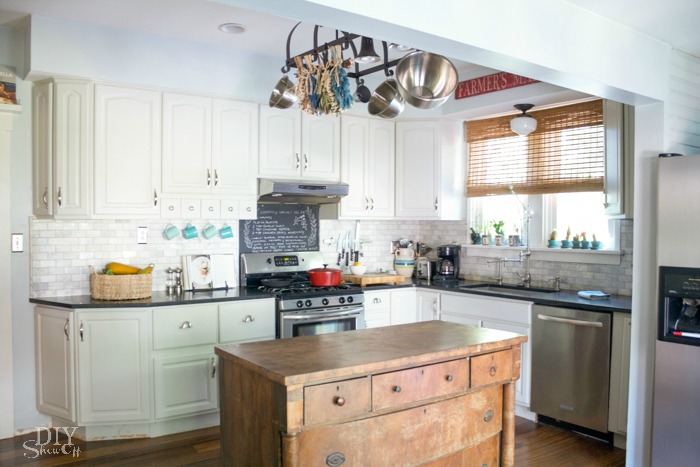
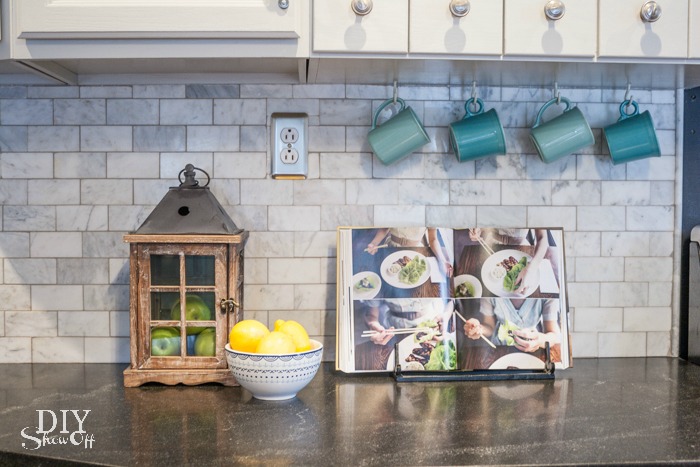
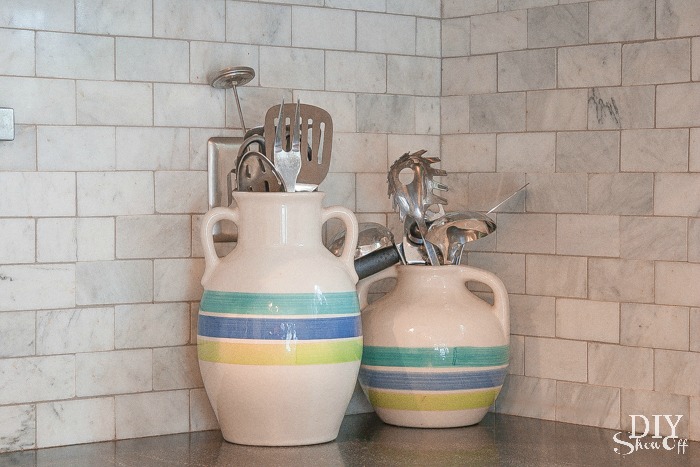
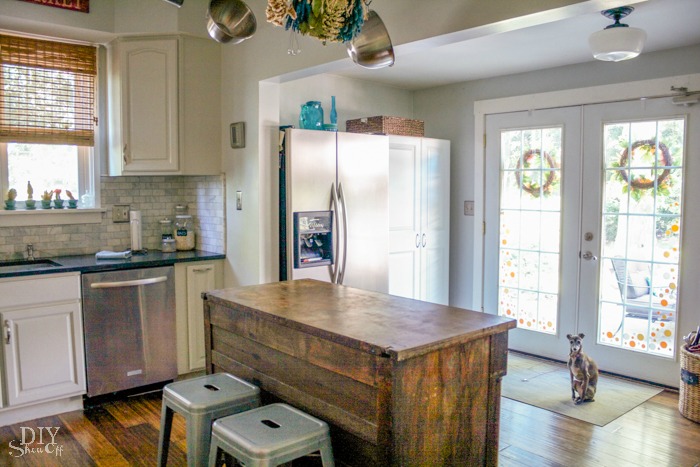
After painting the cabinets, new granite countertops, new sink, new faucet, a marble subway tile backsplash, bamboo floors and the power of paint, it’s transforming into one of our favorite rooms. 

after

kitchen makeoverdiyshowoff kitchen
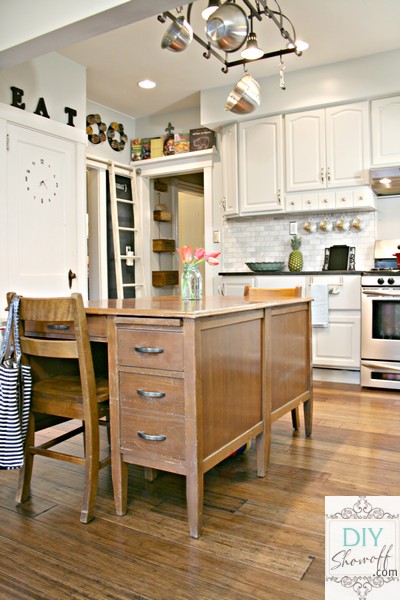
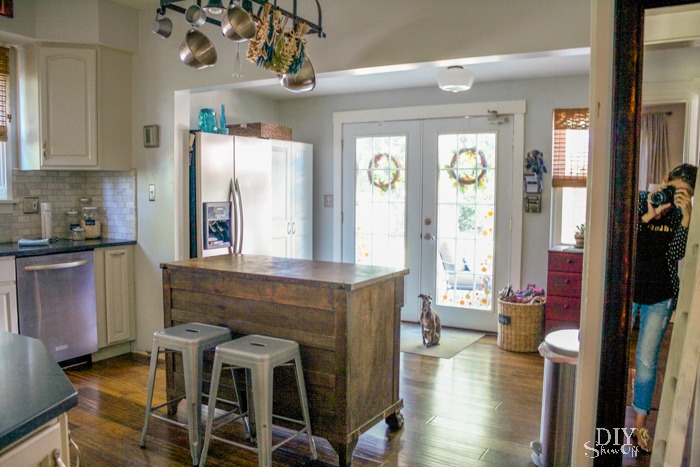
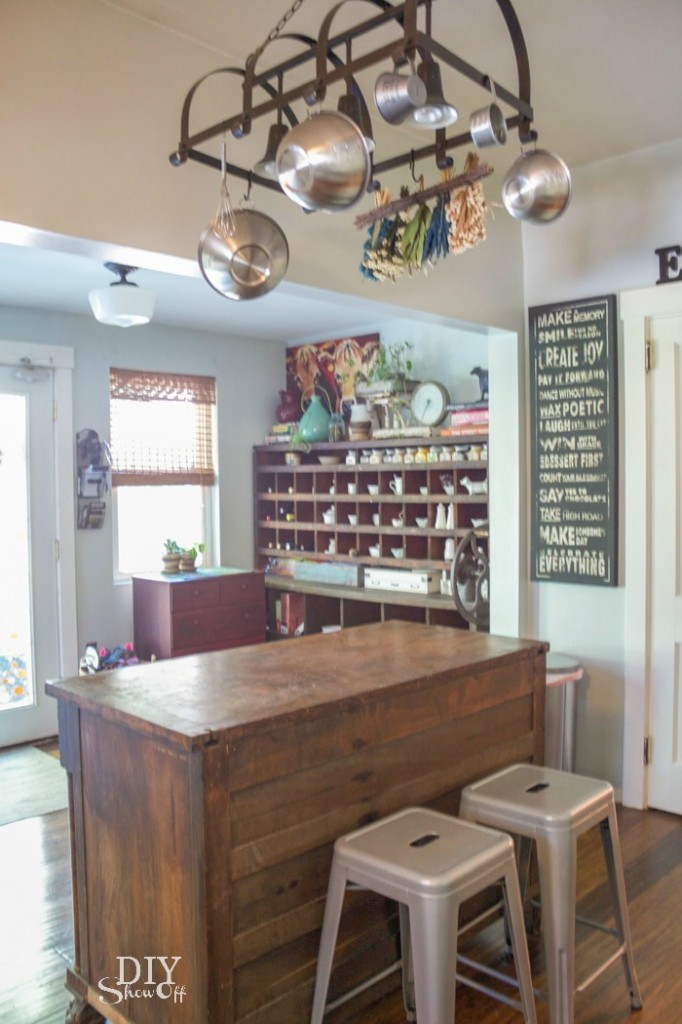
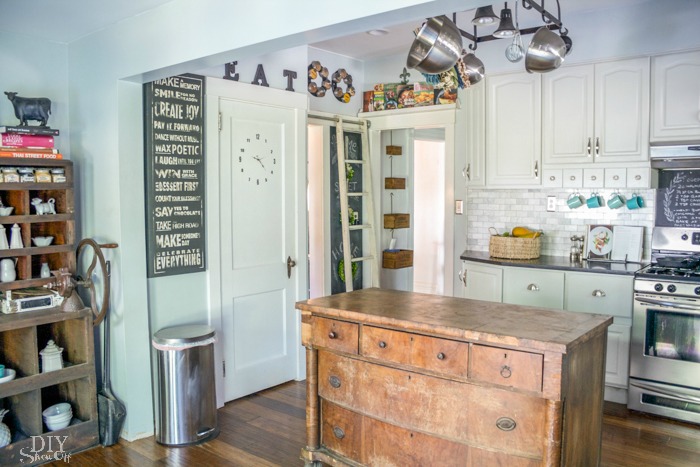
We’re still undecided on our kitchen island. So currently we’re using an antique dresser. Sometimes I use 2 vintage desks pushed together. You never know what I’ll drag into the middle of the floor. Always changing!

farmhouse kitchen

DIYShowOff kitchenDIYShowOff kitchen 

before

farmhouse kitchen before

after…with a little bonus shot of me in the mirror. Do you spy a little Italian greyhound too?

kitchen at diyshowoff 

before…

farmhouse kitchen before

after…

kitchen at diyshowoff.com

before we bought the house…I don’t even want to know what’s on the wall. 

kitchen before

after…

kitchen at diyshowoff.comkitchen at diyshowoff.com

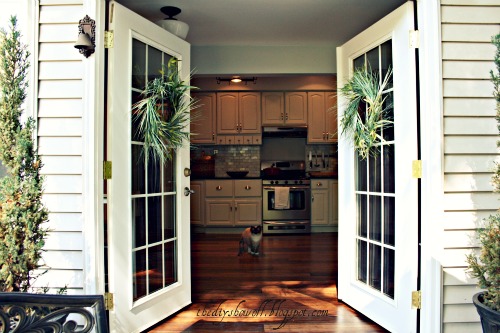
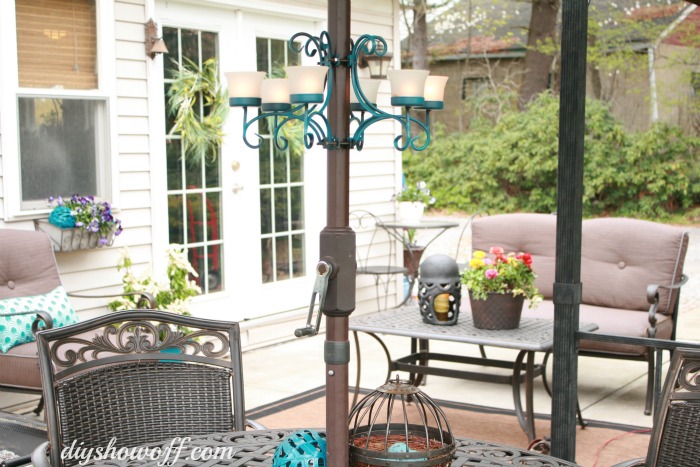
We love that the French doors lead right to the patio where we entertain and dine outdoors in the summer time. It makes serving and clean up a cinch. 

french doors, kitchen, bamboo floors, farmhouse tour, do it yourselfpatio-makeover

Related blog posts:

Home Tour

What about you? What’s the favorite room in your home? Inquiring minds want to know! 😉 

Thanks so much for stopping by! Thanks so much to Lindsay from The White Buffalo Styling Co. for organizing such a fun series. Now pop on over to the final stop: beautiful Iron & Twine

Not only is our house undergoing cosmetic changes but we’re on a journey to a chemical free home too! 

Check out how you can join me in taking the first steps to creating a healthier lifestyle with Young Living Essential Oils at diyshowoff.com

Pantry Lighting Details

Some of you were wanting more details on the lighting when I shared the pantry reveal. The lighting in the open pantry area was a challenge. 1. There was no overhead/ceiling light to begin with. 2. Walls and ceiling are plaster. 3. Outlet was old and controlled by a switch on the wall. 

farmhouse pantry

Electrical work for the lighting was not DIY. My husband has installed recessed lighting in the kitchen but he was able to run electrical from the previously installed ceiling light, so it wasn’t quite so challenging. For the pantry area, no previous lighting meant pulling the wires from the wall to the ceiling. He started with drilling holes in the plaster wall and ceiling but the wood beam where wall meets ceiling had us realizing this job was ‘over our heads’ and not just literally. It was at this point that we decided to hire an electrician.

outlets

Then after some thought and to keep labor costs down, I let the electrician know that I wanted the wiring to run on the outside of the wall. He changed the old outlet near the floor (the old type that meant I needed an adapter anytime my plug had three prongs), added another outlet a little higher up to accommodate the microwave sitting on the pantry shelf (so I wouldn’t have to drill holes into the wood shelves for the cord to reach down to the lower outlet) and ran the lighting wiring up the wall, to the ceiling with a 90 degree turn to place the lighting. He also made the switch work for the lighting only, disconnecting the switch from the outlets. In hind site, I think this was something we could have done, but when in doubt, seek professional advice! 

connecting light fixtures

pantry lighting

Cord covers for the wiring from outlets, along the outside of the plaster wall, along the ceiling and connecting each individual light fixture.

I centered the lighting from the front edge of the shelving to the other wall and since I chose pendant lights, I made sure they were out of the way of an opening door. 

Then with the help of FrogTape® Multi-surface, I painted the track oil rubbed bronze.cord cover

I simply taped off either side of the conduit track along the wall and ceiling with my FrogTape and used my thumbnail to activate the PaintBlock® Technology. Then just painted the track. The oil rubbed bronze paint is sticky since it’s oil based so drying time is longer but still worth the work. It took two coats. 

oil rubbed bronze paint

As soon as I finished applying the second coat, I removed the FrogTape. Nice and clean! Note: paint will take a long time to cure!

removing FrogTape

Painting the conduit the same color as the walls and ceiling would help disguise it more but I think the oil rubbed bronze against the white ceiling adds to the industrial charm, don’t you? Especially with the pipe shelving.

RustOleum Oil Rubbed Bronze

I love it!

industrial pantry lights with wall track

Project Supplies:

farmhouse industrial pantry lighting

 We also added a dimmer…

farmhouse pantry


{open pantry reveal}

FrogTape Blog Squad

Disclaimer: I received compensation to complete this project for using FrogTape® products. All opinions, projects and ideas are based on my own experience. See the  FrogTape® Blog Squad for more inspiration!

Tips for Making a DIY Industrial Pipe Shelving Unit

I recently shared the open pantry before and after reveal and the star of that DIY ‘show off’ is definitely the industrial pipe shelving…Industrial Pipe Shelving As a part of the January Creative Storage challenge for the Lowe’s Creative Ideas team, today I’m sharing a tutorial on what we did to use as tips for creating your own.

Accessories: 


THIS IS LONG and sounds confusing BUT if you’re making one of your own, I think being detailed will help make the plan, design and build easier along with other tutorials and tips you may come across in your search for how to make DIY industrial pipe shelving. 

CONTINUE TO THE TUTORIAL