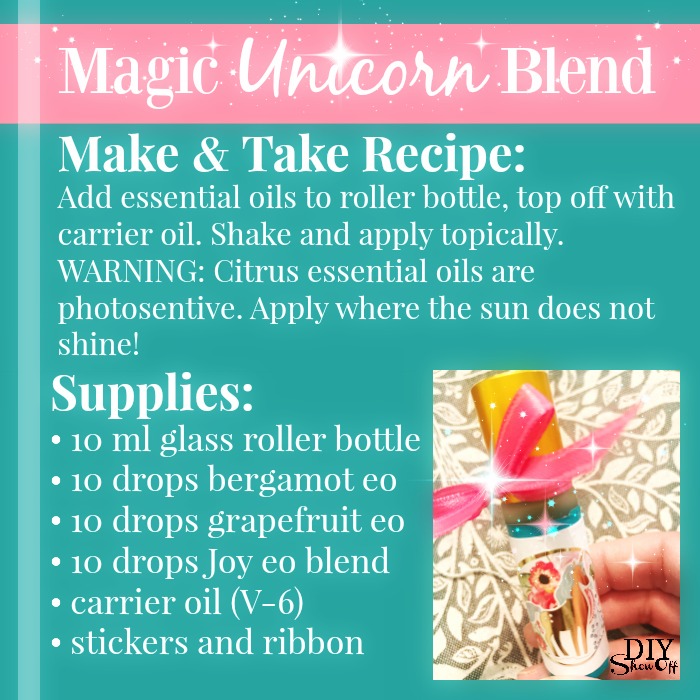
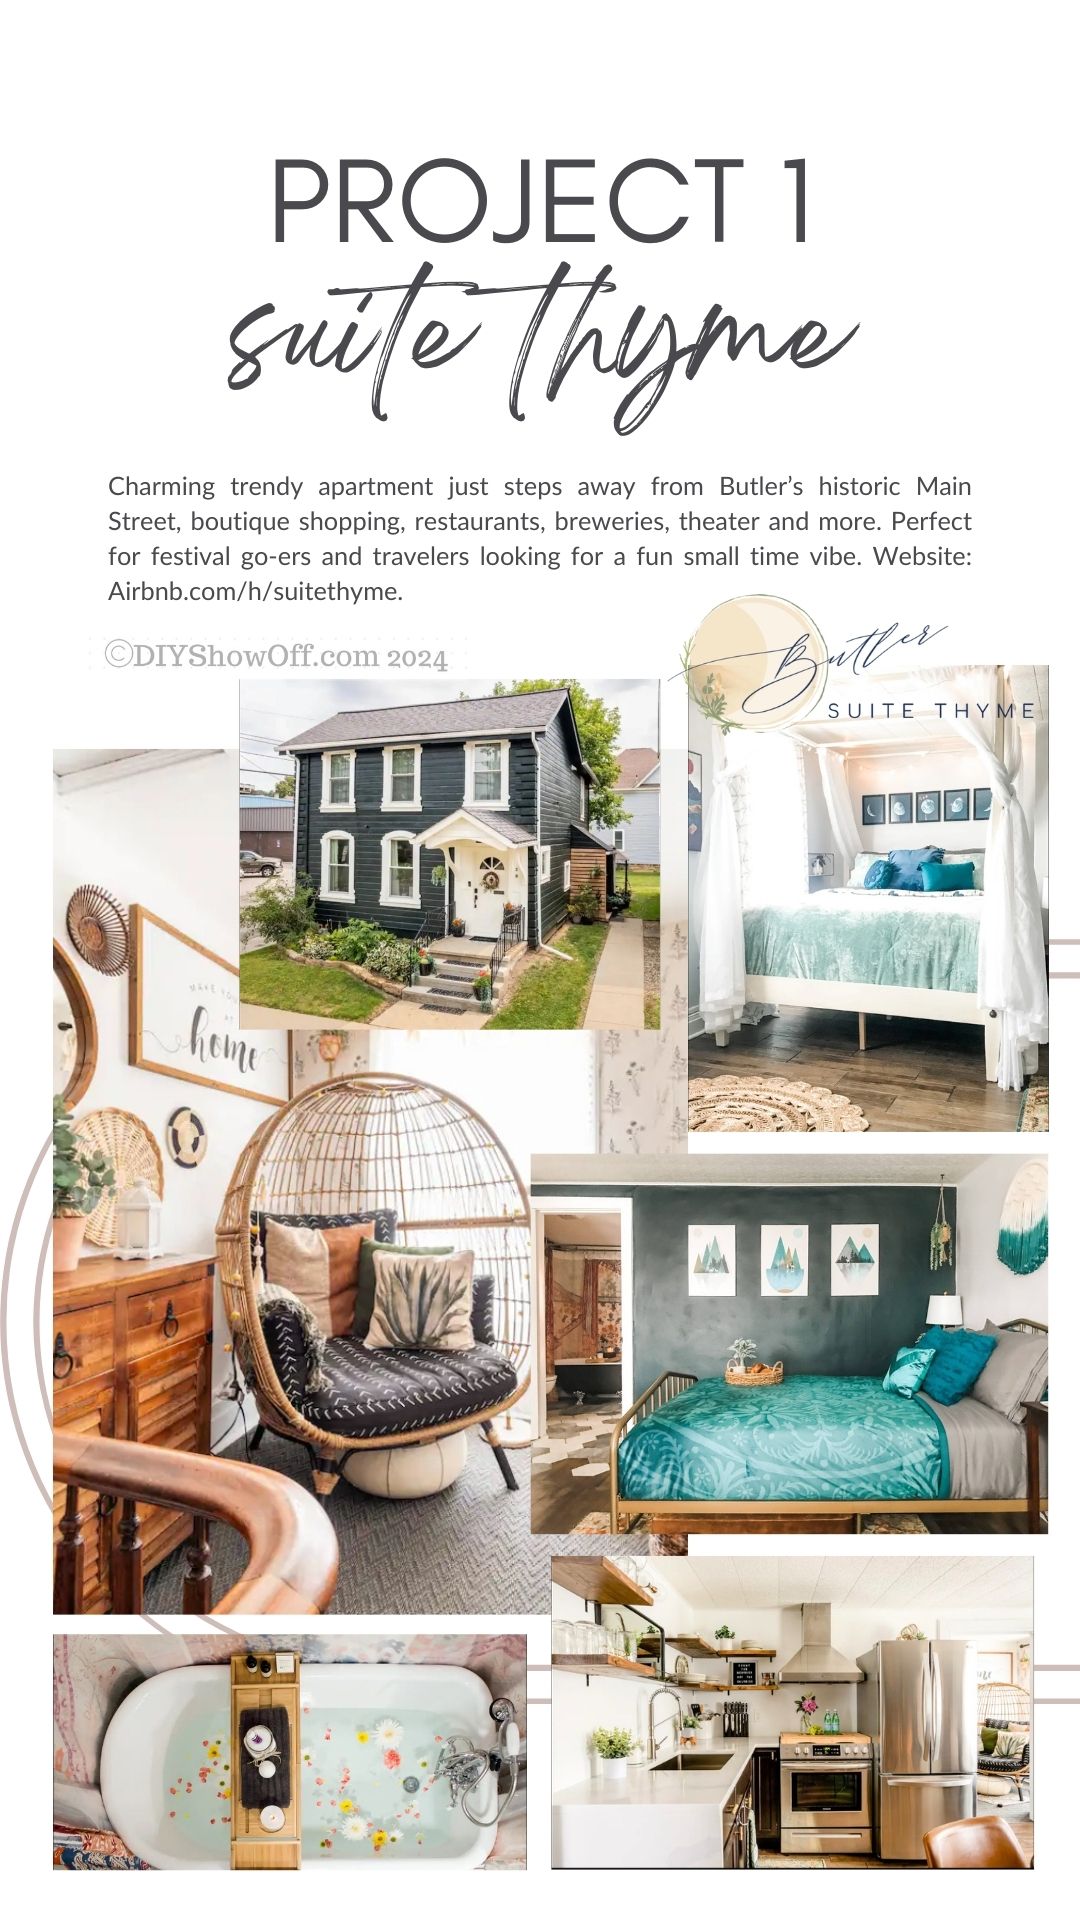
Helloooo, DIYShowOff friends! It’s been a minute. Or longer! Long overdue for an update! I’ve missed you. What’s been going on with you? All good? Around here? Continuing to embark on my whimsical journey of DIY, decorating and domestic wonders along with hosting amazing guests at Suite Thyme and continuing a passion for well-being at Wellness Inspired Living. I recently drafted a design portfolio. And since it documents my decorating and DIY journey to date, thought you’d like a glimpse and update too.
Design Projects
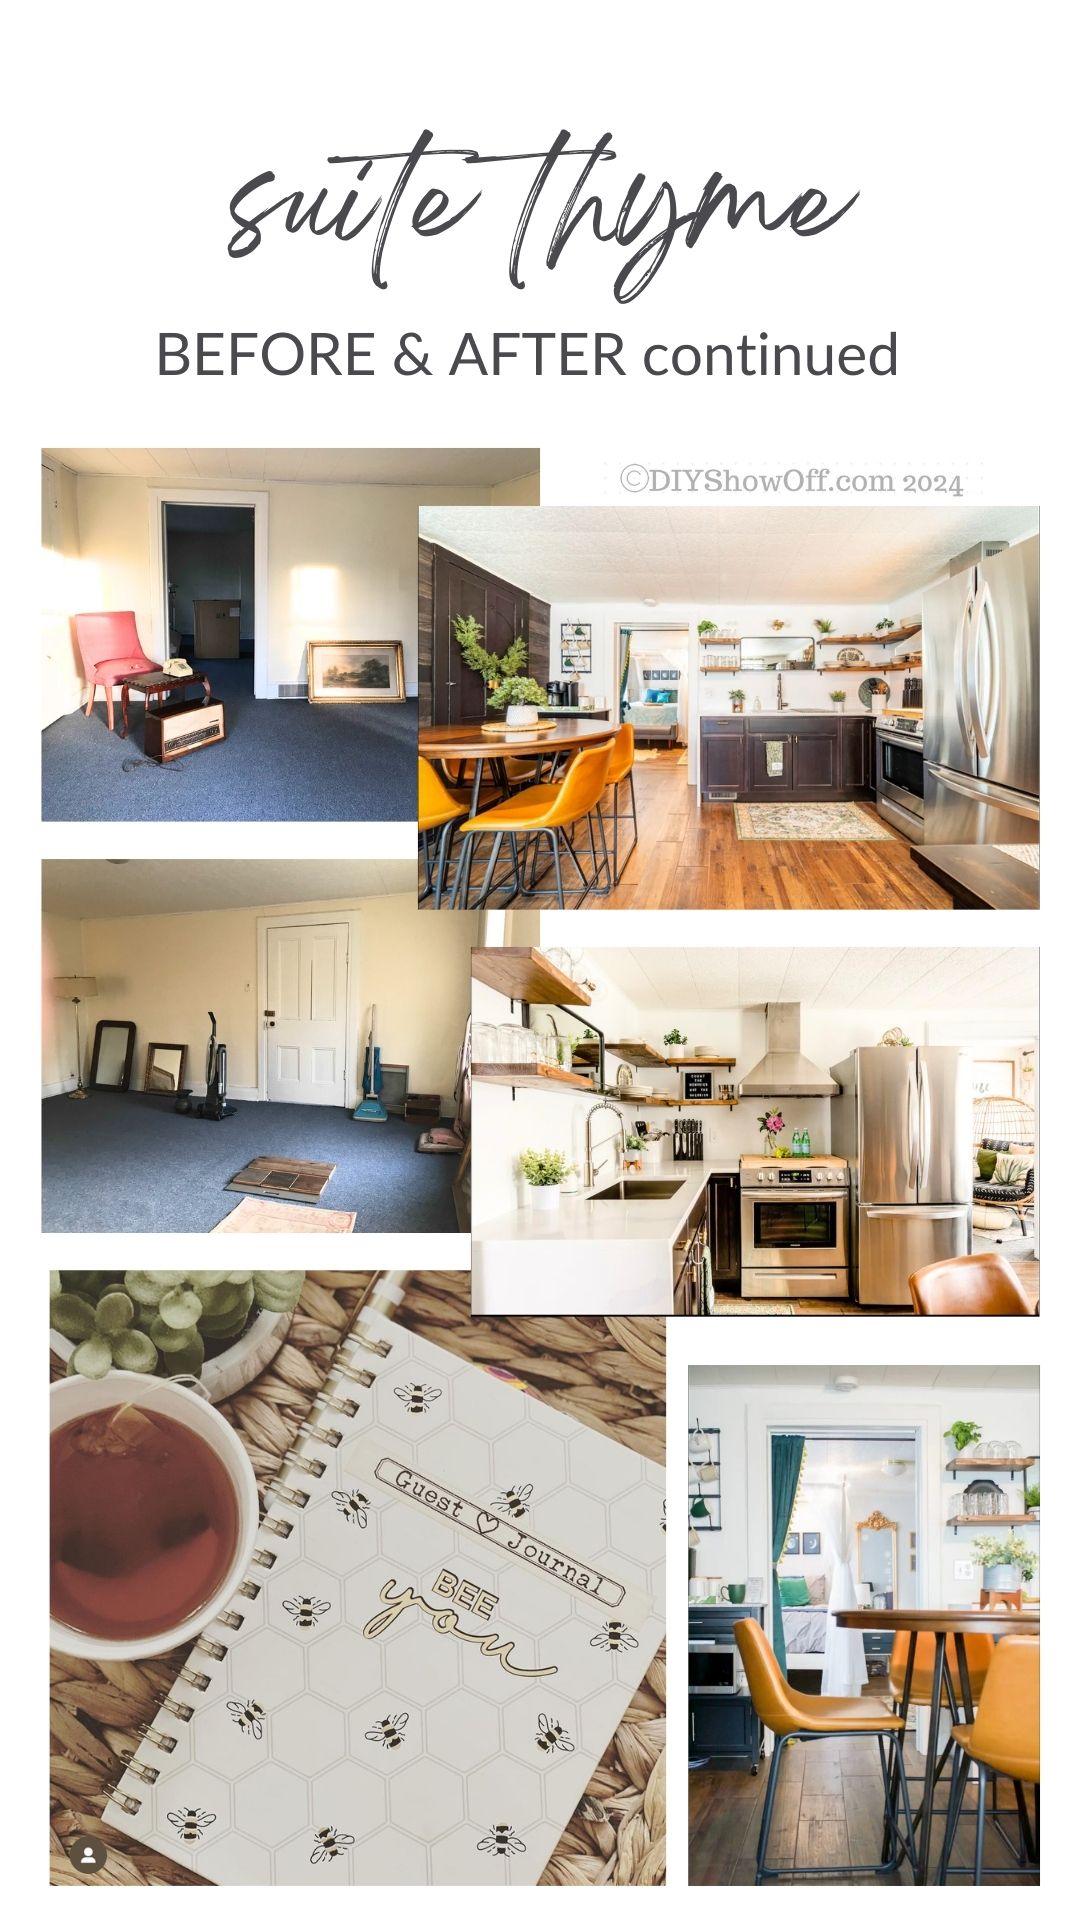
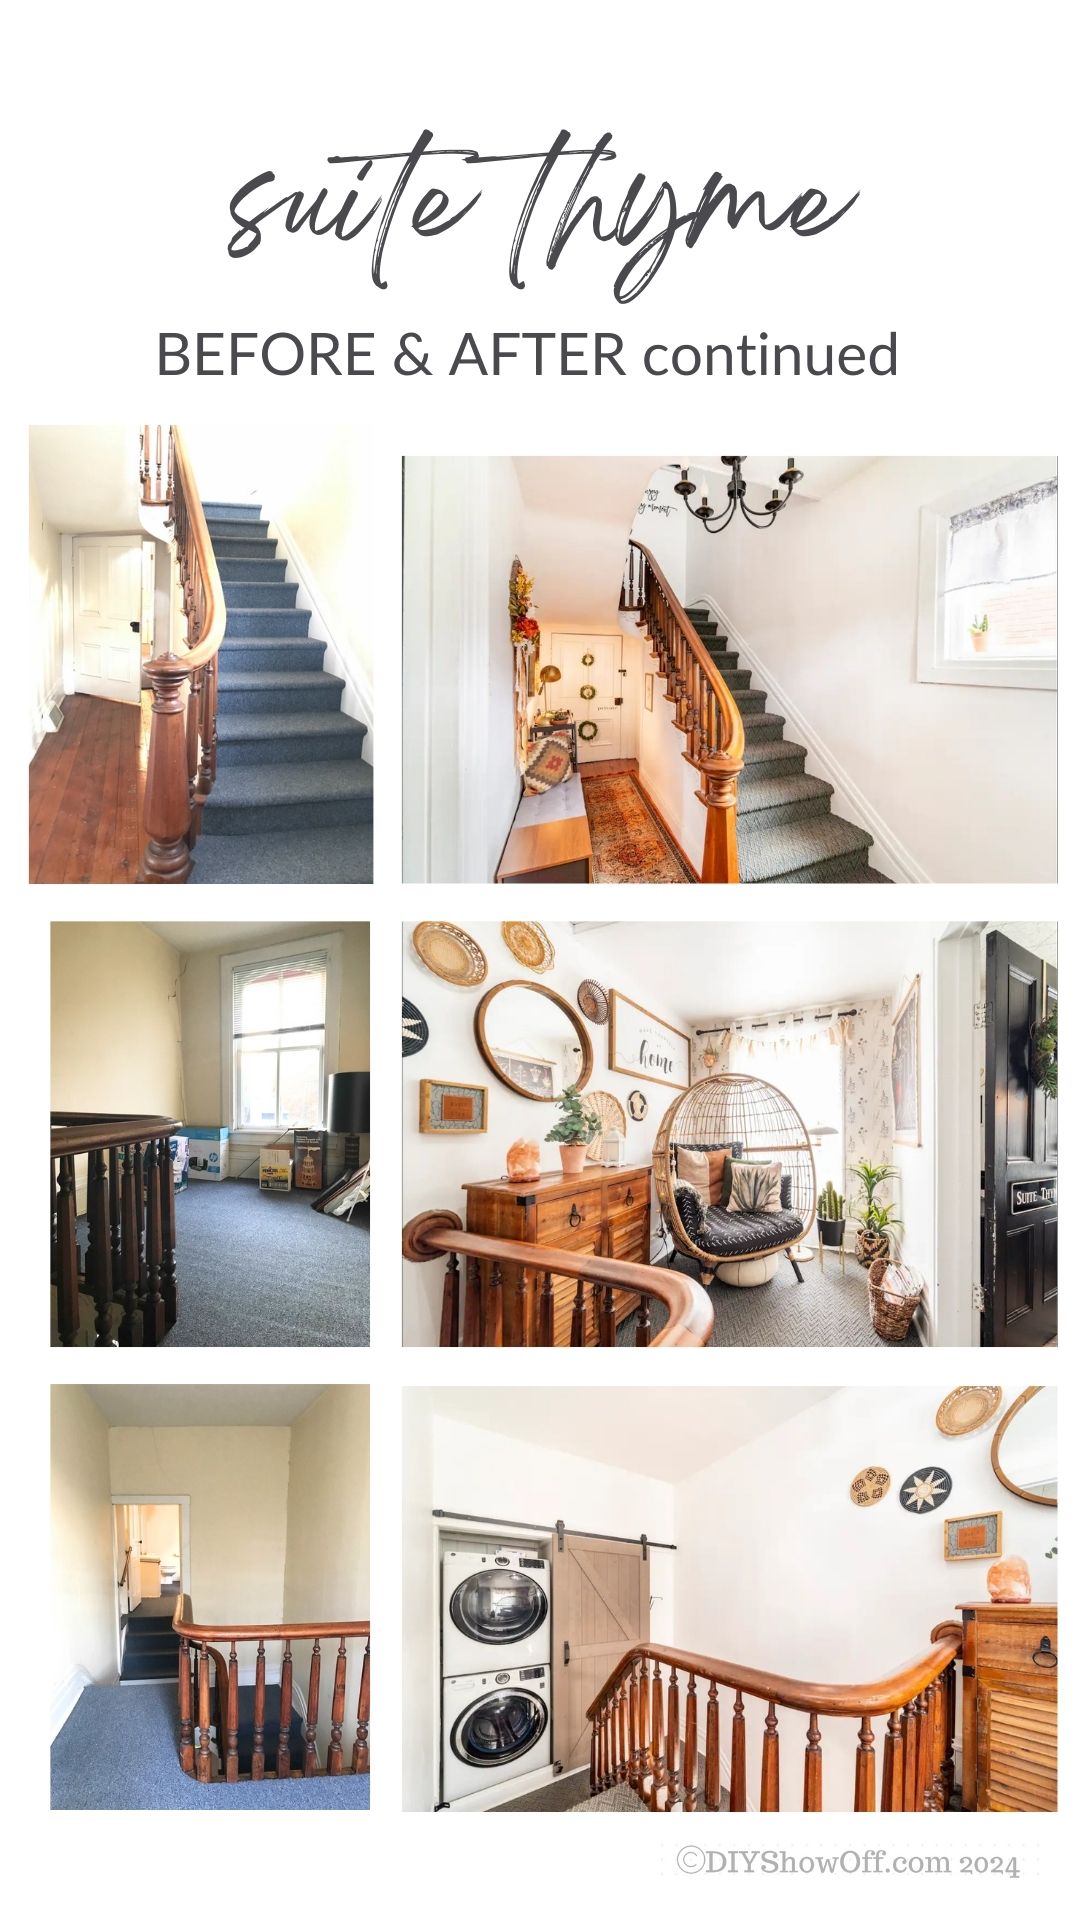
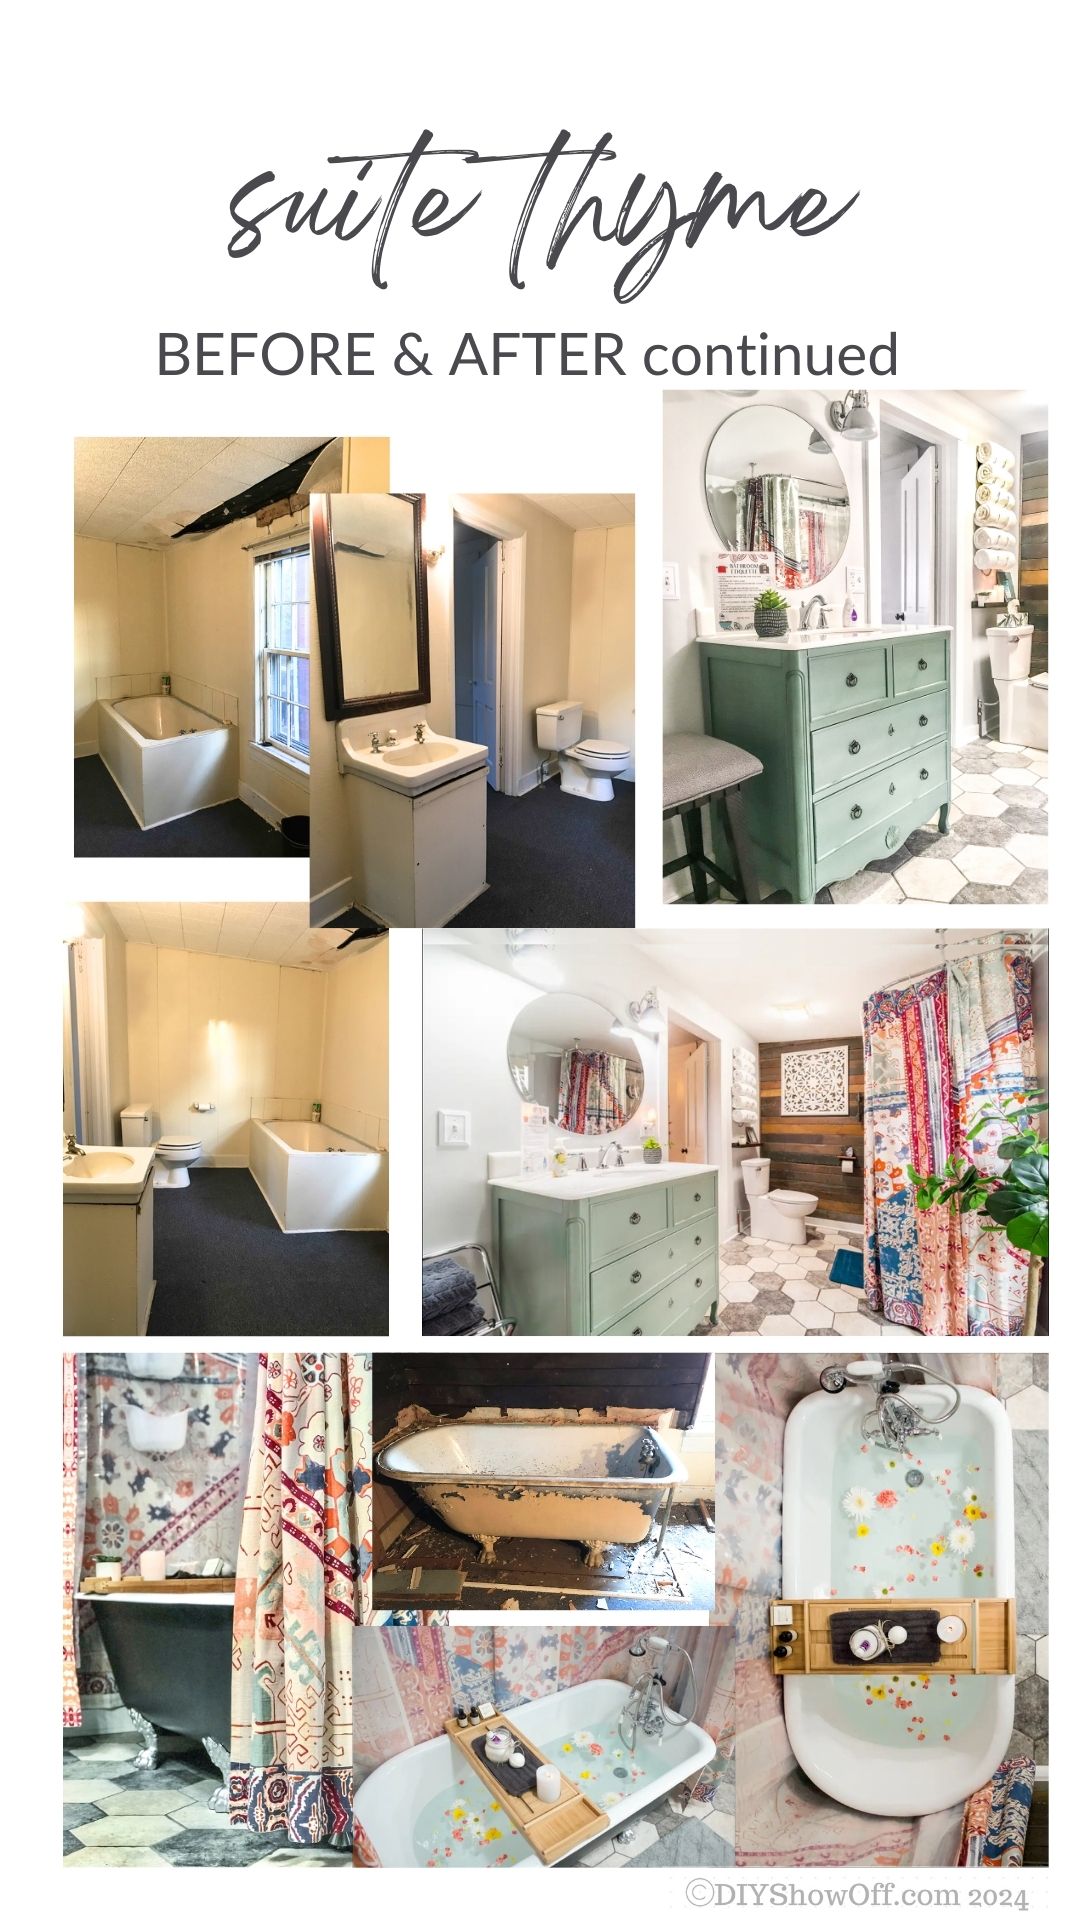
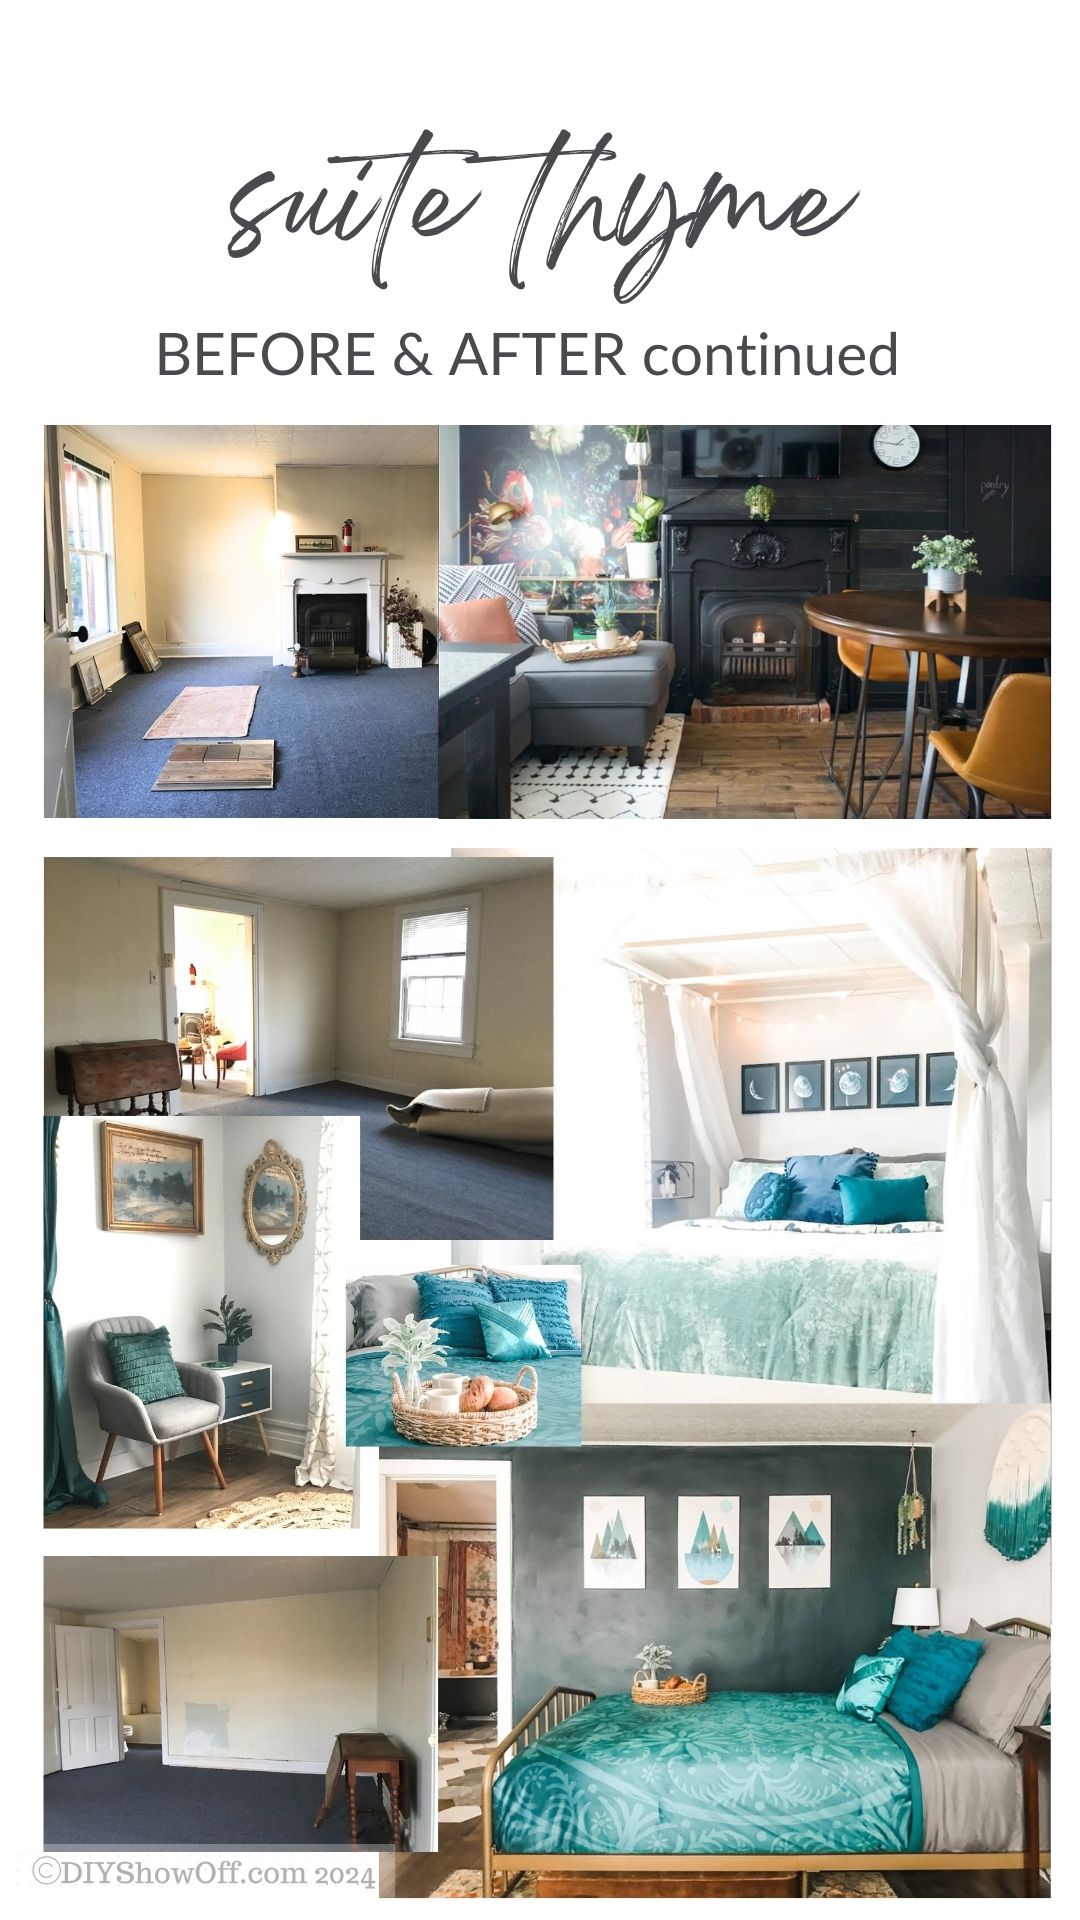
Here’s a showcase of my flair for creating a snug and charming space, paired with my love for crafting a peaceful environment in our short term rental, AirBnb.com/h/SuiteThyme. This design project was absolutely a labor of love. From empty rooms to luxury lodging, Suite Thyme has over 100 five star reviews! Guests include wedding couples, business travelers, family reunion guests, festival go-ers, self care retreats, weekend getaways with friends or for romantic escapes. I enjoy hosting and making guest stays special.
Before and After Transformation
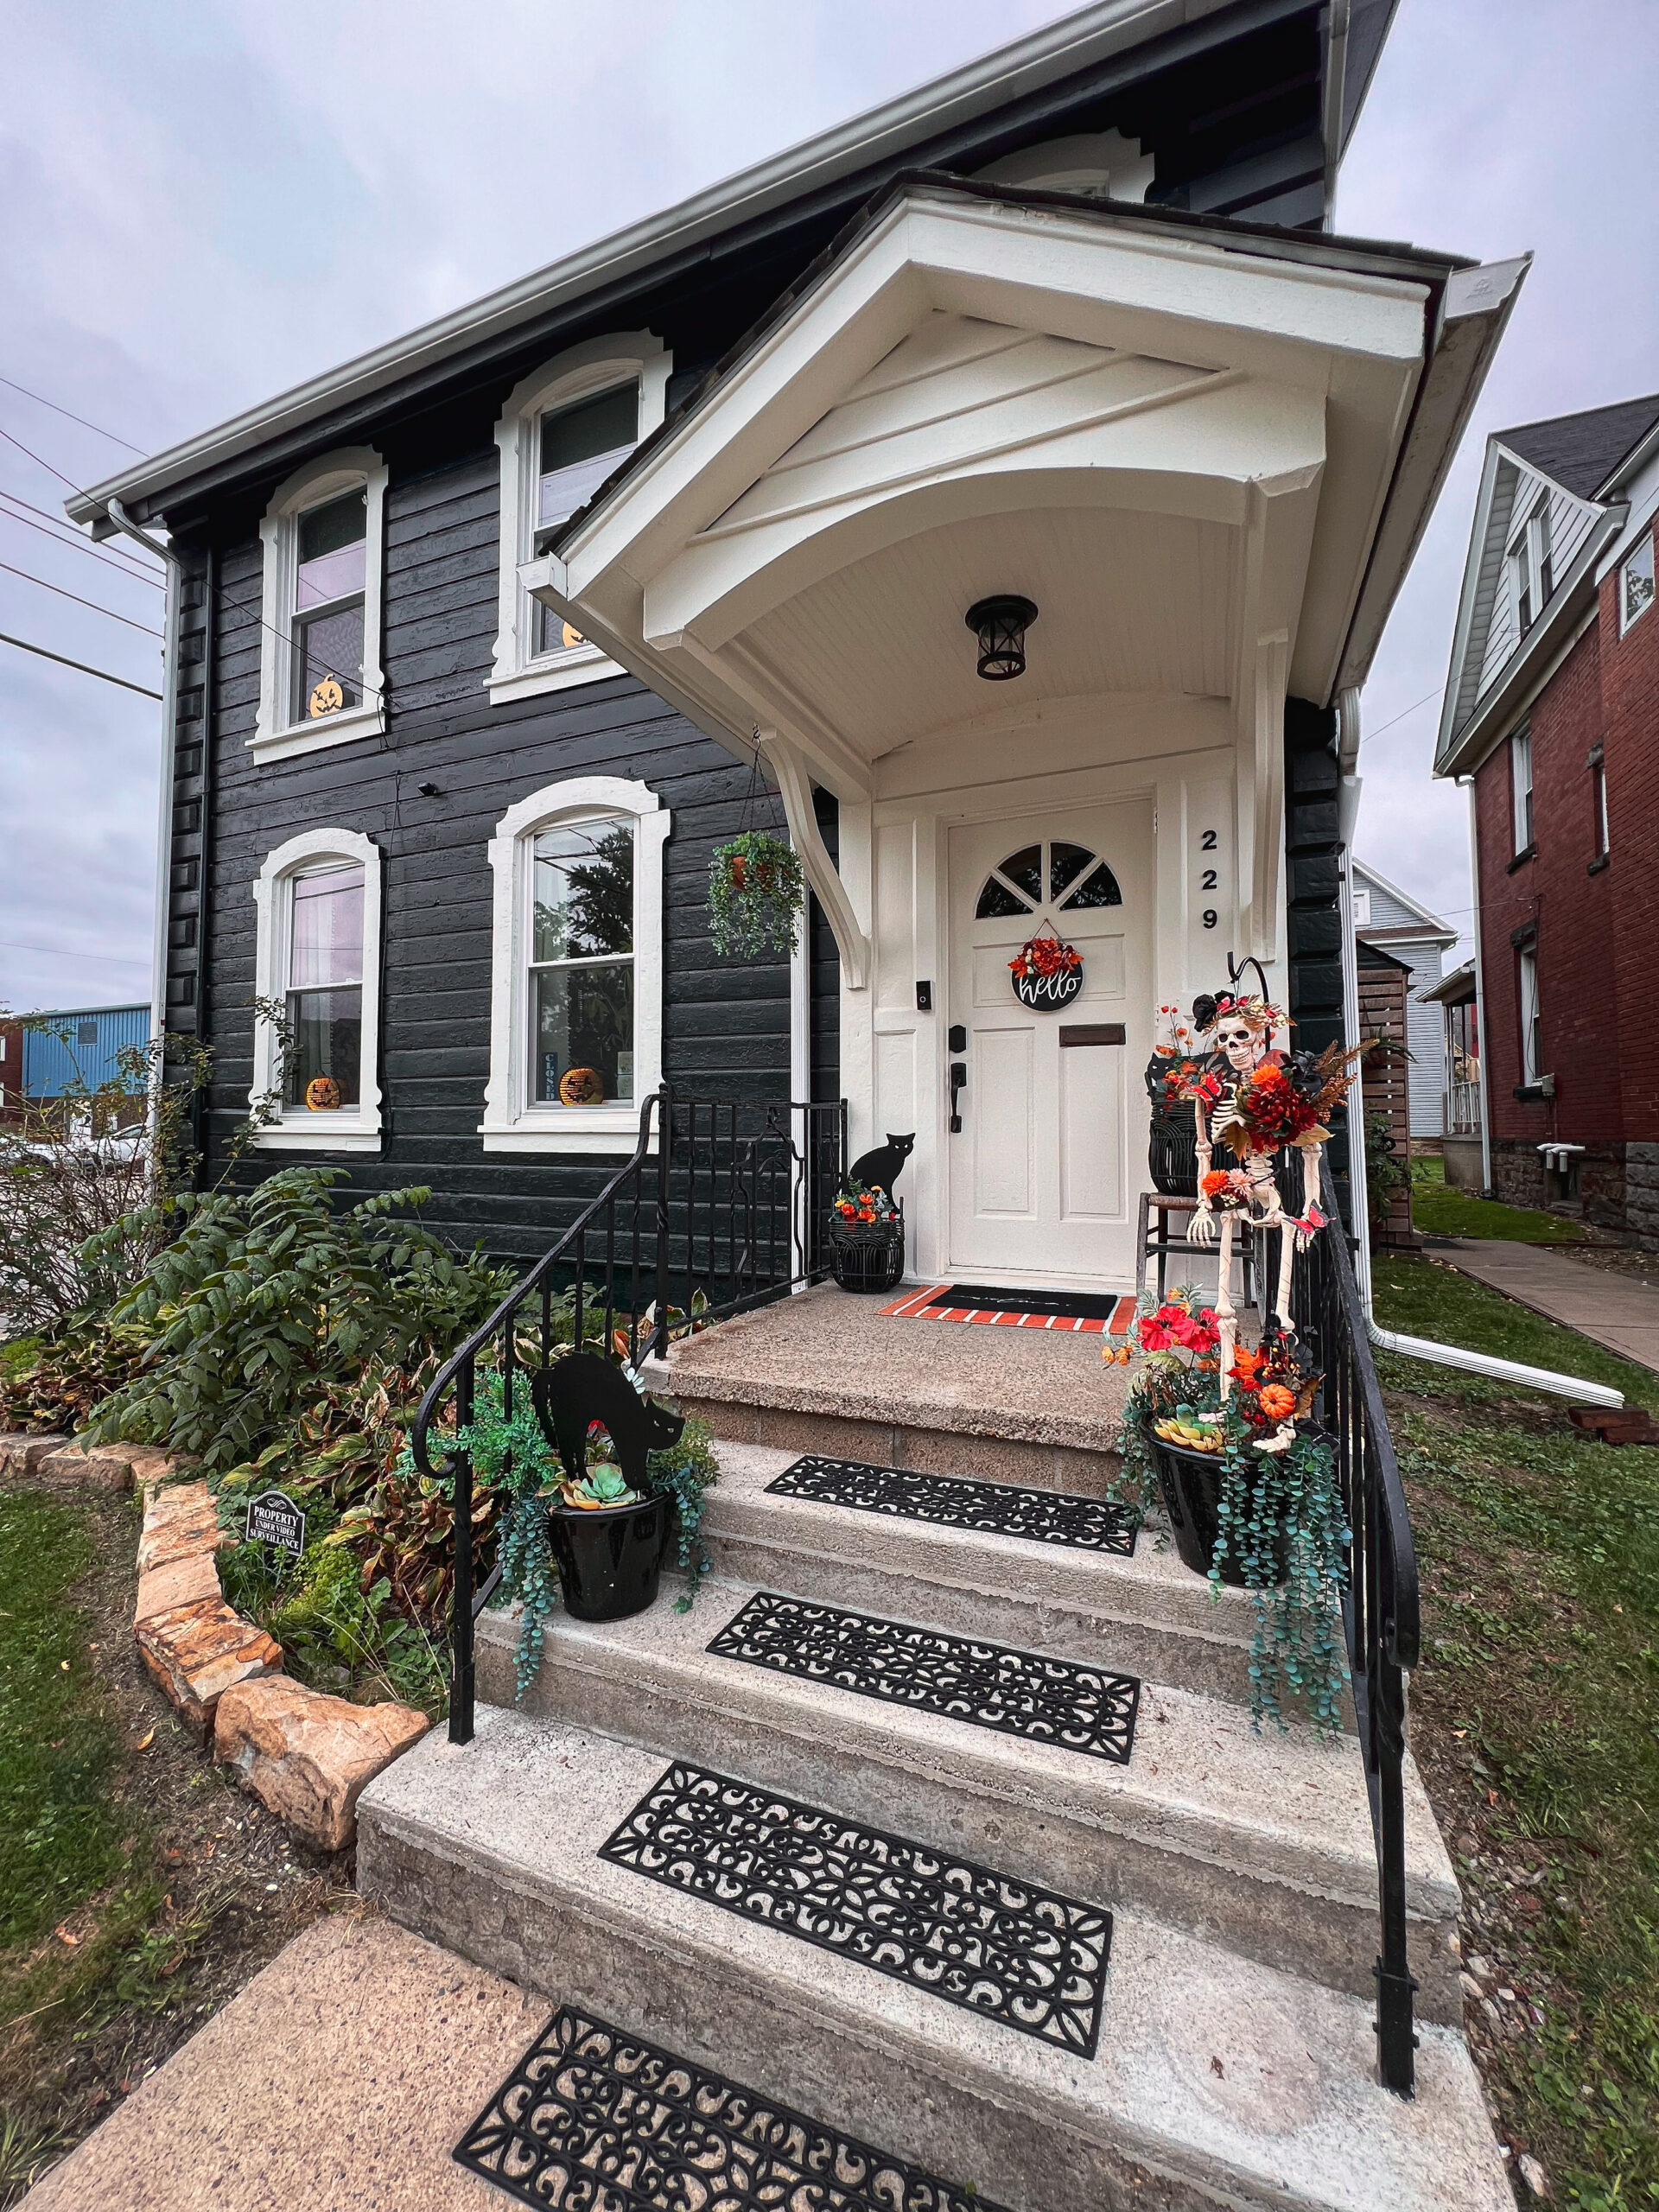
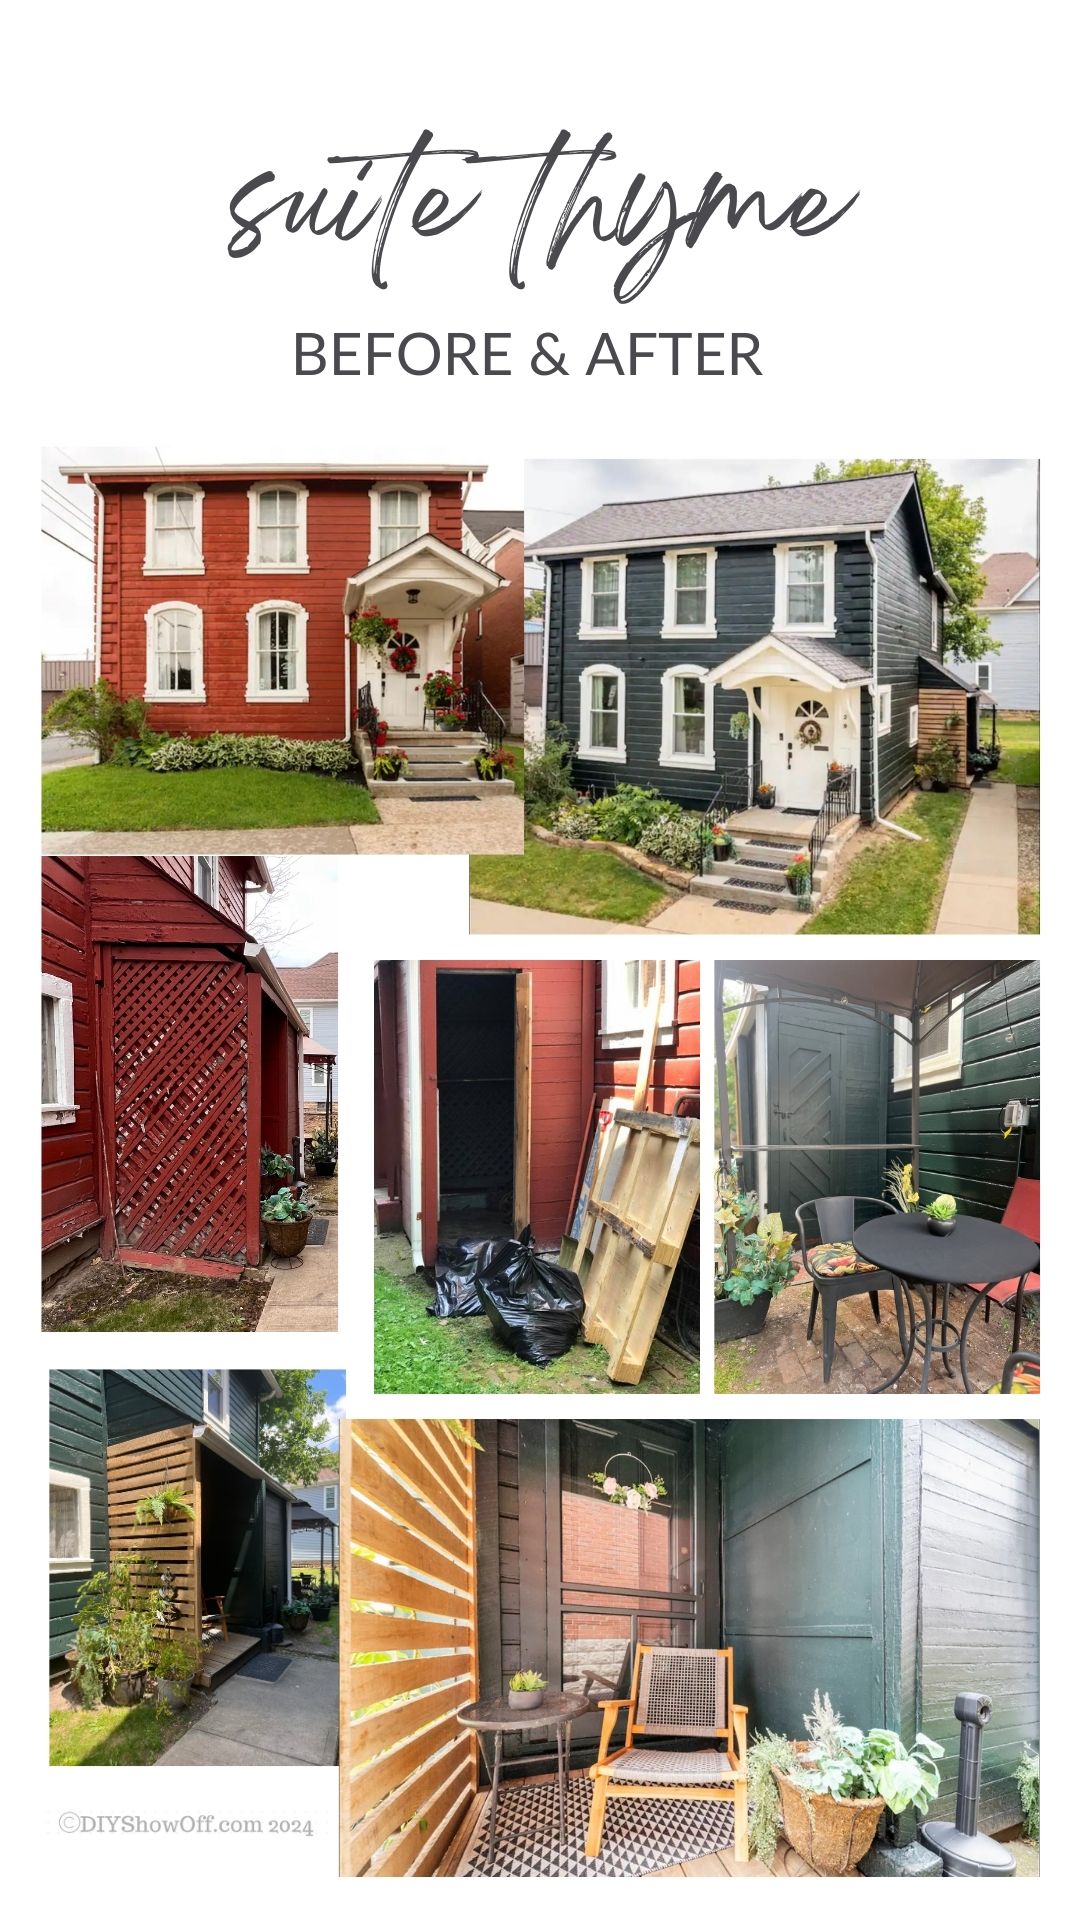
Most of the before and after design for Suite Thyme has been shared in the #helloredreno series but there’s also new windows and a brand new look to the property’s exterior. It doesn’t show in photos, but the red (not original) was very weathered and peeling. And if you’re like me, when the expense is large…I want to be “wow-ed” so changing the color was important to me. Finding a color was a challenge but I am over the moon thrilled with my decision to go with Benjamin Moore’s Black Forest Green. It is stunning! Don’t you think?
This late 1800 property has a lot of history. We purchased it in 2017 from a lawyer who made it his long standing office for over 45 years. I’ve heard there was an antique shop there at one time and a previous deed found on the property shows a purchase back in 1912. I’d love to find out more information. It’s so charming and prominent on a corner city lot.
The transformation has been a lot of work but so worth it!
Design Update
What’s next for Suite Thyme? This year there’s a plan to purchase (judicial sale) an adjoining property to expand the backyard and parking. You may have seen the demo of the abandoned house next door. Fingers crossed it happens! Also on the list is a new metal roof, a concrete patio, some landscaping TLC. And for inside, there’s a few things I’d like to update including a kitchen backsplash and bedroom refresh. It’s hard to believe it’s been providing special lodging for travelers.
Stay tuned for detailed Design Project #2.