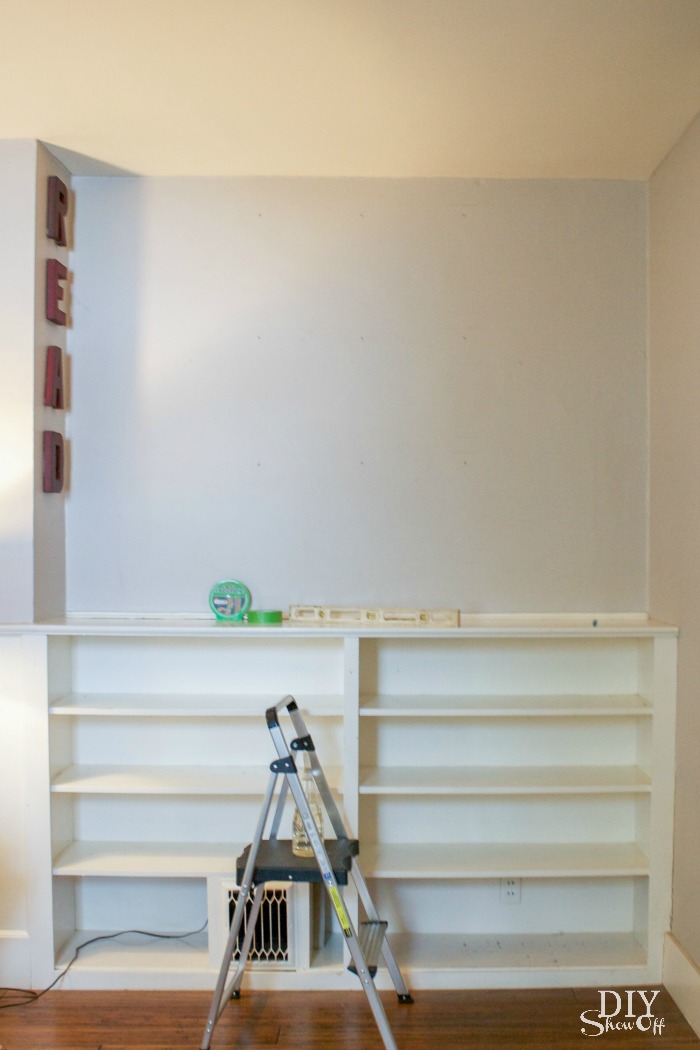
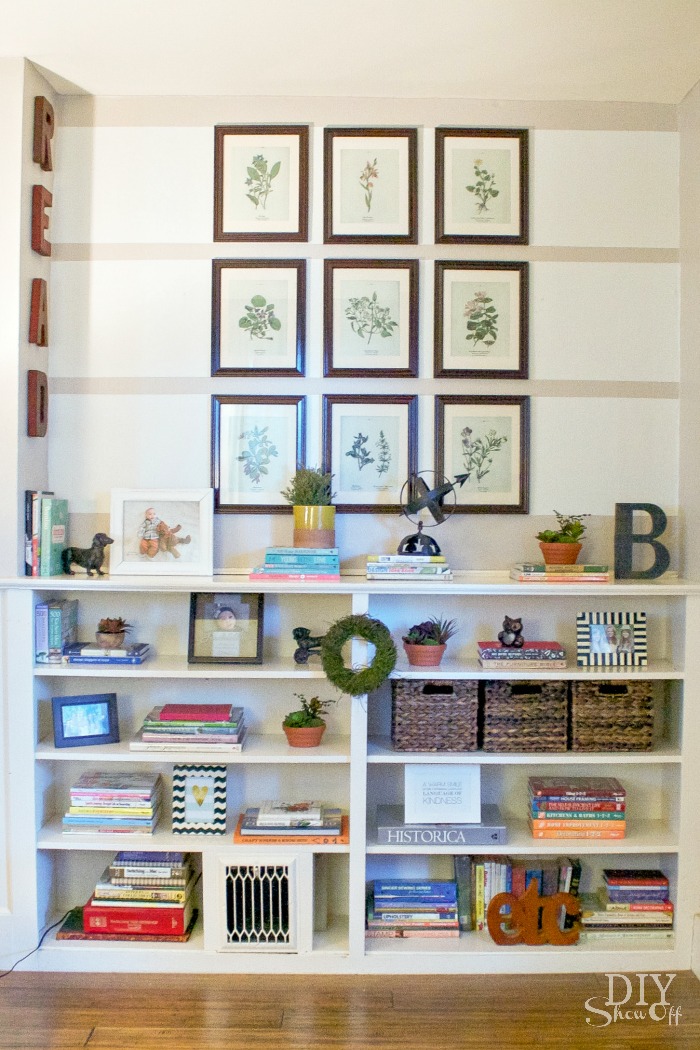
A little cabin fever with sub-zero temps had me looking at areas of our home to “clean” up which lead to painting a striped gallery wall. Strange how my brain works but once I cleared the bookcases (so much dust!), that inspired the idea to dress up the entire area.
paint – I used leftover paint from our laundry room. Color is Valspar Mineral Ash. Existing wall color is Benjamin Moore Smoky Taupe.
What I did:
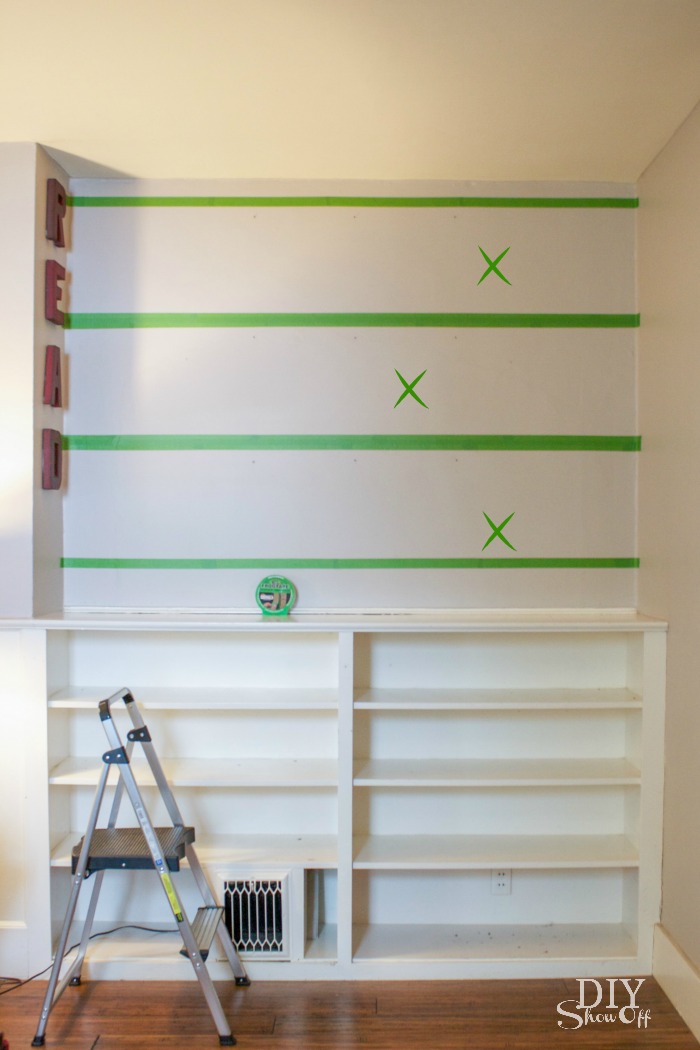
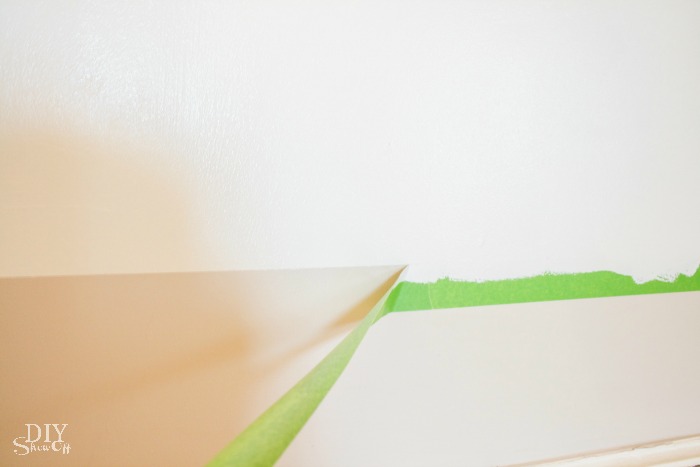
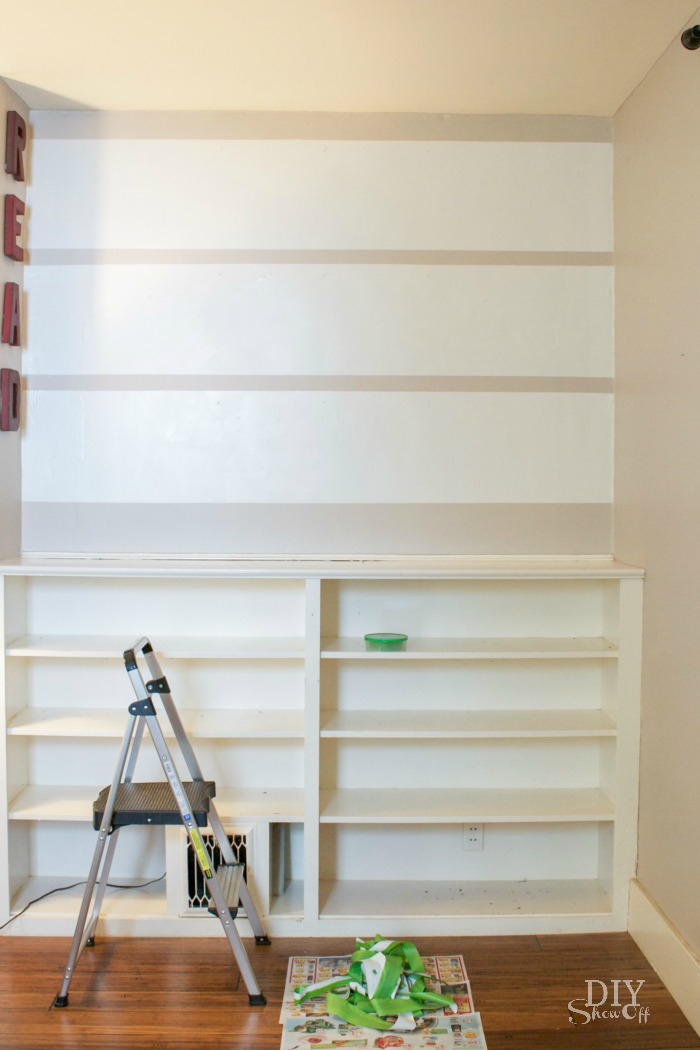
I cleaned the wall above our build in bookcases. I marked where the framed prints hang on the wall then using the level, marked light pencil lines horizontally.
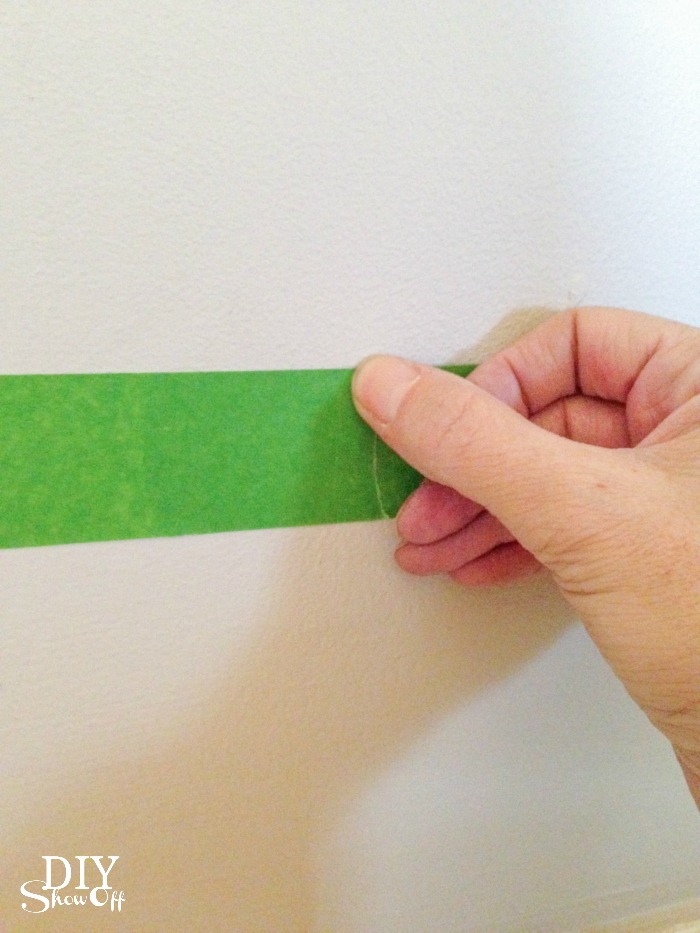
Then I applied the FrogTape.
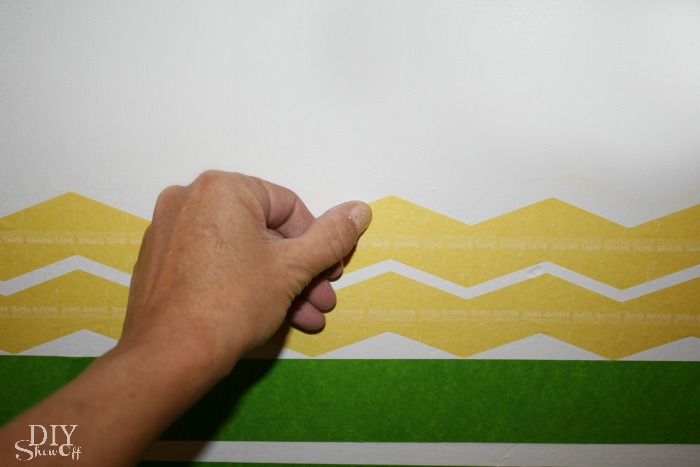
I used my thumbnail to secure the edges of the FrogTape to the wall in order to get nice crisp paint lines.
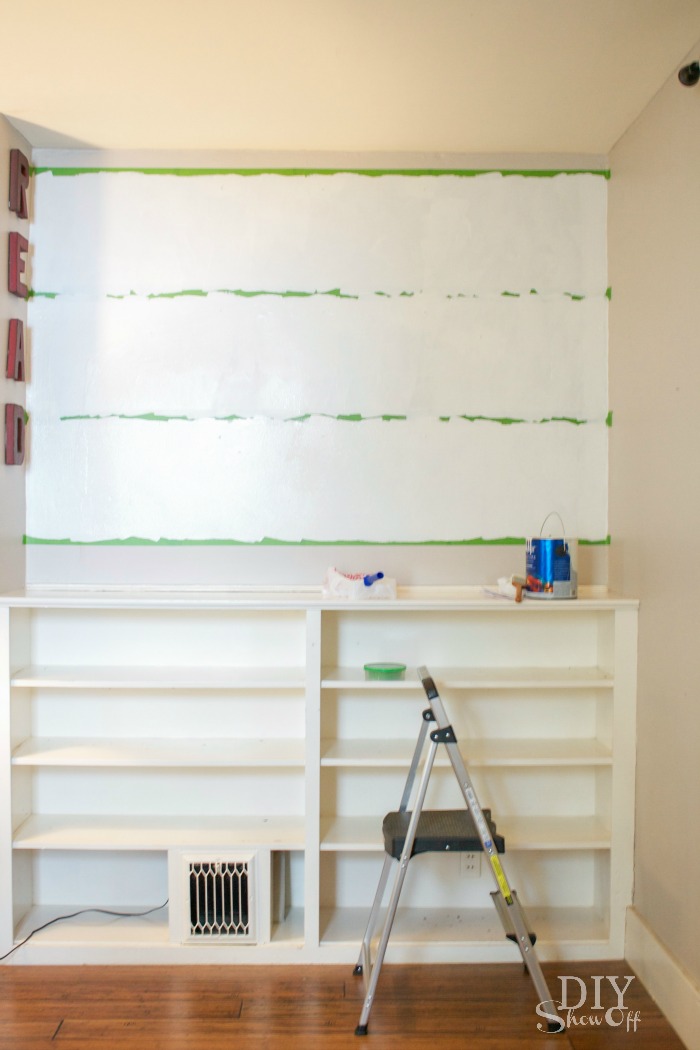
Then simply painted the wall two coats.
While the second coat was still wet, I removed the FrogTape and let the paint dry.
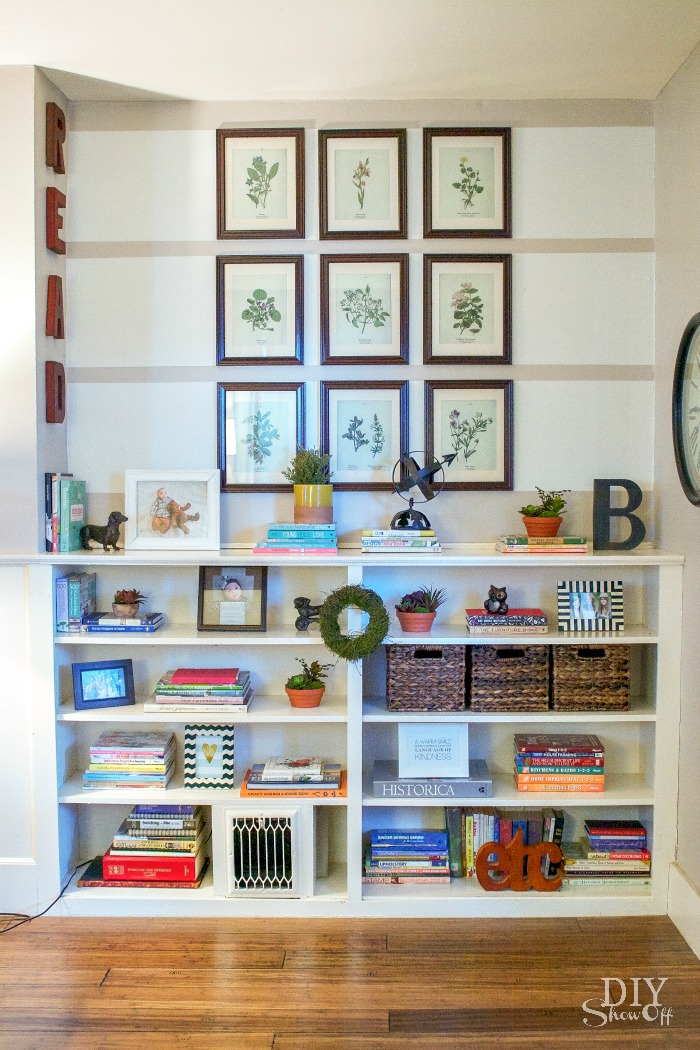
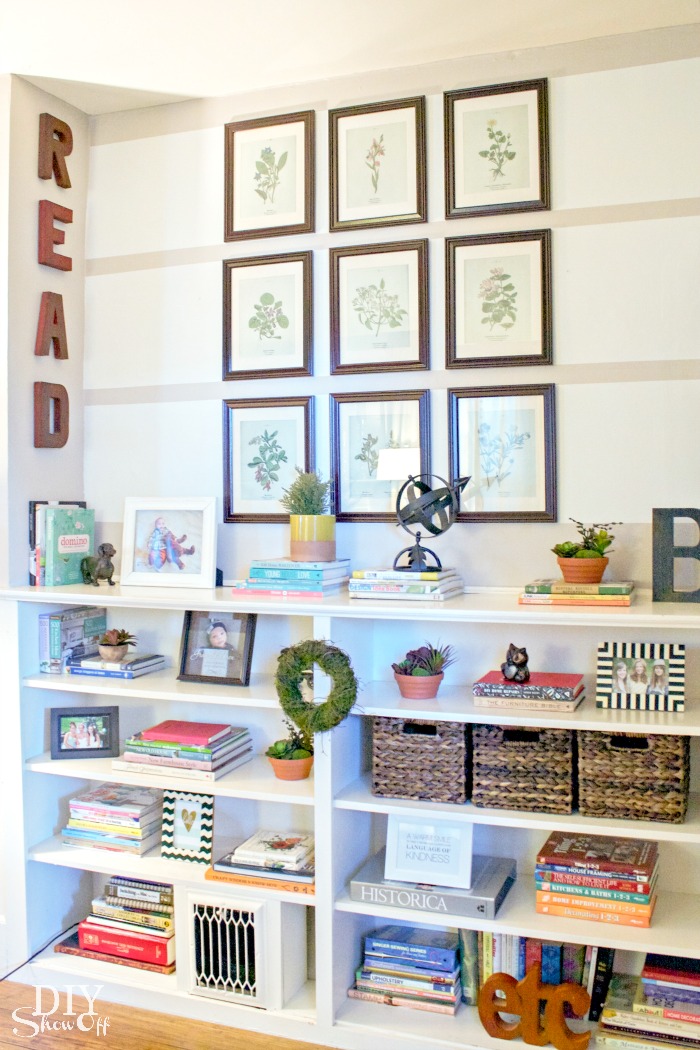
Then hung up my prints and restyled the bookcases. Paint is such an easy way to create a new look, add some interest and to freshen up the space.
Now to come up with some seating for this area. Stay tuned!
Disclaimer: I received compensation to complete this project for using FrogTape® products. All opinions, projects and ideas are based on my own experience.
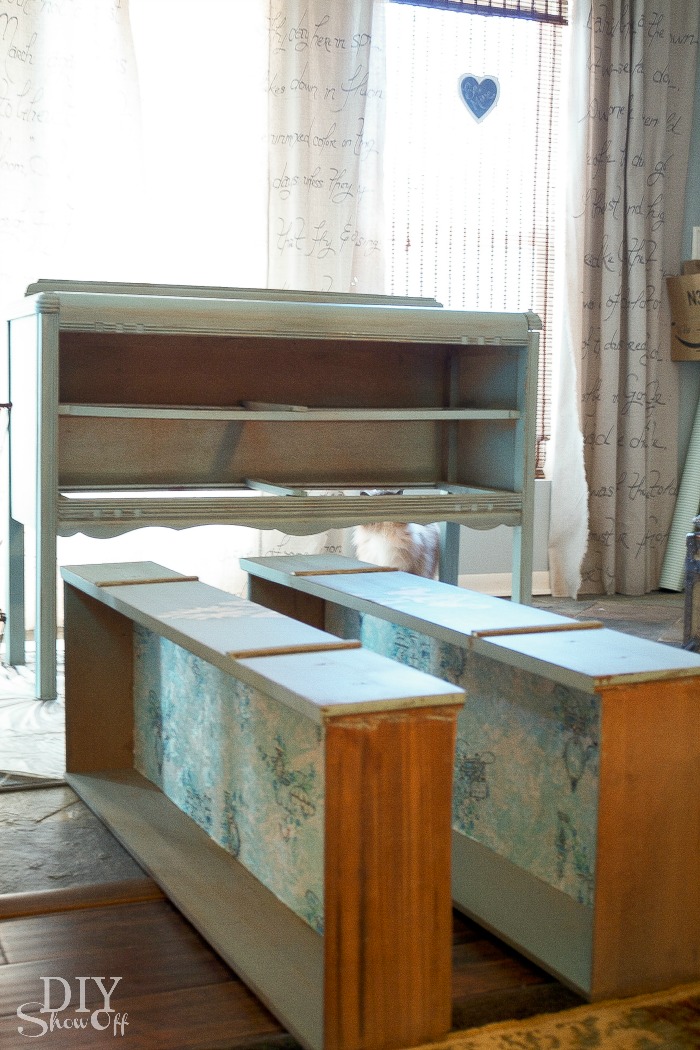
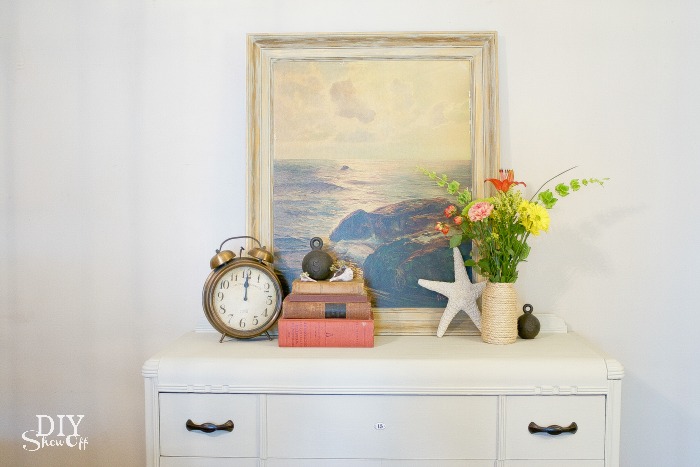
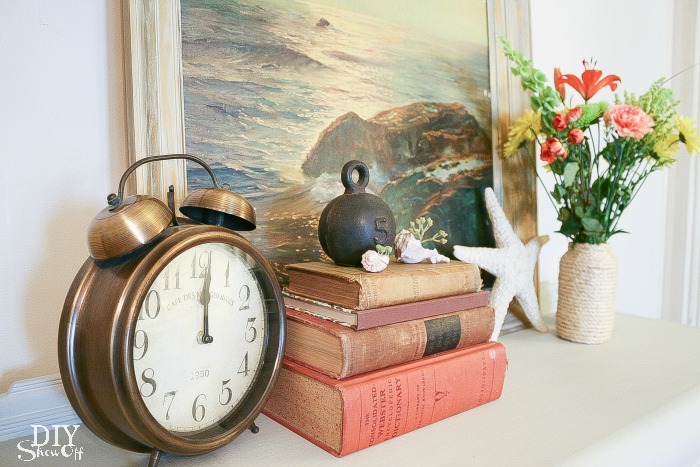
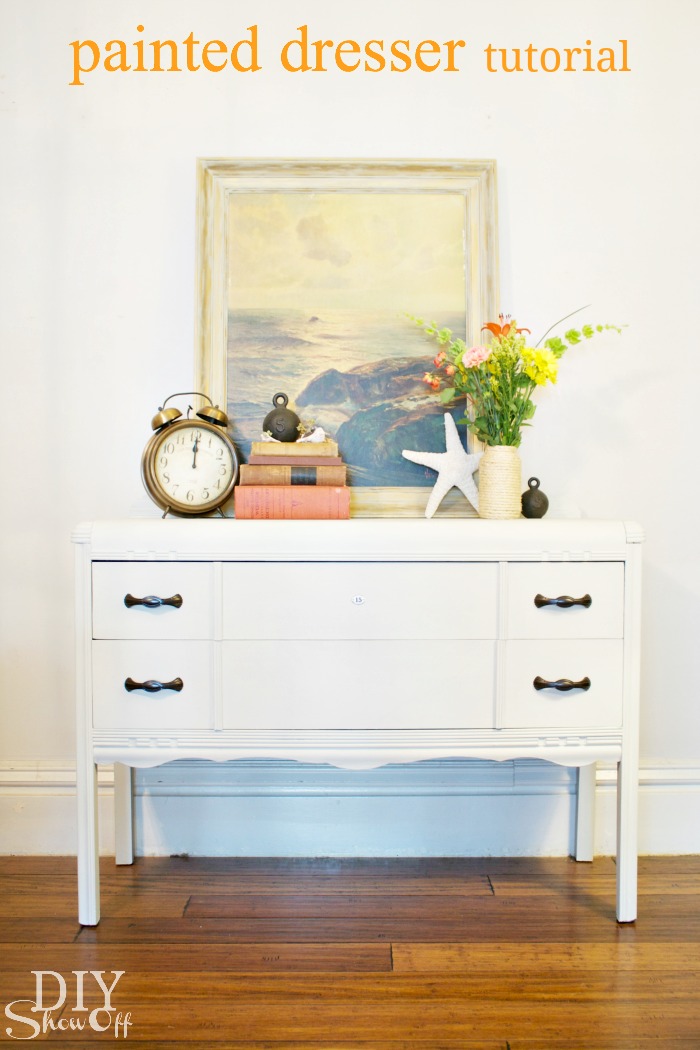
I recently had an opportunity to try out Maison Blanche furniture paint and just happened to have an old painted dresser that needed a fresh new look. If you know me, you know I like to rearrange furniture from room to room and as is (before) just wasn’t versatile. Time for a change!
No prep? You got it! No stripping, no sanding, no priming! Count me in! Here is the dresser before. I wiped it down to clear away the dirt and dust, removed the drawer pulls then jumped right in. Color is La Bonne Terre…to me it looks like a very light putty (sort of an ivory with a gray tone).
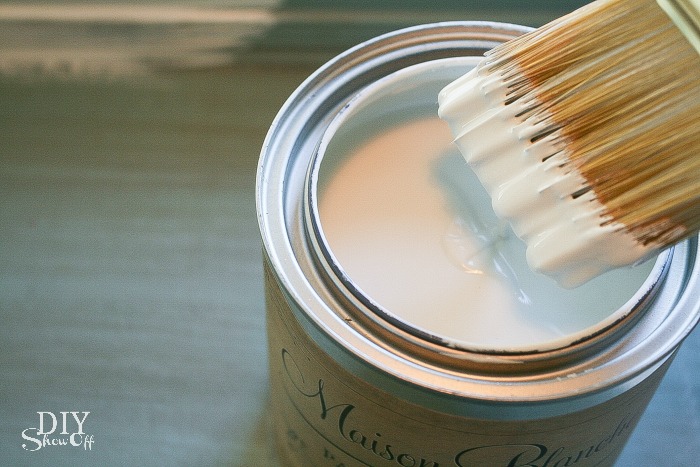
Being a DIY’er, I paint. A lot. And one of the things that makes a paint brand my favorite is the paint’s consistency. Maison Blanche paint did not disappoint! It’s thick. It was love at first sight. Plus! If I wanted it even thicker, I could leave the lid off to thicken it up without it developing that plastic-y painty film. Pretty cool!
I used a regular 2″ brush and gave the dresser coat of paint then started where I began and did a second coat. It goes on so nice and smooth. The paint had a light odor but it wasn’t unpleasant.
The next morning, I did a third coat and let it dry for about six hours. The finish is so soft and smooth. In the afternoon, using an old sock, I applied a coat of gray Lime Wax.
After 15-30 minutes, I buffed the wax finish.
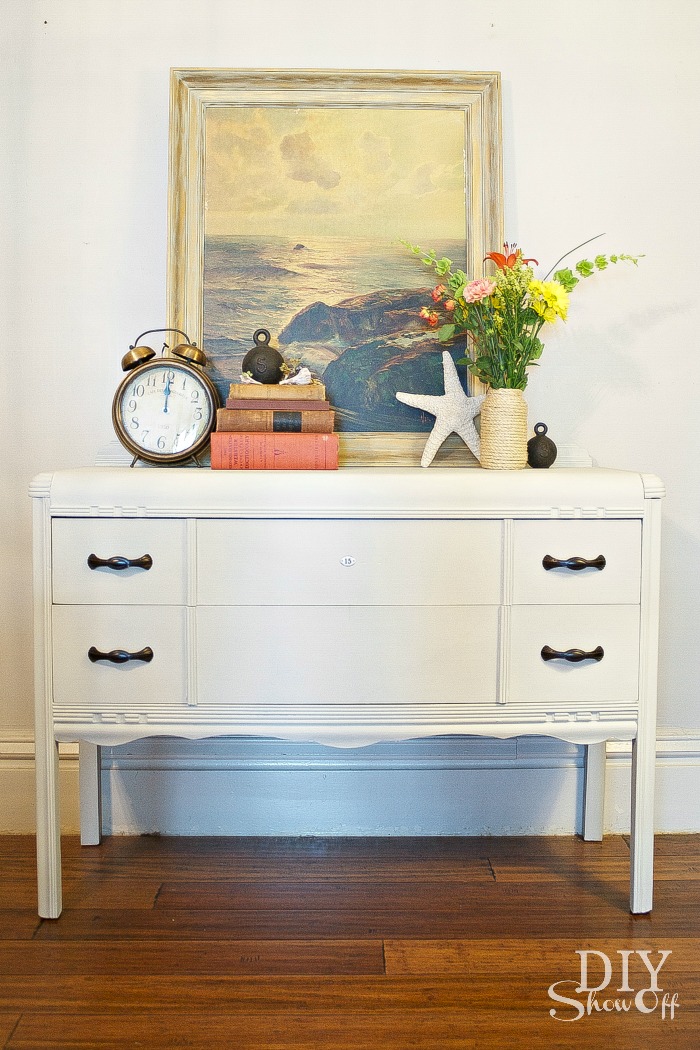
It’s difficult to tell but it gives the paint a subtle pretty patina (transparent gray). I let everything dry overnight (because my oil rubbed bronze spray painted drawer pulls were still drying anyway). Then added the pulls and the result…
…is awesome, isn’t it? Much better! Get your own color at Shannon’s shop, here!
I could re-arrange, style and decorate all day, how about you?
La Bonne Terre with Gray Lime Wax
Need some more examples and inspiration? You’ll want to check these out:
*I received Maison Blanche paint and Lime wax in exchange for a review. As always – opinion and experience is my own. If I didn’t like it, I wouldn’t be sharing about it!
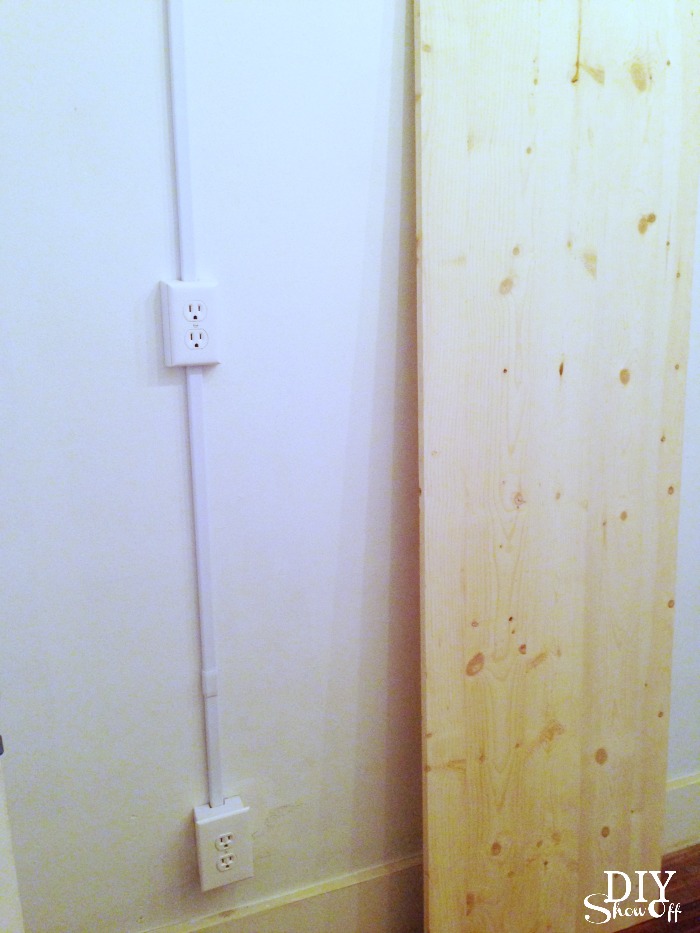
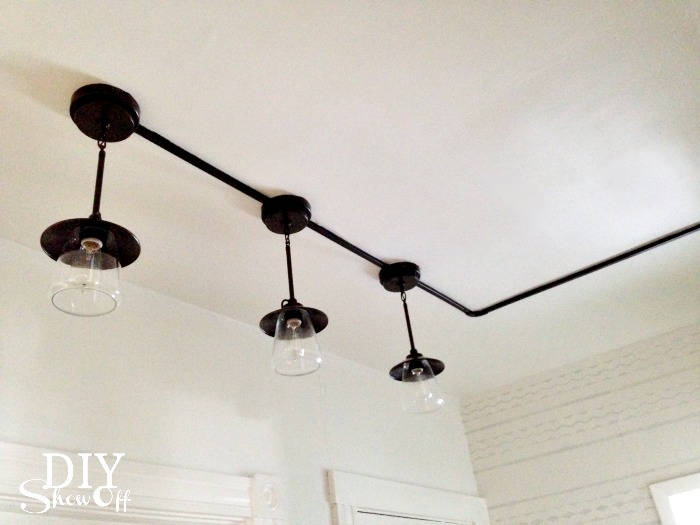
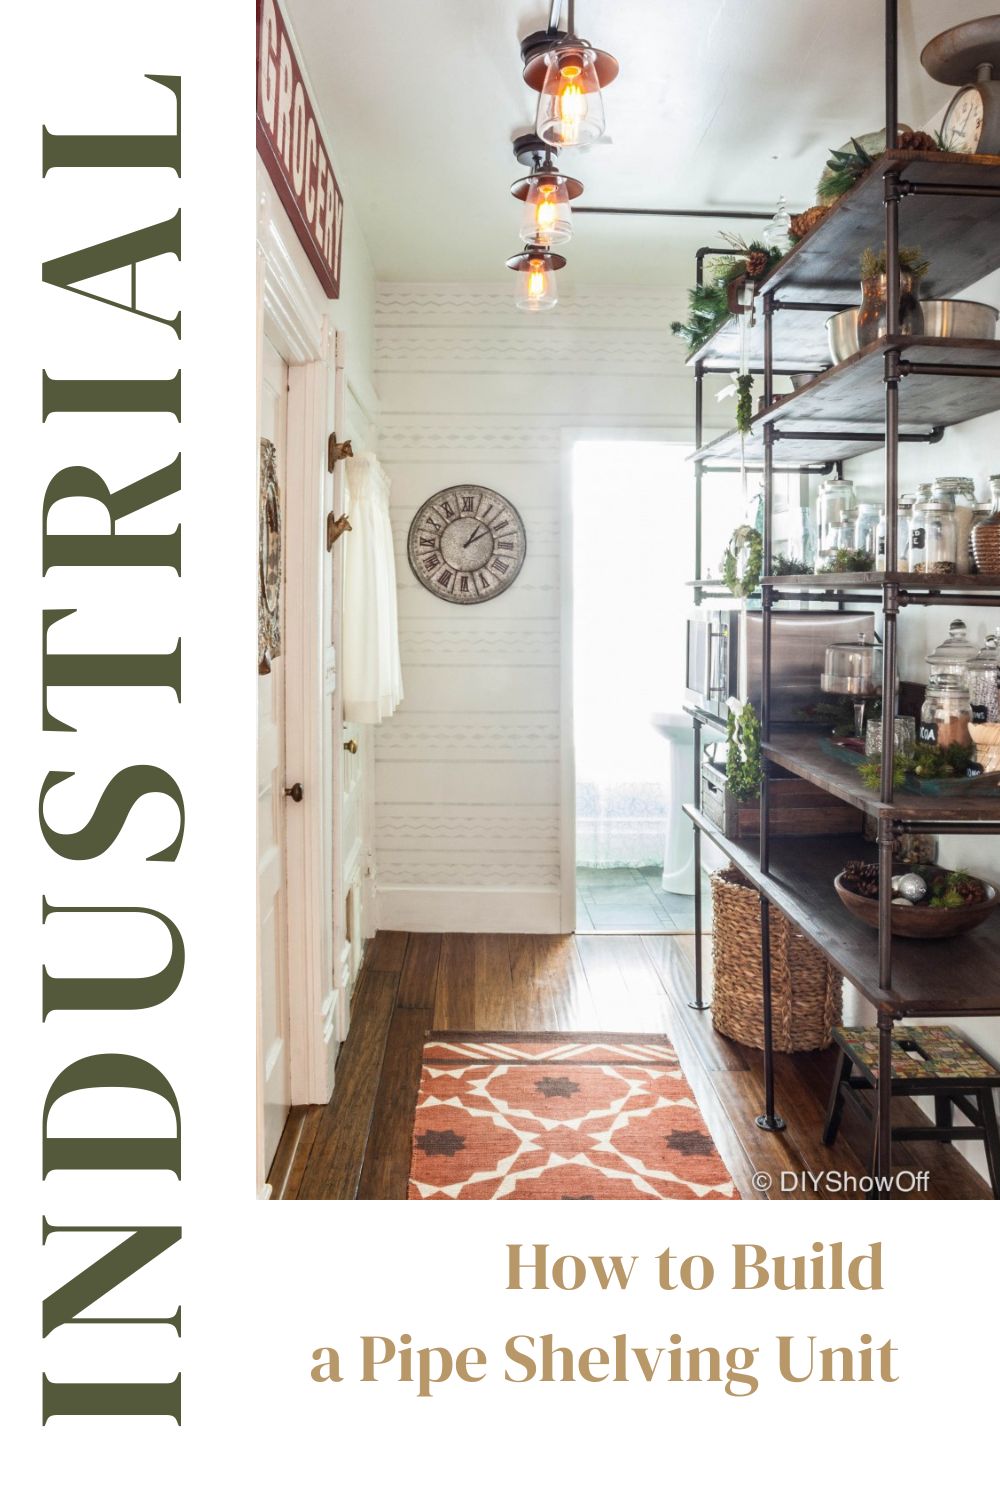
Some of you were wanting more details on the lighting when I shared the pantry reveal. The lighting in the open pantry area was a challenge. 1. There was no overhead/ceiling light to begin with. 2. Walls and ceiling are plaster. 3. Outlet was old and controlled by a switch on the wall.
Lighting Dilemma
Electrical work for the lighting was not DIY. My husband has installed recessed lighting in the kitchen but he was able to run electrical from the previously installed ceiling light, so it wasn’t quite so challenging. For the pantry area, no previous lighting meant pulling the wires from the wall to the ceiling. He started with drilling holes in the plaster wall and ceiling but the wood beam where wall meets ceiling had us realizing this job was ‘over our heads’ and not just literally. It was at this point that we decided to hire an electrician.
Solution
Then after some thought and to keep labor costs down, I let the electrician know that I wanted the wiring to run on the outside of the wall. He changed the old outlet near the floor (the old type that meant I needed an adapter anytime my plug had three prongs), added another outlet a little higher up to accommodate the microwave sitting on the pantry shelf (so I wouldn’t have to drill holes into the wood shelves for the cord to reach down to the lower outlet) and ran the lighting wiring up the wall, to the ceiling with a 90 degree turn to place the lighting. He also made the switch work for the lighting only, disconnecting the switch from the outlets. In hind site, I think this was something we could have done, but when in doubt, seek professional advice!
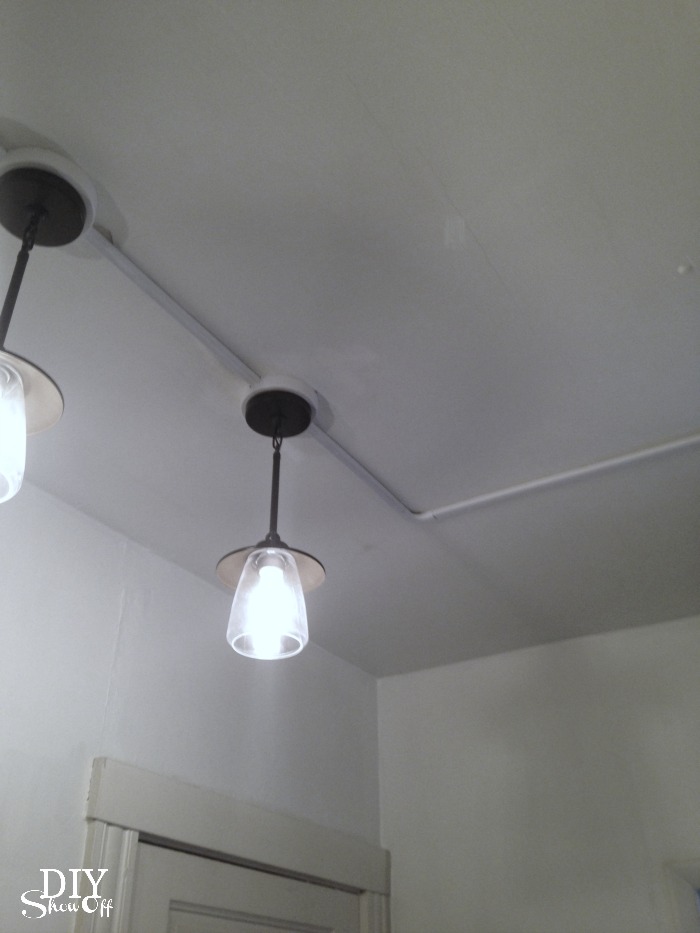
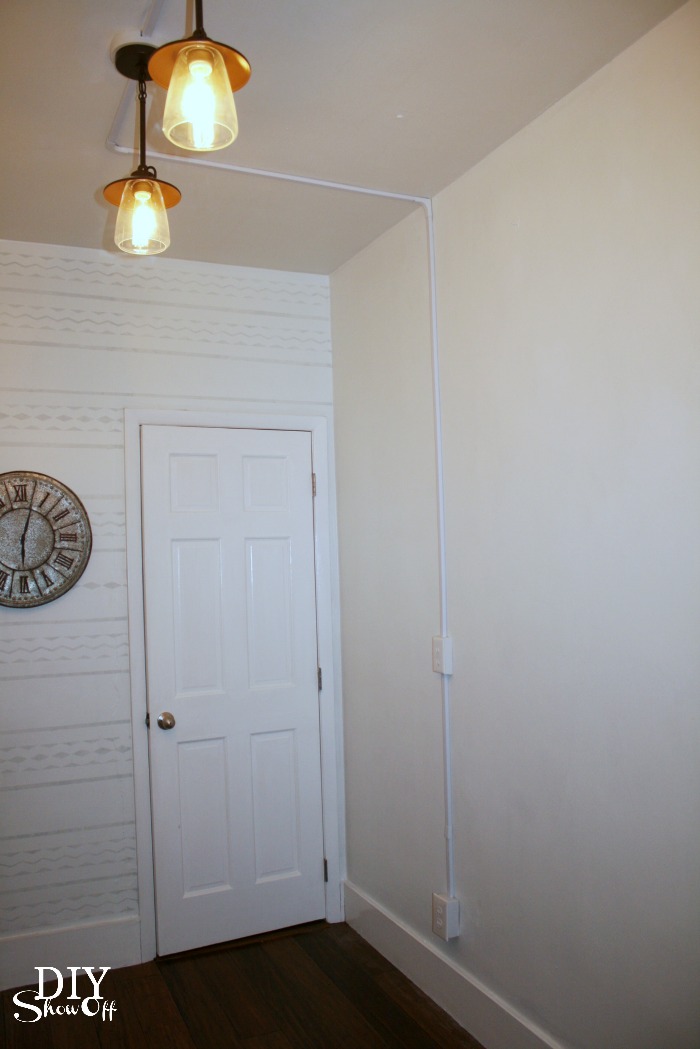
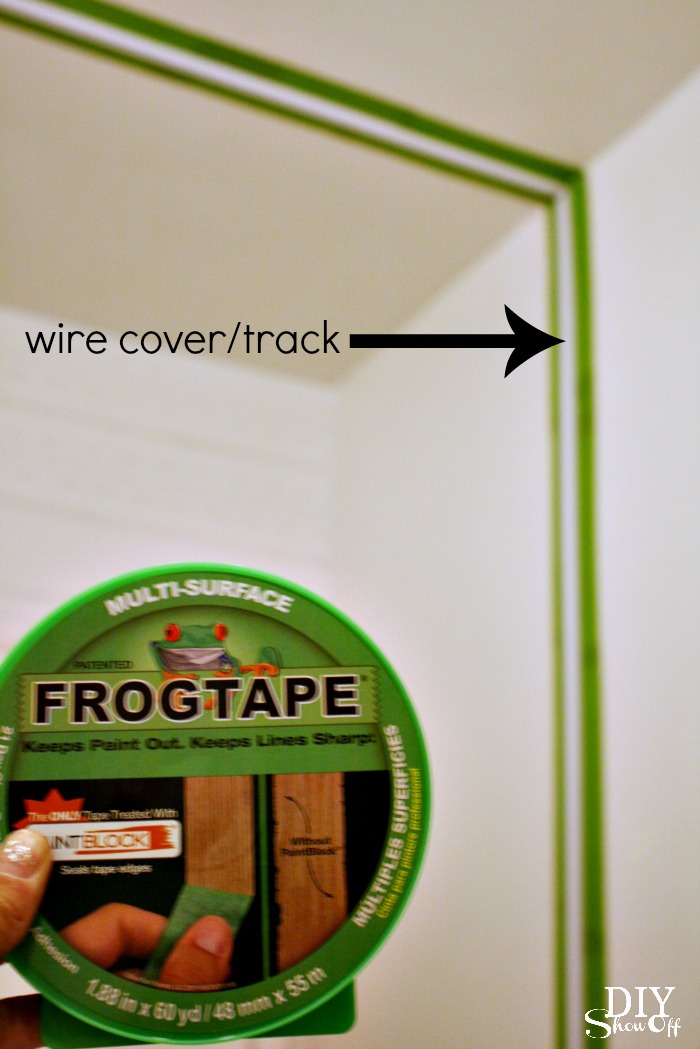
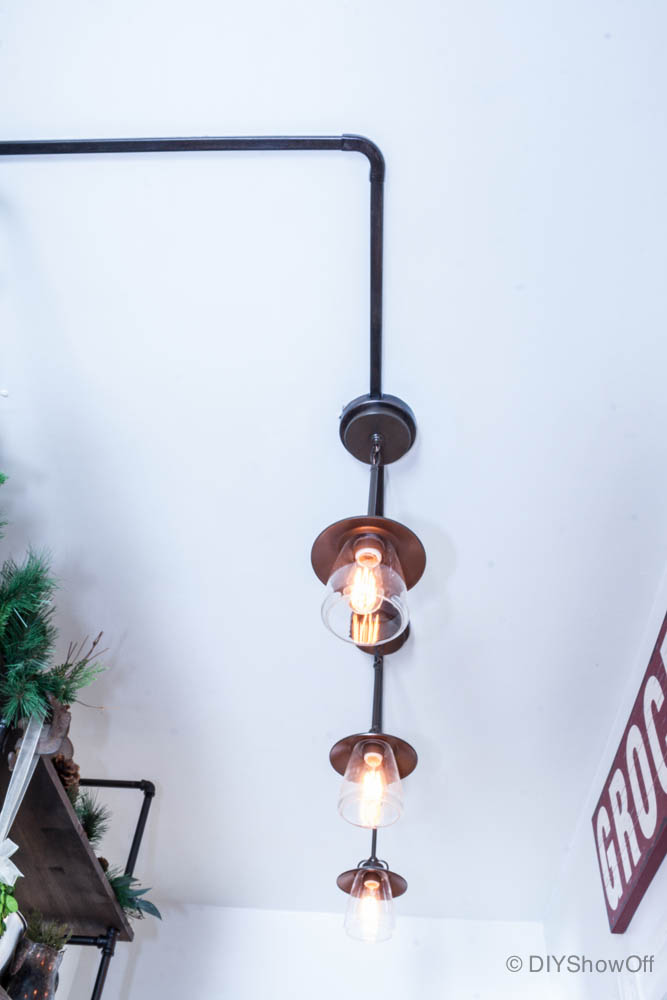
Cord covers for the wiring from outlets, along the outside of the plaster wall, along the ceiling and connecting each individual light fixture.
I centered the lighting from the front edge of the shelving to the other wall and since I chose pendant lights, I made sure they were out of the way of an opening door.
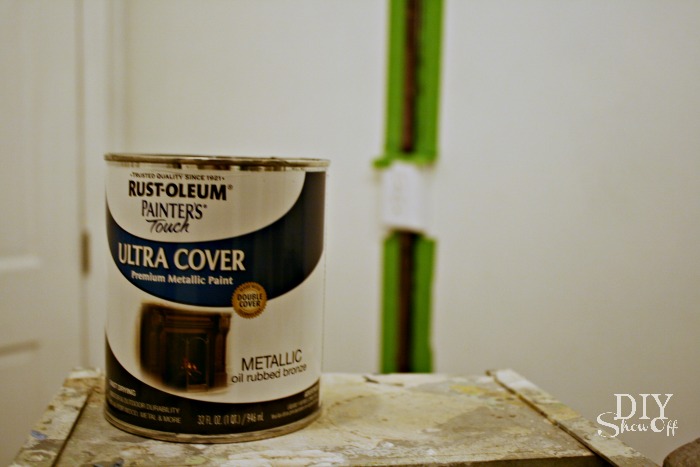
Then with the help of FrogTape® Multi-surface, I painted the track oil rubbed bronze.
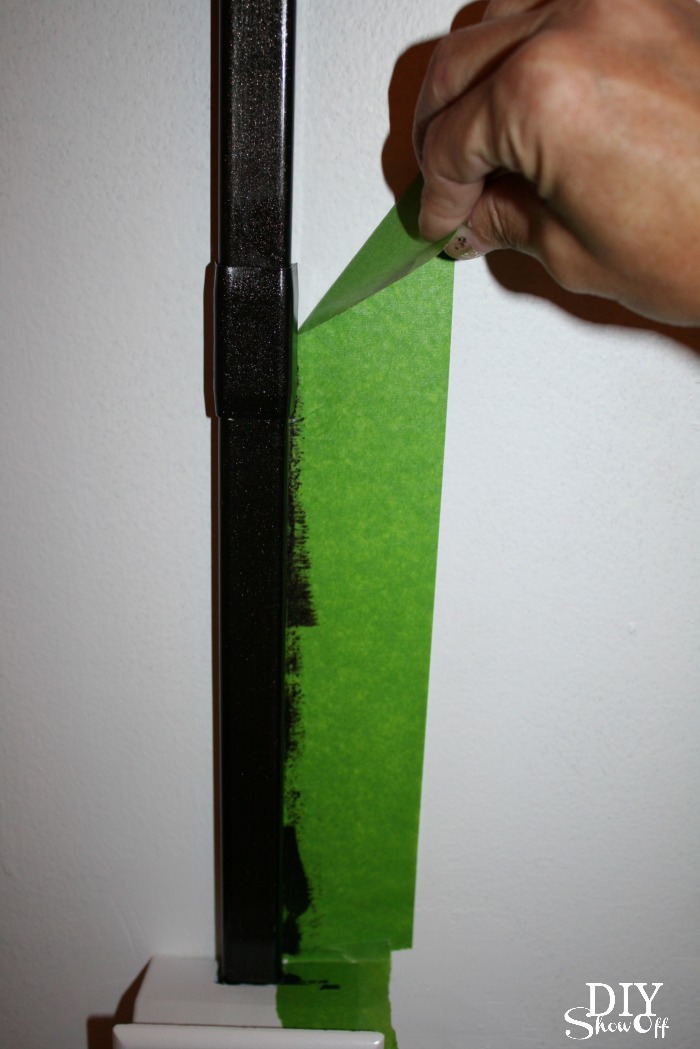
I simply taped off either side of the conduit track along the wall and ceiling with my FrogTape and used my thumbnail to activate the PaintBlock® Technology. Then just painted the track. The oil rubbed bronze paint is sticky since it’s oil based so drying time is longer but still worth the work. It took two coats.
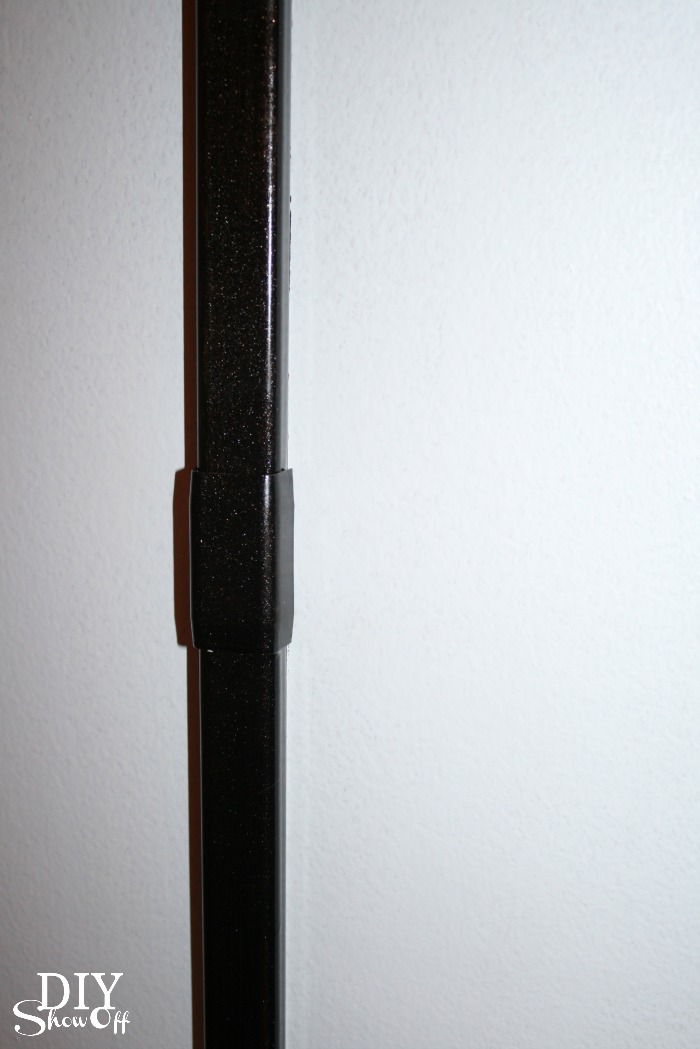
As soon as I finished applying the second coat, I removed the FrogTape. Nice and clean! Note: paint will take a long time to cure!
Painting the conduit the same color as the walls and ceiling would help disguise it more but I think the oil rubbed bronze against the white ceiling adds to the industrial charm, don’t you? Especially with the pipe shelving.
Result
I love it!
Project Supplies:
FrogTape® Multi-Surface painter’s tape
3 round plastic electrical boxes
3 pendant lights
low voltage cord cover with peel and stick tape backing, wide radius elbow (for where ceiling meets wall) and elbow (for 90 degree turn on ceiling) and couplings (for seam coverage where needed).
Disclaimer: I received compensation to complete this project for using FrogTape® products. All opinions, projects and ideas are based on my own experience. See the FrogTape® Blog Squad for more inspiration!
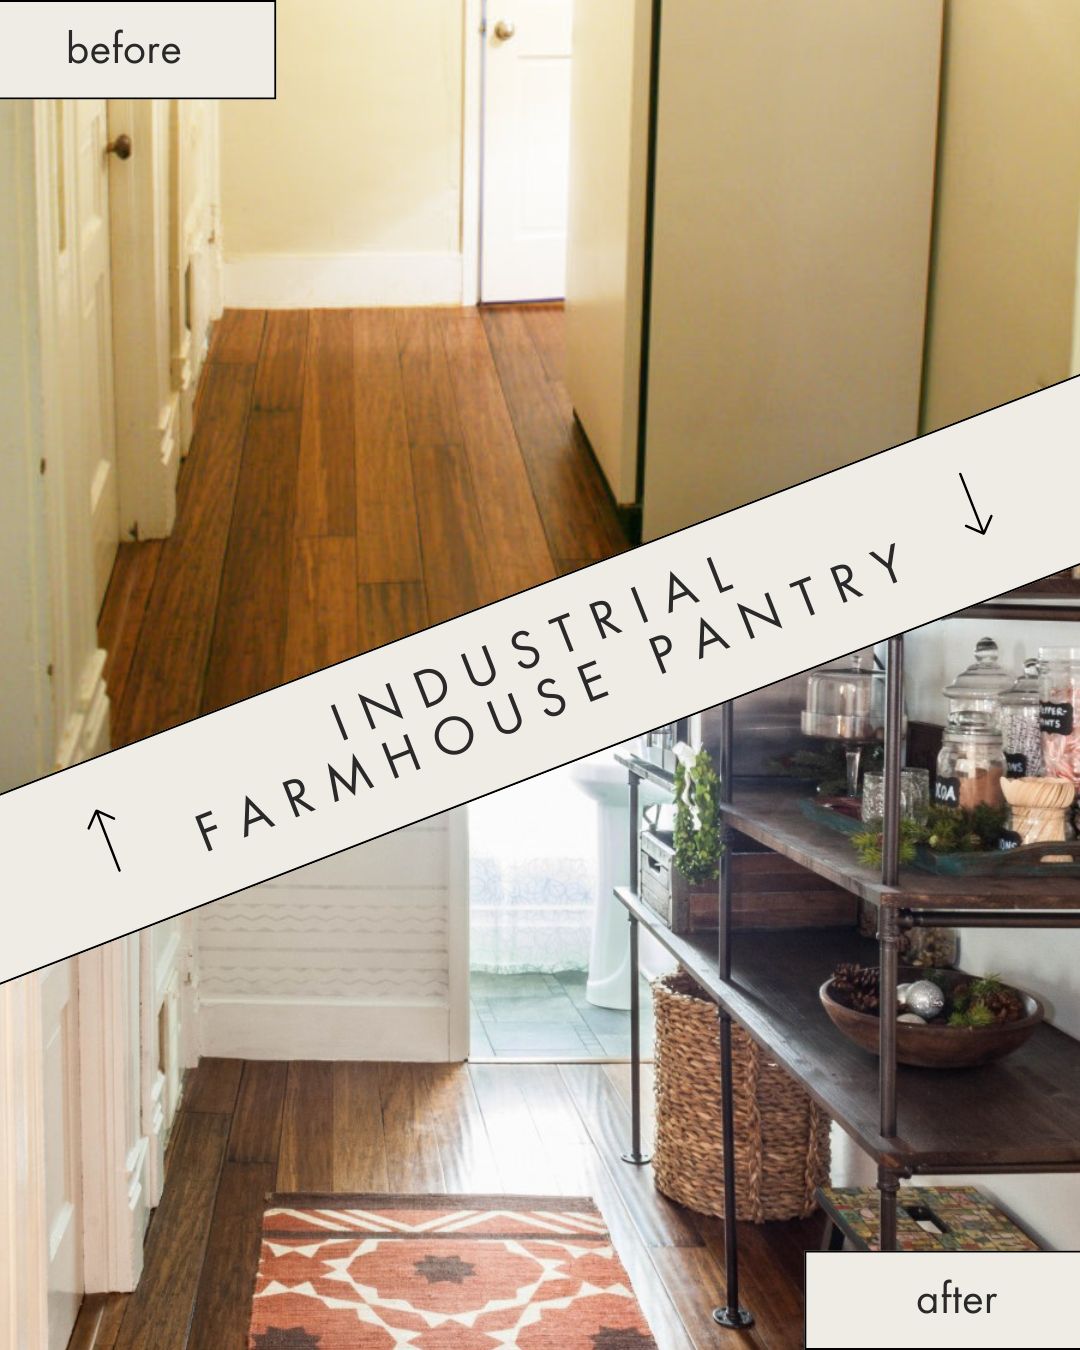
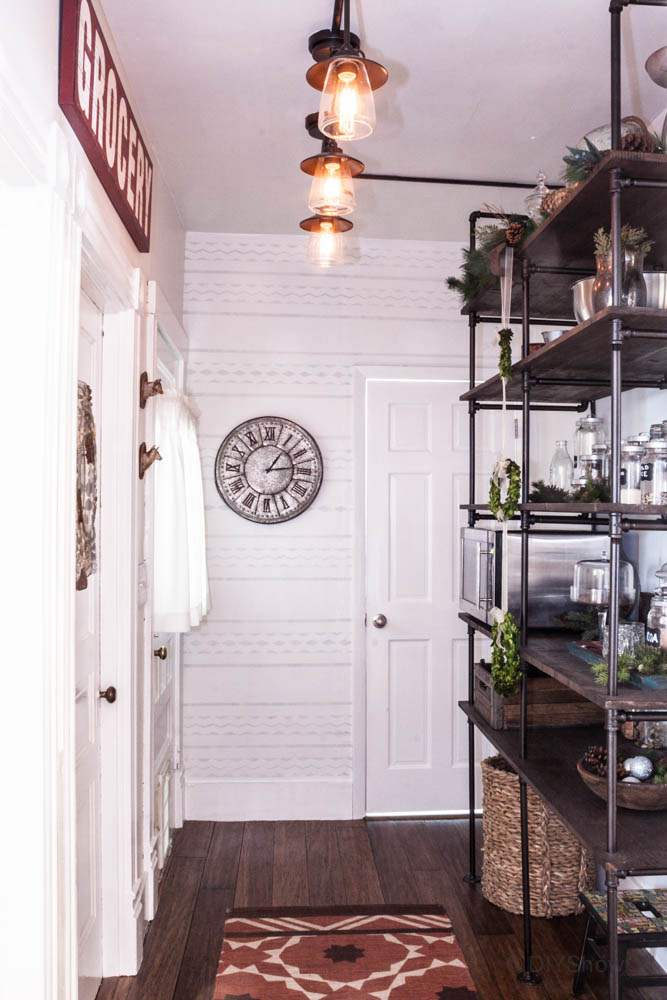
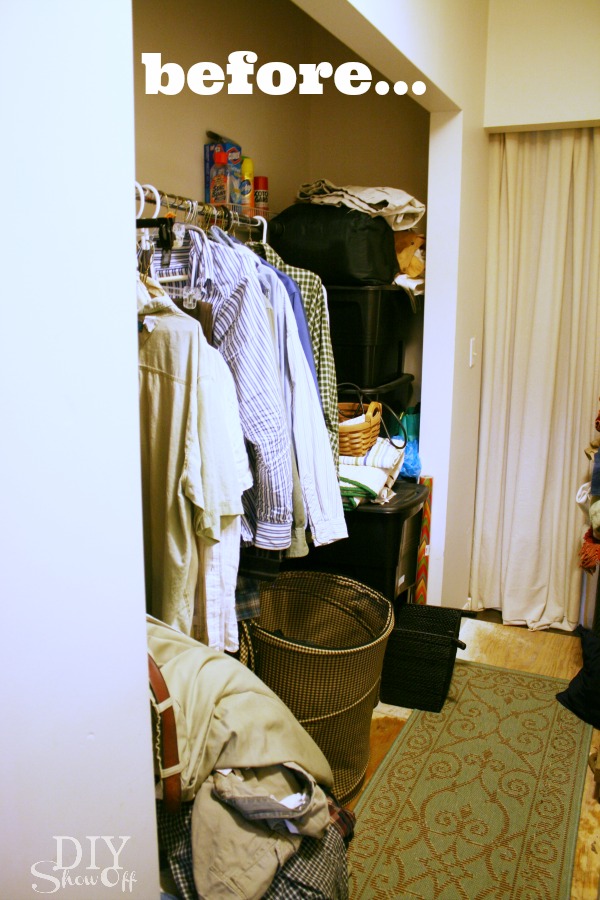
Earlier, I shared the pantry reveal and I’ve had a few questions related to one of the walls as to whether or not I used wallpaper.
Avoiding Wallpaper
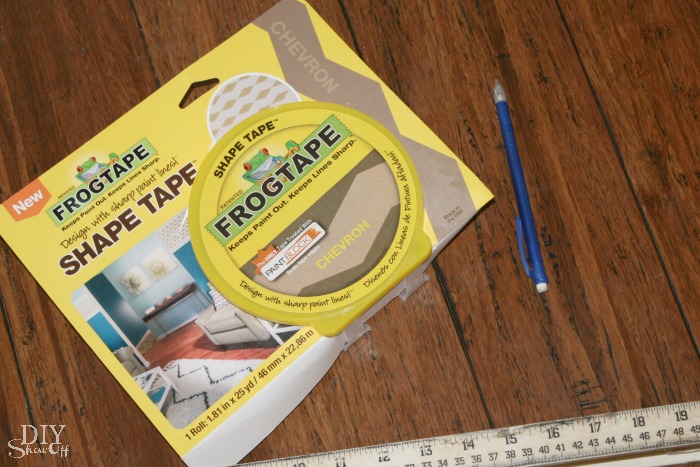
While I do love the look of wallpaper, I’ve had enough wallpaper removal to last me a lifetime so the answer is ‘no’. It’s paint! If you’re a long time DIY Show Off fan, you know that I am a big fan of using FrogTape® to create fun accent walls (see here, here, here, here) and with the addition of the Shape Tape, there are even more options for a creating a fun accent wall. I’d prefer to lightly sand and repaint than strip wallpaper in the future, wouldn’t you?
Painted Accent Wall Process
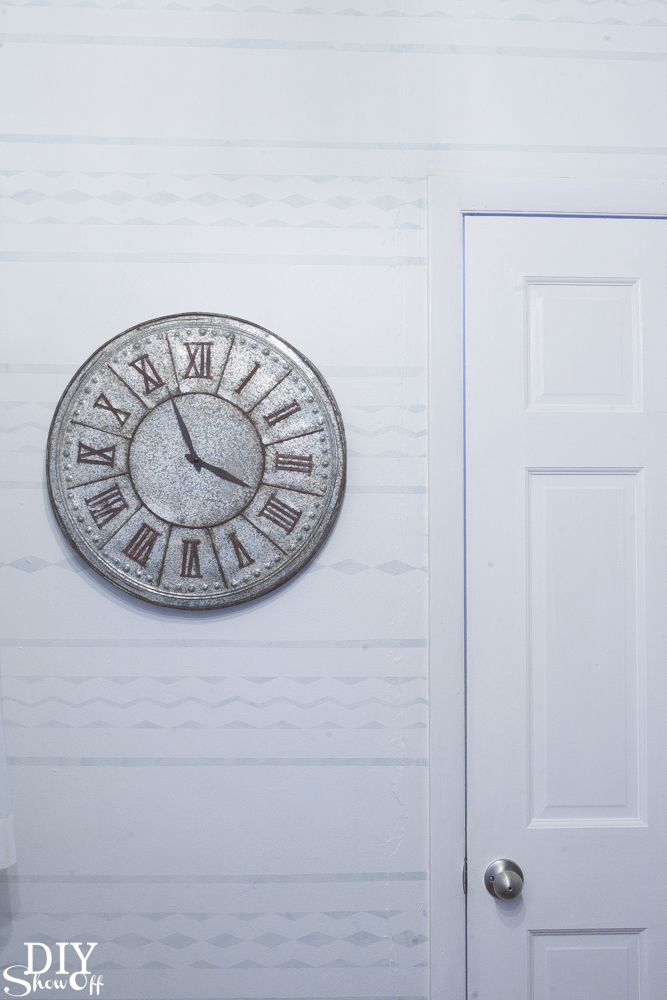
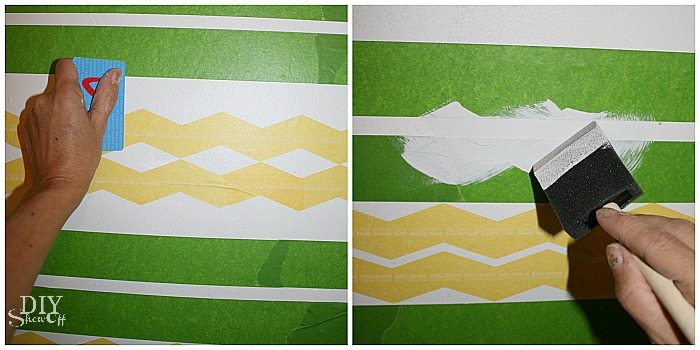
My wall is small. I used FrogTape and chevron Shape Tape to create a fun accent pattern with a tribal/Aztec feel. My lines were mostly “eyeballed”… but use a level and pencil if you’re more of a perfectionist.
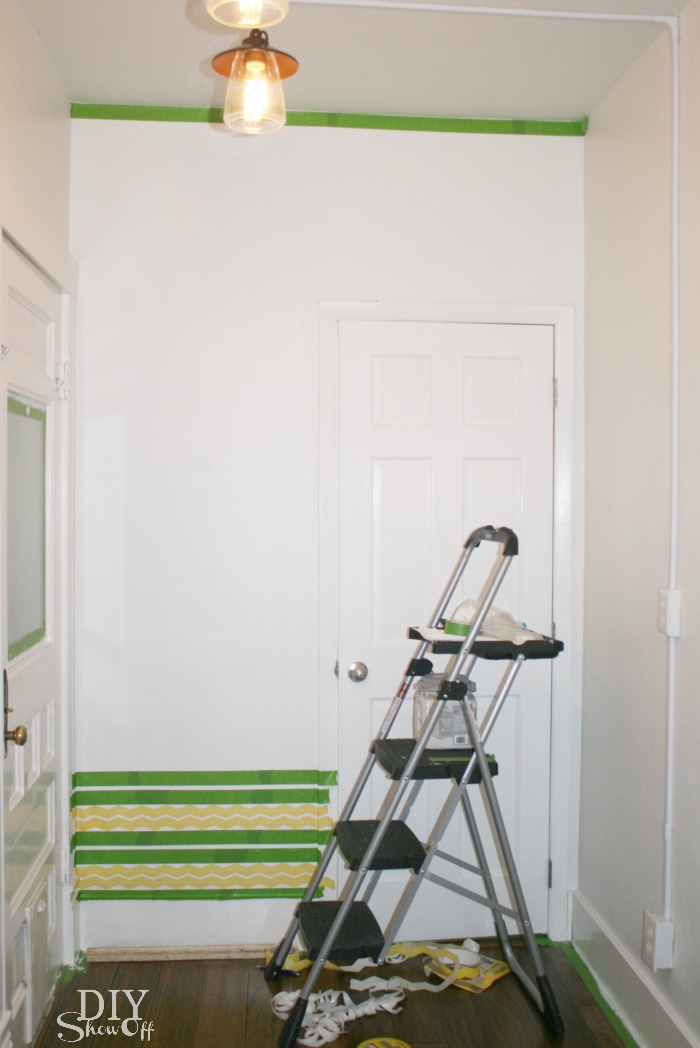
I started at the bottom of my wall space and created straight lines with the Multi-Surface FrogTape and lined it up with the chevron Shape Tape to create stripes, zig zags and diamonds…no real planning out a pattern…I just got creative working my way about 1/3 of the wall (again, no measuring).
Then worked my way down from the ceiling to about 1/3 of the wall space copying the same pattern I used at the bottom of the wall.
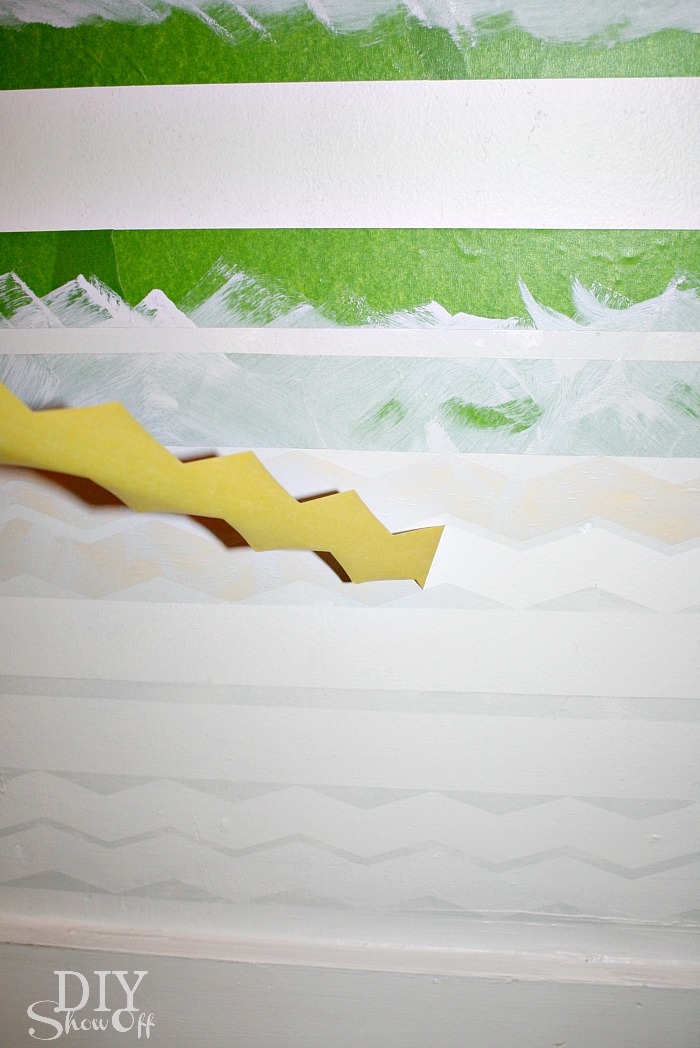
Next I found the center of the wall and spaced out a similar pattern there to meet the bottom and top design. Since it’s the center, I didn’t feel it had to be a perfect match with the top and bottom pattern. I was right! It only adds to the uniqueness of the design. Here’s how it looked with the taping complete:
I actually painted the walls with my base color last April. It’s Valspar (Cool Grey). I didn’t want a loud bold design, so I used some leftover True Value Platinum (Old Fashioned…a light blue/gray) from our kitchen walls as the accent color.
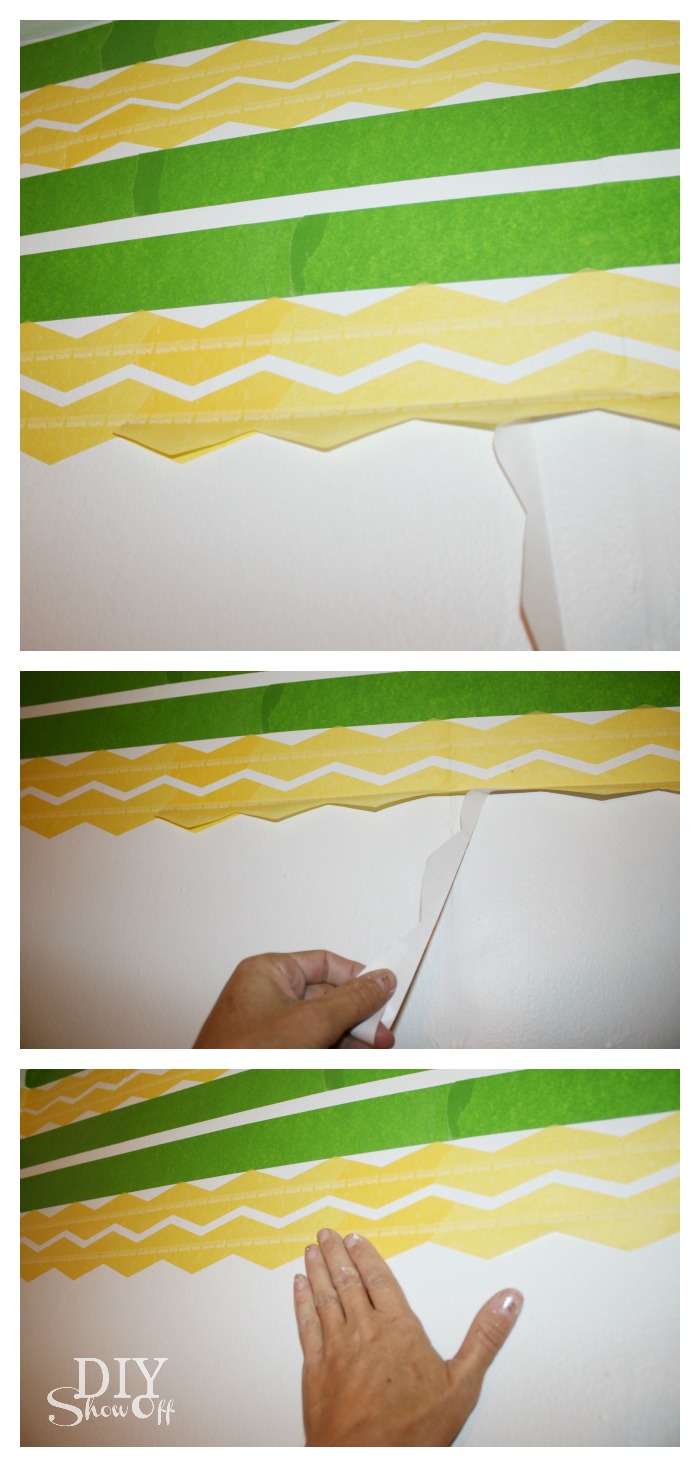
Once my tape design was complete, I used a credit card to burnish the edges of the tape as I worked by rubbing the tape edge then painting the section. I only did one coat (again, I wasn’t looking for bold results and wanted the irregularity of one coat). This wall is bumpy in places so just doing a light colored pattern helps to take focus off of the wall’s imperfections.
As soon as I was finished painting, while the paint was still wet, I removed the tape.
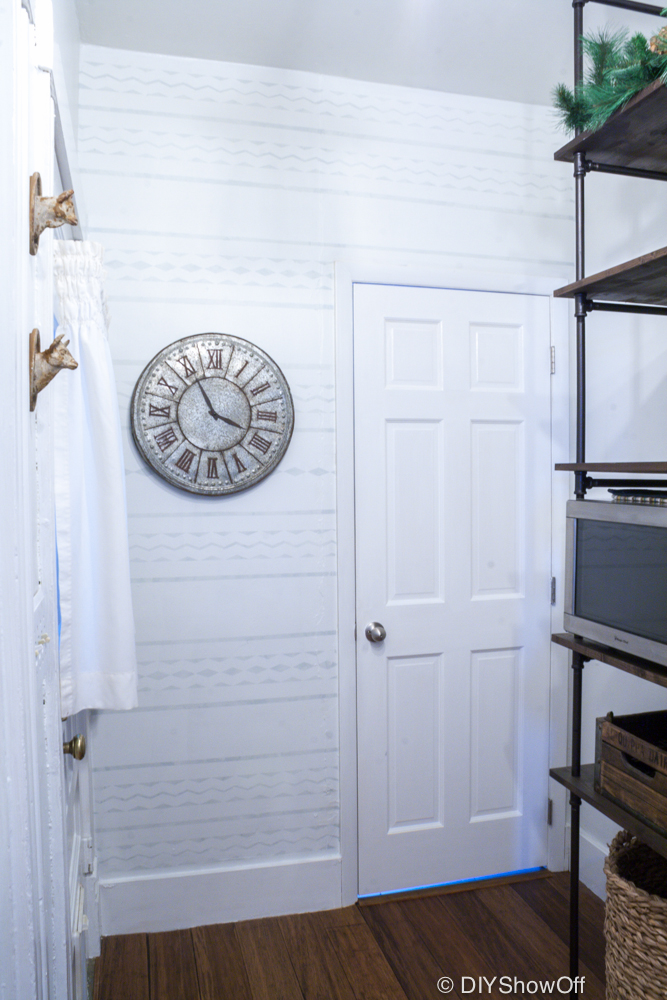
The Reveal
So within a 1-2 hour time frame, my wall had an awesome new ‘wallpapered’ look with a subtle design!
I was going for a tribal or Scandinavian vibe. From a distance, it reminds me of writing paper. Remember it from grade school?
What I love about this: Cost for 1 roll of FrogTape and 1 roll of chevron Shape Tape is less than a roll of wallpaper! Use leftover paint! It’s also less time consuming and less work – all for the same look as wallpaper without the headache to install or remove plus the option to personalize colors and design.
Disclaimer: I received compensation to complete this project for using FrogTape® products. All opinions, projects and ideas are based on my own experience.
There’s progress in the laundry room! The walls have been painted!
It’s always helpful to take a little refresher course before starting a project and of course our DIY blog friend, Lindsay from Makely Home, does a great job with the Glidden “Show Me How” videos (she’s such a natural).
Since I do a lot of painting, I always have paint supplies on hand but when I ventured down to the basement this time, I noticed that my angled brush had seen better days. And I have to tell you, when I’m ready to paint…I want to do it right then. No shower, no make up and no desire to run to the store. So these tips for cutting in and getting clean lines were super helpful!
Then I followed up by rolling the “w”…
It doesn’t matter that I’ve painted dozens of rooms. Taking 1 minute to review those two videos ensured my DIY process went off without a hitch. See all of the Glidden Show Me How videos here.
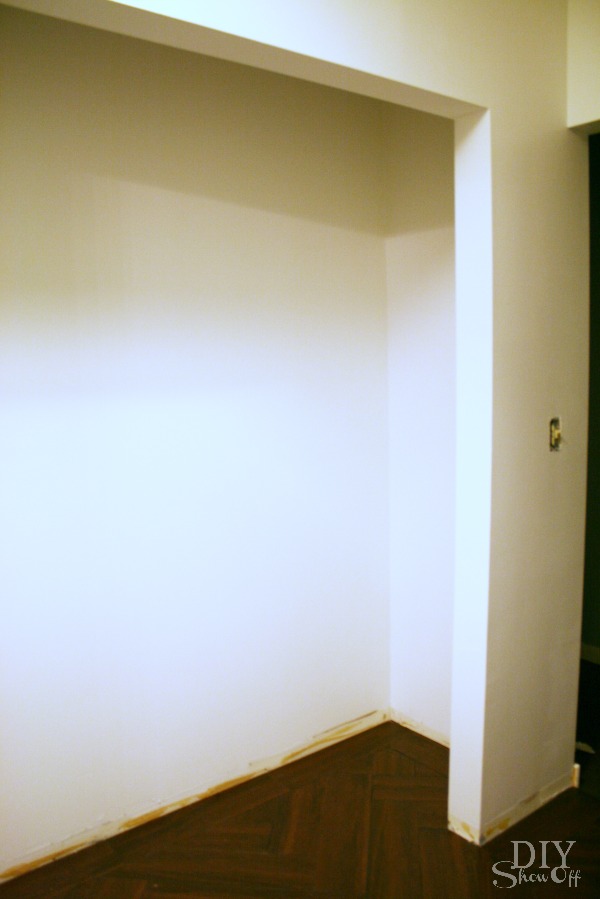
Embarrassing half of the laundry room before…I couldn’t take that chaotic mess or naked flooring any more!
In progress (patched walls)…
Now…I chose a white base since this room is in the middle of the house with no window and no natural light.
Nothing too exciting to show but it sure feels exciting! My walls look beautiful. So fresh and clean and one step closer to being done. And yes…there’s a fun bold painted wall design coming up then onto the baseboards. I’ll share the floor this week too. Stay tuned!
Because there’s so much “life” going on outside of DIY Show Off, the laundry room progress has been slow but hoping to get things going a little faster to get ‘er done!
This post is sponsored by Glidden. As always, thoughts and opinions expressed are my own.