Striped Gallery Wall

A little cabin fever with sub-zero temps had me looking at areas of our home to “clean” up which lead to painting a striped gallery wall. Strange how my brain works but once I cleared the bookcases (so much dust!), that inspired the idea to dress up the entire area. 

What I used: 

  • FrogTape® Multi-Surface
  • paint – I used leftover paint from our laundry room. Color is Valspar Mineral Ash. Existing wall color is Benjamin Moore Smoky Taupe. 

What I did:

I cleaned the wall above our build in bookcases. I marked where the framed prints hang on the wall then using the level, marked light pencil lines horizontally. 

DIY striped gallery wall tutorial @diyshowoff

Then I applied the FrogTape.

DIY striped gallery wall tutorial @diyshowoff

I used my thumbnail to secure the edges of the FrogTape to the wall in order to get nice crisp paint lines. 

DIY striped gallery wall tutorial @diyshowoff

Then simply painted the wall two coats. 

DIY striped gallery wall tutorial @diyshowoff

While the second coat was still wet, I removed the FrogTape and let the paint dry. 

DIY striped gallery wall tutorial @diyshowoff DIY striped gallery wall tutorial @diyshowoff

Then hung up my prints and restyled the bookcases. Paint is such an easy way to create a new look, add some interest and to freshen up the space.

DIY striped gallery wall tutorial @diyshowoff DIY striped gallery wall tutorial @diyshowoff DIY striped gallery wall tutorial @diyshowoff

Now to come up with some seating for this area. Stay tuned!

FrogTape Blog Squad

Disclaimer: I received compensation to complete this project for using FrogTape® products. All opinions, projects and ideas are based on my own experience.

Thrifty Gallery Walls

Just popping in to show off of my girls’ gallery walls. 

Ali’s apartment living room gallery wall is a mix of clearance, IKEA and thrift store finds:

gallery wall

Bri’s living room gallery wall has fun a mix of art, clocks and barometers:

clock gallery wall

Bri’s gallery wall going up the stairs of estate sale and yard sale treasures…

stairway gallery wall

 and one more in progress…

eclectic gallery wall

Aren’t they awesome? I love the eclectic mix! Inspiration to start your own with yard sale season just around the corner. 

See more here, herehere, here, here and here.  

Do you have a gallery wall?

Cheap and Easy DIY Temporary Accent Wall/Wall Art/Gallery Wall Template

I’ve been working on creating a “summer carnival mantel” for the “Fun in the Sun” Blog Hop. I wanted a background that was “NO COMMITMENT” and decided foamboard + FrogTape would do the trick. 

foamboard wall art 

Materials:

  • tri-fold {display} foam board
  • FrogTape

*I’m a member of the FrogTape blog squad and this is a sponsored post.

foamboard wall art tutorial

Tutorial:

I simply alternated FrogTape stripes on each of the 3 sections of the tri-fold display foamboard…

foamboard 

foamboard FrogTape wall art

I wrapped the tape around the outer edges and used my thumbnail to secure the tape edge into the fold for a clean line into the inner creases. 

FrogTape Wall Art

All done! FrogTape green worked out to be a great accent color for my colorful and eclectic summer carnival theme (have you seen my multi-color curtains in the family room)?

family room

Best part? Totally re-usable for changing up decor! Try wrapping paper, fabric, vinyl decals…add interest, color, pattern, texture. Great for rentals. So many options! *Note: Paint is not a good option and will warp foamboard.

Hanging:

The thing I loved about using this as a background for my ‘fun house’ mirror wall was that with the foam board laid out on the floor, I arranged the mirrors and frames. Then marked where I wanted things to hang with a pencil.

tracing wall gallery

Since it’s super light weight, hang with Command Strips.

hanging foamboard 

It’s nice that the command strips allow for moving around to be sure the foamboard is level.

Ievel


foamboard wall art

Nail through the foam board for placement of mirrors, frames or art.

hanging gallery wall

Then display! Here’s a sneak peek of the ‘summer carnival’ mantel…

DIYShowOff summer carnival mantel

And when I’m ready to change things up like I usually do, I can cover the foam board for a completely different look.

foamboard wall art tutorial

Neat, right?

Why I love this project:

  • Easy.
  • Cheap.
  • Lightweight.
  • Great for gallery wall template.
  • No commitment.
  • So many customizable options.
  • Re-usable.

See the summer carnival themed mantel for more pictures. 

summer carnival mantel

*This post is brought to you by FrogTape. FrogTape provided by Shurtech. The opinions are completely my own based on my own experience. For more FrogTape projects ideas, check out the FrogTape Blog Squad.

 FrogTape Blog Squad

Thrifty Gallery Wall and Room Accents

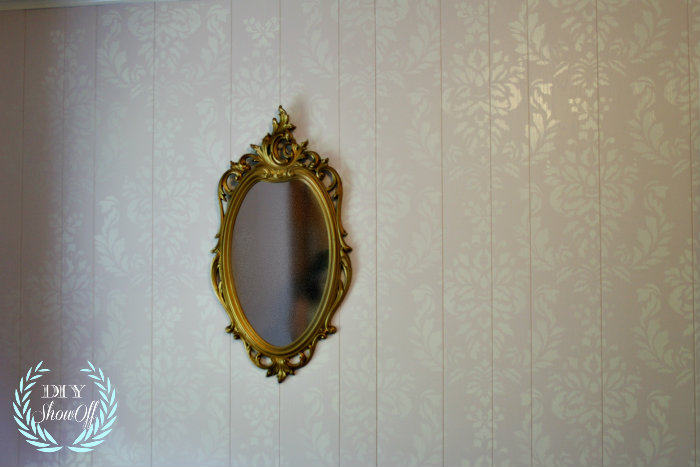
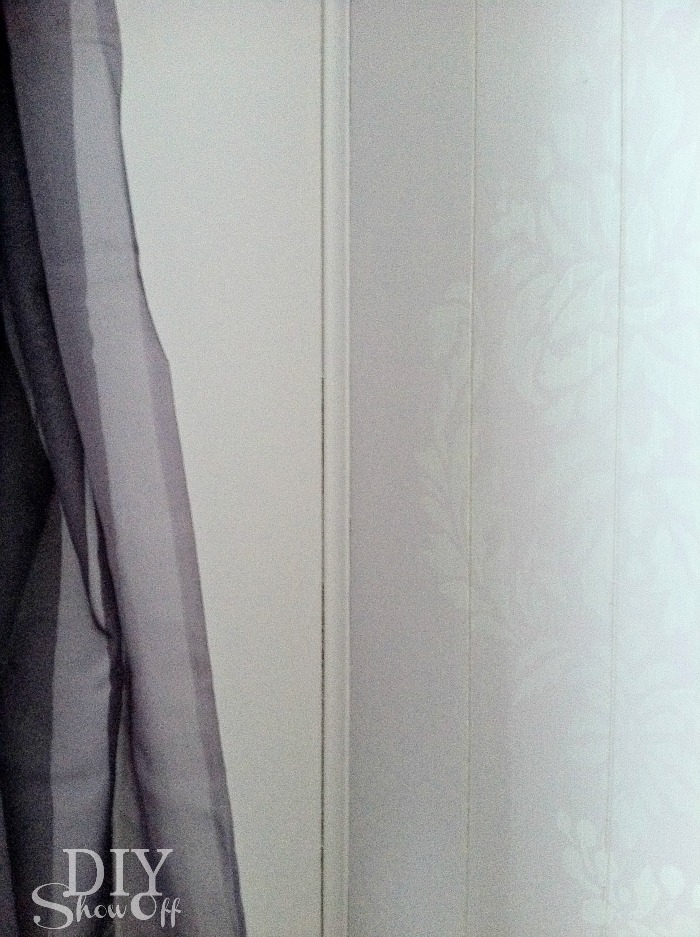
Angel’s room, part 2:  This post is sponsored by FrogTape. The other day I shared painting and stenciling faux-paneled walls. Loved the soft lilac color and subtle damask stenciling.

paneled damask walls

These pictures were taken last year at this time…I’m so behind! I apologize in advance for the poor quality. The reveal photos will be better!

painted paneled walls

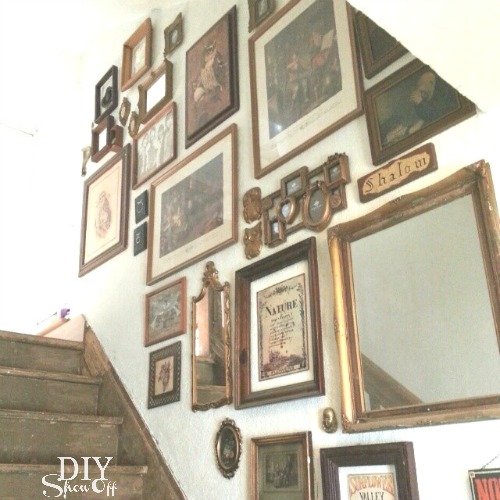
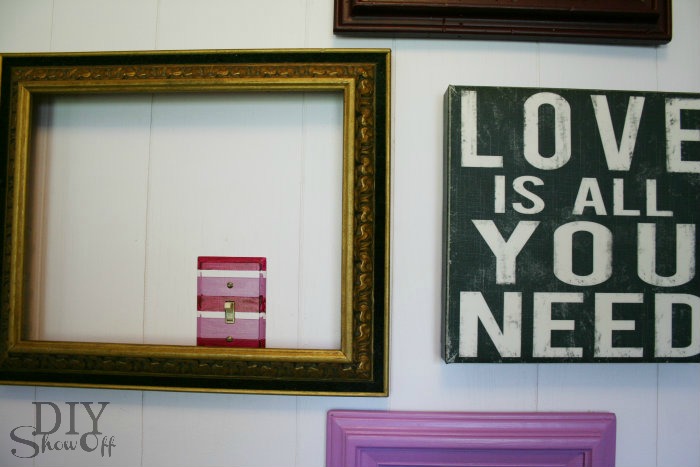
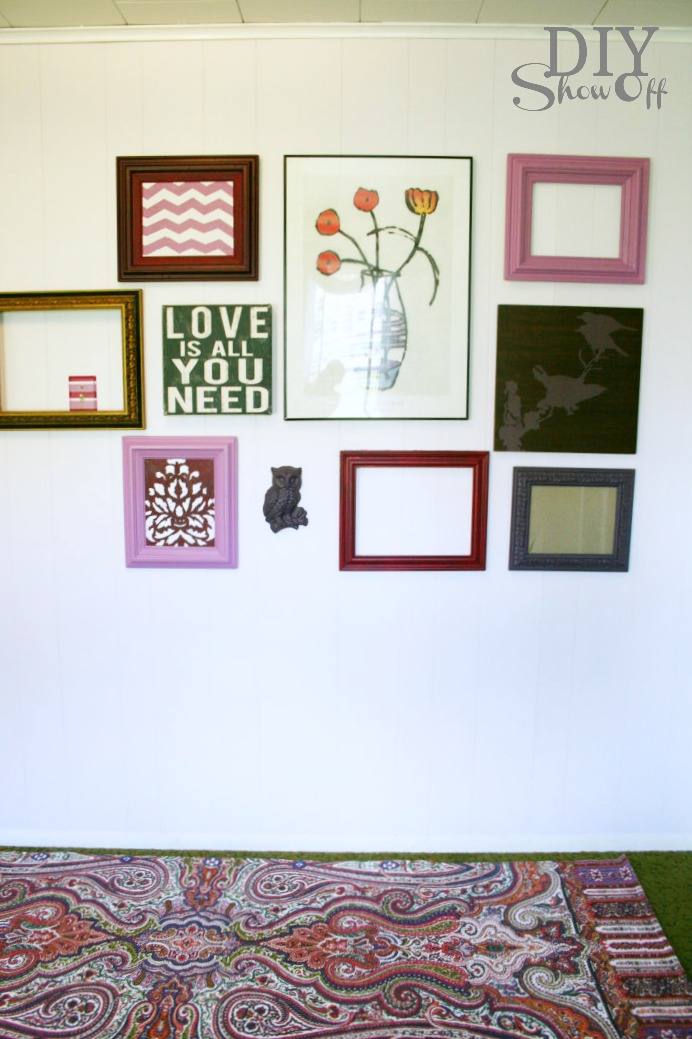
This is my niece’s room. Angel loves all things art including drawing and painting and since I was working with a tight budget, I knew that thrift store picture frames for her to display her work on a gallery wall with room to grow would be the perfect way to decorate one of the walls in her room.

thrift store gallery wall

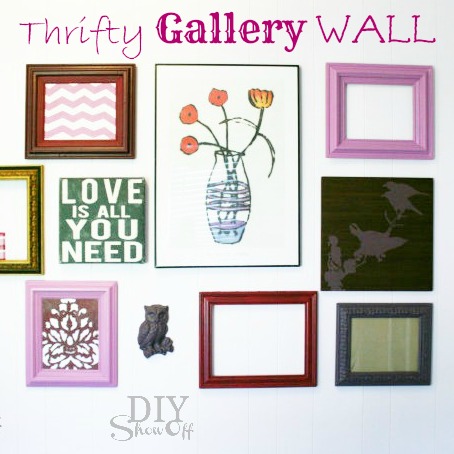
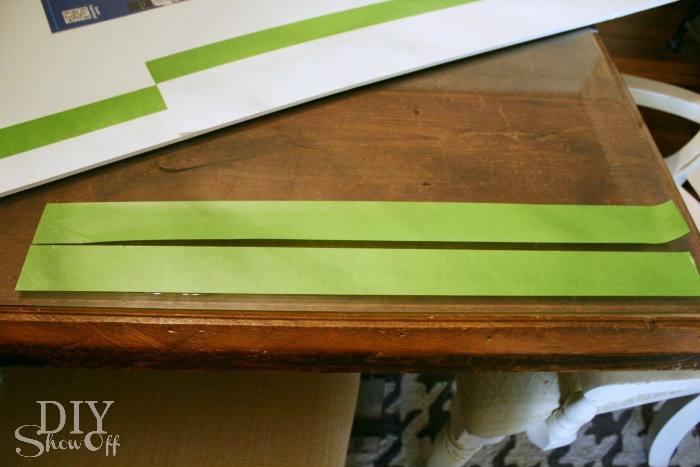
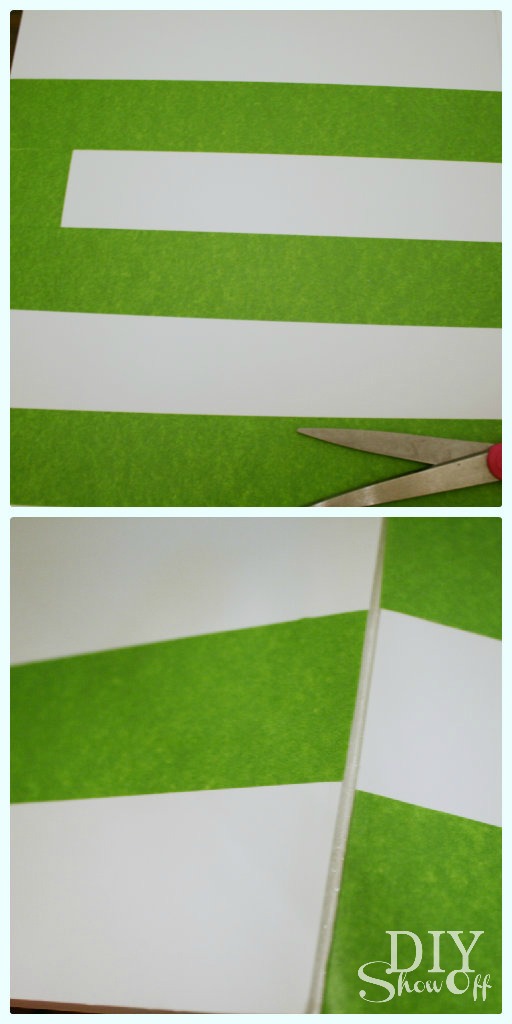
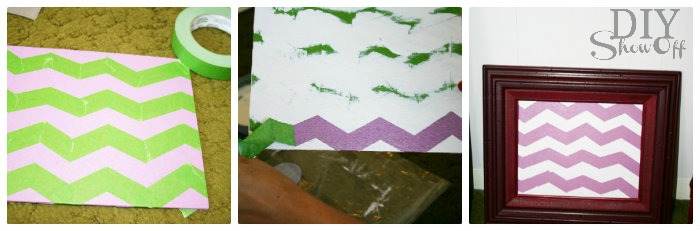
Picture frames were painted with a touch of Valspar’s sample paints in Raspberry Brown and uh…I don’t remember the other color but it looks like Raspberry Sherbet. I had Bri create some chevron patterns on the back board of the frames using FrogTape for a temporary pop of color until Angel arrived and unpacked her own art work and drawings.

FrogTape chevron

Even the light switch cover on the same wall got a painted stripe-y design using FrogTape and coordinating colors in order to blend in with the gallery collection.

light switch cover on gallery wall

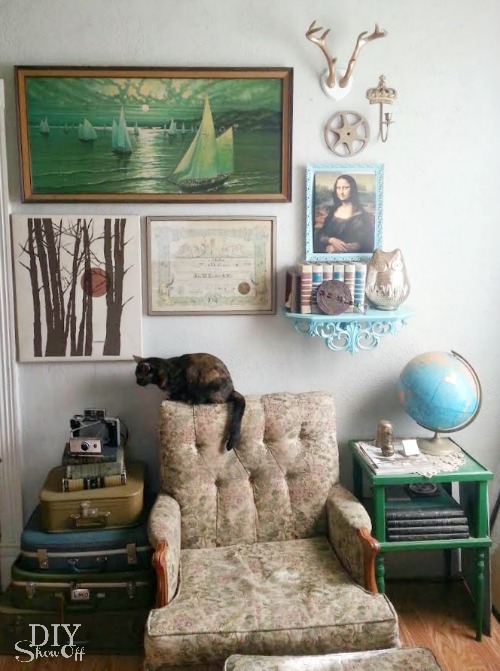
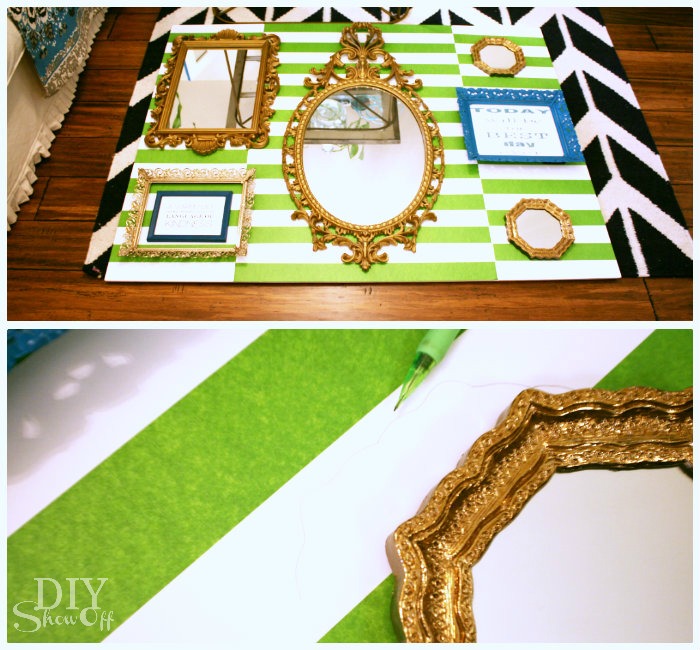
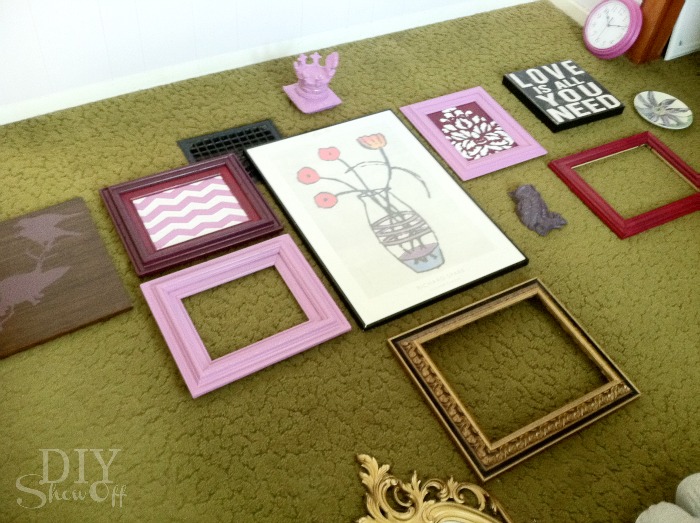
I added a few thrift store prints, a spray painted owl plaque, plate and empty frames then laid it all out on the floor to get an idea of placement. I like placing the largest piece in the center and working my way out. And yea, that green carpet. Yikes! But sometimes you have to work around what can’t be changed, especially in a rental space. It’s a small room, so not much of it will be seen.

gallery wall display

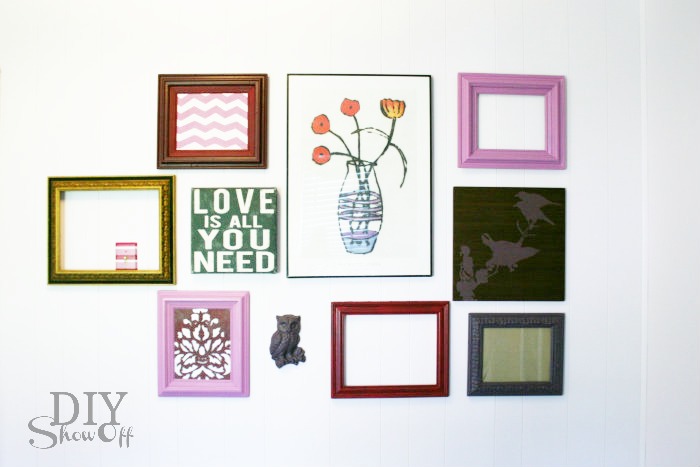
When I was happy with the layout, I transferred it all to the wall. I love the collected look and can’t wait to see Angel’s artwork added to the mix. The gallery wall has room to grow on either side, top and bottom.

thrifty gallery wall

Sometimes you have to work around what can’t be changed. ::hello ugly green carpet:: It’s a small room, so not much of it will be seen, especially with a full sized bed going in the room. I was able to find a colorful rug runner with Angel’s favorite color purple, our additions of raspberry and a touch of green to run along side or at the bottom of Angel’s bed, so the carpet hopefully won’t feel so out of place…

multicolor rug runner

It helps!

gallery wall and area rug

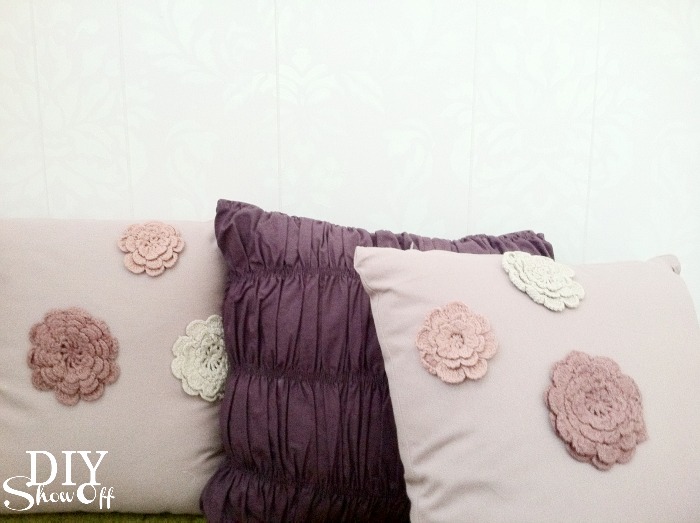
Thrift store lamps were spray-painted a dark plum color…

painted lamp

and pretty coordinating accent pillows on clearance at JoAnns…

purple pillows

All done and just waiting for Angel to move in. She loved it, by the way! I’m still hoping to get over to get some room reveal pictures. One of these days. 🙂

thrifty gallery wall

Sharing at Home Stories A to Z.

*This post is brought to you by FrogTape. FrogTape provided by Shurtech. The opinions are completely my own based on my own experience. For more FrogTape projects ideas, check out the FrogTape Blog Squad.

 FrogTape Blog Squad

DIY Chicken Wire Wall

Meet: Kate from Kate & Kuby. Kate is a DIY’er with a recently new-to-her home and a goal to decorate the entire house (including nursery) before the arrival of their sweet little bundle of joy in October – all on a small budget. She’s been doing an amazing job. Her favorite project so far (and mine too) is her DIY chicken wire wall…

DIY chicken wire wall

Materials:

  • Chicken Wire
  • Staple Gun

chicken wire

Wall before:

wall before

Chicken wire wall after:

chicken wire wall after

Genius! Now it’s a reusable gallery wall!

chicken wire gallery wall

Total cost $25. Easy and affordable. I love the look. I love it’s functionality. See the full post at Kate & Kuby – DIY Chicken Wire Wall.

Here is a sneak peek of a few more fun DIY from Kate:

DIY Anthropologie Letters

DIY anthropologie letters

DIY embroidery hoop art

DIY newspaper trashcan makeover

trashcan makeover

{original newspaper/outbox DIY waste basket tutorial}

DIY Project Parade and re-arranging the living room.

thrifted gallery wall, hanging a gallery wall, plaster walls, decorating, do-it-yourself

Winter gives me spring fever. I love being snowed in when I don’t have to go out but I can’t sit still and get bored looking at the same old thing (as if I have time to be bored) but staring at the same four walls day in and day out and looking at tons of inspiration (thanks to my talented blog friends!) – well, it makes me itchy to re-do and re-arrange. And so, my living room was the victim of my decorating bug. Today, I give you the evolution of the living room.

Earlier this week I shared what I’m reading and where I read

DIY Show Off reading nook

Continue reading