Painted Striped Curtains {apartment sneak peek}

Painting Horizontal Stripes on Fabric Curtain Panels

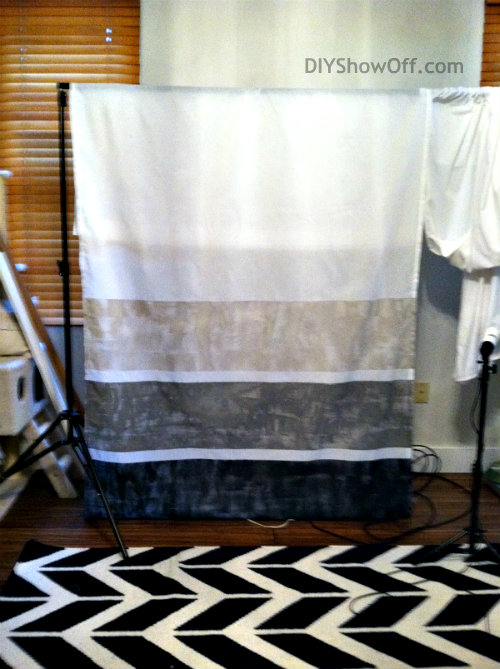
Renovating, furnishing and decorating an apartment = very tight budget. With the main floor needing six panels, Ikea’s Vivan panels were a perfect choice. A set of two panels for $9.99 – what a deal! And they’re huge! 52″ wide x 98″ long. I love all white curtain panels but for the main living space, I wanted to add a little texture, neutral accent and simple pattern. I love horizontal striped curtains. We decided to go with three large neutral stripes, starting from the bottom.

Not according to plan: My plan was to do an ombre design from black, dark charcoal to light gray. I ended up with something a little different. Here’s how I did it, my suggestions on what I would have done differently and why my stripes aren’t ombre.

What I did: 

Materials:

  • Ikea Vivian curtain panels
  • Paint (fabric paint or latex paint)
  • Sponge rollers (recommend trying foam rollers)
  • FrogTape
  • Tools used: yard stick, iron, sewing machine for hemming if needed

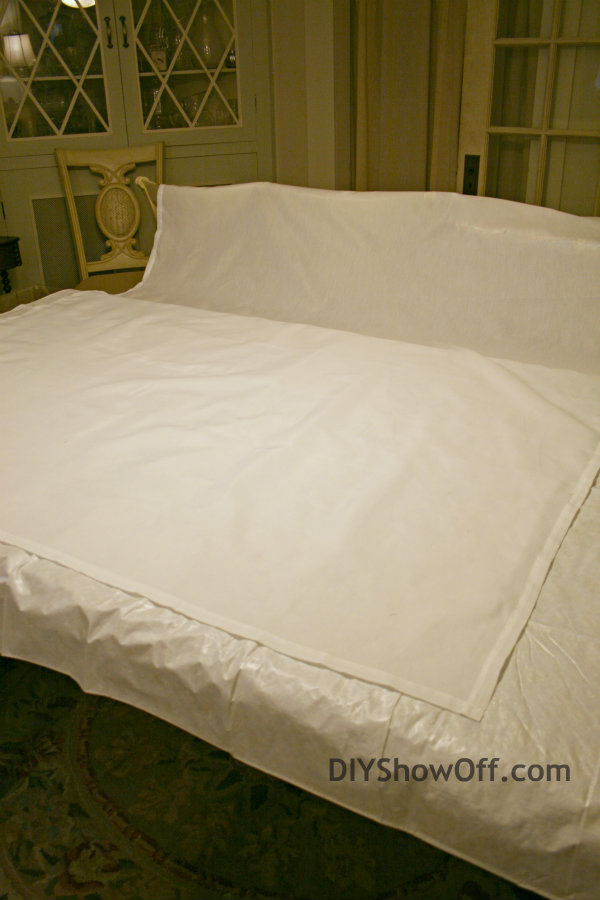
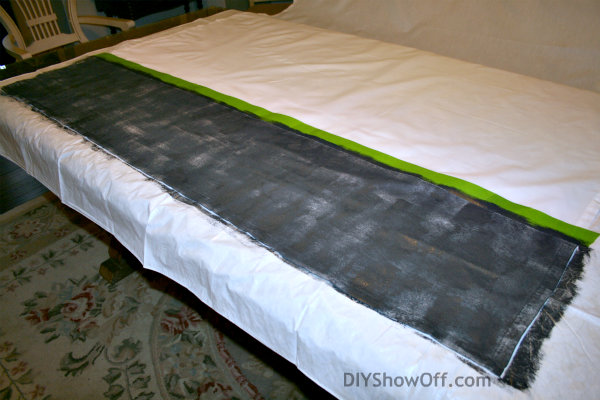
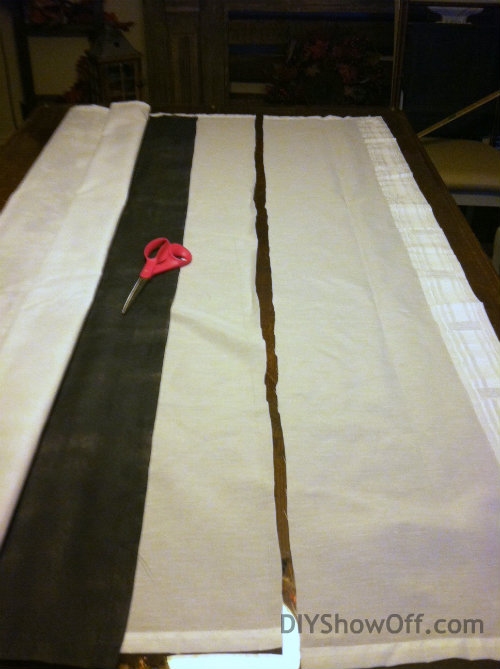
I started by pre-washing and ironing out wrinkles, then spread them out (one at a time) on the dining room table. I used a vinyl table cloth as a “drop cloth” for underneath the panel.

Ikea Vivian curtain panels

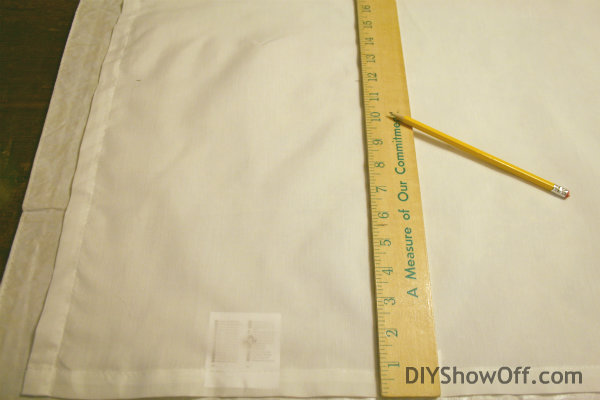
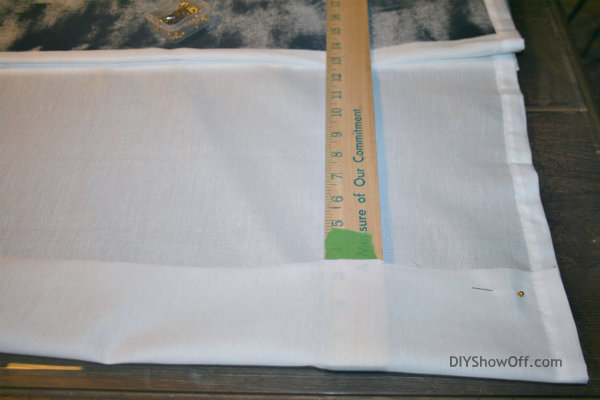
Using my yard stick, I started from the bottom and measured 12 inches, then drew a pencil line.

DIY horizontal striped curtains

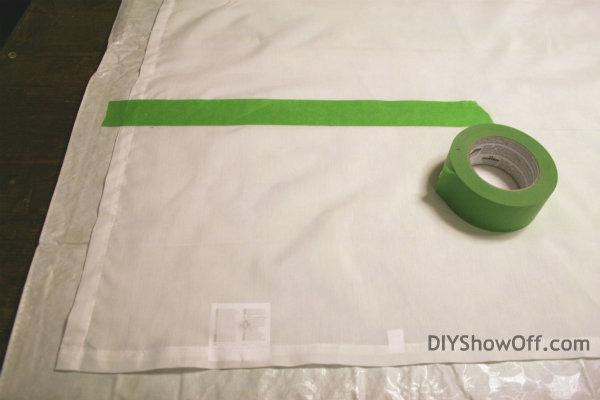
I used my FrogTape on the outside of my 12″ line to create a crisp border. For the next stripe, I measured 12″ from the edge of the FrogTape. Note: My straight tape lines extended past the panel to secure the edges of the fabric to the vinyl tablecloth to help prevent shifting.

FrogTape for painting striped curtains

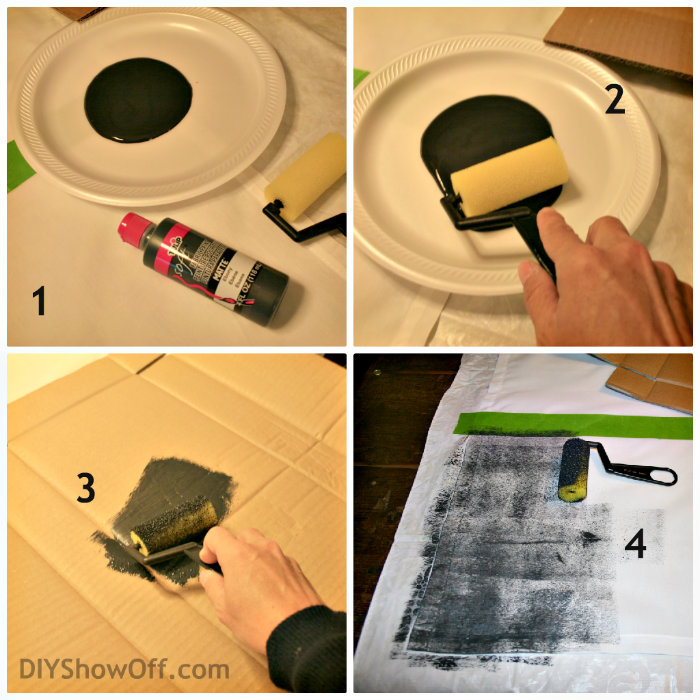
I purchased 3 large bottles of fabric paint in black. My plan was to add white to lighten each stripe. However even three bottles of fabric paint does not go a long way with six curtain panels. I ended up using the black fabric paint for the bottom stripe of each panel.

painting striped curtains

painting stripes on curtains

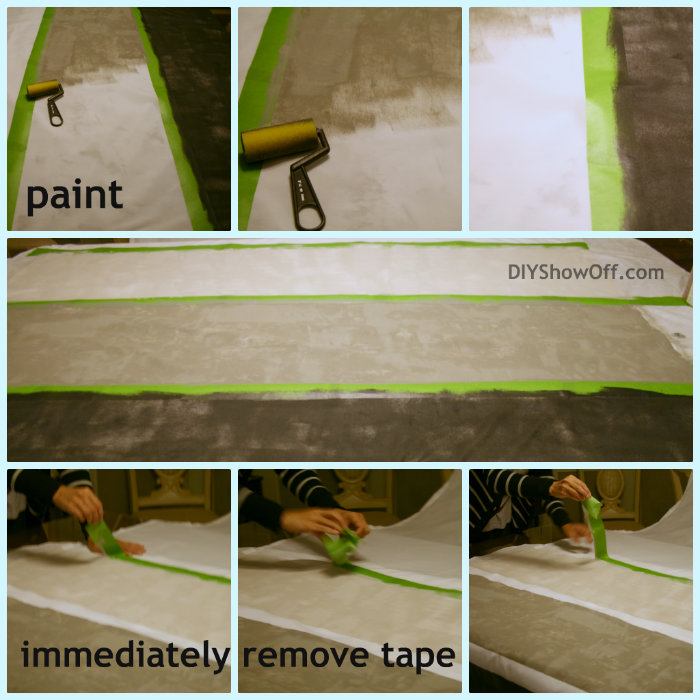
Dip in paint, roll on cardboard/paper towels then roll onto fabric. My cheap rollers meant I had to go over it a few times but once the roller was saturated with paint, it went quicker. 

painted horizontal striped Ikea curtains

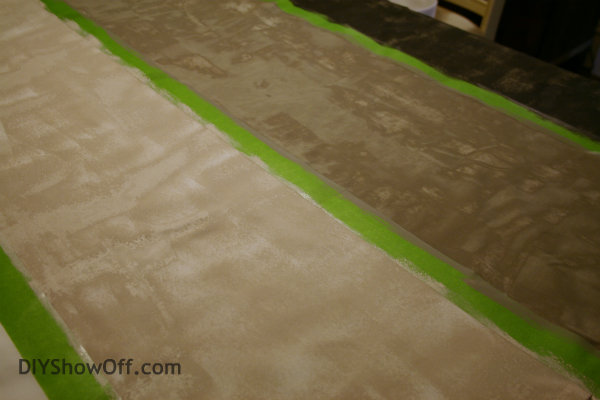
Then…since we are on a budget, I used latex wall paint – which is the reason I ended up with a black stripe, gray stripe and greige stripe…not white ombre, but neutral! Tip: {figured this out after the fact}, water down latex wall paint for better absorption.

DIY painted striped curtain panels

I used a sponge roller from the dollar store for each stripe. Tip: DO not use cheap dollar store sponge rollers. Invest a couple dollars in a better quality foam roller. My cheap sponge roller is part of the reason for a “suede” look…which we were okay with and ended up liking the look, but I also would have liked a more solid result. The faded look is pretty too and when time is an issue, it looks even better. 😉

I painted each stripe, let it dry a little, then hung each panel to dry more thoroughly.  So, with six curtain panels, it did take me a couple of days.

drying painted curtain

I wiped the vinyl tablecloth in between laying out each panel. (Pleasant time saving surprise: The paint on my vinyl drop cloth could be seen through the white curtain panels, meaning after the first one, I didn’t have to measure/mark each panel – I just lined it up on the vinyl drop cloth and taped where the previous curtains’ FrogTape lines showed through.)

how to paint striped curtain panels

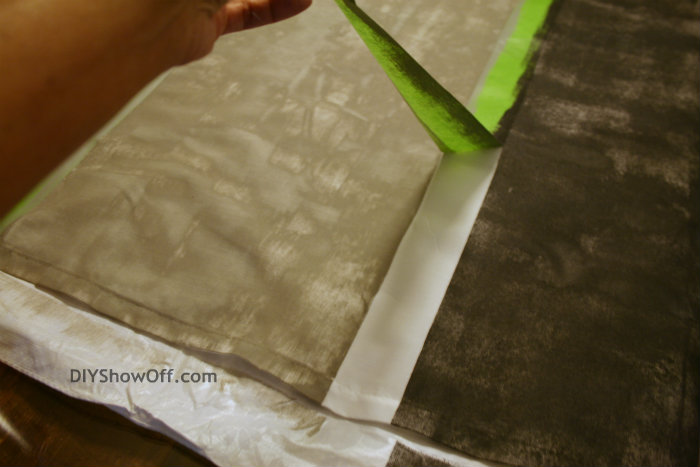
I immediately removed my FrogTape once painting was complete.

removing FrogTape from painted curtains

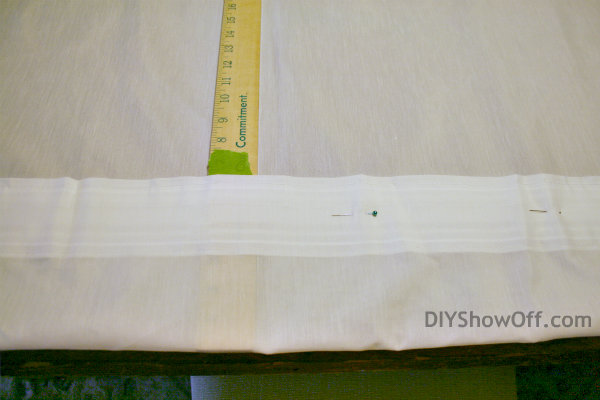
Once all of my panels were dry, I measure the length and cut from the top, adding 3 inches to create a rod pocket (cutting from the top or bottom means one of those needs hemmed and I found painting from the bottom up easier). I love using curtain rings, but again, 6 sets of curtain rings adds up, and this is a budget friendly makeover.

measuring and cutting curtain panels

cutting and measuring…

creating rod pocket

sewing a rod pocket

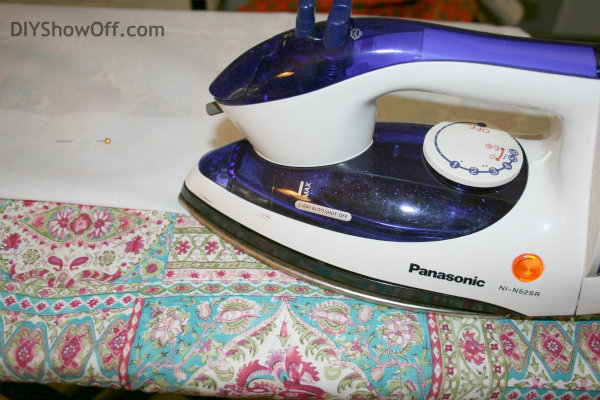
I creased the extra 3 inches with an iron,

ironing rod pocket

then folded about an inch under and ironed that.

creating and ironing rod pocket hem

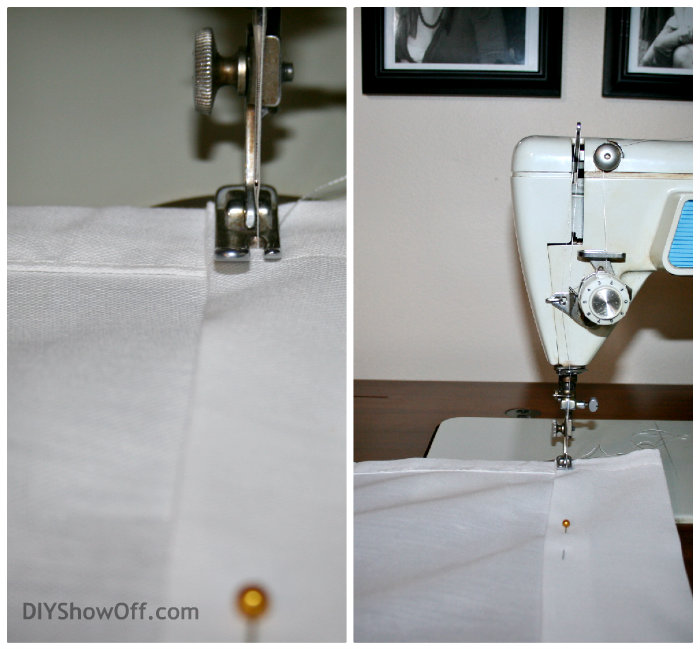
I sewed a straight line near the bottom of the ironed fold to create a rod pocket.

sewing rod pocket

***I’ll share what I did with the “top” piece of the curtain panels soon – cutting from the top left me with 6 valances, just needing a hem.

I gave each panel another quick iron over and now they’re hanging!

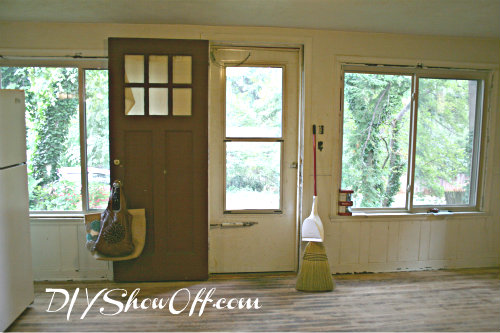
Before apartment makeover:

door before

Just a peek of the apartment windows before:

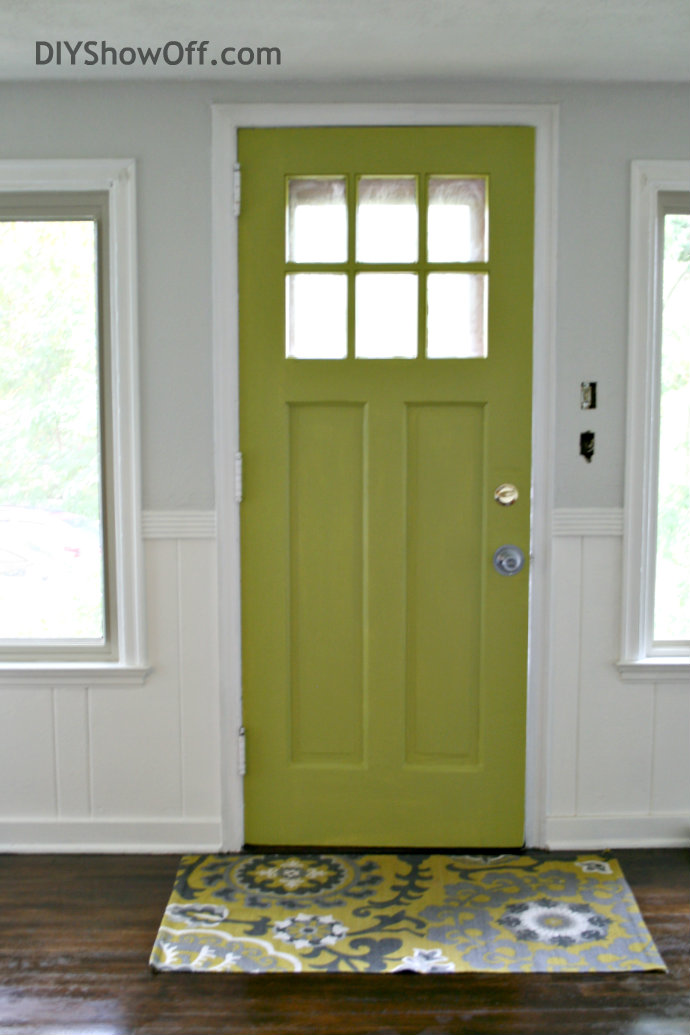
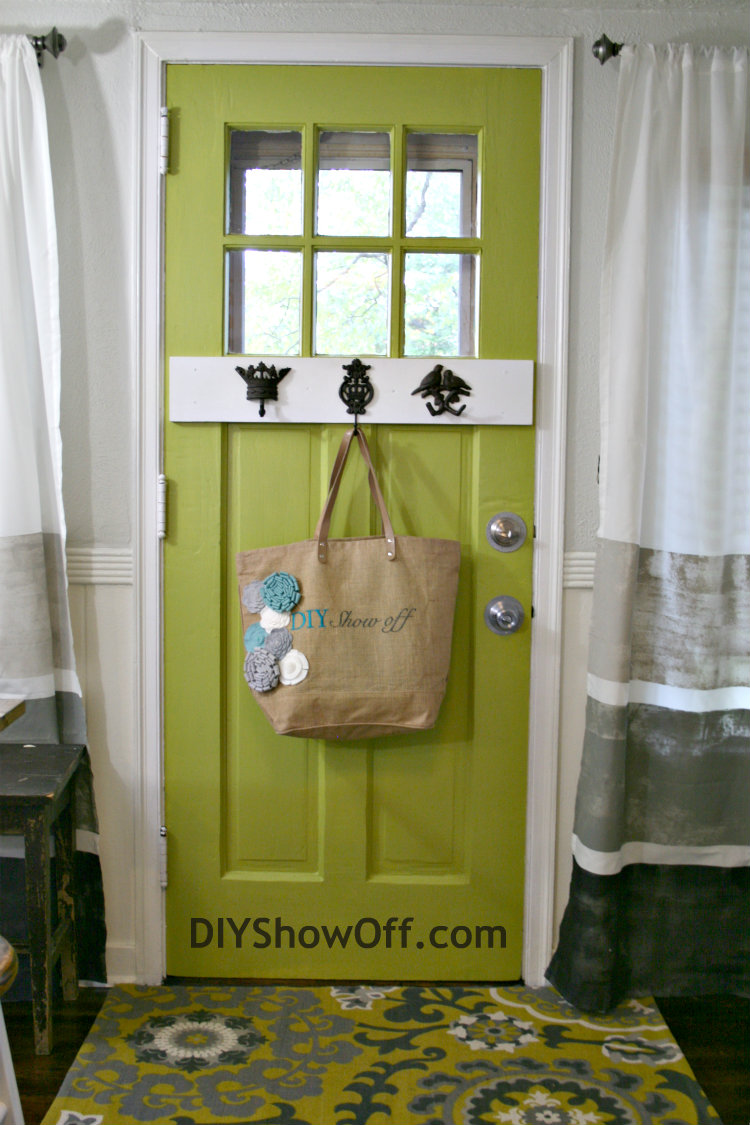
chartreuse door

Door paint color is Valspar Gilded Pesto (beautiful chartreuse!).

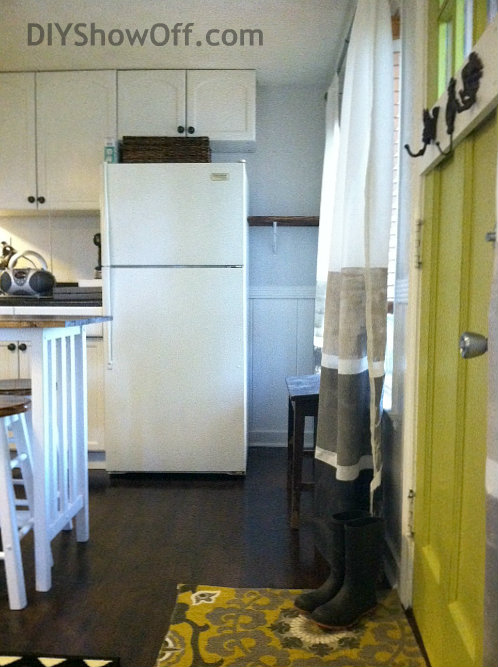
Sneak peek windows after:

DIY painted horizontal striped curtains

Side note: Since the tiny apartment doesn’t have an entry way or closet, I attached some coat hooks (Hobby Lobby) to a board and screwed it to the door – instant cute coat rack. DIY Show Off bag is from Nest of Posies.

painted curtain after

Whatdoyathink? It might make more sense when you see the rest of the apartment, eh? Patience, my friends. I know – not one of my strengths either. 😉

Note: I haven’t washed the curtains after painting, but I’m assuming all will be well – after all, the paint doesn’t wash out of my paint splattered DIY attire.

Update: More apartment details! We are still working on some finishing touches and last minute issues that have come up {the joys of DIY!}, so the reveal has been pushed back. However, there are a TON of DIY details and I’ll be sharing those over the next week or two {and while we’re on vacation}. We think it’s awesome and can’t wait to hear what you think! Little by little…we’ll work up to the reveal!

This is a sponsored post brought to you by FrogTape. The opinions are completely my own based on my own experience. 

FrogTape Blog Squad

Porch Floor Makeover ~ Home Repair Tutor

Good day, DIY’ers! Today I’m excited to introduce you to Jeff from

Home Repair Tutor blog

Like most of us DIY’ers, Jeff started working on home improvement projects on their home and rental properties in order to save money. He shares his knowledge and experiences with the hopes of helping others realize they can save time, money and DIY. I love that he shares his bloopers as well…a great “don’t do what I did” approach to learning.

Recently, Jeff researched the best products and ways to refinish a wooden porch floor and is sharing that secret here today!

Materials for stripping old paint (optional): 

  • Behr Stain & Finish Stripper
  • foam roller (One thing that makes reading enjoyable at Home Repair Tutor is that Jeff uses technical terms like “hot dog” roller! It throws you off for a minute while you giggle but you definitely know what he means!)
  • wire brush
  • tape/drop cloths to cover anything not being stripped (and to cover plants)

Materials for painting the porch:

  • 5 gallon bucket
  • 4 gallons of Restore paint (2 gallons will cover 100 square feet but you will need 2 coats)
  • paint stirrer
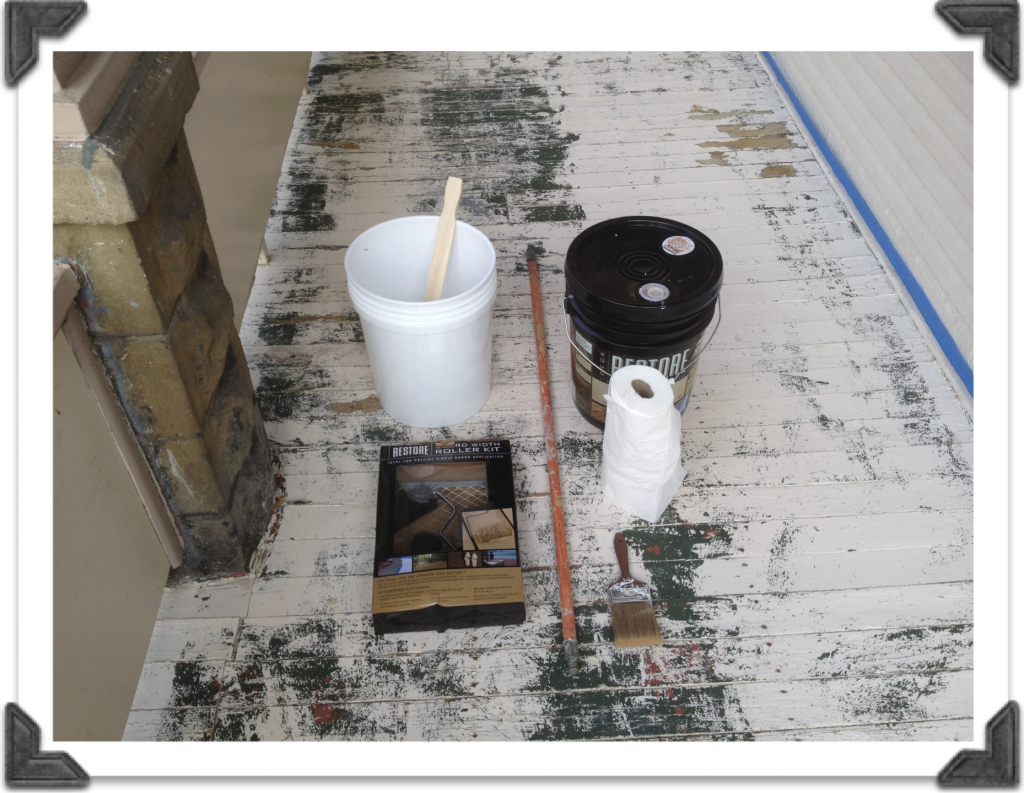
  • Restore paint roller kit that comes with a paint grid (some may say screen) for the 5 gallon bucket (Color shown below is Fieldstone)
  • 4 inch paint brush (cheapest available)
  • extension pole for paint roller (optional)
  • paper towels
  • painter’s tape/drop cloths to cover parts not being painted or to prevent splashing

Restore Paint materials

Tutorial:

How to strip a painted porch floor

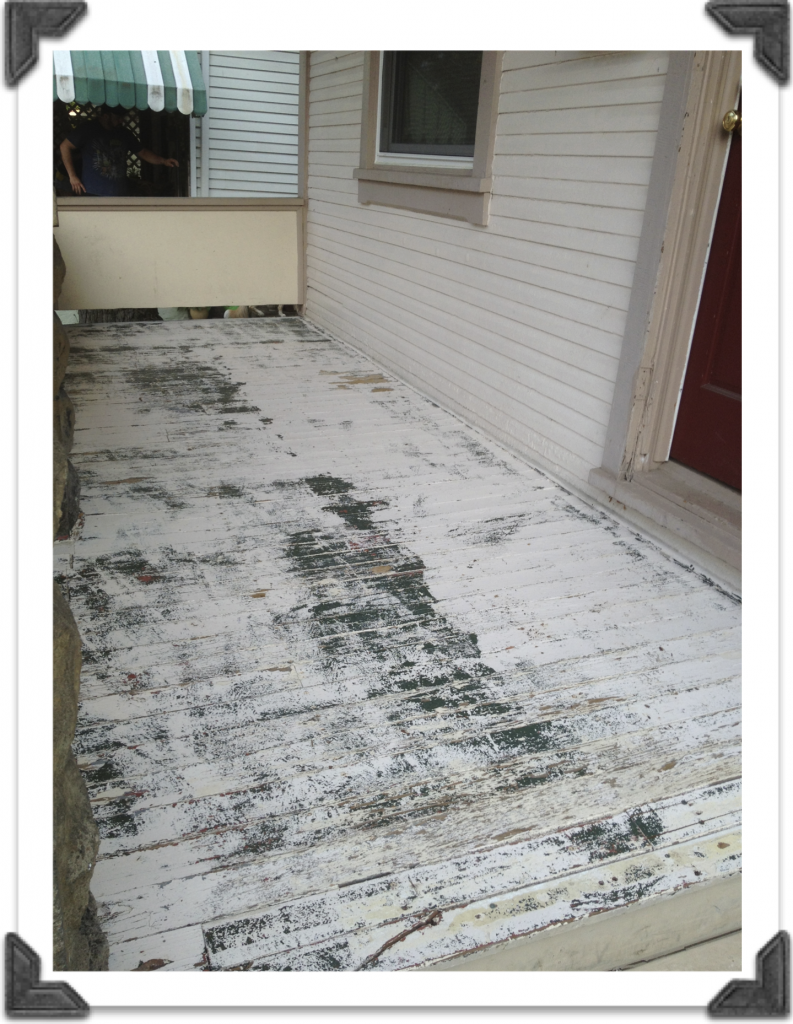
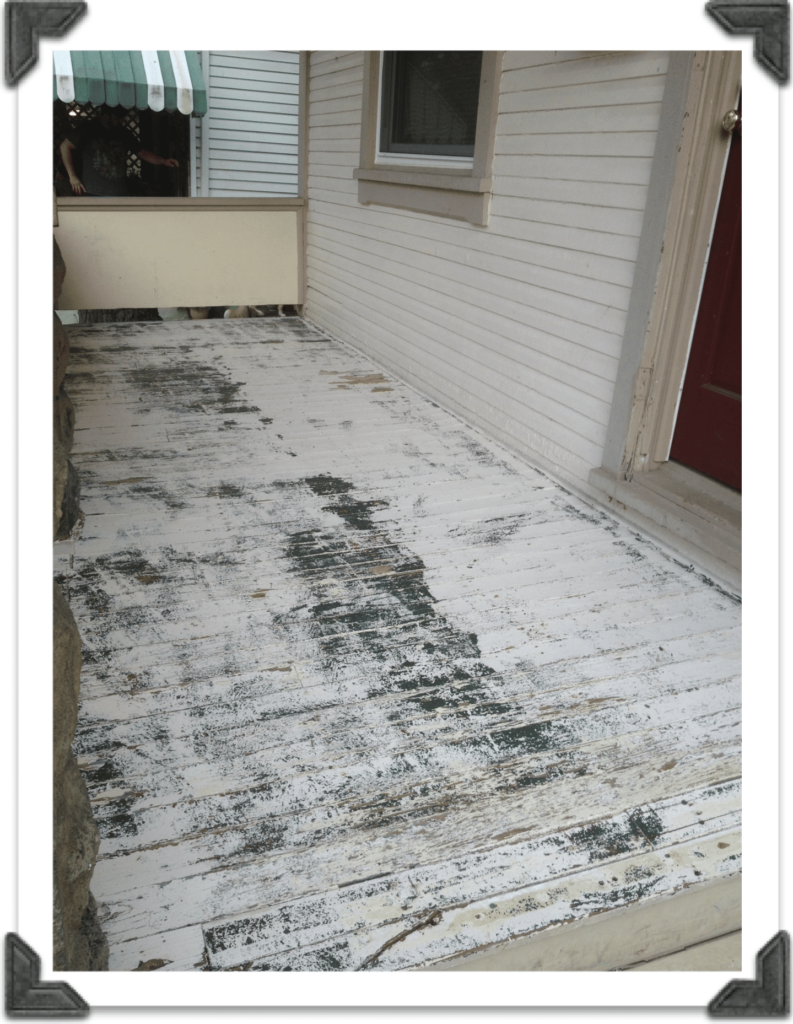
Jeff started the process with stripping away the old paint in order to achieve an even finish by rolling on the Behr Stain and Finish Remover with a foam roller. He worked in 3-4 rows of floor boards then waited 5-10 minutes before etching the boards with a wire brush. After finishing about 5 square feet of wood, he carefully used a hose to spray off the excess paint and repeated this process until the entire porch was done and let it dry overnight. The next day, this is how it looked:

paint stripped porch

How to painting a porch floor

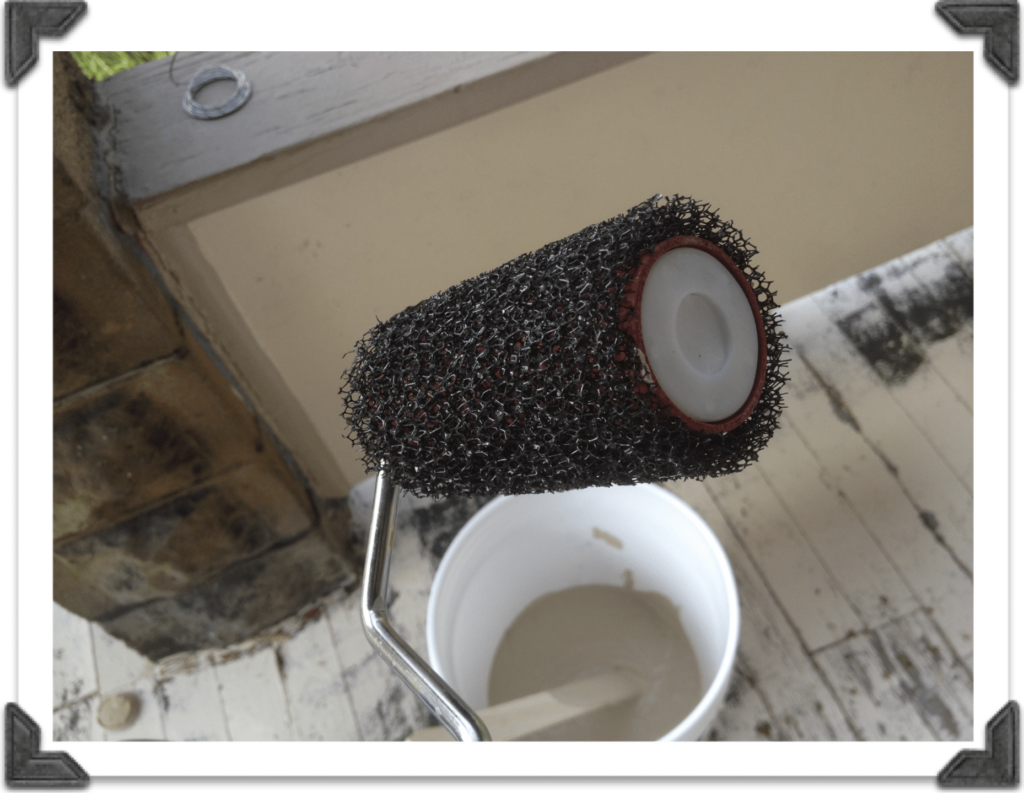
Pour about 1 gallon of Restore into the white 5 gallon bucket and stir with the wood stirrer to ensure an even consistency. Place the paint screen into the 5 gallon bucket then dip the Restore roller into the paint and move it back and forth on the grid to remove excess paint.The Restore paint roller covers are what provide the rough texture.

Restore Paint Roller Cover

Jeff’s technique for painting with Restore consisted of rolling the paint onto the floor boards with the roller in one direction, moving from right to left. He did cut in first using a 4 inch paint brush and painted the quarter round trim and any other areas that butted against support beams, etc. Moving on, he found that painting 4 to 5 boards with the paint roller then smoothing them with the paint brush worked best. He overlapped the paint brush strokes by one half the width of the paint brush to ensure a consistent & smooth finish. You can see Jeff’s Restore Project video for a better visual explanation.

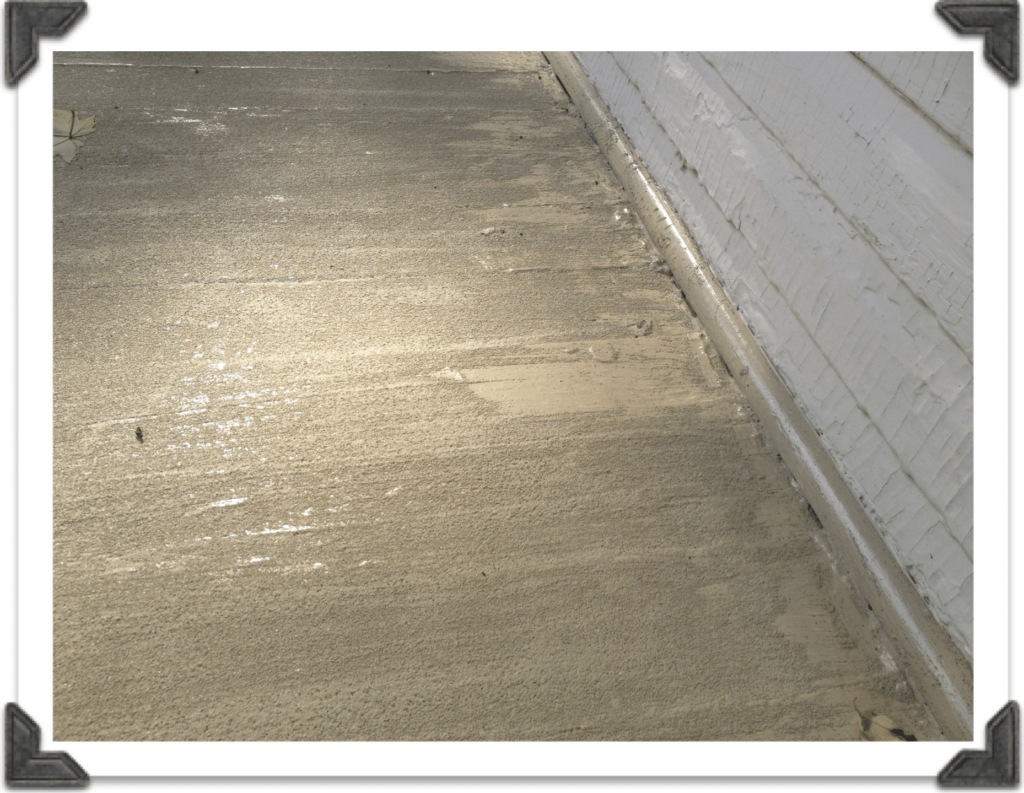
Jeff states that you can choose to leave the rough texture created by the Restore roller or smooth it out using the brush like he did. He chose the smoother finish over the concern that dirt and grime may get trapped in the textured surface.

The final feel of the Restore paint is grainy and it definitely did an awesome job of making the wood boards more even. There is absolutely no splintering poking through the two coats (recommended by the manufacturer and Jeff).

After one coat:

First Coat of Restore

After letting the paint dry for 24 hours, apply a second coat.

After two coats of Restore paint…

Restore After Second Coat

Once again, here’s the before:

Paint Stripped PorchA freshly painted, slip resistant surface after:

Restore After Second Coat 2

Tips:

  • This does seal the spaces between the boards and rain water will puddle. Best used on porches with a slight downward pitch.
  • Remove painter’s tape as you finish sections. Otherwise, it may be permanently stuck if painted and allowed to dry.

Project cost: $150 (and lasting more than the usual two year period of other finished outdoor areas)

Time involved: Approximately 7 hours (*includes paint stripping time and applying two coats).

Pretty awesome, right? It reminds me of our brushed concrete patio. The Restore paint comes in a variety of colors and is a great alternative to staining. Love the texture. Now…if only I had a outdoor wooden area to paint, this would be my preference. With a stencil involved in those steps. haha!
~*~*~*~

Thanks to Jeff for sharing his helpful porch painting tutorial and Restore paint review! See more of his projects at Home Repair Tutor. (I spy some bathroom tiling tips that I’ve bookmarked for an upcoming project).

I have to tell you that I’m always excited to make new DIY friends around the world wide web. I recently learned that Jeff is local geographically to us. Woo hoo! Another Steeler fan (well, for Mr. DIY since I’m not really into football other than being in the same room while the game is on). But the best part?! If I hit a snag with the apartment renovation, guess who will be getting a call? Be careful when you say “If I was local, I’d totally be helping you!” You just never know who might live next door!

Peacock Blue Painted/Glazed Table Tutorial

Hello! I am Amanda and I blog at mommy is coocoo.
~ My blog is all about fun! ~

mommy is coo coo

Whether you are laughing about the realities of marriage and motherhood or being inspired to make your everyday surroundings lovely, regardless of your budget.

I am especially honored to be doing a guest post for the DIY Show Off.  Roeshel was the first blogger to ever feature this crazy momma and we’ve been blogging friends ever since.
Today I’d like to share a simple glazing tutorial with you. You can see how I turned a $60 craigslist table into this peacock blue masterpiece.
 
I found a table on Craigslist (and Mr. coocoo went and purchased the table with his hard earned money, on his day off.)  I was inspired by several pretty round tables (see those here).
My favorite inspiration table was blue so, out came my peacock blue paint, glaze, and lacquer and my cheap table became the focal point of my family eating area.
How to glaze painted furniture coocoo momma style:
{Before I get started, I would like to say you can do it too! It’s not that difficult, I promise.}
    • I bought a gallon of peacock blue paint from Wal-Mart (cost about $13).
    • I lightly sanded the top of my table with my hand held sander.
    • (and then) I just started painting (see it’s really not that difficult). Paint the entire table and let all the paint dry.
  • Now it’s time to glaze. I bought glaze from Lowe’s or Home Depot (I can’t remember which one). If you aren’t sure what to do, go to the paint department find an employee and tell them you need some glaze. Viola! You will walk out (for about $25 bucks) with something like this.
  • Mix the glaze with whatever paint color you want to add to your already painted furniture. Does this seem scary? It’s not. I chose black paint but you could use whatever color you like.
  • I mixed equal parts glaze and black paint. If this is your first time to glaze don’t freak out, you may want to start out with more glaze and less paint. You can always add more paint to your glaze/paint mixture.
  • Make sure your table is clean (wipe all the dust off from when you sanded).
  • Start glazing! It’s just like regular painting now (clearly, you don’t need a new paint brush). I like to use long horizontal paint strokes. Don’t panic if you get too much paint in one spot! Keep your brush moving. You are going to love it!
  • After your first coat of glaze dries decide if you want to add more glaze (I did because I wanted my table to be a little bit darker. It’s all about preference).
  • Finally, I added this protective finish (bought at Wal-Mart) to the table (This step is a lot of work but it is worth it! Follow the instructions on the can).
The coocoo kitchen table! We love it!
I never had a round table growing up. Did you?

I really enjoy how close we are now when we are eating.  Since there is no chance I am going to be able to eat a meal without helping (at least) three other people, the round table makes it much easier for me to serve, cut food, wash hands and faces, and give Scary Mommy looks when the coocoo kids aren’t eating their food.
Thank you so much for allowing me to share today Roeshel!If you’d like to see more of my projects or meet the whole coocoo family head on over to mommy is coocoo.
DIY Show Off - FacebookDIY Show Off - TwitterDIY Show Off - PinterestDIY Show Off - Feed