DIY & Show Off: Fabulous Furniture Highlights

January was an awesome month for rescuing furniture. Check out these favorites from January 2014 That DIY Party links: 

That DIY Party Furniture Highlights January 2014

I have a cute copper desk lamp. It’s in the closet. All I’m missing is this gorgeous DIY Ikea desk hack at The Gathered Home. I love the copper detail paired with that luscious rustic plank top, Brynne!

DIY Ikea desk hack @TheGatheredHome

Furniture surgery. Melissa brought this old girl back to life. See more details on restoring a Queen Anne settee at The Whimsical Wife

restoring queen anne settee @TheWhimsicalWife

Rescued furniture. One of my favorites. And this desk and chair re-do at Brooke Eva is so, so, SO pretty!

desk and chair makeover @BrookeEva

 Wow! You won’t believe this DIY Ikea furniture hack at Songbird Blog. Marianne, you did an amazing job giving that plain old tv stand a beautiful new look!

DIY Ikea furniture hack @SongbirdBlog

Ikea hacks are so much fun. Ready for another one? Aniko’s DIY Ikea hack headboard at Place of My Taste is stunning! What a happy place to fall asleep and to wake up every day.

Ikea headboard hack @PlaceofMyTaste

Liz has invited us for coffee or tea. She’s all ready for our visit with her fully stocked coffee & tea bar at Create…awesome dresser re-do!

coffee bar @CreatedwithLove

Remember to pin from the original source. See more DIY highlights on That DIY Party Pinterest Board for easy re-pinning…

thatdiyparty.pinboard

Have a DIY project to share? Well head on over to “show off” your DIY…

That DIY Party

DIY Project Parade Highlights – showing off some awesome DIY friends.

Thanks for stopping by and joining the party on a weekly basis. I can’t tell you how much it means to me with all of the amazing parties going on. I hope that the DIY Project Parade is an event which introduces you to new friends and a place to find the latest DIY inspiration from some awesome DIY talent.

I welcome every single guest and I’m so glad you take the time to show up, link your projects or visit our friends sharing their creativity! Here are a few highlights you may have missed…

FAVORITE ROOM REVEALS

Cassie from Primitive & Proper shares a couple of sweet updates. One on a special little girl, Cora, who could use our continued thoughts and prayers and another on her beautiful living room updates.

living room updates - Primitive & Proper

Laura from Top This Top That shares her super fun media room filled with so many sweet DIY accents! Imagine having a movie theater in your home?! (Maybe you do, but I don’t … yet and Laura’s is such great inspiration!)

DIY media room

Bridgette from Osie Moats shares a sneak peak of her beautiful cottage dining room. Dreamy!

Missy from Lookie What I Did has one gorgeous laundry room reveal! I’d share every image but I think it’s best if you visit her for more pictures, storage ideas and links to several awesome DIY details. Wow!

laundry room reveal - Lookie What I Did

FAVORITE DIY HOME DECOR

I love when creative, easy DIY makes a HUGE statement, especially when it turns out to look like something from a gallery. That’s what you’ll find this past week from Jessica at Stay at Home-ista: linen and paper DIY art! Wow!

DIY linen and paper wall art - Stay at Home-ista

Have a box of photos NOT in an album? Or need a fun creative inexpensive way to create beautiful personalized wall art? Love wall galleries but don’t know where to start? Did you see this super cute snapshot wall gallery over at It’s Two A.M.? Loooove the fun colors and mix of pretty frames…

snapshot wall gallery

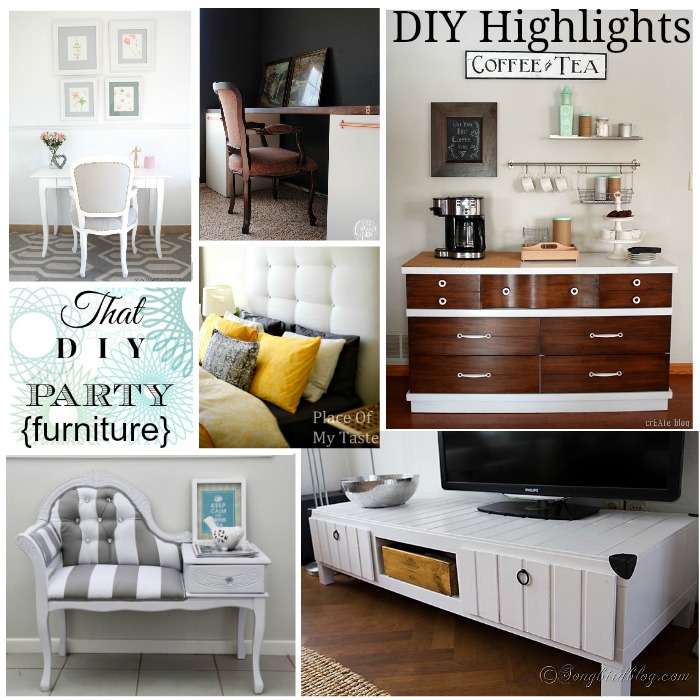
FAVORITE FAB DIY FURNITURE

Jen from The House of Wood is soooo good at building furniture. I love her most recent: how to build the perfect end table. Love the shape!

DIY end table - House of Wood

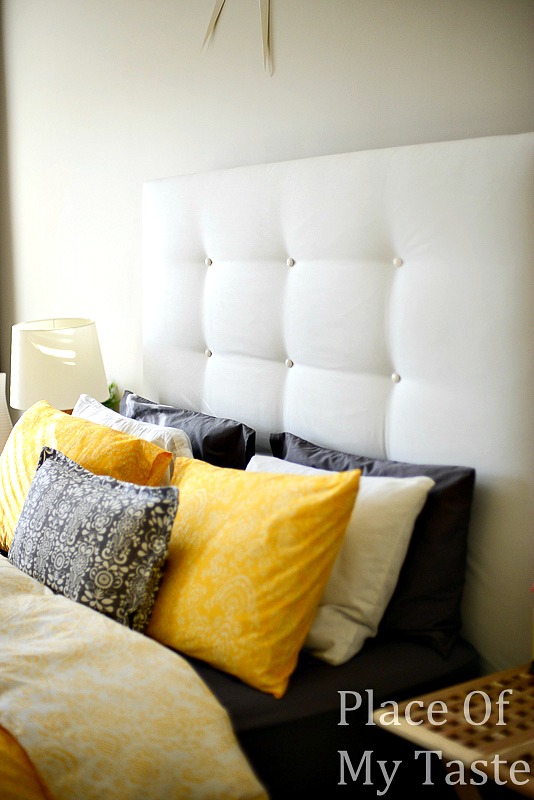
I’m including this under “furniture” because that’s what I consider a headboard, don’t you? How fabulous is this picture frame headboard from Remodelando la Casa? Cristina shares how to make a this unique picture frame headboard.

picture frame headboard at Remodelando la Casa

FAVORITE CRAFTS

Kelly at Live.Laugh.Rowe always has the cutest projects and this past week was no exception when Kelly shared her painted drop cloth soap wraps. Counting down the days to filling stockings? This is a sweet idea!

DIY soap wraps - Live.Laugh.Rowe

So, big round of applause for these talented ladies! Better than applause, they’d love for you to stop by and leave a comment on original posts and pin from there! And I’d feature every link if I could but since that would be the longest blog post in history, visit last week’s DIY Project Parade to see so much more inspiring creative DIY. And if you were featured, don’t forget to grab your button. 🙂

DIY Show Off
<div align="center"><a href="https://diyshowoff.com" title="DIY Show Off"><img src="https://i899.photobucket.com/albums/ac195/Roeshel/DIYprojectparadeFEATUREDMEBUTTON.png" alt="DIY Show Off" style="border:none;" /></a></div>

Have I told you lately how much I love it when you stop by? With traveling to the apartment for renovating, I feel like I miss so much…not being able to sit in front of the computer. I can’t wait to be done and take a few days to get caught up. Thanks for showing up today and showing off your DIY. I hope to see you again at the DIY Project Parade!

DIY Show Off

Peacock Blue Painted/Glazed Table Tutorial

Hello! I am Amanda and I blog at mommy is coocoo.
~ My blog is all about fun! ~

mommy is coo coo

Whether you are laughing about the realities of marriage and motherhood or being inspired to make your everyday surroundings lovely, regardless of your budget.

I am especially honored to be doing a guest post for the DIY Show Off.  Roeshel was the first blogger to ever feature this crazy momma and we’ve been blogging friends ever since.
Today I’d like to share a simple glazing tutorial with you. You can see how I turned a $60 craigslist table into this peacock blue masterpiece.
 
I found a table on Craigslist (and Mr. coocoo went and purchased the table with his hard earned money, on his day off.)  I was inspired by several pretty round tables (see those here).
My favorite inspiration table was blue so, out came my peacock blue paint, glaze, and lacquer and my cheap table became the focal point of my family eating area.
How to glaze painted furniture coocoo momma style:
{Before I get started, I would like to say you can do it too! It’s not that difficult, I promise.}
    • I bought a gallon of peacock blue paint from Wal-Mart (cost about $13).
    • I lightly sanded the top of my table with my hand held sander.
    • (and then) I just started painting (see it’s really not that difficult). Paint the entire table and let all the paint dry.
  • Now it’s time to glaze. I bought glaze from Lowe’s or Home Depot (I can’t remember which one). If you aren’t sure what to do, go to the paint department find an employee and tell them you need some glaze. Viola! You will walk out (for about $25 bucks) with something like this.
  • Mix the glaze with whatever paint color you want to add to your already painted furniture. Does this seem scary? It’s not. I chose black paint but you could use whatever color you like.
  • I mixed equal parts glaze and black paint. If this is your first time to glaze don’t freak out, you may want to start out with more glaze and less paint. You can always add more paint to your glaze/paint mixture.
  • Make sure your table is clean (wipe all the dust off from when you sanded).
  • Start glazing! It’s just like regular painting now (clearly, you don’t need a new paint brush). I like to use long horizontal paint strokes. Don’t panic if you get too much paint in one spot! Keep your brush moving. You are going to love it!
  • After your first coat of glaze dries decide if you want to add more glaze (I did because I wanted my table to be a little bit darker. It’s all about preference).
  • Finally, I added this protective finish (bought at Wal-Mart) to the table (This step is a lot of work but it is worth it! Follow the instructions on the can).
The coocoo kitchen table! We love it!
I never had a round table growing up. Did you?

I really enjoy how close we are now when we are eating.  Since there is no chance I am going to be able to eat a meal without helping (at least) three other people, the round table makes it much easier for me to serve, cut food, wash hands and faces, and give Scary Mommy looks when the coocoo kids aren’t eating their food.
Thank you so much for allowing me to share today Roeshel!If you’d like to see more of my projects or meet the whole coocoo family head on over to mommy is coocoo.
DIY Show Off - FacebookDIY Show Off - TwitterDIY Show Off - PinterestDIY Show Off - Feed