DIY Sleepy Time Cream Recipe

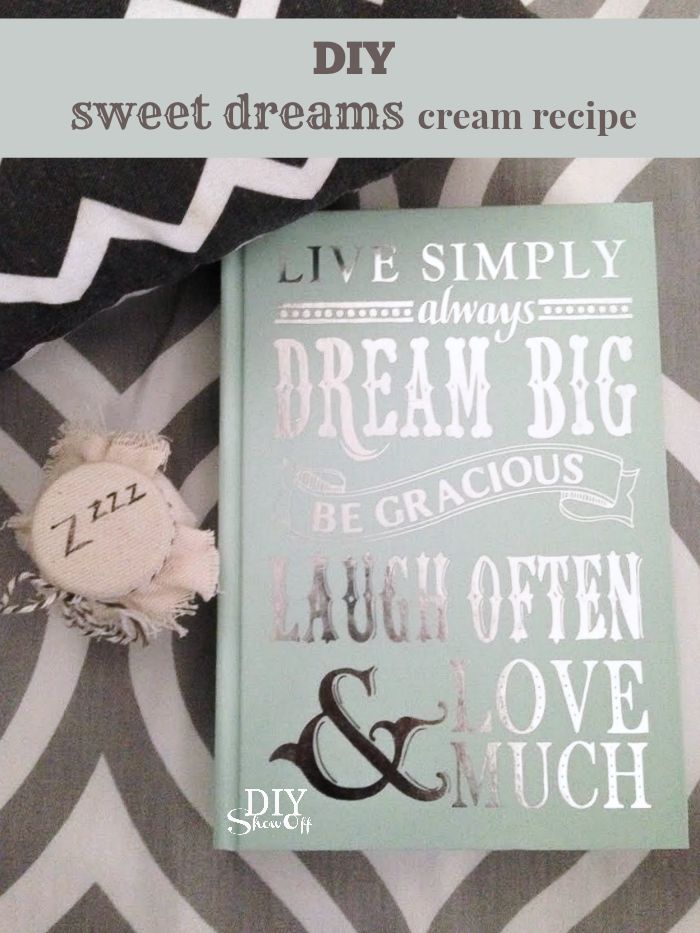
Sometimes there’s nothing better than a good night’s sleep. It sets the stage for a great start to an amazing day! I recently made up some DIY recipes using essential oils for gifts and this is one of my favorites. Toss in a small pillow and journal to create a sweet gift set. EVERYONE needs a good night’s rest so it’s a one size fits all kind of gift. 

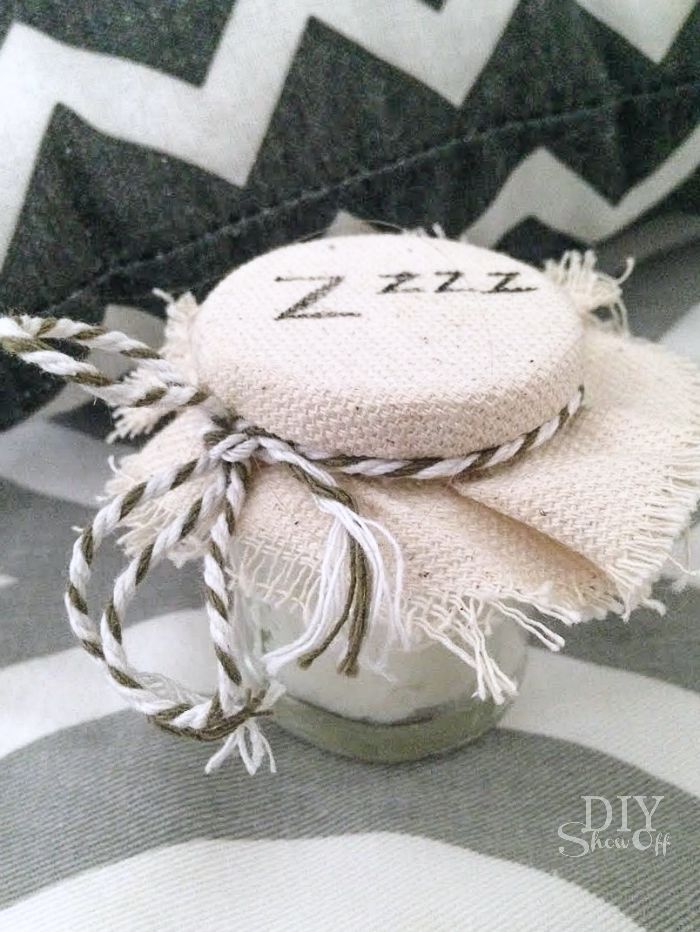
DIY sleepy time gift idea / sweet dreams cream @diyshowoff #youngliving #essential oils

DIY Sweet Dreams Cream Recipe

DIY sleepy time gift idea / sweet dreams cream @diyshowoff #youngliving #essential oils

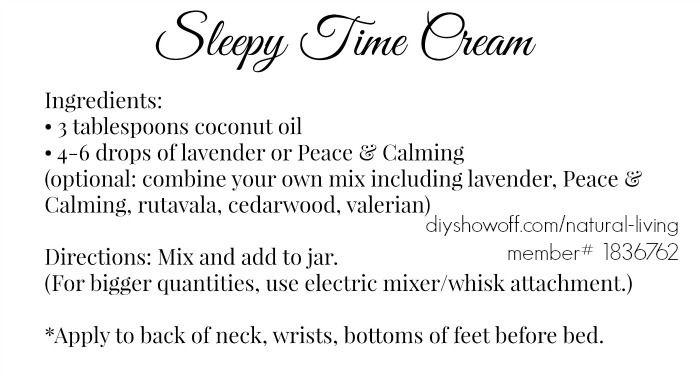
ingredients:

  • 4-6 drops of essential oil per
  • 3 tablespoons of coconut oil
  • small jar with lid (I got mine in the wedding favor aisle at Michaels) 
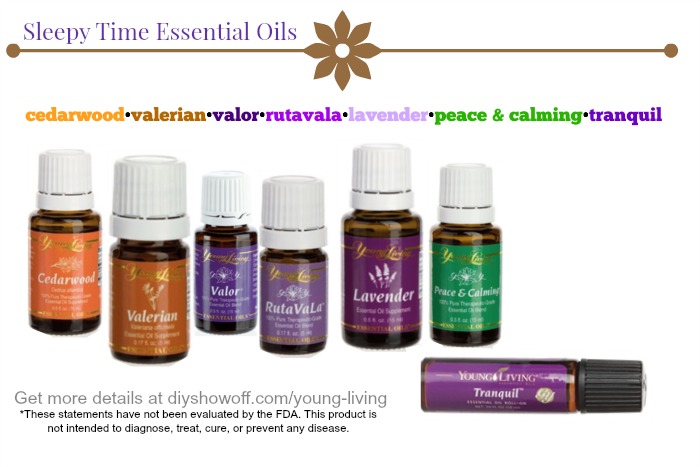
  • essential oil suggestions: Lavender, Cedarwood, RutaVaLa, Tranquil, Peace & Calming, Valerian, SleepyIze. (Best scents are lavender and Peace & Calming.)

directions:

Mix and add to jar. For larger quantities use an electric mixer with a whisk attachment. 

DIY sleepy time gift idea / sweet dreams cream @diyshowoff #youngliving #essential oils


DIY sleepy time gift idea / sweet dreams cream @diyshowoff #youngliving #essential oils

DIY sleepy time gift idea / sweet dreams cream @diyshowoff #youngliving #essential oils


printable recipe:

Young Living essential oils Make & Take Holiday Open House ideas @diyshowoff

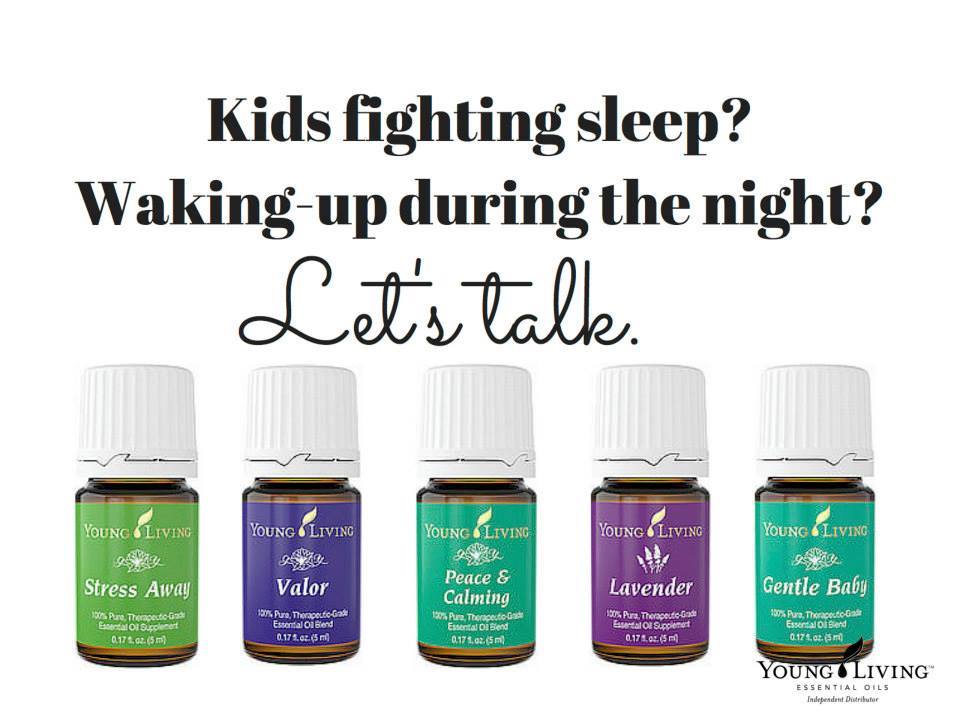
kids fighting sleep? Let's talk! @diyshowoff

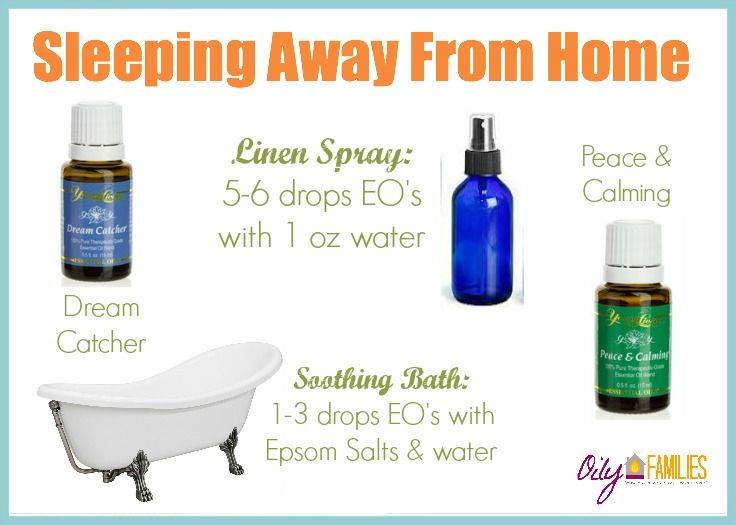
Sleeping away from Home

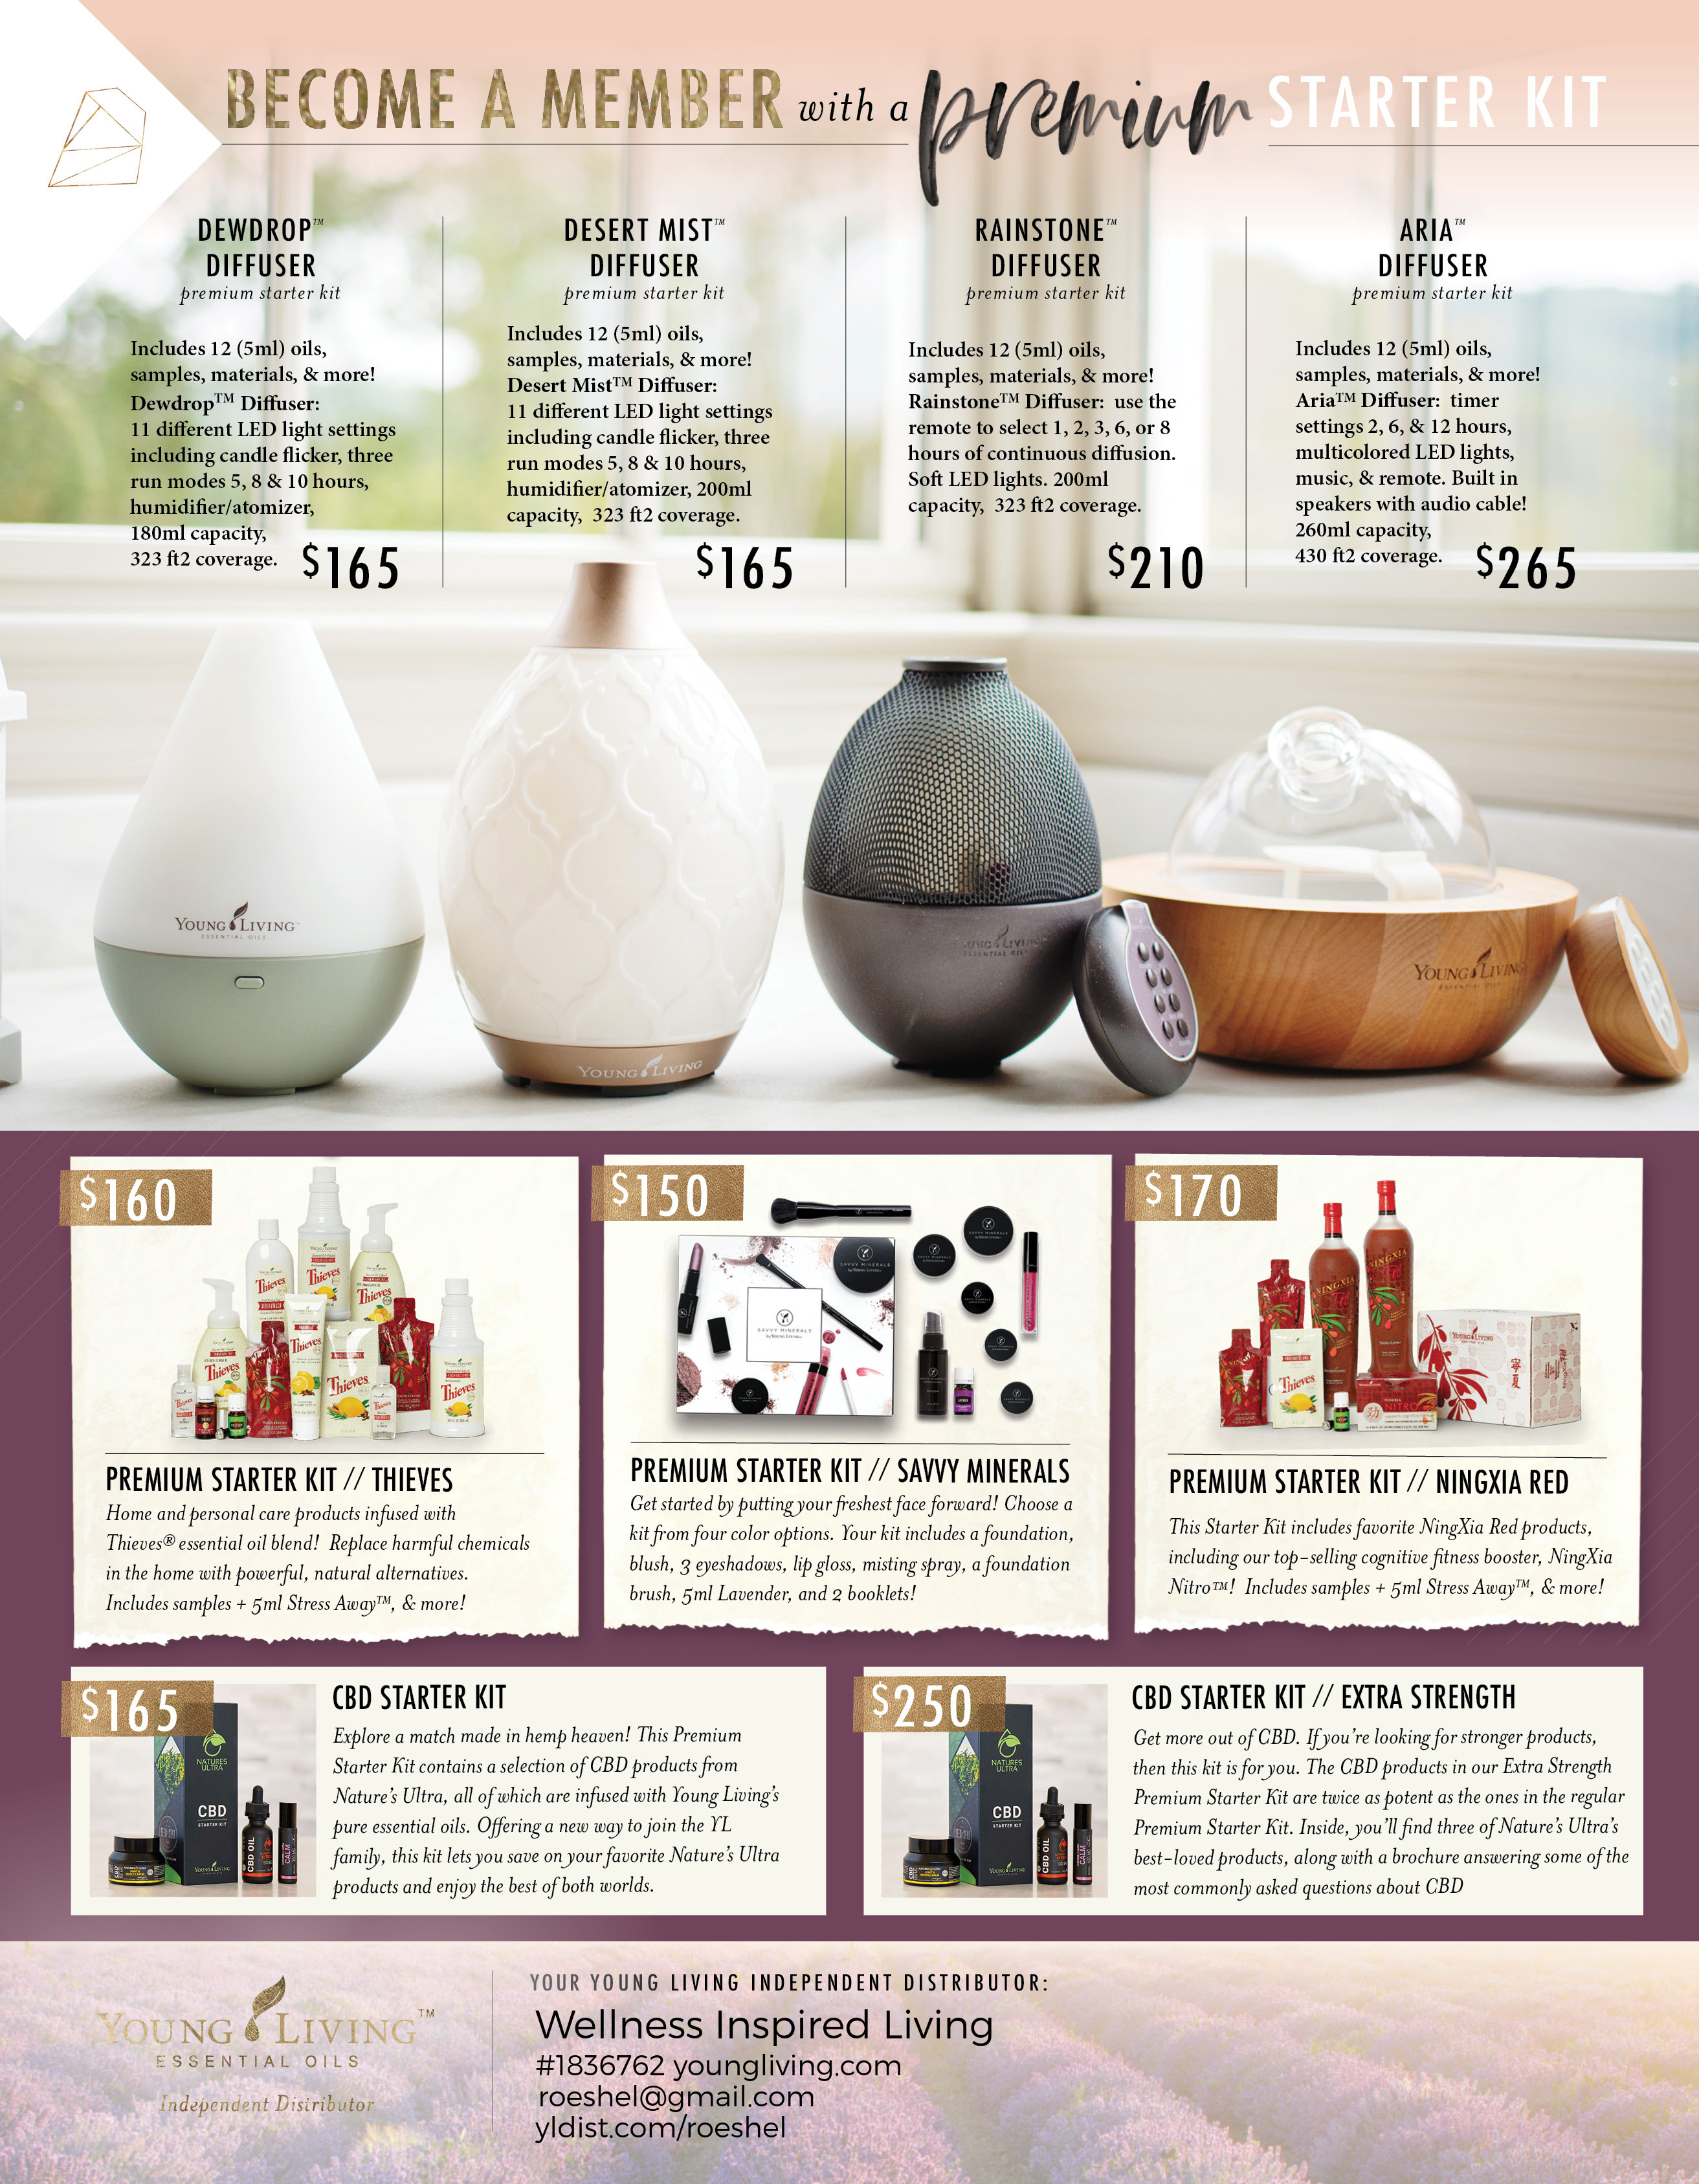
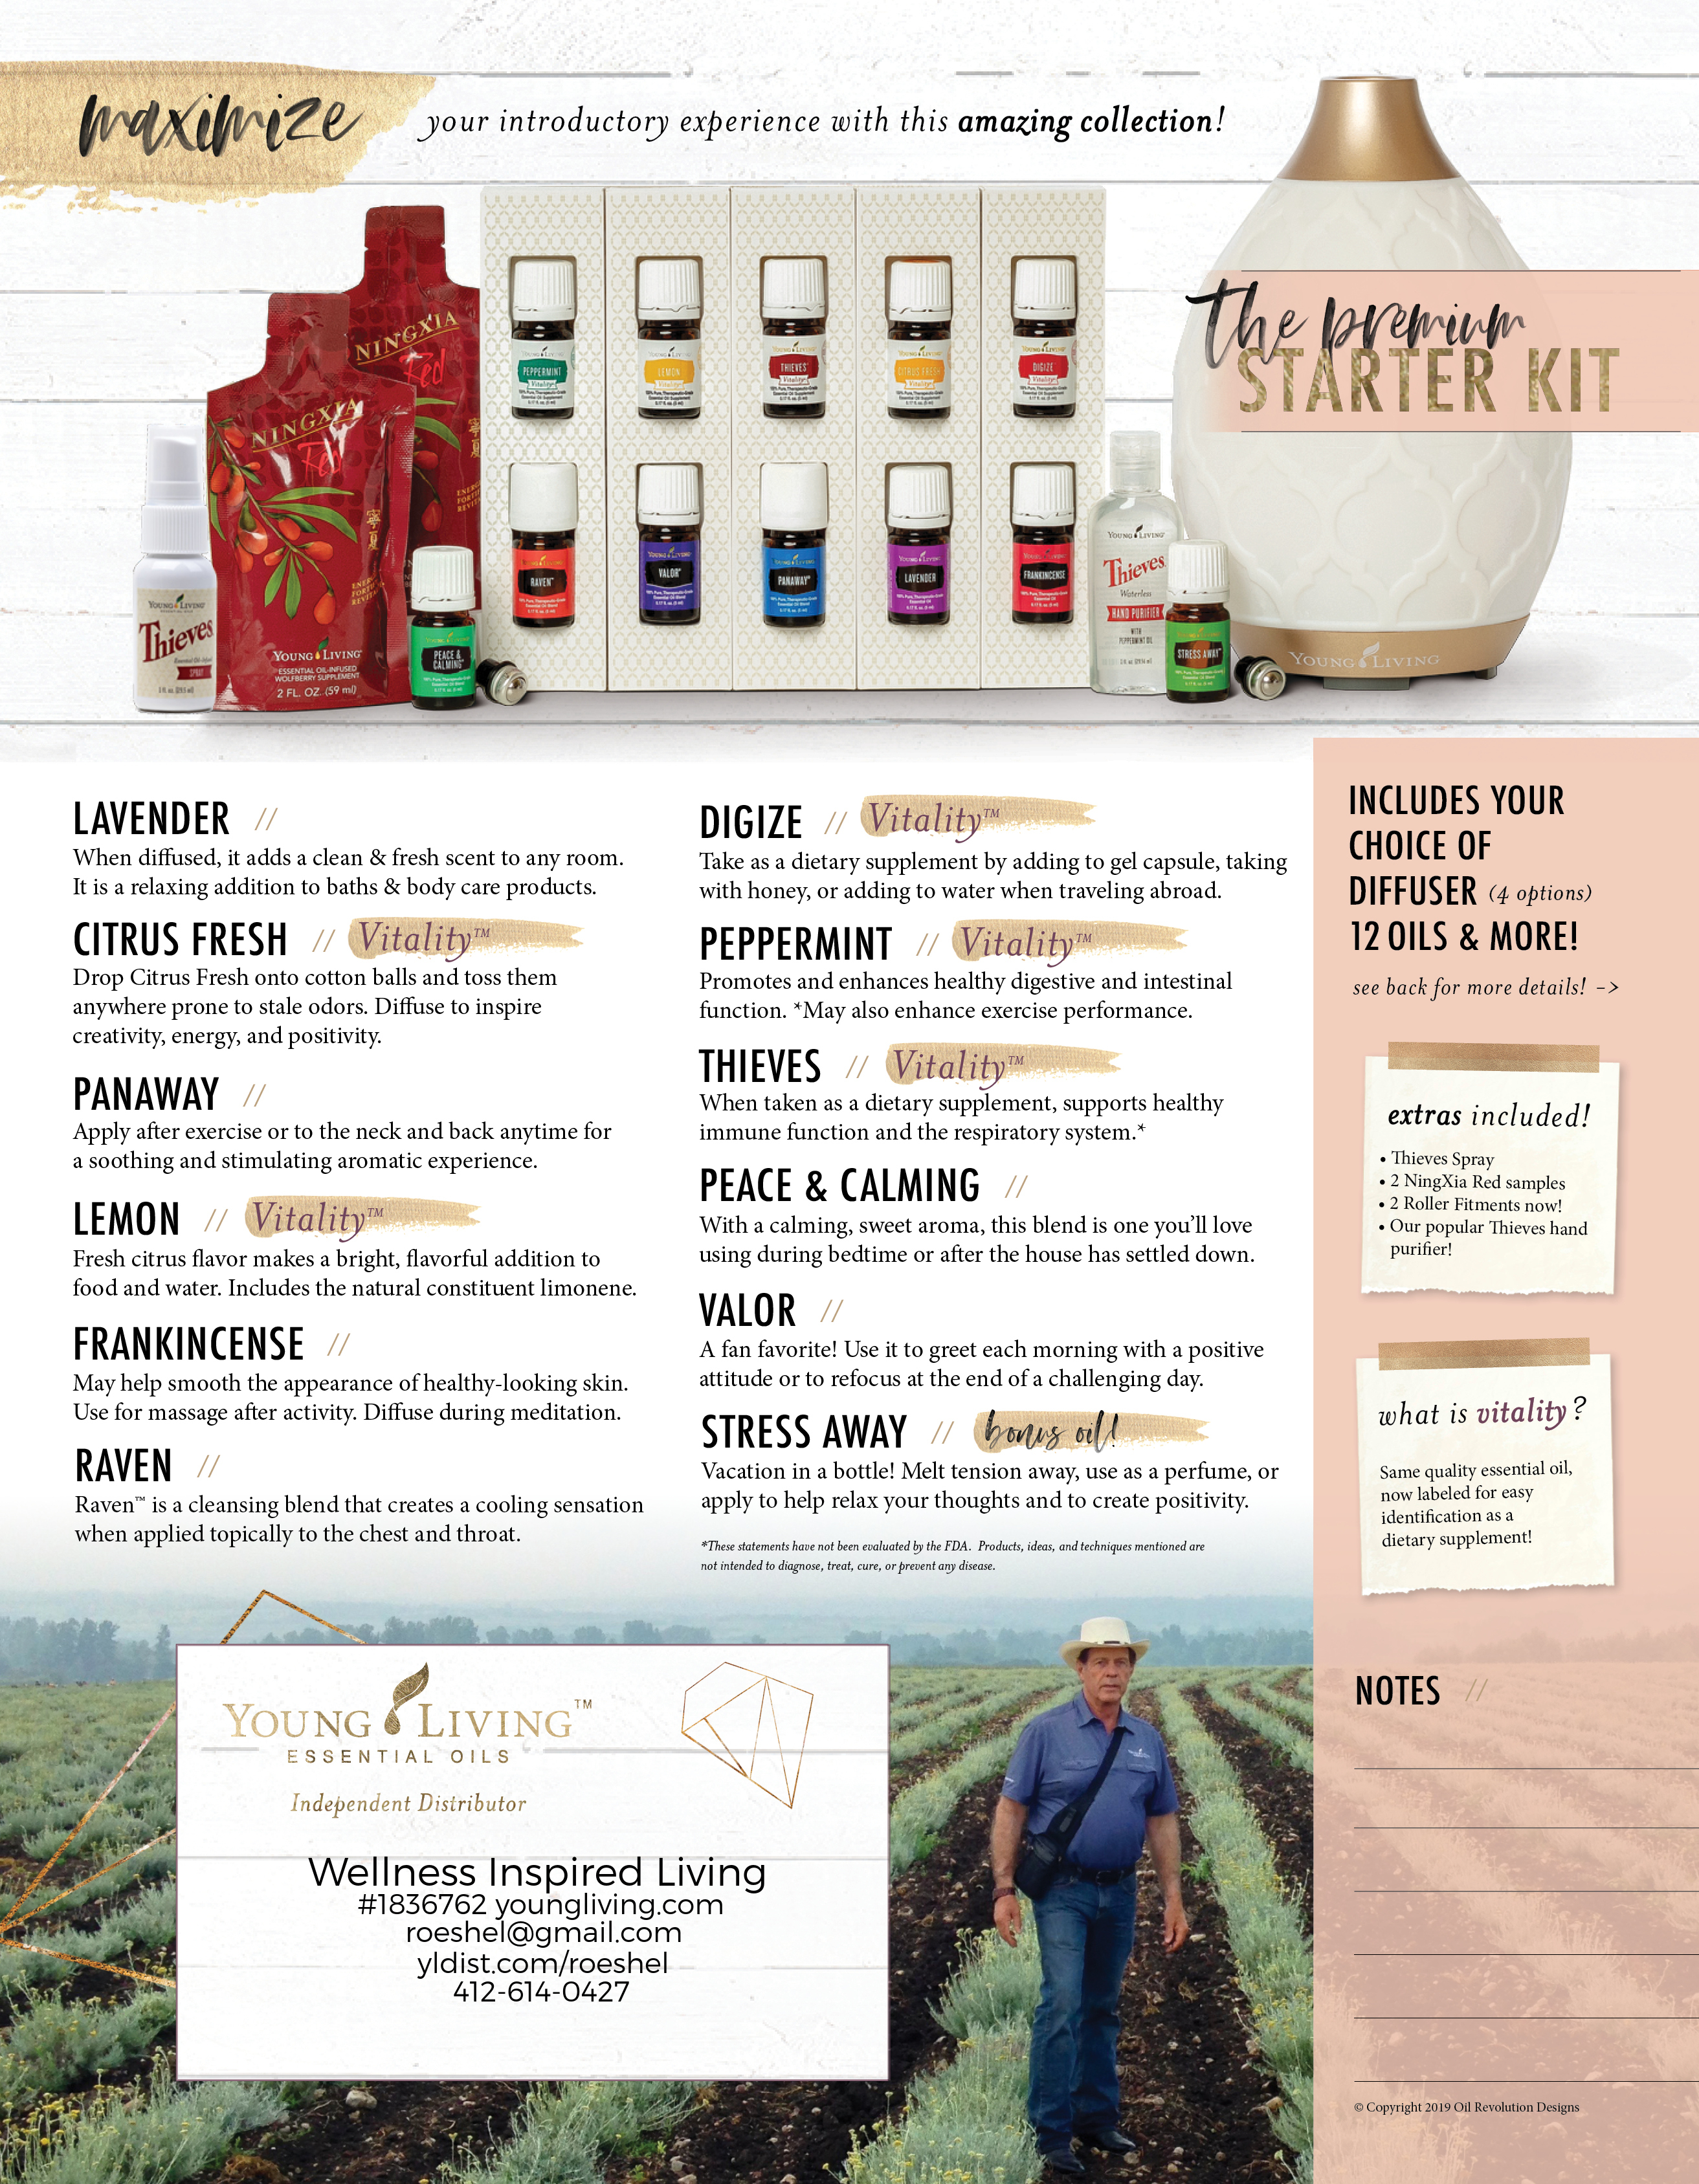
I only recommend Young Living essential oils. Want to learn more? Visit my Young Living Essential Oils page for details!  And take the steps towards a better night’s sleep with the premium starter kit. Get it HERE!

Young Living at diyshowoff.com


related:

Young Living sleepy time essential oils @diyshowoff #1836762


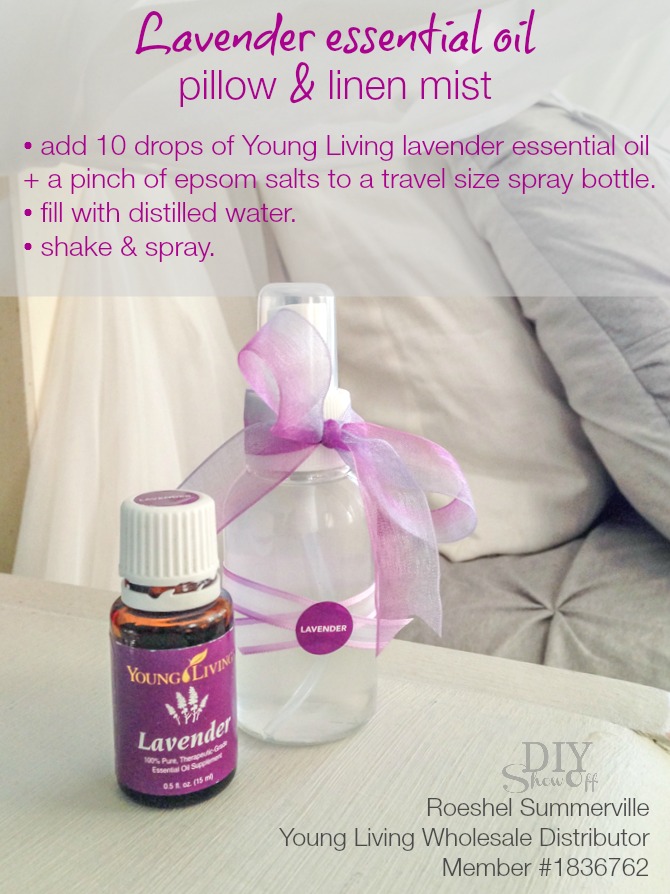
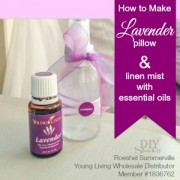
lavender pillow and linen spray @diyshowoff #oilyfamilies

Learn more about Young Living essential oils, my story and join me in creating a healthy chemical free home HERE. AND! Get the DIYShowOff welcome bundle for free from me personally! Extra gifts, loads of support. If there is one thing I regret, it’s waiting as long as I did to jump on board. It’s worth the investment as it’s motivated us to truly make healthier choices, sparking a new healthy lifestyle. What are you waiting for? 

diyshowoff young living essential oils member#1836762

Easy DIY Personalized Easter Basket Liner

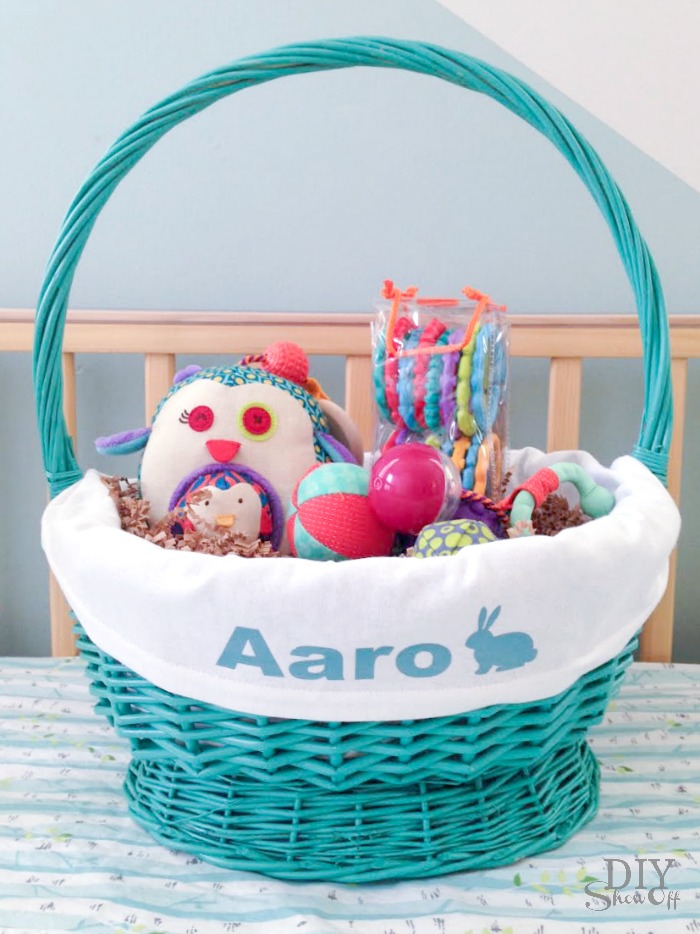
Happy Spring! With a new grand-baby in the family, I can’t help but get all giddy about making up an Easter basket this year. As you know, I love to personalize gifts and with just a t-shirt and a DIY iron-on vinyl, this liner is super easy to make! 

DIY personalized Easter basket liner tutorial @diyshowoff

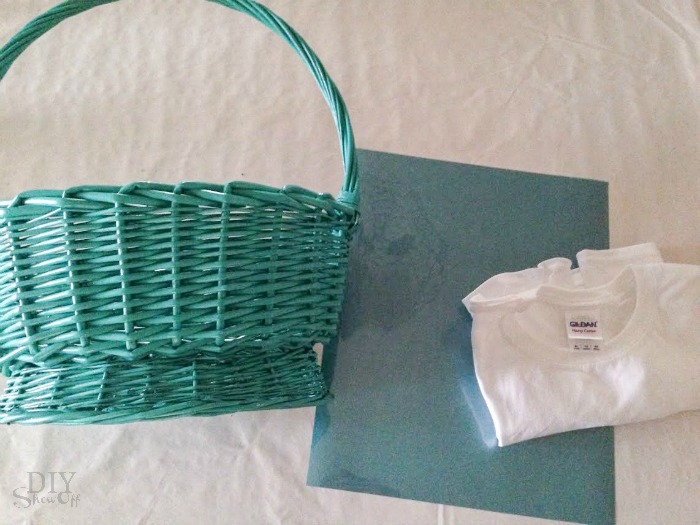
What I used:

personalized Easter basket liner @diyshowoff

What you’ll need: sewing machine, scissors, straight edge, computer/vinyl cutter, iron. 

What I did:

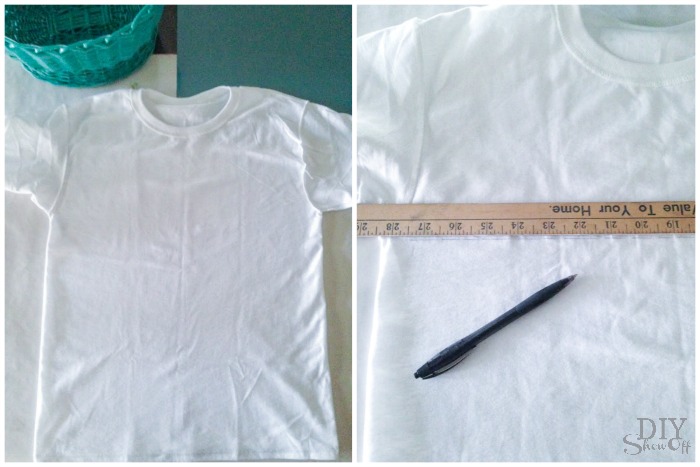
Lay inside out t-shirt flat and using a straight edge, draw a line beneath the t-shirt arms. This is the sewing guide…simply a straight line. 

personalized Easter basket liner @diyshowoff

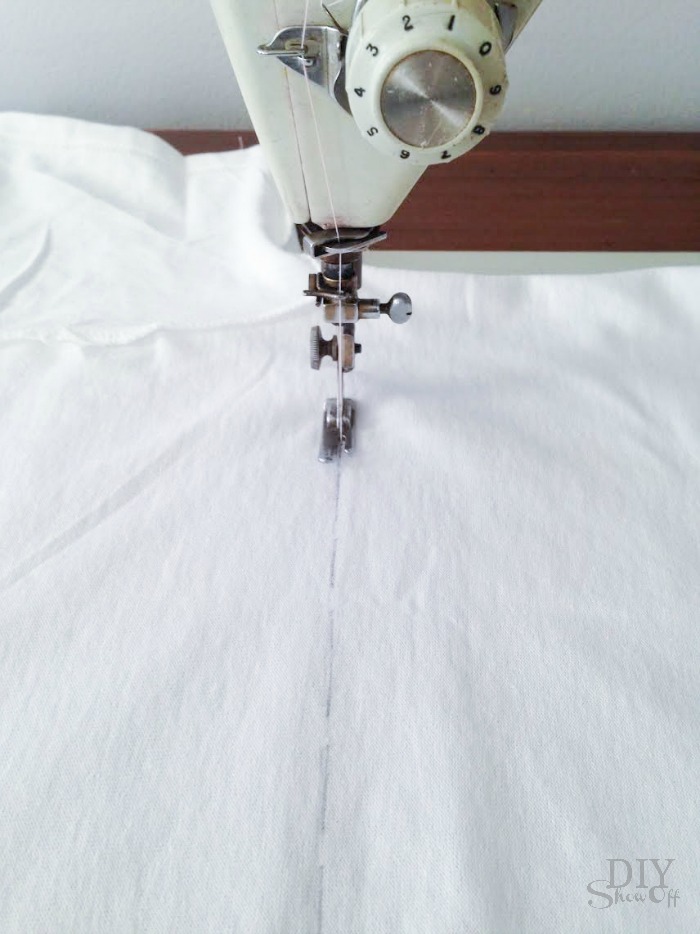
Sew along the line. 

personalized Easter basket liner @diyshowoff

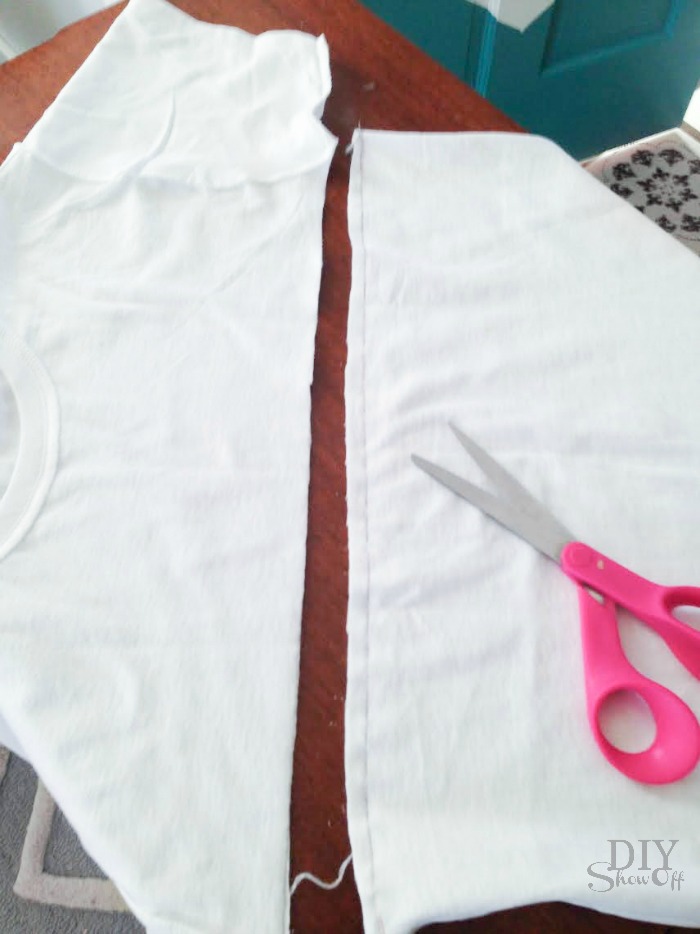
Then cut straight across above the sewn line (right below the armpits of the t-shirt). 

personalized Easter basket liner @diyshowoff

Flip right side out. 

Place the seam inside of the basket and fold the edges of the t-shirt over the basket to create a liner. Measure how much room you have horizontally and vertically to get an idea of your iron on design’s size. I kept mine under 2″ high by 7″ wide. 

personalized Easter basket liner @diyshowoff

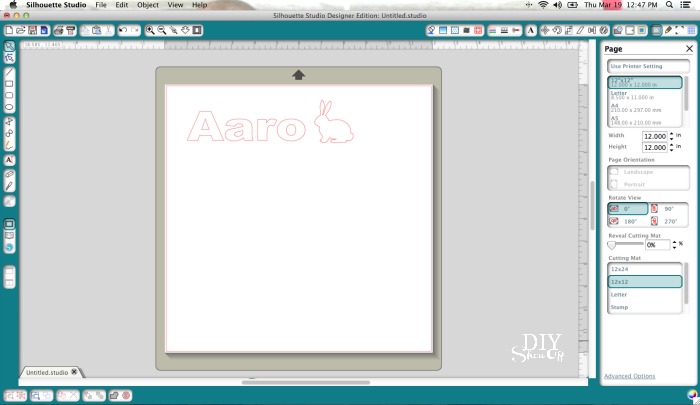
Using the Silhouette Design Studio software, I created a graphic with name and a cute little bunny shape. 

personalized Easter basket liner @diyshowoff

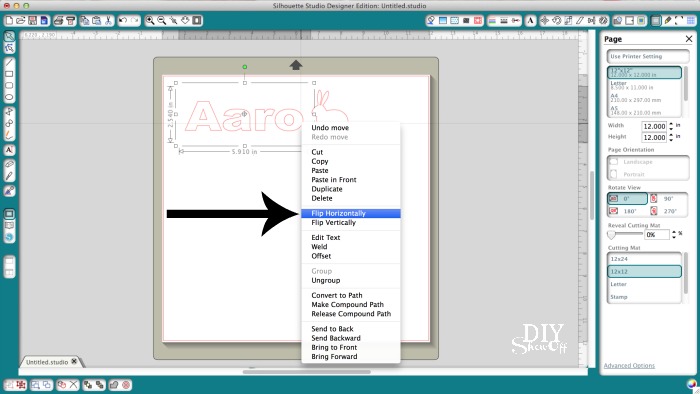
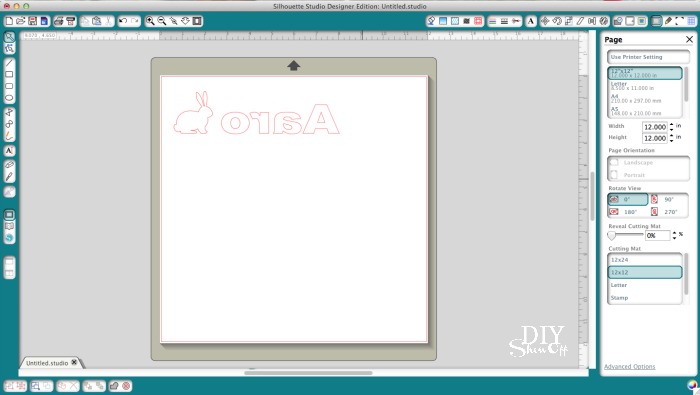
You’ll need to mirror the text and image by right clicking and selecting “flip horizontally”. 

personalized Easter basket liner @diyshowoffpersonalized Easter basket liner @diyshowoff

Double check the size. (One sheet of iron-on vinyl is going to make a LOT of decals!) 

personalized Easter basket liner @diyshowoff

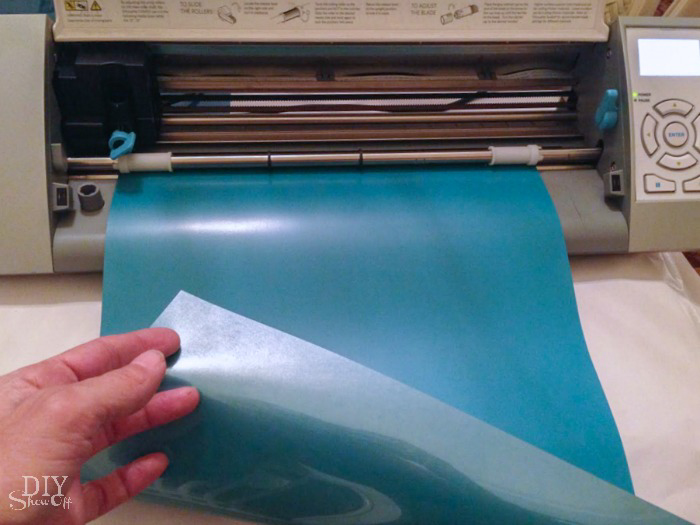
Load vinyl into the machine shiny side down. The shiny side is actually the transparent cover. Vinyl is the matte side (facing up). 

personalized Easter basket liner @diyshowoff

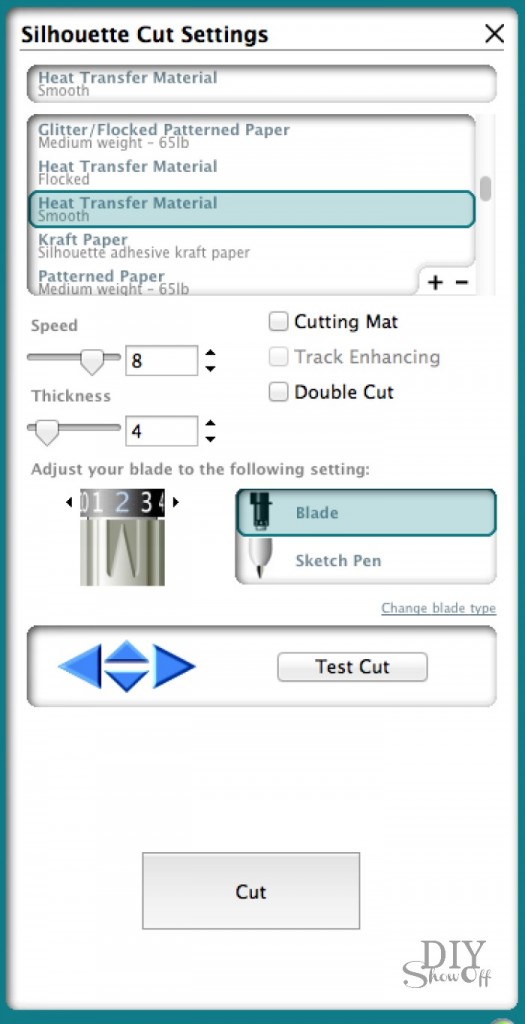
Send the design to ‘cut’. Adjust setting for heat transfer material and “cut”.

personalized Easter basket liner @diyshowoff

When cutting is complete, remove vinyl from machine. Trim to a manageable size. 

personalized Easter basket liner @diyshowoff

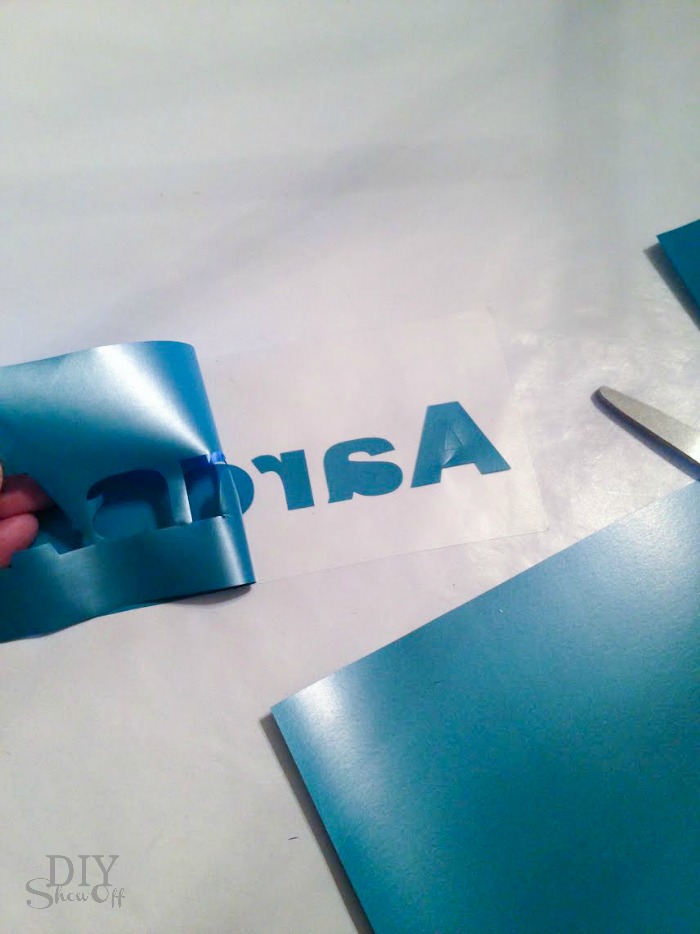
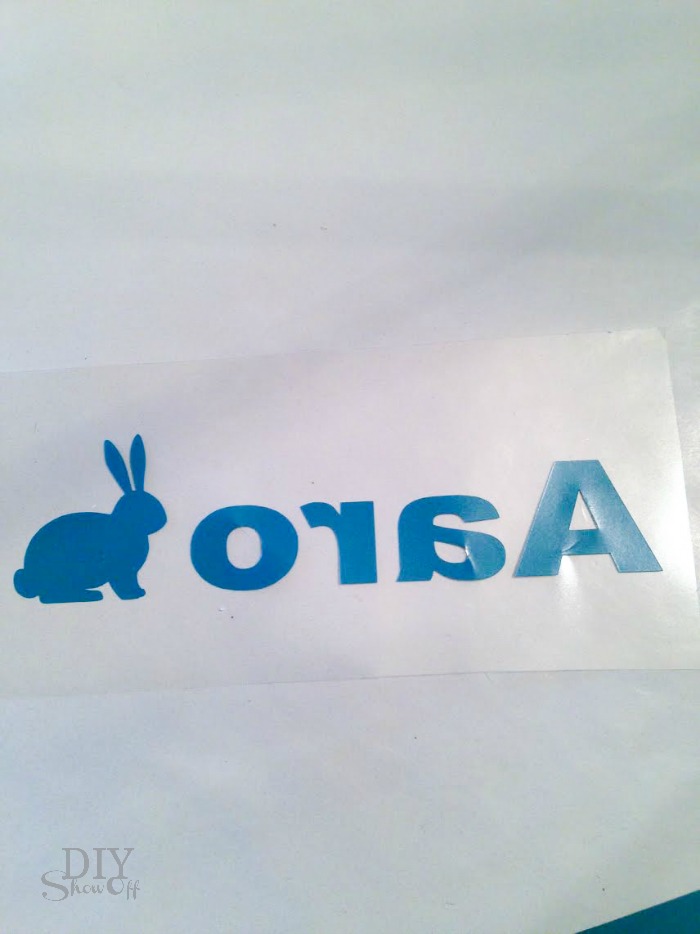
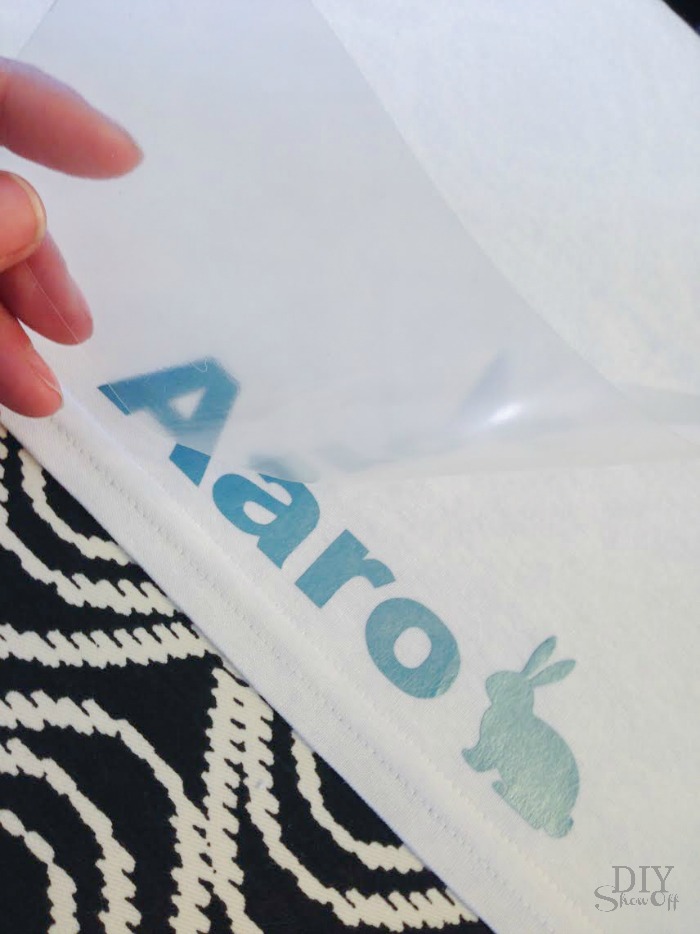
Weed away the excess vinyl. The decal will show a backwards design on the transparency. 

personalized Easter basket liner @diyshowoff

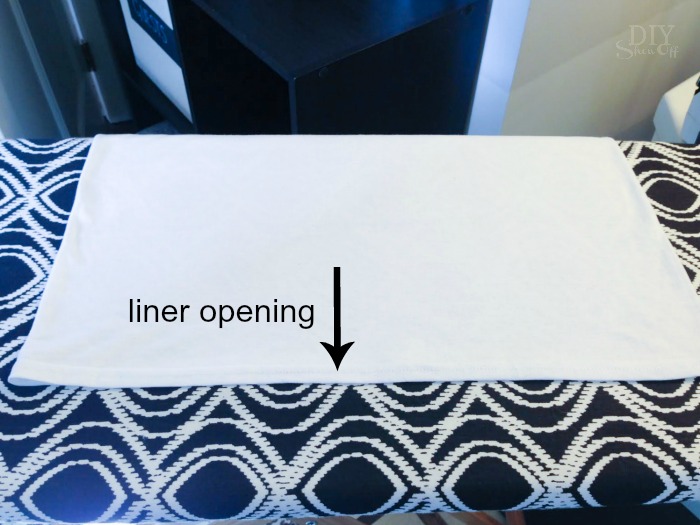
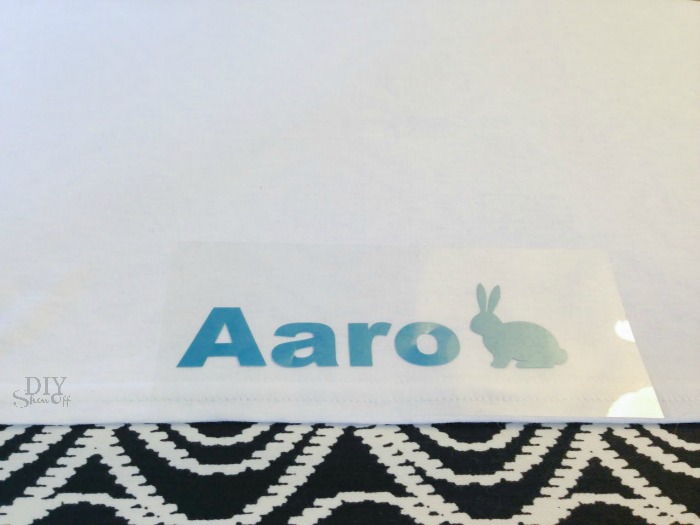
Smooth out the t-shirt liner with the open end facing you. Place the iron on decal towards the bottom, centered. 

personalized Easter basket liner @diyshowoffpersonalized Easter basket liner @diyshowoff

Cover with a cotton cloth (or the scrap t-shirt material) and iron according to instructions that came with the iron on vinyl.

personalized Easter basket liner @diyshowoffpersonalized Easter basket liner @diyshowoff

Carefully remove the transparency film. 

personalized Easter basket liner @diyshowoff

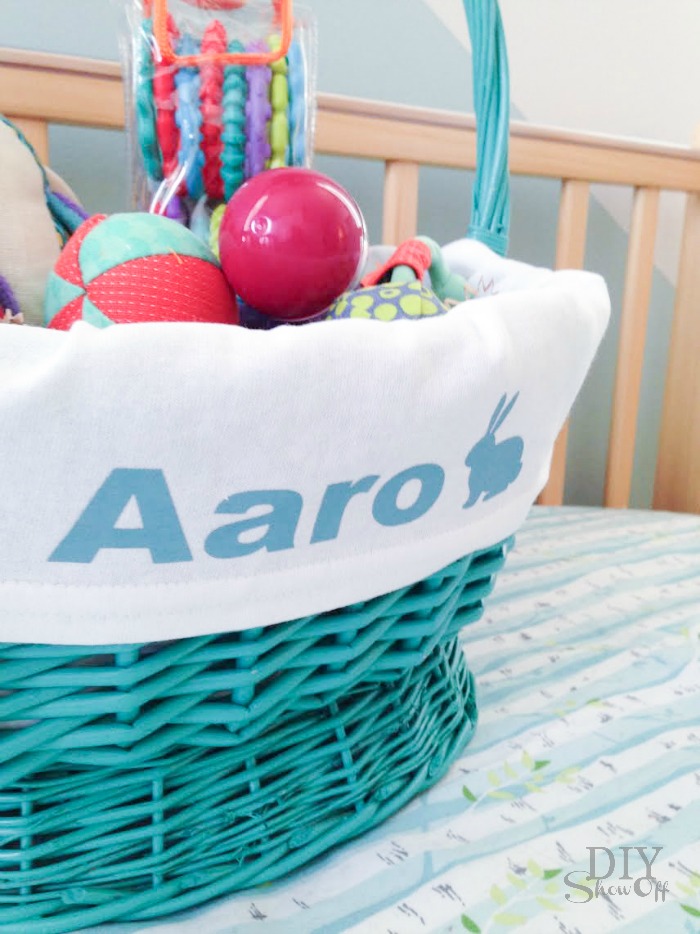
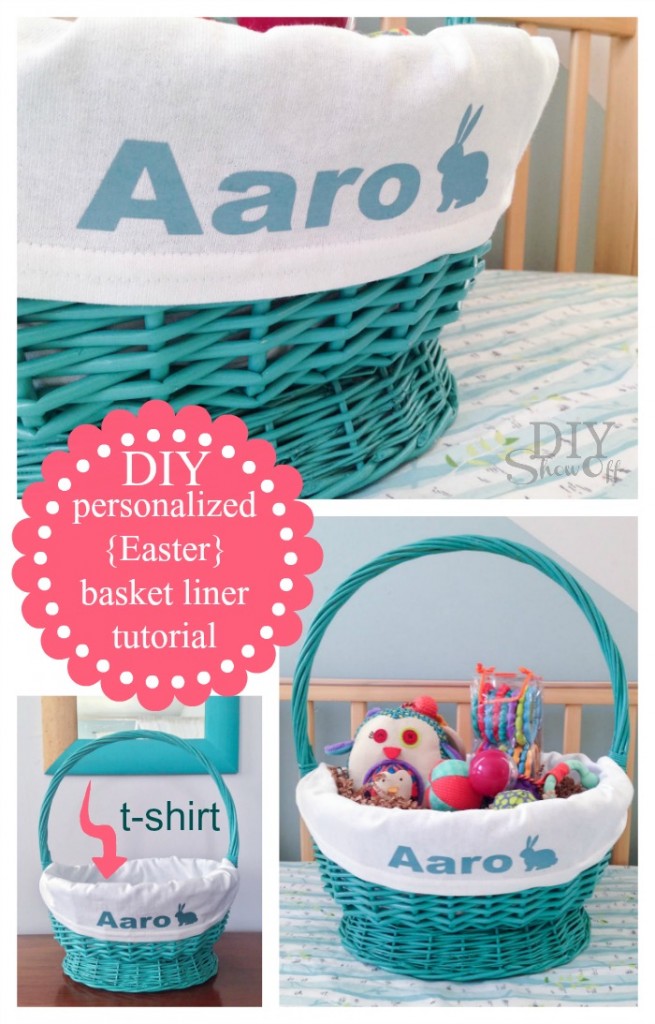
Line the Easter basket and fill. Easy, right? Cute too! 

DIY personalized Easter basket liner tutorial @diyshowoffDIY personalized Easter basket liner tutorial @diyshowoff

It’s actually a pretty easy DIY project for any time of the year, any basket or to personalize a gift basket for any occasion.

DIY personalized Easter basket liner tutorial @diyshowoff


More Easter DIY ideas

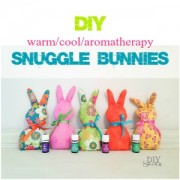
DIY warm cool aromatherapy snuggle bunnies @diyshowoff #essentialoilsdip-dyed-easter-egg-tutorialDIYShowOff Easer succulent garden


*This post is sponsored by Happy Crafters. Tutorial, experience and opinion is my own. I love the products and the prices are affordable. Check out all the supplies at Happy Crafters for great prices, products and inspiration for your next project. 

HClogopngsmall

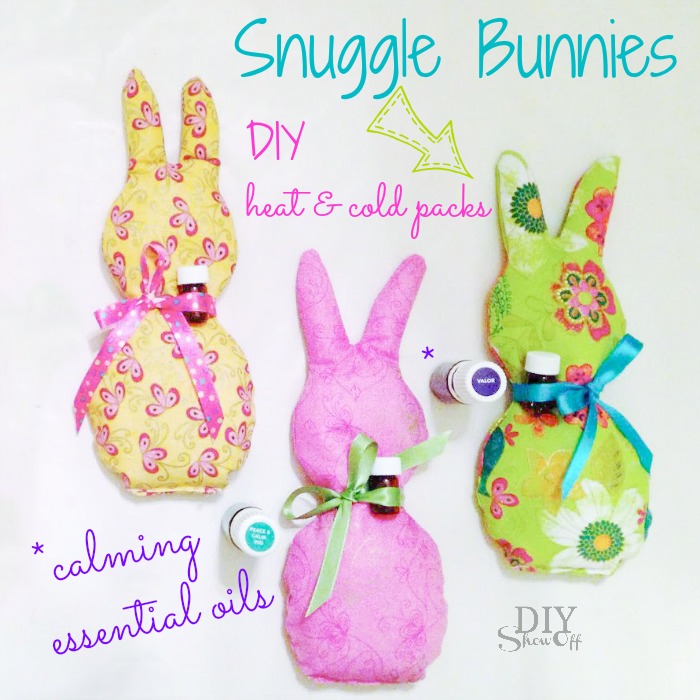
DIY aromatherapy heat/cold {rice} packs: Snuggle Bunnies

Who likes a little extra comfort with some warmth when cold, cooling off when hot and relaxing/calming essential oils to promote a good night’s sleep!? Don’t we all? 

embracing wellness blog hop #oilyfamilies

Only a few more weeks ’til Easter!

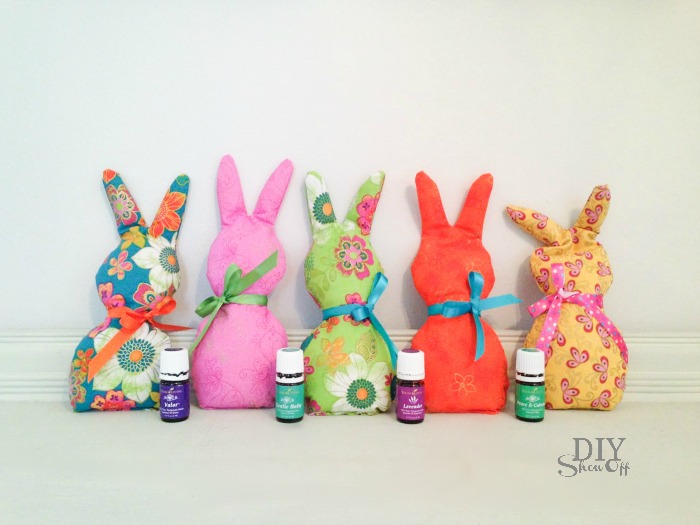
Looking for a (useful and handmade) gift idea? I like to give my nieces and nephews candy-free gifts. Since I’m so in love with essential oils, I think these cute lil’ snuggle bunny heat/cold packs are a nice gift idea. Perfectly soothing. Also a cute idea for essential oil class/party door prizes too. 

Snuggle Bunnies DIY heat and cold rice packs with calming essential oils @diyshowoff

What I used: (*includes some affiliate links)

  • fabric – I purchased something similar to this (makes 15 bunnies)

Snuggle Bunnies DIY heat and cold rice packs with calming essential oils @diyshowoff

Tools: printer, scissors, sewing machine/thread, straight pins, screwdriver

Snuggle Bunnies DIY heat and cold rice packs with calming essential oils @diyshowoff

What I did:

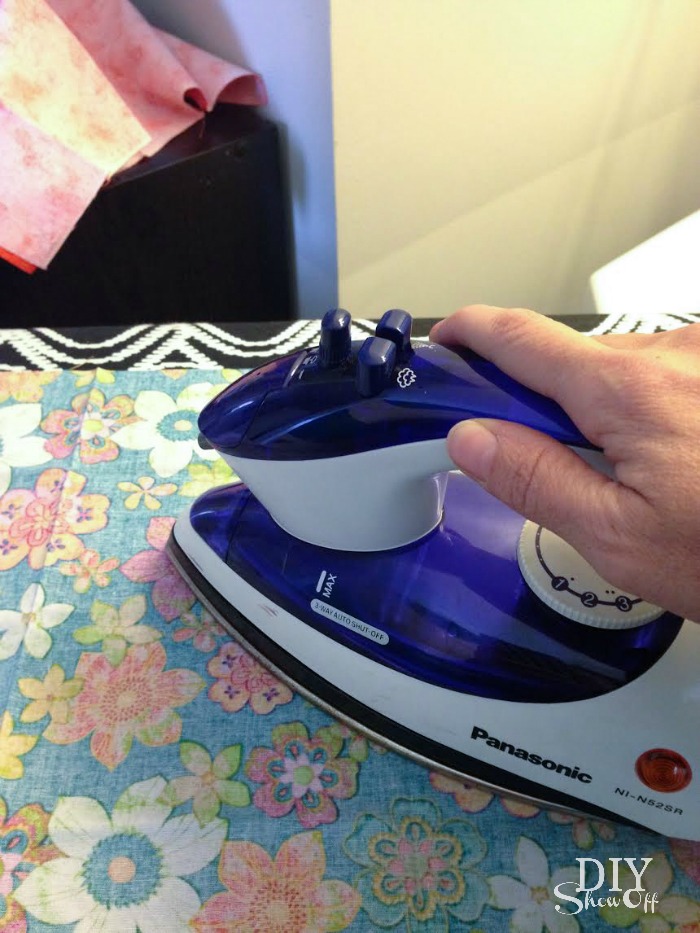
Iron fabric. 

Snuggle Bunnies DIY heat and cold rice packs with calming essential oils @diyshowoff

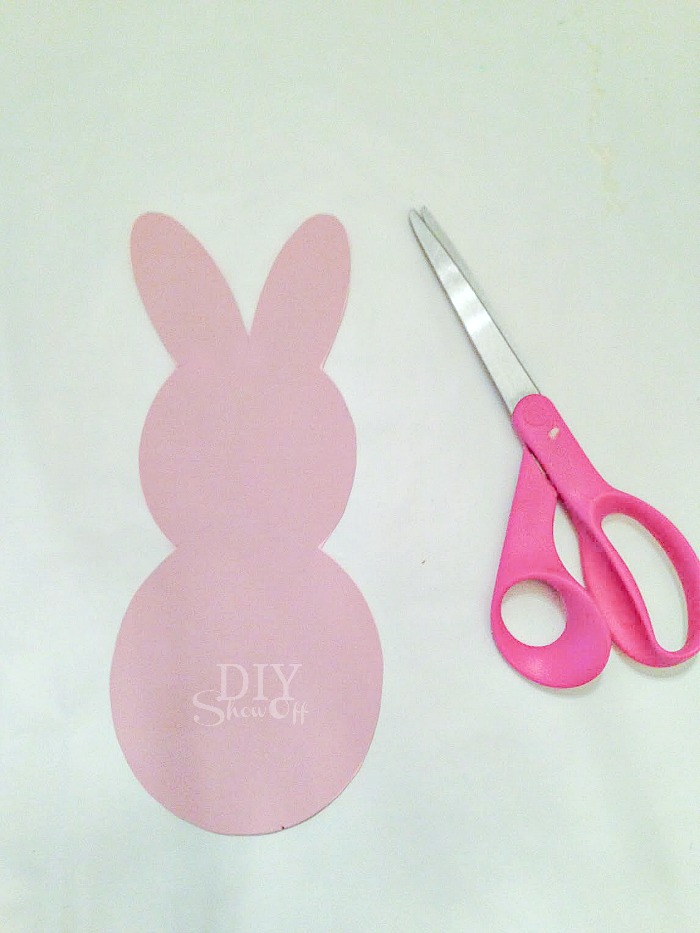
Download and print the bunny pattern on card stock. Cut out pattern.

Snuggle Bunny Pattern @diyshowoff

free printable Snuggle Bunny Pattern download

Snuggle Bunnies DIY heat and cold rice packs with calming essential oils @diyshowoff

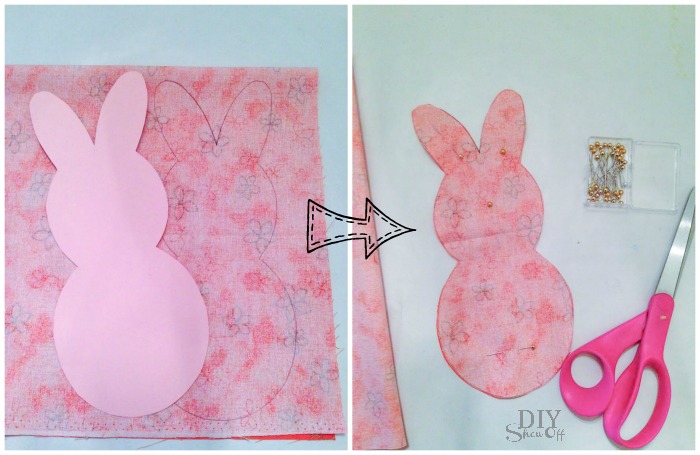
Trace pattern on wrong side of doubled fabric. Pin fabric pieces together and cut out bunny shape.

Snuggle Bunnies DIY heat and cold rice packs with calming essential oils @diyshowoff

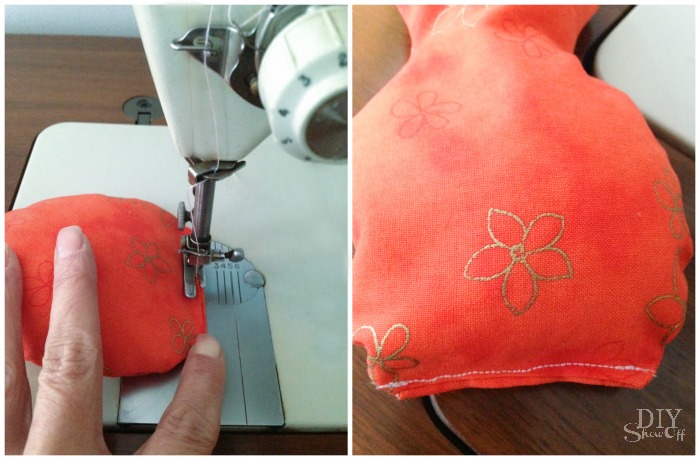
Sew all sides (I sewed as close to the raw edge as I could get and capturing both pieces – front/back – of fabric). Leave the bottom open.

Snuggle Bunnies DIY heat and cold rice packs with calming essential oils @diyshowoff

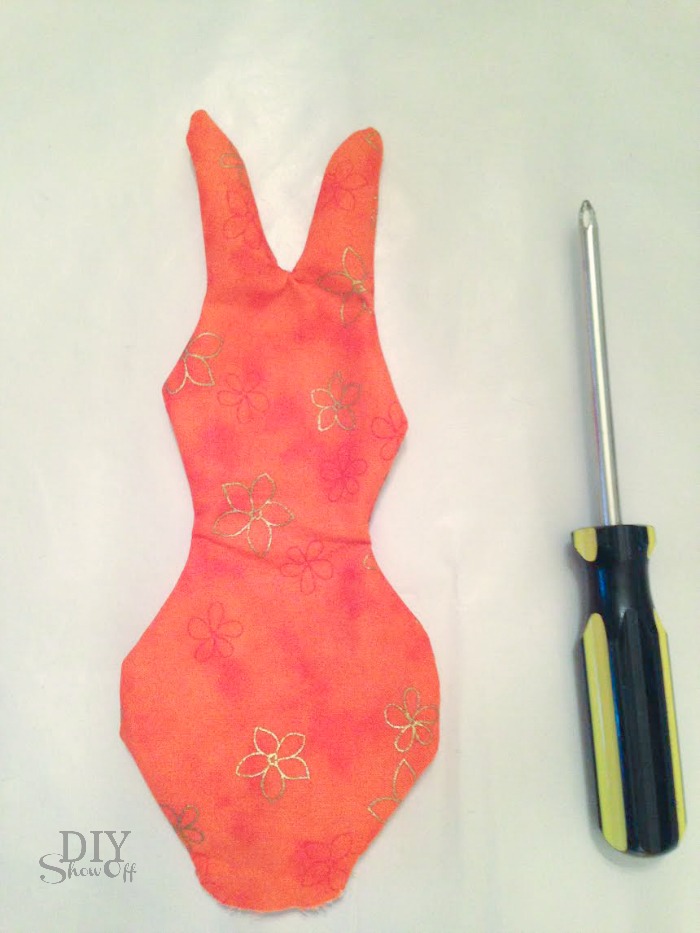
Turn right side out (a screwdriver comes in handy for the ears – don’t poke too hard). 

Snuggle Bunnies DIY heat and cold rice packs with calming essential oils @diyshowoff

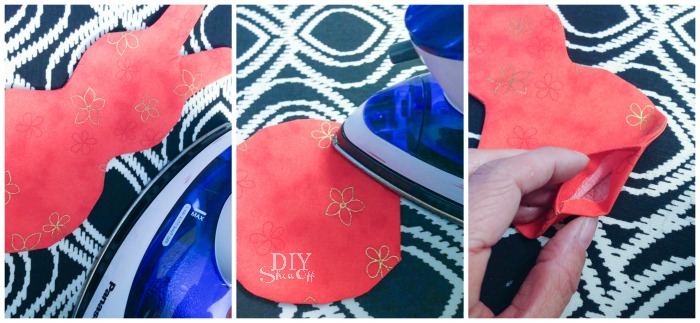
Iron. Fold in bottom raw edges and iron. 

Snuggle Bunnies DIY heat and cold rice packs with calming essential oils @diyshowoff

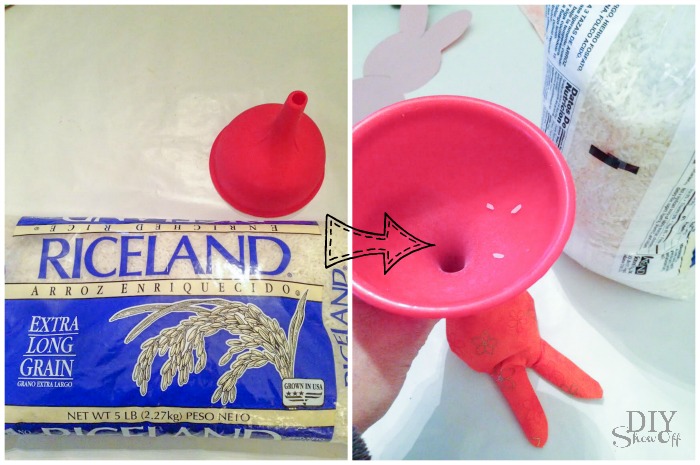
Fill with rice. You’ll want it to be a bit floppy, not super packed full. 

Snuggle Bunnies DIY heat and cold rice packs with calming essential oils @diyshowoff

Sew opening shut.

Snuggle Bunnies DIY heat and cold rice packs with calming essential oils @diyshowoff

Add a ribbon bow, attach instructions inside a gift card and a sample of soothing/relaxing essential oil (Recommendations: Young Living Peace & Calming, lavender, Valor or Gentle Baby).

Snuggle Bunnies DIY heat and cold rice packs with calming essential oils @diyshowoff

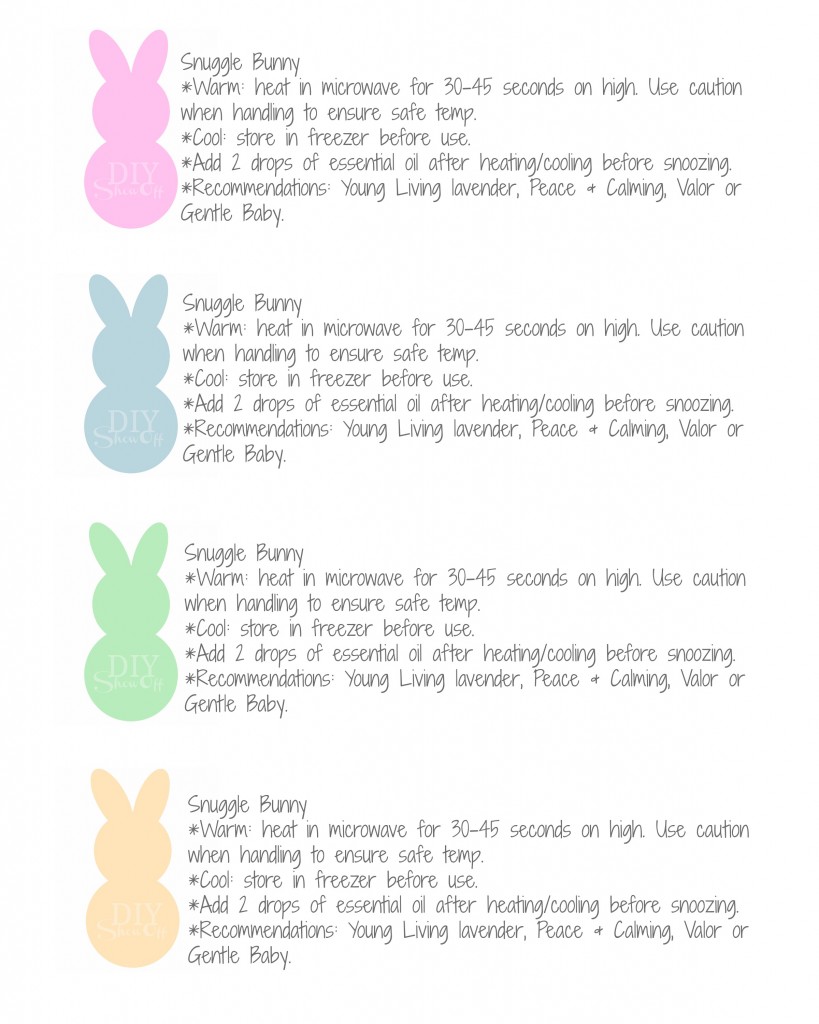
Print usage instructions: (download printable)

printable Snuggle Bunny Directions @diyshowoff

free download: printable Snuggle Bunny Directions

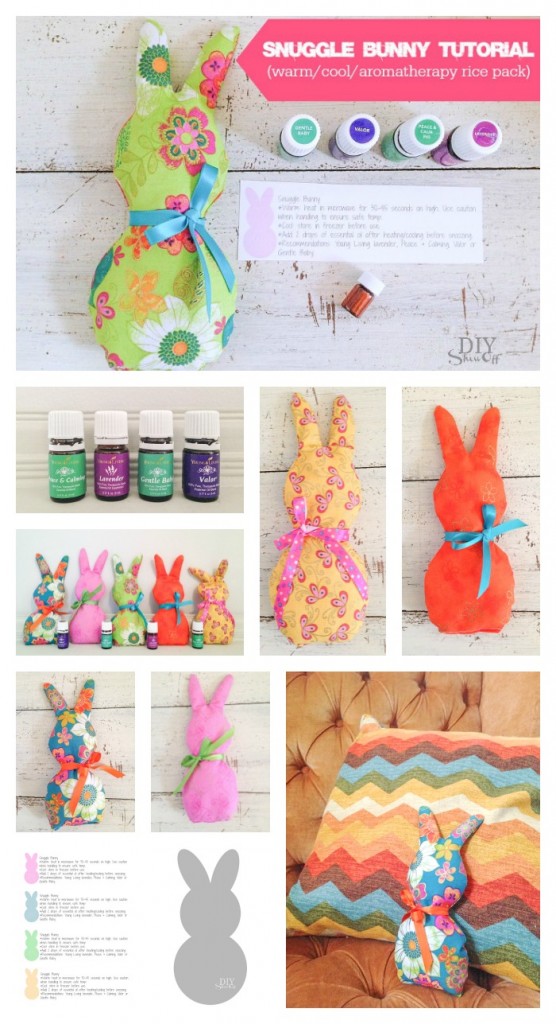
Cute, handmade hot or cold aromatherapy snuggle bunnies to promote a good night’s rest.

Snuggle Bunnies Tutorial - DIY warm/cool/aromatherapy with essential oils) rice packs @diyshowoff

Fun idea: sew on a small pocket, add a felt carrot to tuck inside and add your essential oils to that! 

$25 CASH BACK WITH THE PURCHASE OF A PREMIUM STARTER KIT USING THIS REFERRAL LINK: Wellness Inspired Living!

Premium Starter Kit selections Premium Starter Kit selections

EXPIRES 3/30/20 

Ready to take the a step towards creating a healthy home? Wa-hoo! Check out this month’s DIYShowOff Young Living essential promotion here

MORE ESSENTIAL OIL RELATED POSTS:

essential oils lotion bars @diyshowoffDIY warm cool aromatherapy snuggle bunnies @diyshowoff #essentialoilsRefreshing Berry Smoothie Recipeessential oil and sea salt gift idea @diyshowoffmocha mint smoothieYoung Living Citrus Essential Oils gift idea @diyshowoffessential oils gift ideas @diyshowoffDIY essential oils sugar scrub recipe @diyshowoffyoung living at diyshowoff.comGift Ideas for Oily Friendsdiyshowoff cinnamon apple crisp recipeFall Scents for your home with Essential Oils @diyshowoffHow to Make lavender pillow and linen spray @diyshowoff wool dryer balls and essential oils @diyshowoff #oilyfamiliesrefreshing summer time organic lemonade

For more essential oil info and ideas, check out these blog friends:

*My tutorials are the methods, steps and personal experiences that have worked for me (my own story). Proceed with tutorials at your own risk and always test before implementing. Always use proper safety precautions.