Baby Shower Gift Basket Tips and Inspiration

There’s nothing more precious than a new baby and putting together a collection of sweet baby gifts can be so meaningful for parents-to-be! I love shopping and gathering up gifts to create a beautiful arrangement and I’m all about a pretty presentation. I thought I’d share a few I’ve made this past year to help inspire you if you’re stuck or looking for some examples to go by. Some affiliate links included. 

diyshowoff baby shower gift basket tips and inspiration

Baby Shower Gift Basket Tips

Tips for personalizing a gift for a new little person makes if feel so special, right? Here are a few tips to help:

  • Registry – most parents-to-be will share their baby shower registry. Try to choose a few items from their hand selected wish list when possible.
  • Gender – it’s rare that we don’t know this ahead of time and completely unnecessary but if you do know, it does narrow down options. 
  • Name – even more rare, but if it is known, I love to add something monogrammed – specifically, I love adding a wall art letter or creating a personalized iron on decal. 
  • Theme – a lot of the time, the baby shower invitation will give a hint to the nursery theme or design style … elephants, owls, woodland, boho, Noah’s ark, etc.  
  • Parents’ hobbies, collections, lifestyle. Do they love the outdoors (fishing? hunting?), love their dog(s)?, have a favorite sport’s team? 
  • Your signature piece – for example, I’m all about wellness so I try to include chemical free, natural, organic options when I can. 
  • Diapers & board book – baby showers now will often host a special raffle for bringing one of these items. I always use a pack of Honest newborn diapers in the bottom of the basket to lift the gifts. Either way, diapers are SUPER helpful and adding a favorite children’s story or baby board book to create a library of bedtime stories is one of my favorite things to add. 
  • Gift wrap a few of the items with coordinating wrapping paper. I often use what I have on hand. It doesn’t have to be specific baby shower themed. 

Baby Shower Gift Basket Inspiration

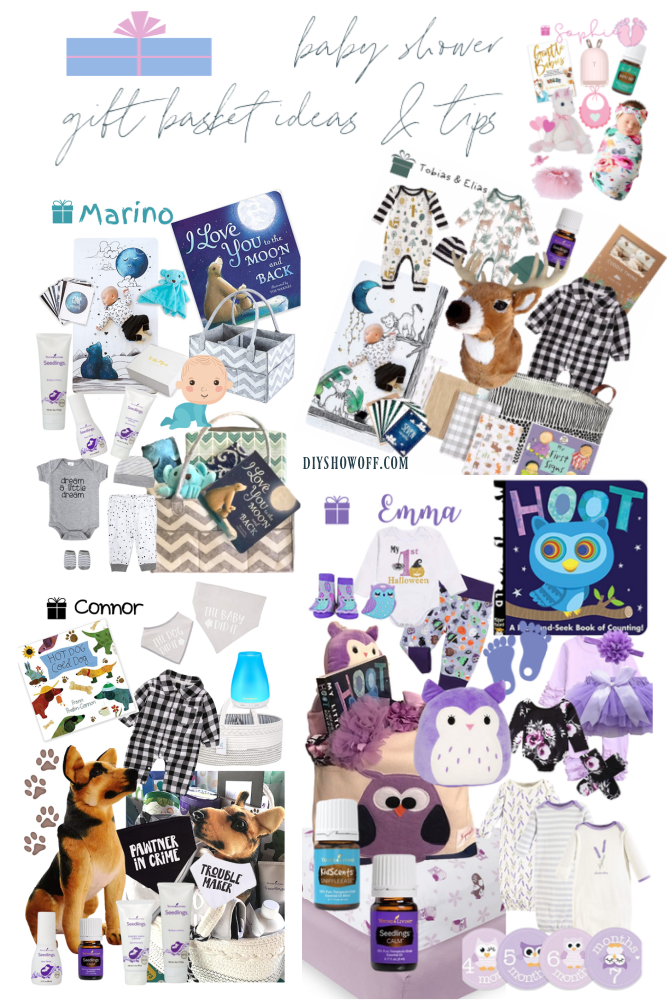
Here are 5 baby shower gift baskets I’ve put together to help inspire your next baby shower gift. 

Girls: 

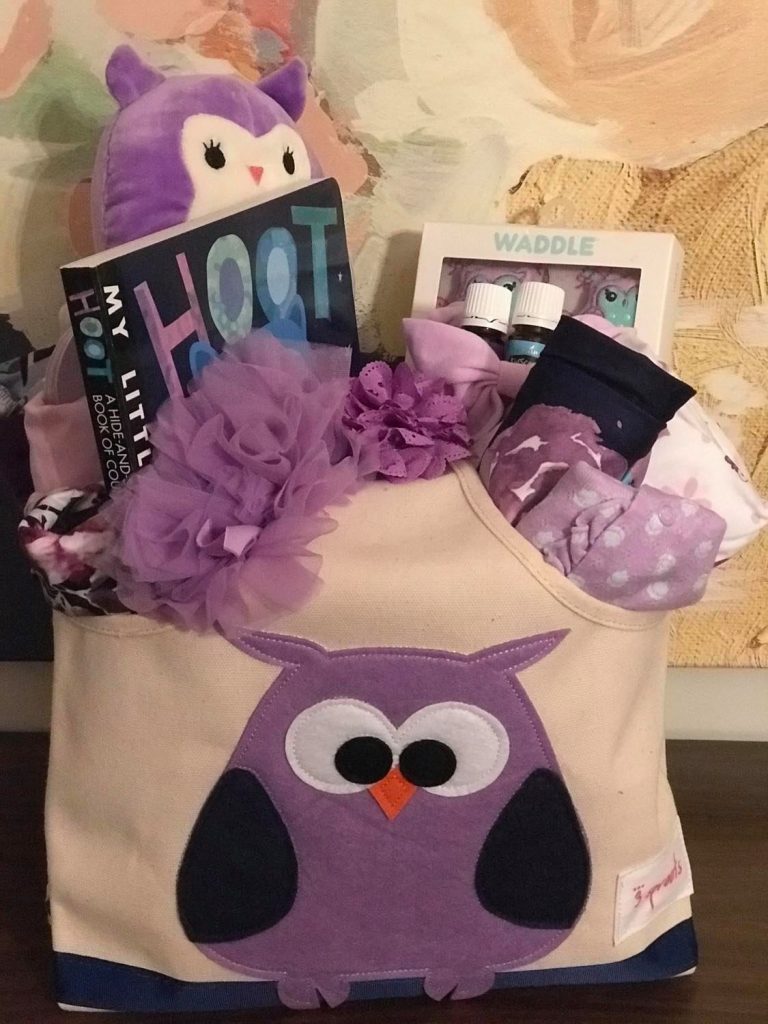
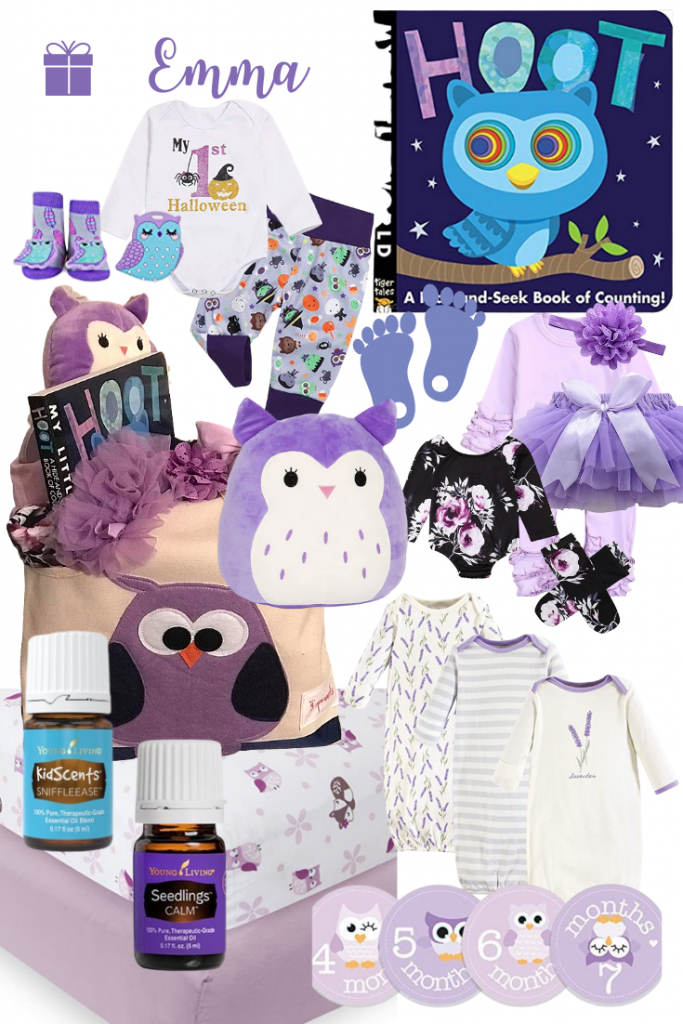
EMMA

Emma’s mommy’s favorite color is purple and she designed an owl themed nursery. My dear friend waited a long time for this precious miracle and I am so happy for them! 

purple owl baby girl gift basket

Gifts I selected: 

purple baby gift ideas

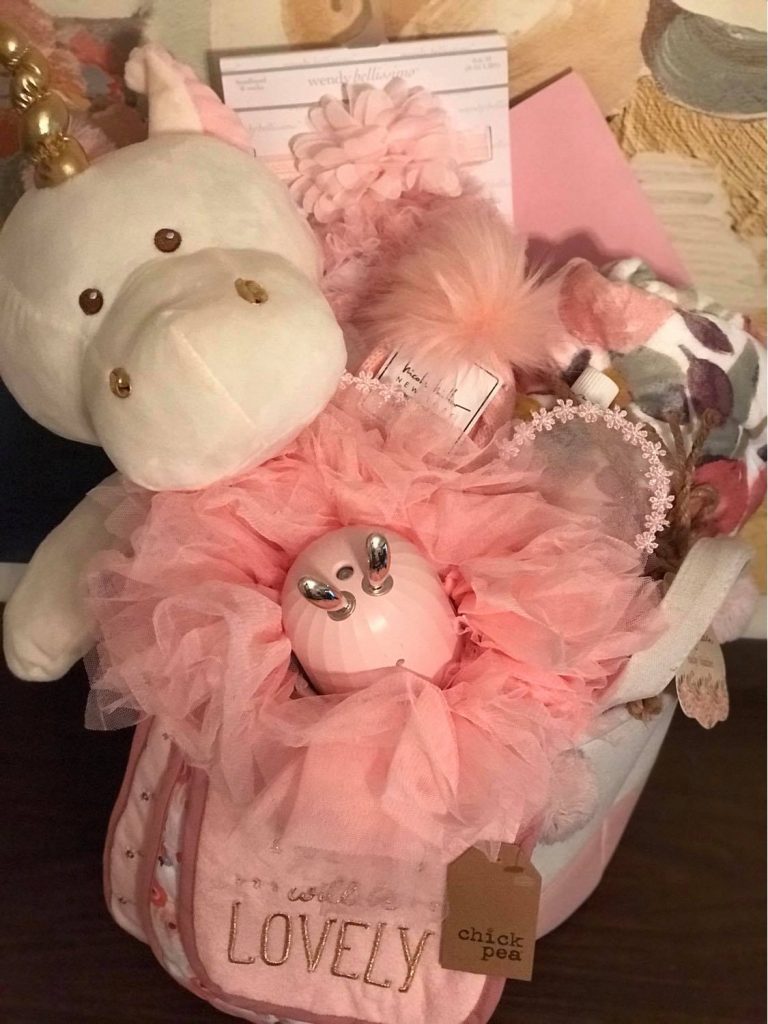
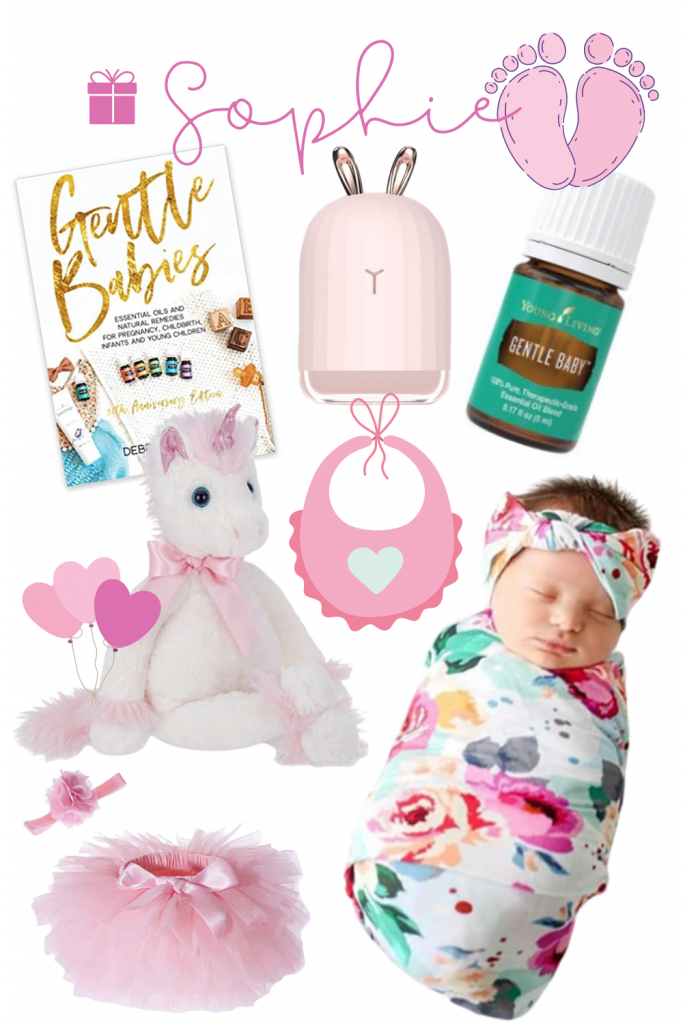
SOPHIE

– a pink themed collection fit for a princess!

pink princess baby girl gift basket

Gifts I chose: {some substitutions pictured)

pink baby gift basket tips inspiration

Boys: 

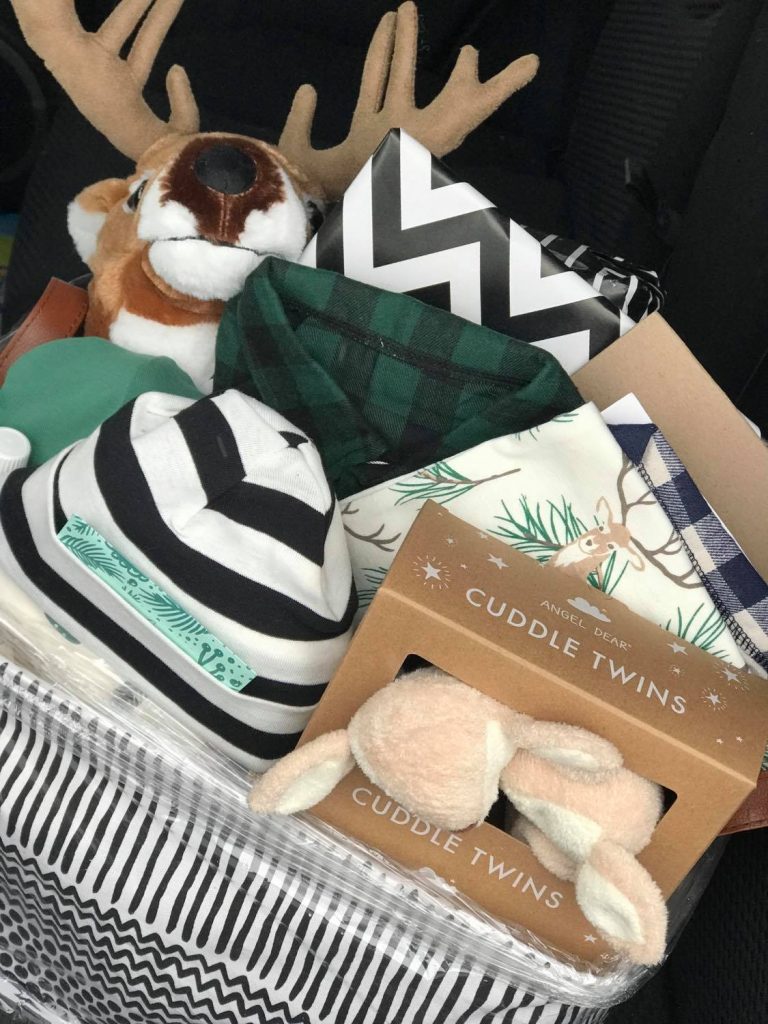
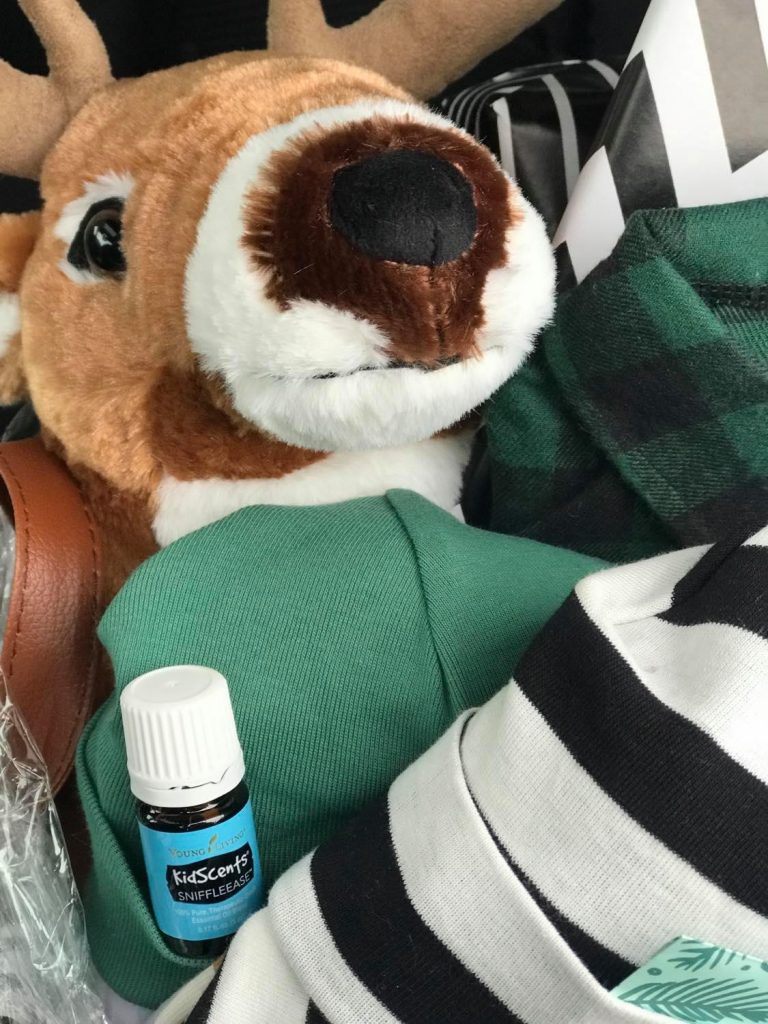
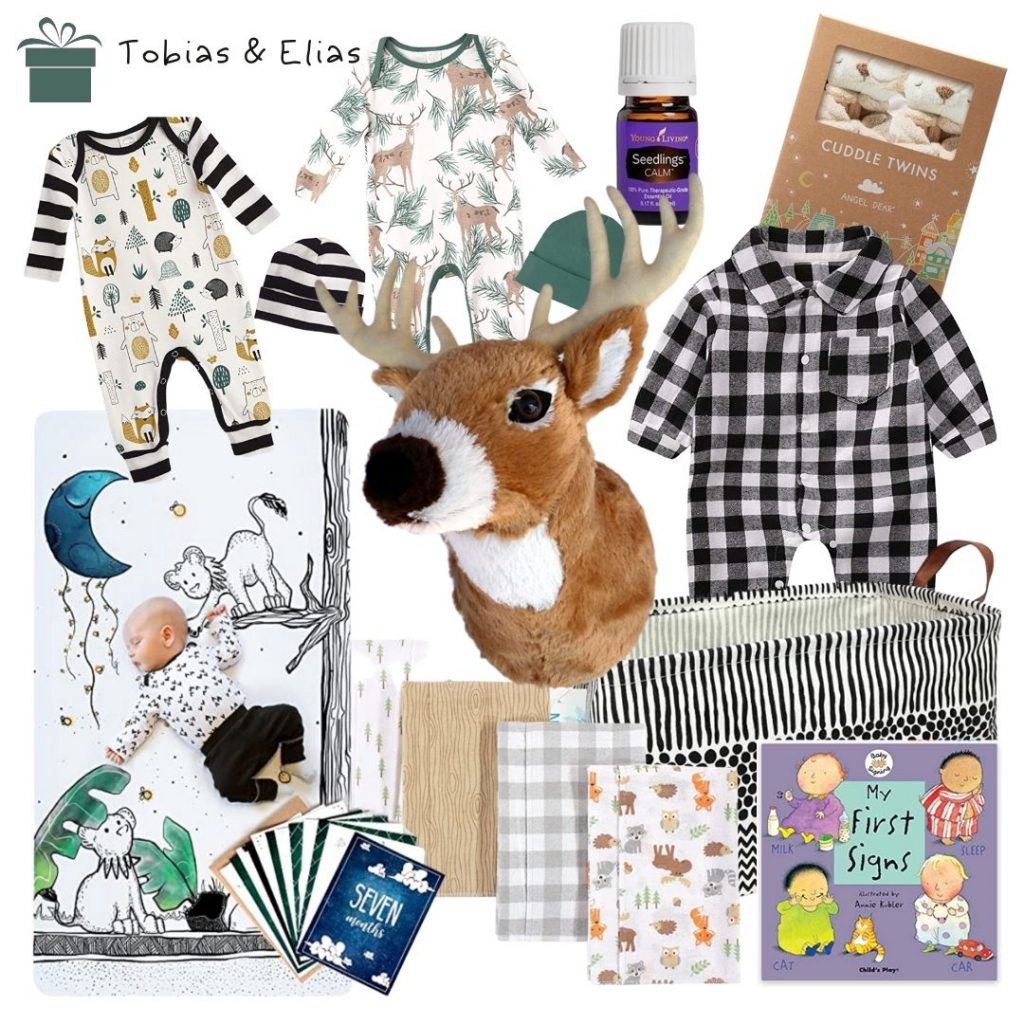
TOBIAS & ELIAS

– shopping for twins is so much fun! I didn’t go with completely “identical” but it was fun to put a woodland theme gift collection together for two! 

woodland theme baby shower gift basket deer boy baby shower gift basket

Gifts hand picked by me: 

woodland baby shower gift basket tips inspiration diyshowoff

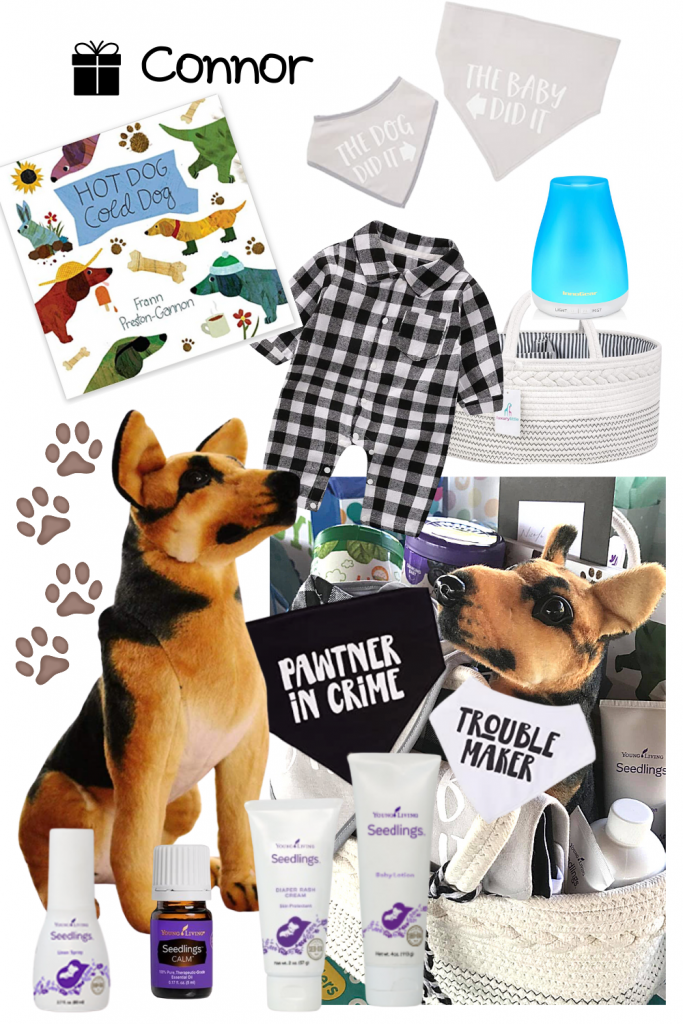
CONNOR

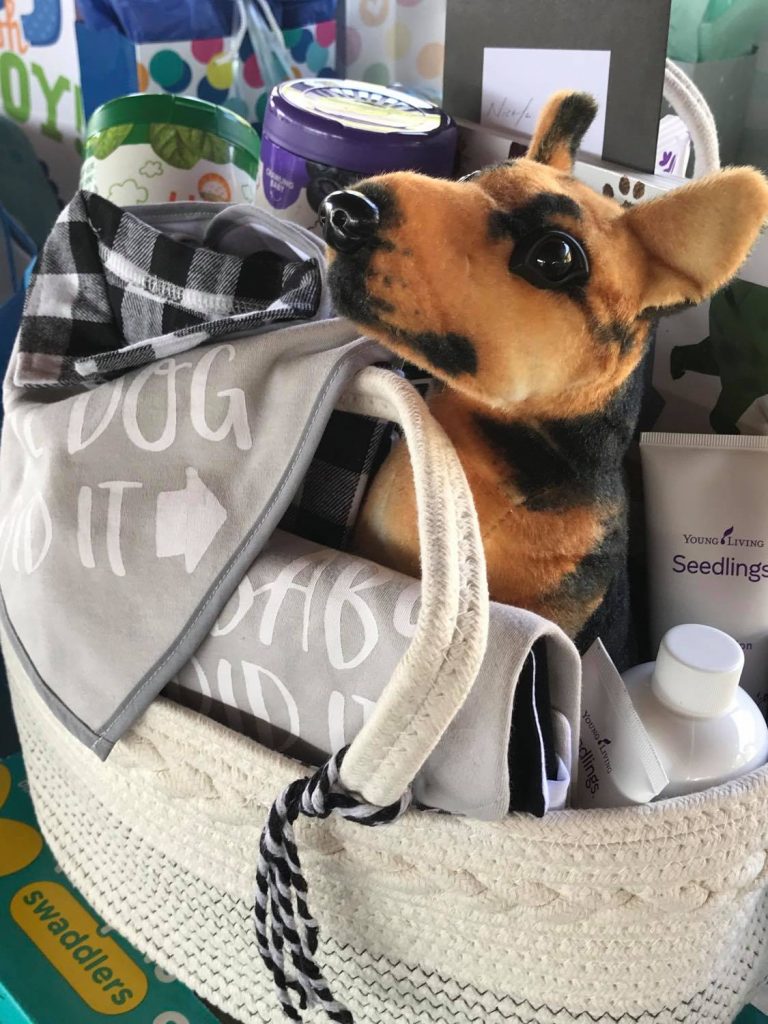
– this little guy’s mom and dad are parents to two German Shepherds. What fun it was to include the ‘fur babies’ too!

german shepherd baby gift basket

Gifts I included:

dog baby gift basket tips inspiration

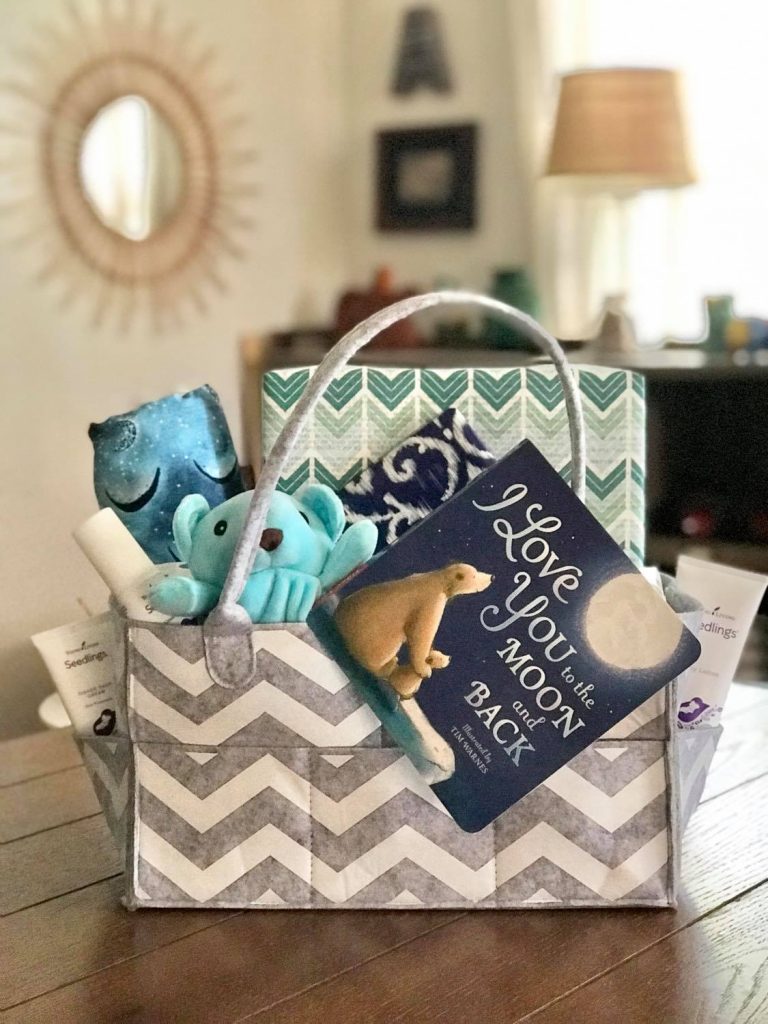
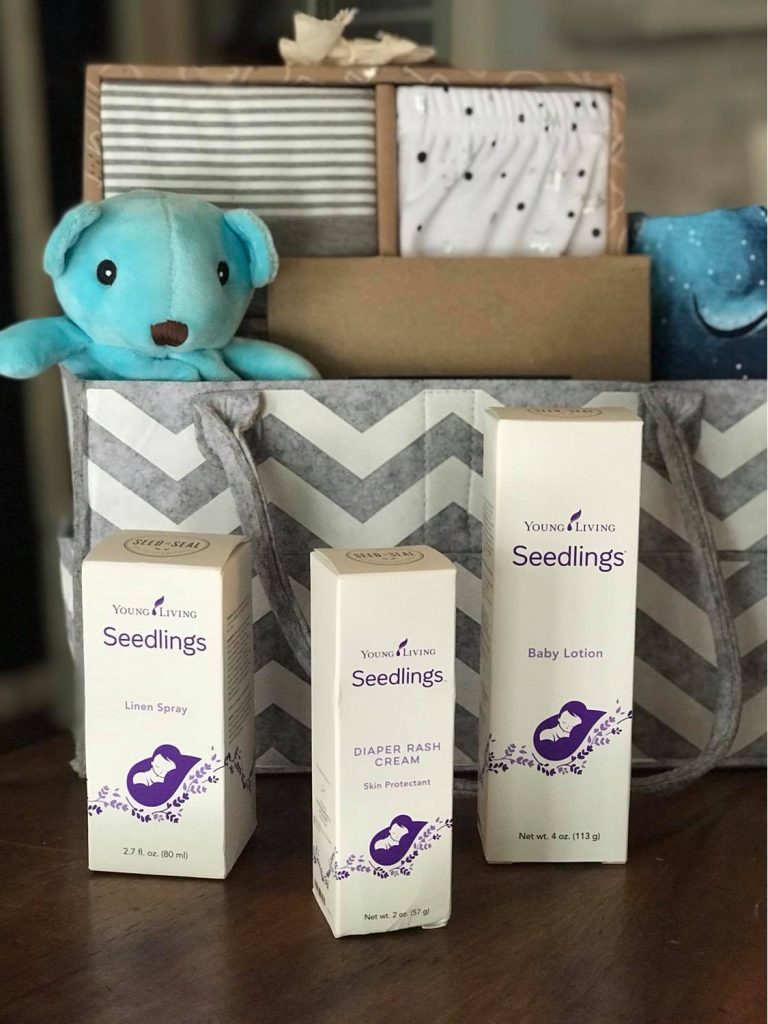
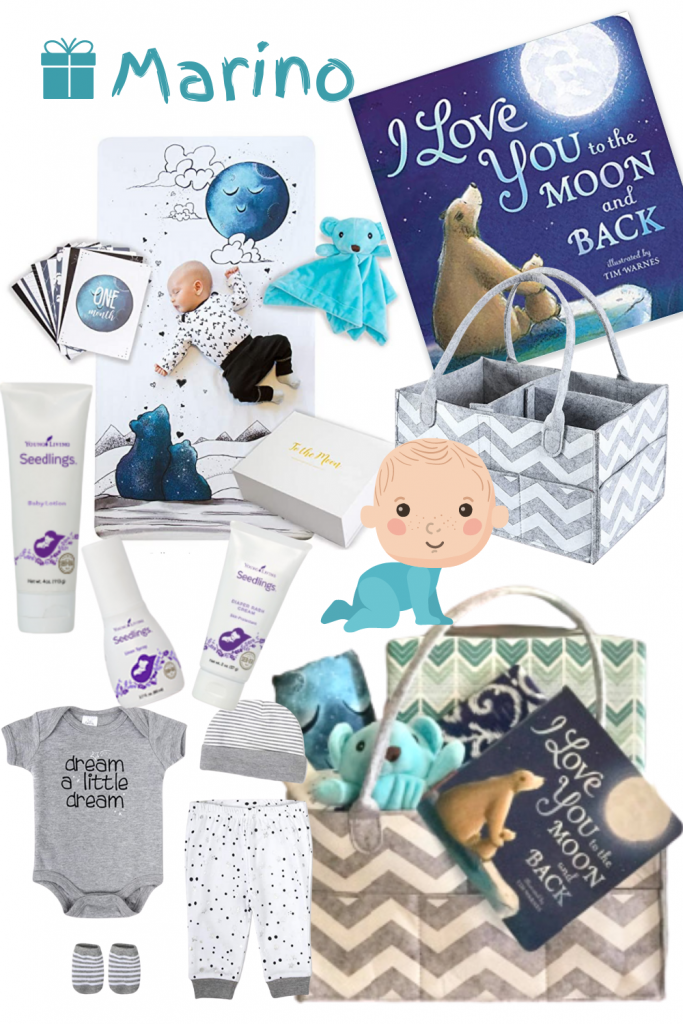
MARINO

– a blue teddy bear/sweet dreams collection for this precious boy. 

baby boy young living seedlings blue bear gift basketyoung living seedlings

Gifts I selected: 

baby boy gift basket inspiration tips

What are some of your favorite go-to baby gift ideas? 

DIY Keepsake Mother’s Day Gift

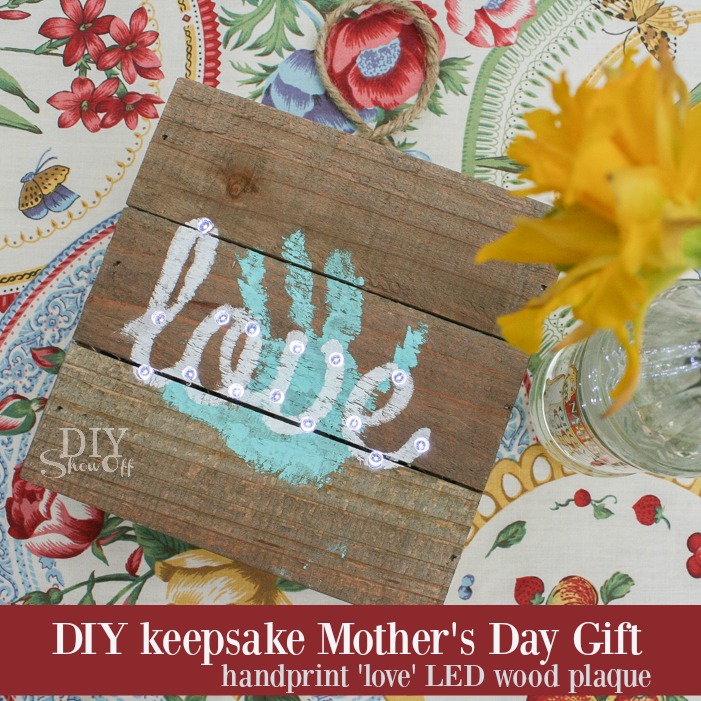
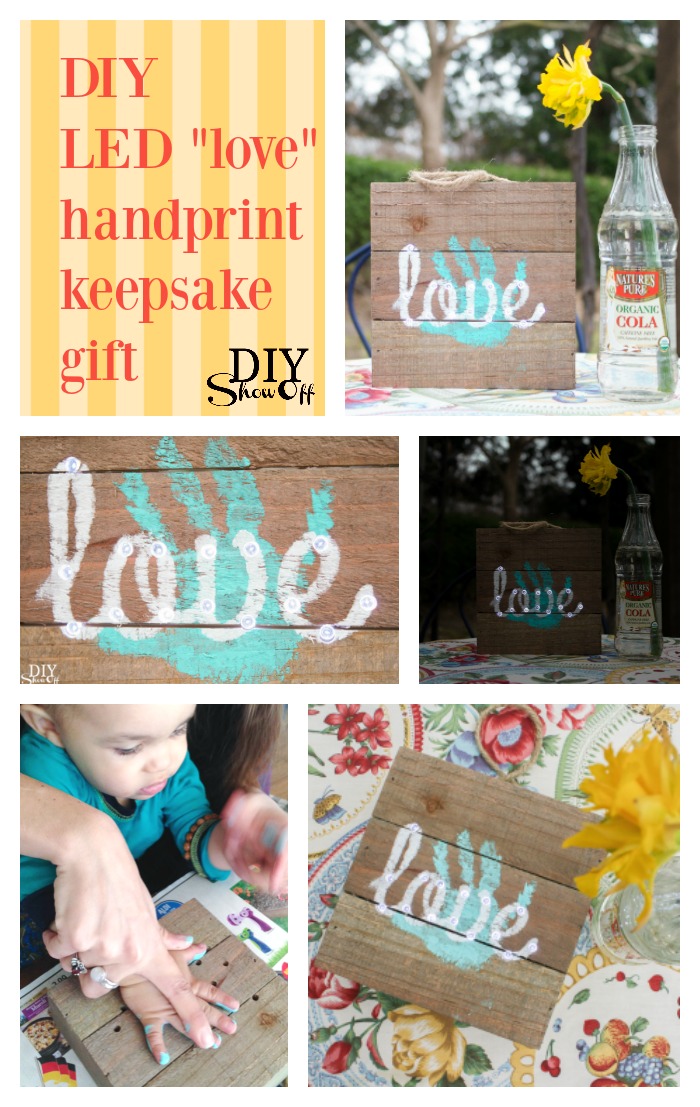
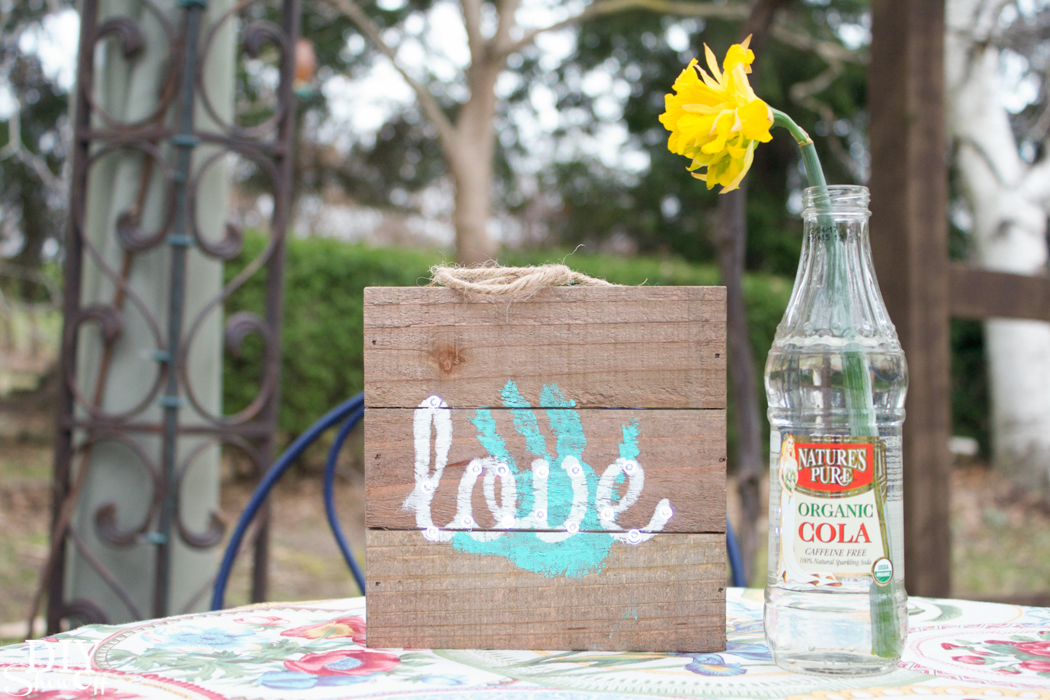
The Michaels’ Makers’ April Challenge is all about Mother’s Day and this project will be for celebrating my daughter who’s now a mom too (Ali, don’t look! lol). I couldn’t resist scooping up this opportunity to get creative and practice a little DIY influence on the littlest one in our family by making up a DIY keepsake Mother’s Day gift.

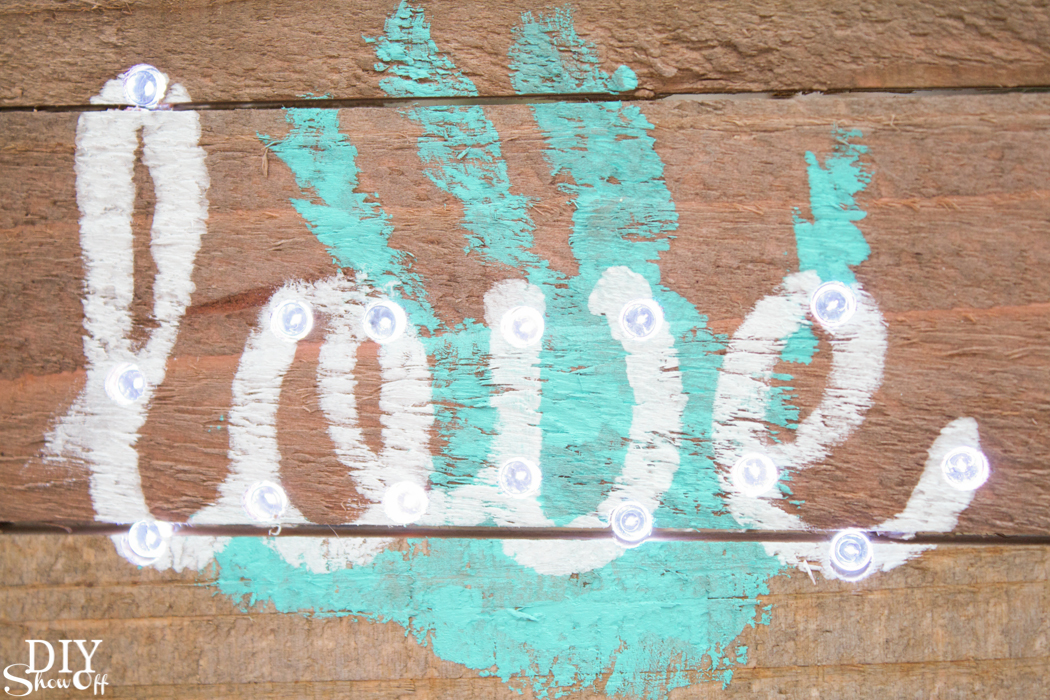
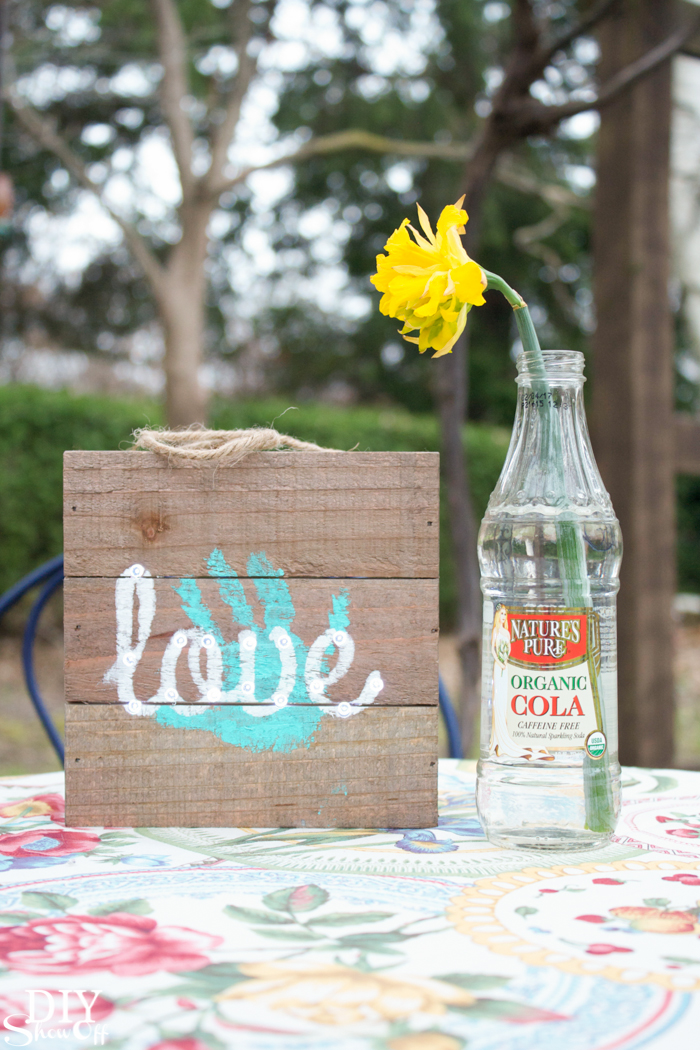
Awe! A cute DIY keepsake handprint Mother's Day gift (LED 'love' wood plaque) tutorial @diyshowoff #michaelsmakersAwe! A cute DIY keepsake handprint Mother's Day gift (LED 'love' wood plaque) tutorial @diyshowoff #michaelsmakers

Materials we used:

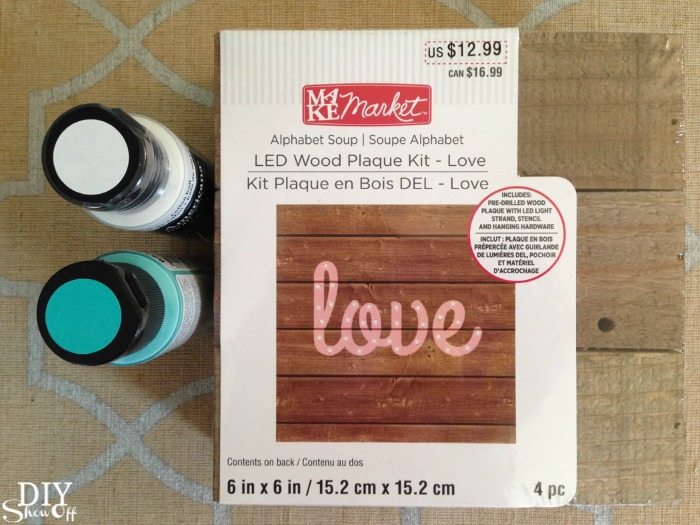
  • MAKE Market LED wood plaque kit – LOVE (Alphabet Soup Collection) available at Michaels’ Craft Store
  • 2 colors of paint and 2 foam brushes (or sponges)
  • painter’s tape

Awe! A cute DIY keepsake handprint Mother's Day gift (LED 'love' wood plaque) tutorial @diyshowoff #michaelsmakers

What we spent: Under $15

Time we invested: Less than an hour (+ paint drying time)

What we did:

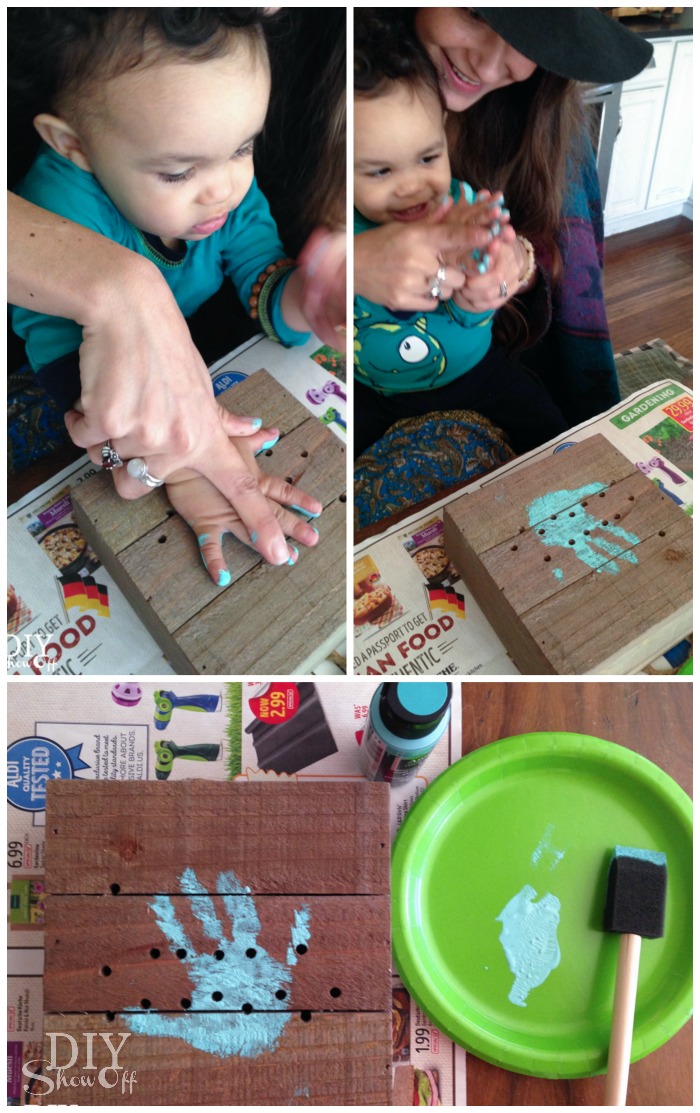
1. We protected our work surface and applied a thin coat of paint to his little hand then carefully pressed it to the wood plaque. We washed his hands immediately and let painted handprinted plaque dry. 

Awe! A cute DIY keepsake handprint Mother's Day gift (LED 'love' wood plaque) tutorial @diyshowoff #michaelsmakers

2. Using painter’s tape, we secured the stencil to the plank sign, lining up the word “love” so we could see the drilled holes in the empty stencil space. 

Awe! A cute DIY keepsake handprint Mother's Day gift (LED 'love' wood plaque) tutorial @diyshowoff #michaelsmakers

3. Next, with a foam brush we applied paint to the stencil (using a sponge technique using a little paint…don’t glop it on or it will seep under the stencil) to paint on the word “love”. We removed the stencil, filled in any spaces and let the paint dry. 

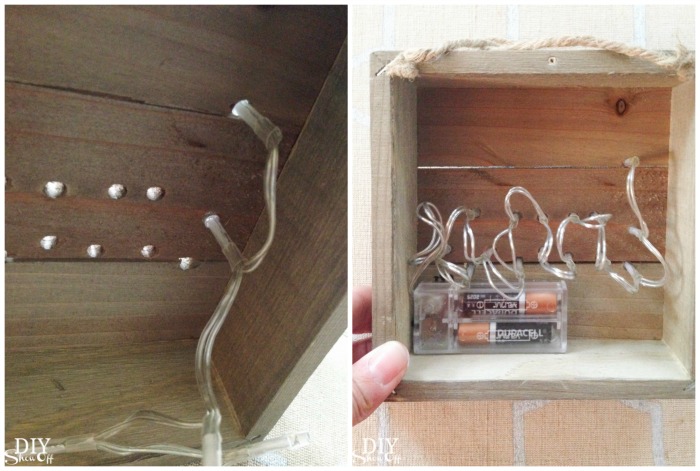
4. Last, we pushed the string of LED lights through the drilled holes from the back side and added 2 AA batteries. 

Awe! A cute DIY keepsake handprint Mother's Day gift (LED 'love' wood plaque) tutorial @diyshowoff #michaelsmakersAwe! A cute DIY keepsake handprint Mother's Day gift (LED 'love' wood plaque) tutorial @diyshowoff #michaelsmakers

5. The kit comes with hanging hardware and foam/felt for protecting the wall. Attach according to packaged instructions. 

Awe! A cute DIY keepsake handprint Mother's Day gift (LED 'love' wood plaque) tutorial @diyshowoff #michaelsmakers

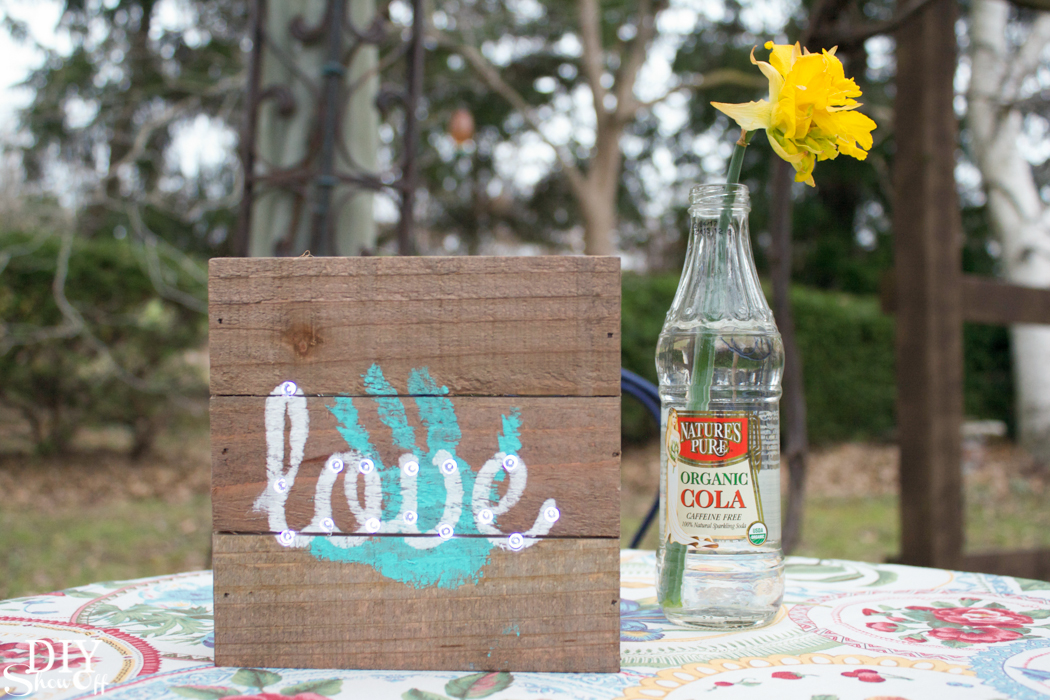
Very simple. Very cute. And a special keepsake from baby to mom. Display on a shelf or add to a gallery wall. So sweet! 

Awe! A cute DIY keepsake handprint Mother's Day gift (LED 'love' wood plaque) tutorial @diyshowoff #michaelsmakers

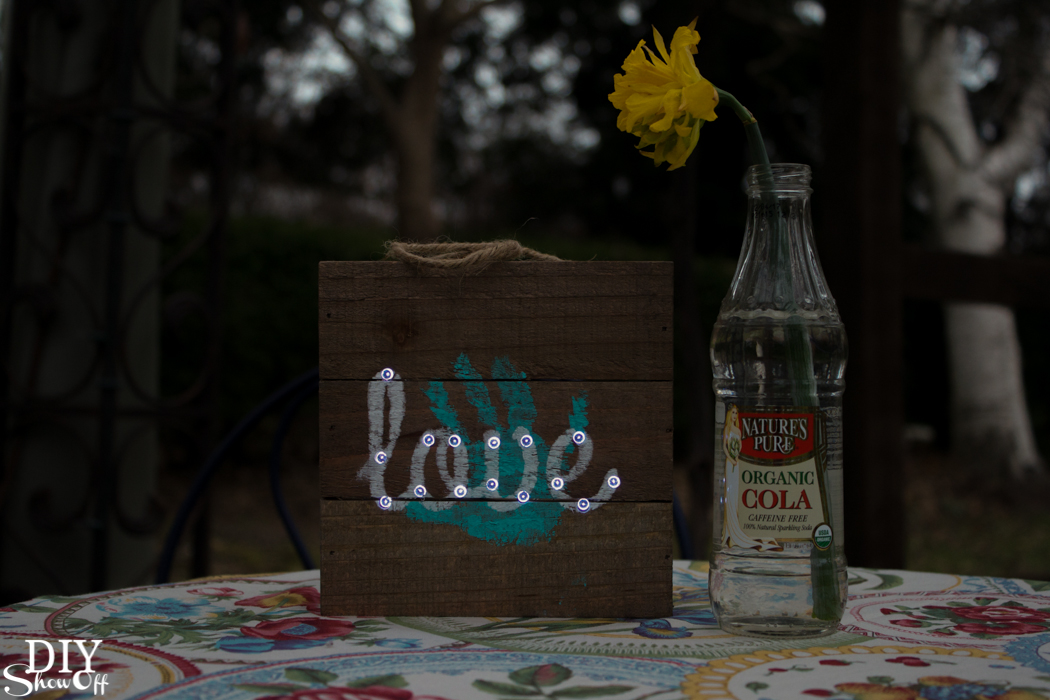
Those little LED lights provide a powerful glow in the dark!Awe! A cute DIY keepsake handprint Mother's Day gift (LED 'love' wood plaque) tutorial @diyshowoff #michaelsmakersAwe! A cute DIY keepsake handprint Mother's Day gift (LED 'love' wood plaque) tutorial @diyshowoff #michaelsmakers

mothers day challenge #michaelsmakersMichaels has everything you need to craft the perfect handmade gift that will make Mom’s day! Grab your coupon, shop and get creative. Handmade gifts are my favorite for Mother’s Day!

If you don’t know where to begin, you can always take a look at some of the fun projects on Michaels.com or the other 49 Makers’ ideas on The Glue String for to see how they personalized their crafts starting at 10 a.m. EST April 1, 2016:  

 Loading InLinkz ...

Awe! A cute DIY keepsake handprint Mother's Day gift (LED 'love' wood plaque) tutorial @diyshowoff #michaelsmakers

DIY Baby Farmer Costume

Michaels Makers October challenge is DIY Halloween costume.

DIY Halloween Costume Challenge #michaelsmakers

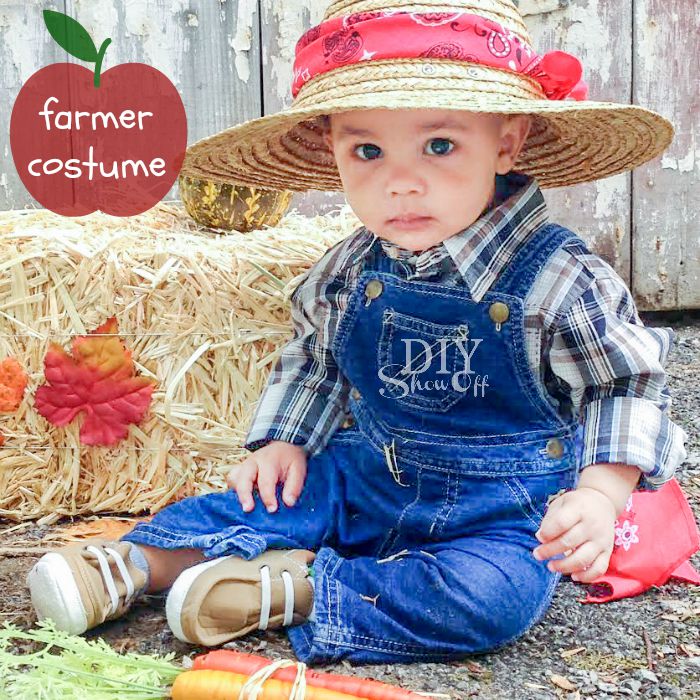
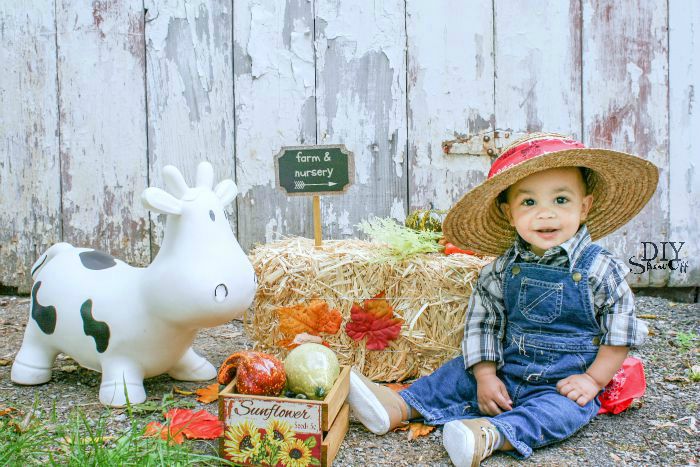
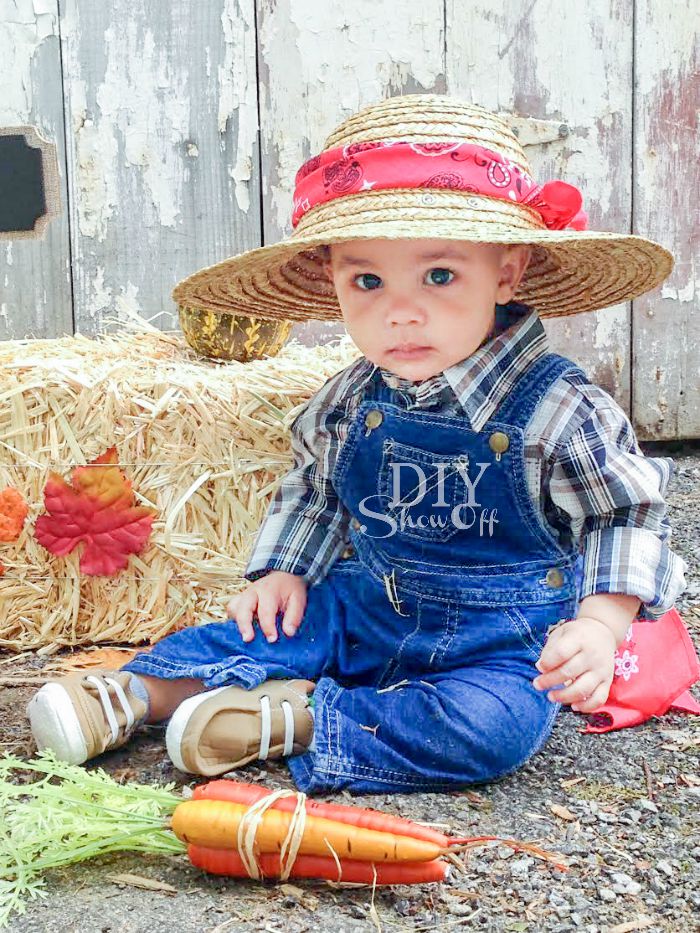
So fun! Someone in our family is celebrating a first Halloween this year. But babies aren’t too interested in Halloween or costumes so I love that this costume really is super easy to throw together with an existing pair of overalls, and flannel or plaid shirt. 

cutest baby farmer DIY costume @diyshowoff

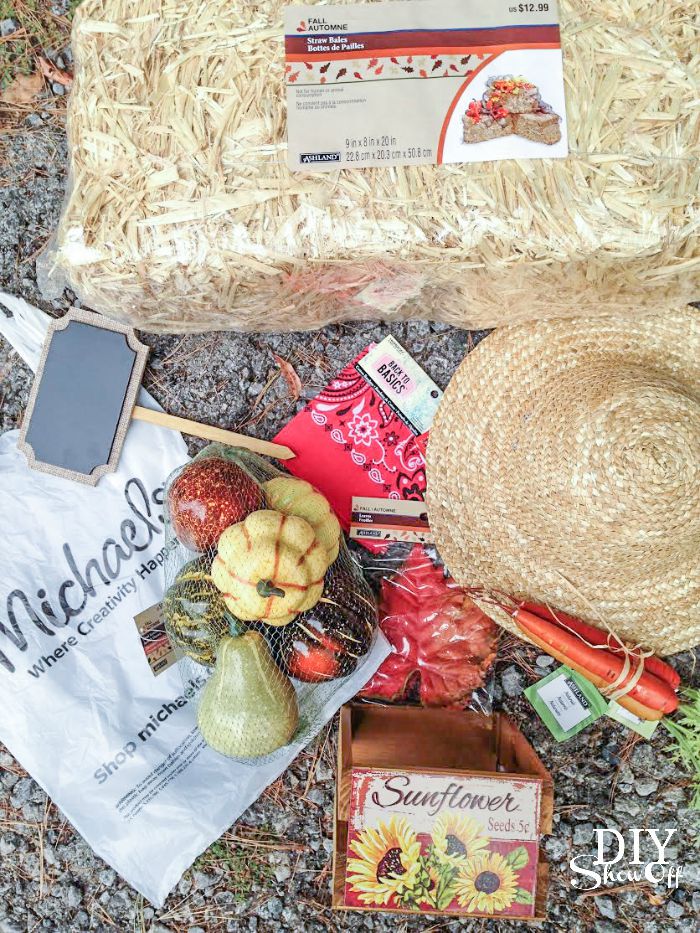
Grab a few props from Michaels and you have a perfect harvest/farm fresh themed photo opportunity for this time of year, a few decorative items to re-use and a comfortable baby ready for that Halloween party.

cutest baby farmer DIY costume @diyshowoff

(some affiliate links shown below)
Shop at Michaels
 – shop from home!

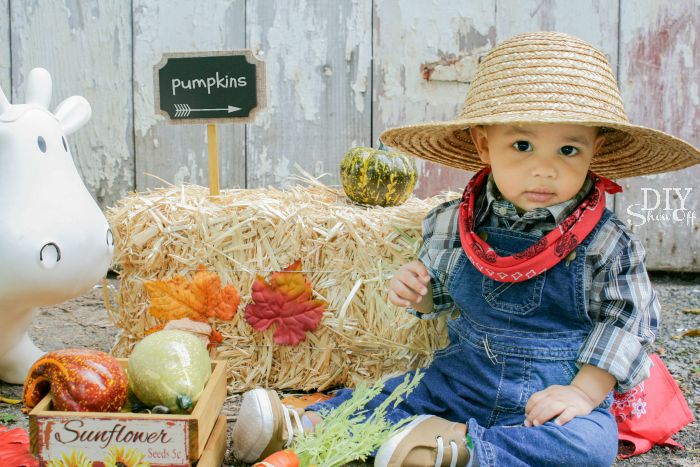
Cute, right?

cutest baby farmer DIY costume @diyshowoff #michaelsmakers

And easy too!

cutest baby farmer DIY costume @diyshowoff

After the fact, you have items for an autumn harvest vignette or centerpiece. Duel purpose pieces rock!

cutest baby farmer DIY costume @diyshowoff

Need more DIY Halloween decor and costume ideas? Check these out: 
DIY Halloween Costume Challenge #michaelsmakers

  • Michaels has great products and inspiration to help transform your yard, classroom or living room into a spooktacular space this year!
  • Whether you’re into spooky sights, playful pumpkins or giggling ghouls, the Michaels.com Halloween project page has tons of ideas for DIY Halloween costumes and décor.
  • Still haven’t decided what you’re going to be? Check out the other 49 DIY costumes from the Michaels Makers starting at 11 a.m. EST today and you might just find the perfect one for you, your kiddos or your beloved pet this Halloween– they’re to die for! 

Jazz up baby’s crib for under $10

Need a splash of color in the nursery? Jazz up the crib with vinyl decals for less than $10! 

Jazz up your crib for under $10 with DIY adhesive vinyl decals. Tutorial @diyshowoff

Crib before:

Jazz up your crib for under $10 with DIY adhesive vinyl decals. Tutorial @diyshowoff

Materials I used: Happy Crafters adhesive vinyl x 2 colors 

Tools Needed: Scissors

Jazz up your crib for under $10 with DIY adhesive vinyl decals. Tutorial @diyshowoff

The Oracle brand adhesive vinyl from Happy Crafters has a grid on the back side. Using scissors, simply cut strips of adhesive vinyl to size. No vinyl cutting machine required.  

Jazz up your crib for under $10 with DIY adhesive vinyl decals. Tutorial @diyshowoff

Remove backing and place onto crib like stickers. You choose the color or colors that coordinate with your space. Best part? They’re removable! Get a fresh new look temporarily without ruining the crib’s finish. 

Jazz up your crib for under $10 with DIY adhesive vinyl decals. Tutorial @diyshowoff

After: 

Jazz up your crib for under $10 with DIY adhesive vinyl decals. Tutorial @diyshowoffJazz up your crib for under $10 with DIY adhesive vinyl decals. Tutorial @diyshowoffJazz up your crib for under $10 with DIY adhesive vinyl decals. Tutorial @diyshowoff

Can’t go wrong with easy, affordable, temporary and cute crib decorating! 

*Please note that you should make safety your first priority. If you find that your vinyl decals are peeling up, remove vinyl immediately. We do not have any issues, I’m only sharing a decorating project that works for us. Attempt this project at your own risk. 

**This post is sponsored by Happy Crafters. Tutorial, experience and opinion is my own. I love the products and the prices are affordable. Check out all the supplies at Happy Crafters for great prices, products and inspiration for your next project. 

HClogopngsmall

DIY {club foot} Brace Cover

Sweet grand baby boy was born with club feet and after months of casting then surgery, he graduated to special shoes and a bar.

Before…

DIY {club foot} brace cover tutorial @diyshowoff

And sometimes that bar conks him on the head. Ouch. So I made up a little cushion/cover and wanted to share here for others who may be searching to cover their baby’s Ponseti bar.

DIY {club foot} brace cover tutorial @diyshowoff

Materials I used:

  • pipe insulation
  • fabric
  • Velcro one wrap

DIY {club foot} brace cover tutorial @diyshowoff

What I did:

I cut a piece of pipe insulation to fit the brace between the shoes (6 inches). 

Next, I cut a piece of scrap fabric 8×9 inches. (It’s a snug fit so I’d suggest doing 8×11 inches instead…a little extra to tuck in.)

DIY {club foot} brace cover tutorial @diyshowoff

Then just ironed/sewed the borders. 

DIY {club foot} brace cover tutorial @diyshowoffDIY {club foot} brace cover tutorial @diyshowoff

I cut two pieces of the Velcro to fit around the pipe insulation snuggly. 

DIY {club foot} brace cover tutorial @diyshowoff

Assembly: Insert the brace into the pipe insulation. Wrap the fabric around the pipe insulation, tucking the ends into the open side. Secure with the Velcro. 

Optional: If you’re more of a sewing expert than me, you could do snaps or sew on velcro. 

DIY {club foot} brace cover tutorial @diyshowoff

Now, the brace has a bit of cushioning. If there was only a way to cushion those hard soled shoes.

DIY {club foot} brace cover tutorial @diyshowoffDIY {club foot} brace cover tutorial @diyshowoff DIY {club foot} brace cover tutorial @diyshowoff


Ps. Yes, his shoes are on backwards. Doctors orders, part of the treatment. Isn’t he the cutest?

DIY {club foot} brace cover tutorial @diyshowoff

Easy DIY Personalized Easter Basket Liner

Happy Spring! With a new grand-baby in the family, I can’t help but get all giddy about making up an Easter basket this year. As you know, I love to personalize gifts and with just a t-shirt and a DIY iron-on vinyl, this liner is super easy to make! 

DIY personalized Easter basket liner tutorial @diyshowoff

What I used:

personalized Easter basket liner @diyshowoff

What you’ll need: sewing machine, scissors, straight edge, computer/vinyl cutter, iron. 

What I did:

Lay inside out t-shirt flat and using a straight edge, draw a line beneath the t-shirt arms. This is the sewing guide…simply a straight line. 

personalized Easter basket liner @diyshowoff

Sew along the line. 

personalized Easter basket liner @diyshowoff

Then cut straight across above the sewn line (right below the armpits of the t-shirt). 

personalized Easter basket liner @diyshowoff

Flip right side out. 

Place the seam inside of the basket and fold the edges of the t-shirt over the basket to create a liner. Measure how much room you have horizontally and vertically to get an idea of your iron on design’s size. I kept mine under 2″ high by 7″ wide. 

personalized Easter basket liner @diyshowoff

Using the Silhouette Design Studio software, I created a graphic with name and a cute little bunny shape. 

personalized Easter basket liner @diyshowoff

You’ll need to mirror the text and image by right clicking and selecting “flip horizontally”. 

personalized Easter basket liner @diyshowoffpersonalized Easter basket liner @diyshowoff

Double check the size. (One sheet of iron-on vinyl is going to make a LOT of decals!) 

personalized Easter basket liner @diyshowoff

Load vinyl into the machine shiny side down. The shiny side is actually the transparent cover. Vinyl is the matte side (facing up). 

personalized Easter basket liner @diyshowoff

Send the design to ‘cut’. Adjust setting for heat transfer material and “cut”.

personalized Easter basket liner @diyshowoff

When cutting is complete, remove vinyl from machine. Trim to a manageable size. 

personalized Easter basket liner @diyshowoff

Weed away the excess vinyl. The decal will show a backwards design on the transparency. 

personalized Easter basket liner @diyshowoff

Smooth out the t-shirt liner with the open end facing you. Place the iron on decal towards the bottom, centered. 

personalized Easter basket liner @diyshowoffpersonalized Easter basket liner @diyshowoff

Cover with a cotton cloth (or the scrap t-shirt material) and iron according to instructions that came with the iron on vinyl.

personalized Easter basket liner @diyshowoffpersonalized Easter basket liner @diyshowoff

Carefully remove the transparency film. 

personalized Easter basket liner @diyshowoff

Line the Easter basket and fill. Easy, right? Cute too! 

DIY personalized Easter basket liner tutorial @diyshowoffDIY personalized Easter basket liner tutorial @diyshowoff

It’s actually a pretty easy DIY project for any time of the year, any basket or to personalize a gift basket for any occasion.

DIY personalized Easter basket liner tutorial @diyshowoff


More Easter DIY ideas

DIY warm cool aromatherapy snuggle bunnies @diyshowoff #essentialoilsdip-dyed-easter-egg-tutorialDIYShowOff Easer succulent garden


*This post is sponsored by Happy Crafters. Tutorial, experience and opinion is my own. I love the products and the prices are affordable. Check out all the supplies at Happy Crafters for great prices, products and inspiration for your next project. 

HClogopngsmall