Snack Time Table Runner

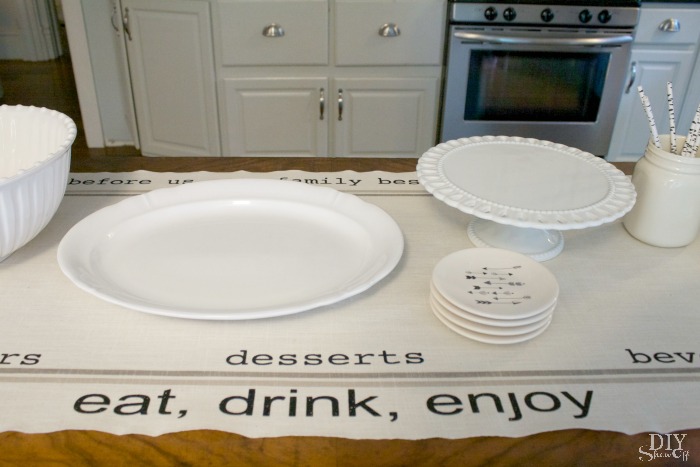
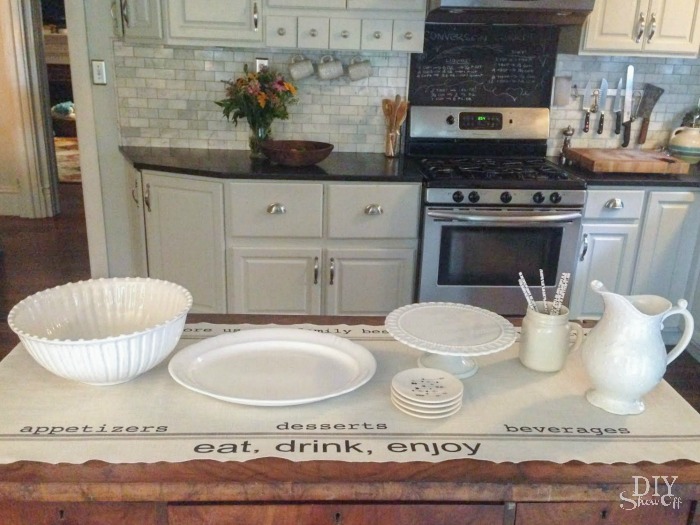
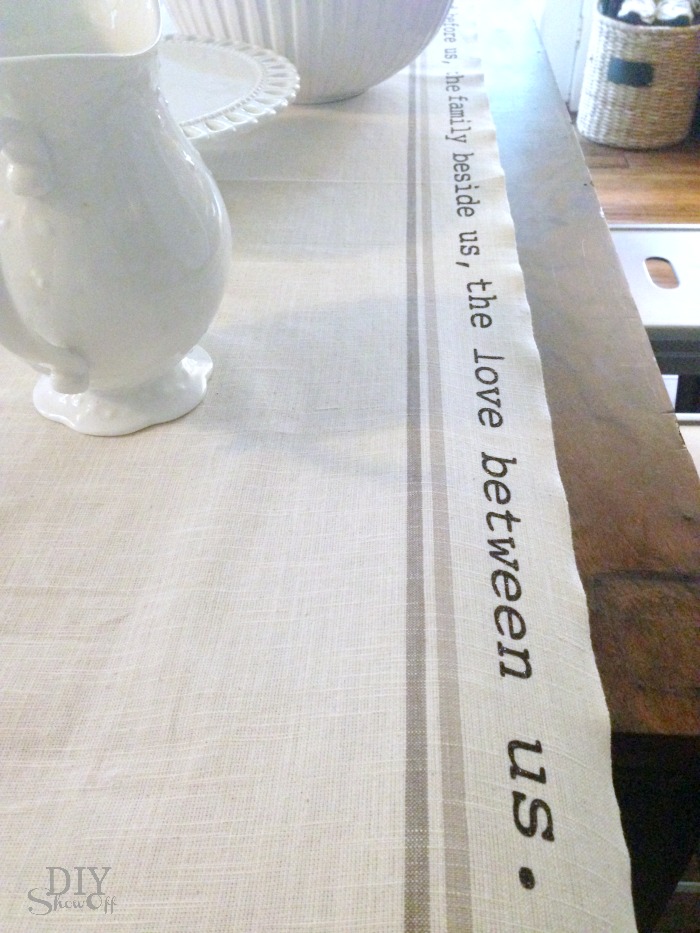
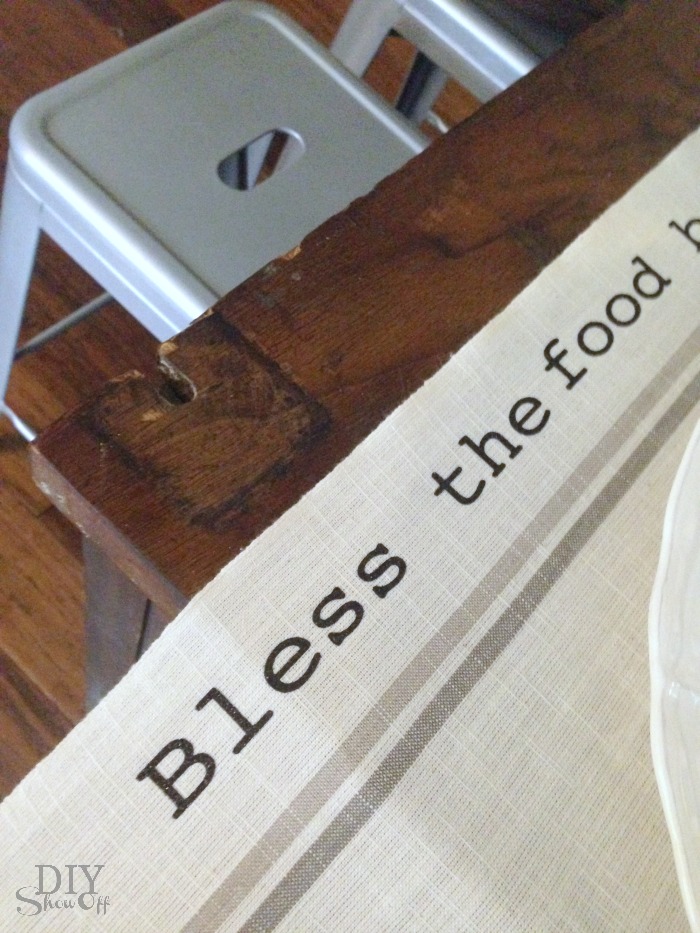
Serving up snacks for guests? Dress up the ‘buffet’ with a cute table runner. 

snack time table runner tutorial @diyshowoff

Materials I used: 

What I did: 

Wash, dry, iron and hem edges of toweling fabric to create a runner. I accidentally deleted the photos from this step…but the toweling only needs hems on the short sides. 

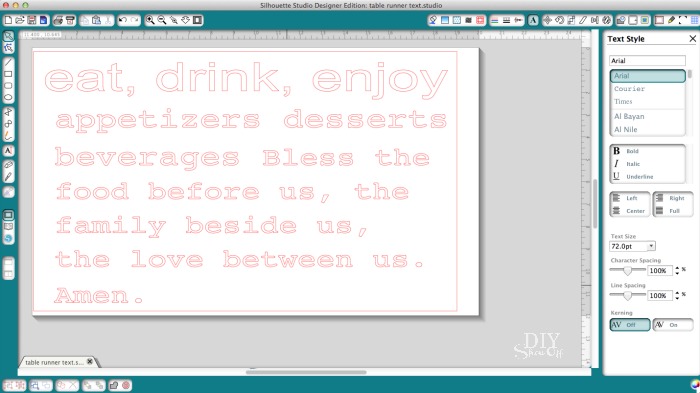
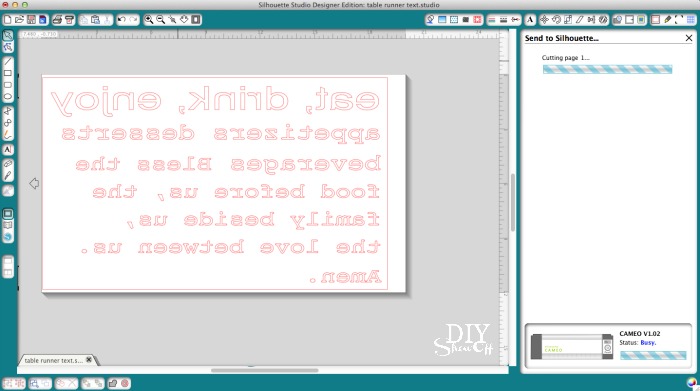
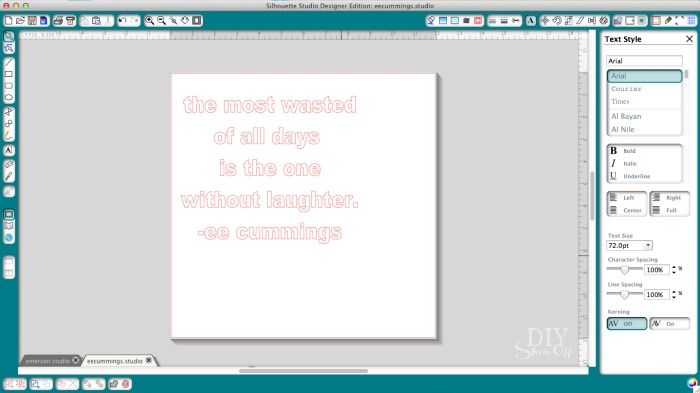
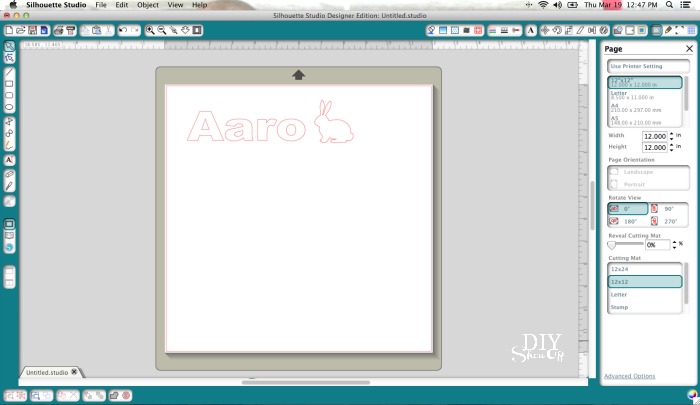
Create text using Silhouette Studio Designer software. 

snack time table runner tutorial @diyshowoff

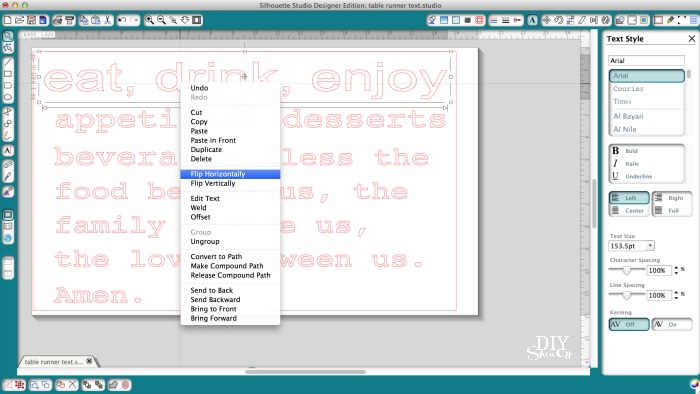
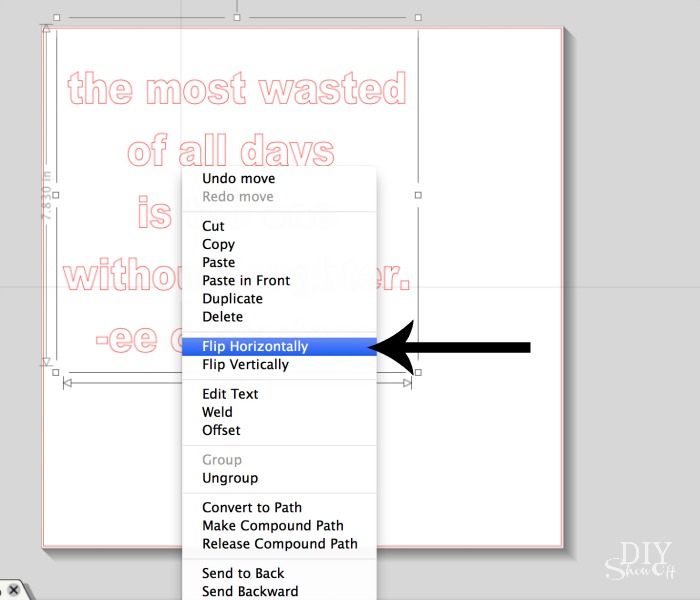
Important: flip/mirror text (right click and “flip horizontally”). 

snack time table runner tutorial @diyshowoff snack time table runner tutorial @diyshowoff

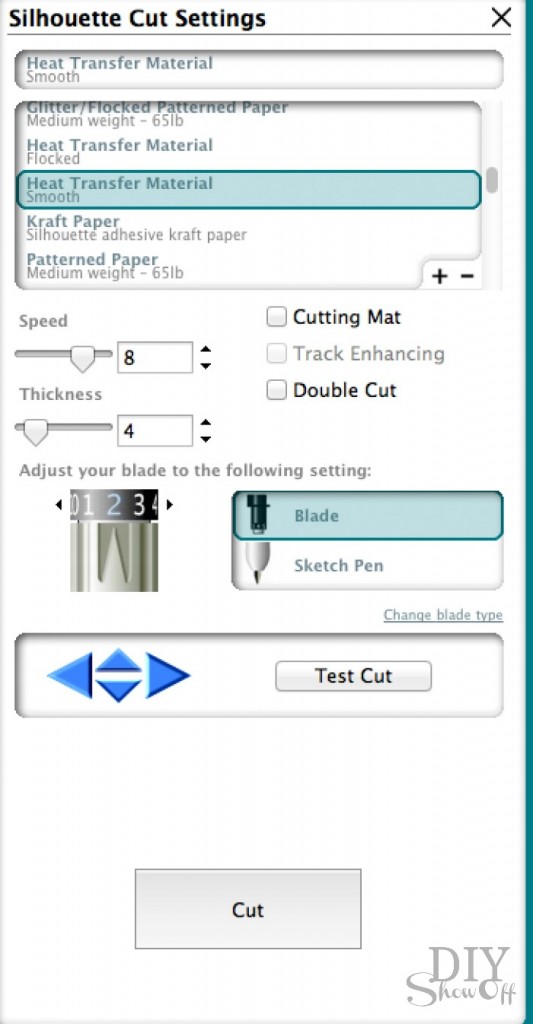
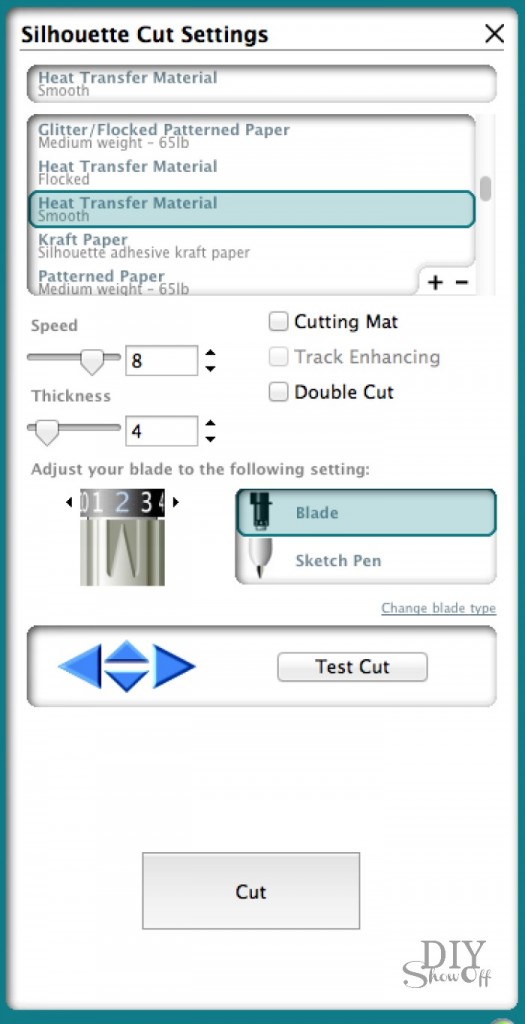
Adjust Silhouette blade settings for heat transfer in the “cut” screen.

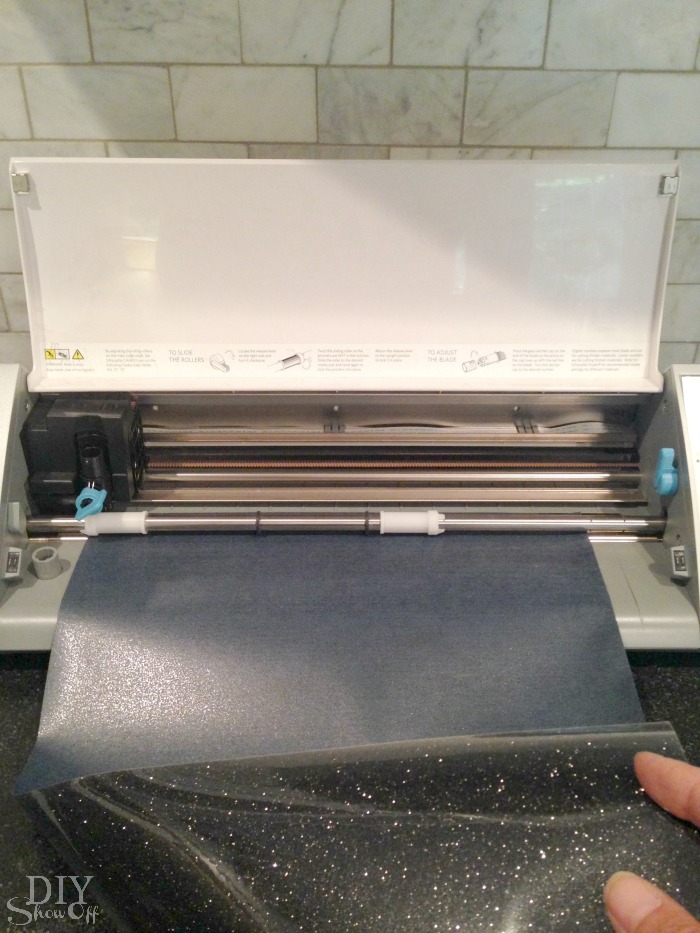
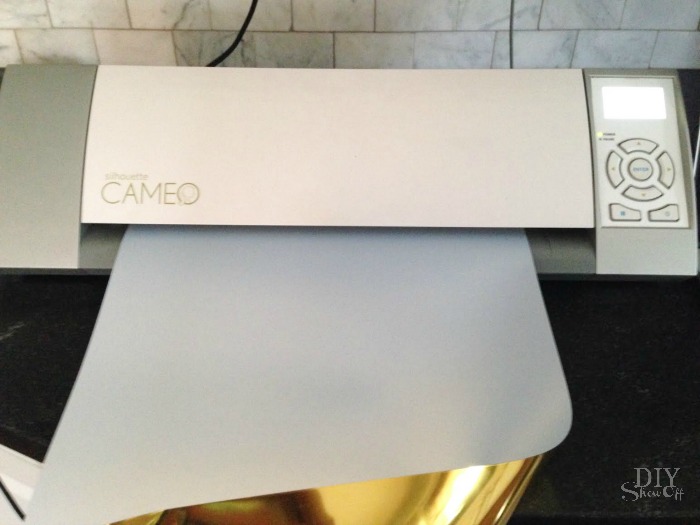
Load iron on vinyl into machine shiny/pattered/glittered side down and click “cut”.

snack time table runner tutorial @diyshowoff

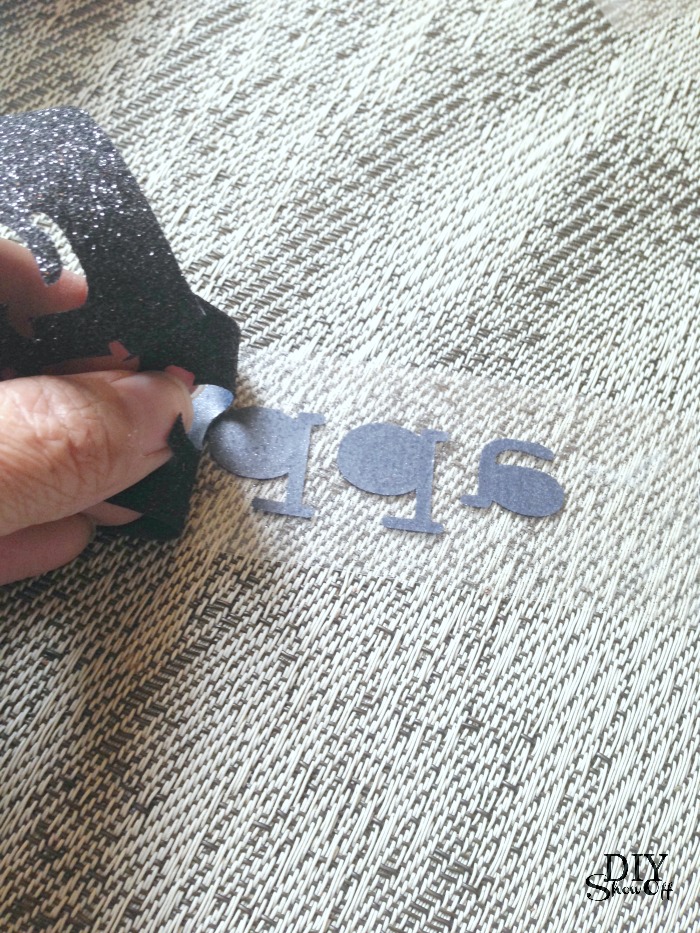
When complete, remove vinyl from machine and weed away excess iron on vinyl. Design/text will show backwards on the tacky side of a transparency. 

snack time table runner tutorial @diyshowoff

Place iron on decal with transparency onto fabric. Cover with scrap fabric and apply heat with iron on high setting for 20-30 seconds. snack time table runner tutorial @diyshowoff
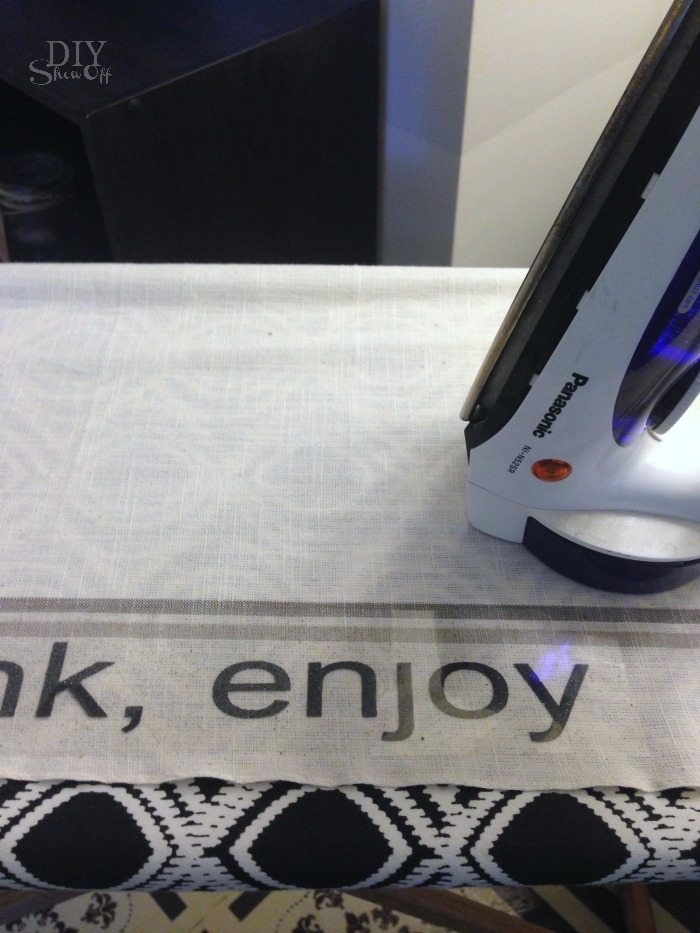
 

snack time table runner tutorial @diyshowoff

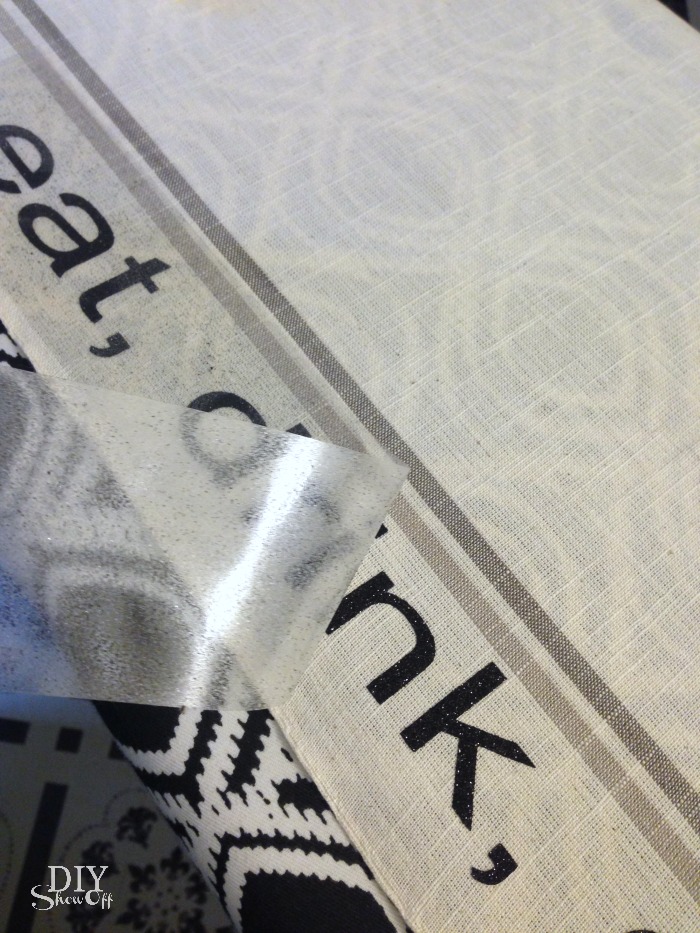
Pull away transparency. (If iron-on pulls up, replace transparency and repeat applying heat.)

snack time table runner tutorial @diyshowoff

After iron on decals are all placed, iron entire runner on the back side.

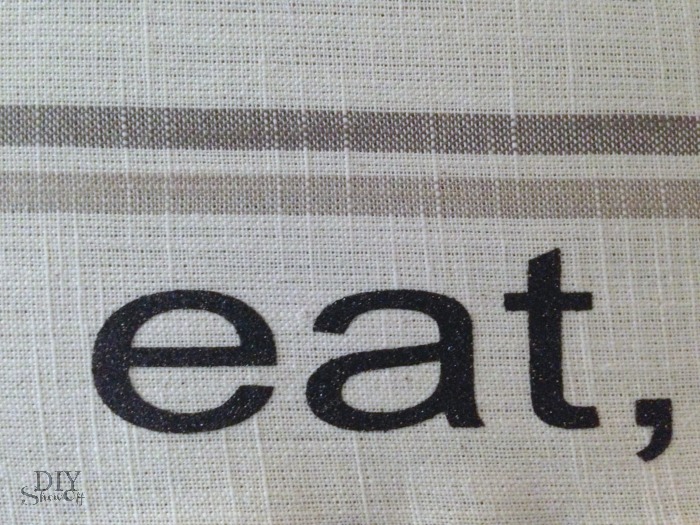
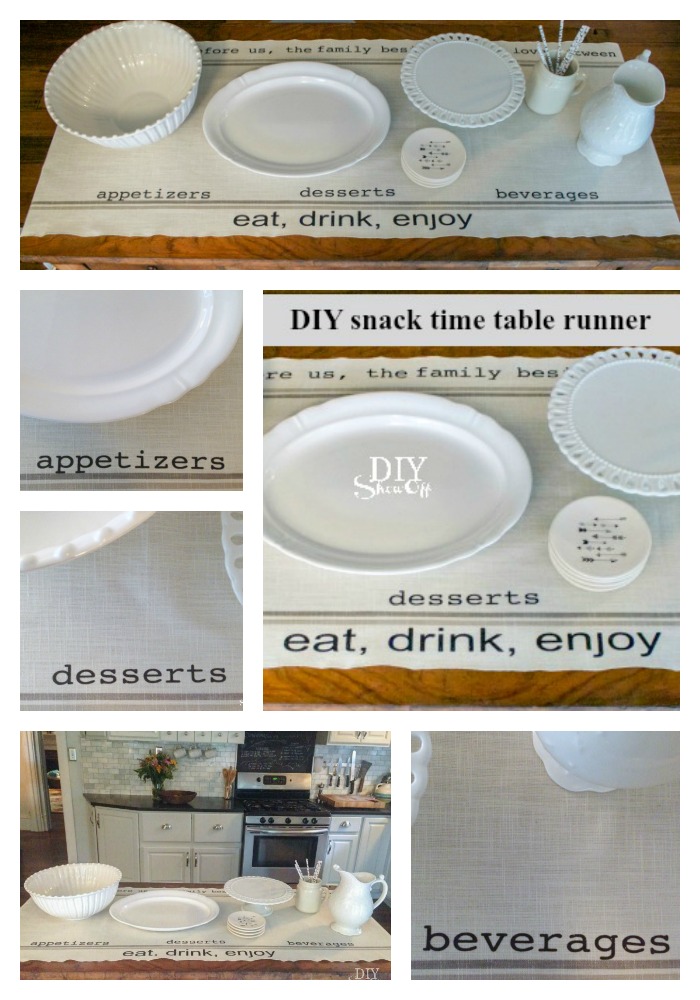
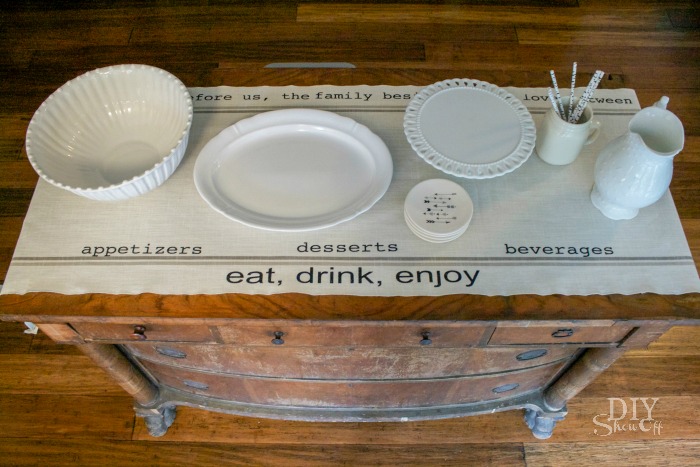
Perfect for adding a special touch to snacks for a small gathering. 

snack time table runner tutorial @diyshowoff snack time table runner tutorial @diyshowoff snack time table runner tutorial @diyshowoff snack time table runner tutorial @diyshowoff snack time table runner tutorial @diyshowoff snack time table runner tutorial @diyshowoff

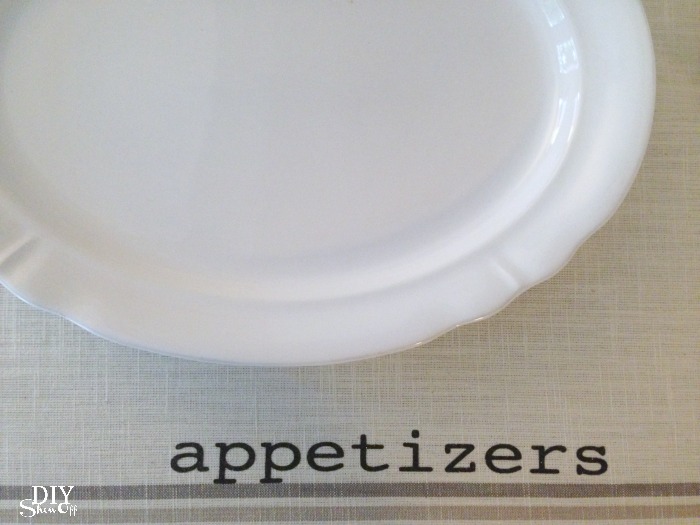
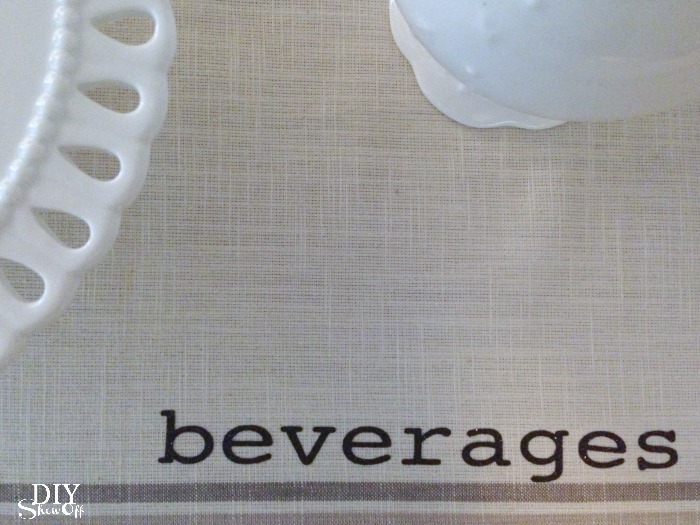
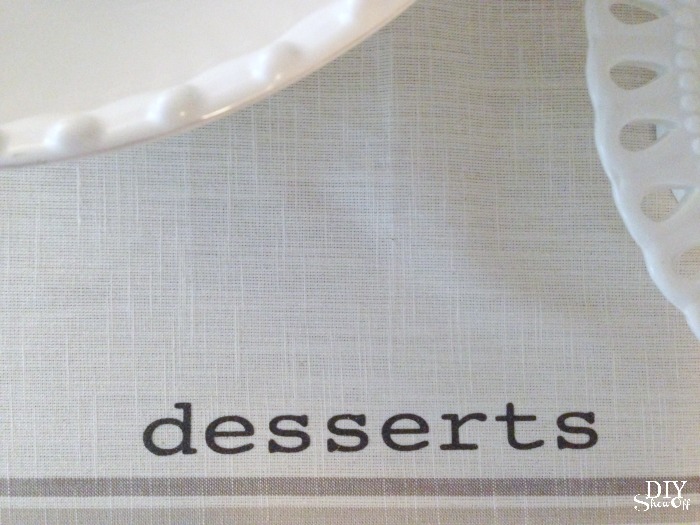
Cute display for appetizers, desserts and beverages displayed on our kitchen island.  snack time table runner tutorial @diyshowoff snack time table runner tutorial @diyshowoff snack time table runner tutorial @diyshowoff
 

snack time table runner tutorial @diyshowoff

*This post is sponsored by Happy Crafters and my last one. What a fun partnership – I’m in love with the products and they’re affordable too! Tutorial, experience and opinion are my own. Check out all the supplies at Happy Crafters for great prices, products and inspiration for your next project. 

HClogopngsmall

DIY Vinyl Iron on Decal

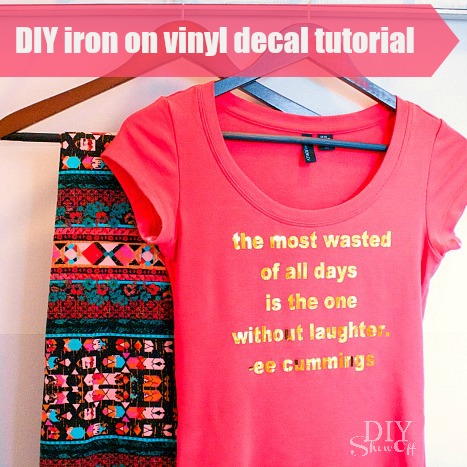
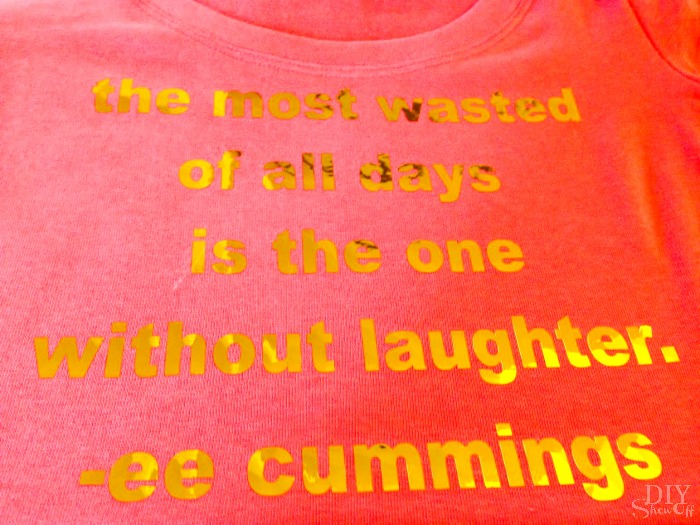
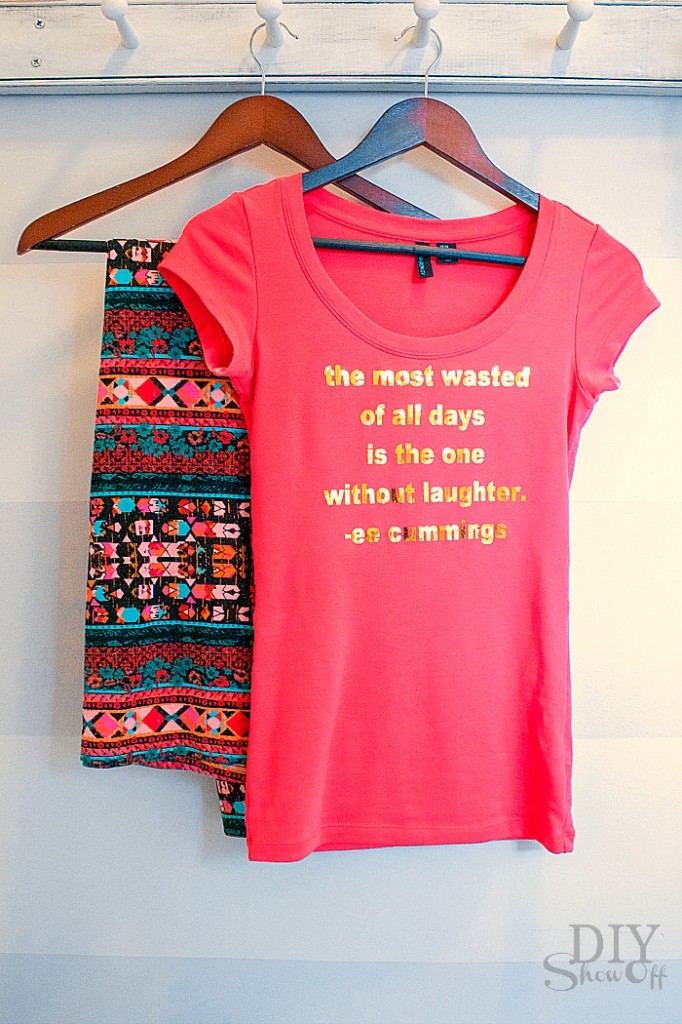
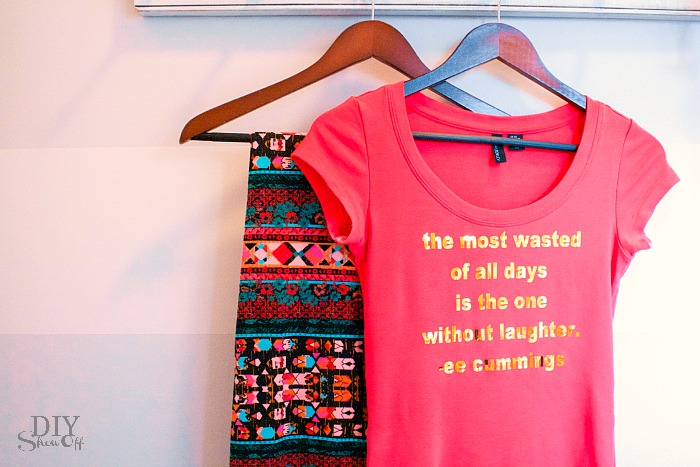
My monthly project for Happy Crafters is all about iron on vinyl, my favorite being the gold vinyl where I can quickly add a little bling to a plain t-shirt, tote back, pillow covers, onesies, etc. 

gold metallic iron on vinyl decal tutorial @diyshowoff #happycrafters

Materials:

Tutorial:

Use Silhouette Design Studio software to create a design of text with a quote. 

gold metallic iron on vinyl decal tutorial @diyshowoff #happycrafters

Resize text the text box and font to fit the front of your t-shirt. 

*Important! Right click and “flip horizontally” so that the text is a mirror image/backwards.

gold metallic iron on vinyl decal tutorial @diyshowoff #happycraftersgold metallic iron on vinyl decal tutorial @diyshowoff #happycrafters

Load sheet of vinyl iron on into the machine shiny/color side facing down. 

gold metallic iron on vinyl decal tutorial @diyshowoff #happycrafters

Click “send to cut” and be sure to adjust settings for cutting smooth heat transfer. I found that I needed to up the blade 2 more than recommended to get through the vinyl (awesome quality stuff!) so you may want to do a small text cut. 

gold metallic iron on vinyl decal tutorial @diyshowoff #happycrafters

Click “cut”. Once cutting is complete, remove vinyl from machine. 

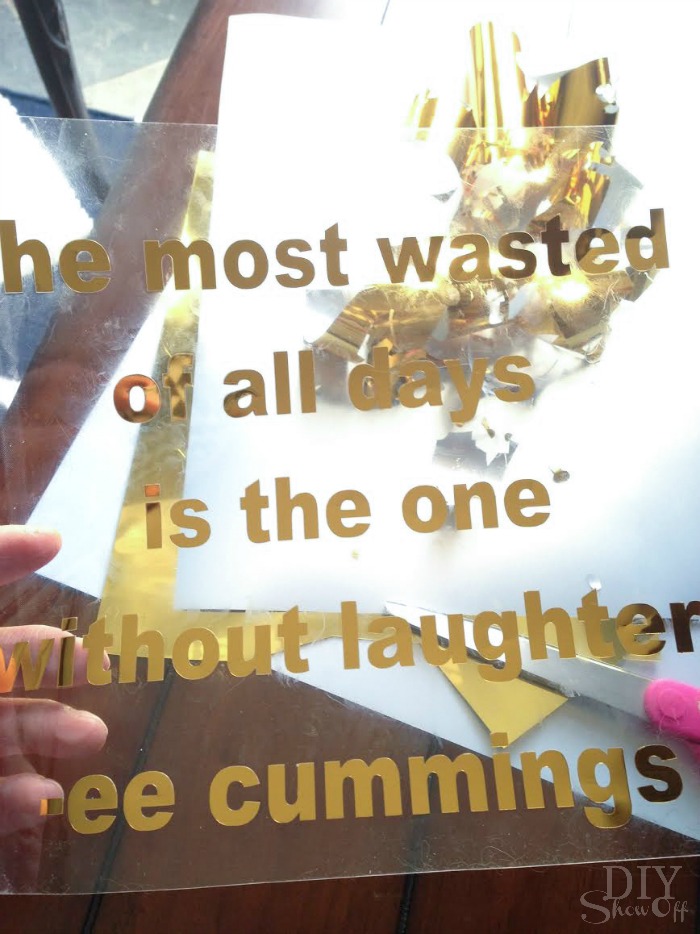
Trim away excess vinyl. I like to have about an inch border around my text.

Weed away the negative part of the design (leaving text on the tacky clear transfer sheet). 

gold metallic iron on vinyl decal tutorial @diyshowoff #happycrafters

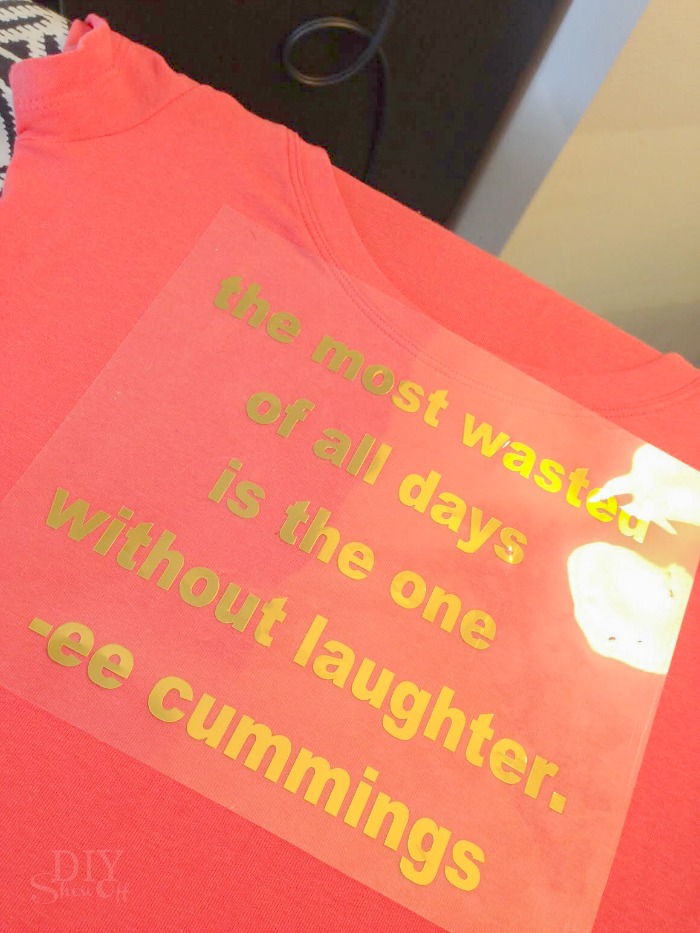
Place iron on sticky side down onto t-shirt.

gold metallic iron on vinyl decal tutorial @diyshowoff #happycrafters

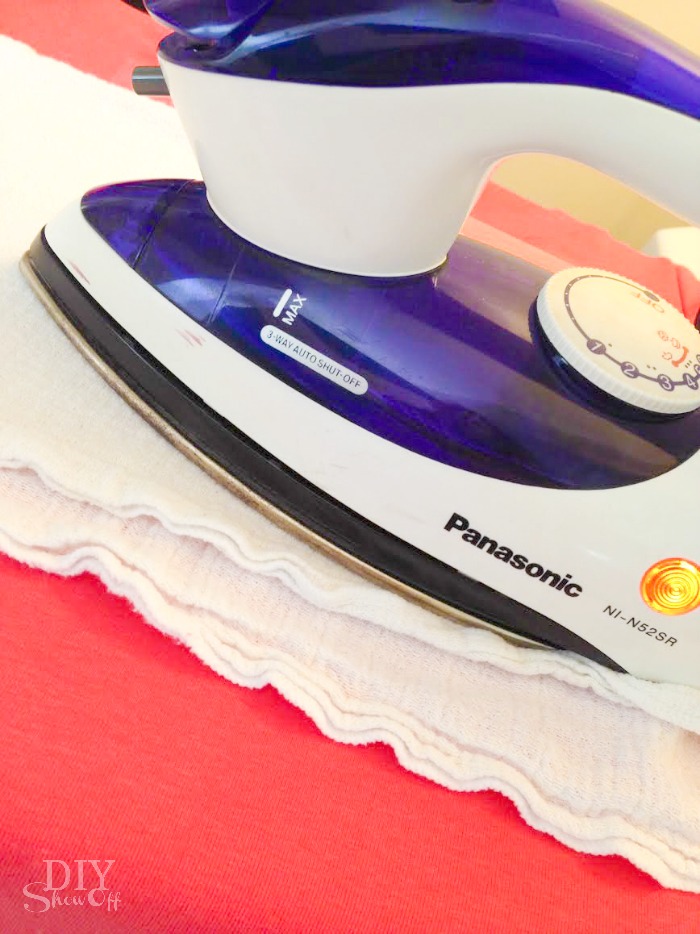
Iron according to paper instructions included with the vinyl iron on material with a cotton cloth over the transparent plastic. 

gold metallic iron on vinyl decal tutorial @diyshowoff #happycrafters

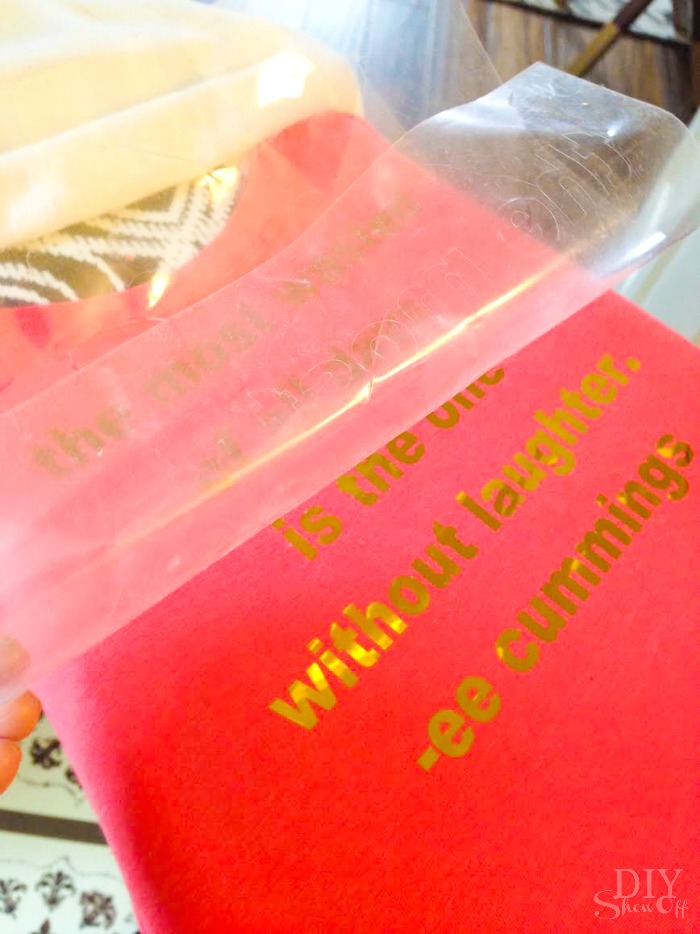
Carefully peel away clear transfer sheet. If vinyl iron on design hasn’t transferred, replace transparent sheet and re-iron/try again. 

gold metallic iron on vinyl decal tutorial @diyshowoff #happycrafters gold metallic iron on vinyl decal tutorial @diyshowoff #happycrafters

That’s it! This metallic gold foil has a mirror quality, reflections in the decal. So cool!

gold metallic iron on vinyl decal tutorial @diyshowoff #happycraftersgold metallic iron on vinyl decal tutorial @diyshowoff #happycrafters

*This post is sponsored by Happy Crafters. Tutorial, experience and opinion is my own. I love the products and the prices are affordable. Check out all the supplies at Happy Crafters for great prices, products and inspiration for your next project. 

HClogopngsmall

Easy DIY Personalized Easter Basket Liner

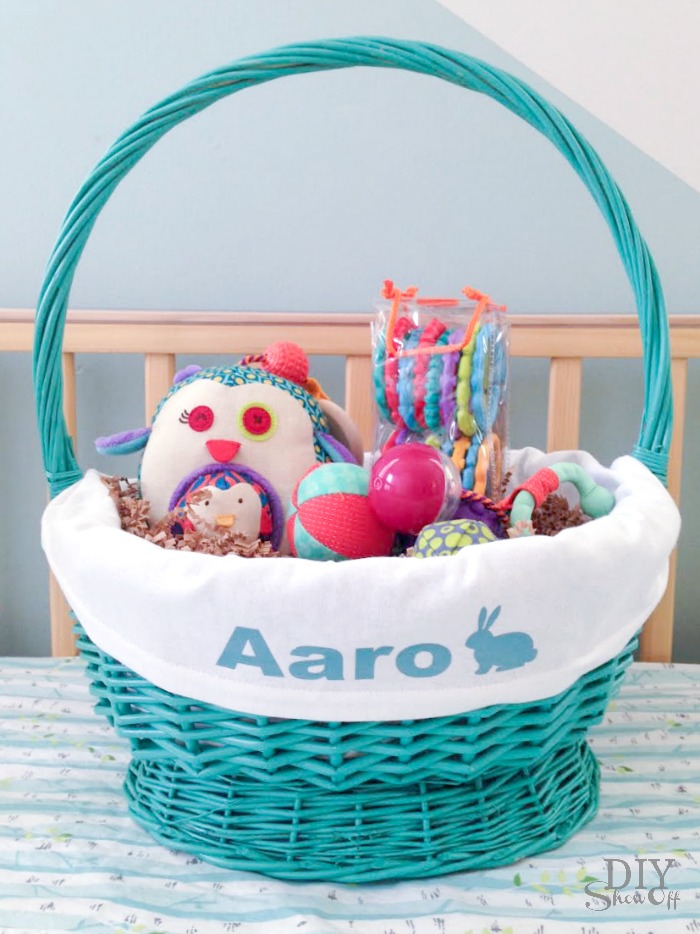
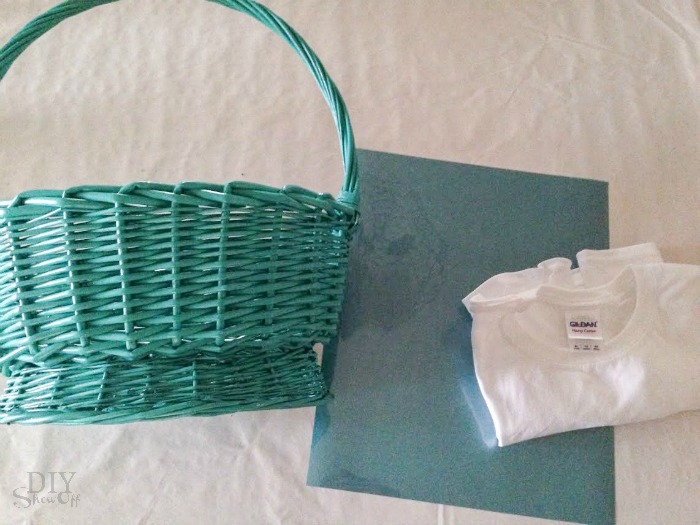
Happy Spring! With a new grand-baby in the family, I can’t help but get all giddy about making up an Easter basket this year. As you know, I love to personalize gifts and with just a t-shirt and a DIY iron-on vinyl, this liner is super easy to make! 

DIY personalized Easter basket liner tutorial @diyshowoff

What I used:

personalized Easter basket liner @diyshowoff

What you’ll need: sewing machine, scissors, straight edge, computer/vinyl cutter, iron. 

What I did:

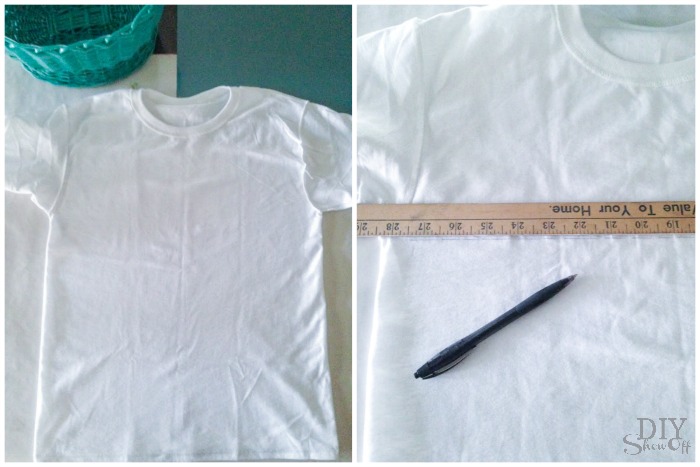
Lay inside out t-shirt flat and using a straight edge, draw a line beneath the t-shirt arms. This is the sewing guide…simply a straight line. 

personalized Easter basket liner @diyshowoff

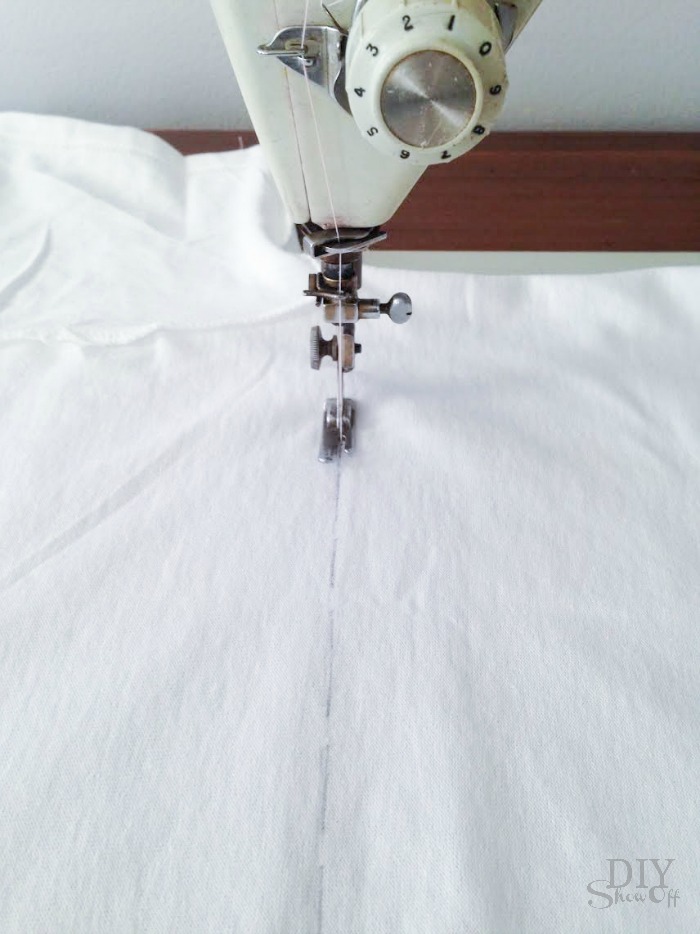
Sew along the line. 

personalized Easter basket liner @diyshowoff

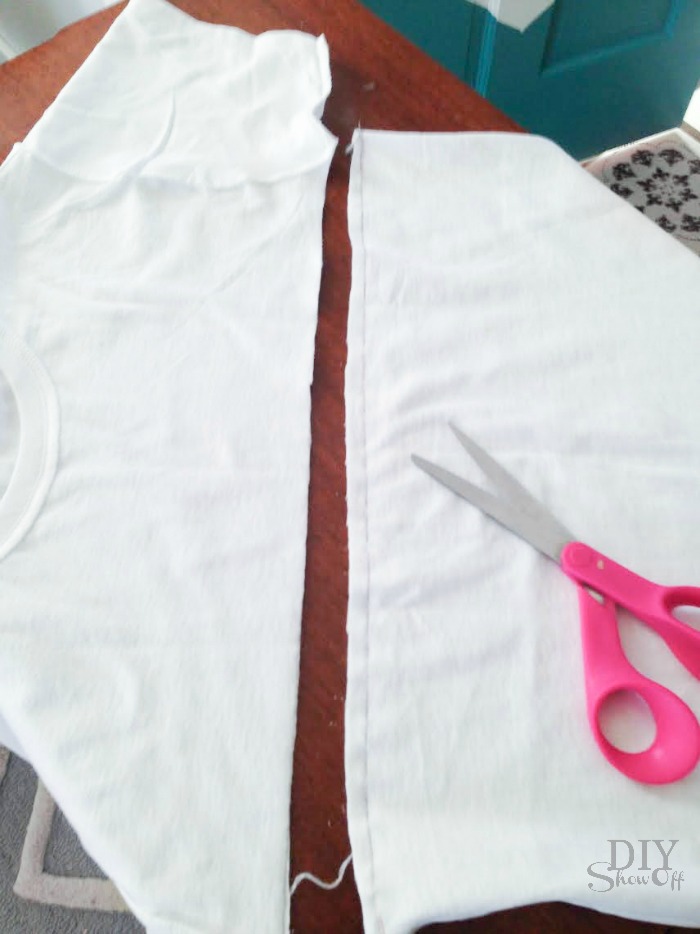
Then cut straight across above the sewn line (right below the armpits of the t-shirt). 

personalized Easter basket liner @diyshowoff

Flip right side out. 

Place the seam inside of the basket and fold the edges of the t-shirt over the basket to create a liner. Measure how much room you have horizontally and vertically to get an idea of your iron on design’s size. I kept mine under 2″ high by 7″ wide. 

personalized Easter basket liner @diyshowoff

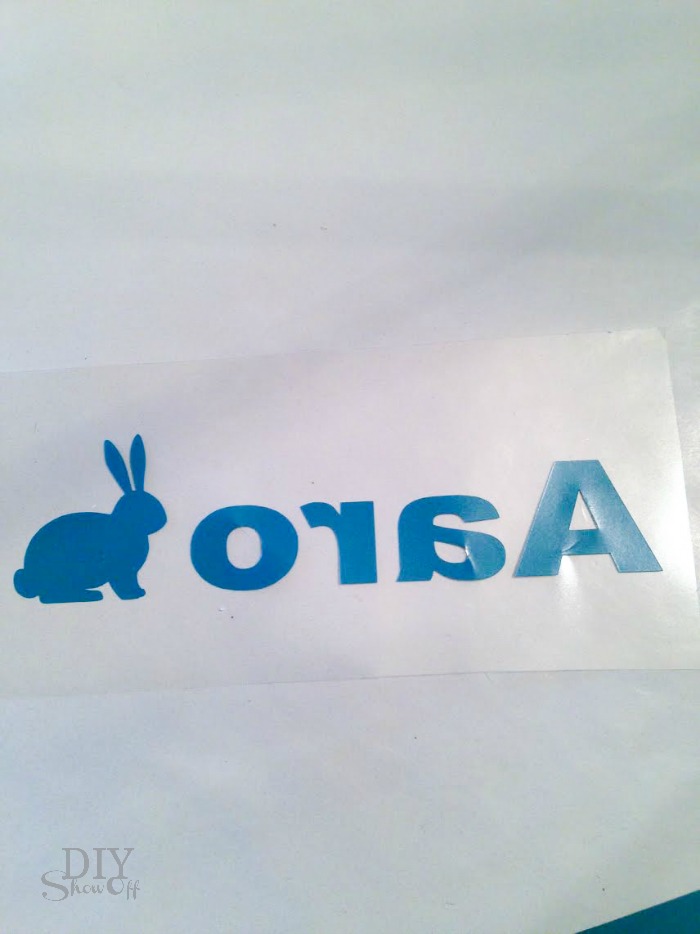
Using the Silhouette Design Studio software, I created a graphic with name and a cute little bunny shape. 

personalized Easter basket liner @diyshowoff

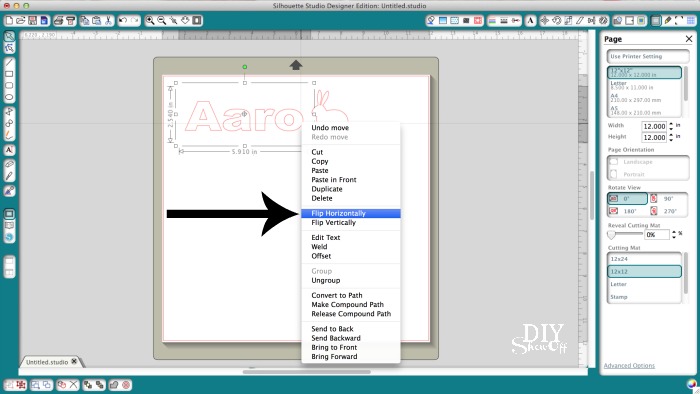
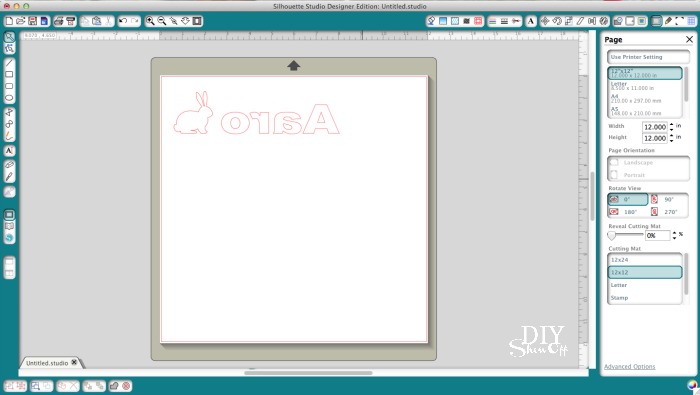
You’ll need to mirror the text and image by right clicking and selecting “flip horizontally”. 

personalized Easter basket liner @diyshowoffpersonalized Easter basket liner @diyshowoff

Double check the size. (One sheet of iron-on vinyl is going to make a LOT of decals!) 

personalized Easter basket liner @diyshowoff

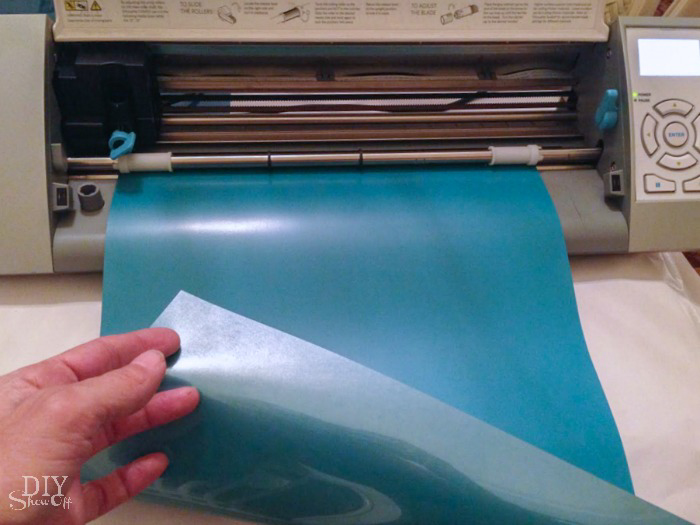
Load vinyl into the machine shiny side down. The shiny side is actually the transparent cover. Vinyl is the matte side (facing up). 

personalized Easter basket liner @diyshowoff

Send the design to ‘cut’. Adjust setting for heat transfer material and “cut”.

personalized Easter basket liner @diyshowoff

When cutting is complete, remove vinyl from machine. Trim to a manageable size. 

personalized Easter basket liner @diyshowoff

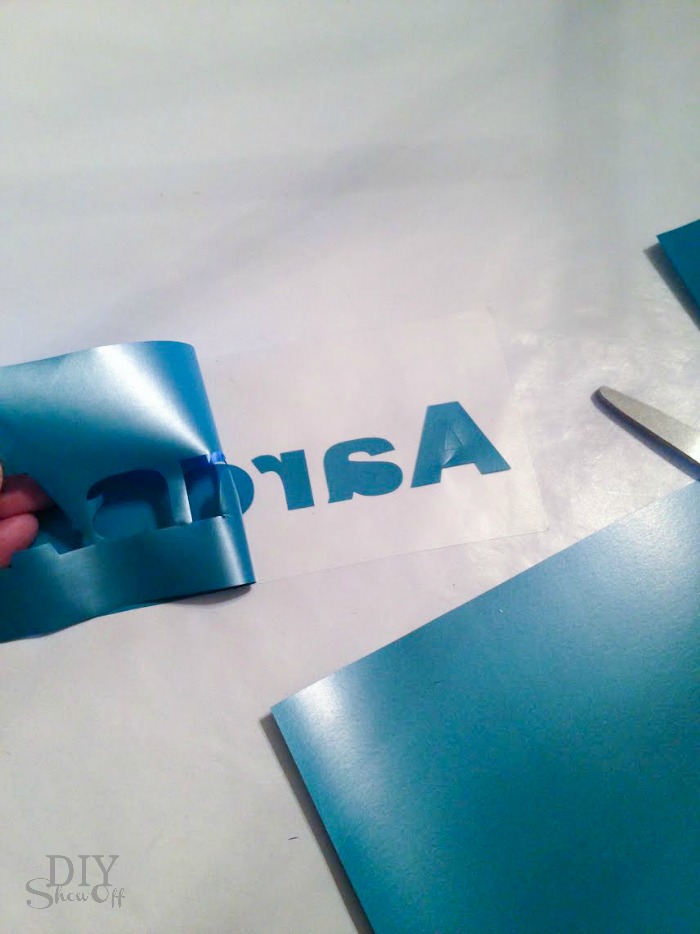
Weed away the excess vinyl. The decal will show a backwards design on the transparency. 

personalized Easter basket liner @diyshowoff

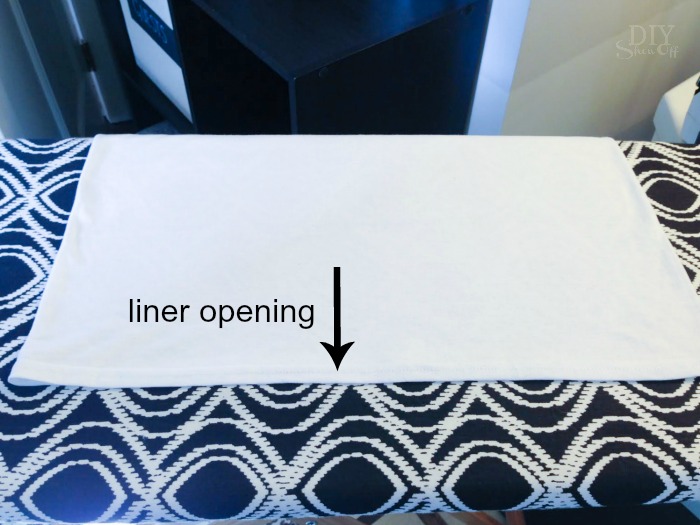
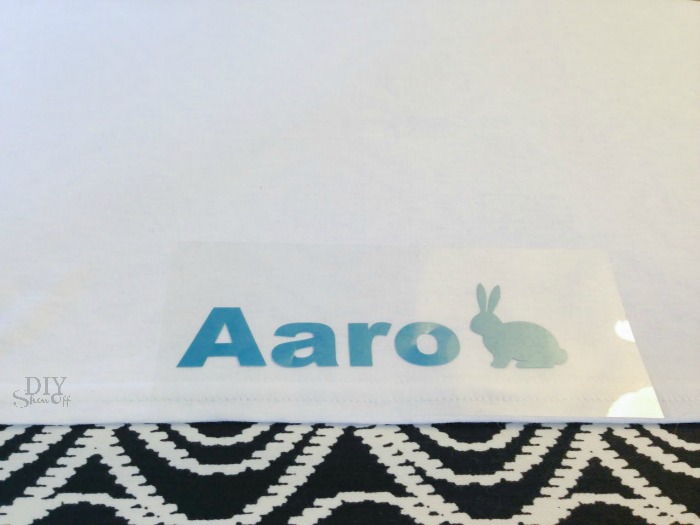
Smooth out the t-shirt liner with the open end facing you. Place the iron on decal towards the bottom, centered. 

personalized Easter basket liner @diyshowoffpersonalized Easter basket liner @diyshowoff

Cover with a cotton cloth (or the scrap t-shirt material) and iron according to instructions that came with the iron on vinyl.

personalized Easter basket liner @diyshowoffpersonalized Easter basket liner @diyshowoff

Carefully remove the transparency film. 

personalized Easter basket liner @diyshowoff

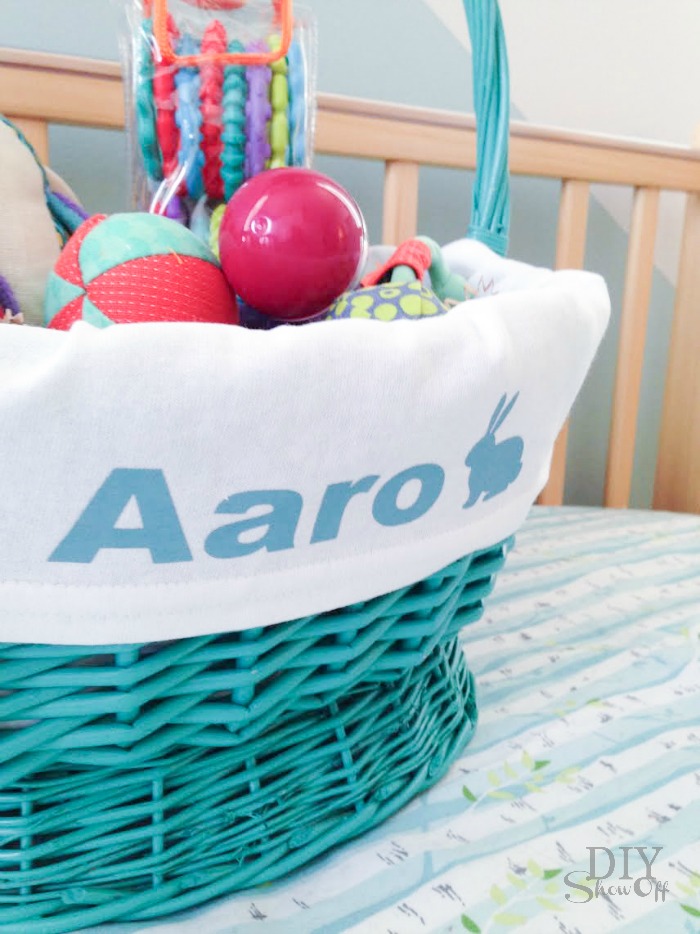
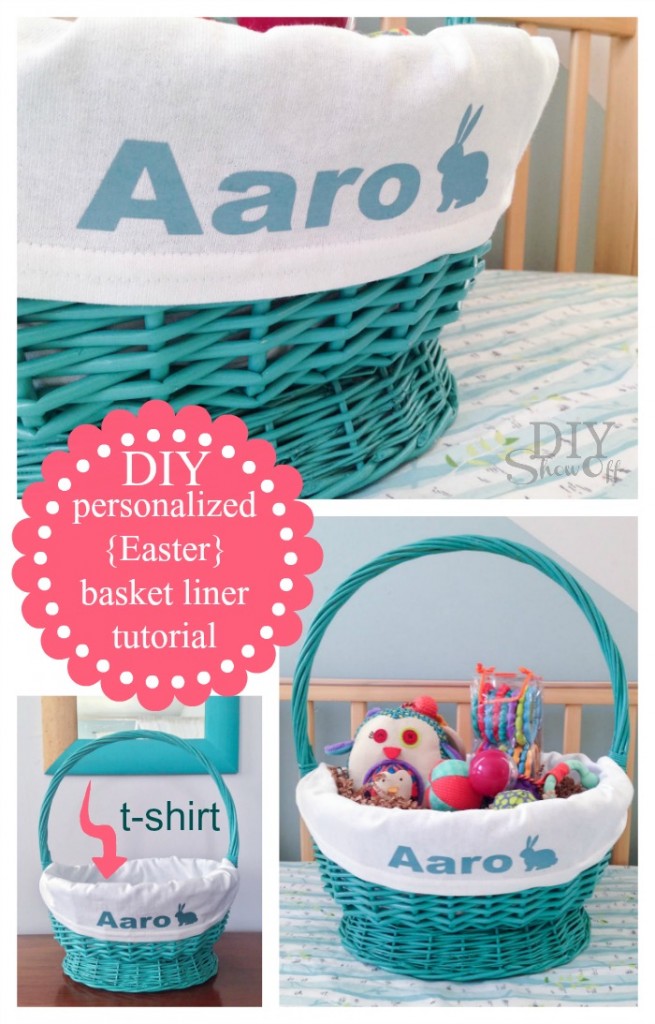
Line the Easter basket and fill. Easy, right? Cute too! 

DIY personalized Easter basket liner tutorial @diyshowoffDIY personalized Easter basket liner tutorial @diyshowoff

It’s actually a pretty easy DIY project for any time of the year, any basket or to personalize a gift basket for any occasion.

DIY personalized Easter basket liner tutorial @diyshowoff


More Easter DIY ideas

DIY warm cool aromatherapy snuggle bunnies @diyshowoff #essentialoilsdip-dyed-easter-egg-tutorialDIYShowOff Easer succulent garden


*This post is sponsored by Happy Crafters. Tutorial, experience and opinion is my own. I love the products and the prices are affordable. Check out all the supplies at Happy Crafters for great prices, products and inspiration for your next project. 

HClogopngsmall

Personalized Baby Gift Set

I love being creative when it comes to baby gifts and personalizing a baby layette set with iron-on vinyl decals is just so easy to do!

DIY personalized baby layette gift set @diyshowoff

Supplies:

What I did:

Using my Silhouette studio designer edition software, I created a few fun decals. 

DIY personalized baby layette gift set @diyshowoff

For iron-ons, text (and some images) will need to be mirrored/flipped horizontally. Simply right click and choose “flip horizontally”. 

DIY personalized baby layette gift set @diyshowoff

Load the vinyl into the machine shiny side down (the shiny side is the transparency side). 

DIY personalized baby layette gift set @diyshowoff

Adjust settings for cutting heat transfer material and send to cut. Unload vinyl from the machine. (Note: I do not use a cutting mat as shown below.)

DIY personalized baby layette gift set @diyshowoff

Cut off the excess vinyl/material and weed (remove) the unwanted part of the the vinyl leaving just the decals. 

DIY personalized baby layette gift set @diyshowoffDIY personalized baby layette gift set @diyshowoff

Set iron according to heat instructions provided with vinyl iron on. 

Place iron on decal, shiny side facing you (iron on isn’t sticky but the clear transparency is…sticker side down to help hold iron on in place). 

DIY personalized baby layette gift set @diyshowoff

Cover with a cotton diaper cloth, burp cloth or towel and heat iron on according to instructions. 

DIY personalized baby layette gift set @diyshowoff

Carefully peel away transparency (if iron on pulls up too, re-place and iron some more). 

DIY personalized baby layette gift set @diyshowoff

Create an entire personalized baby layette gift set…

DIY personalized baby layette gift set @diyshowoffDIY personalized baby layette gift set @diyshowoff

*This post is sponsored by Happy Crafters. Tutorial, experience and opinion is my own.  Check out all the supplies at Happy Crafters for inspiration for your next project. 

HClogopngsmall

DIY Metallic Iron On Decal Tutorial

DIY metallic iron on decal tutorial @diyshowoff

I know, I know. I just shared a t-shirt tutorial a few weeks ago that I created for my sister but making up your own personalized iron on decals is so fun! Recently my blog buddy Julia from Cuckoo 4 Design (love her!) shared on her FB page the coolest t-shirt. It read “#BLOGGER”, however it’s only available in Germany so thinking along the lines of DIY (as usual), I decided to make my own for my August Happy Crafters project. They have a great selection of metallic iron on vinyl that I couldn’t wait to use.

DIY metallic iron on decal tutorial @diyshowoff

Materials:

What I did:

Open up your Silhouette Studio Design Edition software and create the text “#BLOGGER” for the front of the shirt. I also added “@DIYSHOWOFF” for the back of mine. Center on a 12×12 space. 

metallic gold #blogger vinyl decal tutorial @diyshowoff #happycrafters

Right click the text box to bring up the edit menu and select “flip horizontally”. You’ll need to mirror the text for cutting. 

metallic gold #blogger vinyl decal tutorial @diyshowoff #happycraftersmetallic gold #blogger vinyl decal tutorial @diyshowoff #happycrafters

Load the iron on vinyl into the machine gold side down (back side up). 

metallic gold #blogger vinyl decal tutorial @diyshowoff #happycrafters

Adjust blade setting for heat transfer and send to cut. 

metallic gold #blogger vinyl decal tutorial @diyshowoff #happycrafters

Unload from the machine and weed away excess vinyl. The silver/gold side will peel away from a tacky transparent side (your text will be stuck backwards to the tacky side). 

metallic gold #blogger vinyl decal tutorial @diyshowoff #happycrafters

Smooth out the shirt onto an ironing board. Place iron on vinyl decal tacky side down in the spot where you’d like it to show on the front of the shirt. 

metallic gold #blogger vinyl decal tutorial @diyshowoff #happycrafters

Cover the decal with a cotton dish towel (or scrap fabric). Iron on high adding pressure according to the instructions provided with the Happy Crafters iron on vinyl. 

metallic gold #blogger vinyl decal tutorial @diyshowoff #happycrafters

Slowly peel away the transparency. If you notice that the vinyl hasn’t adhered, replace transparency and iron again applying more pressure. 

metallic gold #blogger vinyl decal tutorial @diyshowoff #happycrafters

Once transparency is removed, I replaced my cotton dish towel and ironed the lettering flat. 

metallic gold #blogger vinyl decal tutorial @diyshowoff #happycrafters

Repeat the same steps for adhering the iron on vinyl decal to the back you may want to slide a piece of cardboard inside of the shirt first to prevent re-heating the front iron-on decal. 

metallic gold #blogger vinyl decal tutorial @diyshowoff #happycrafters

That’s it. I may have ironed mine on too high a temp so I have a sort of distressed look to my decal … which I love! So you may want to do a practice run/test to get it just right if you’re not a fan of the distressed lettering. Good luck! 

metallic gold #blogger vinyl decal tutorial @diyshowoff #happycrafters

And…it coordinates with my black and gold polka dotted iPhone case. #stylish haha!

metallic gold #blogger vinyl decal tutorial @diyshowoff #happycraftersmetallic gold #blogger vinyl decal tutorial @diyshowoff #happycrafters

What hashtag would you choose for your shirt? 

*This post is sponsored by Happy Crafters. Tutorial, experience and opinion is my own.  Check out all the supplies at Happy Crafters for inspiration for your next project. 

HClogopngsmall


Glitter Iron On Vinyl Decal Tutorial

Many of you have asked how my sister is doing and guess what? She’s finally completely “all done” with her treatments! Hurray! Confetti & champagne! My hero! And my hero’s superpower is “hope”…

DIY glitter iron-on decal tutorial at diyshowoff…and like most heroic milestones, it’s an occasion for a celebration, right?! Right! Well, that’ll be coming up in just a few weeks when we celebrate her birthday with a super-hero themed “Bobbi-fest” but in the meantime, I whipped up a cute breast cancer survivor shirt. 

What I used:

What I did:

1. Using my Silhouette design studio software, I created a design using text and a breast cancer ribbon, keeping the overall size in mind for a good fit on the shirt. 

pink glitter iron on - hope is my superpower breast cancer shirt

2. Right click each part of the design and choose “flip horizontally” to mirror the text and image. 

pink glitter iron on - hope is my superpower breast cancer shirt pink glitter iron on - hope is my superpower breast cancer shirt

3. Load the vinyl shiny-side (pink glitter side) facing down into the vinyl cutting machine. 

pink glitter iron on - hope is my superpower breast cancer shirt

4. Choose glitter/flocked iron on adhesive from the drop down menu in the cut settings. Adjust blade settings. (Always do a test cut first to ensure the blade doesn’t cut too deep or too shallow.)

pink glitter iron on - hope is my superpower breast cancer shirt

5. Hit “cut”.

pink glitter iron on - hope is my superpower breast cancer shirt

6. When cutting is complete, remove from machine and peel away excess vinyl. Weed away the vinyl surrounding the design. 

pink glitter iron on - hope is my superpower breast cancer shirt

7. Following the iron on’s printed instructions, I laid out the shirt on an ironing board and smoothed out the wrinkles. Place vinyl onto shirt.

pink glitter iron on - hope is my superpower breast cancer shirt

pink glitter iron on - hope is my superpower breast cancer shirt

8. Cover with a cotton dish towel or cotton fabric and iron, applying pressure 25-30 seconds and then moving to the next spot on the design and repeating. I used the highest setting on my iron (no steam).

pink glitter iron on - hope is my superpower breast cancer shirt

9. Slowly peel away the transparency. (If letters peel away too, repeating step 8, applying more pressure/holding a few seconds longer.)

pink glitter iron on - hope is my superpower breast cancer shirt

Ta-da!

Hope is my super power breast cancer iron on decal tutorial

Despite nausea and having tests done the same day, she agreed to model my handiwork. Isn’t she beautiful? {I love how despite not feeling 100%, she smiles. And how her hair is growing back with curls!}

breast cancer (hope is my superpower) - Bobbi at diyshowoff.com

Now that the treatment is behind her, she’s free to focus on recovering, building up strength and feeling better every single day. Thanks for your prayers! xoxo

Glitter is so difficult to photograph. It’s a more uniform and sparkly than shown above. 

hope is my super power


party pink bling glitter iron on vinyl

*This post is sponsored by Happy Crafters. Tutorial, experience and opinion is my own.  Check out all the supplies at Happy Crafters for inspiration for your next project. 

HClogopngsmall