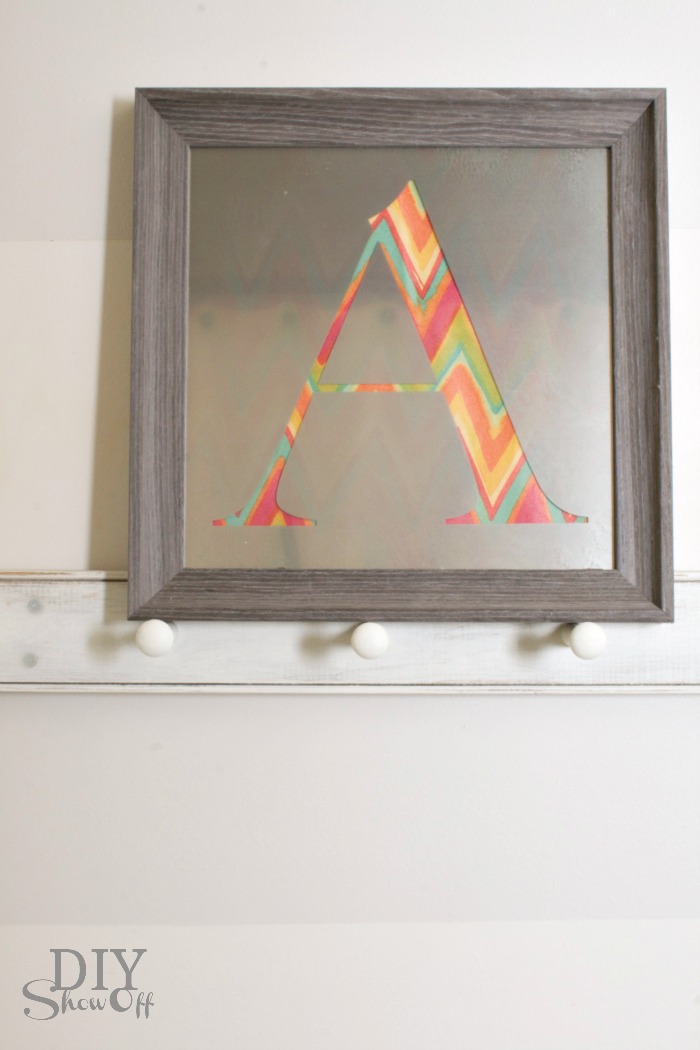
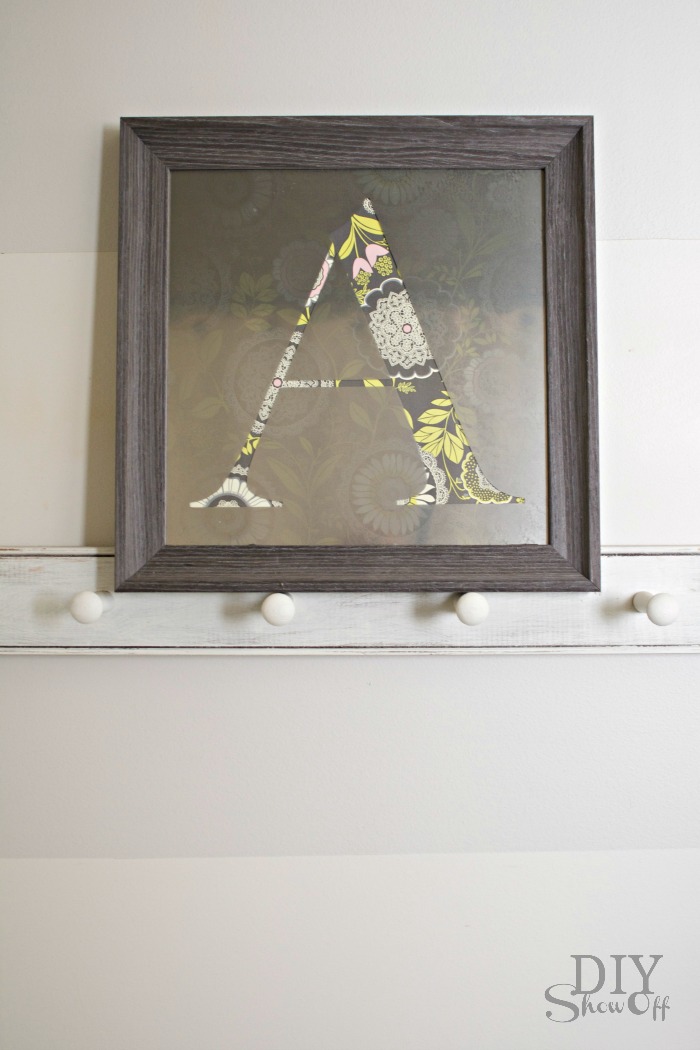
DIY Customizable Monogrammed Mirror Tutorial

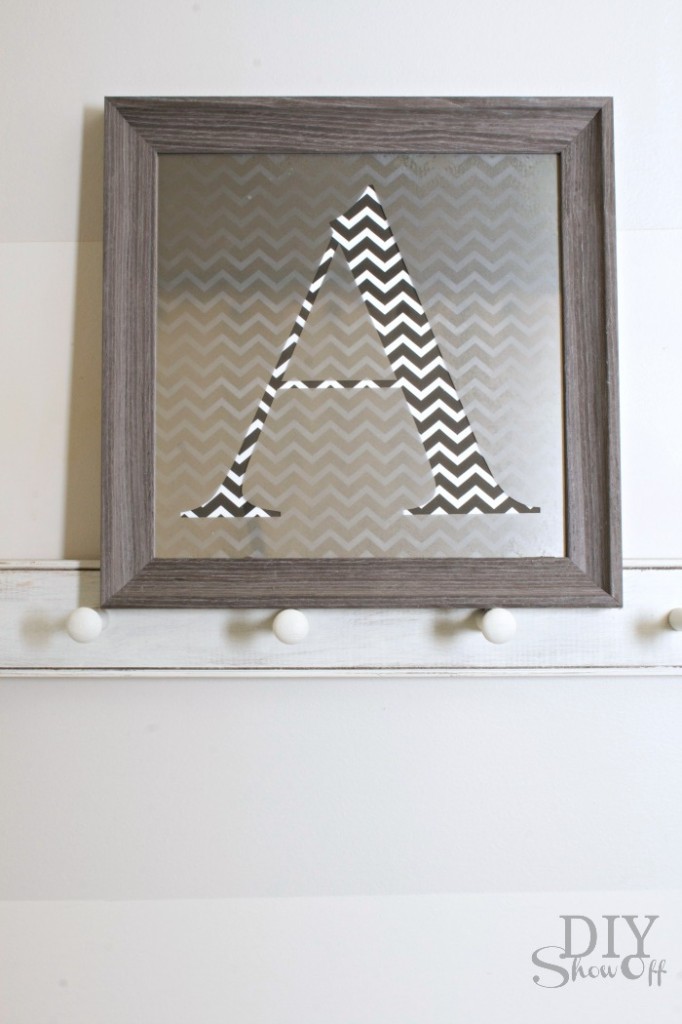
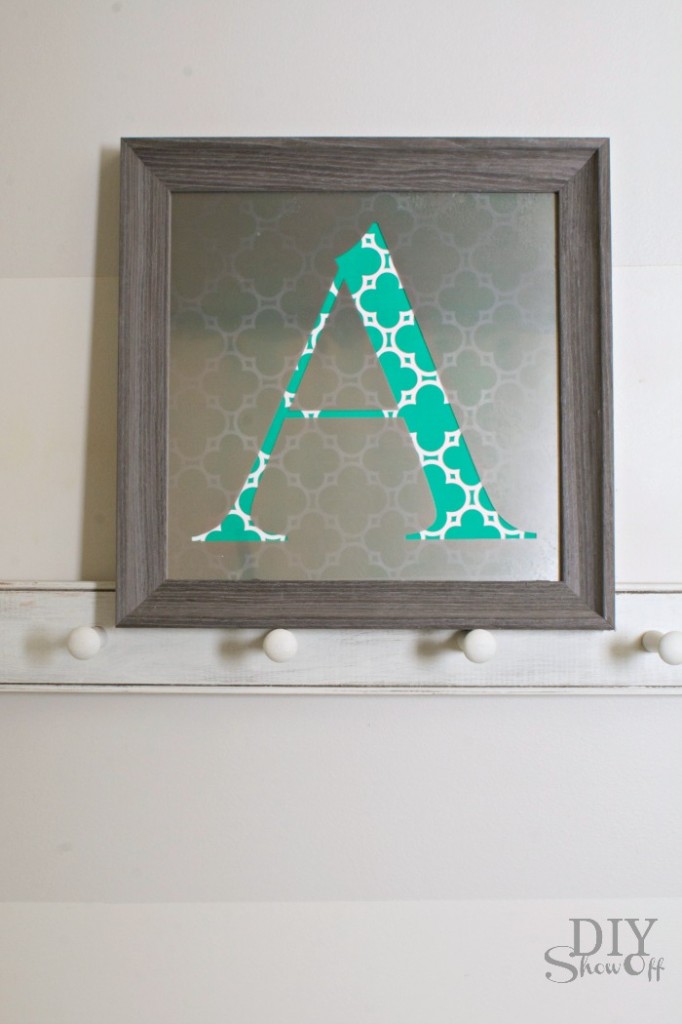
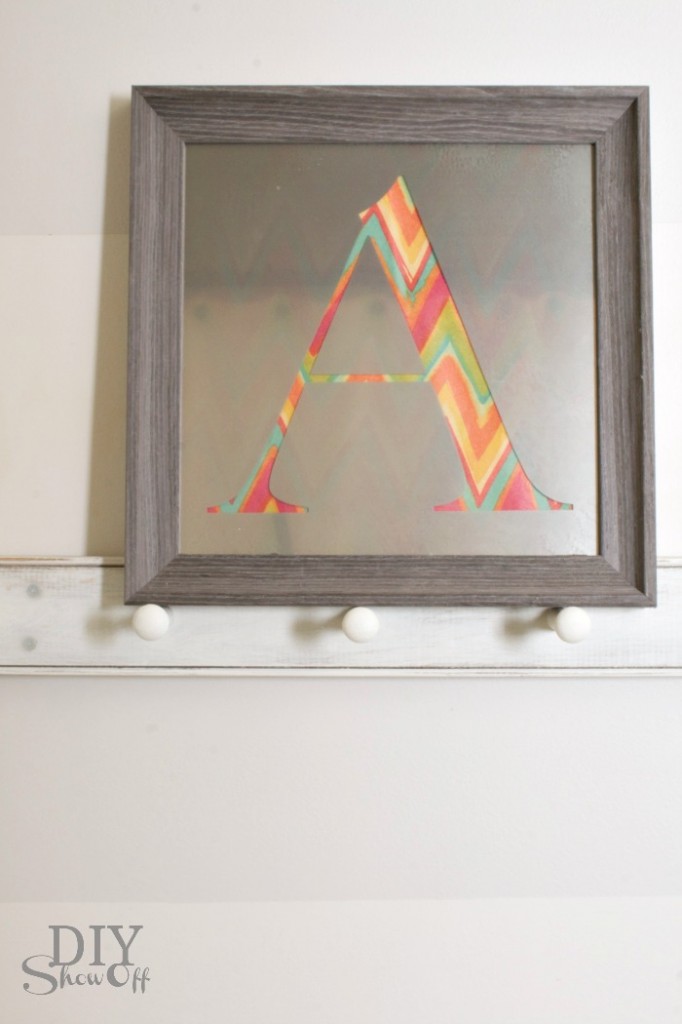
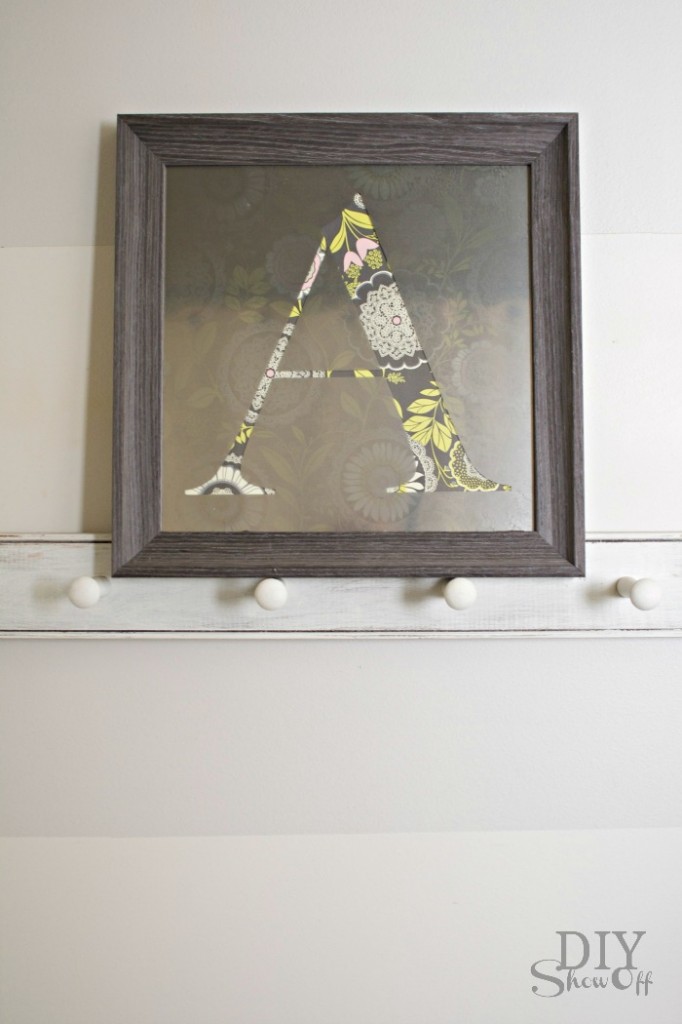
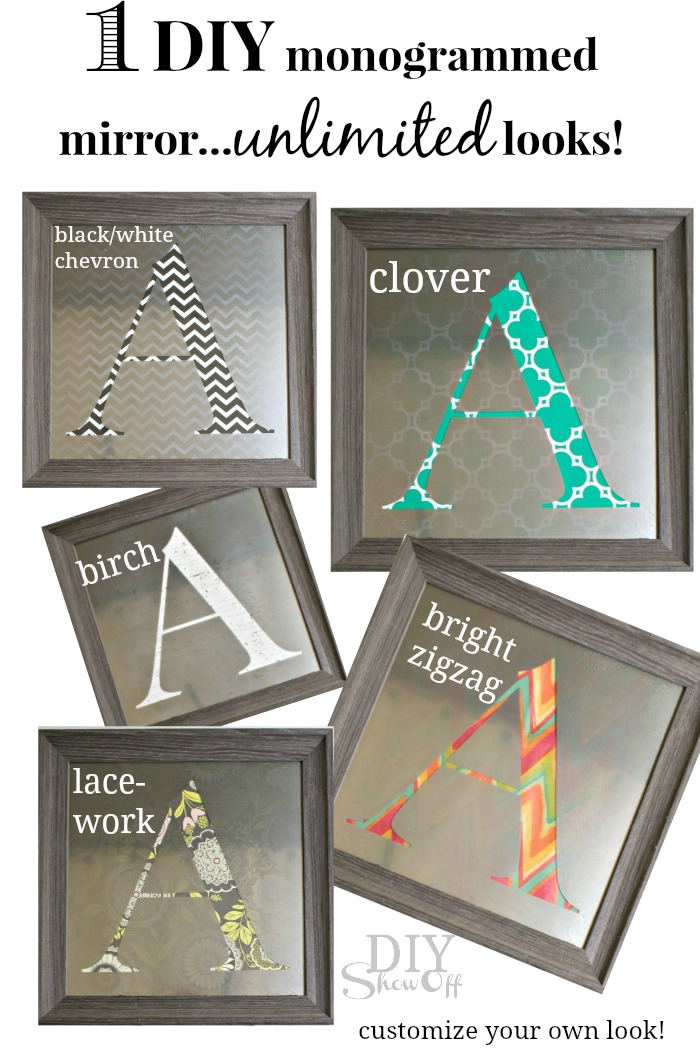
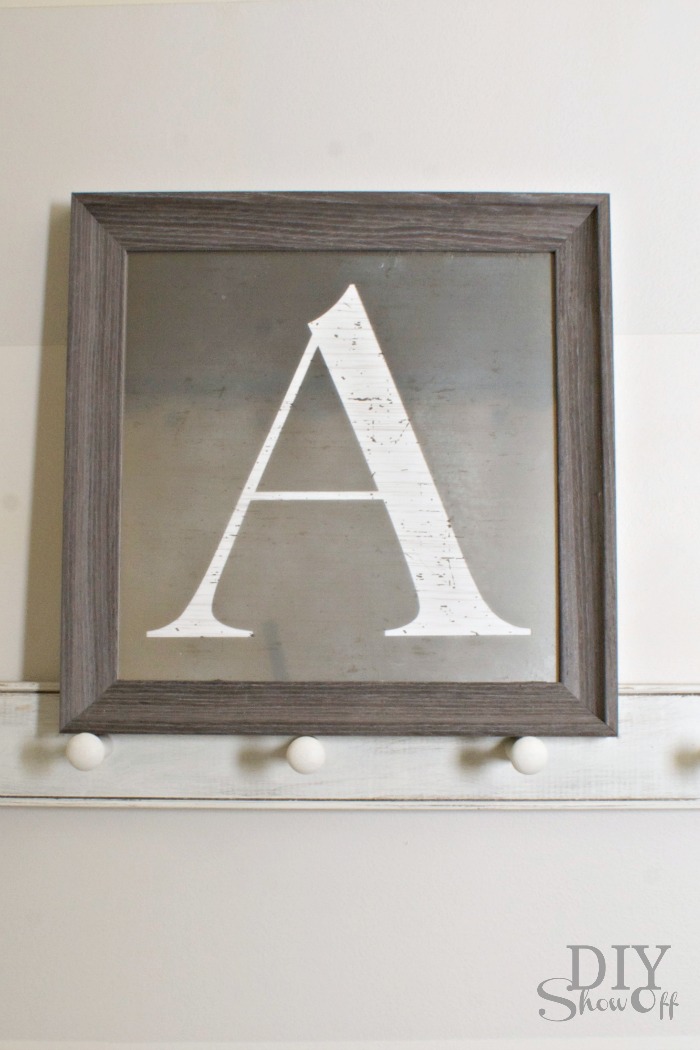
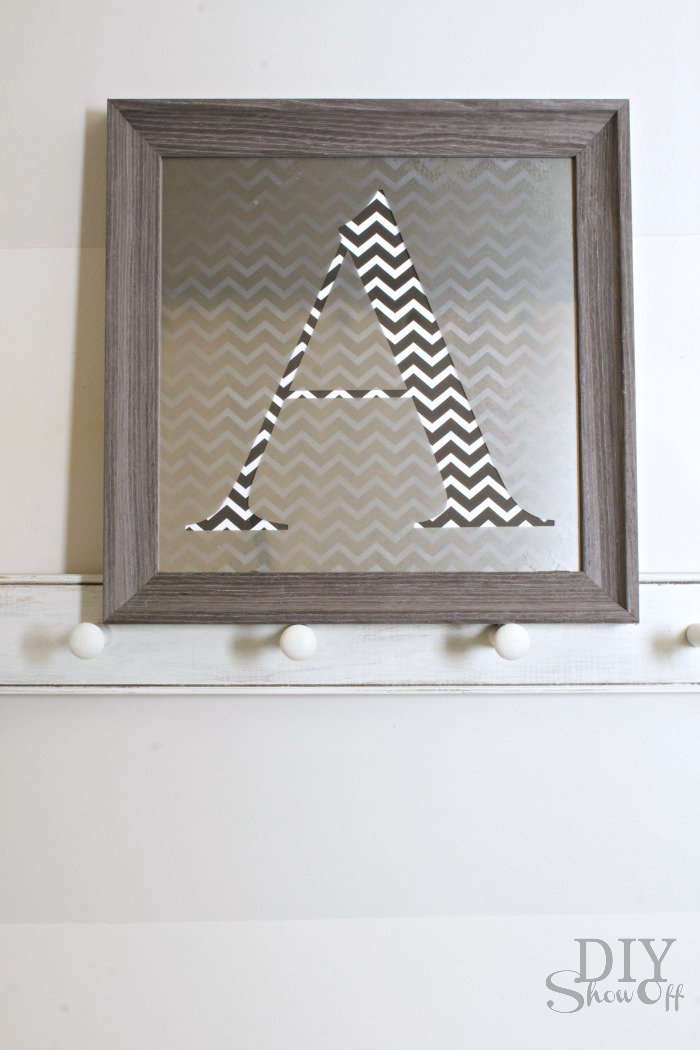
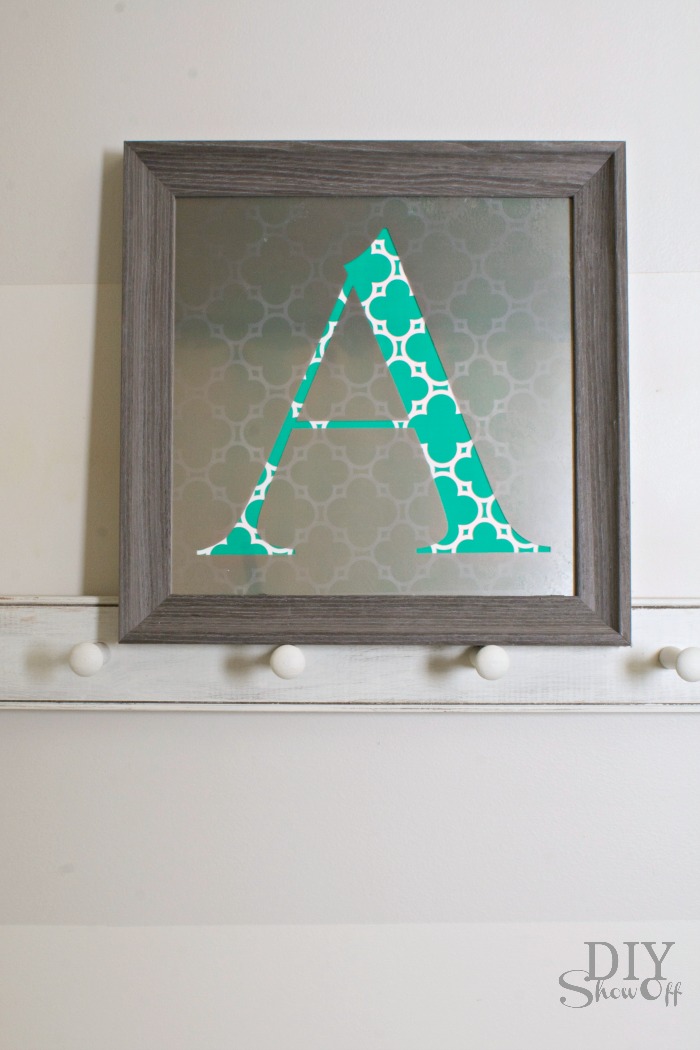
Looking for a great gift DIY gift idea? Or some easy DIY wall art? Look no further! This framed monogrammed mirror is easy to do and easily customizable for swapping out colors and patterns. It’s perfect for those who love to decorate and easily changes to match any decor. One decorative accent, UNLIMITED looks! So fun!
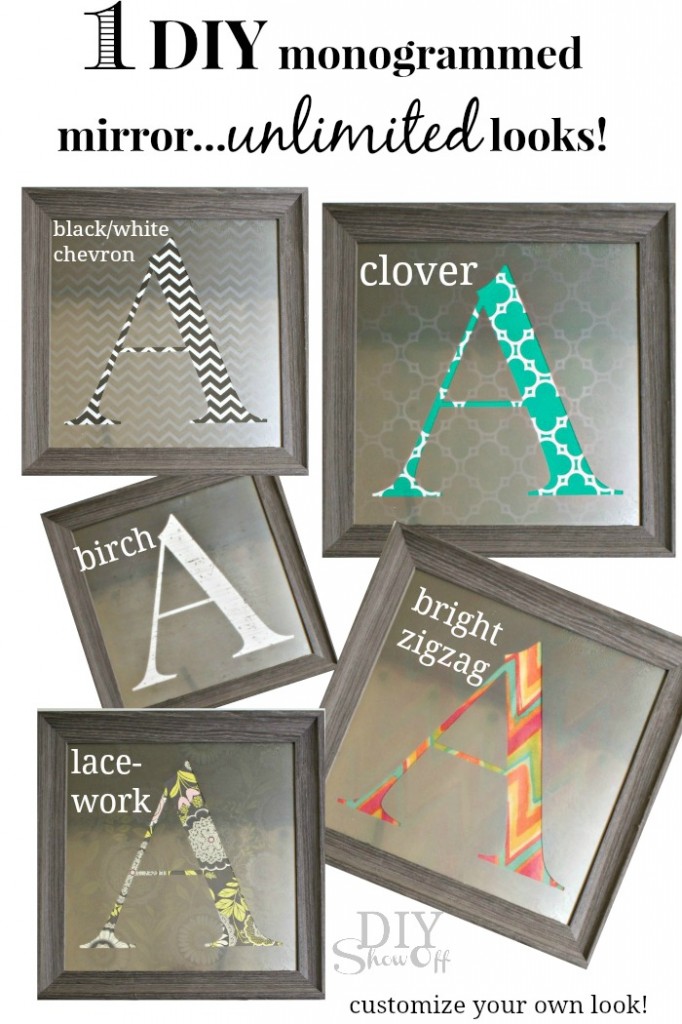
One decorative accent - UNLIMITED LOOKS: DIY Interchangeable/Custom Monogrammed Mirror Tutorial

Materials:

  • Picture frame with glass – I purchased mine at TJMaxx but shop the house or thrift stores for an even better deal!
  • Krylon Looking Glass – Mirror Like Spray Paint
  • Vinyl letter decal, shape or silhouette – don’t have a Silhouette Cameo to do your cutting? Use a stencil and contact paper to create your own. Remember to ‘mirror’/’flip’ the design so that it doesn’t show backwards.
  • Scrapbook paper, wrapping paper {holiday/wedding/birthday paper for celebrating/gift giving would be cute too!}, book pages, maps, fabric…get creative! Cut to size to fit within the frame. 

Tutorial:

1. Create vinyl decal to fit inside of the dimensions of the picture frame/onto the glass. Remember to mirror/flip the design so that it doesn’t show backwards (vinyl will be applied to the backside of the glass). I used my Cameo to cut out a design on vinyl.Letter A for monogrammed mirror DIY
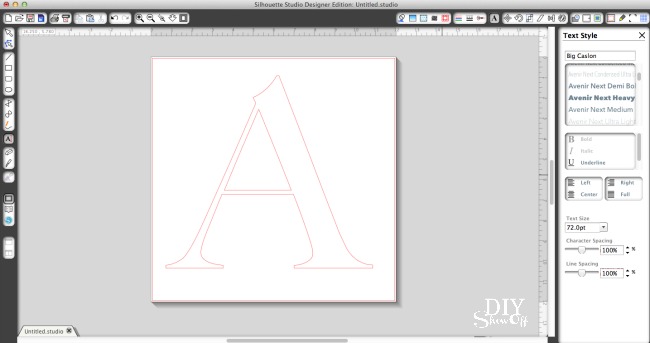
2. Disassemble glass from frame and clean the glass. DIY monogrammed mirror tutorial
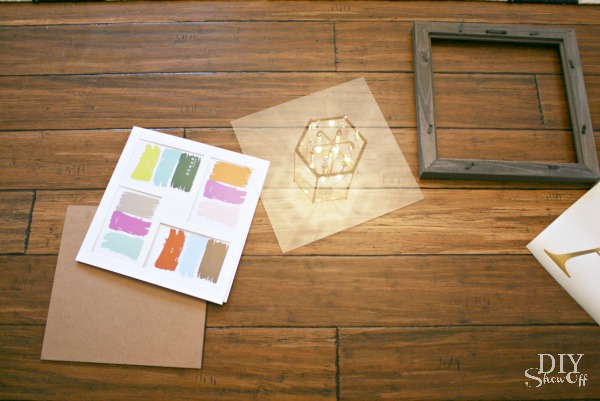
3. Apply vinyl decal to glass. I centered a letter “A”. You’ll be applying it to the backside of the mirror so you’ll want to “mirror” or flip the letter if needed so it doesn’t show up backwards. A shape or silhouette would be cute too! Example: monogram, dog, person, state, stag, word, etc.Monogrammed Mirror DIY tutorial
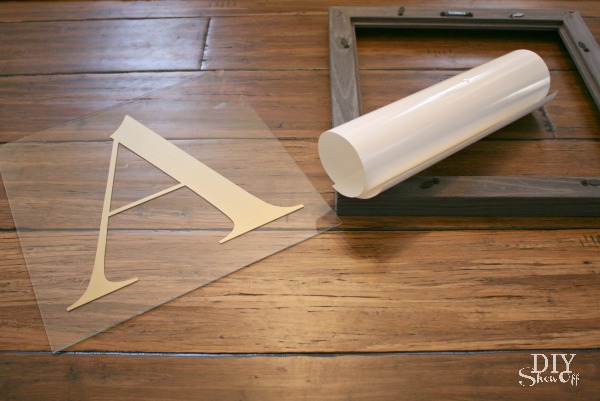
4. Follow instructions on Krylon Looking Glass can. Wear a respirator in poorly ventilated areas. Apply a light coat of the Krylon Looking Glass spray paint in a sweeping motion (starting off of the glass). Do this on the side of the glass with the vinyl decal. One decorative accent - UNLIMITED LOOKS: DIY Interchangeable/Custom Monogrammed Mirror Tutorial
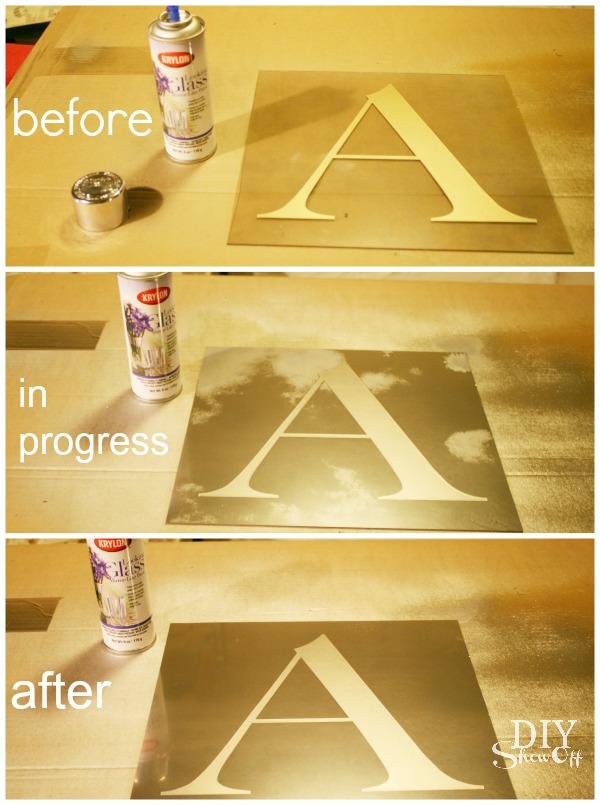
{zero degrees outside, spray painting in the basement – pardon the poor lighting!}

5. According to the instructions, repeat the above step four more times (only waiting a minute between coats – this stuff dries fast!). Then let dry one hour before handling. I did five coats and my glass still has a semi-transparent look which I like. Try more coats for a more solid look. 

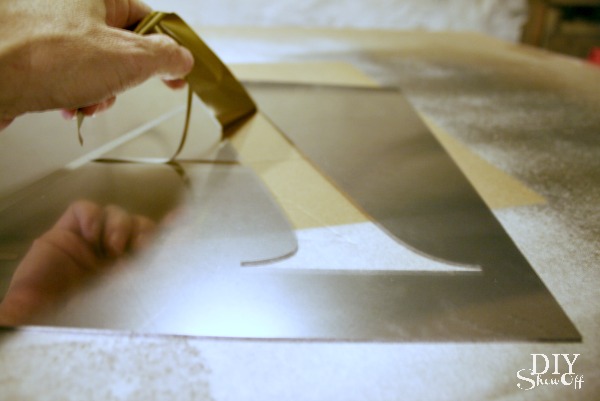
6. Once dry, carefully remove the vinyl decal by lifting an edge using your fingernail or thumbnail or a vinyl weeding tool if you have one. Be careful not to scratch the mirror-painted finish (although scratches add to an antiqued/aged look). One decorative accent - UNLIMITED LOOKS: DIY Interchangeable/Custom Monogrammed Mirror Tutorial
7. Cut scrapbook paper, book pages, fabric or wrapping paper to the same dimensions as the glass. Re-assemble glass and frame and insert scrapbook or wrapping paper in the same manner as framing a picture. One decorative accent - UNLIMITED LOOKS: DIY Interchangeable/Custom Monogrammed Mirror Tutorial
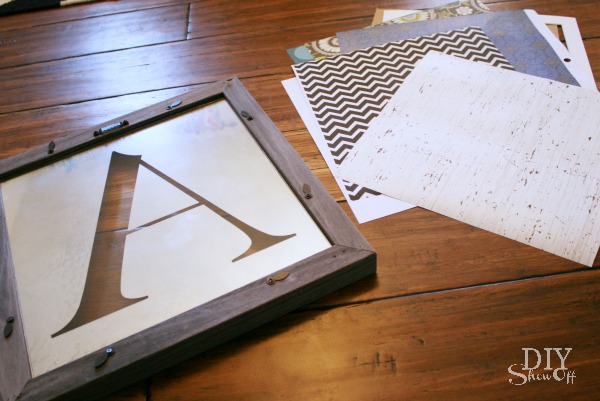
All done! Include several shades and patterns of paper with your gift and let the recipient choose their favorite look to coordinate with their home.
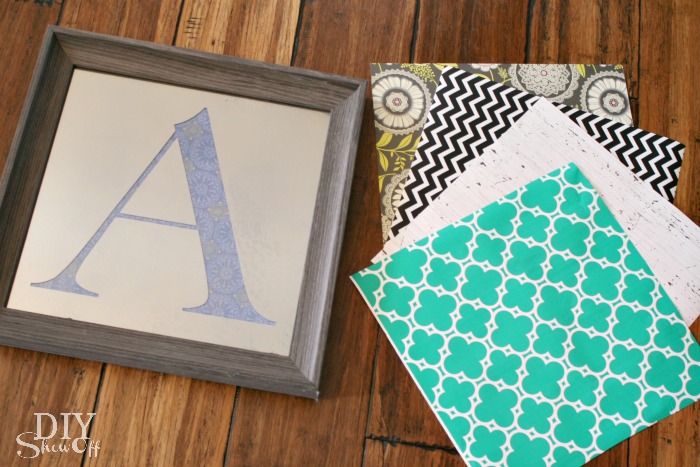
One decorative accent - UNLIMITED LOOKS: DIY Interchangeable/Custom Monogrammed Mirror Tutorial

Cool, right? They’re going to love it and you’re going to want one for yourself!
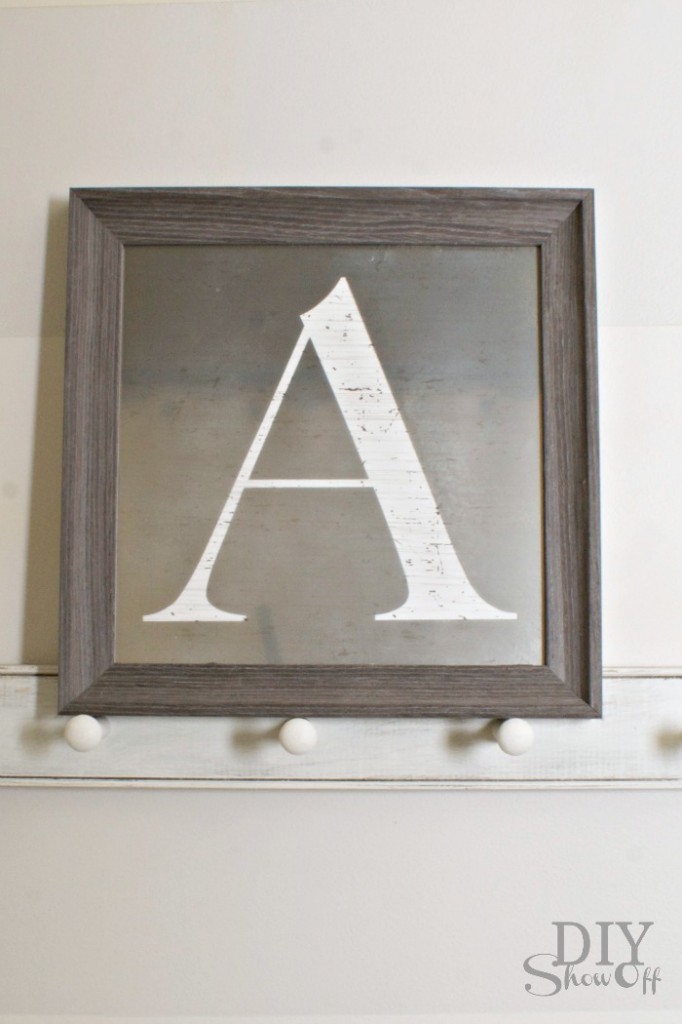
Monogrammed Mirror Tutorial DIY mirror DIY mirror DIY mirror DIY mirror

You can’t tell from my pictures but the mirrored surface is very reflective. I just took my photos at an angle where you weren’t seeing me and my camera’s reflection in the glass. The mirror finish also has a bit of a worn/antiqued look that I love. One decorative accent - UNLIMITED LOOKS: DIY Interchangeable/Custom Monogrammed Mirror Tutorial

Next up in the series is an awesome project from Amy at Positively Splendid!

For even more fun Krylon Looking Glass ideas, visit the entire series:

Friday –
http://www.infarrantlycreative.net
http://findinghomeonline.com
http://www.theshabbycreekcottage.com
http://sarahmdorseydesigns.blogspot.com
http://www.the36thavenue.com
http://www.eastcoastcreativeblog.com
http://lilluna.com
https://diyshowoff.com
http://www.positivelysplendid.com

Saturday –

http://tatertotsandjello.com
http://www.ourfifthhouse.com

Disclaimer: This is a post sponsored by Krylon. As always, all ideas, opinions and experience is my own. I first tried Krylon Looking Glass paint back in 2010 on an old window

Like what you see? Get reminders and updates delivered right to your inbox:

Enter your email address:
Delivered by FeedBurner

DIY Holiday Wall Decals

DIY vinyl holiday wall decals are perfect for adding some festive touches to existing decor during the holidays. Great for making new decor too! Last year I added gold vinyl lettering to a large mirror (Glory to God in the Highest).

Christmas Dining Room 2012

Christmas mirror

I also love using vinyl lettering to create signs or to place directly on the wall.

Reindeer Games Sign Tutorial

DIY chevron Christmas Reindeer Games sign

But this year, I have a large world map in the family room. I tested the vinyl on the canvas and it didn’t cause any damage so this project got the ‘green light’ for me! Yay! (Please do your own test before applying vinyl directly to canvas or art work.) If it didn’t work, plan B was to use vinyl lettering on a wood plank sign for above my canvas. or to add vinyl lettering to a laminated map poster. 

before {family room makeover}

family room makeover

MaterialsI used:

Tools: 

  • Silhouette Cameo

What I did:

I created my lettering for “Joy to the World” using my Silhouette Studio software.

Joy to the World Christmas lettering

*Incidentally, there is a nearly identical ‘world shape’ as shown on my canvas, so you could also cut out vinyl continents in any color and apply directly to the wall or onto a large piece of plyboard to create your own overall “Joy to the World” wall decals. 

Load the vinyl into the Silhouette Cameo color side up. 

Happy Crafters Tutorial

Adjust the blades as needed and send design to “cut”. 

Remove vinyl from machine and weed away negative space around lettering and centers from the letters o and e.

Joy to the World vinyl wall art

Place transfer paper over the design and rub with a credit card. 

Joy to the World vinyl wall art

Peel away waxpaper backing from lettering. If letters are sticking to the wax paper, replace transfer paper and rub again. Sometimes I have to use my thumbnail to help the vinyl transfer.

Place vinyl design with transfer paper onto the canvas.

Tricky! Rub the design without stretching the canvas. I supported the back side of the canvas with a book before rubbing. 

Joy to the World vinyl wall art

Peel away transfer paper. 

Joy to the World vinyl wall art

All done!

The best part is that I can remove the vinyl letters after the holidays without damaging my printed canvas (remember to test your art before attempting this – or create a specifically designated piece for the holidays). 

Joy to the World Christmas wall art

I also added “peace on earth” to my globe to help camouflage the area where numerous price tag stickers removed the map paper…

peace on earth globe

How are you adding vinyl to your holiday decor this year? 

Joy to the World Vinyl Decals on Map

*This post is sponsored by Happy Crafters. Tutorial, experience and opinion is my own. 

HClogopngsmall

(thin) DIY wall art

We have a sliding door in our dining room…

eclectic dining room

It slides to the right to open. Which means, I can’t hang most things like framed art or a clock or mirror in that space if I want to slide the door open. Shown above…I can’t push that door any further than the mirror, otherwise, the door will knock it right off of the wall.

Earlier this week I shared a DIY foamboard project that I used as a fun gallery wall template/background…

foamboard wall art tutorial

Which made me think…foam board is lightweight AND thin and would work great in our dining room. Perfect wall art material fitting behind a sliding door.

This is how I also know that painting foam board isn’t such a great idea. It warps and bows but I’m still loving my project.

Using FrogTape, I taped off alternating stripes, making sure to press down the edges securely to activate the PaintBlock Technology (to keep the paint from seeping under the tape). 

FrogTape Wall Art

Then painted my stripes. (I think using a Sharpie or decorative tape would be a better option.)

DIY foam board art

I then removed my FrogTape. It did remove the paper backing in places which is what gives my finished project an aged, distressed look. Even though it didn’t go according to plan, I didn’t give up. 

Using my Silhouette Cameo, I created vinyl decals (flatware silhouettes and the letters “D I N E”). Vinyl and transfer paper provided by Happy Crafters

applying vinyl decals

Then I used a glaze to ‘stain’ the bright white stripes and the areas where the paper pulled off with the FrogTape. 

diy foam board art

So where the paper pulled away gives it a distressed look:

distressed dine sign

My foamboard is bowed so I did try adding weight for a while with books. Fail. It didn’t help. But I hung it up anyway using command strips. Even with the warping, it’s still a great fit behind the sliding door…

easy DIY dining room art 

With the sliding door open…

dining room sliding door wall art

Not bad, right? Lesson learned: don’t paint foam board but I do love that it’s lightweight and thin so I’ll definitely be creating another DIY foam board project for this space. Perfect behind my sliding door. 

*This post is brought to you by FrogTape. FrogTape provided by Shurtech. The opinions are completely my own based on my own experience. For more FrogTape projects ideas, check out the FrogTape Blog Squad.

 FrogTape Blog Squad

*This is a sponsored post. Vinyl and transfer paper provided by Happy Crafters.

HClogopngsmall


How to make an established/monogrammed sign {bridal shower gift}

I’ve always wanted to make an established sign as a gift and a recent bridal shower was the perfect occasion.

How to make an established/monogrammed sign.

Materials:

  • Wood 18 x 9 x 1
  • TransTint Dye (Dark Walnut or Dark Mission Brown)
  • Craft Paint (gray and white)
  • Stencil (I used a vinyl stencil I created with my Silhouette Cameo)
  • Spray Lacquer
  • Sawtooth picture hanger

Tutorial:

I sanded down a pretty piece of wood then died it with my favorite color of TransTint Dye from Rockler a long time ago as part of my participation with the DIY Club. I seriously love this product. A little goes a long way and I can control the color – just add water. I also love that I can let the unused portion sit on a shelf. Water evaporates and I can just add water to re-use the unused portion. I’ve used it on many projects and have so much left!

transtint dye

Using my Silhouette Cameo, I designed and cut out a monogram, border and last name vinyl stencil. {Be sure to measure the sign and create a border/design that fits within those measurements.}

Silhouette Cameo

I peeled off the letters and used the “negative” part of the vinyl as a stencil. Placing it straight was the hardest part. Holding it up to the light and cutting straight lines using the guide on the back of the vinyl was helpful.

Silhouette Cameo vinyl monogram

I pulled away the wax paper, applied the vinyl stencil and made sure it was all good and stuck by rubbing the design with a credit card.

DIY vinyl

Slowly peel away the backing…

DIY sign tutorial

Next I painted the border, monogram and “established 2012” using gray acrylic craft paint. I gave it a few coats.

DIY painted sign

I’m impatient, so I let it dry a few minutes then peeled away the vinyl. Then I let it dry fully.

DIY monogram sign

I created another vinyl stencil of the last name and cut it out using my Silhouette Cameo. Once the first paint was dry, I followed the same steps to apply the last name stencil. I placed the name in the center of the sign and used white paint.

DIY gift sign

Let dry. Last step is to attach a hanger to the back {make sure the nails/screws aren’t bigger than the depth of the wooden sign!}. I also gave my sign a coat of spray satin matte lacquer.

sawtooth sign hanger

Ta-da! I personalized gift:

DIY established monogram sign

{So sorry about the low light/poor quality pictures! Ugh! I didn’t realize until pictures were uploaded after the gift was given.}

What do you think?

Wish me luck today. I’m heading to the apartment (enlisting the help of my 19-year-old nephew) to tackle my first attempt to sand hardwood floors!

Enjoy the weekend!

OH! It’s the LAST CHANCE TO ENTER THE BETTER HOMES & GARDENS “Color Guide” and  “New Cottage Style” decorating book giveaway. Need some inspiration? Stop over to enter to win!

BHG Decorating Book Giveaway

bhg.book.collage

Disclaimer: I created the above project using some supplies I’ve received in the past for previously sponsored projects. Opinion is my all mine based on my experience.

DIY Show Off - FacebookDIY Show Off - TwitterDIY Show Off - PinterestDIY Show Off - Feed


DIY painted foam playmat becomes wall art

The long weekend here means catching up on some little projects that kept getting put off. Remember when I painted a foam playmat, thinking it’d be a great kitchen/cooking mat?

before…

painted playmat tutorial, DIY kitchen mat, Gorilla tape

after…

{painted foam playmat tutorial}

How to paint a foam playmat, floor mat, do it yourself, DIY, vintage restaurant sign, aged, distressed, lobster, beachy, New Orleans

It looks great there, doesn’t it?

DIY, tutorial, painted floor mat

It really does. But, Mr. DIY is the cook and he’s not always neat, if you know what I mean. Food flies everywhere.  And you guys – it was just so pretty. I’ve never painted anything so large that came out so well and I just couldn’t let it get covered with food and smashed down by grown up weight and feet and ruined. I’m so proud of that painted playmat. I’ll make another for this area with a farmhouse theme, I promise.

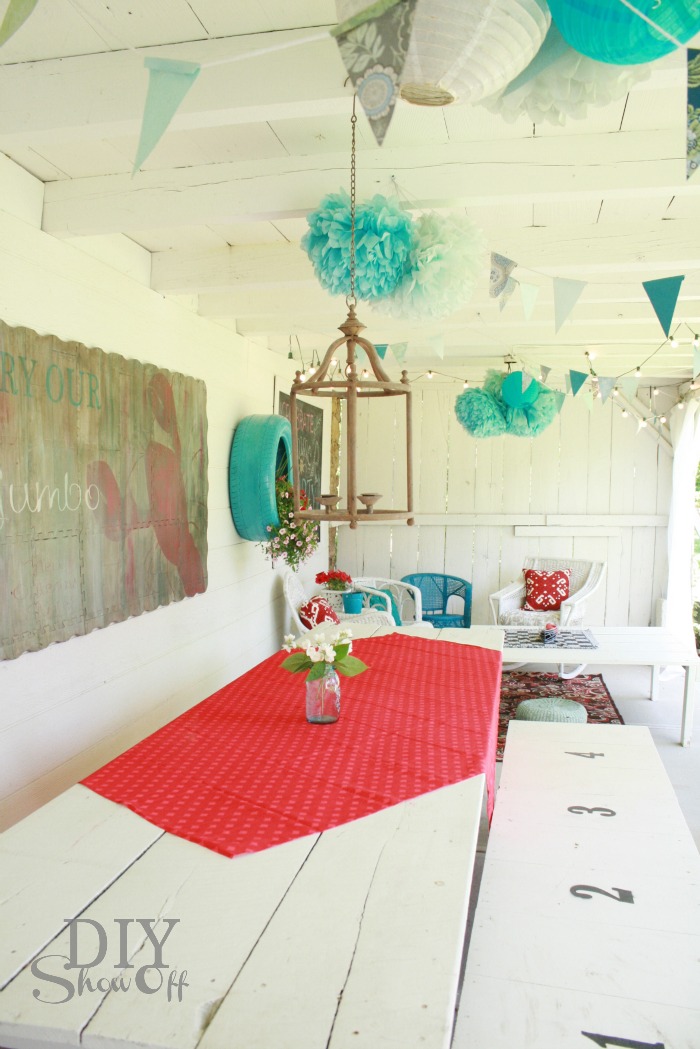
In the meantime, we have this huge blank wall at the barn patio…

barn patio makeover

Know where I’m going with this? It can be affordable huge DIY wall art too and looks awesome here…

barn patio after

and just for fun, here is what this covered barn area looked like when we bought our house…

and now…

painted foam playmat

And there will be more projects here on this covered patio area {with better lighting and pictures} as I update this space. It’s great for entertaining: cook outs, picnics and bon fires. It’s a cozy comfortable place to relax and get away from the house too, to curl up with a good book with some privacy, even in the rain.

I love the way the playmat fills up the huge empty wall. What do you think?

DIY Show Off - FacebookDIY Show Off - TwitterDIY Show Off - PinterestDIY Show Off - Feed