DIY by Cuckoo 4 Design

Julia from Cuckoo 4 Design is sharing some of her awesome inspiring DIY talent with us today. I’ve introduced you in the recent past {you’ve never been more envious of a crazy cat lady and her deluxe DIY cat tunnel before} but I wanted to give a shout out to a few more of her DIY goodies! {We hosted a sweet German exchange student named Julia too and I love pronouncing “YOOL-YAH!” every time I visit her blog.} You can see all of her DIY projects and more at

cuckoo for design

BUT here are a few of the super amazing things I love most (click the pictures to be directed to her original link):

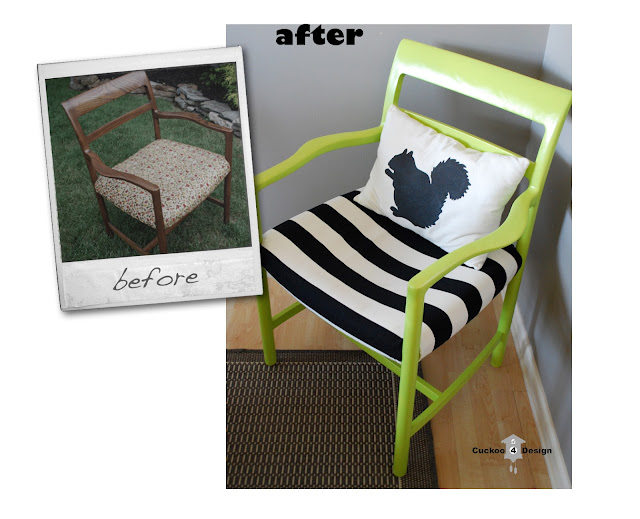
  • What?! Can you believe this super transformation? wood chair makeover
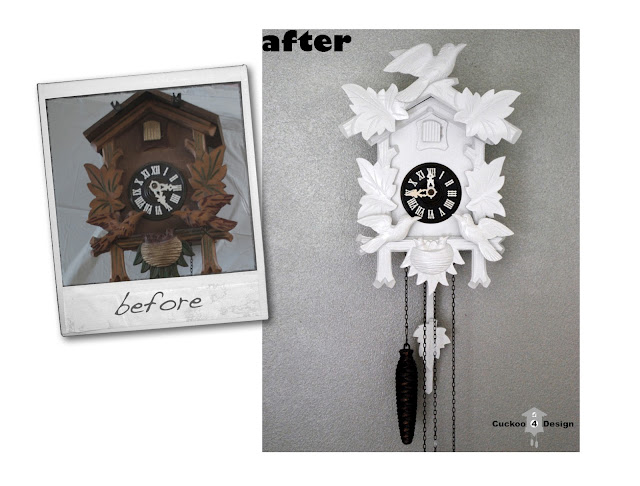
  • Julia paints cuckoo clocks! How cool! I’ve been looking at yard sales and thrift stores ever since I spied this beauty taken apart, painted and re-assembled by Julia…cuckoo clock makeover
  • Ever wonder what to do with a collection of trophies, awards and medals? Well, Julia’s creative idea is awesome…DIY medals trophies project

Just pop over, walk right in. She won’t mind. In fact, I have a feeling it’d make her day. She’d love for you to visit. Take a look at her before & after tab and the gorgeous inspiring projects on her side bar. I’m patiently waiting for a home tour. The sneak peeks are gorgeous…

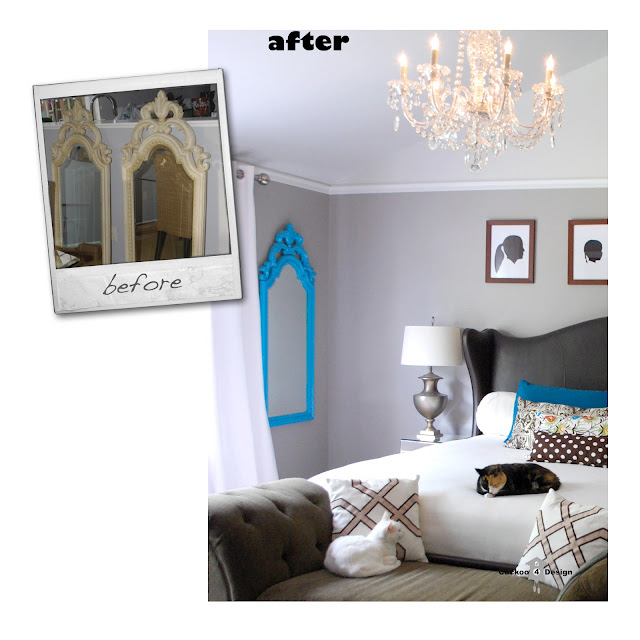
DIY mirror makeover

See more from Julia at Cuckoo 4 Design.

You might also enjoy:

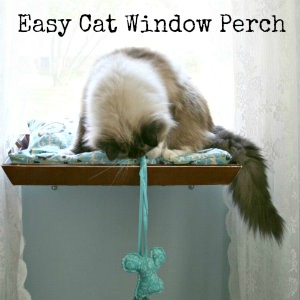
easy DIY cat window perch


Peacock Blue Painted/Glazed Table Tutorial

Hello! I am Amanda and I blog at mommy is coocoo.
~ My blog is all about fun! ~

mommy is coo coo

Whether you are laughing about the realities of marriage and motherhood or being inspired to make your everyday surroundings lovely, regardless of your budget.

I am especially honored to be doing a guest post for the DIY Show Off.  Roeshel was the first blogger to ever feature this crazy momma and we’ve been blogging friends ever since.
Today I’d like to share a simple glazing tutorial with you. You can see how I turned a $60 craigslist table into this peacock blue masterpiece.
 
I found a table on Craigslist (and Mr. coocoo went and purchased the table with his hard earned money, on his day off.)  I was inspired by several pretty round tables (see those here).
My favorite inspiration table was blue so, out came my peacock blue paint, glaze, and lacquer and my cheap table became the focal point of my family eating area.
How to glaze painted furniture coocoo momma style:
{Before I get started, I would like to say you can do it too! It’s not that difficult, I promise.}
    • I bought a gallon of peacock blue paint from Wal-Mart (cost about $13).
    • I lightly sanded the top of my table with my hand held sander.
    • (and then) I just started painting (see it’s really not that difficult). Paint the entire table and let all the paint dry.
  • Now it’s time to glaze. I bought glaze from Lowe’s or Home Depot (I can’t remember which one). If you aren’t sure what to do, go to the paint department find an employee and tell them you need some glaze. Viola! You will walk out (for about $25 bucks) with something like this.
  • Mix the glaze with whatever paint color you want to add to your already painted furniture. Does this seem scary? It’s not. I chose black paint but you could use whatever color you like.
  • I mixed equal parts glaze and black paint. If this is your first time to glaze don’t freak out, you may want to start out with more glaze and less paint. You can always add more paint to your glaze/paint mixture.
  • Make sure your table is clean (wipe all the dust off from when you sanded).
  • Start glazing! It’s just like regular painting now (clearly, you don’t need a new paint brush). I like to use long horizontal paint strokes. Don’t panic if you get too much paint in one spot! Keep your brush moving. You are going to love it!
  • After your first coat of glaze dries decide if you want to add more glaze (I did because I wanted my table to be a little bit darker. It’s all about preference).
  • Finally, I added this protective finish (bought at Wal-Mart) to the table (This step is a lot of work but it is worth it! Follow the instructions on the can).
The coocoo kitchen table! We love it!
I never had a round table growing up. Did you?

I really enjoy how close we are now when we are eating.  Since there is no chance I am going to be able to eat a meal without helping (at least) three other people, the round table makes it much easier for me to serve, cut food, wash hands and faces, and give Scary Mommy looks when the coocoo kids aren’t eating their food.
Thank you so much for allowing me to share today Roeshel!If you’d like to see more of my projects or meet the whole coocoo family head on over to mommy is coocoo.
DIY Show Off - FacebookDIY Show Off - TwitterDIY Show Off - PinterestDIY Show Off - Feed


Before & After Series for Habitat for Humanity

Supporting Habitat for Humanity

The work that the non-profit organization, Habitat for Humanity is so important. They’ve had a huge impact all over the world. It’s only fitting that DIY’ers support the cause (since we too love home improvement). That’s the reason for One Project Closer’s annual Before & After series. OPC started this event four years ago as a way to help raise awareness for Habitat, and to support their mission to provide decent, safe and affordable places to live.

How it Works

If you’re not familiar with the series, here’s the basics: you submit pictures and a story from a home improvement project you worked (no contracted jobs) sometime over the past year. Every week of the summer (June 20 – September 21), a winner is selected and their story is published online. Each winner gets a $50 gift card to either Lowes, Home Depot, or Amazon, and we make a donation of $100 to Habitat for Humanity in their honor! At the end of the Summer, the best submission, as voted on by readers, wins a bonus $150 gift card to one of the three stores above.

This year is different and even more AWESOME because One Project Closer has asked 13 blogs to get involved, each hosting a week, picking that week’s winner, and featuring the Before and After article on their site.

This week’s host is OPC’s The Better Half and the first before and after story is being feature TODAY – here! I hope you’ll check it out and submit your own before and after story!

Supporting Habitat for Humanity

How to Enter

If you want to submit a before and after story, email your submission to beforeandafter@oneprojectcloser.com or enter via the link party to show off your great transformations HERE. You have all summer long to link up. I’ll share a reminder and link each week.
DIY Show Off - FacebookDIY Show Off - TwitterDIY Show Off - PinterestDIY Show Off - Feed