DIY Freestanding Mobile Pipe Coat Rack

Holiday season! That means some entertaining in our home, get-togethers with families, dinner parties (having a holiday open house today, in fact).  Time to get holiday guest ready! Did you ever notice that your own family fills up the coat closet (sometimes to the point of “avalanche!” when opening the door? Or is that just us?!)…and when guests arrive in colder months, coats are stored in the guest bedroom in a pile on a bed? Our solution: 

DIY galvanized pipe and wood mobile coat rack on casters @diyshowoff #lowescreator

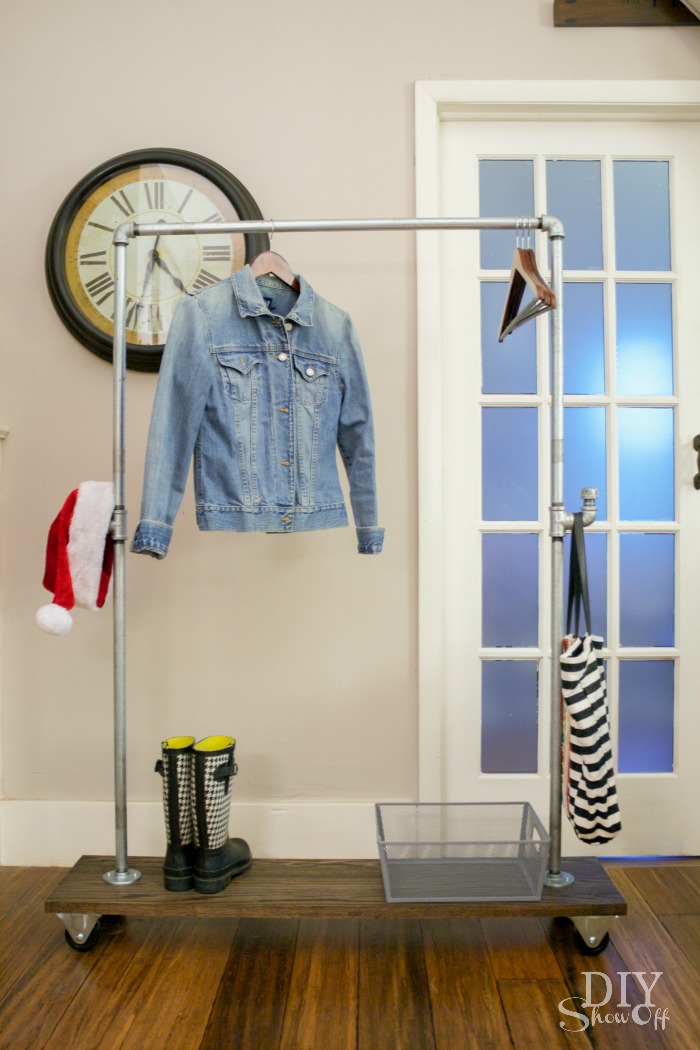
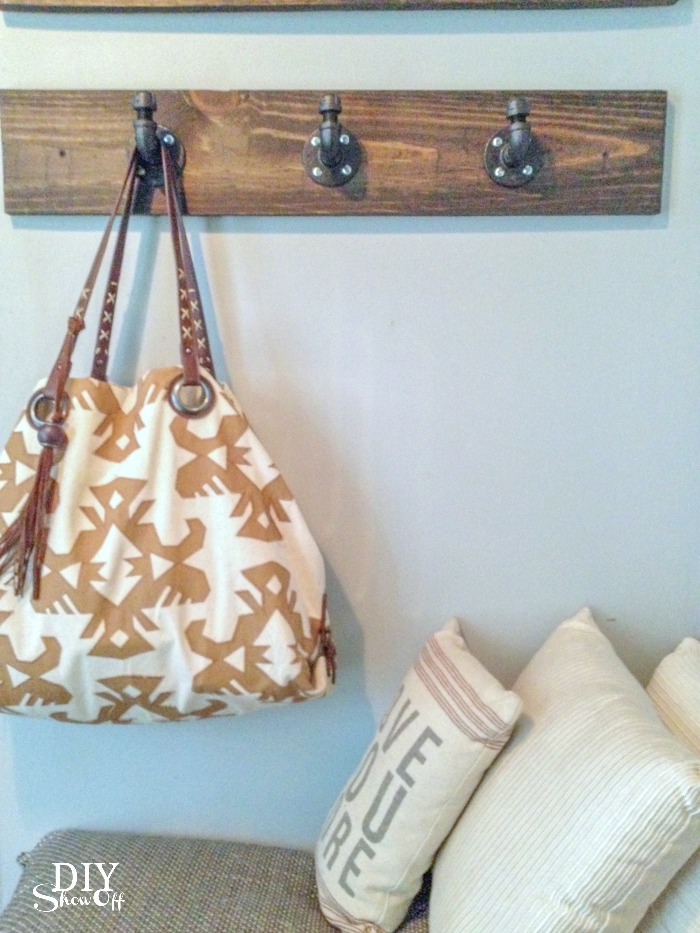
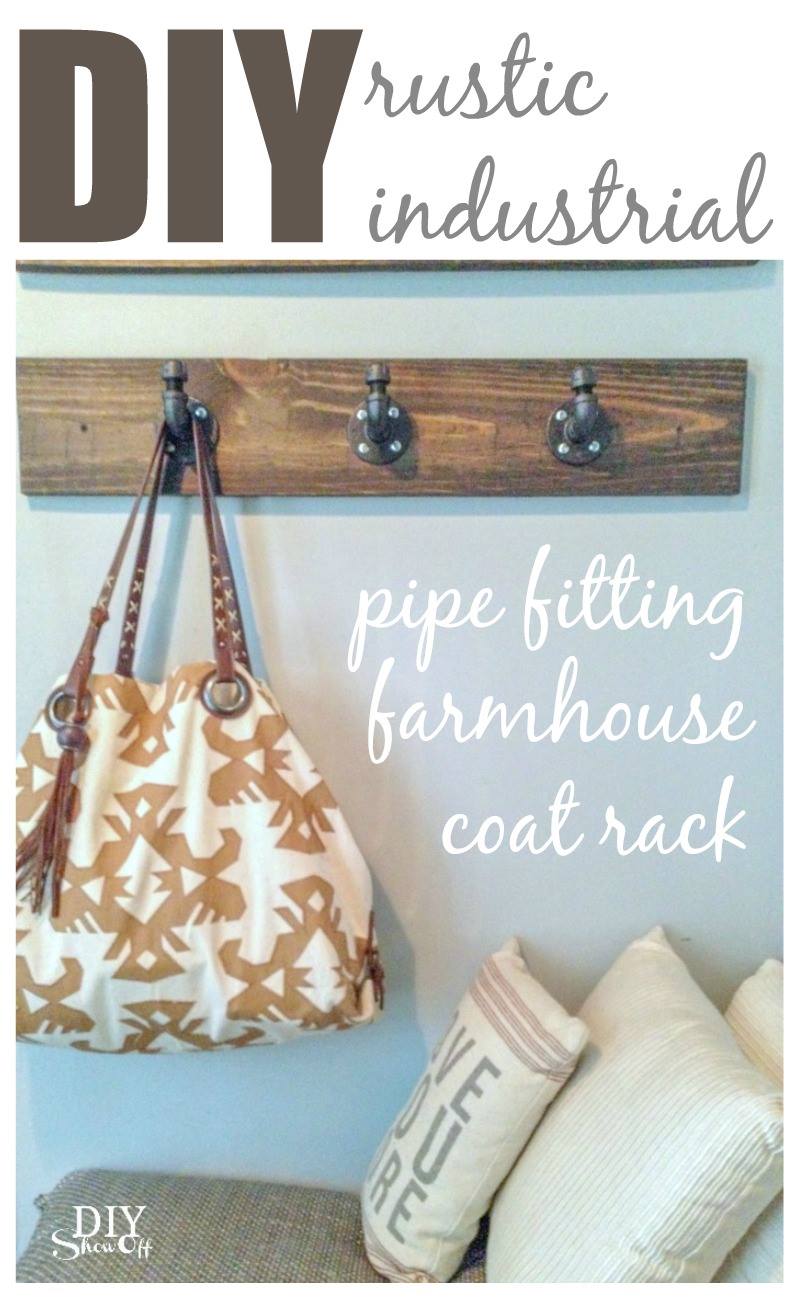
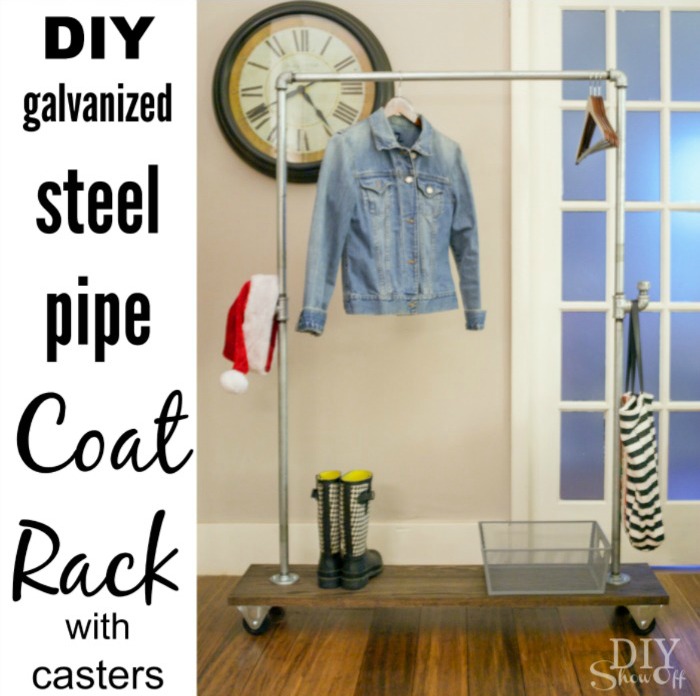
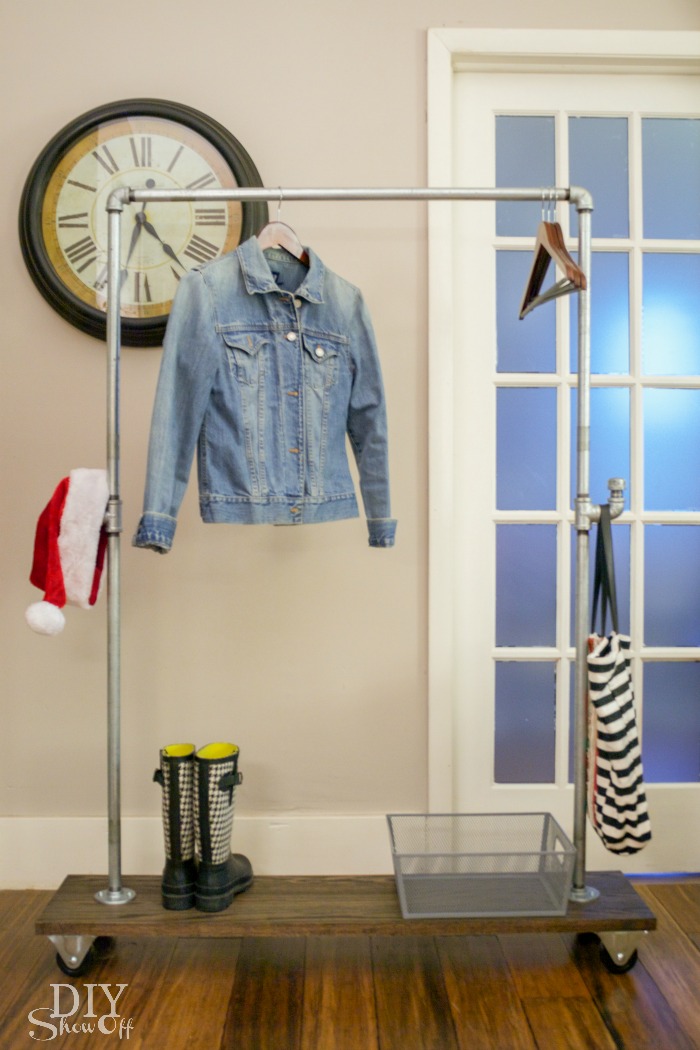
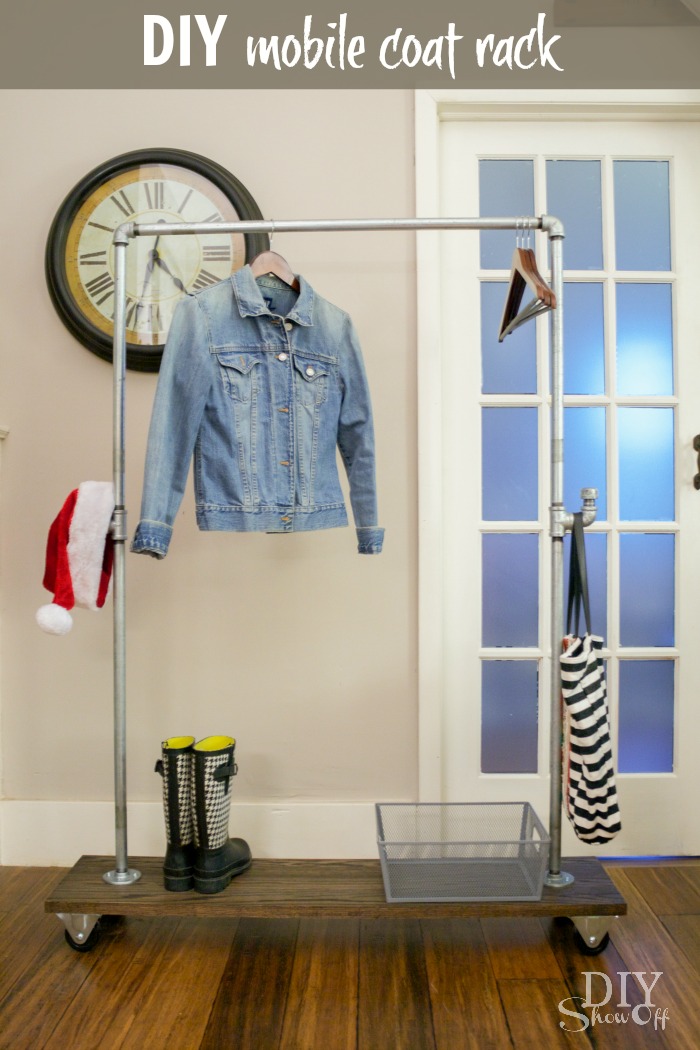
A DIY moveable, mobile coat rack. I am so over the utility types that teeter, lean or fall over when filled up. Know what I mean? This industrial looking DIY coat rack is sturdy, not to mention adds a touch of rustic industrial style.

Materials I used:

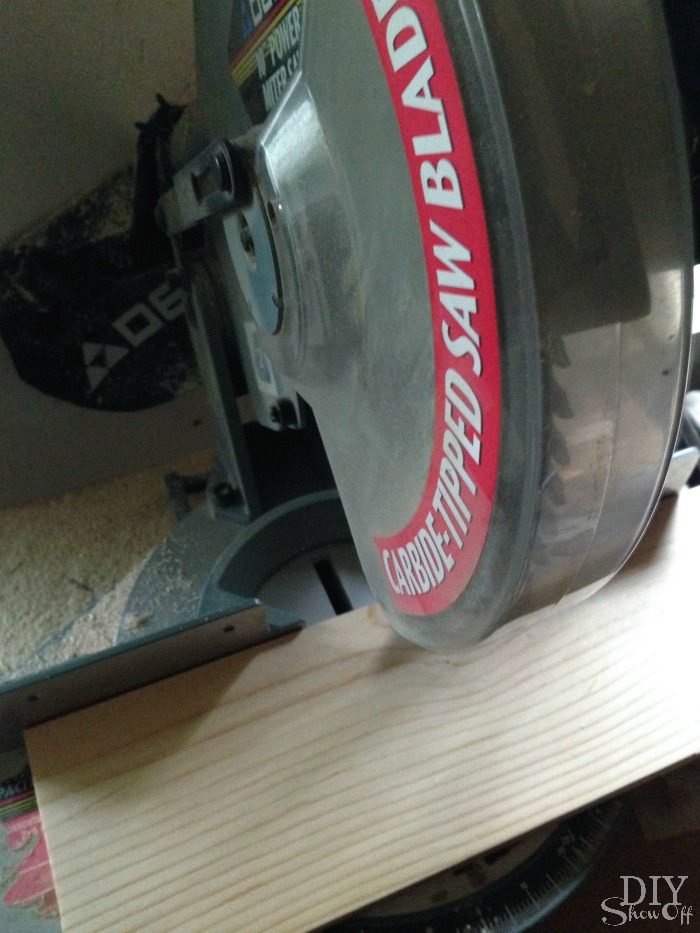
  • (1) 48 inch stair tread (I used red oak but for a more budget friendly option, there was also pine)
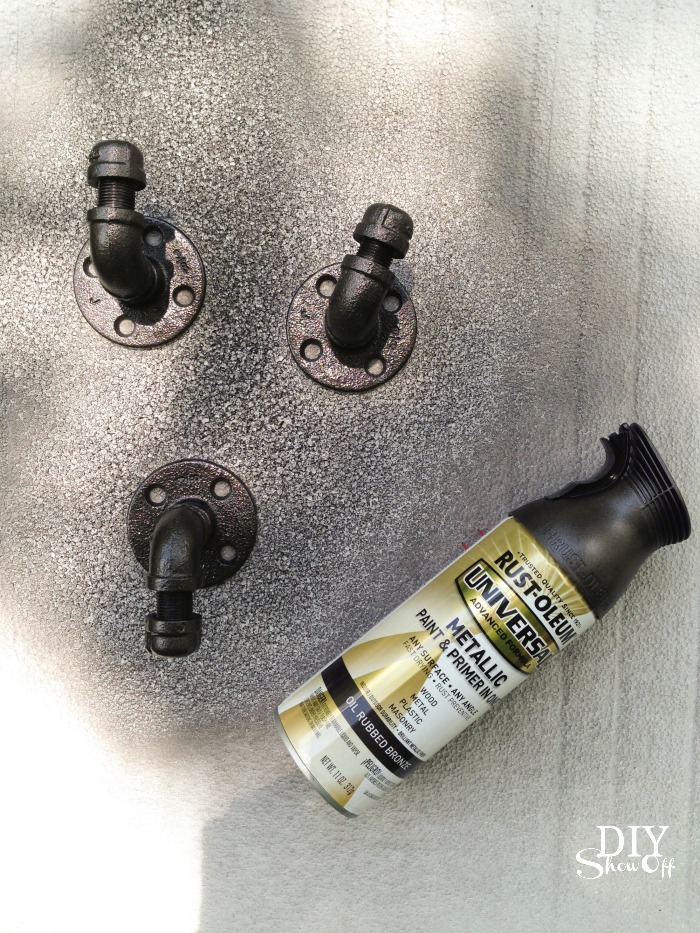
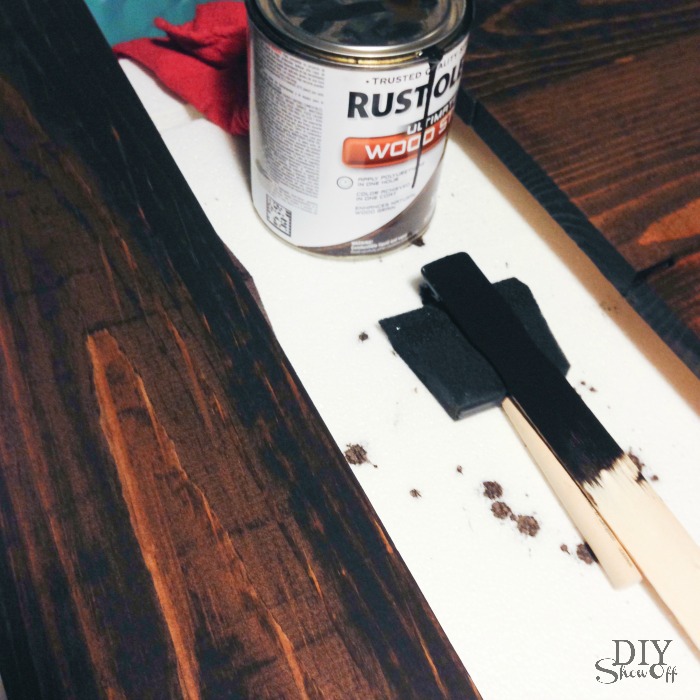
  • Rust-Oleum Ultimate Wood Stain (color is kona and ebony)
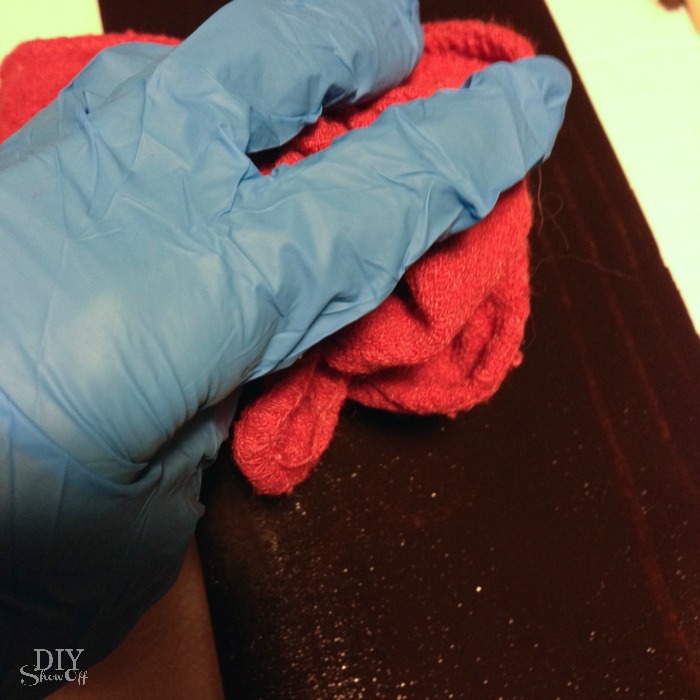
  • foam brush for applying stain, gloves & rags, paint brush for applying polyurethane
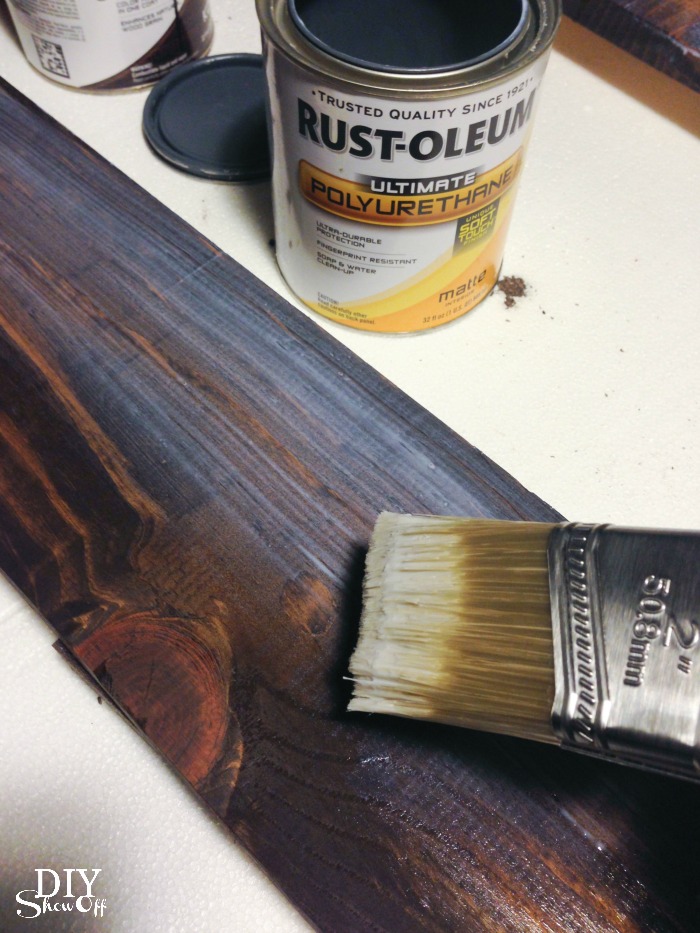
  • Rust-Oleum Polyurethane sealer (finish is satin)
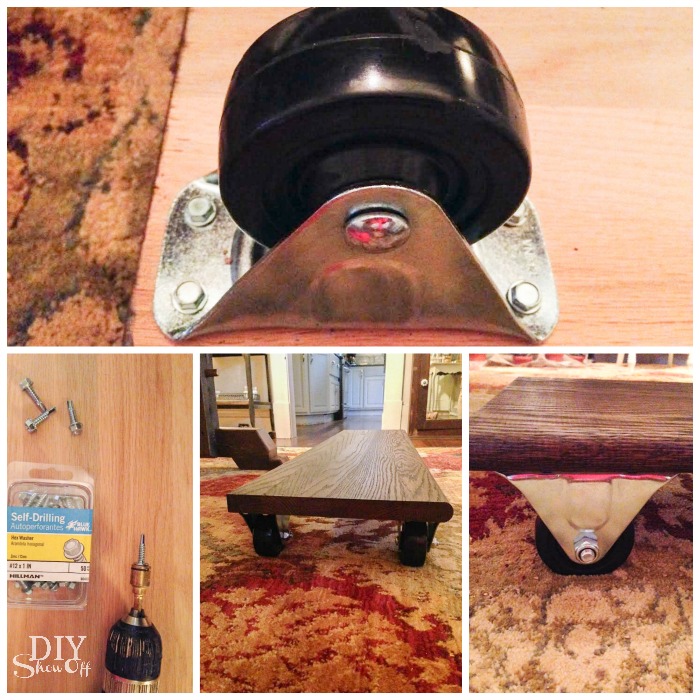
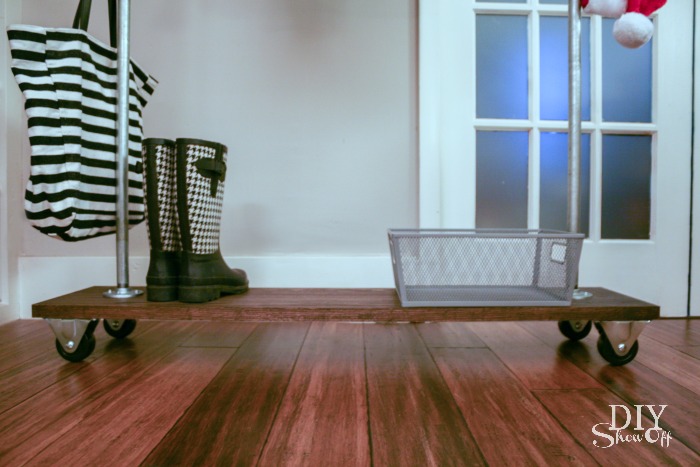
  • (4) heavy duty casters 
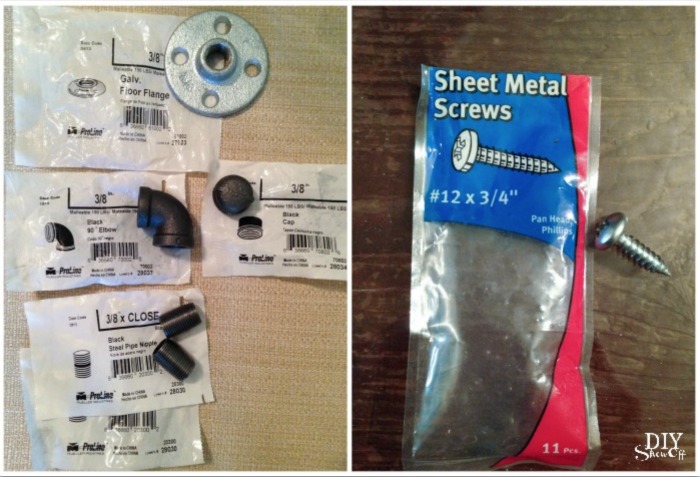
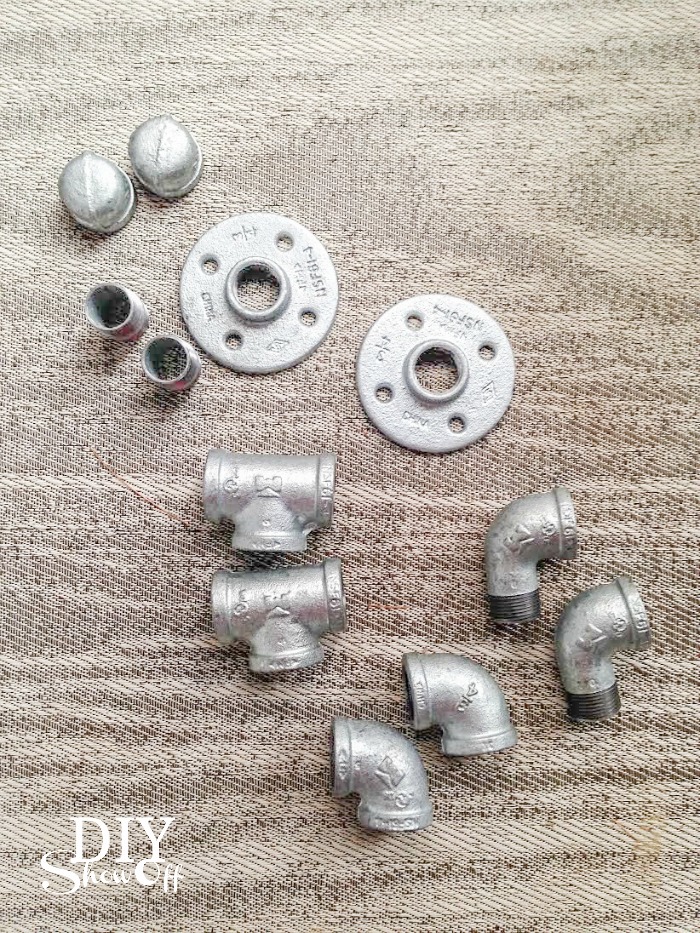
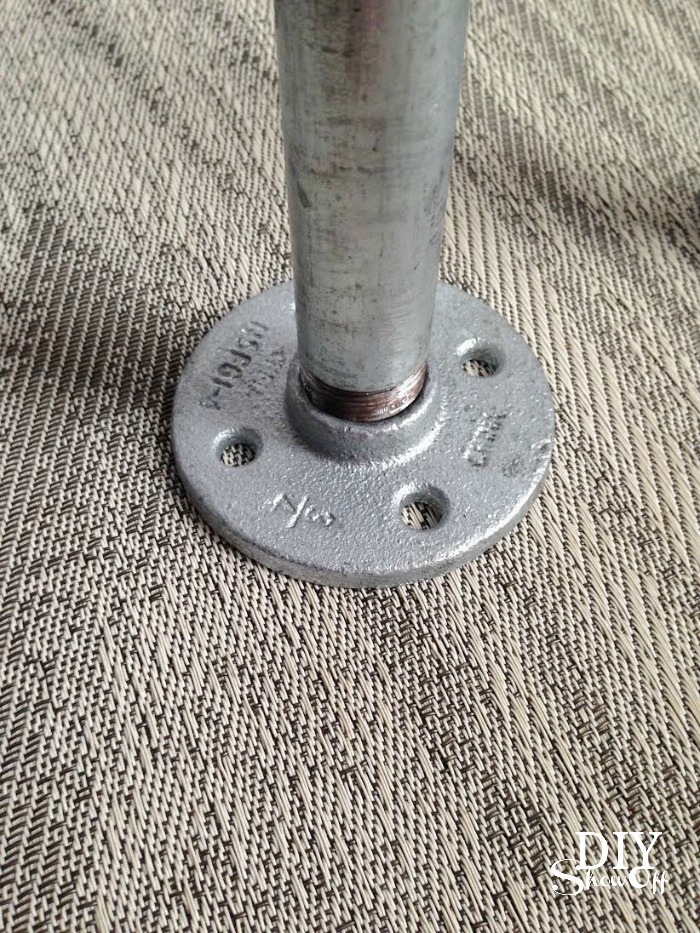
  • (2) 3/4″ flanges
  • (2) 24″ galvanized steel pipes
  • (2) 30″ galvanized pipes
  • (2) 3/4″ tee connectors
  • (2) 3/4″ nipple connectors
  • (2) 3/4″ 90 degree elbows
  • (2) 3/4″ 90 degree street elbows
  • (2) 3/4″ caps
  • (1) 36″ galvanized pipe
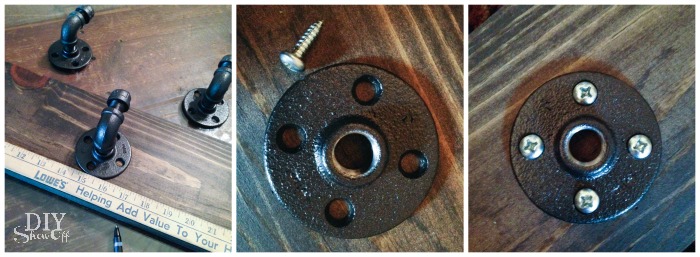
  • #12 1 inch hexagon washers (screws)

DIY galvanized pipe and wood mobile coat rack on casters @diyshowoff #lowescreatorDIY coat rack with galvanized steel pipe and casters @diyshowoff

What I did:

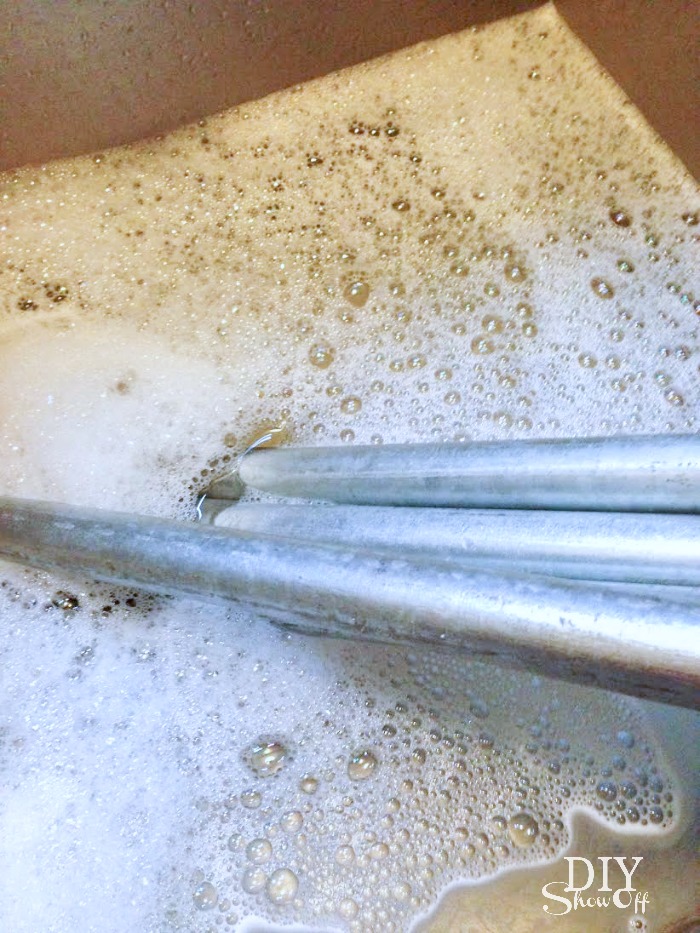
Soak the sticker parts of the galvanized pipes in hot soapy water. (It doesn’t take long.) Remove stickers. Dry pipes and set aside. 

DIY galvanized pipe and wood mobile coat rack on casters @diyshowoff #lowescreator

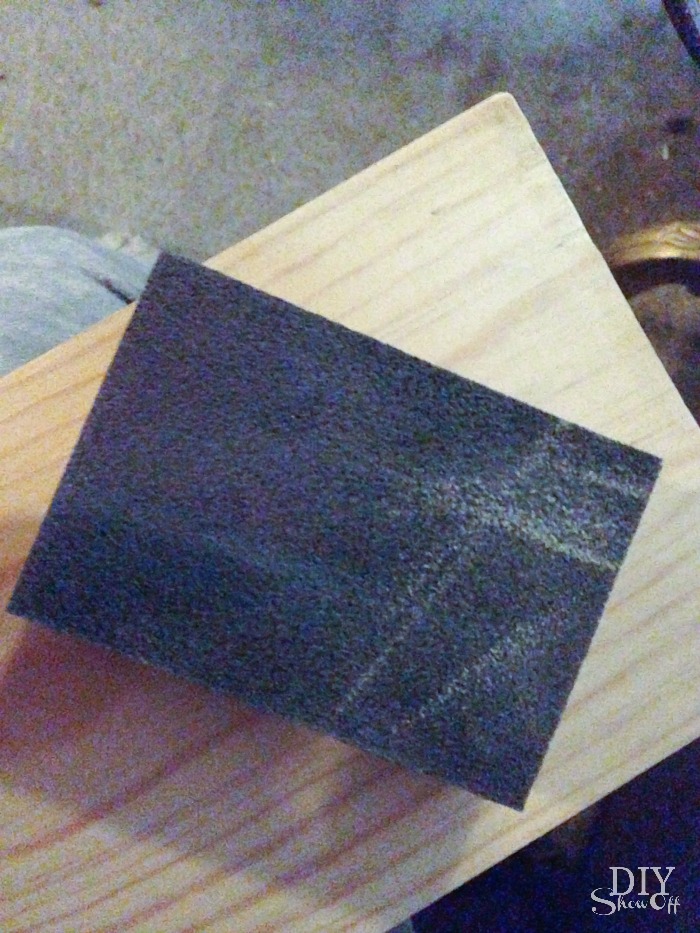
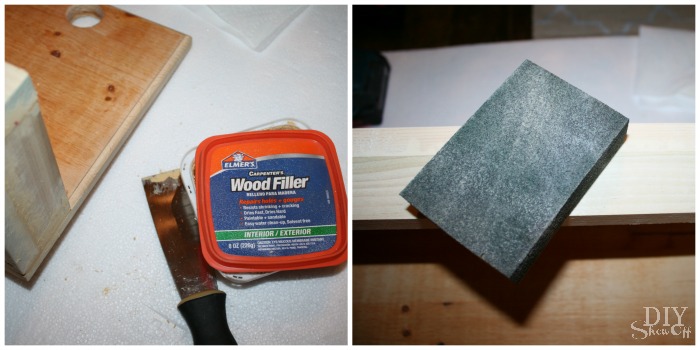
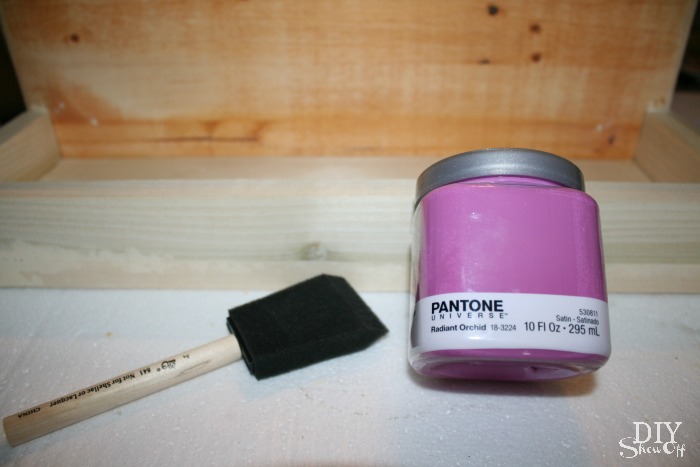
Finish the wood. Using the foam brush, I applied the wood stain (brush on in the same direction as the wood grain). Let sit for a few minutes then wipe away the excess with old rags. Unlike pine, the red oak wasn’t absorbing my favorite kona colored stain in as rich of a color so I also applied two coats of ebony in the same way to achieve a darker color. Stain then dries in about an hour. 

DIY galvanized pipe and wood mobile coat rack on casters @diyshowoff #lowescreator

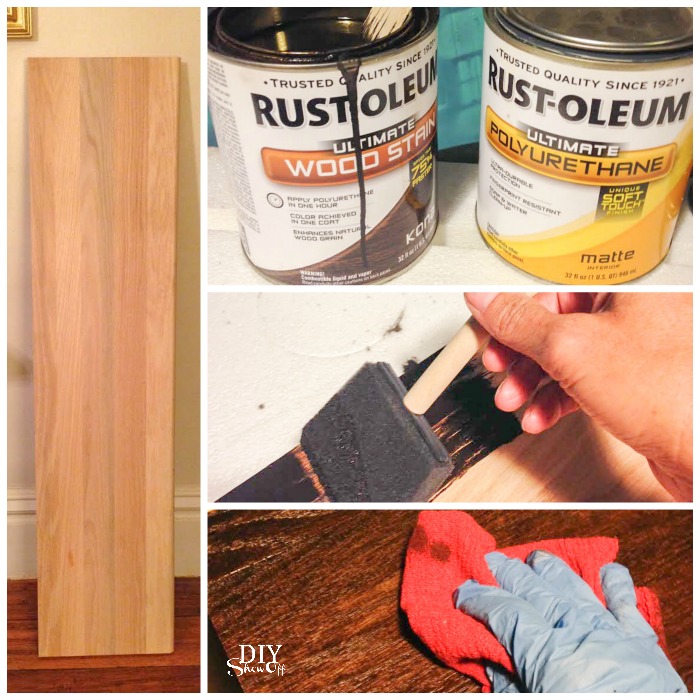
After the stain was dry, I sealed the wood using a coat of polyurethane. Simply brush on (looks a bit milky when wet but dries clear). I let that dry overnight. 

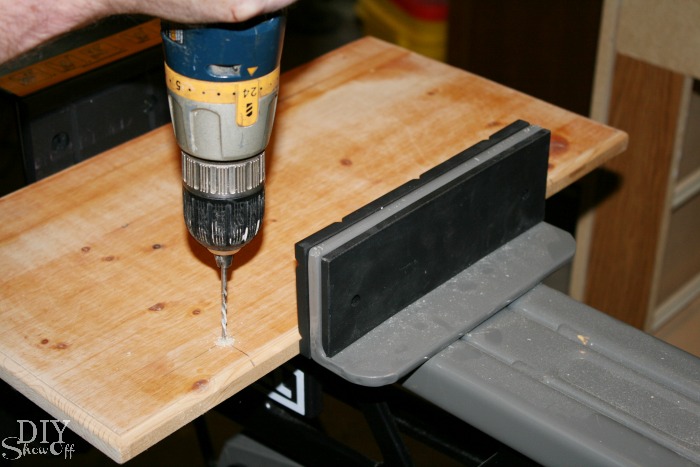
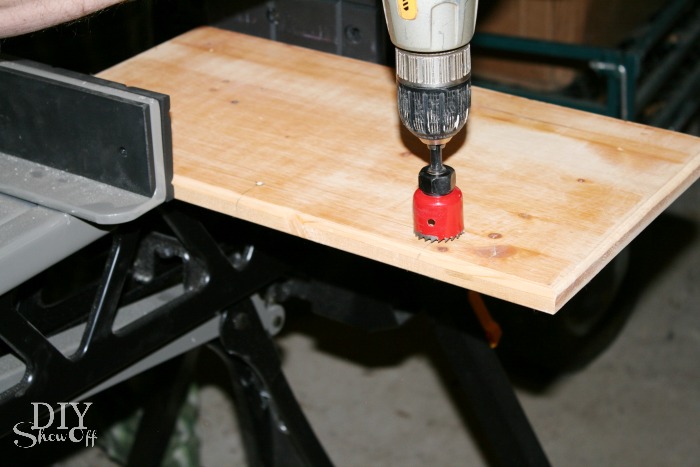
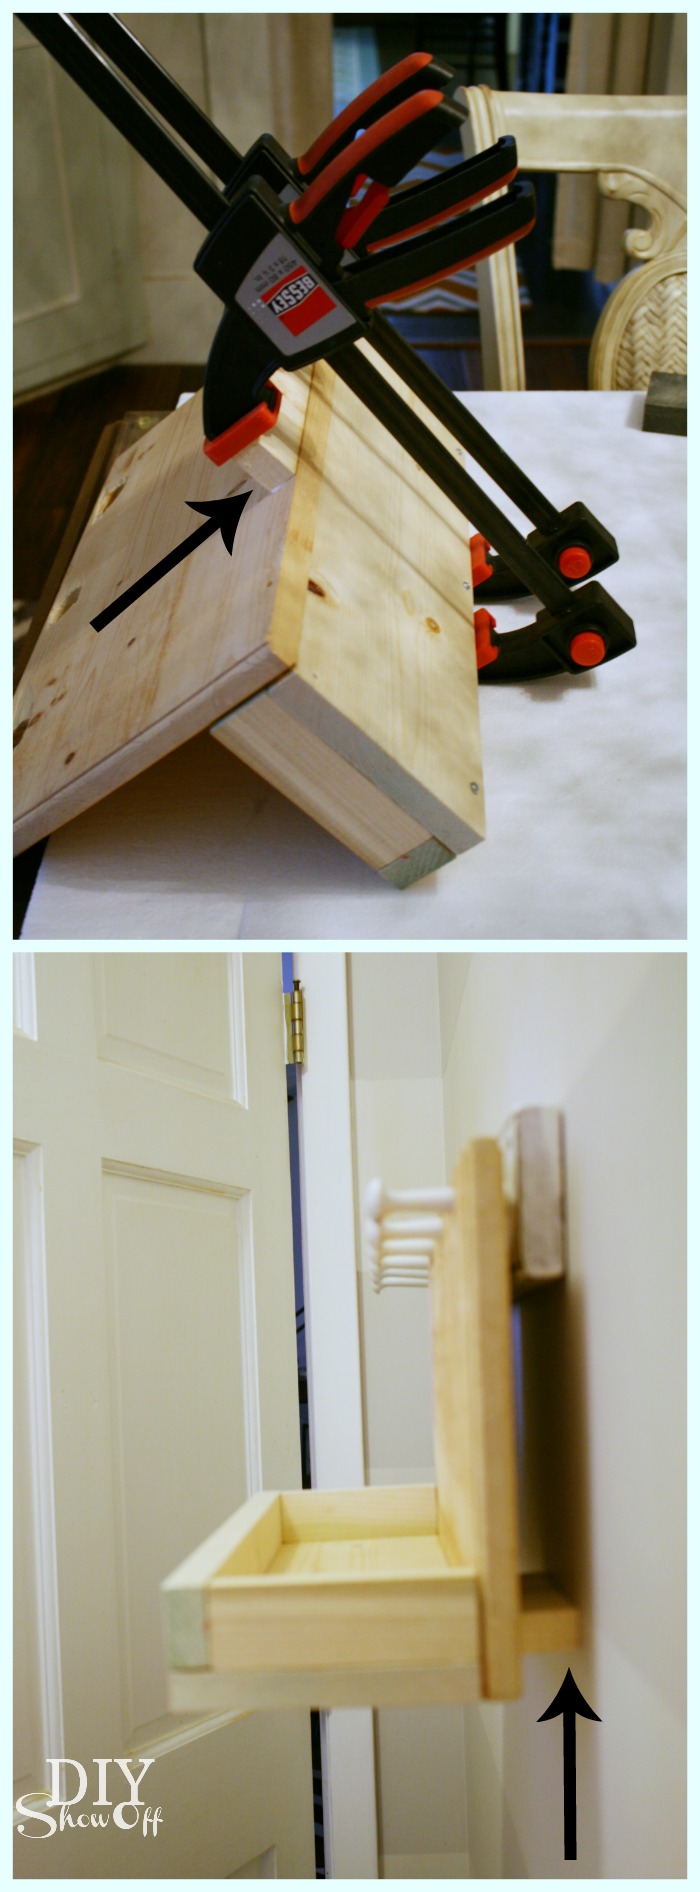
I attached the four casters to the under (unfinished) side using the hexagon screws. Be careful with the screws on the cut side of the wood. Going too close to the edge may cause the wood to crack. 

DIY galvanized pipe and wood mobile coat rack on casters @diyshowoff #lowescreator

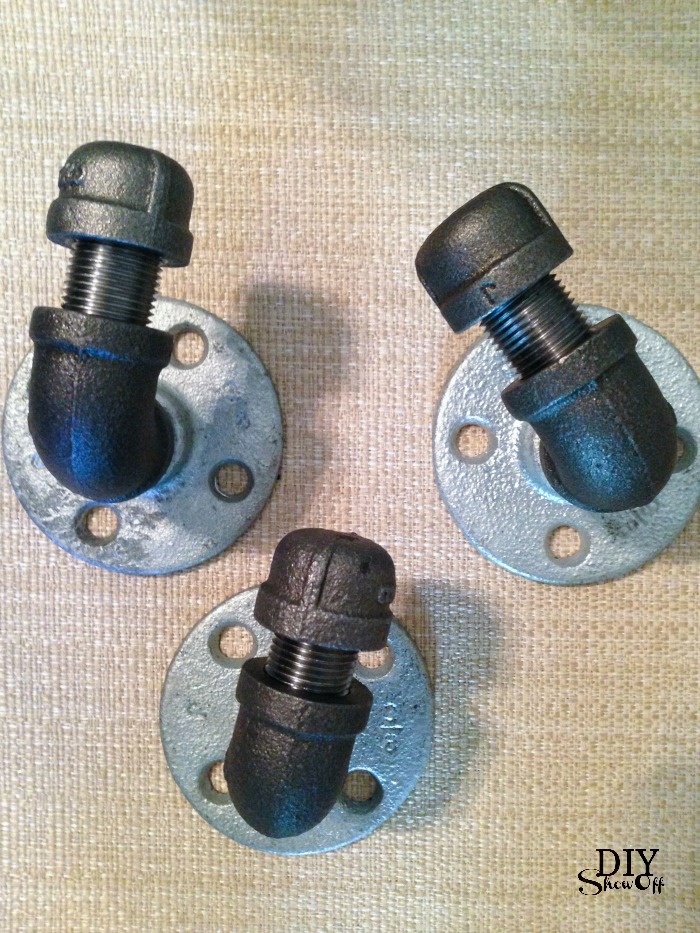
Flip right side up. Set aside the nipple connectors, two street elbows and the caps. 

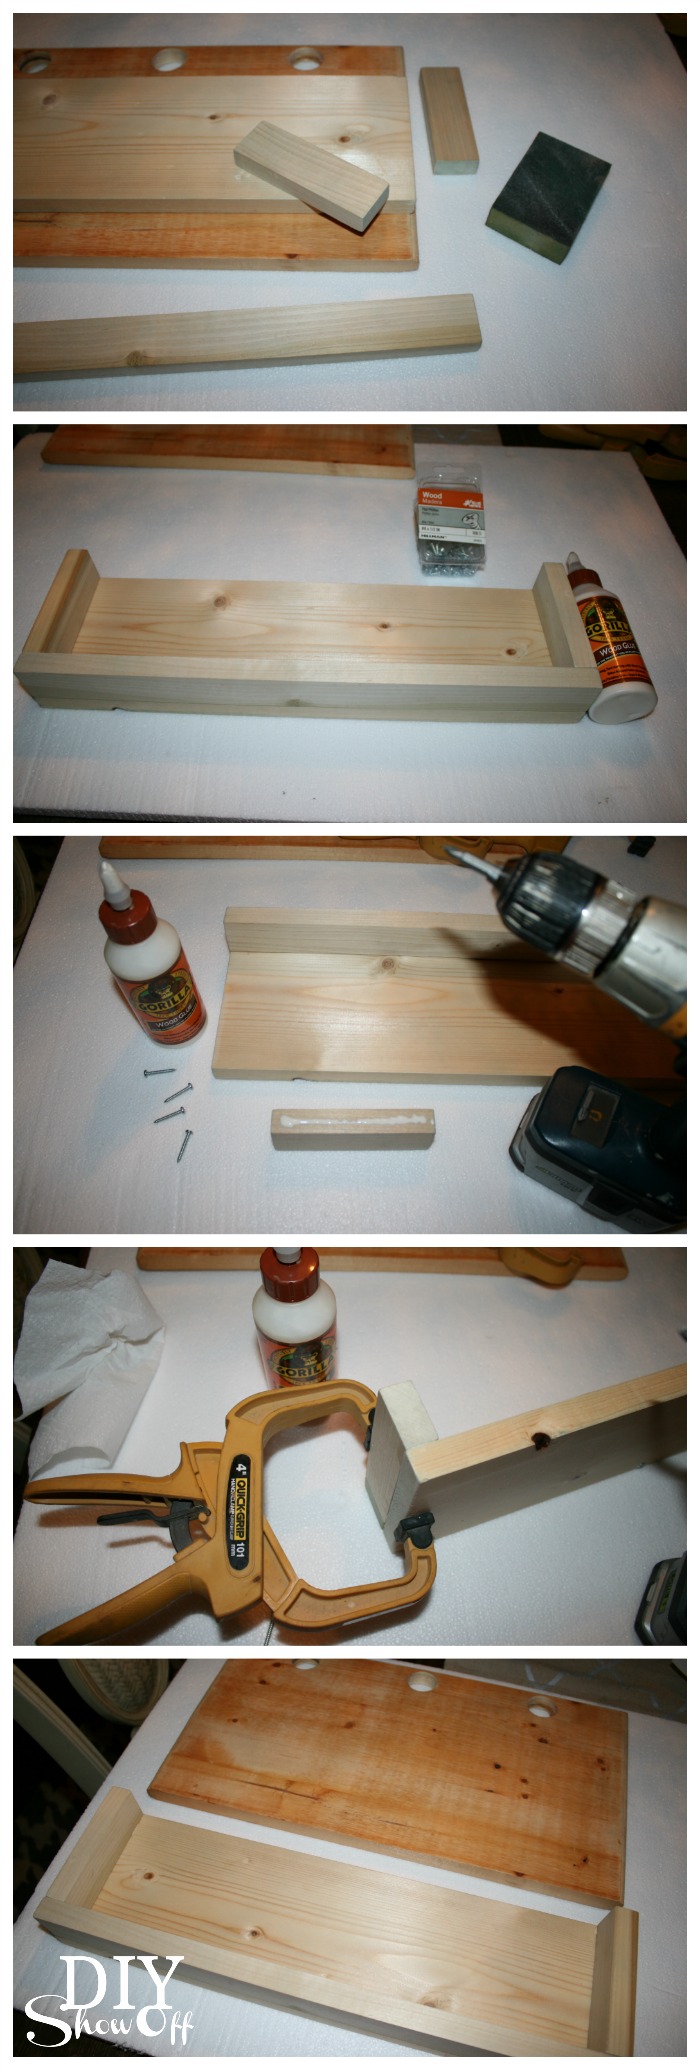
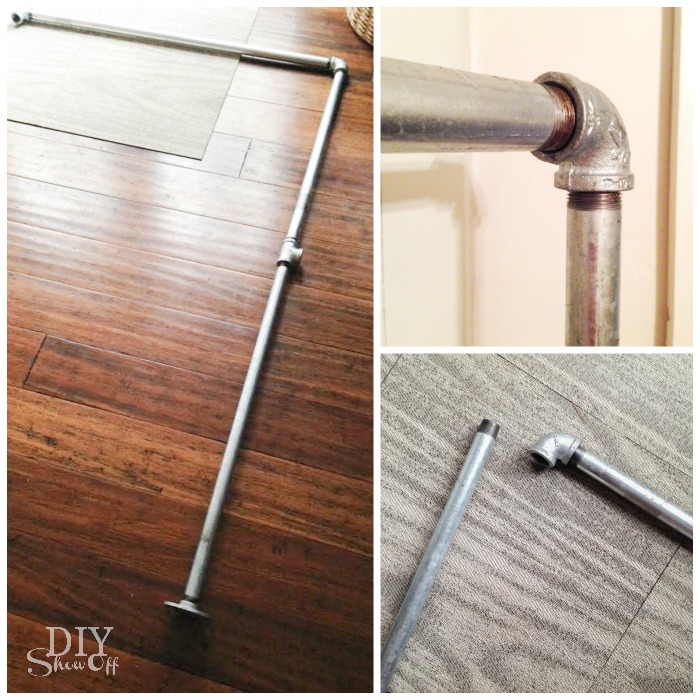
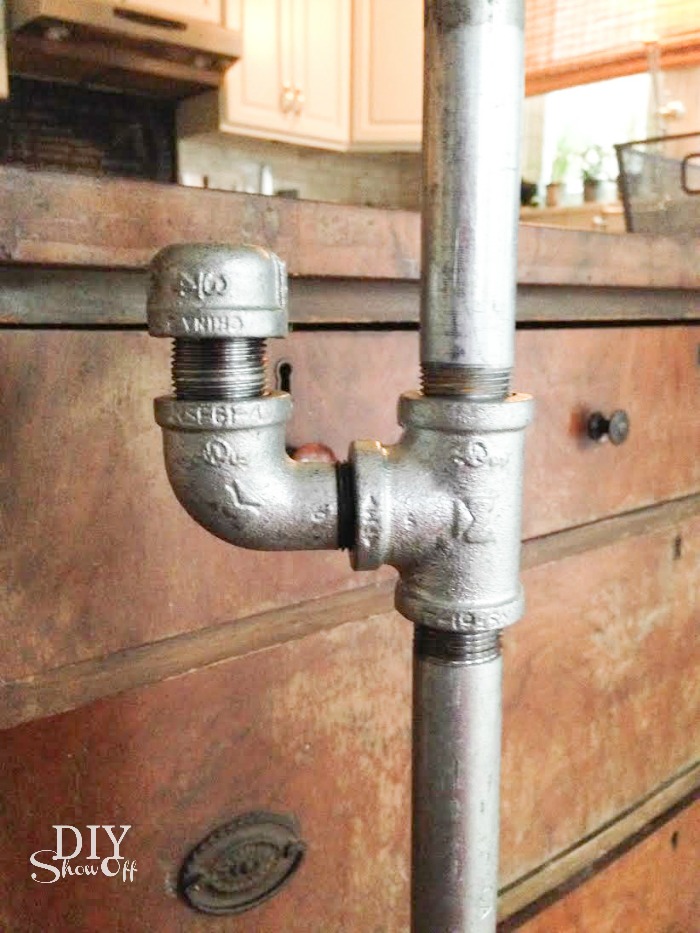
Next I assembled my pipe pieces. Starting with the flanges. Screw 30″ pipes into flanges.

DIY galvanized pipe and wood mobile coat rack on casters @diyshowoff #lowescreator
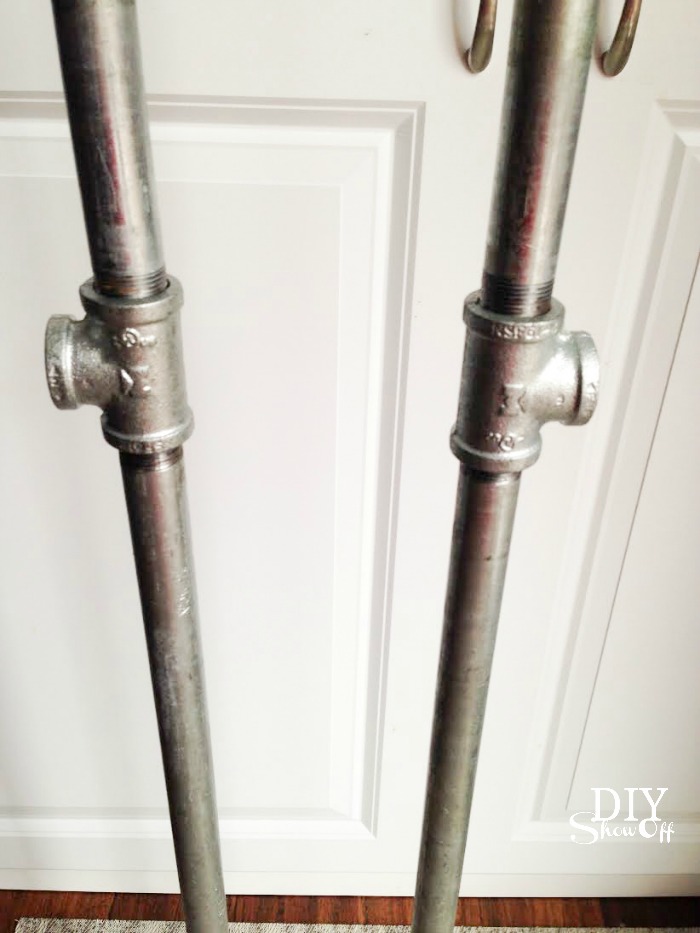
Then add tees to the other end of each 30″ pipe.

DIY galvanized pipe and wood mobile coat rack on casters @diyshowoff #lowescreator


Then add the other 30″ pipe sections (one to each tee – you’ll have two poles at this point).

DIY galvanized pipe and wood mobile coat rack on casters @diyshowoff #lowescreator

Add a 90 degree elbow to the top of one pole.

DIY galvanized pipe and wood mobile coat rack on casters @diyshowoff #lowescreator

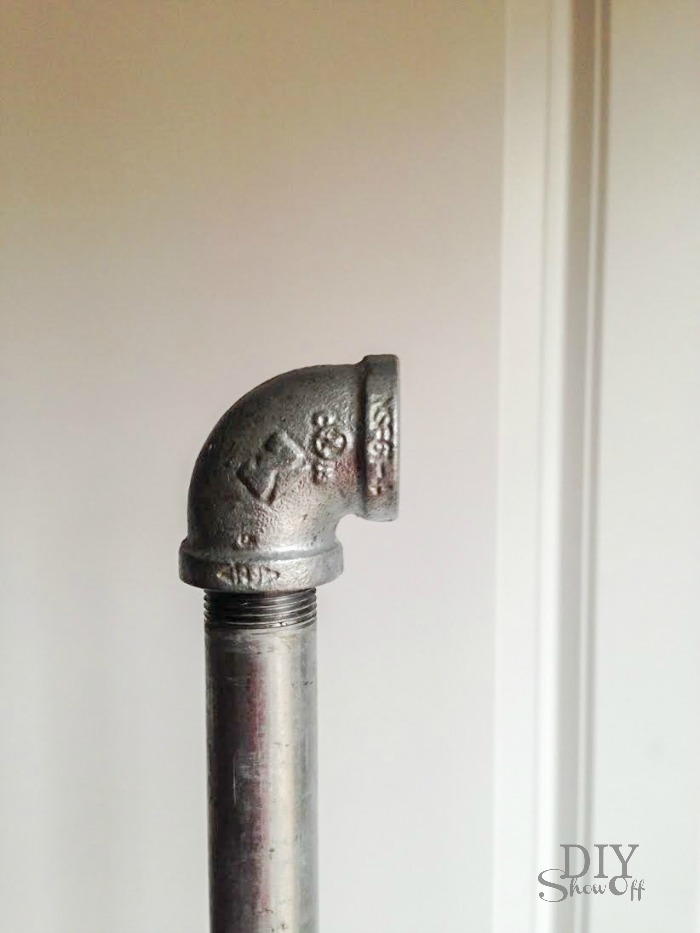
Connect the 36″ galvanized pipe (center) piece. Add a 90 degree elbow to the end of the center pipe piece then add the other pole.  

DIY galvanized pipe and wood mobile coat rack on casters @diyshowoff #lowescreator

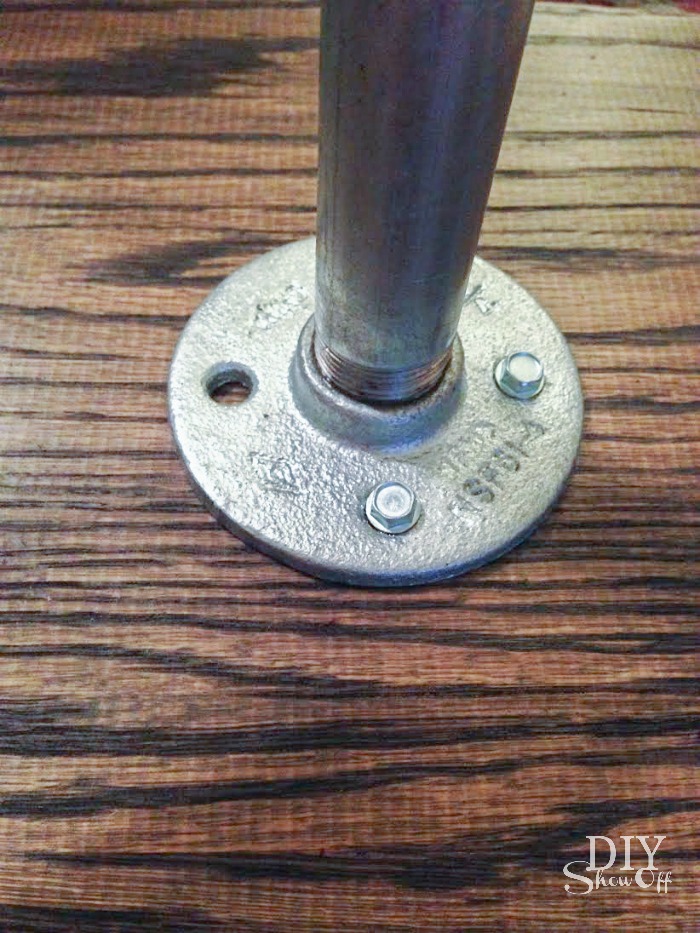
Place the pole-contraption onto the wood stair riser (I found the center by using a yard stick).  Attach flanges to the wood using the hex screws.

DIY galvanized pipe and wood mobile coat rack on casters @diyshowoff #lowescreator

Add nipple connectors to the center tees, then elbows then caps. This creates a space for hanging purses, hats or scarves. 

DIY galvanized pipe and wood mobile coat rack on casters @diyshowoff #lowescreator

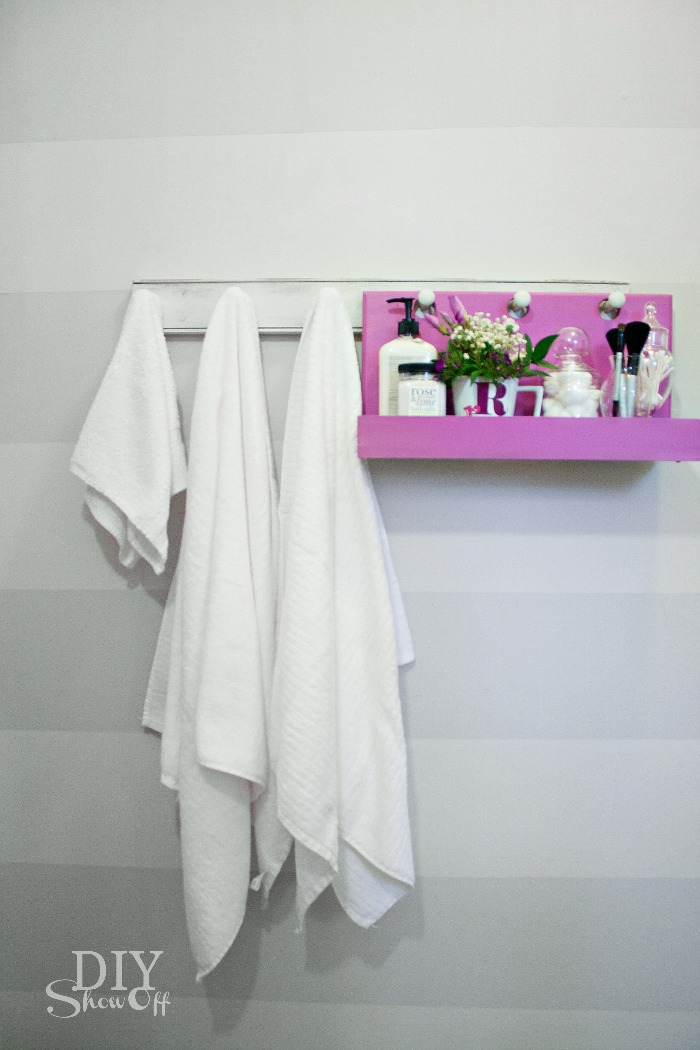
Now when we’re expecting guests, we can simply roll the coat rack near the door for hanging coats. Or use it as extra hanging space in a room without a closet (or one with a packed closet). Handy to have in the laundry room too! 

DIY galvanized pipe and wood mobile coat rack on casters @diyshowoff #lowescreatorDIY galvanized pipe and wood mobile coat rack on casters @diyshowoff #lowescreator

Store it in the basement, a closet, the laundry room, an office or guest room and then move near the door for parties and gatherings. Or if you have room, display near the front door entryway or mudroom area. 

DIY galvanized pipe and wood mobile coat rack on casters @diyshowoff #lowescreator 

DIYShowOff #lowescreator

I received a Lowe’s gift card to put towards this challenge. Opinion and above idea is 100% my own. More DIY ideas at Lowe’s Creative Ideas or follow Lowe’s on InstagramPinterest and sign up for the Creative Ideas magazine and app.

DIY Book Ends

Back to school time! Time to restock the desk area for homework assignments and school projects. Add cute set of DIY book ends to perk things up. 

A to Z book ends tutorial @diyshowoff

As a part of the Michael’s Makers team, I have the opportunity to create a monthly themed project. This month’s challenge is “Back to School”. A bit of a ‘challenge’ when your nest is empty but these will work in grand-baby boy’s nursery too. 😉

What I used: 

  • 4  wood blocks 
  • wood glue and clamps
  • scrapbook paper and scrapbook cards
  • multi-surface acrylic craft paint and foam brush
  • gloss finish decoupage and foam brush
  • {thin} washi tape
  • letter A
  • letter Z
  • hot glue gun & glue

DIY Show Off back to school book ends tutorial

What I did:

Start with applying a bead of wood glue to each block to create an “L” shape. Clamp, wipe away any excess glue and let dry. 

DIY Show Off back to school book ends tutorial #michaelsmakers

Once glue was dry, I removed the clamps and applied a ‘white wash’ look using a foam brush and multi-surface acrylic craft paint. I only applied one coat so that the wood grain still showed through. Let dry. 

DIY Show Off back to school book ends tutorial #michaelsmakers

Cut scrapbook paper to size for inside of the “L” shape and the outside of the vertical wood piece. I used scrapbook paper and cute patterned scrapbook cards. 

DIY Show Off back to school book ends tutorial #michaelsmakers

Apply a coat of decoupage to one side at a time as a glue. Place scrapbook paper onto decoupaged surface. Smooth out air bubbles. Apply another coat of decoupage over the scrapbook paper, sealing it. I brushed on the decoupage in the same direction as the wood grain. Repeat decoupage + scrapbook paper to all sides. Decoupage will go on with a ‘milky’ look but dry transparent. 

DIY Show Off back to school book ends tutorial #michaelsmakers

Add washi tape to sides, smooth out bubbles/make sure it’s adhered. Apply a coat of decoupage to seal. *There’s also the option to apply the decoupage before the washi tape to act as a ‘glue’. 

DIY Show Off back to school book ends tutorial #michaelsmakers

Apply a second coat of decoupage to all surfaces. I let mine dry overnight. 

Attach wood “A” and “Z” using hot glue gun. Wouldn’t they be cute with succulent planters, plastic animals, vases, figurines instead too? 

DIY Show Off back to school book ends tutorial #michaelsmakers

Once hot glue sets, you’re good to go!

DIY Show Off back to school book ends tutorial #michaelsmakers

Ready for keeping school books within easy reach and an organized desk top. Useful, functional book ends that coordinate with your home office, library, reading room, craft room, nursery or homework station…love it!

DIY Show Off back to school book ends tutorial #michaelsmakersDIY Show Off back to school book ends tutorial #michaelsmakersDIY Show Off back to school book ends tutorial #michaelsmakers

See MORE ‘back to school’ crafts from these blog friends:

Teachers – It’s time to start planning for the new school year and Michaels has all of the ideas and supplies you need to create a one-of-a-kind classroom, plus you get a 15 percent discount on all classroom purchases!

In addition to the products available for teachers, parents and students can find organizational tools to keep on track throughout the year as well as project ideas to personalize school supplies

Check out Michaels’ Back to School Pinterest Board to find fun and creative project ideas to kick the year off right! 

As a member of the Michael’s Makers team, I receive a gift card to complete and share fun craft challenges.

Michaels.com: Your 24-hour Arts & Crafts Store


DIY Pipe Fitting Wooden Coat Rack Tutorial

This little seating area is great for putting on shoes and a quiet pet resting place and I love the vintage mould (I think that’s what the chalkboard is hanging on) but you know what? I was ready for a change. Surprise, surprise! haha!

eclectic-hallway

Time to get creative and since we love pipe and wood projects for a bit of a rustic industrial style (see this), those are the materials I used to create a pipe fitting wooden coat rack. 

What I used:

DIY pipe coat hooks

  • Three 3/8 inch galvanized flanges
  • Three 3/8 inch 90 degree elbows
  • Three 3/8 inch black caps
  • Three 3/8 inch x close steel pipe nipples
  • Twelve 3/4 inch sheet metal screws (these fit nicely for securing the flanges to wood)
  • RustOleum Universal Metallic spray paint + primer (oil rubbed bronze)
  • Scrap 1 x 6 pine board 
  • RustOleum Ultimate wood stain (Kona)
  • RustOleum Ultimate polyurethane
  • 2 drywall anchors and screws (to secure to wall)

What I did:

1. I connected my pipe fittings in this order: flange, nipple, elbow, nipple, cap.

DIY pipe coat hooks @diyshowoff

2. Then I gave them a few light coats of spray paint and let dry. 

DIY pipe coat hooks @diyshowoff

3. I cut my scrap pine board to 30 inches.

DIY pipe coat hooks @diyshowoff

4. Then sanded the edges smooth and wiped clean. 

DIY pipe coat hooks @diyshowoff

5. Next using a foam paint brush, I applied the wood stain and let it sit for a couple of minutes. You’ll want to wear gloves!

DIY pipe coat hooks @diyshowoff

6. Then wiped away the stain with an old rag and let it dry.

DIY pipe coat hooks @diyshowoff

7. After about an hour, I brushed on the polyurethane and let it dry according to manufacturer’s instructions. 

DIY pipe coat hooks @diyshowoff

8. Once everything was dry, I secured the first pipe hook to the center of my wood plank. Then secured the other two. 

DIY pipe coat hooks @diyshowoff

9. I attached it to the wall using drywall anchors and screws. 

DIY pipe coat hooks @diyshowoff

Perfect for hanging jackets, the dog’s leash, or my tote bag. 

rustic industrial pipe fitting coat rack @diyshowoff.com

Check back next week to see the tutorial for the dog silhouette wood plank wall art tutorial.

DIY Burlap and Spool Key Keeper Tutorial

Michael's Raw Bar

As a part of the Michael’s Makers team, I have the opportunity to participate in monthly craft challenges. This month’s project is a DIY burlap and spool key keeper tutorial. 

DIY Show Off key holder

I don’t know about you but I LOVE craft supplies like cork, burlap, unfinished, twine, jute…all things “natural and earthy”. I feel like I could just start a collection of natural materials with no crafting plans…they’re all just so pretty! But since this isn’t blog isn’t titled  “Hoard Show Off”, let’s get to the ‘how to’!

DIY Burlap and Spool Key (or jewelry) Keeper Tutorial

(Because we all have a habit of misplacing our keys on occasion, right? Some more than others. Ahem, “Mr. DIY”)

DIY key holder supplies at diyshowoff.com

Materials:

  • stretched burlap canvas
  • natural wood cutout (I chose a key but I saw the cutest bird cage cut out at Michael’s too)
  • cork letter
  • wooden spools
  • twine and scissors
  • optional: acrylic craft paint (black) and foam paint brush
  • hot glue and hot glue gun
  • picture hanging hardware or 3M strips

What I did:

1. Paint the accessories and let dry. I painted the wooden key decal and spools black. 

DIY key holder tutorial at diyshowoff.com

2. Wind twine around spool. Cut twine and secure with hot glue. 

DIY key holder tutorial at diyshowoff.com

3. Attach accessories (wooden key decal, cork monogram and spools) to stretched burlap frame using hot glue. 

DIY key holder tutorial at diyshowoff.com

4. Hang and display near door. I nestled mine inside of a regular picture frame.

DIY key holder tutorial at diyshowoff.com

Keep keys within easy reach or hang in a in closet, the bedroom or bathroom for hanging necklaces, beads, bracelets, hair ties, etc. 

DIY key holder tutorial at diyshowoff.com

It doesn’t get much easier than that, does it? Perfect for your own home (and sanity) or a great handmade housewarming gift idea. 

DIY key holder tutorial at diyshowoff.com

On August 8th, you’ll find these and MORE fun accessories at Michael’s new “Raw Bar”. Tons of unfinished, natural craft supplies for your next DIY craft project. 

Michael's Raw Bar Michael's Raw Bar

I’m a member of the Michael’s Makers team which means I receive a gift card to complete and share fun craft challenges.

Michaels.com: Your 24-hour Arts & Crafts Store

See MORE ‘raw’ crafts from these blog friends:


DIY Hanging Organizer (for peg hooks)

How do you add a fun pop of color to an otherwise neutral room? Try Pantone’s Color of the Year for something you may not normally choose. The Lowe’s Creative Idea March challenge was to use Valspar’s Radiant Orchid. Just a small touch adds elegance to my white and gray space. 

Pantone Color of the Year Radiant Orchid

Inspired by PB’s Gabrielle system, I created a wooden peg hook organizing caddy from scrap wood. 

DIY Hanging Organizer Tutorial

Materials I used: Most of my wood was purchased at Lowe’s and is left over from previous projects with the exception of the .50 yard sale find piece shown below. Adjust measurements according to your own needs or scrap wood measurements. Inexpensive pine works well for this project.

  • 1″ x 10″ x 18 1/2″ (back)
  • 1″ x 6″ x 18 1/2″ (bottom)
  • 1″ x 2″ x 4″ (sides)
  • 1″ x 2″ x 18 1/2″ (front)
  • 1″ deep (or however thick your peg hook rack is)  x 1″ tall  x 6″ wide (back stop piece)
  • Gorilla Wood Glue
  • 1 1/2″ wood screws
  • Wood filler
  • Valspar Radiant Orchid 

What I did:

Mark the center top of the back piece of wood. Hold up to a peg on your coat rack, lining the center with the center of a peg. On the wood, mark the center of each peg placement.

DIY peg hook caddy tutorial

Decide which hole saw bit is just a little bigger than the pegs. 

DIY peg hook caddy tutorial

You’ll want your holes to be near the top end. I used a ruler to measure down about 2″ from the top and a level to make a cross mark to show the center of each hole. Drill tiny pilot holes where the pencil marks meet.

DIY peg hook caddy tutorial

Attach the hole saw bit to your drill and using the pilot hole as a guide for the center drill bit, drill/cut holes. I think our hole saw bit is a little dull so the back side of my wood is splintered. (Thankfully no one will see that side!)

DIY peg hook caddy tutorial

Sand and wipe clean all wood pieces. Hang on pegs to ensure holes line up.

DIY peg hook caddy tutorial

Using wood glue, wood screws and clamps, assemble your caddy and let dry. I attached my screws from the bottom and back so they weren’t seen but you could also countersink screws, fill and sand.

DIY peg hook caddy tutorial

I thought that was it for the construction until I tested it hanging on my peg hooks. Oops, front heavy. Using just wood glue and a clamp, I attached the back stop piece to the center bottom of the back. This ensures that the caddy will hang level.

DIY peg hook caddy tutorial

Using wood filler, fill all seams and cracks. Let dry, sand smooth and wipe clean. 

DIY peg hook caddy tutorial

Paint the entire wood caddy. Mine took two coats. Radiant Orchid wouldn’t have been my first choice but it’s growing on me and it’s nice to do something bold and fun for a change. I love the Valspar sample size paint…more than enough and perfect for adding colorful accents. Down the road all it takes is a new coat of a different color to re-freshen things up. 

DIY peg hook caddy tutorial


Now I have a shelf/tray for decorative items, toiletries in the bathroom

bathroom organization - DIY peg hook hanging shelf

DIY hanging peg hook organizer

hanging peg hook organizer

bathroom peg hook hanging organizer

Great for keys, wallet, sunglasses, change, cell phone near the door in the mudroom or entryway. 

Peg Hook Hanging DIY Organizer

DIY peg hook mudroom entryway organizing hanging caddy

PB inspired peg hook shelf caddy organizer

My peg hook is located in my bathroom but I’d really love to have something like this near the door as well. How about you? 

More DIY ideas at Lowe’s Creative Ideas, follow Lowe’s on InstagramPinterest and sign up for the Creative Ideas magazine and app!    

LCI

*Disclaimer: As a member of the Lowe’s Creative Ideas Creators and Influencers network, I received a Lowe’s gift card to complete this challenge. As always, all ideas and opinions are in my own words. The blog post above is what worked for me. Results may vary. Remember to work in a well-ventilated area and to take the proper safety precautions.