DIY Halloween Vignette

Decorating for Halloween? I’m not much of a Halloween decorator but I do have friends with October birthdays and these make a great gifts! 

DIY Halloween decor @diyshowoff

EASY Halloween Wall Art 

DIY Halloween decor @diyshowoffYou’ll need these items from the craft store:

  • stretched burlap
  • felt placemat
  • felt decor
  • glue dots (or recommended: hot glue)

Using lots and lots of glue dots or hot glue, layer and secure the felt placemat onto the stretched burlap canvas (glue dots = temporary and using stretched burlap for another project in the future, hot glue = more permanent). Then secure the felt decoration on top of the felt placemat. It doesn’t get much easier than that! 

DIY Halloween decor @diyshowoff

Halloween BOO Blocks tutorial

DIY Halloween decor @diyshowoff

Check out my DIY wooden BOO blocks tutorial on the FrogTape® blog squad site HERE!

Do you decorate for Halloween? Just a little or do you go all out?

I received compensation to complete this project for using FrogTape® products. All opinions, projects and ideas are based on my own experience.

Springtime in Paris vignette {Enter to win a trip to Paris!}

#springtimeinparis #michaelsmakers @diyshowoff

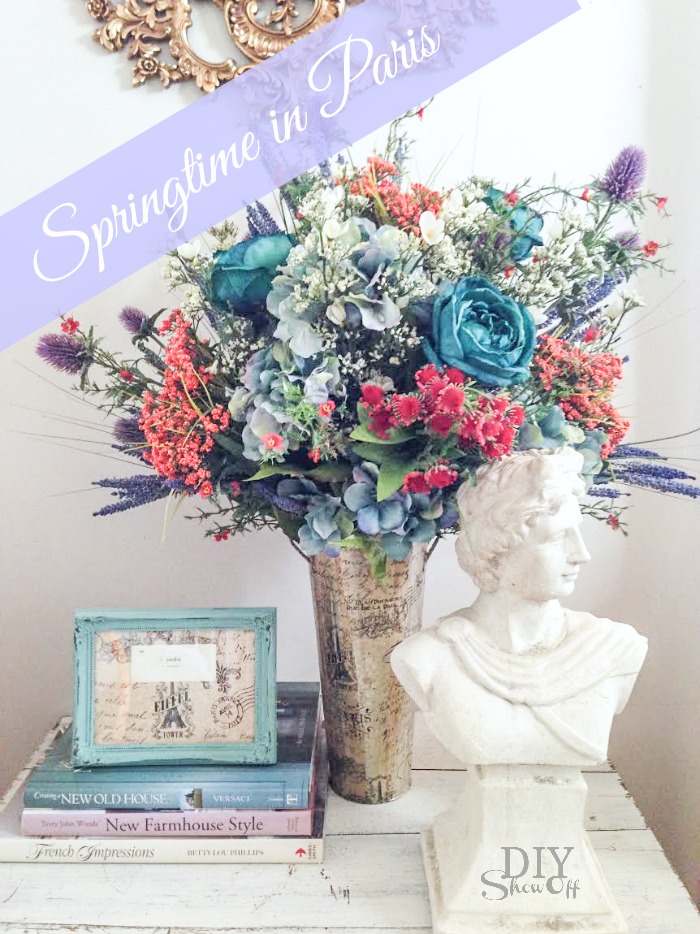
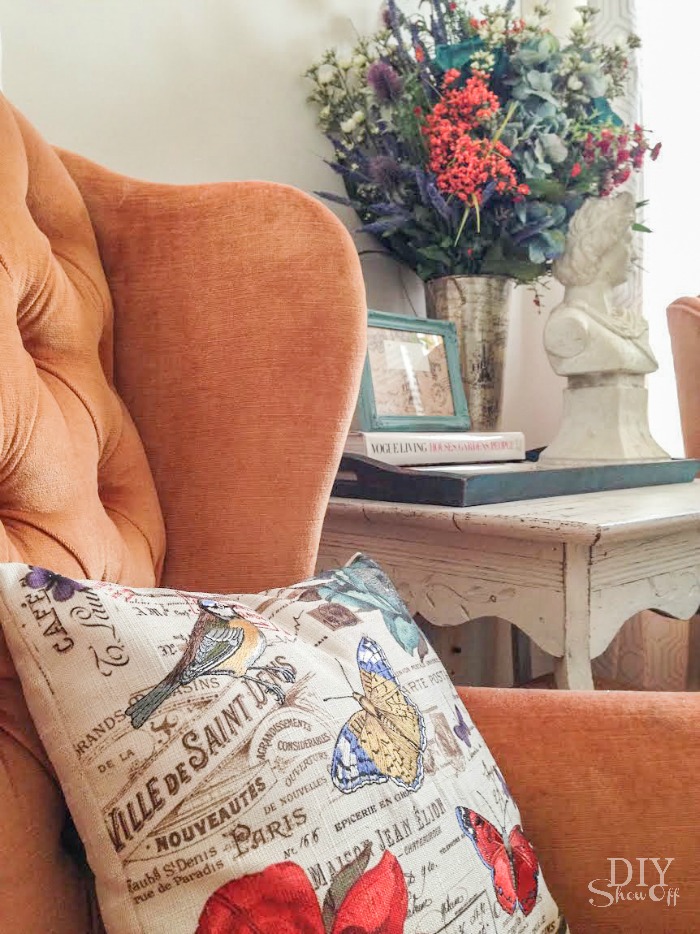
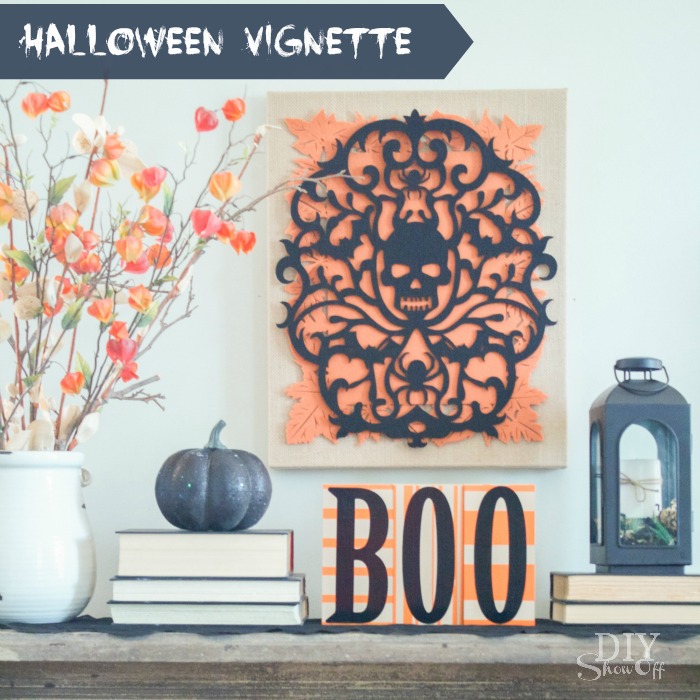
I sure wish it was springtime in western PA but until that day arrives (hopefully sometime in the very near future), I’m enjoying the Michael’s Makers March challenge: “Springtime in Paris”. I paired pretty French script pillows with a pretty DIY springtime arrangement in a decoupaged French script vase with matching frame to bring a little “Springtime in Paris” to our home. 

decoupage vase @diyshowoff #SpringTimeinParis #michaelsmakers

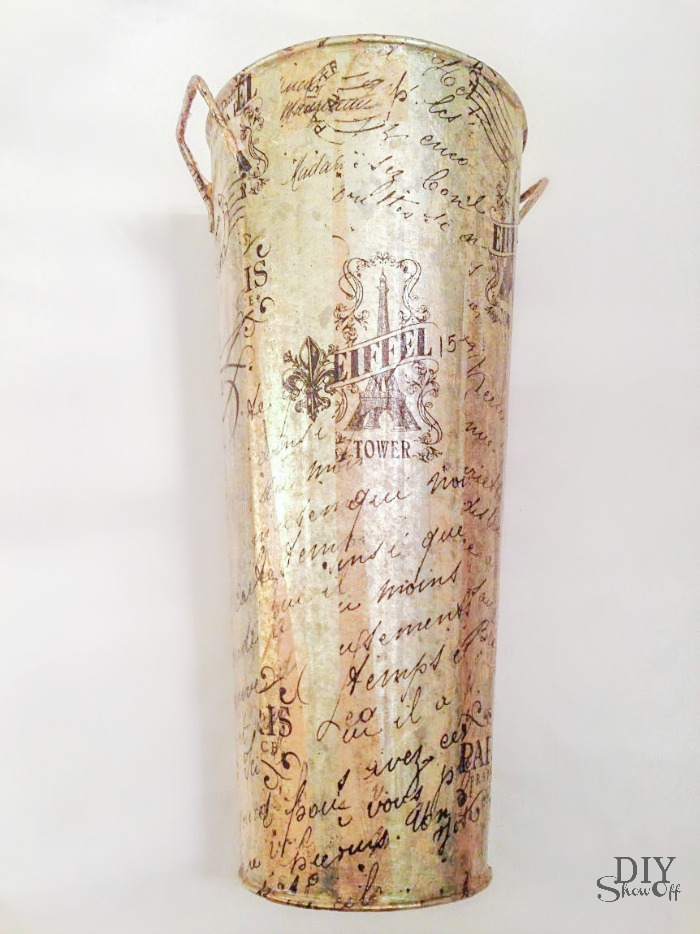
decoupaged tin vase and floral arrangement

Supplies:

Shop Home Decor and Floral at Michaels

  • tin vase
  • decoupage
  • French printed tissue paper
  • foam paint brush

40% Off Any One Regular Price Item

This Week's Coupon at Michaels.com

How to:

Working in sections. Brush on a coat of decoupage.

decoupage vase @diyshowoff #SpringTimeinParis #michaelsmakers

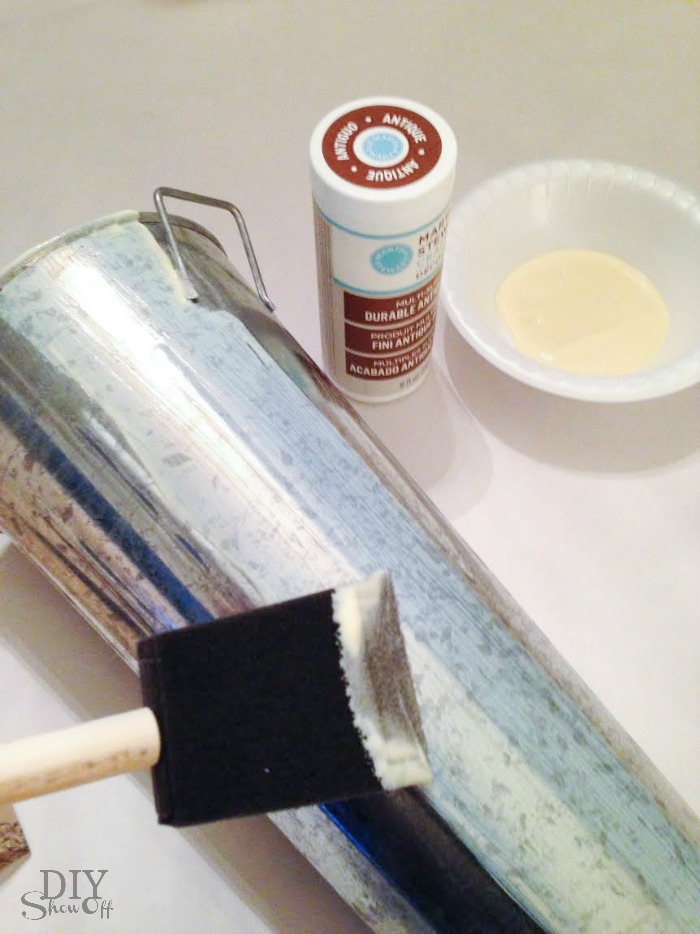
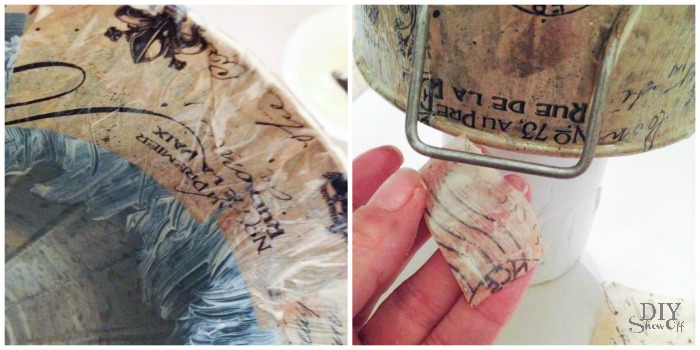
Due to the shape of my tin vase, I applied strips of tissue paper in layers.

decoupage vase @diyshowoff #SpringTimeinParis #michaelsmakers


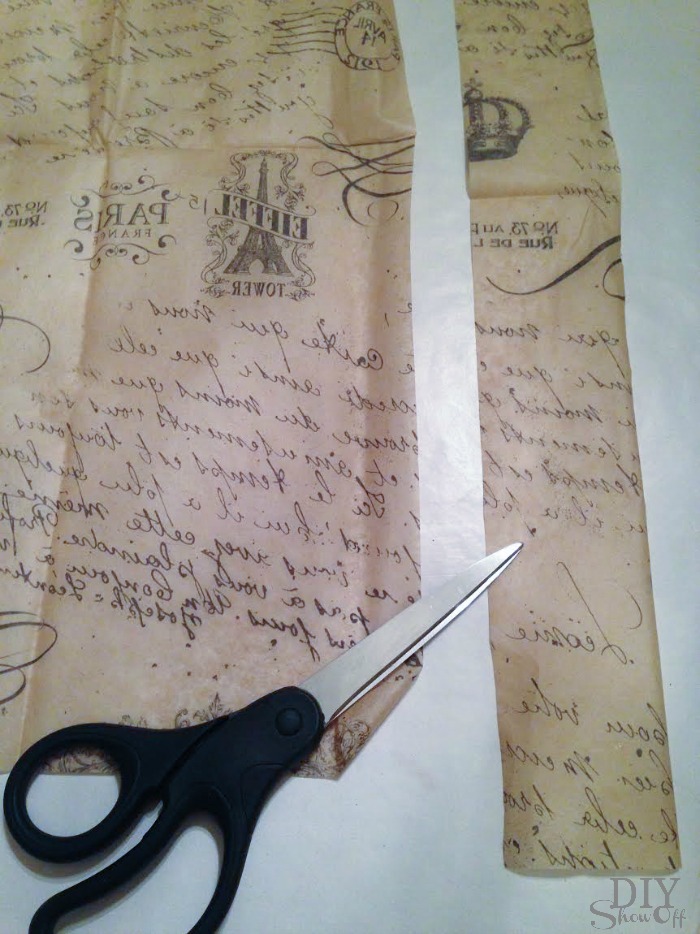
Apply one strip to the wet decoupage, smoothing out the wrinkles (carefully to avoid tearing the tissue paper) then move on to the next section and repeat.  decoupage vase @diyshowoff #SpringTimeinParis #michaelsmakersdecoupage vase @diyshowoff #SpringTimeinParis #michaelsmakers

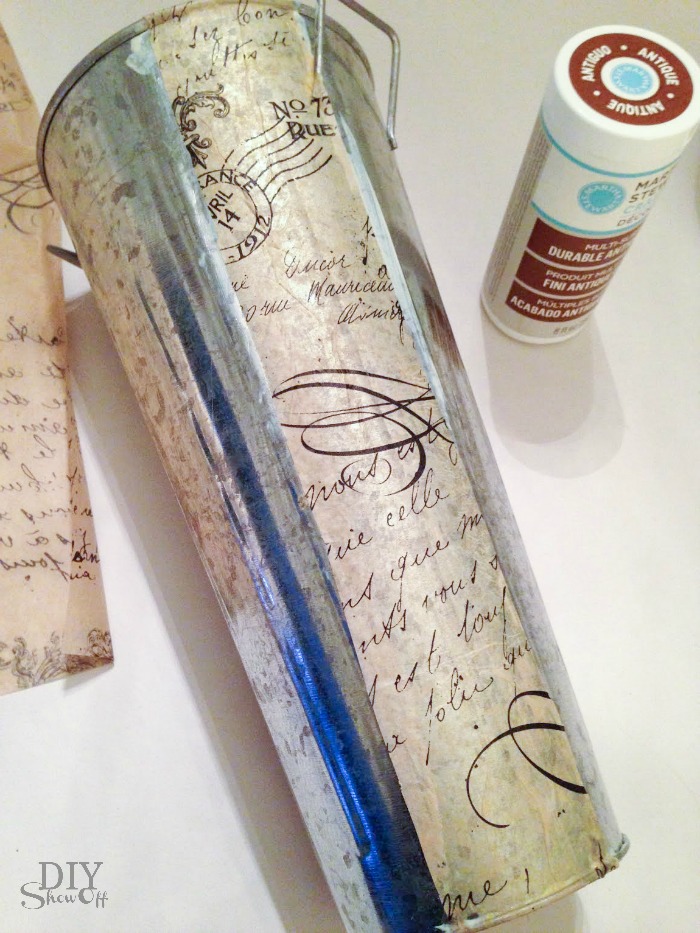
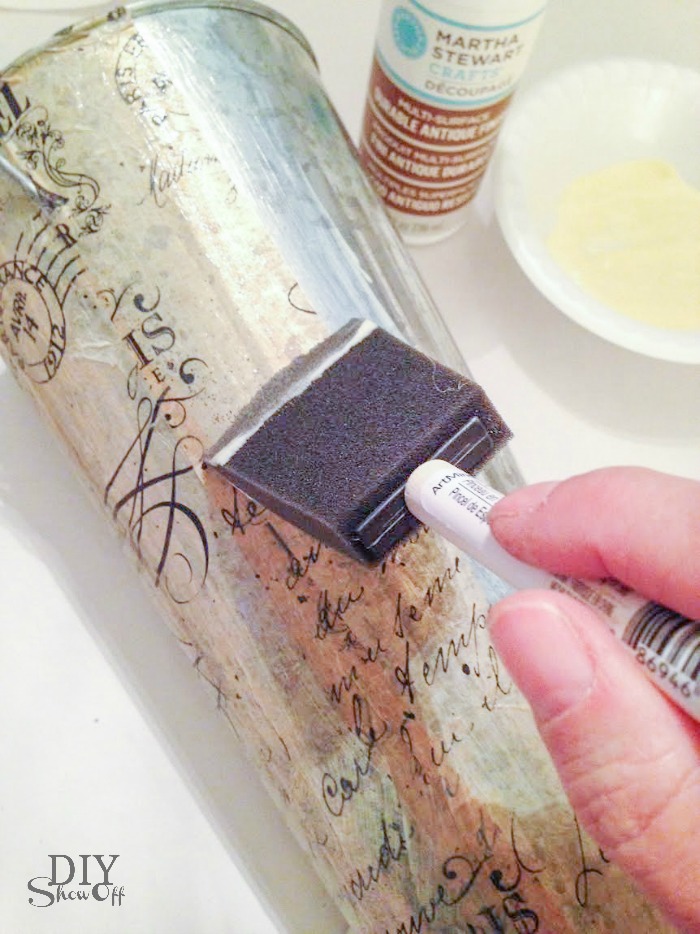
Once the entire vase is covered, brush on another coat of decoupage. You can repeat and add more decoupage layers if you want. The more layers, the better protection. 

decoupage vase @diyshowoff #SpringTimeinParis #michaelsmakersdecoupage vase @diyshowoff #SpringTimeinParis #michaelsmakers

Let dry. The metallic sheen shines through. Love that happy surprise!

decoupage vase @diyshowoff #SpringTimeinParis #michaelsmakers

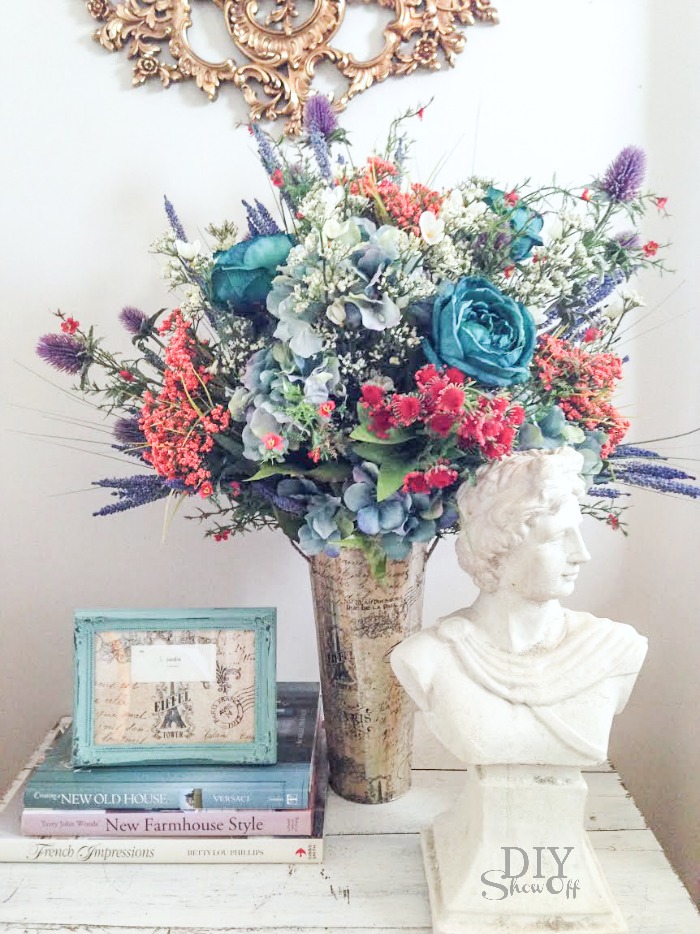
Now arrange your favorite spring time florals. I love this collection of faux teals, oranges and purples with greenery.

decoupage vase @diyshowoff #SpringTimeinParis #michaelsmakers

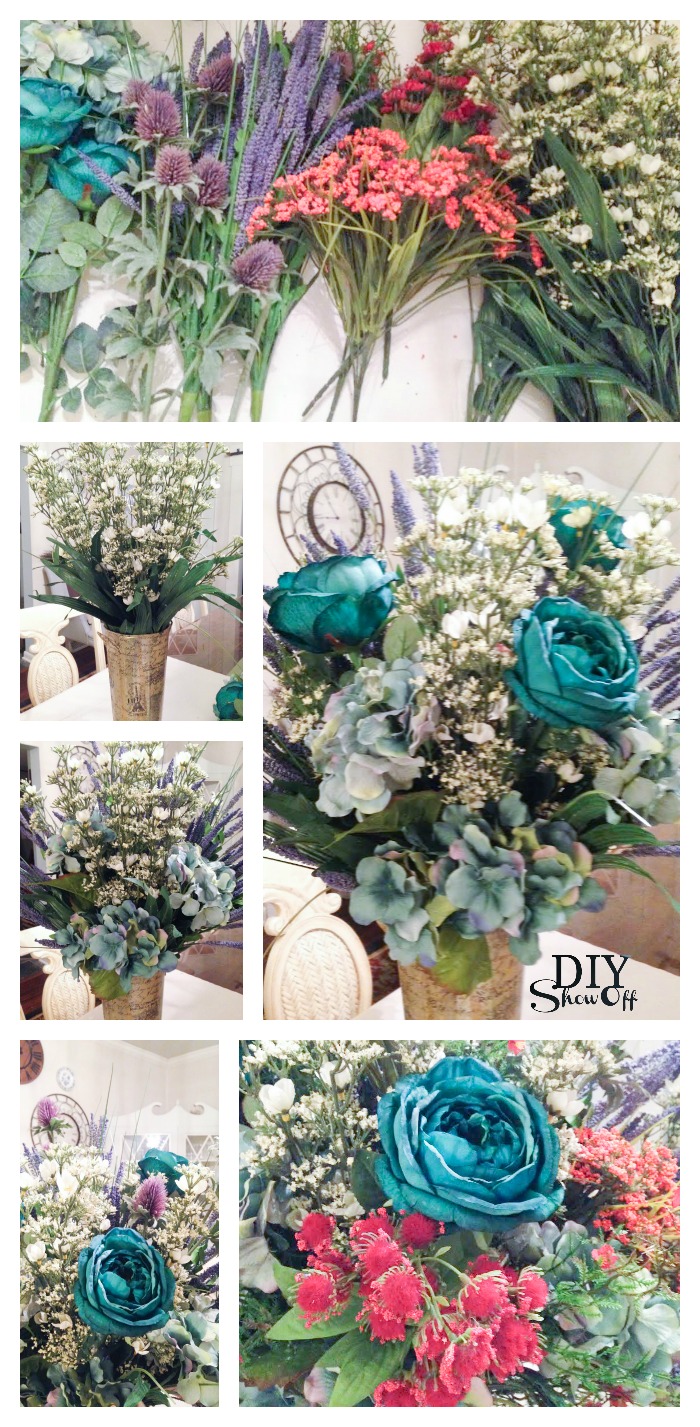
Gorgeous! Spring is right around the corner!

decoupage vase @diyshowoff #SpringTimeinParis #michaelsmakers

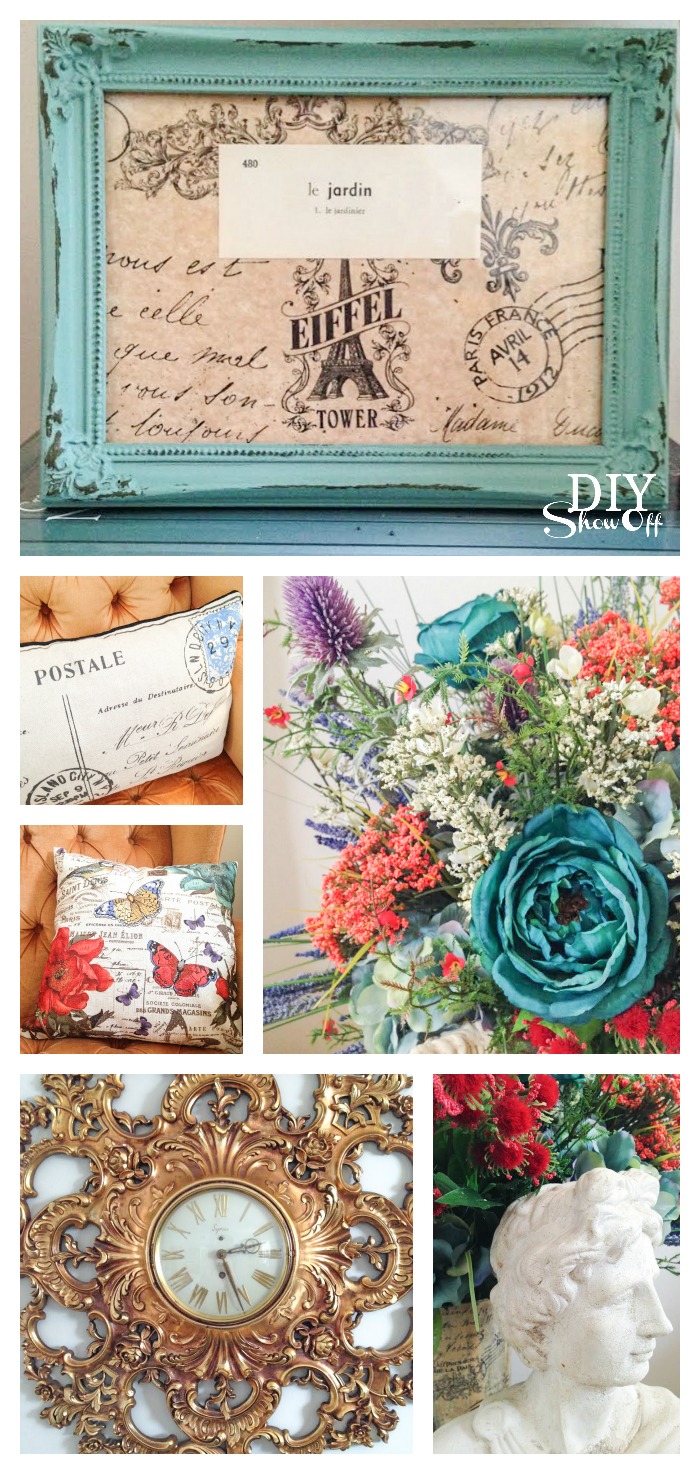
I added a bit of tissue paper and French language flash card to a frame {le jardin = garden}, some things from around the house and pillows (also available at Michael’s) to complete my Springtime in Paris vignette. 

decoupage vase @diyshowoff #SpringTimeinParis #michaelsmakersdecoupage vase @diyshowoff #SpringTimeinParis #michaelsmakersdecoupage vase @diyshowoff #SpringTimeinParis #michaelsmakers

See more Springtime in Paris inspiration from these sweet blog friends:


#springtimeinparis #michaelsmakers @diyshowoff

·       Now it’s your turn!  That’s right, you can enter to win the trip of a lifetime to Paris too. How? By creating your own Parisian-inspired art, floral, baking or paper crafting project and uploading a photo to www.paris.michaels.com through March 31. You can also share your project on social using #SpringtimeInParis #Contest

·       What do you win? A four-night trip for two to Paris, 1,000 euros, a VIP tour of the Louvre, private classes including sketching, floral arranging, baking and more!

·       If you need a little Paris inspiration to get you started, take a look at some of the Springtime in Paris projects on Michaels.com.

Disclaimer: As a member of the Michael’s Makers blog team, I received a Michael’s gift card to complete this craft challenge. 

October’fest of Fun! {Theme: Fall Crafts}

Welcome, DIY friends! In lieu of the regularly scheduled DIY Fall Festival this week, I’m super excited to be kicking off and hosting the October’fest of Fun with some of my blog friends! Today’s theme is “crafts”. All fall crafts, including spooky!
DIY Halloween Nevermore Tree
I decorate one area for Halloween every year, one small fun Halloween vignette. This year, I’m bringing back my “nevermore” tree that I made a few years ago. I swapped out the container, added a few more crows. Here are some tips on how I made mine for making your own:
Materials:
  • Vase, container, urn. I used glass this time but any container for holding small branches works. A few years ago, I used an old thrift store vase and spray painted it black…

DIY Halloween decor

  • Small branch (desired size that fits your container). Choose one that has several branch-offs to look more like a tree.
  • Black spray paint
  • Styrofoam cone
  • Handful of dry moss. Other options: shredded newspaper, crinkled paper
  • Dollar Store accessories: faux crows, plastic spiders, cotton spider webbing, ribbon
  • Optional: low temp hot glue
Tutorial:DIY nevermore tree tutorial
1. I started by spraying my branch black and adding a touch of black to my dried moss and let them dry.
2. Because I used a glass container, I lined it with a scrap piece of dropcloth.
3. Paper, newspaper, moss would also work.
4. Using the bottom of my tree branch, I poked a hole into the circular side of my cone. Insert the Styrofoam cone into container with the circular side/hole facing up. You can secure your foam to the container. I didn’t.
5. Insert the branch into the Styrofoam hole. Secure with hot glue if needed.
6. Cover styrofoam with dried moss, crinkled paper or shredded paper. Glue into place if desired.
7.  8.  9. ACCESSORIZE: I strung more dried moss and spider webs to my branches (drag the spider webbing). Attach crows. I used black twist ties to attach some of my crows, others are just propped on branches. I did use hot glue to attach a few plastic spiders and added a couple of snips of sheer ribbon here and there for a little added whimsy.
Stand back and admire!
DIY Halloween Nevermore Tree
Do you decorate for Halloween? Any fun fall crafts to share?
  • Note: Today’s theme is “crafts” – Fall or Halloween crafts only please {ALL FALL DIY FALL FESTIVAL resumes next Wed.}
  • Please link back using the button below or permalink to this post. Thanks!
DIY Showoff
<div align="center"><a href="https://diyshowoff.com/" title="DIY Showoff"><img src="https://i237.photobucket.com/albums/ff107/smnf/Octoberfestoffunbuttonsidebarsize205x_zps2e9f4157.png" alt="DIY Showoff" style="border:none;" /></a></div>


Don’t forget to visit these blog friends this week:
Thursday: Link up your fall mantels with Shannon @ Fox Hollow Cottage

Friday: Share your fall tablescapes with Kristin @ My Uncommon Slice of Suburbia

Saturday: Debbie @ Debbiedoo’s – share your fall home tour!
OneCreativeMommy.com