Easy DIY Personalized Easter Basket Liner

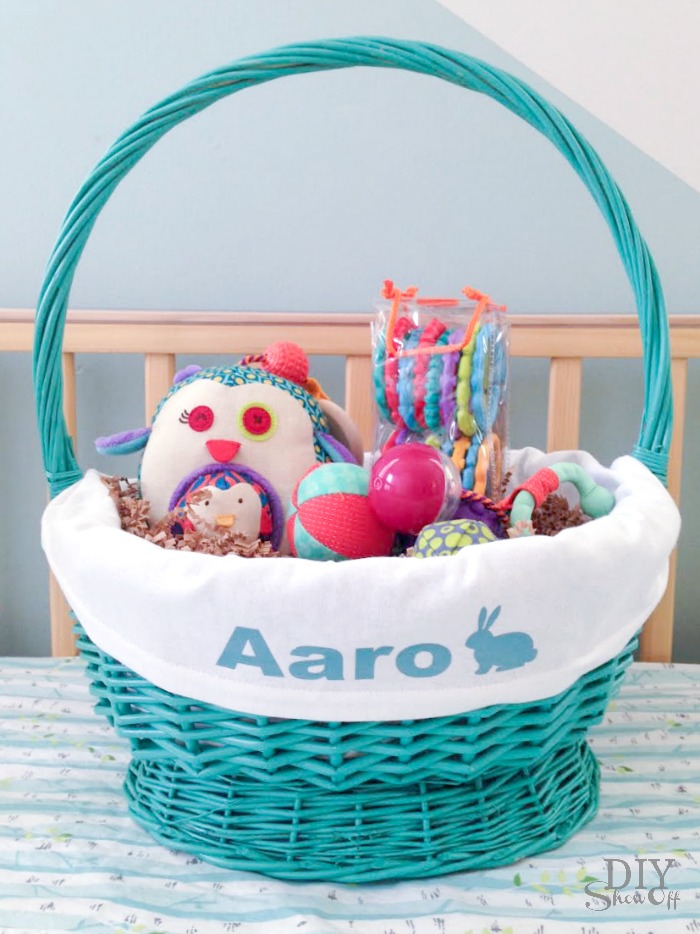
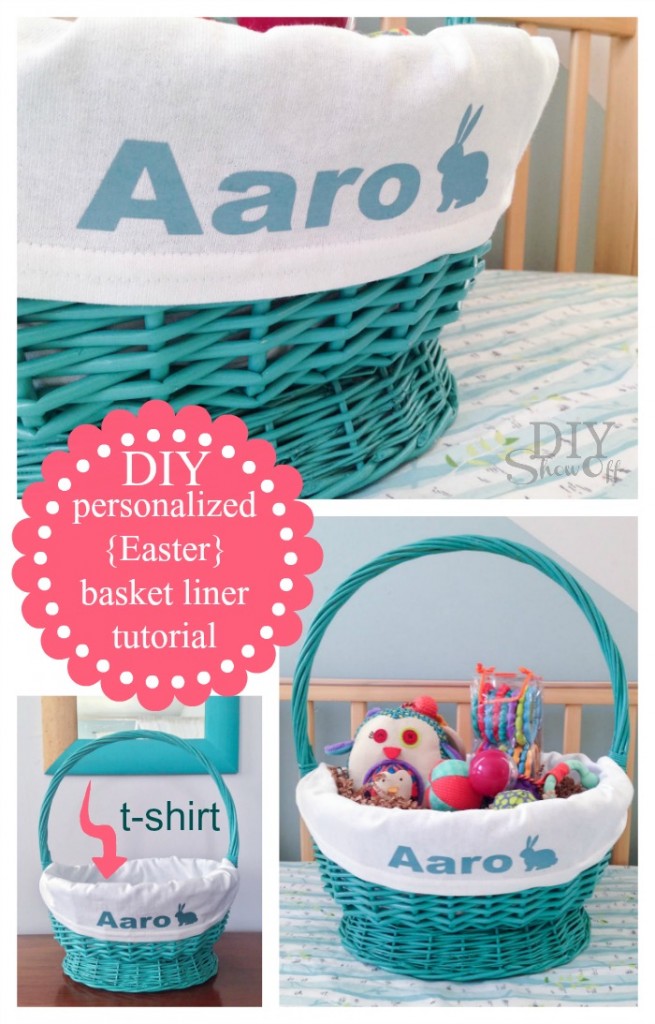
Happy Spring! With a new grand-baby in the family, I can’t help but get all giddy about making up an Easter basket this year. As you know, I love to personalize gifts and with just a t-shirt and a DIY iron-on vinyl, this liner is super easy to make! 

DIY personalized Easter basket liner tutorial @diyshowoff

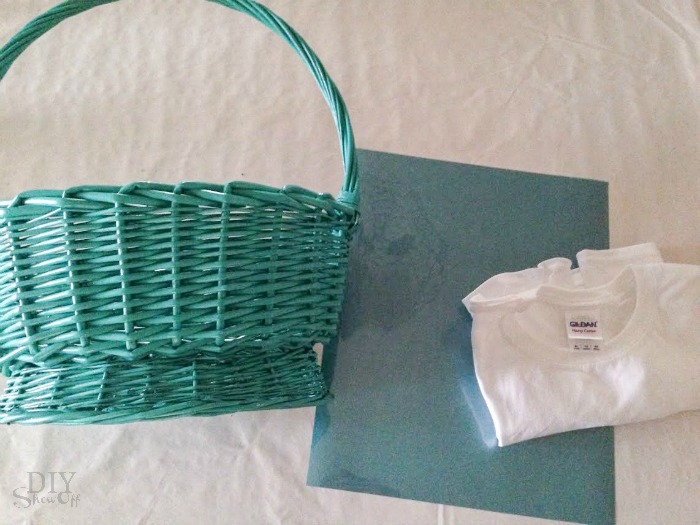
What I used:

personalized Easter basket liner @diyshowoff

What you’ll need: sewing machine, scissors, straight edge, computer/vinyl cutter, iron. 

What I did:

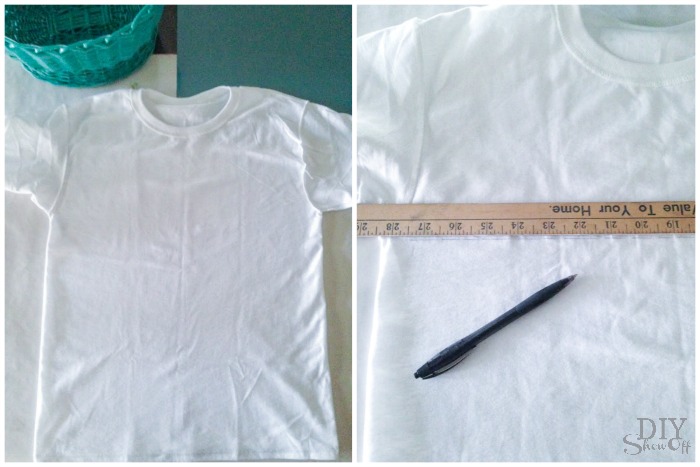
Lay inside out t-shirt flat and using a straight edge, draw a line beneath the t-shirt arms. This is the sewing guide…simply a straight line. 

personalized Easter basket liner @diyshowoff

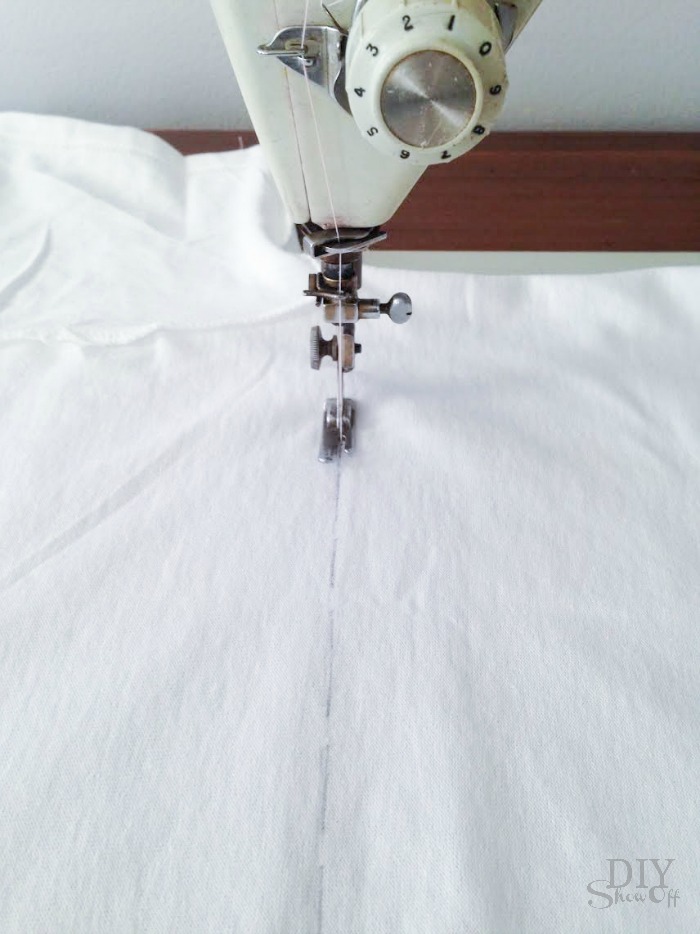
Sew along the line. 

personalized Easter basket liner @diyshowoff

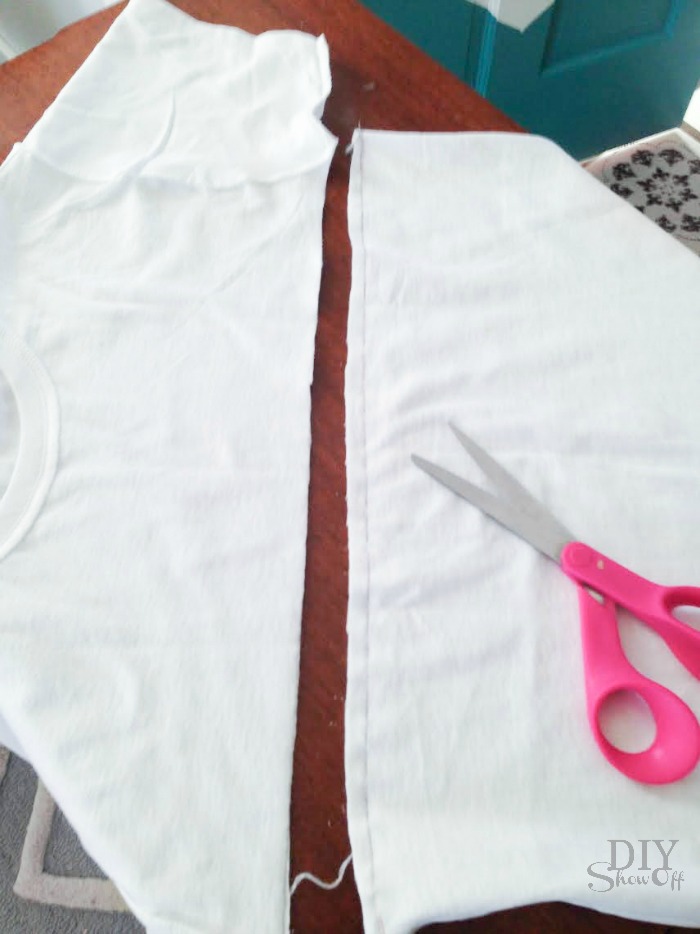
Then cut straight across above the sewn line (right below the armpits of the t-shirt). 

personalized Easter basket liner @diyshowoff

Flip right side out. 

Place the seam inside of the basket and fold the edges of the t-shirt over the basket to create a liner. Measure how much room you have horizontally and vertically to get an idea of your iron on design’s size. I kept mine under 2″ high by 7″ wide. 

personalized Easter basket liner @diyshowoff

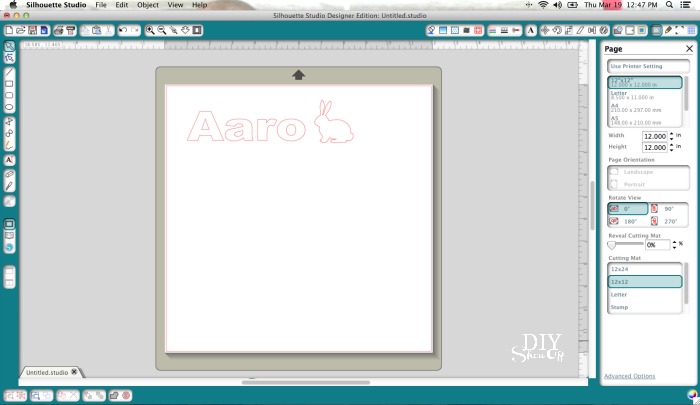
Using the Silhouette Design Studio software, I created a graphic with name and a cute little bunny shape. 

personalized Easter basket liner @diyshowoff

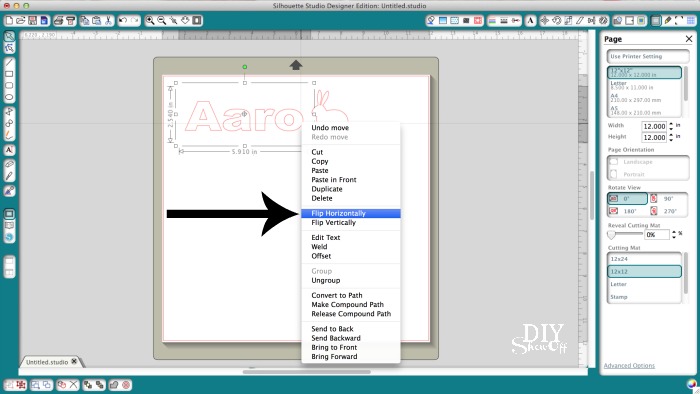
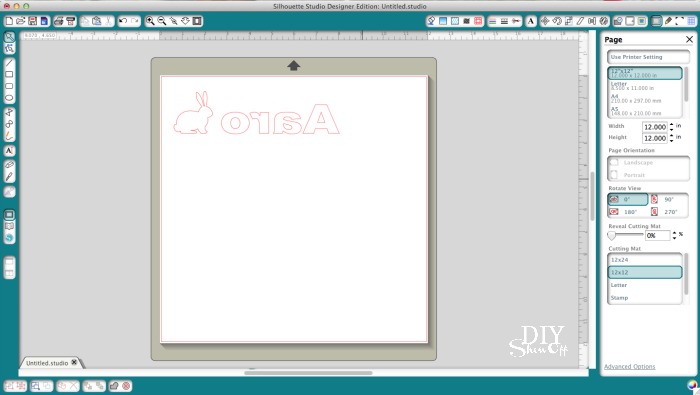
You’ll need to mirror the text and image by right clicking and selecting “flip horizontally”. 

personalized Easter basket liner @diyshowoffpersonalized Easter basket liner @diyshowoff

Double check the size. (One sheet of iron-on vinyl is going to make a LOT of decals!) 

personalized Easter basket liner @diyshowoff

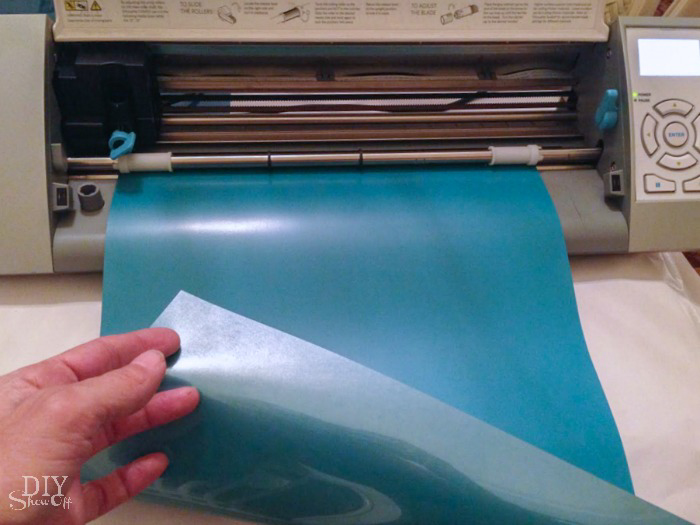
Load vinyl into the machine shiny side down. The shiny side is actually the transparent cover. Vinyl is the matte side (facing up). 

personalized Easter basket liner @diyshowoff

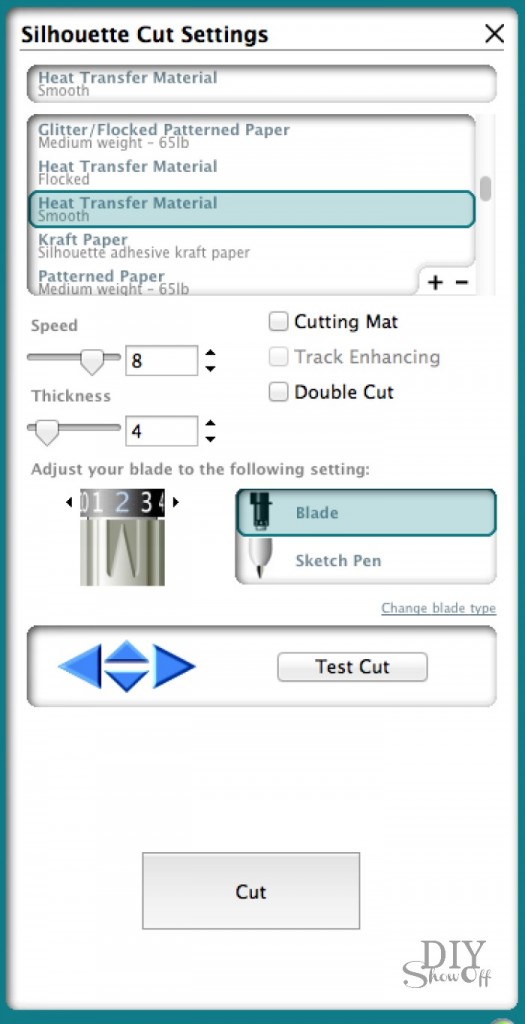
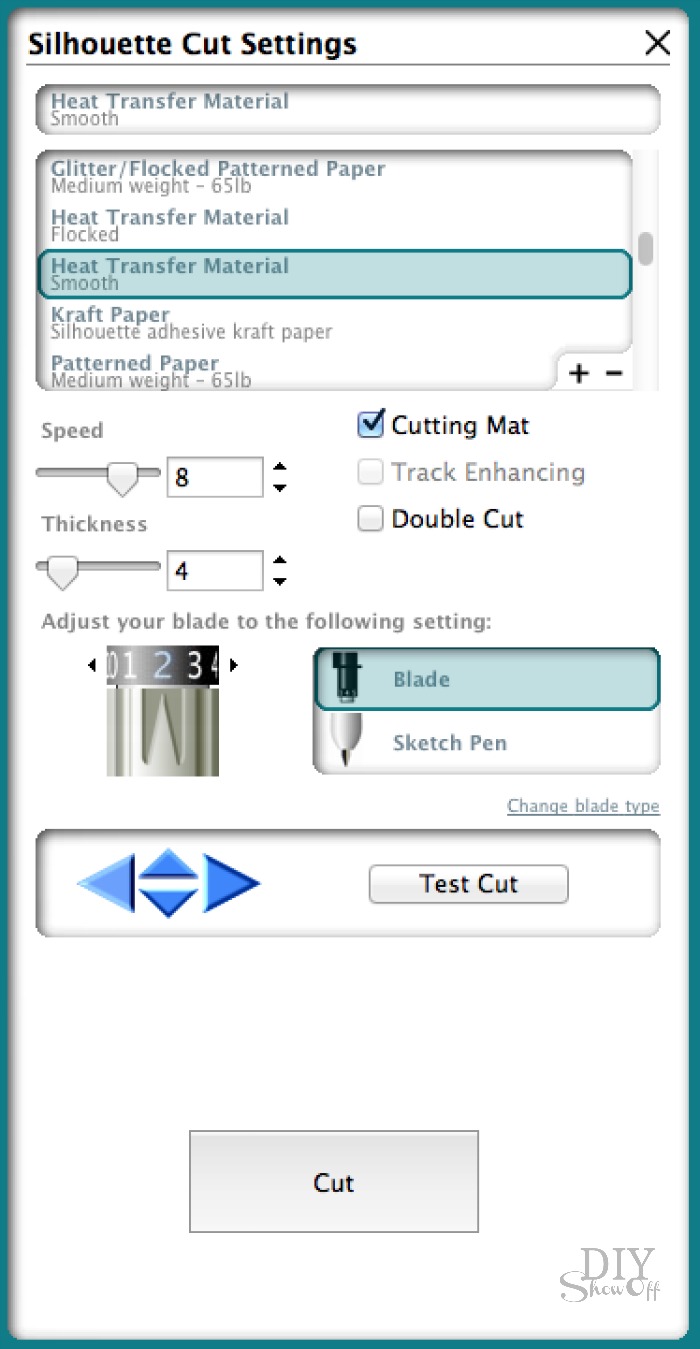
Send the design to ‘cut’. Adjust setting for heat transfer material and “cut”.

personalized Easter basket liner @diyshowoff

When cutting is complete, remove vinyl from machine. Trim to a manageable size. 

personalized Easter basket liner @diyshowoff

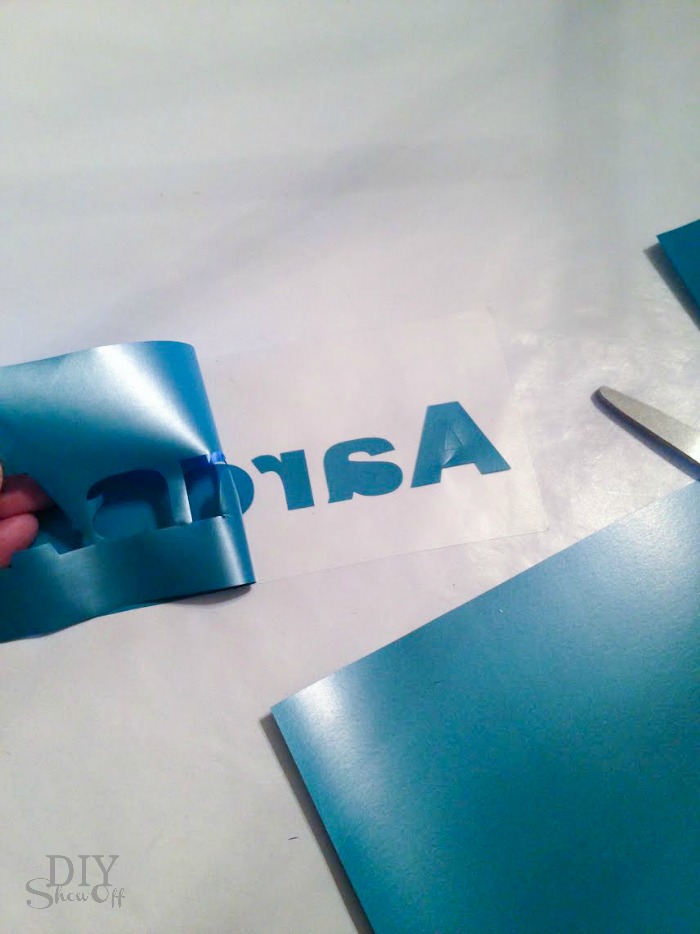
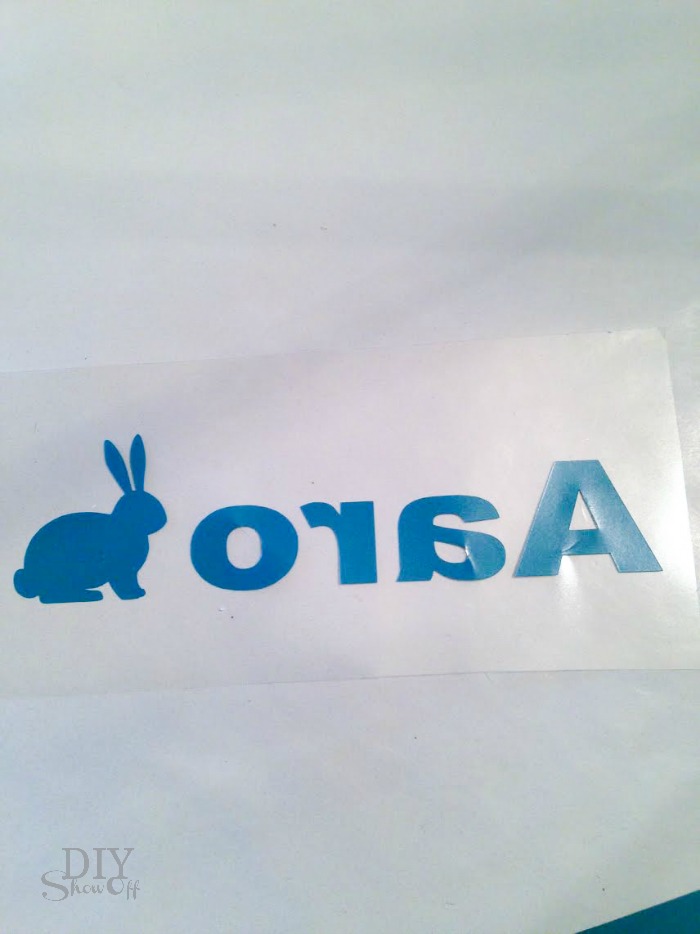
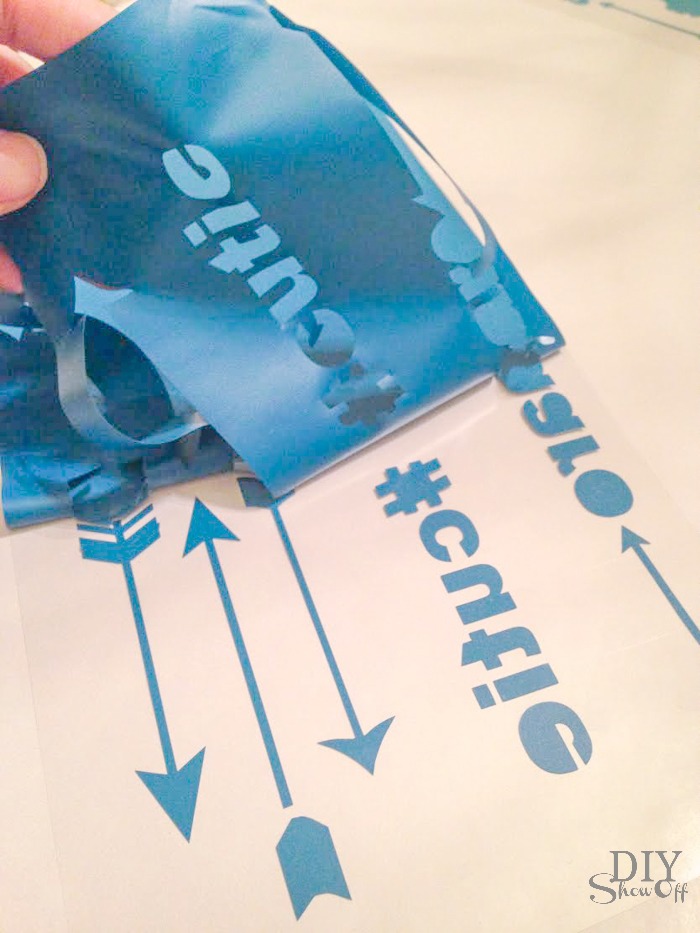
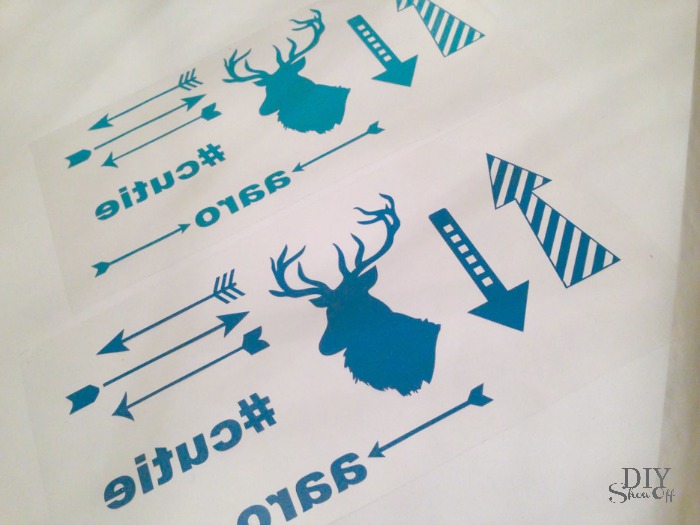
Weed away the excess vinyl. The decal will show a backwards design on the transparency. 

personalized Easter basket liner @diyshowoff

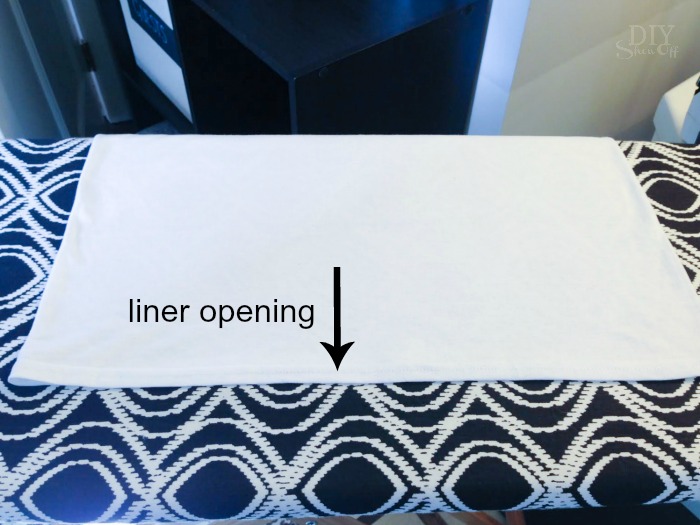
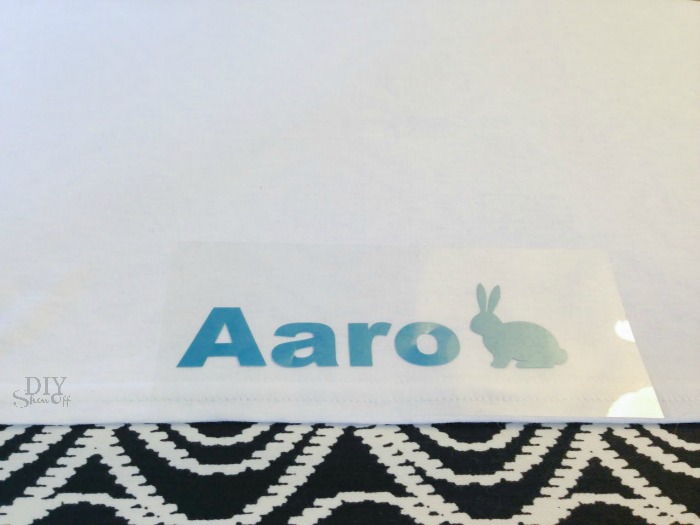
Smooth out the t-shirt liner with the open end facing you. Place the iron on decal towards the bottom, centered. 

personalized Easter basket liner @diyshowoffpersonalized Easter basket liner @diyshowoff

Cover with a cotton cloth (or the scrap t-shirt material) and iron according to instructions that came with the iron on vinyl.

personalized Easter basket liner @diyshowoffpersonalized Easter basket liner @diyshowoff

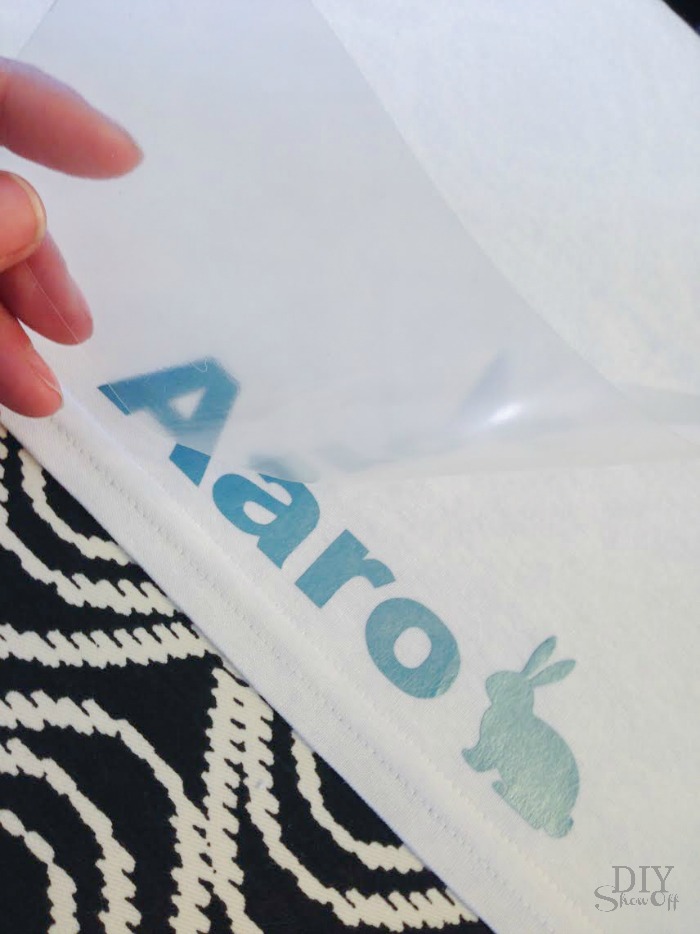
Carefully remove the transparency film. 

personalized Easter basket liner @diyshowoff

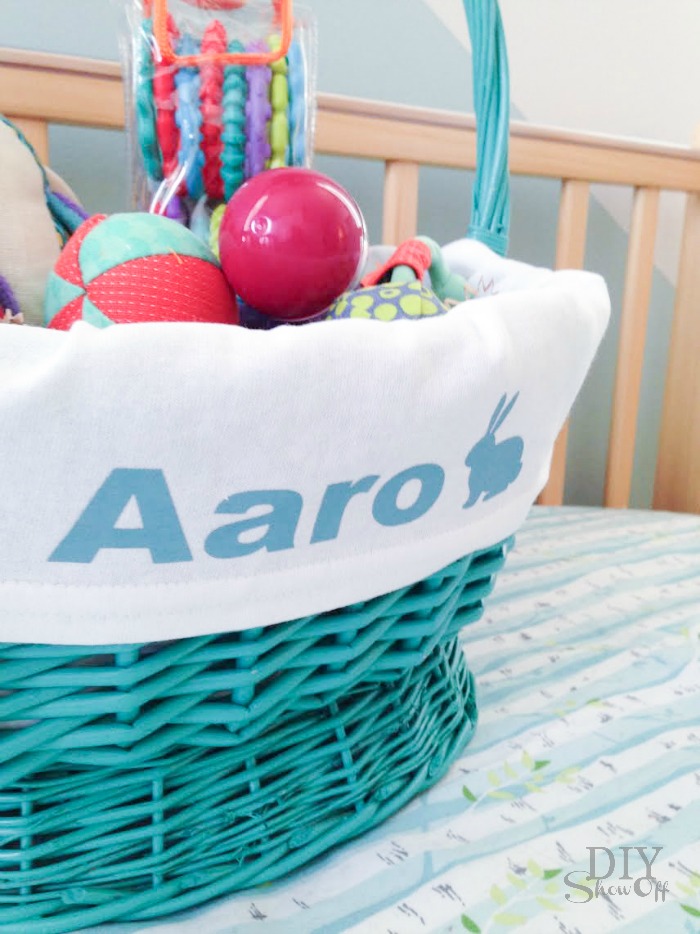
Line the Easter basket and fill. Easy, right? Cute too! 

DIY personalized Easter basket liner tutorial @diyshowoffDIY personalized Easter basket liner tutorial @diyshowoff

It’s actually a pretty easy DIY project for any time of the year, any basket or to personalize a gift basket for any occasion.

DIY personalized Easter basket liner tutorial @diyshowoff


More Easter DIY ideas

DIY warm cool aromatherapy snuggle bunnies @diyshowoff #essentialoilsdip-dyed-easter-egg-tutorialDIYShowOff Easer succulent garden


*This post is sponsored by Happy Crafters. Tutorial, experience and opinion is my own. I love the products and the prices are affordable. Check out all the supplies at Happy Crafters for great prices, products and inspiration for your next project. 

HClogopngsmall

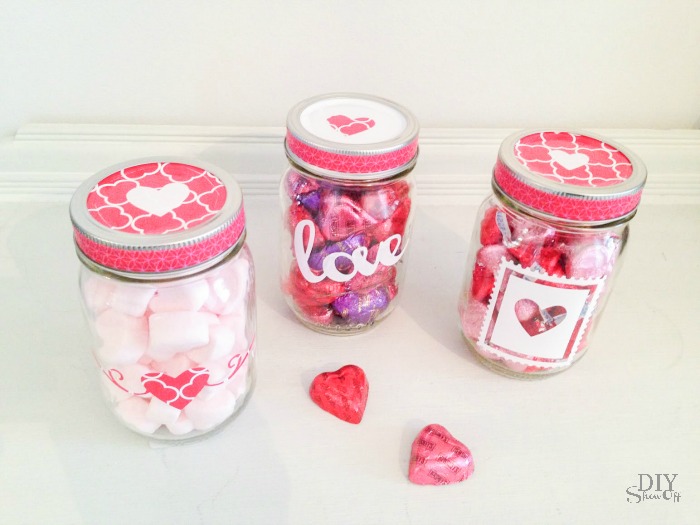
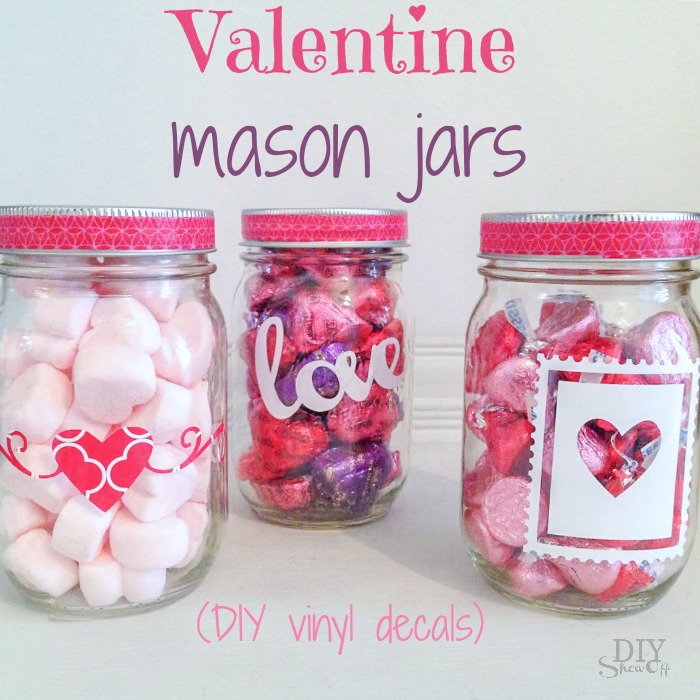
Valentine Mason Jars

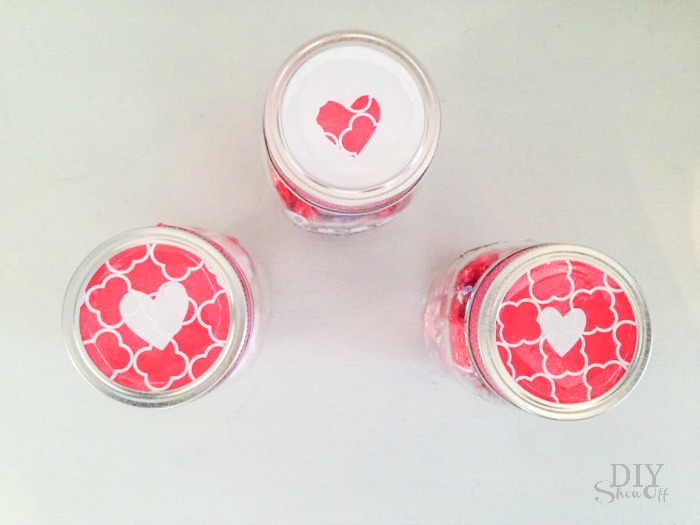
Valentine mason jars @diyshowoff

Being able to create your own vinyl decals makes last minute quick gifts easy. You’ll need:

Valentine's Day mason jars Happy Crafters

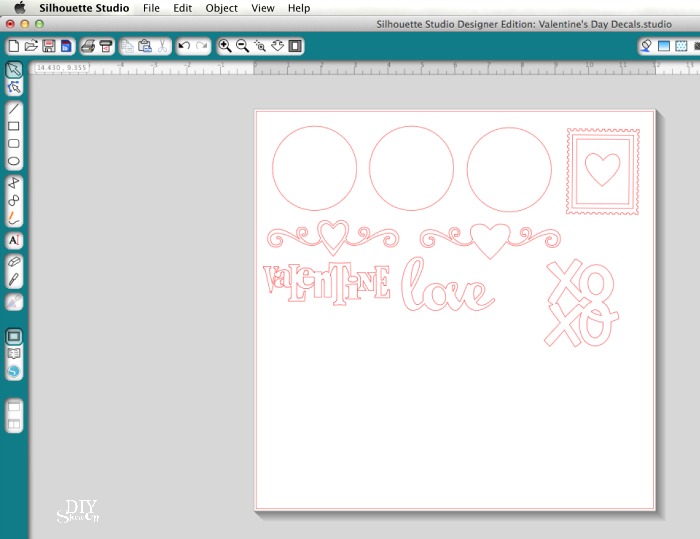
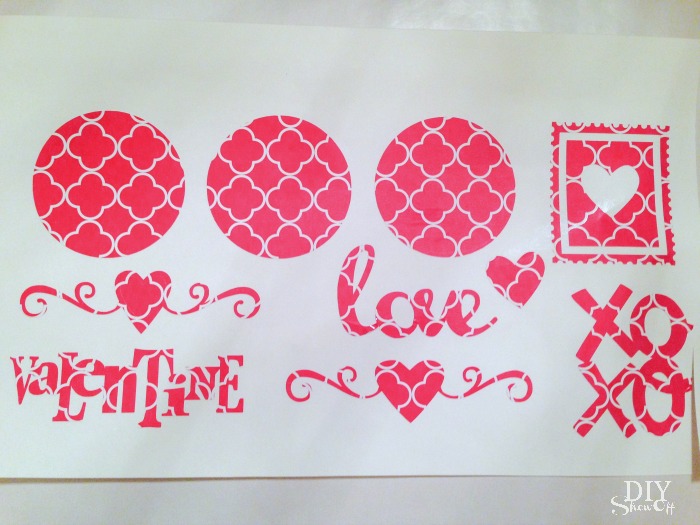
Of course you can create your own designs by just cutting things out with scissors but investing in a vinyl cutter has proven to be well worth the it. I simply created some Valentine designs and circles for mason jar lids using the Silhouette Design Studio software…

Valentine mason jars @diyshowoff

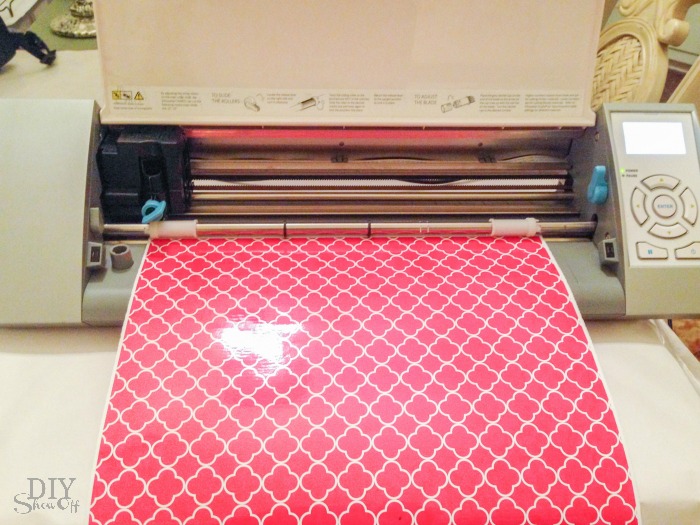
Load vinyl into the machine pattern/shiny side up. 

Valentine mason jars @diyshowoff

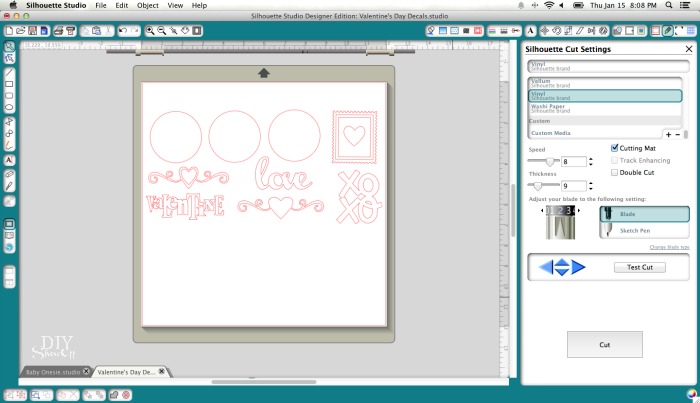
Adjust settings for vinyl and send design to cut.

Valentine mason jars @diyshowoff

Remove vinyl from machine and weed away (remove) excess vinyl (vinyl that isn’t a part of the decals).

Valentine mason jars @diyshowoff

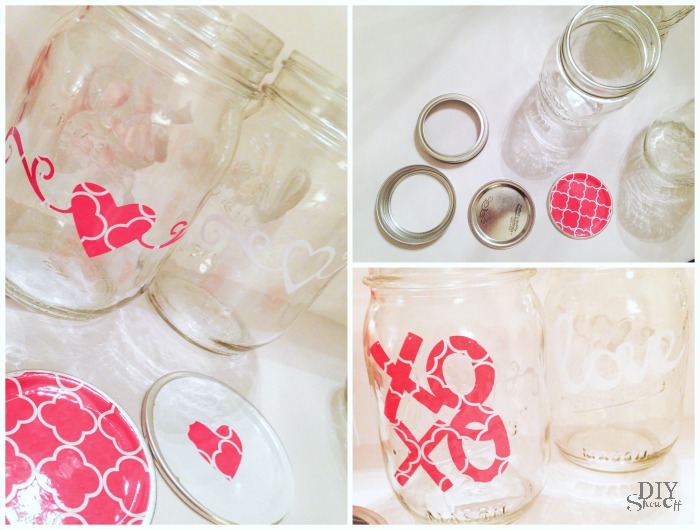
Apply vinyl like stickers or use transfer paper to decorate mason jars and lids. 

Valentine mason jars @diyshowoff

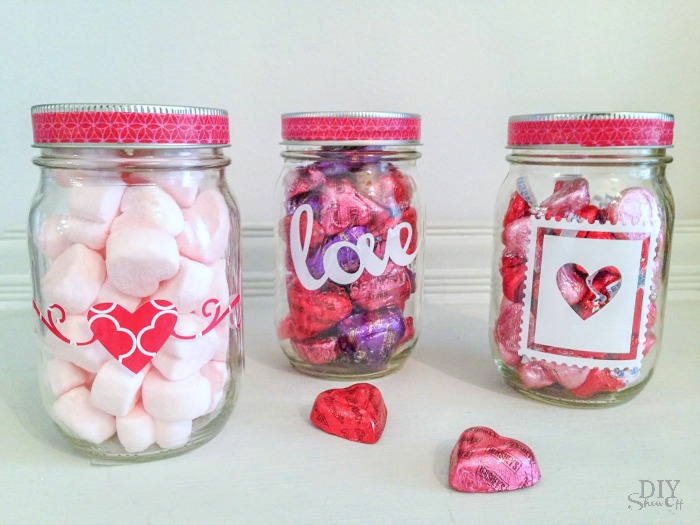
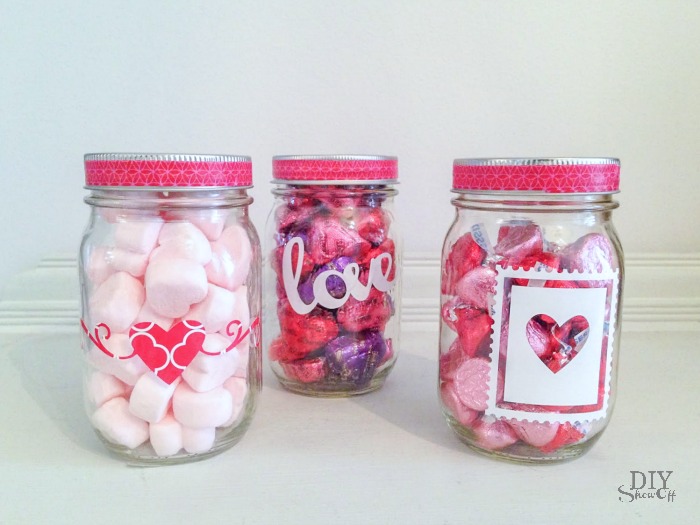
Add ribbon or decorative tape to embellish and fill jars with candy, small gifts, homemade bath salts, etc. Instant, quick easy Valentine gifts for teachers or friends. 

Valentine mason jars @diyshowoff Valentine mason jars @diyshowoffValentine mason jars @diyshowoff Valentine mason jars @diyshowoff

*This post is sponsored by Happy Crafters. Tutorial, experience and opinion is my own.  Check out all the supplies at Happy Crafters for great prices, products and inspiration for your next project. 

HClogopngsmall

Personalized Baby Gift Set

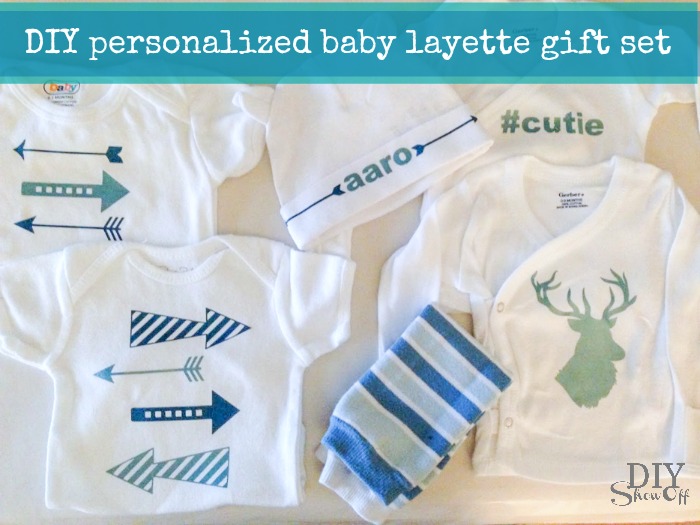
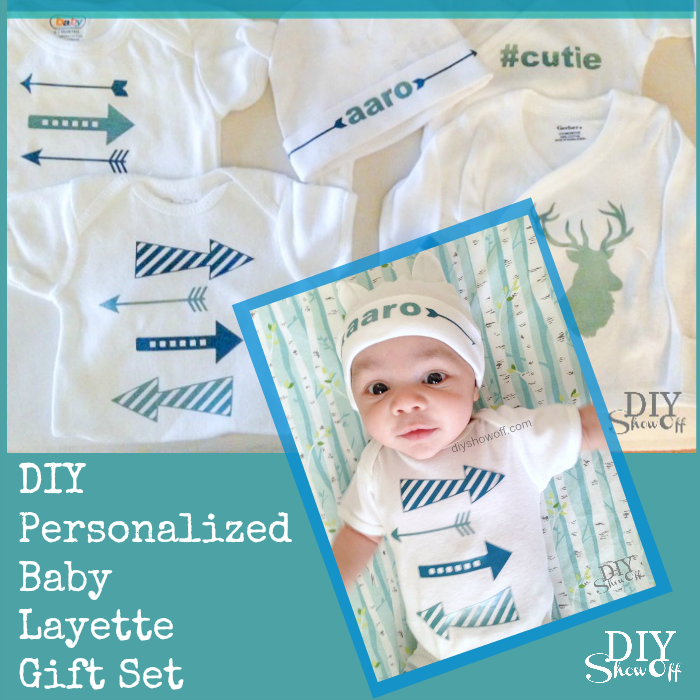
I love being creative when it comes to baby gifts and personalizing a baby layette set with iron-on vinyl decals is just so easy to do!

DIY personalized baby layette gift set @diyshowoff

Supplies:

What I did:

Using my Silhouette studio designer edition software, I created a few fun decals. 

DIY personalized baby layette gift set @diyshowoff

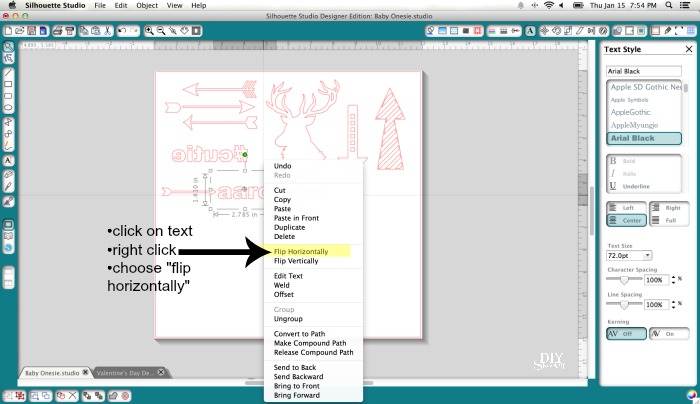
For iron-ons, text (and some images) will need to be mirrored/flipped horizontally. Simply right click and choose “flip horizontally”. 

DIY personalized baby layette gift set @diyshowoff

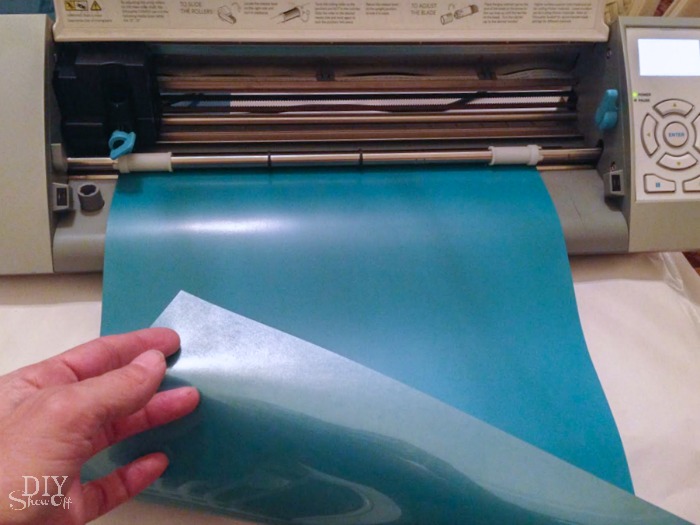
Load the vinyl into the machine shiny side down (the shiny side is the transparency side). 

DIY personalized baby layette gift set @diyshowoff

Adjust settings for cutting heat transfer material and send to cut. Unload vinyl from the machine. (Note: I do not use a cutting mat as shown below.)

DIY personalized baby layette gift set @diyshowoff

Cut off the excess vinyl/material and weed (remove) the unwanted part of the the vinyl leaving just the decals. 

DIY personalized baby layette gift set @diyshowoffDIY personalized baby layette gift set @diyshowoff

Set iron according to heat instructions provided with vinyl iron on. 

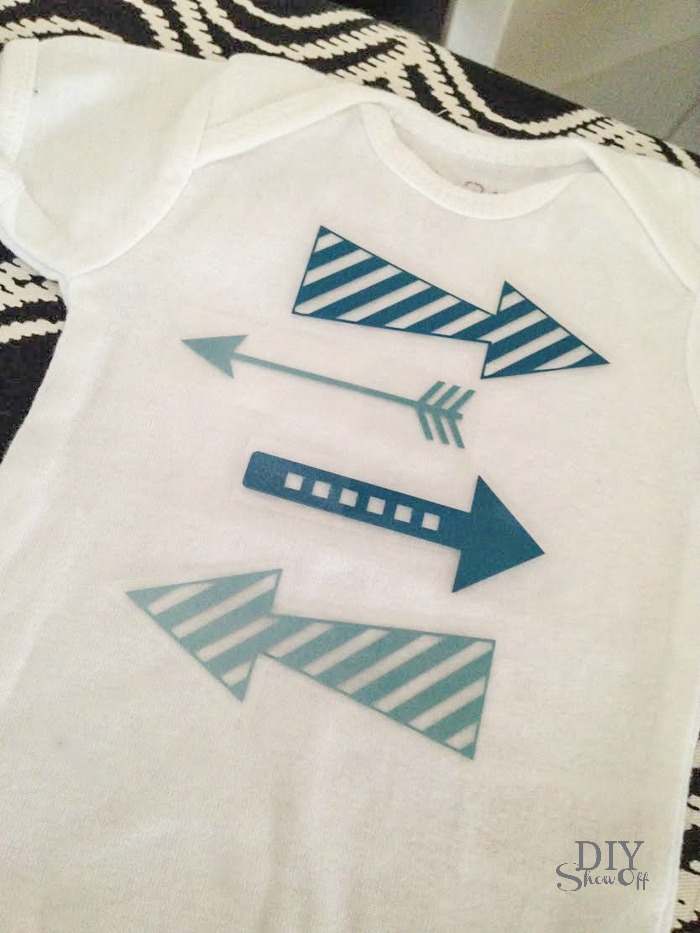
Place iron on decal, shiny side facing you (iron on isn’t sticky but the clear transparency is…sticker side down to help hold iron on in place). 

DIY personalized baby layette gift set @diyshowoff

Cover with a cotton diaper cloth, burp cloth or towel and heat iron on according to instructions. 

DIY personalized baby layette gift set @diyshowoff

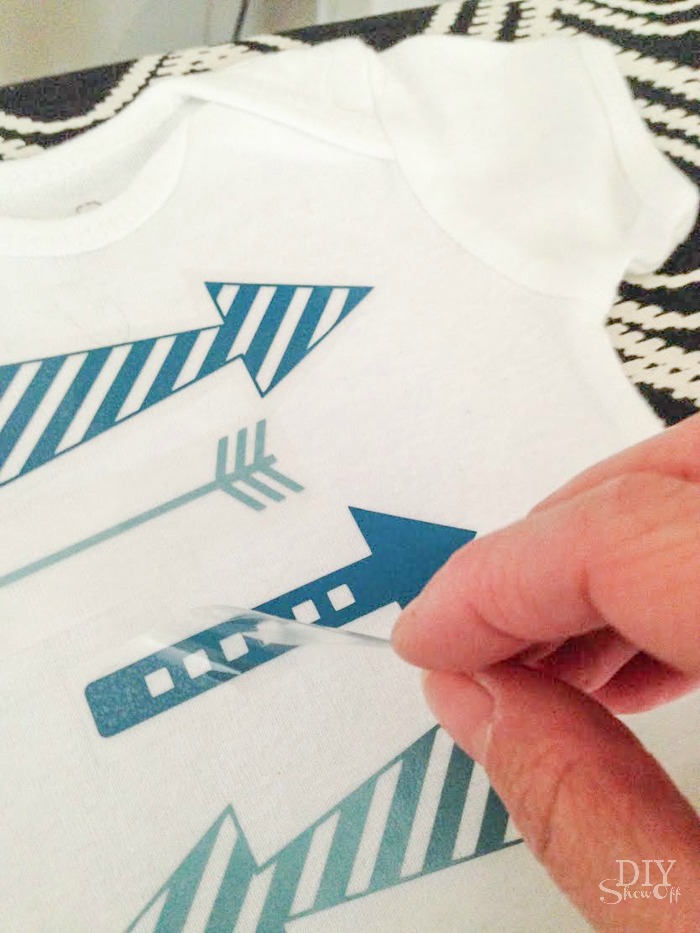
Carefully peel away transparency (if iron on pulls up too, re-place and iron some more). 

DIY personalized baby layette gift set @diyshowoff

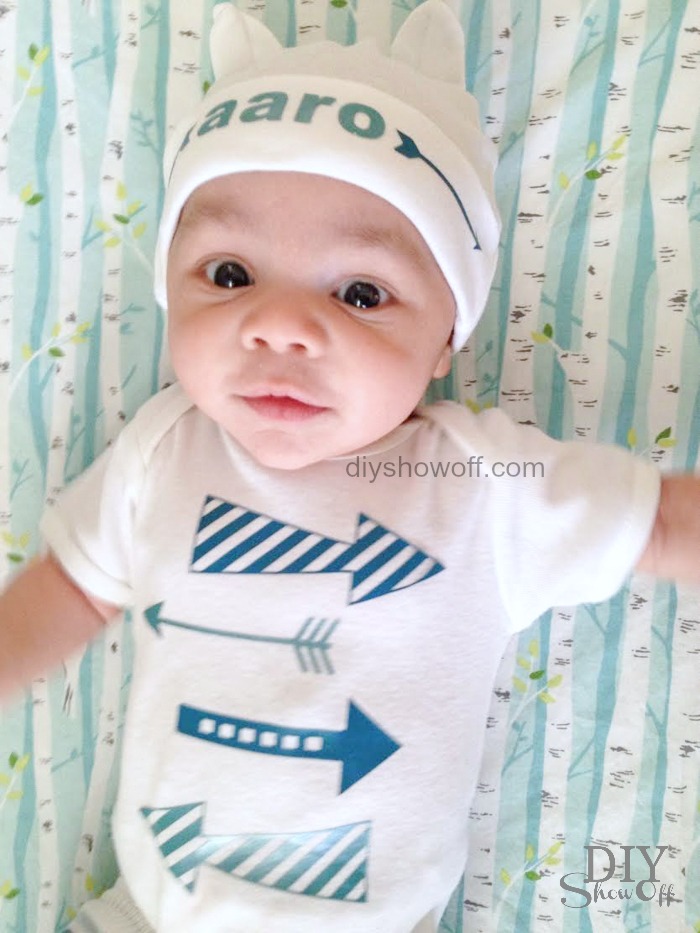
Create an entire personalized baby layette gift set…

DIY personalized baby layette gift set @diyshowoffDIY personalized baby layette gift set @diyshowoff

*This post is sponsored by Happy Crafters. Tutorial, experience and opinion is my own.  Check out all the supplies at Happy Crafters for inspiration for your next project. 

HClogopngsmall