Special Announcement and Our Next DIY Challenge

I can’t wait any more to share the news!

definition of true value

For the past two years, I’ve been honored and super excited to be a part of the True Value DIY Blog Squad. We’ve completed some fun True Value DIY projects in the past.

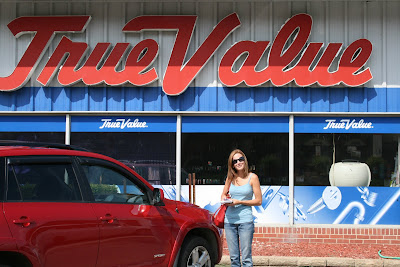
TRUE VALUE 2012 DIY BLOG SQUAD

We were so surprised when we were asked to participate again in 2012 and there may have been some big smiles and high fives. We humbly accepted because of this…

(scraping and painting the exterior is in the works)

apartment exterior

Side note: True Value Blog Squad is bittersweet for me. Niski was a part of our team that first year and I just miss her soooo much. 🙁

True Value DIY Blog Squad

We’ll have to motivate lazy Lalka to be a part of the team this year. 

Our plans include giving a tiny fixer upper one bedroom apartment (we’re the owners) a little fixing up and some cosmetic surgery here and there. We’re up for the challenge of making the most of this small space on a small budget and can’t wait to share the transformation with you.

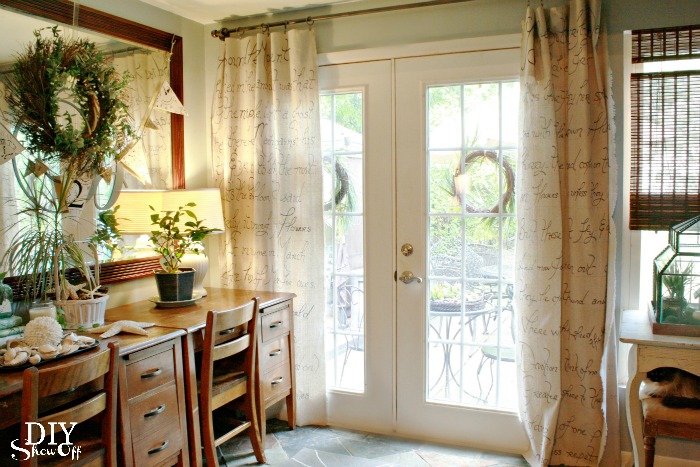
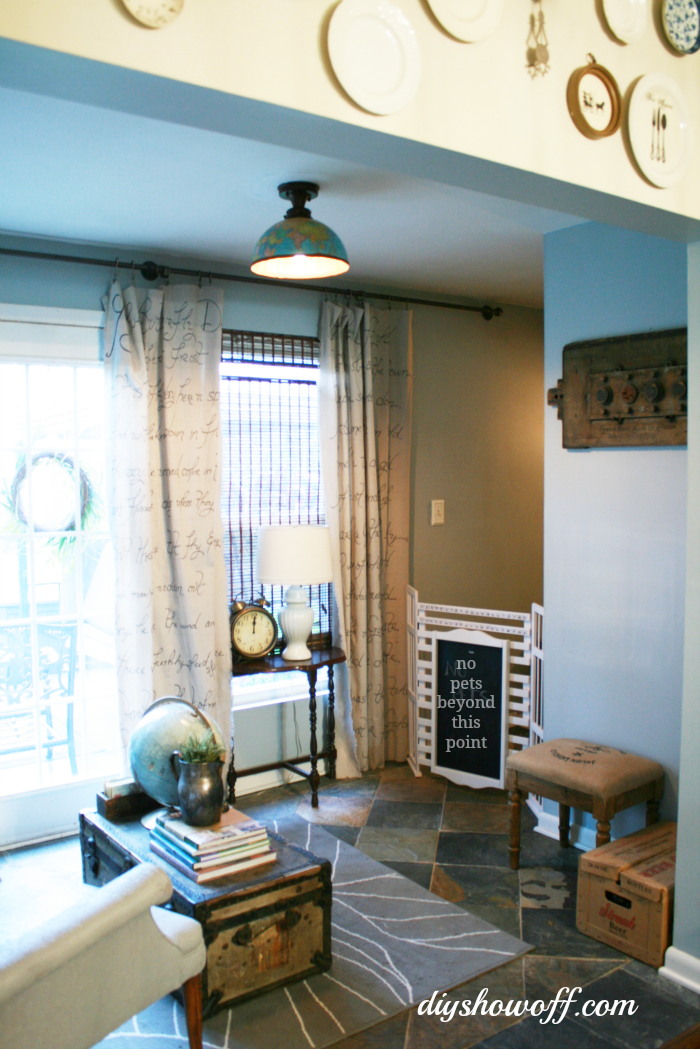
Inside is teeny tiny and dingy/dirty. Previous tenant was there for years and years and it’s now been empty for quite a few years. It’s pretty dirty and run down. It only has 4 rooms – a small combined living room, kitchen, dining area

first floor apartment before

and a small bedroom and bathroom upstairs.

apartment second floor before

Do you see past the dirt to the potential? It’s darling! The goal is a fresh and pretty transformation with a little DIY magic in this cozy little home.

We’ll be sharing some of the DIY home improvement projects very soon along with some awesome giveaways! Here are the ways you can stay up-to-date with the entire True Value Blog Squad so you don’t miss a thing:

Any ideas for that little apartment (besides lots of cleaning and painting)? I can’t wait to get started on redoing those hardwood floors too. Love the wainscoting and those little curved stairs. If you had a completely clean slate with a big green light and super small budget, where would you start?

We were chosen by True Value to be one of the members of the 2012 DIY Squad. I have been compensated for the materials needed for my DIY projects. However, the thoughts and opinions expressed are completely honest and my own. I have not been paid to publish positive comments and no one has twisted my arm to participate. 

DIY Show Off - FacebookDIY Show Off - TwitterDIY Show Off - PinterestDIY Show Off - Feed

DIY Project Parade ~ DIY Pipe Curtain Rod Tutorial

HAPPY NEW YEAR, DIY SHOW OFF FRIENDS! 2011 was awesome and wishing you an even better 2012. Welcome to the First DIY Project Parade of 2012!

12 foot curtain rods are expensive!  I love the look of our new affordable DIY curtain rod made from pipe and fittings:

I knew True Value would stock the materials I needed:
2 – 6′ galvanized steel pipes (True Value will cut/thread the ends to any size)
3 galvanized 1/2″ flanges
3 galvanized 1/2″ tee fittings
3 1/2″ connectors {nipples}

Parts:

Drywall screws

2 finials and 1 wine cork

Tools:
Stud finder
Drill
Screw driver
Level

I gave all of my pieces a coat of Krylon‘s hammered metal:

1.  Find and mark studs. Measure/mark the height you’d like the curtain rod to hang (not my hairy arm!).

2. Attach “tee” to flange using nipple. Do this for all three pieces.

3. and 4.  Slide on curtain rings onto pipe at this stage. Tip:  Keep curtain rings clipped to plastic casing they came with or clipped to index card or piece of cardboard to help keep them in place during installation (not shown). Attach two flange sets to the ends of a pipe.

5.  Hold pipe with flanges on each end up to the wall, mark holes for screws (use a level to make sure rod hangs straight) by starting a hole with a spade bit or nail (hammer lightly).

6.  Four screws to each flange.

7.  Attach last flange set to remaining pipe.

8.  Slide on more curtain rings (I use 7 for each curtain panel).

9. Screw one end of pipe into the tee that’s secured to the wall.

10.  Twist flange so it’s flush to the wall.

Note:  The installation process will scuff your walls…you’ll need to touch up.

11. Repeat steps 5 and 6 for the other end.

12. Choose 2 finials that fit in your space and match your style. I spray painted mine to match the pipes.

13. Cut a piece of a wine cork in half.

14. Shave down the sides. (Make 2 pieces, one for each end of the pipe.)

15.  Push a piece of the cork into the end of the pipe.

16.  Screw the finial into place into the cork.

Done and ready for curtains!

I love the industrial look. {No Sew Drop Cloth Script Curtain Tutorial here}

More photos of the sitting room “Christmas un-decorated” coming up!  🙂

Let’s see what you’ve been up to!

The DIY Show Off

1. You must use the button above (ADD BUTTON HTML CODE FROM SIDE BAR TO YOUR POST) and link to this post to share the linky love. You post must be recent, shared at one DIY Project Parade only (not continuously) and be DIY related.
2.Include your name or blog name and project title. Add your permalink (not your blog url, but your DIY project post url). Feel free to link a Past Post, just invite your readers in a current post with a quick note.
3.Or email your link to thediyshowoff@gmail.com and I will add it for you.
4.If you notice your link has disappeared -please add the link back to The DIY Show Off to your post today, a button or a quick note to your readers about the party and try again! I love when everyone participates and readers check out everyone’s links, but I think the return favor of linking back is the nice thing to do so everyone plays fair and enjoys all of the projects and links. Also – this blog party is for DIY projects only. Links not related to DIY will be deleted. Please share your link one week only.

5.  If reading this in an email, pop over to https://diyshowoff.com to see the inspiring DIY projects linked up!
6.  NOW you can “like” the links!  What a fun idea!  Most liked links may be included in a post of DIY Project Parade highlights later in the week.

7.  Visit a few other links to make some new friends, get some creative ideas and feel free to leave me a comment. I’m likely sitting here on the computer and could use a happy distraction!
Don’t forget to come back Sunday evening and link up your 2011 DIY recap and my DIY year in review.
*~*~*~*~*~*~*~*~*~*~*~*~*~*~*~*~*~*~*~
I was one of the bloggers selected by True Value to work on the DIY Squad. I have been compensated for my time commitment to the program as well as my writing about my experience. I have also been compensated for the materials needed for my DIY project. However, my opinions are entirely my own and I have not been paid to publish positive comments. FOLLOW TRUE VALUE ON FACEBOOK AND TWITTER!~*~*~*~*~

Pin It

DIY Project Parade and DIY No Sew Script Drop Cloth Curtain Tutorial

No Sew Drop Cloth Script Curtain Panel Tutorial
 
no-sew-dropcloth-curtains
I wanted something different for our sitting room and the new DIY curtain rod. I love the idea of drop cloth curtains…affordable ($25 for a 9×12 drop cloth).
 
9×12 drop cloth for three 4′ panels
Sharpie Permanent Marker
 
 
I spread the drop cloth out on the dining room table.
 
I wanted 3 panels. My floor to ceiling height in the sitting room is 7 1/2 foot. I drew up a plan:
 
I made marks 18 inches (minus 1 1/2 feet) in from the bottom hem (laying out my drop cloth with 9 ft. being the height and 12 ft. being the length). The cut panels are the exact height from floor to ceiling (we’ll worry about exact correct length later…as long as they’re a little longer than needed, it’s all good.
 
*Tip:  The drop cloth will be larger than table (if you have floor space to spread out – that’s great). Otherwise, working from one end, hold up fabric overlapping edge, measure and mark.
 
I cut from mark to mark. I heard using pinking sheers helps eliminate unraveling (myth as shown below).
 
*Tip:  Large drop cloth is difficult to work with. Pull fabric towards you as you cut.
 
Next I cut 3 panels out of the 12 feet at 4 feet each.  However:  I don’t think the manufacturer thought anyone would actually measure a drop cloth, so I had two 48″ pieces and one 42″ piece. (Which is okay – these are decorative and it was okay for my middle curtain to be off a little…but take this into account if it matters for you!!!)
 
I did not hem  cut edges – I like the frayed edge.  Left curtain panel has an outer hem by manufacturer, inside is frayed. Middle has two frayed edges.  Right panel is reverse of left with an outer hem, inner frayed. Top hem is sewn by the manufacturer.
 
I washed the panels on the hand wash cycle and dried on low.
 
As you can see, pinking sheers did not make a difference with fraying…
 
Unless this is decreased fraying?!
 
I pulled or cut away the strings. I like the frayed look once the tangled mess was gone.
 
Next I ironed the panels, using a high temp and steam.
 
I laid each panel out on the floor and using a yard stick, I made LIGHT pencil lines every six inches starting from the top.
I chose Robert Frost poems. They’re mostly nature related and short. I selected poems that were around 12 lines long. (Panels have 14 pencil lines:  Poem title, poem and author’s name = 14 lines too! Perfect!)
 
Using a Sharpie, I just started copying and writing out the poems…judging/eyeballing whether I needed to write smaller or bigger or insert a symbol to make the lines fit on a line. Sometimes I went over and darkened certain words by tracing again with my Sharpie.)
 
I didn’t like the “B” at the beginning of one of my poems, so I made a patch of left over drop cloth and this is the only part I sewed – but I patched right over the ugly “B”.  You might call it imperfection but I call it character.  🙂
 
When finished, I hung the curtains using curtain clips.
 
For the bottom hem, with the curtain hanging, push the bottom fabric to where the floor meets the wall. Draw a pencil line in that corner.  Cut along the line with pinking sheers.
DIY script drop cloth drapes
 
All done. Custom. Affordable and I love the look!!!  How about you?


sitting-room
 
 
Let’s see what you’ve been up to!
The DIY Show Off
 
 
1. You must use the button above (ADD BUTTON HTML CODE FROM SIDE BAR TO YOUR POST) and link to this post to share the linky love. You post must be recent, shared at one DIY Project Parade only (not continuously) and be DIY related.
 
2.Include your name or blog name and project title. Add your permalink (not your blog url, but your DIY project post url). Feel free to link a Past Post, just invite your readers in a current post with a quick note.
 
3.Or email your link to thediyshowoff@gmail.com and I will add it for you.
 
4.If you notice your link has disappeared -please add the link back to The DIY Show Off to your post today, a button or a quick note to your readers about the party and try again! I love when everyone participates and readers check out everyone’s links, but I think the return favor of linking back is the nice thing to do so everyone plays fair and enjoys all of the projects and links. Also – this blog party is for DIY projects only. Links not related to DIY will be deleted. Please share your link one week only.

5.  If reading this in an email, pop over to http://thediyshowoff.blogspot.com to see the inspiring DIY projects linked up!

6. If you have a Holiday link to share, feel free to link up to here too!
 
 
7.  NOW you can “like” the links!  What a fun idea!  Most liked links may be included in a post of DIY Project Parade highlights later in the week.

8.  Visit a few other links to make some new friends, get some creative ideas and feel free to leave me a comment. I’m likely sitting here on the computer and could use a happy distraction!
*~*~*~*~*~*~*~*~*~*~*~*~*~*~*~*~*~*~*~
  
I was one of the bloggers selected by True Value to work on the DIY Squad. I have been compensated for my time commitment to the program as well as my writing about my experience. I have also been compensated for the materials needed for my DIY project. However, my opinions are entirely my own and I have not been paid to publish positive comments.
 
 
Sharing here this week: