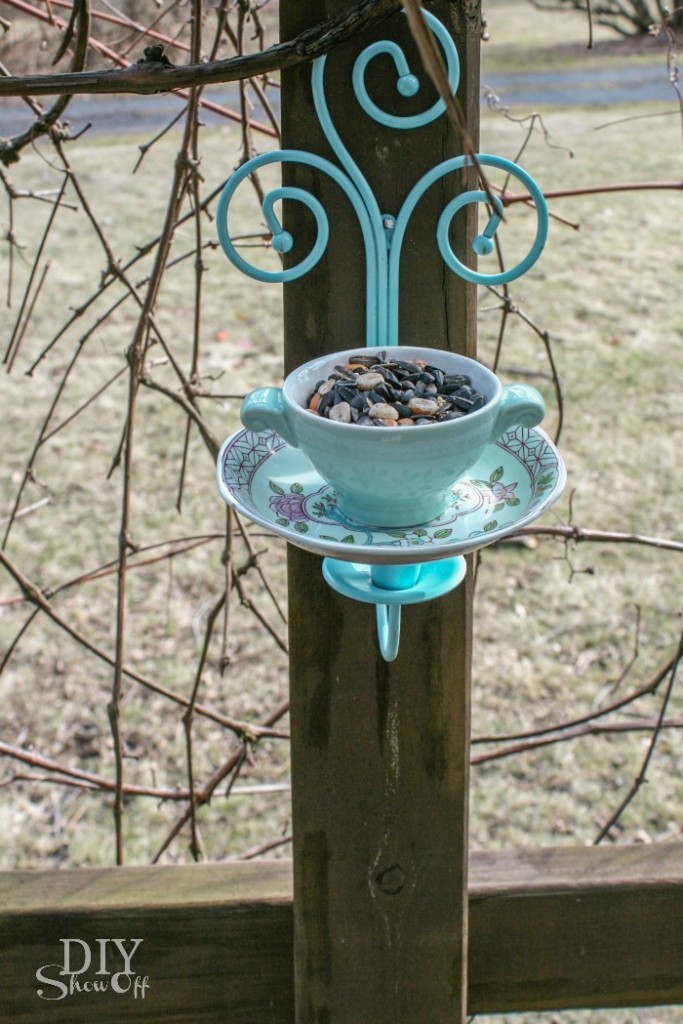
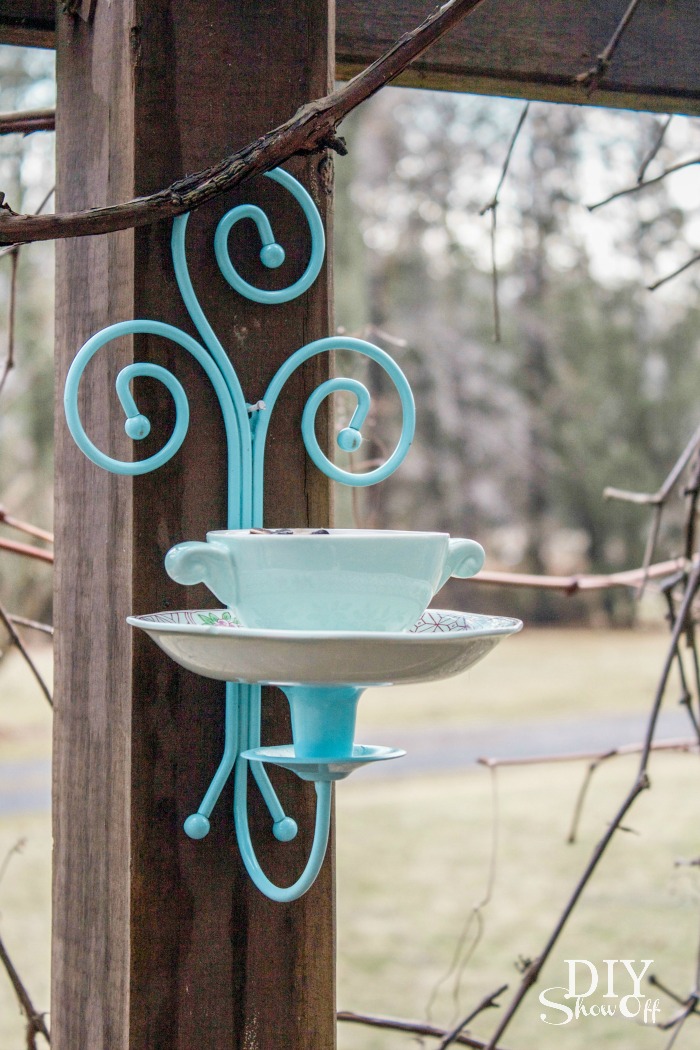
Like to attract bird’s to the backyard? Me too. Well…away from the patio where I enjoy sipping tea and starting my day with devotions.
The next time you’re at the thrift store, pick up an old candle sconce, tea cup and saucer to create a cute little bird feeder.
What I used:
- candle sconce
- tea cup & saucer
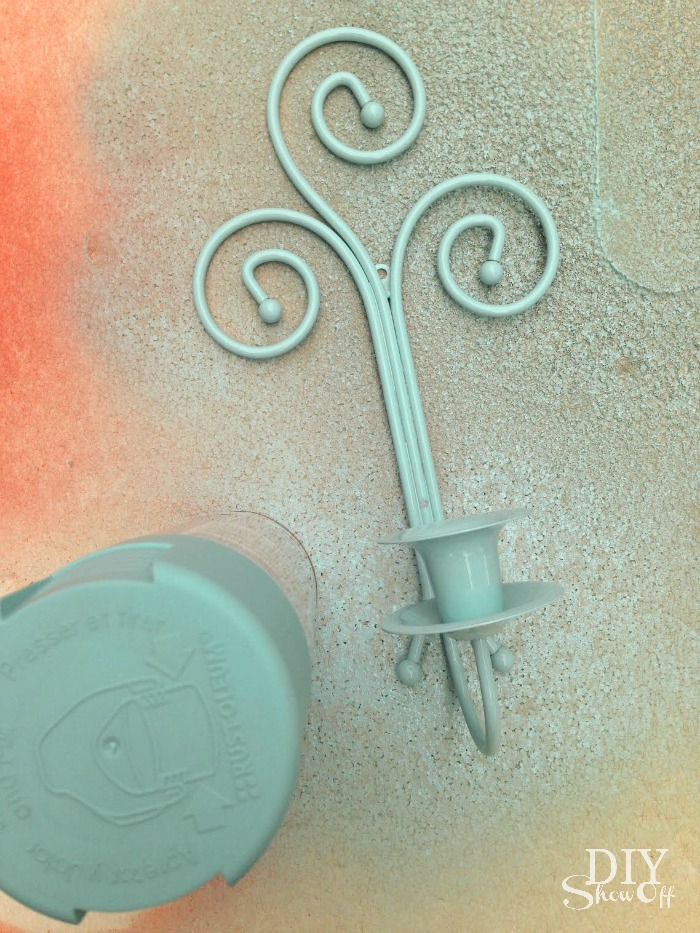
- Rust-Oleum Painter’s Touch Ultra Cover x2 (satin aqua)
- sanding block
- damp rag
- E600 glue
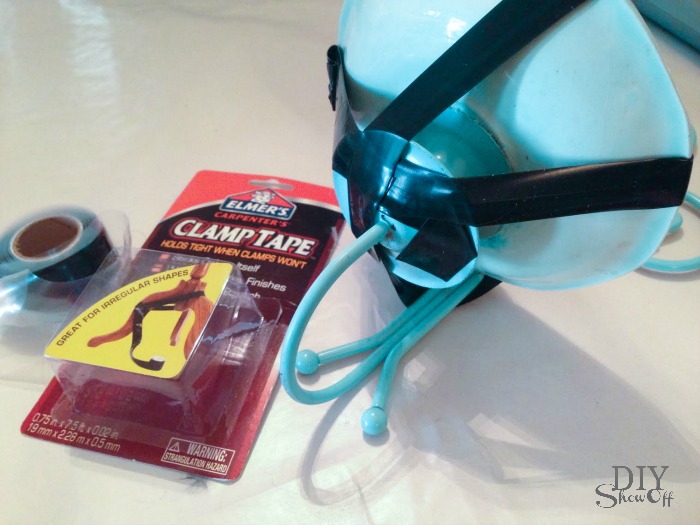
- clamp tape
What I did:
Lightly sand and clean candle sconce. Apply light even coats of spray paint and let dry.
Using glue, attach saucer and tea cup to candle sconce (saucer first then tea cup after the saucer has dried).
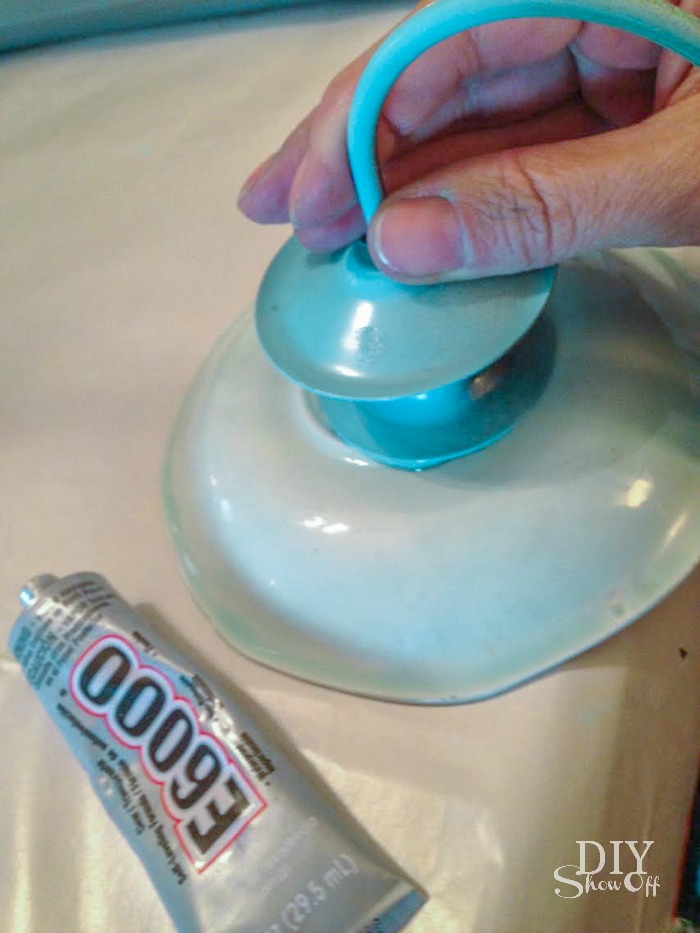
This is the first time I’ve used clamp tape. LOVE it! Worked really well to keep the pieces together while glue dried.
Let dry according to glue package instructions.
Hang, fill with bird seed and enjoy!
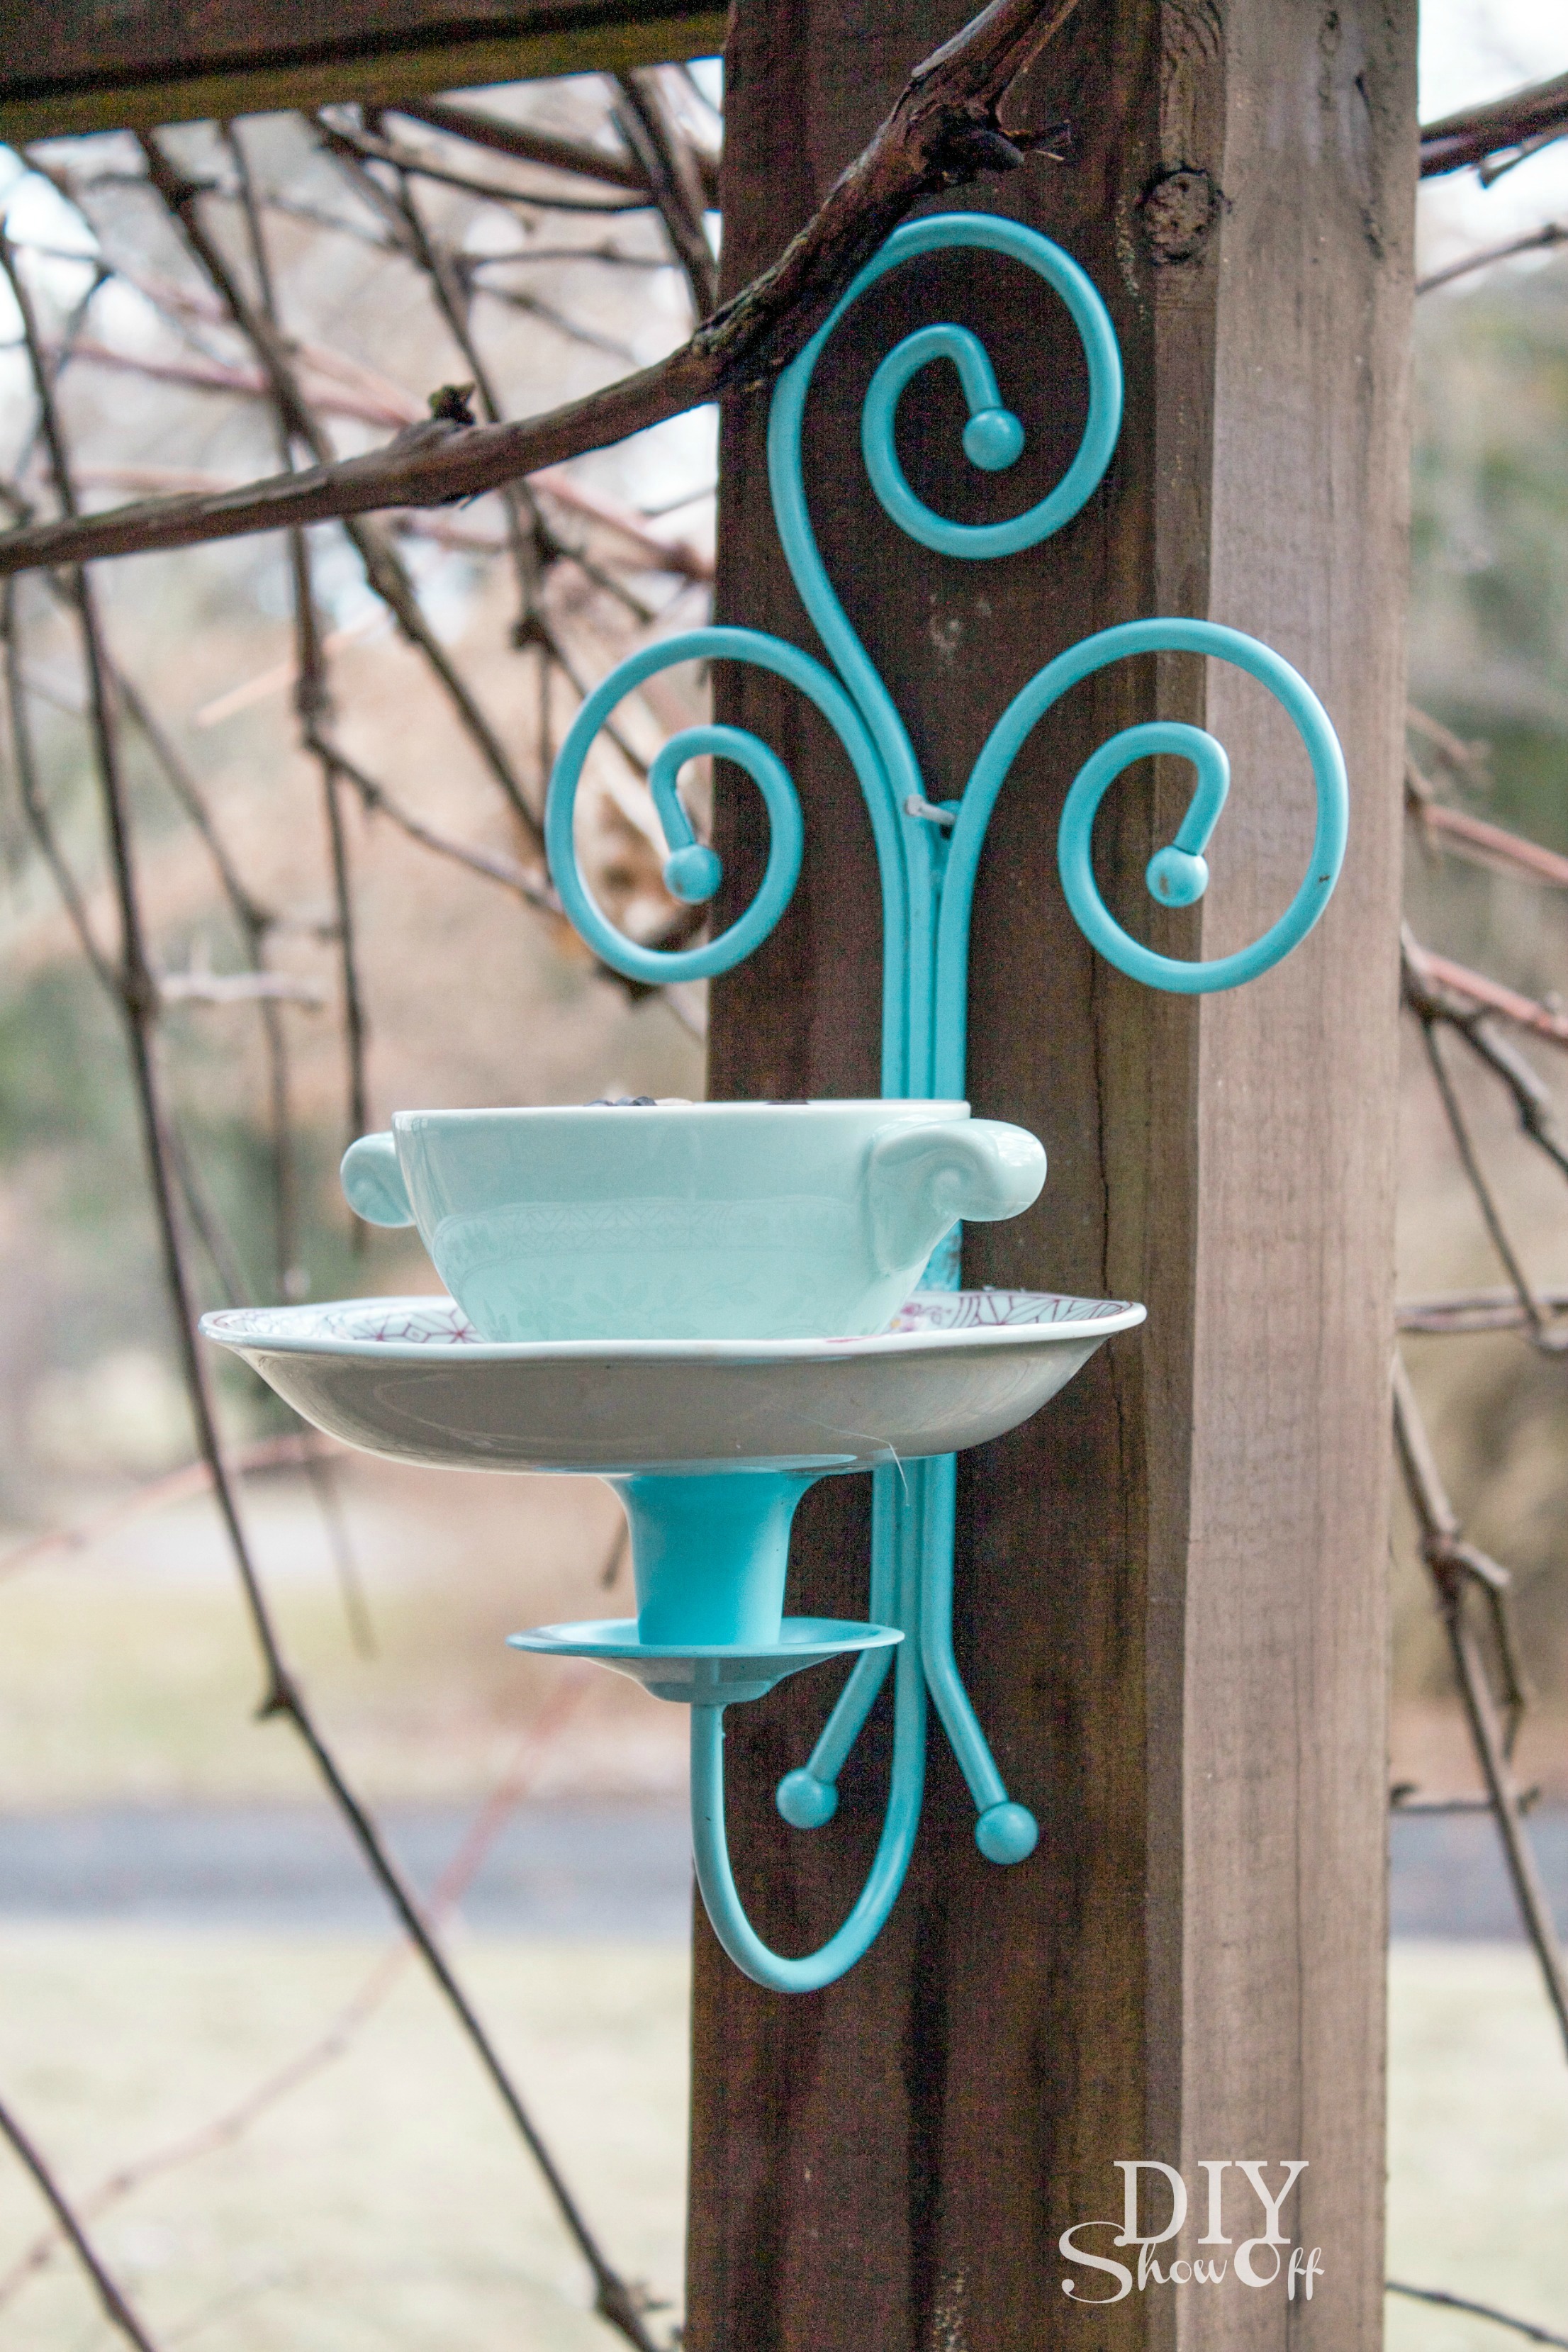
Pretty outdoor decor too.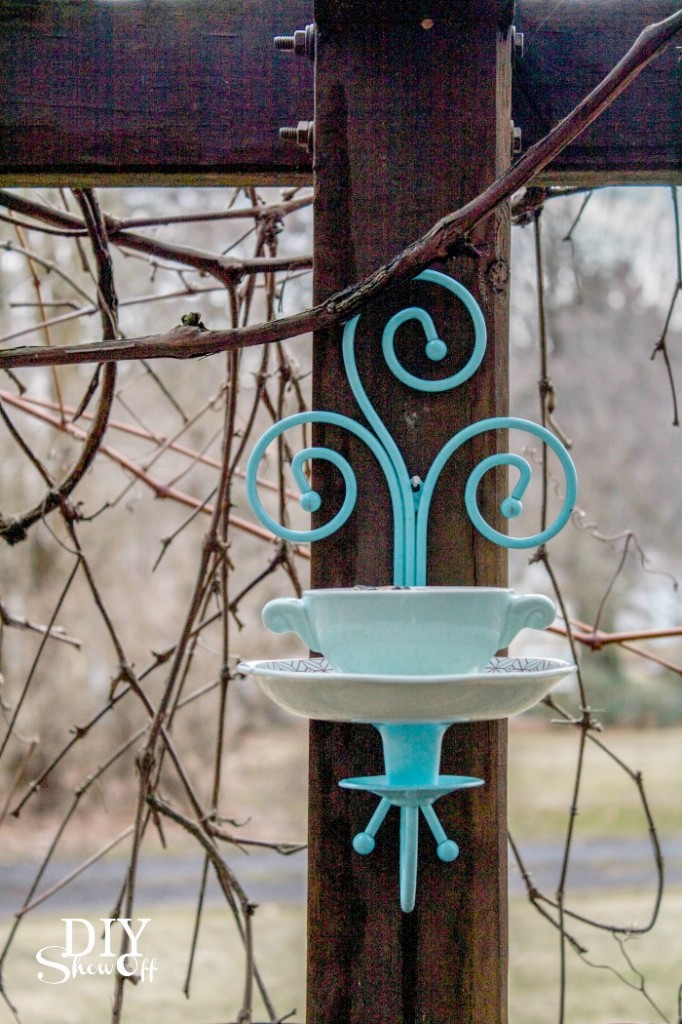

I haven’t noticed if the birds are enjoying it yet. The food disappeared but it may just happen to be feeding the squirrels. lol