DIY Vinyl Iron on Decal

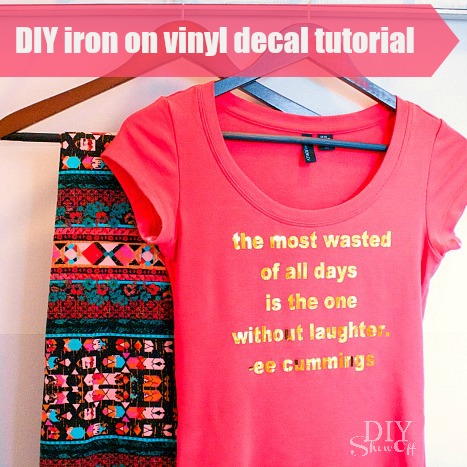
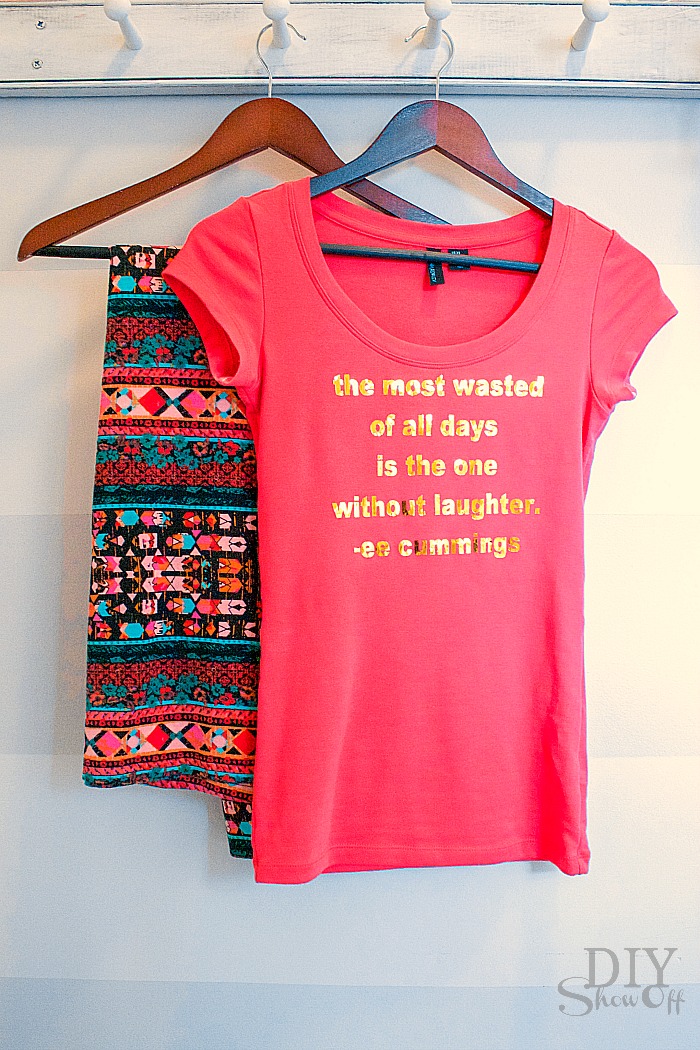
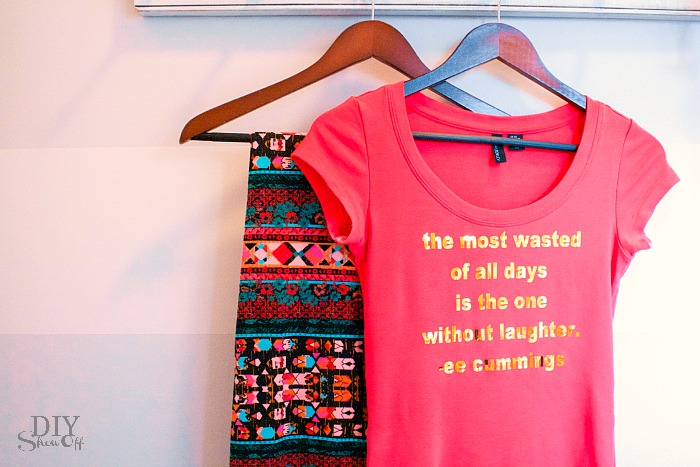
My monthly project for Happy Crafters is all about iron on vinyl, my favorite being the gold vinyl where I can quickly add a little bling to a plain t-shirt, tote back, pillow covers, onesies, etc. 

gold metallic iron on vinyl decal tutorial @diyshowoff #happycrafters

Materials:

Tutorial:

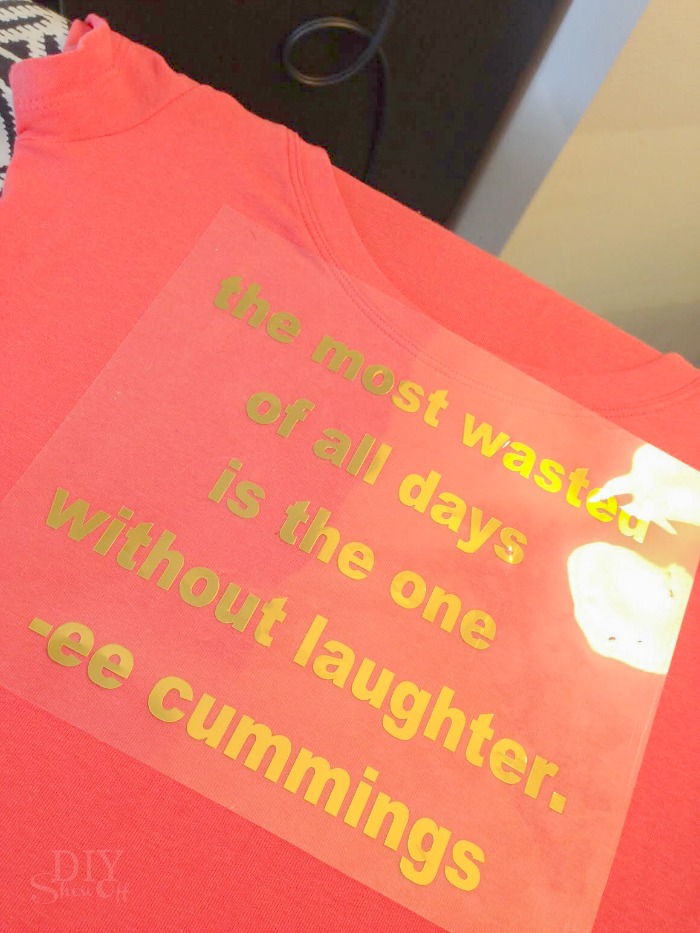
Use Silhouette Design Studio software to create a design of text with a quote. 

gold metallic iron on vinyl decal tutorial @diyshowoff #happycrafters

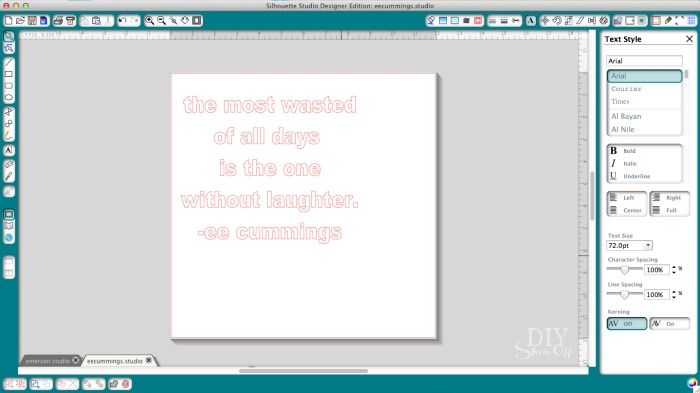
Resize text the text box and font to fit the front of your t-shirt. 

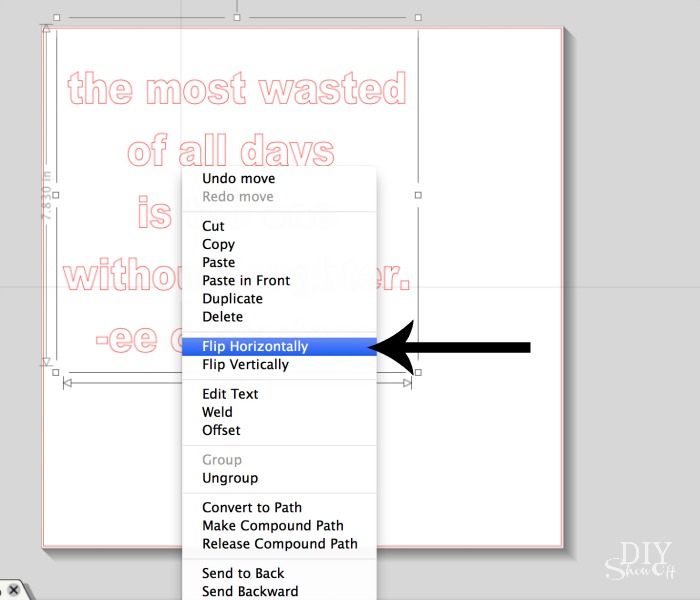
*Important! Right click and “flip horizontally” so that the text is a mirror image/backwards.

gold metallic iron on vinyl decal tutorial @diyshowoff #happycraftersgold metallic iron on vinyl decal tutorial @diyshowoff #happycrafters

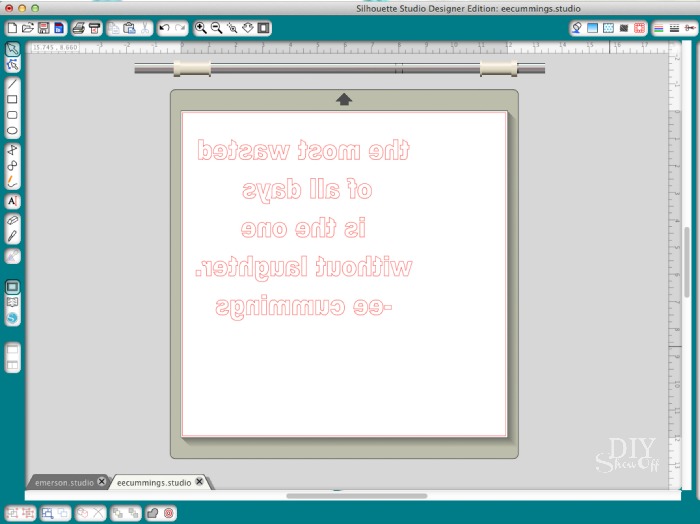
Load sheet of vinyl iron on into the machine shiny/color side facing down. 

gold metallic iron on vinyl decal tutorial @diyshowoff #happycrafters

Click “send to cut” and be sure to adjust settings for cutting smooth heat transfer. I found that I needed to up the blade 2 more than recommended to get through the vinyl (awesome quality stuff!) so you may want to do a small text cut. 

gold metallic iron on vinyl decal tutorial @diyshowoff #happycrafters

Click “cut”. Once cutting is complete, remove vinyl from machine. 

Trim away excess vinyl. I like to have about an inch border around my text.

Weed away the negative part of the design (leaving text on the tacky clear transfer sheet). 

gold metallic iron on vinyl decal tutorial @diyshowoff #happycrafters

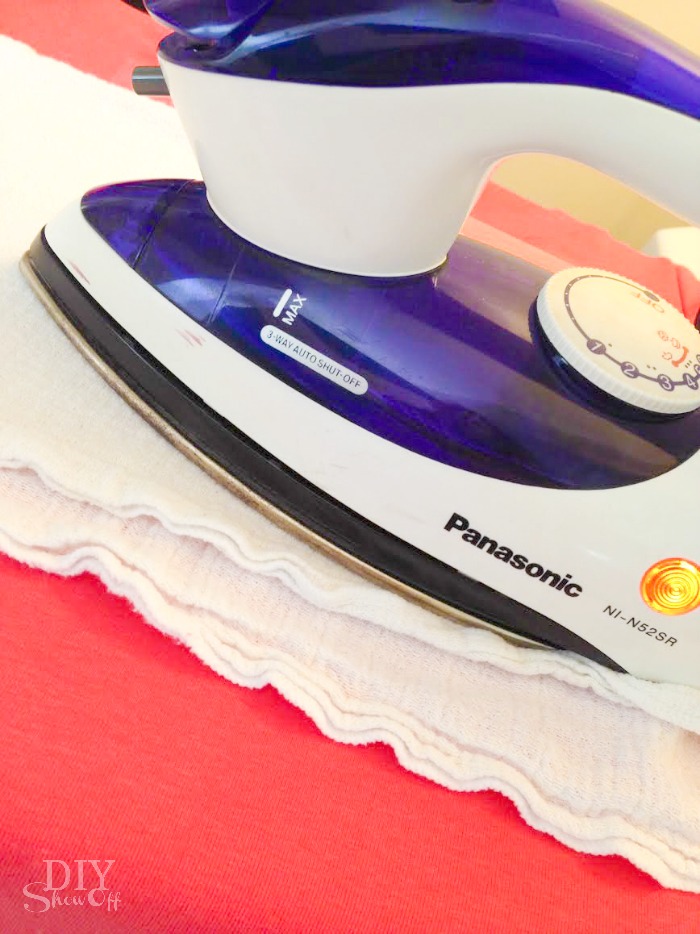
Place iron on sticky side down onto t-shirt.

gold metallic iron on vinyl decal tutorial @diyshowoff #happycrafters

Iron according to paper instructions included with the vinyl iron on material with a cotton cloth over the transparent plastic. 

gold metallic iron on vinyl decal tutorial @diyshowoff #happycrafters

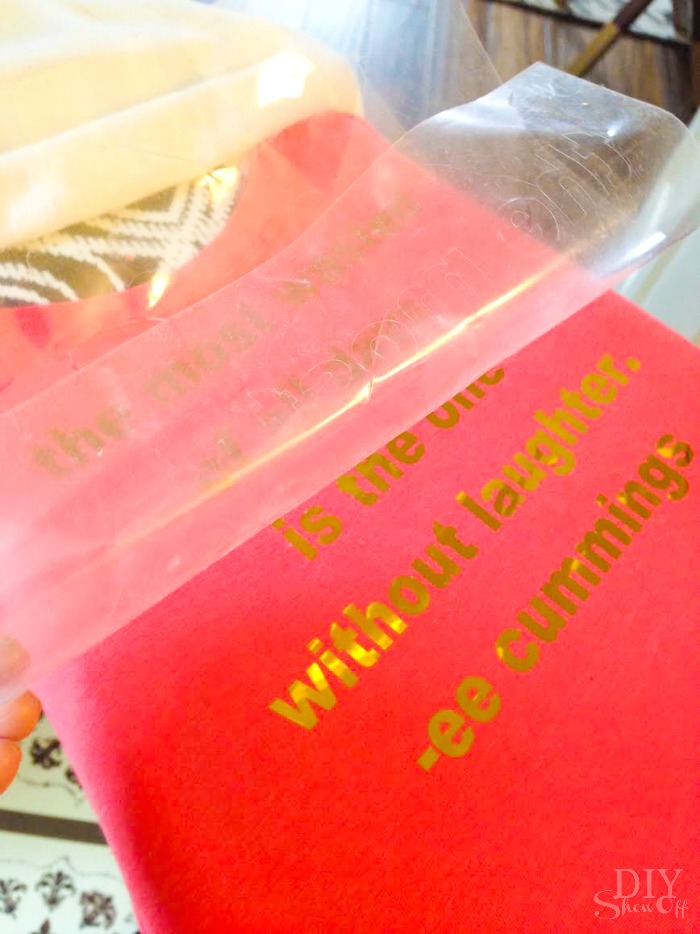
Carefully peel away clear transfer sheet. If vinyl iron on design hasn’t transferred, replace transparent sheet and re-iron/try again. 

gold metallic iron on vinyl decal tutorial @diyshowoff #happycrafters gold metallic iron on vinyl decal tutorial @diyshowoff #happycrafters

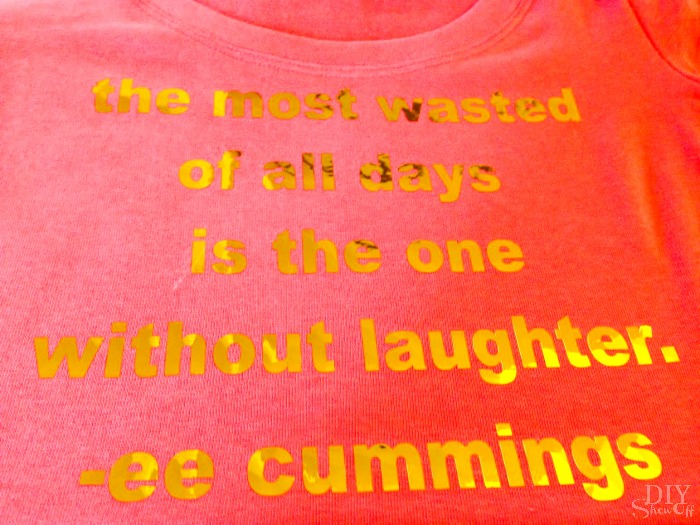
That’s it! This metallic gold foil has a mirror quality, reflections in the decal. So cool!

gold metallic iron on vinyl decal tutorial @diyshowoff #happycraftersgold metallic iron on vinyl decal tutorial @diyshowoff #happycrafters

*This post is sponsored by Happy Crafters. Tutorial, experience and opinion is my own. I love the products and the prices are affordable. Check out all the supplies at Happy Crafters for great prices, products and inspiration for your next project. 

HClogopngsmall

Tea Cup Candle Sconce Bird Feeder Tutorial

Like to attract bird’s to the backyard? Me too. Well…away from the patio where I enjoy sipping tea and starting my day with devotions. 

The next time you’re at the thrift store, pick up an old candle sconce, tea cup and saucer to create a cute little bird feeder. 

DIY tea cup candle sconce bird feeder tutorial @diyshowoff

What I used: 

  • candle sconce
  • tea cup & saucer
  • Rust-Oleum Painter’s Touch Ultra Cover x2 (satin aqua)
  • sanding block
  • damp rag
  • E600 glue
  • clamp tape 
What I did:
 
Lightly sand and clean candle sconce. Apply light even coats of spray paint and let dry. 
DIY tea cup candle sconce bird feeder tutorial @diyshowoff
Using glue, attach saucer and tea cup to candle sconce (saucer first then tea cup after the saucer has dried).
DIY tea cup candle sconce bird feeder tutorial @diyshowoff
This is the first time I’ve used clamp tape. LOVE it! Worked really well to keep the pieces together while glue dried. 
DIY tea cup candle sconce bird feeder tutorial @diyshowoff
Let dry according to glue package instructions. 
 
Hang, fill with bird seed and enjoy!
DIY tea cup candle sconce bird feeder tutorial @diyshowoff
Pretty outdoor decor too.DIY tea cup candle sconce bird feeder tutorial @diyshowoff
 
I haven’t noticed if the birds are enjoying it yet. The food disappeared but it may just happen to be feeding the squirrels. lol DIY tea cup candle sconce bird feeder tutorial @diyshowoff

Easiest {no sew} Small Dog Snood {infinity scarf} Tutorial!

Have a small dog? This is the easiest {no sew} small dog snood {or infinity scarf} tutorial! 

DIY (no sew) small dog snood infinity scarf in less than 1 minute! @diyshowoff

Our Italian Greyhound, Rosie, has very little body fat and very short fur. Needless to say, she’s not a happy to be walking in a winter wonderland type girl (she’s so much like me). Even if it’s summer time, she’s burrowed under her blankets on the couch in the a/c. So you can imagine winter time = sweaters, pajamas, coats.

DIY small dog snood/infinity scarf tutorial (no sew) @diyshowoff

While I was doing some online shopping, I came across something called a “snood”.

Snood: (/snuːd/, rhymes with ‘food‘, not ‘wood‘) is historically a type of European female headgear, or in modern times a tubular neck scarf. In the most common form, the headgear resembles a close-fitting hood worn over the back of the head.

I’ve seen dog snoods for sale but my DIY-eye saw the opportunity for a super easy tutorial where I could choose the patterns and colors for a lot less than $12+ each and not have to wait for (or pay for) delivery.

Ready to make one? 

Small Dog Snood Tutorial

1. Shop your closet or thrift shop for a stretchy long-sleeved knit shirt or thermal shirt (this type works best as it won’t unravel or need hemmed).

2. Make sure the cuff area stretches enough to go over your dog’s head comfortably. It should be loose fitting but not so loose it’s hanging. Loose but snug. Got that? Italian Greyhounds have VERY small heads so this is perfect for Rosie. 

3. Then simply cut the sleeve off near the armpit area/where the shirt meets the shoulder. Cut your snood shorter if desired. 3/4 length sleeves work too! 

DIY small dog snood/infinity scarf tutorial (no sew) @diyshowoff

Ta-da! The easiest DIY no-sew dog snood ever! 

DIY small dog snood/infinity scarf tutorial (no sew) @diyshowoff

If using a sweater, you may have to hem the larger cut side of the sleeve to prevent un-raveling. 

I paid 1.50 for size large shirts from the thrift shop. That’s $3.00 for 4 snoods! Or FREE if you end up cutting up shirts from your own closet. Well, maybe minus the money you’ll need to replace your wardrobe if you go crazy. 

DIY small dog snood/infinity scarf tutorial (no sew) @diyshowoff

I snoodle her by putting her head through the larger part of the snood first (the side I cut), letting it naturally bunch around her neck/collar area. If it’s too bulky, remove and cut the sleeve shorter. The smaller cuff area rests closest to her ears and top of her head, the larger part of the sleeve sits at her shoulders. 

DIY small dog snood/infinity scarf tutorial (no sew) @diyshowoff

Rosie mostly wears them as infinity scarves over her collar but when it’s cold, I pull it up over her ears for her outdoor potty breaks. Awe, baby! Or is that granny? Too cute either way! 

DIY small dog snood/infinity scarf tutorial (no sew) @diyshowoff

And for those concerned about safety, Rosie only wears her snood under adult supervision.

DIY small dog snood/infinity scarf tutorial (no sew) @diyshowoff

Please supervise your snood-wearing pooch.

DIY small dog snood/infinity scarf tutorial (no sew) @diyshowoff

Note: Rosie is a 10 lb. senior dog with a tiny skull. If your dog is larger, try sewing a larger version using a stretchy fabric and by looking at the shape of a shirtsleeve and the size of your dog. You don’t have to be a professional seamstress, just a few simple stitches. Results may vary. 🙂 

Update: And just like that, that quick, one DIYShowOff reader has already raided her closet and a few minutes later, her sweet chihauhaus are cozy and warm! This is Phoebe & Sable. They love to snuggle. Aren’t they cute?! Thanks for sharing, Mary-Louise! xo 

DIY small dog snood/infinity scarf tutorial (no sew) @diyshowoff

Share your photos and show off your snoodled pups by emailing them to thediyshowoff at gmail dot com. 

More DIY:

DIY wood plank wall art - DIYShowOffeasy DIY cat window perchDIY Dog Bed