Project Diary #11 – Living Room Before & After

Featured

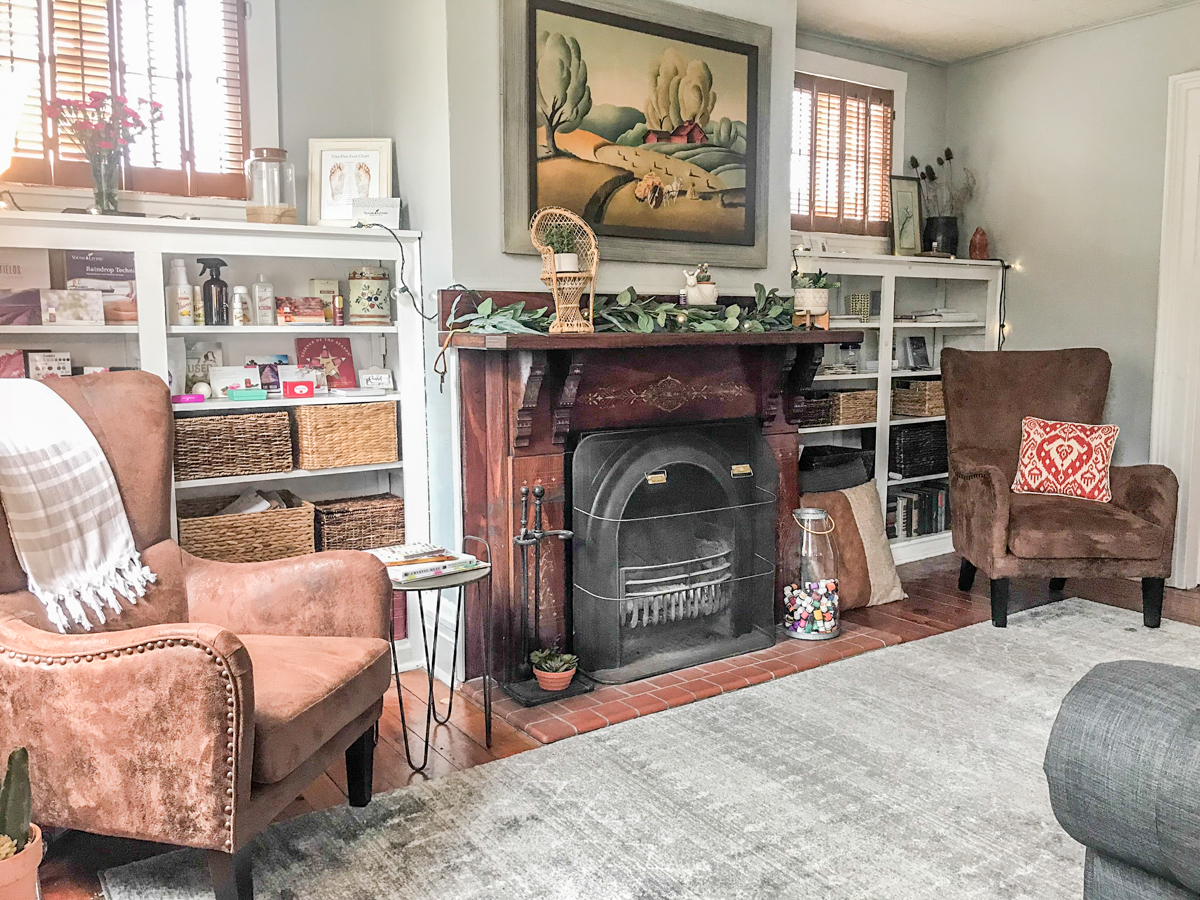
I know. I know! It’s about time I checked in with progress. It has been slow moving given it’s been just about exactly one year since we closed on this studio space. And it’s still a work in progress, especially upstairs in the apartment area but the commercial office/studio space on the main floor has just a few finishing touches left and I can call it done! Today, I just couldn’t help but share the living room transformation! 

And this isn’t the true true reveal with amazing photography using my good camera but I have been wanting to get something posted so I figured I’d upload some photos of how it’s changing with the living room and how it looks compared to when I bought the place to how we’re enjoying it today. The workshop transformation, main bathroom updates and some holiday decorating coming in the following days. Stay tuned!

Okay, let’s get started!

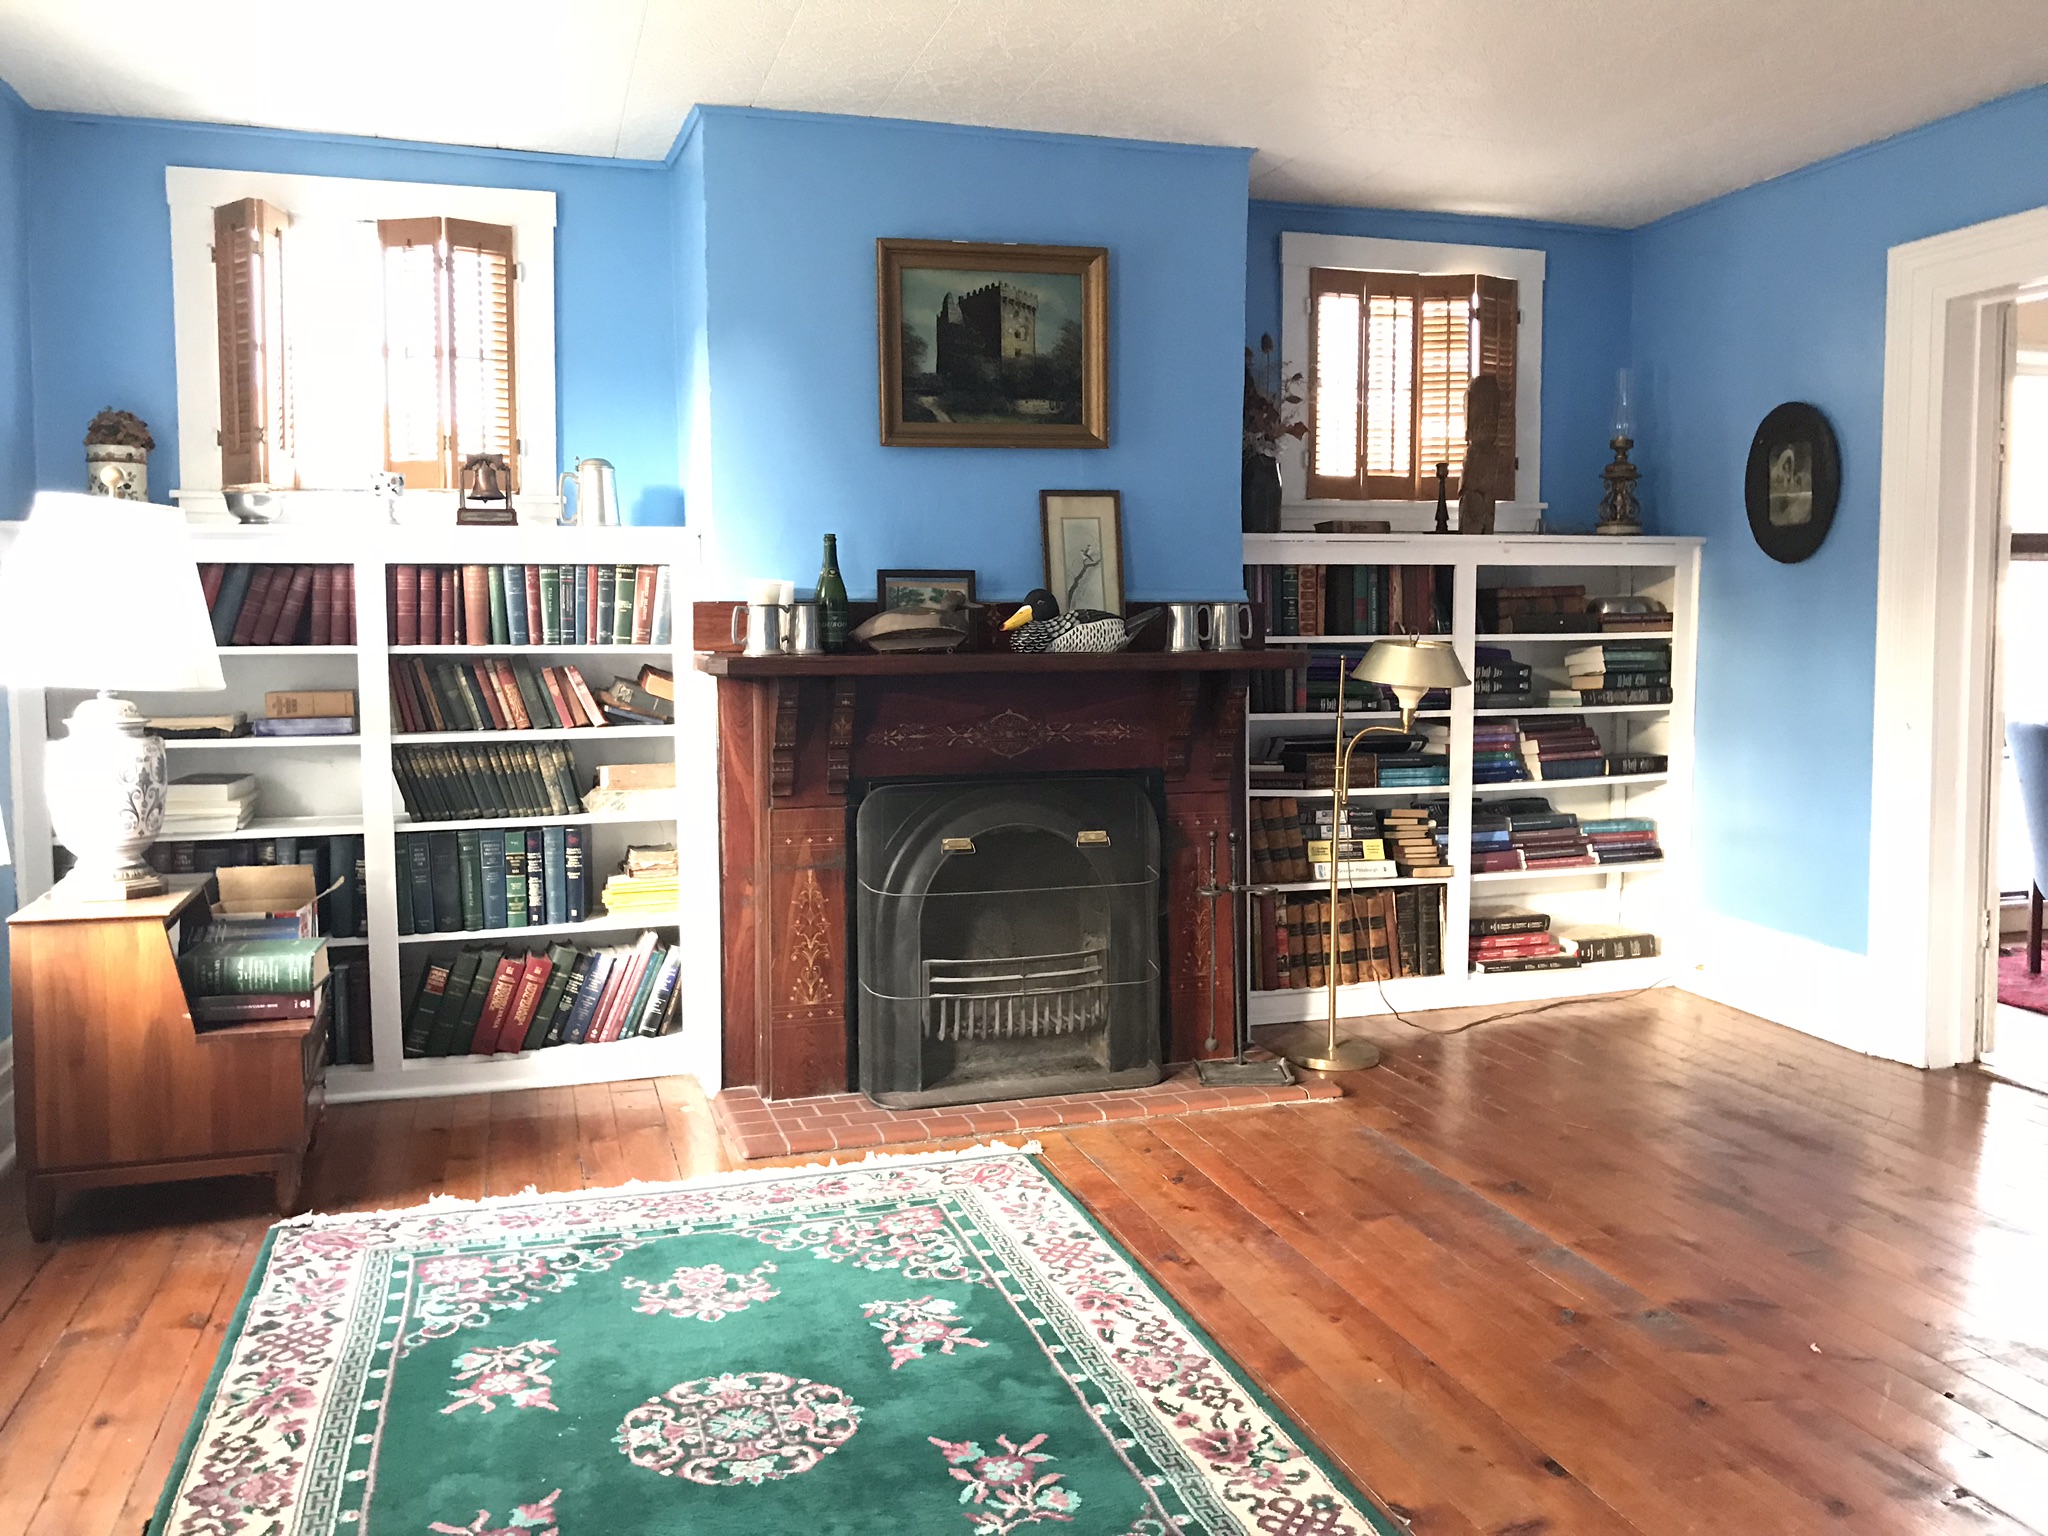
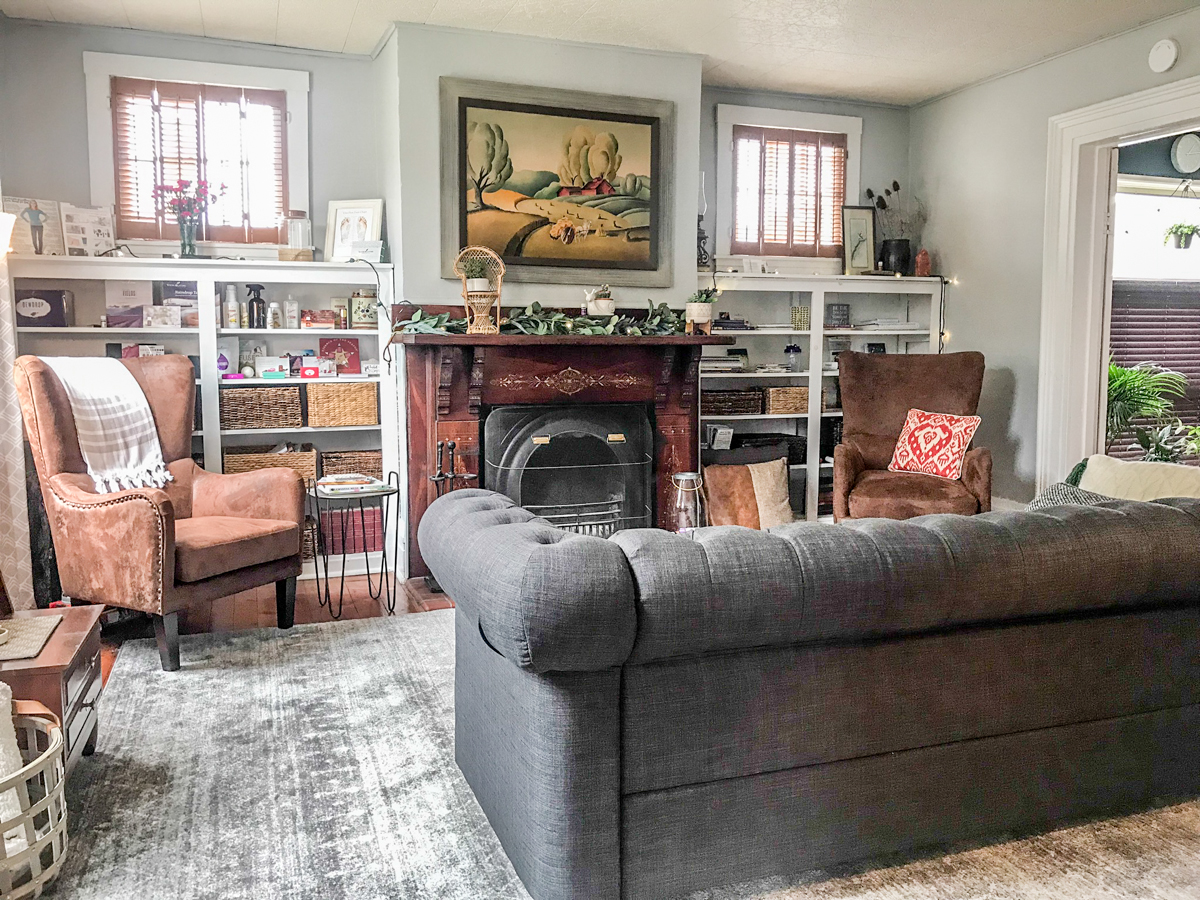
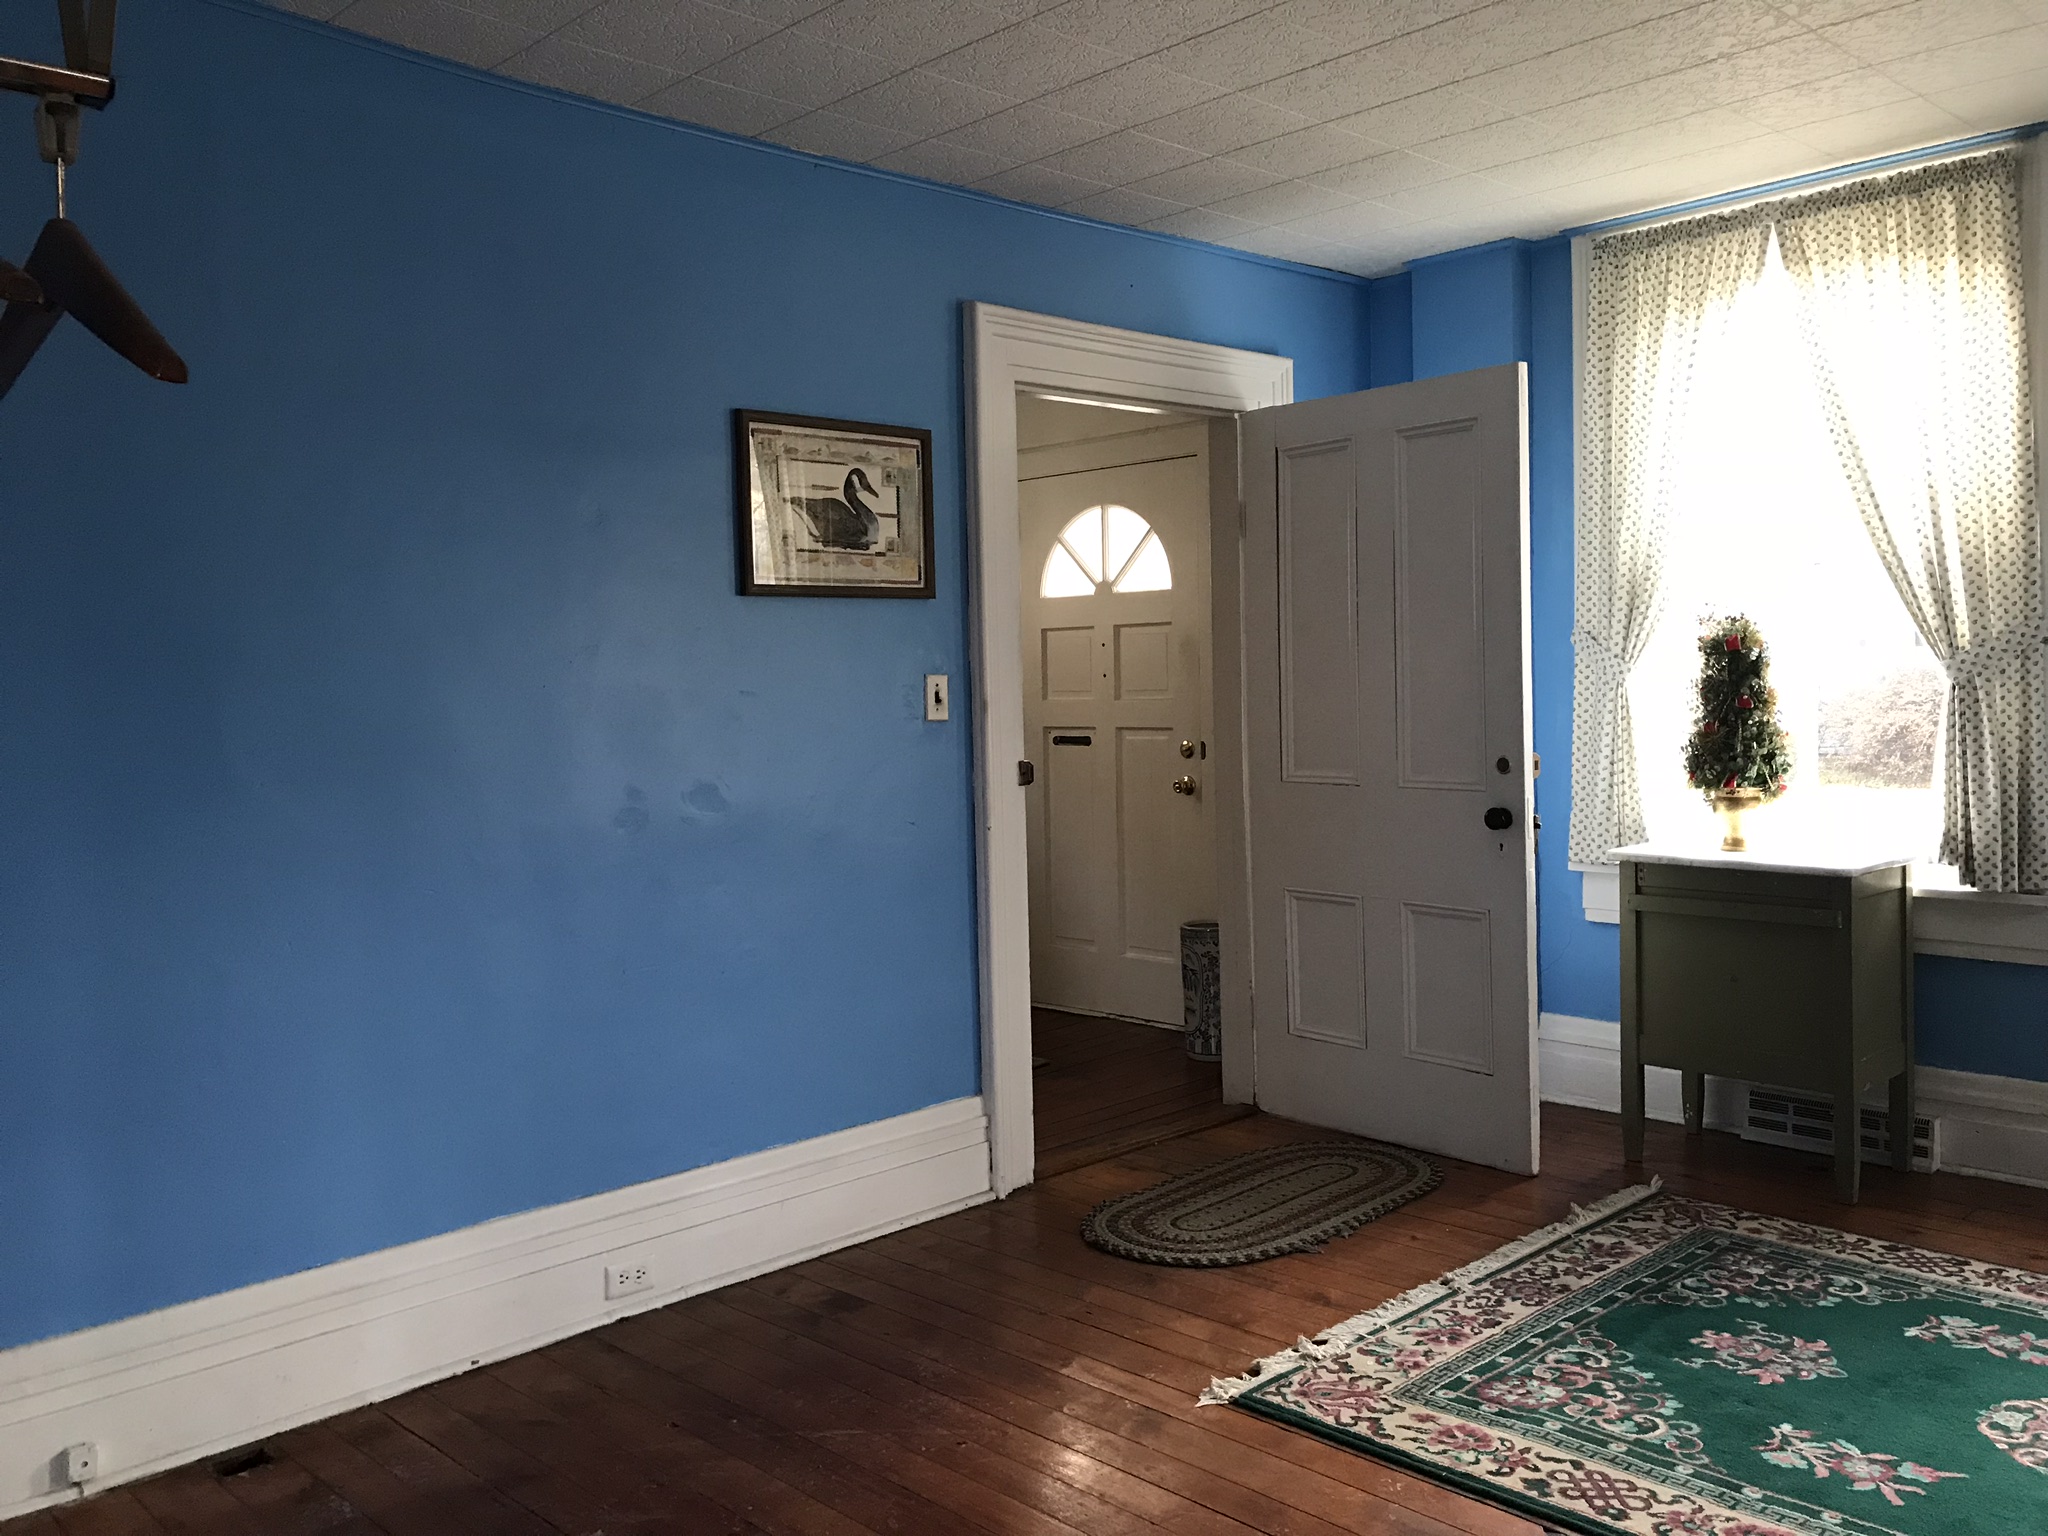
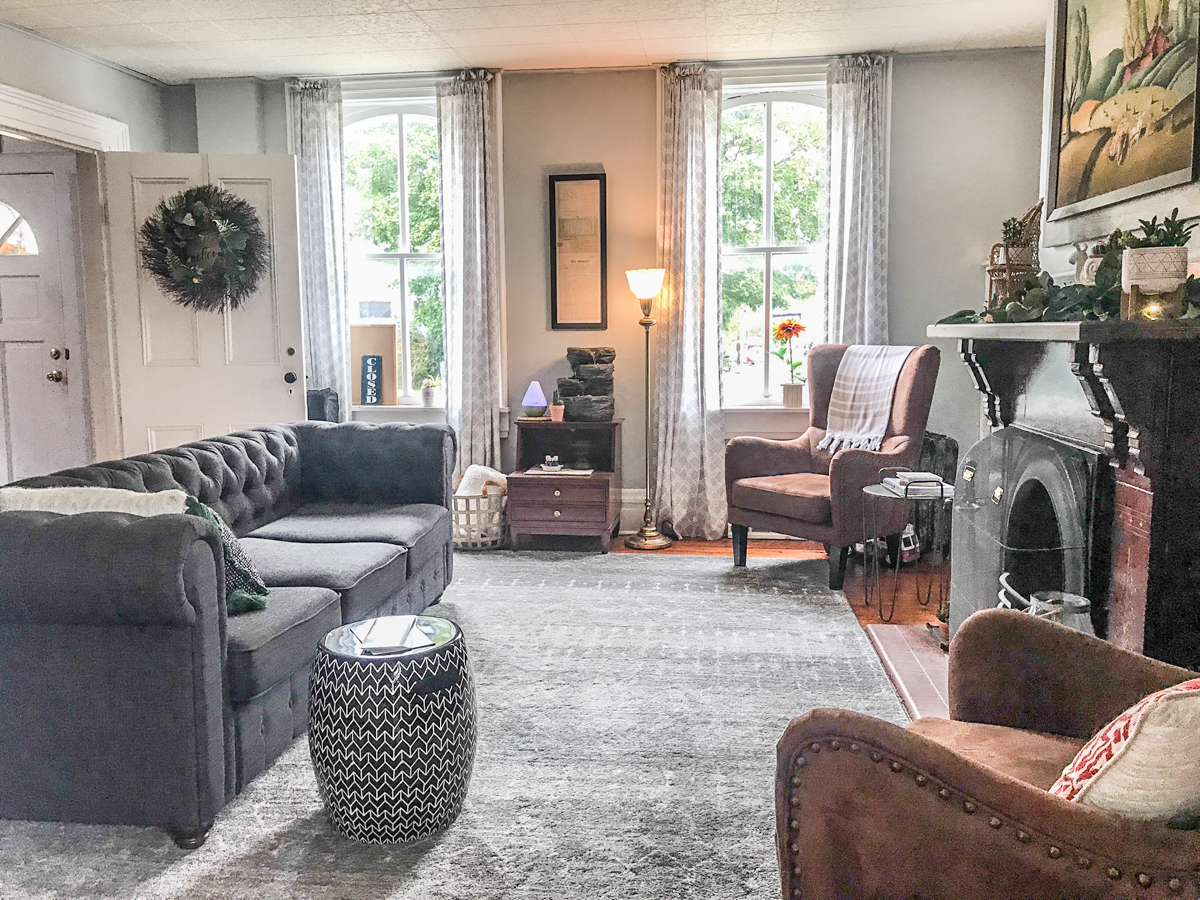
I call this the living room. It’s where small gatherings, iTOVI scans, Aroma Freedom Technique sessions and one-on-one meetings are held. I’m including the before photos so you can get an idea of what has changed. Really, not too much in the way of DIY – paint and some new furnishings and decor make a huge difference. I worked in a few furniture and decorative items left by previous owner with the new and thrifted purchases. I love the eclectic mix. 

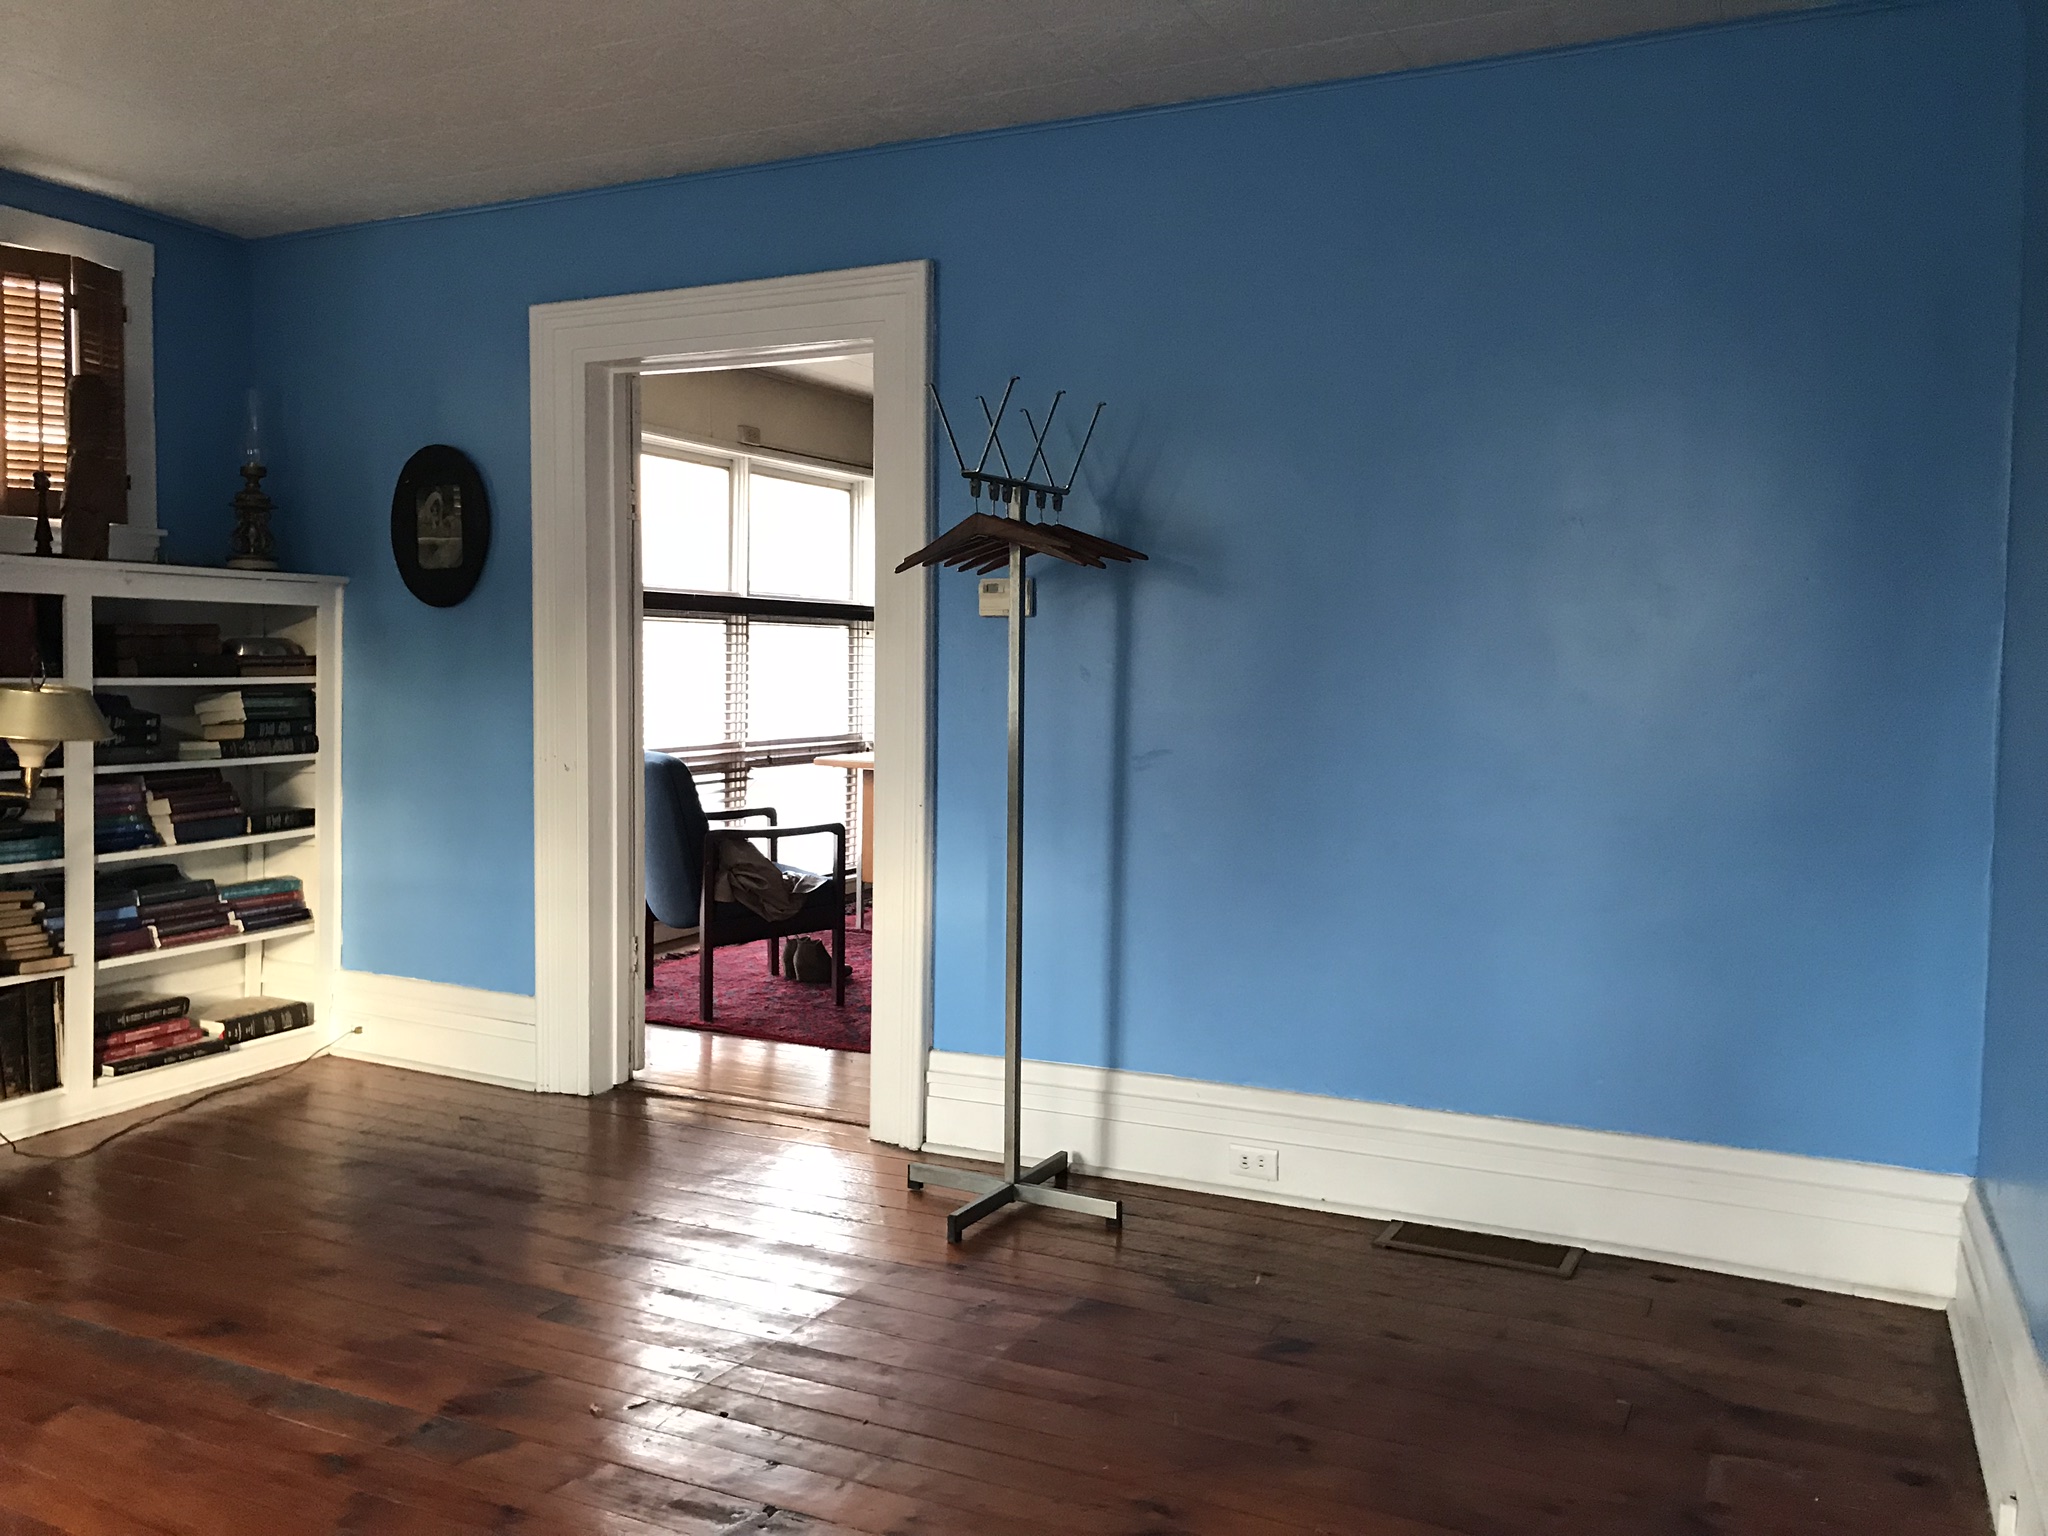
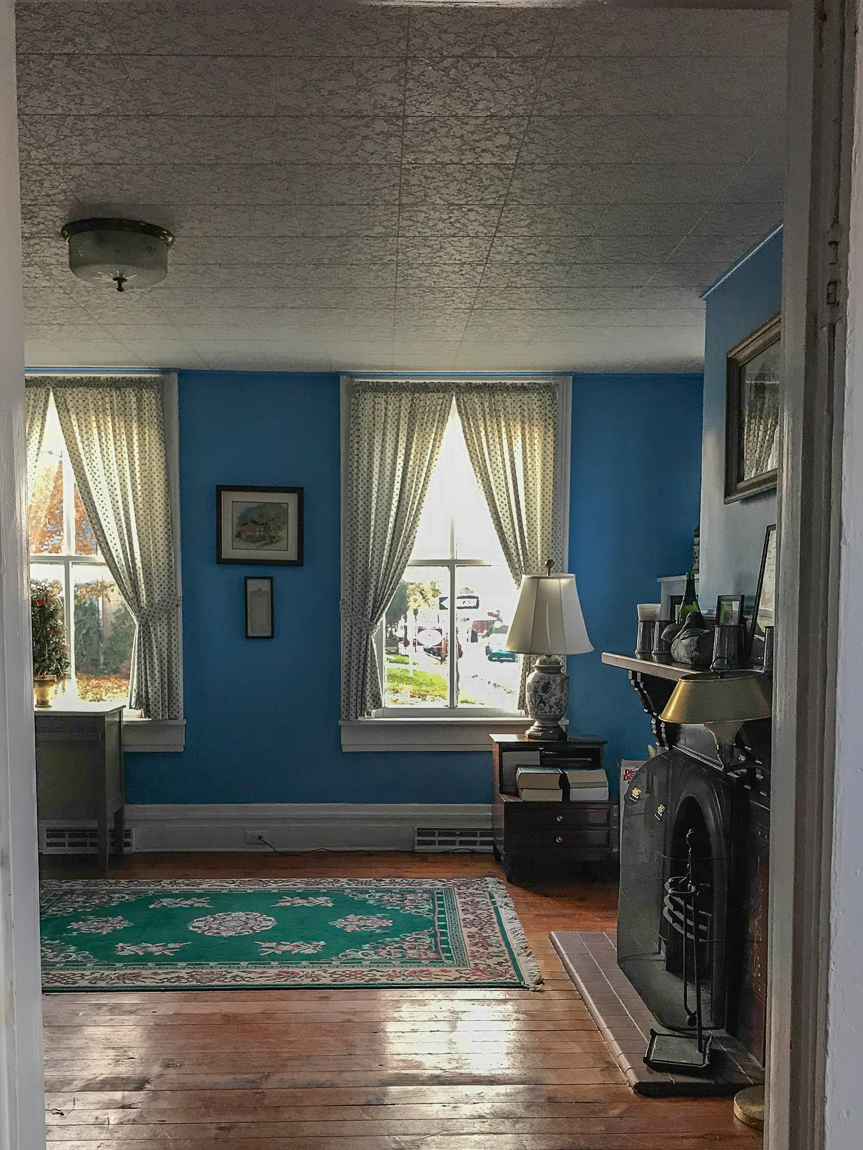
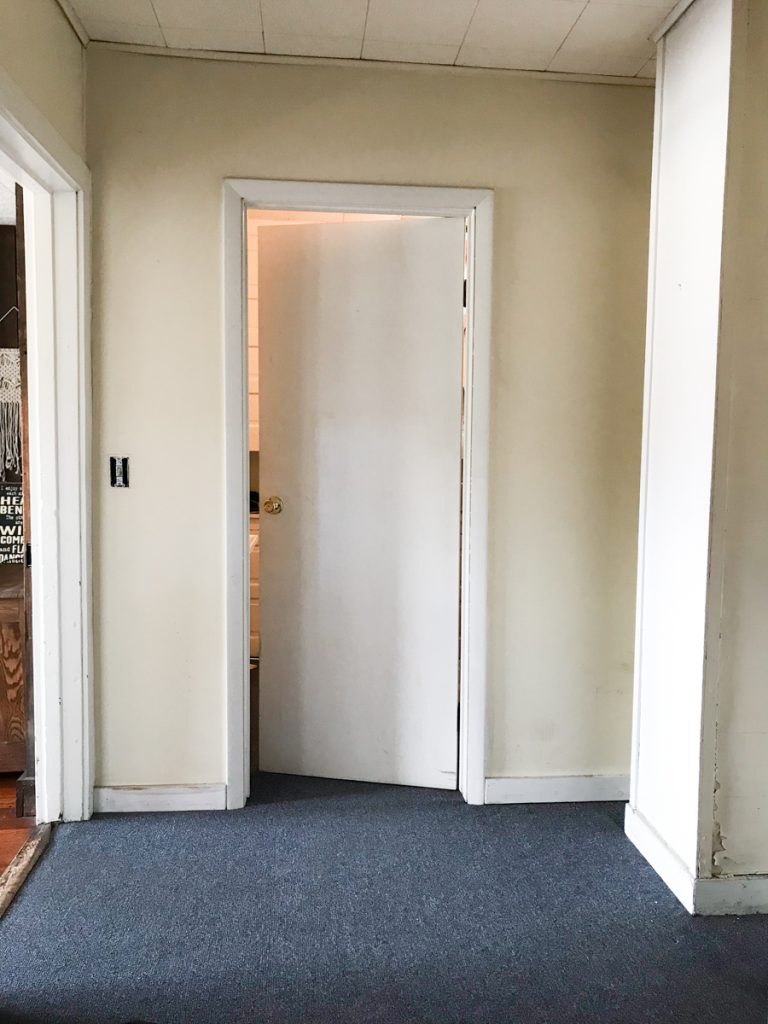
Before this, this room was used as a waiting area for the law office by previous owner. Blue paint, library shelves and sparse on the furniture. 

before:

library before

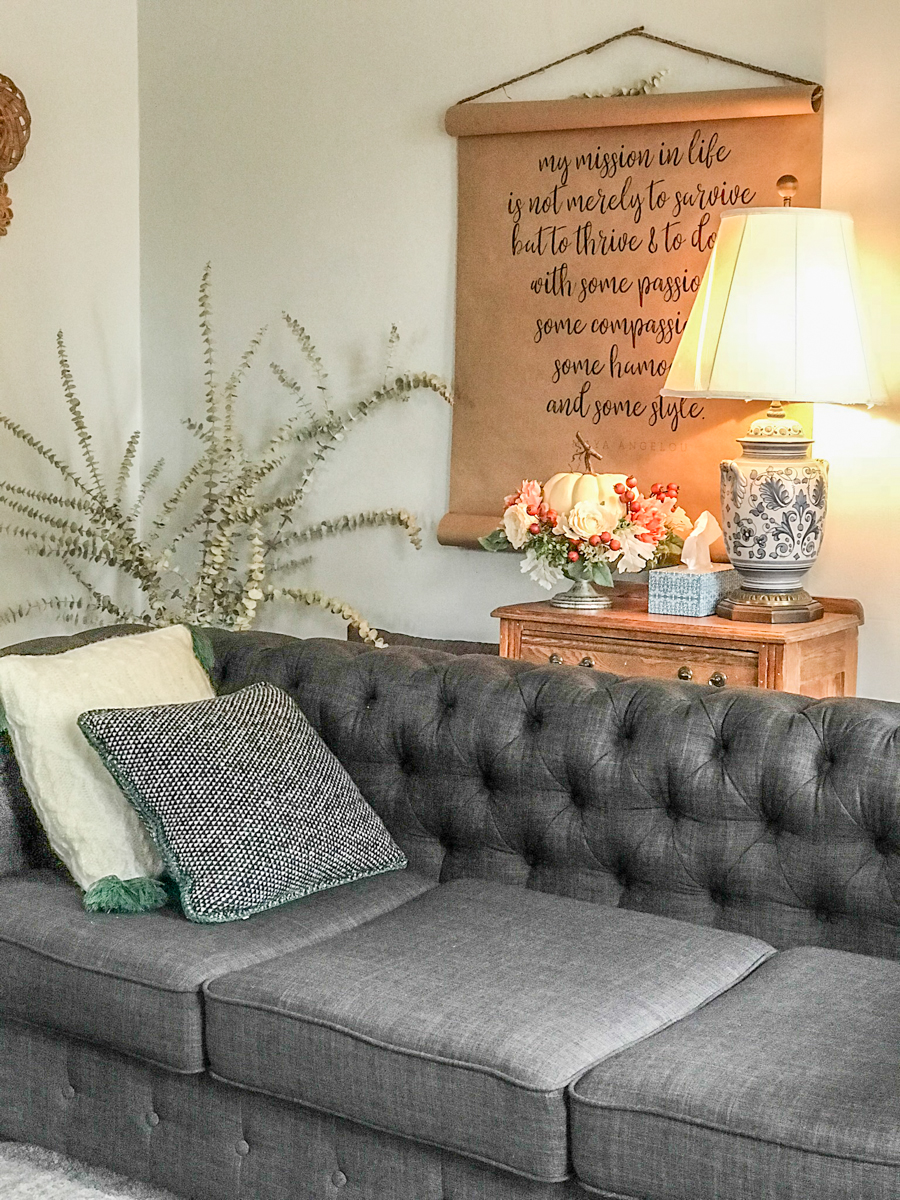
now:

livingroom after

There was a reception type desk in this area as well. 

Before

blue room

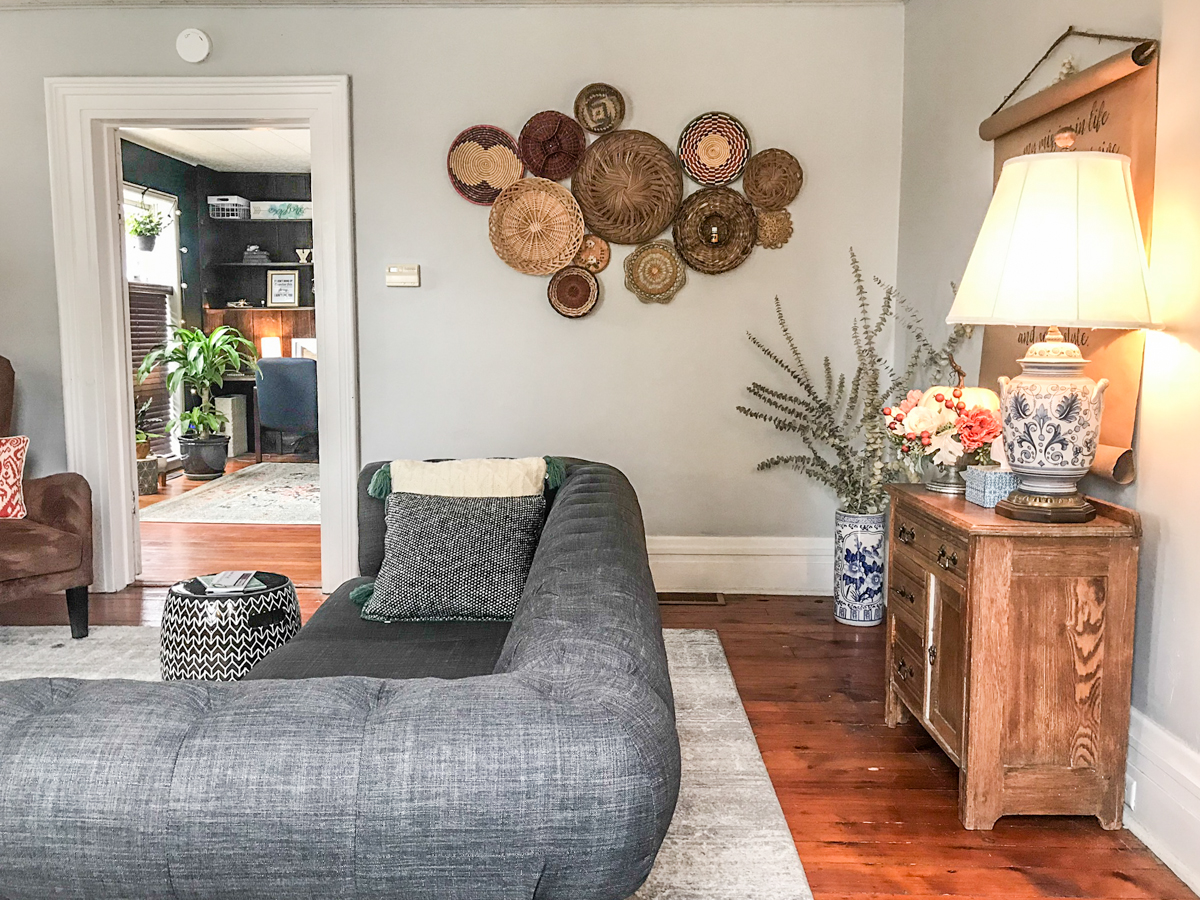
After: (ahhh! and a sneak peek of the workshop!)

livingroom decor

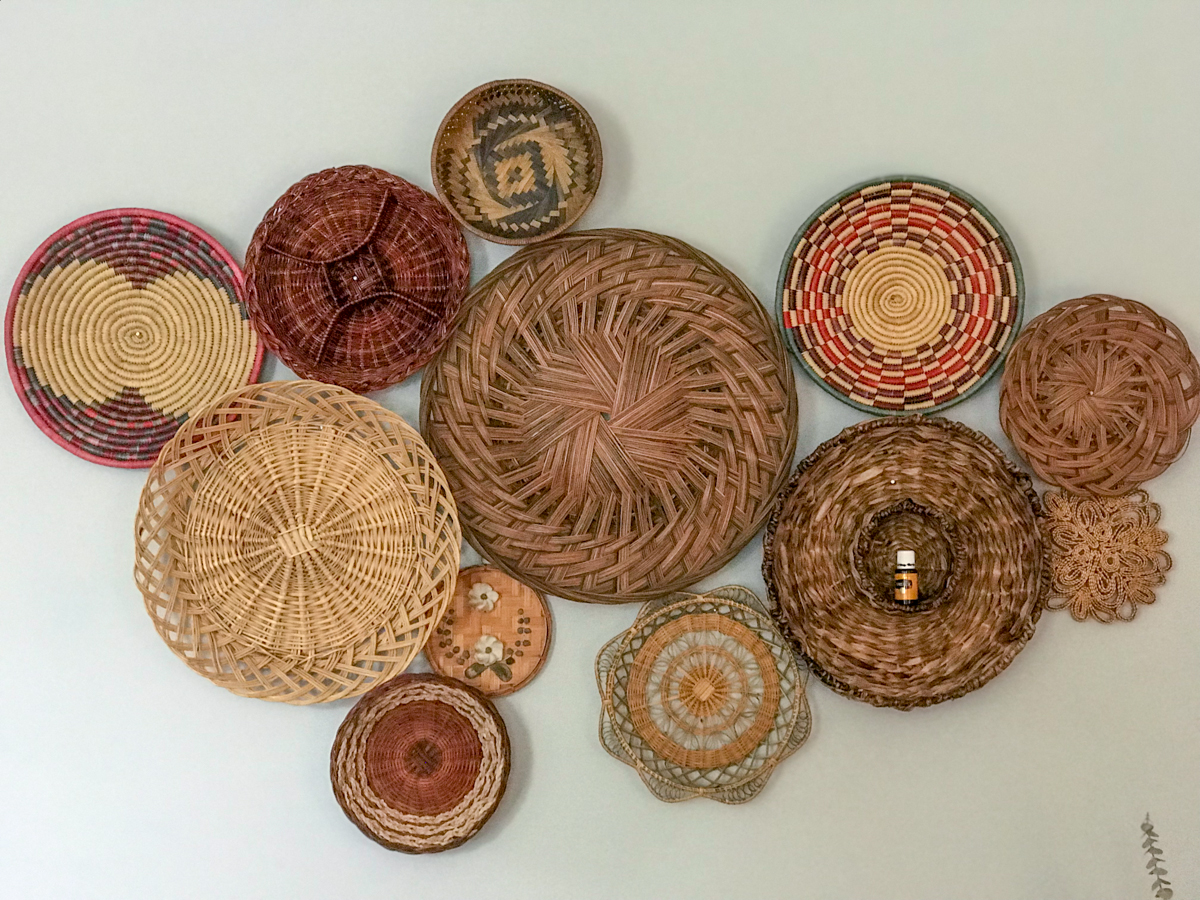
Thrifted basket wall: basket wall blue walldecor livingroom

Before: DIY craft studio // workshop - before room makeover @diyshowoff

After: 

helloredreno livingroom

Really all that this room needed was updated paint and still could use a whole lotta caulk. Someday I’ll refinish the original pine floors and perhaps swap out the ceiling light fixture and see about getting the fireplace working. But the power of paint is one of my favorite DIY tools to a beautiful transformation. 

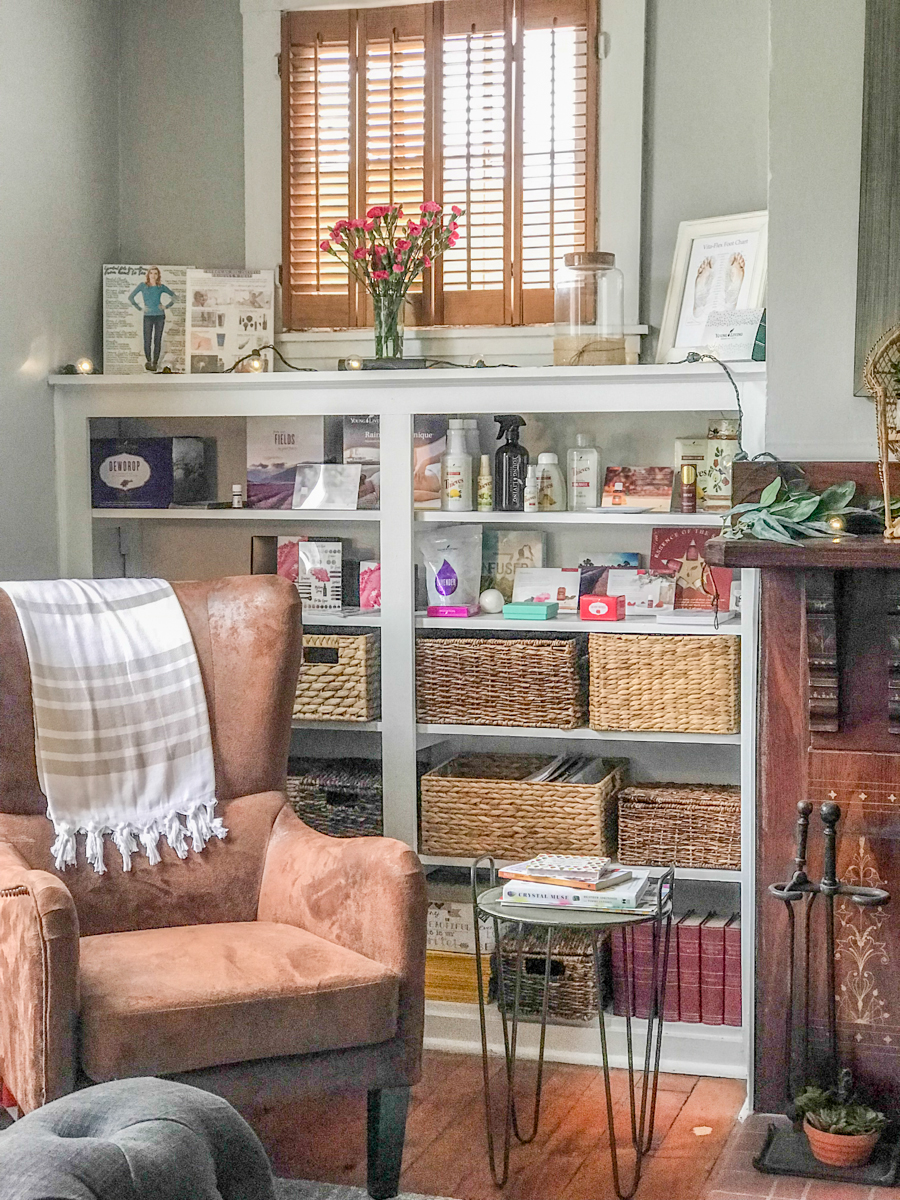
I love the the built-in bookcases for displaying products and organizing supplies in baskets.

built in bookcase builtin bookshelves studio livingroom

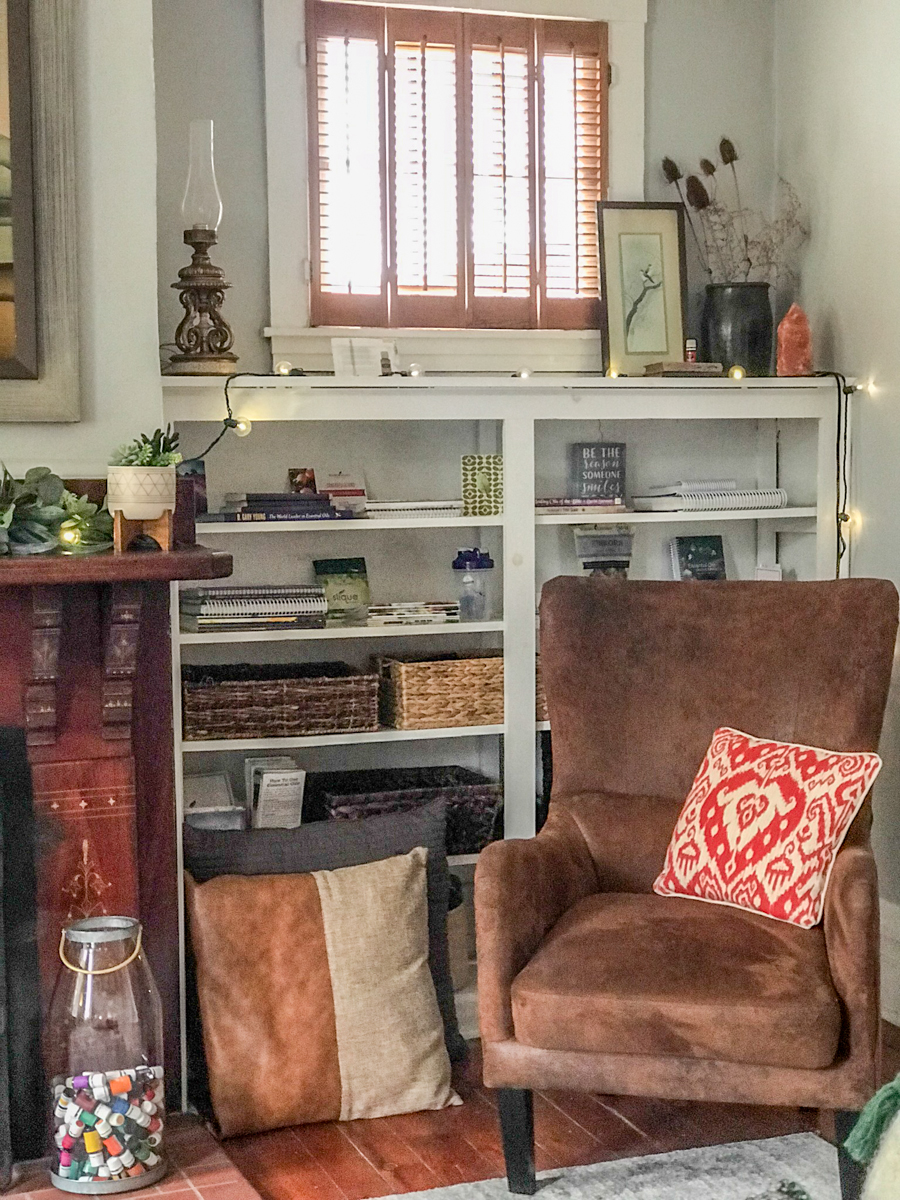
And the fireplace! Isn’t it gorgeous? Painting above the fireplace was the previous owners. I’ve incorporated a few of the things left behind. I love it! 

fireplacestudio livingroom

So, what do you think? Isn’t it cute? So cozy and comfy. C’mon over and we’ll catch up over a glass of wine! I could spend so much time curled up on that couch! 

Next up:

The workshop transformation. It’s my favorite! 

The building has so much historical charm. It’s about one block from our town’s Main Street. The bus stop is literally steps away. There’s a Bed & Breakfast across the street and an antique shop nearby. There are breweries, the YMCA, shops, restaurants, salons, florists, candy/coffee shop, holiday parades and festivals within walking distance. So fun! If renovation from blah to ahhhhh is your thing, stay tuned!

So subscribe and be reminded of updates as the renovations progress! I’ll share before and after photos, projects underway and updates, plans and design boards, sources and links as they relate as well as fun events going on in and around the downtown area. I’ll be using a specific hashtag on social media to keep things all neat and tidy and organized.

#helloredreno

I welcome your thoughts and ideas! And as always, thanks for your encouragement and support and for sharing in my joy and vision! Watch for #helloredreno!

Project Diary Entry #1 – Hello Red Reno!

Project Diary Entry #2 – Efficiency Apartment

Project Diary Entry #3 Color Passive Paint

Project Diary Entry #4 – Full Bathroom Demo Day

Project Diary Entry #5 – Sealing A Wood Plank / Shiplap Wall

Project Diary Entry #6: Bathroom Flooring

Project Diary Entry #7: Sealing Brick

Project Diary #8: Hardwood Floors

Project Diary #9: Carpeted Stairs

Project Diary #10 Vinyl Floor Tiles

Project Diary #11 – Living Room Before & After


Project Diary #10 Vinyl Floor Tiles

Featured

Finally! I know. It’s been a while since the last update. Lots of work! There is something to report in the #helloredreno series, a bit of progress that includes beautiful new vinyl floor tiles and walls in a back entry and main floor restroom area for the workshop. I’m still working on final details like getting a sink/vanity installed, trim work, some fun DIY projects and decor but I just can’t wait to show you this beautiful flooring! 

shaw fairmount sweetbriar flooring

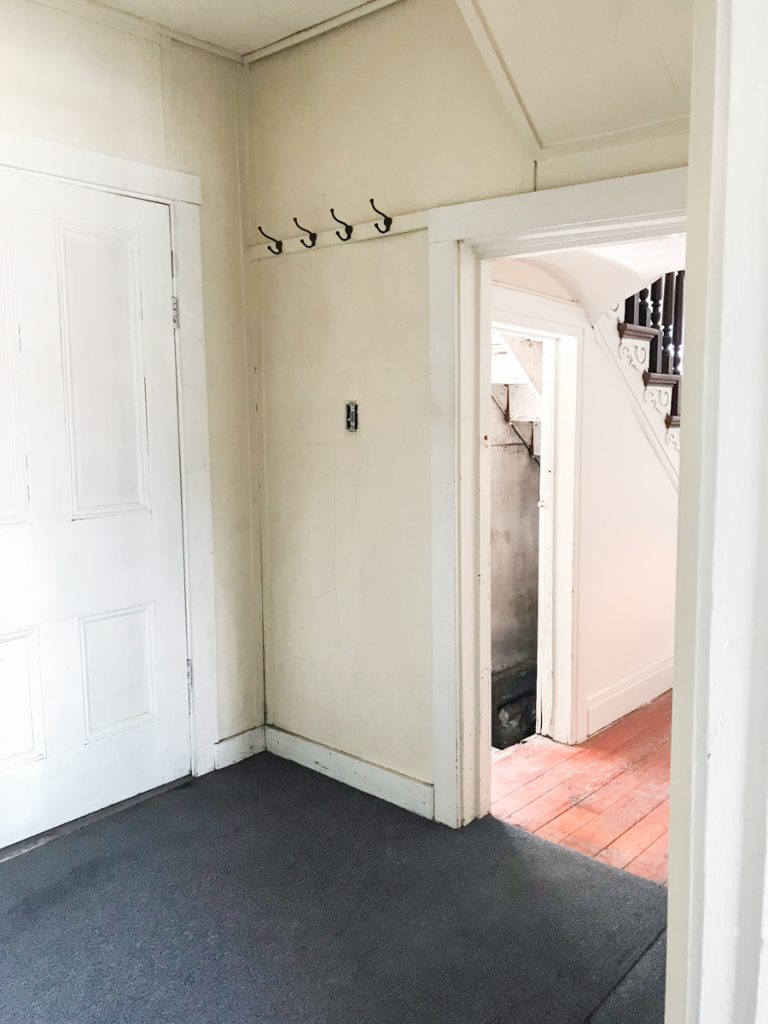
Back Story // Before: 

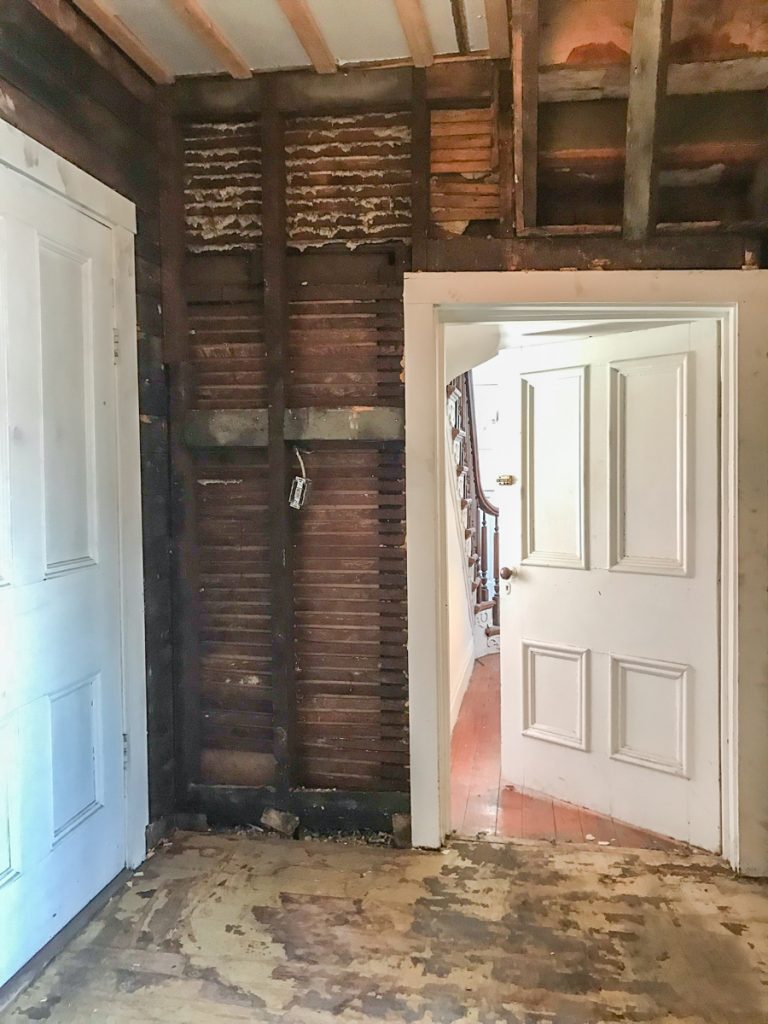
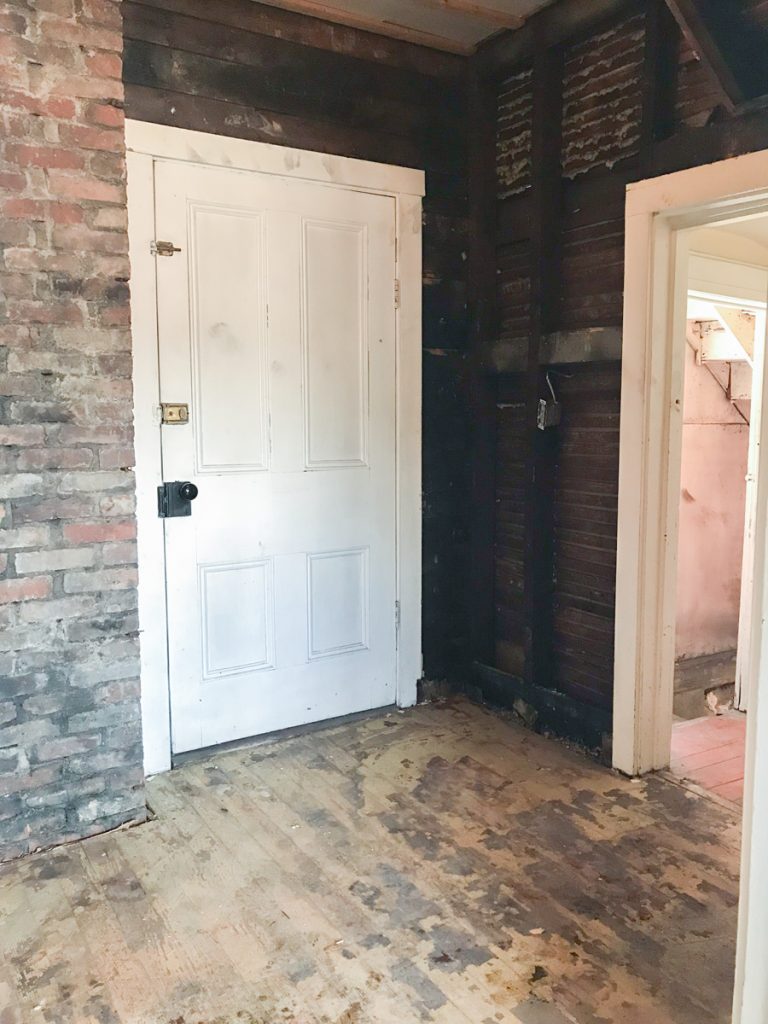
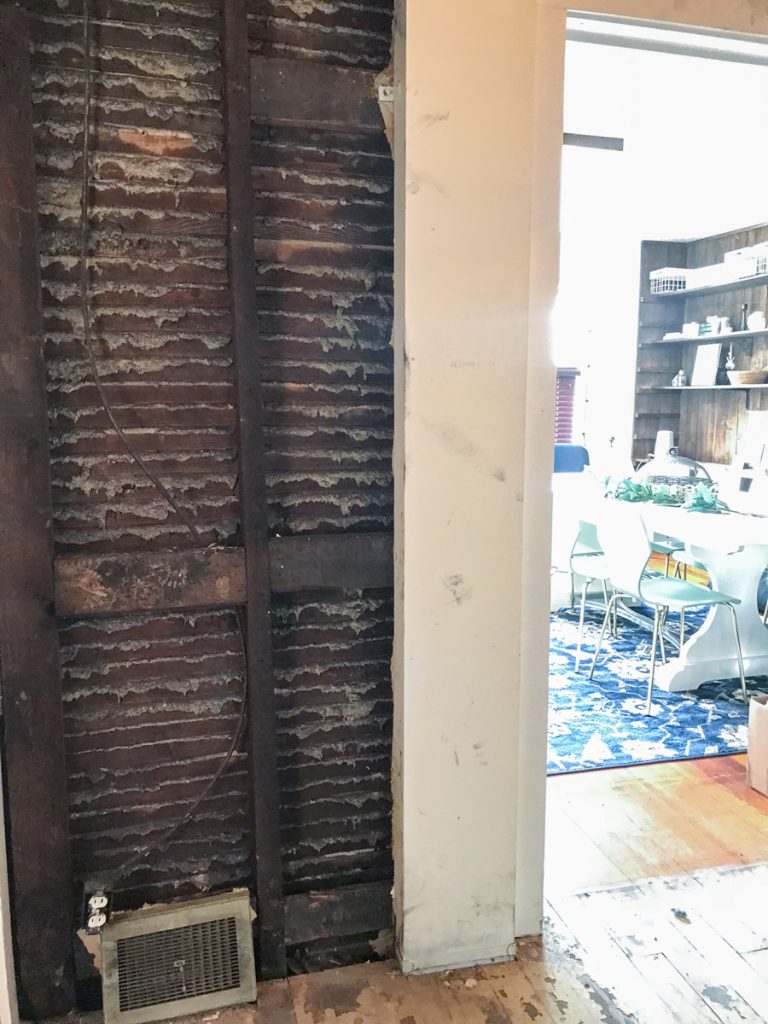
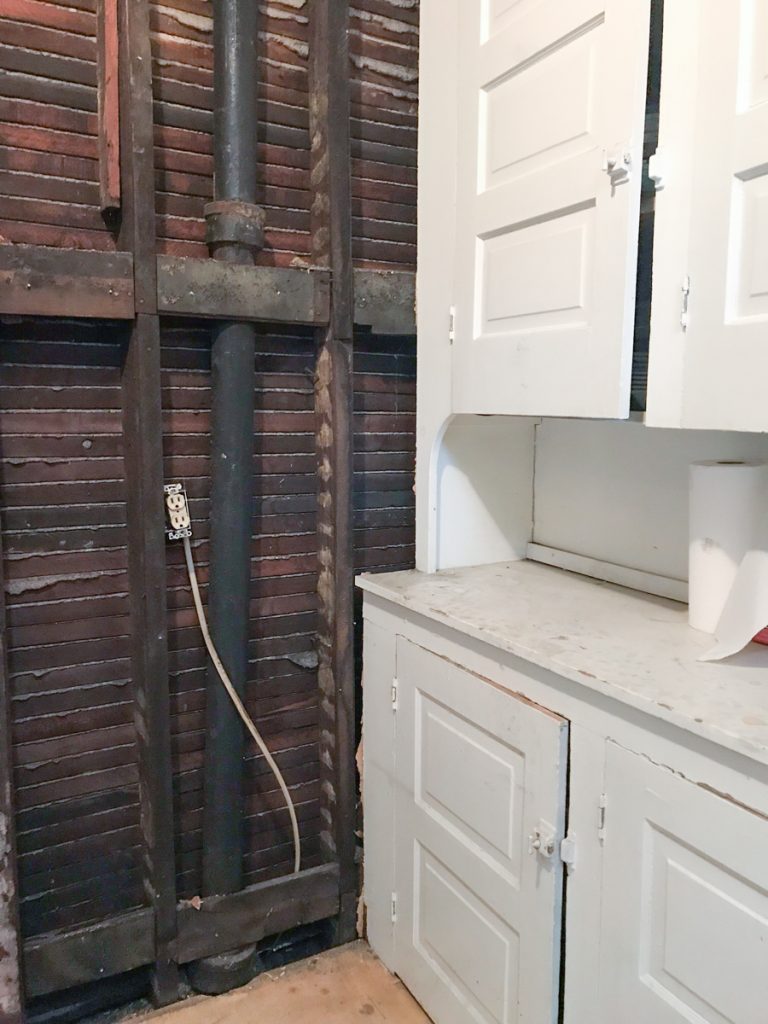
Real quick: the “painted cardboard” walls were removed to reveal very dirty lathe? I’m not sure but it was filthy. Oh and the ceiling tiles are gone as well! We installed some insulation and my sweet Mr. DIY guy put up some fresh new drywall. Side note: It was a very verbally colorful experience since nothing is square in this 100  year old building but thank goodness it’s done! Now Let’s get the the before shots from when it just changed hands from the previous owner to us…

back entryway – everything was so dirty

backroom before

back entryway looking into the main {half} bathroom area

coatroom before

back entryway and what we call the hobbit door (watch your head!) leading to the basement stairs, front door and staircase

back entry before

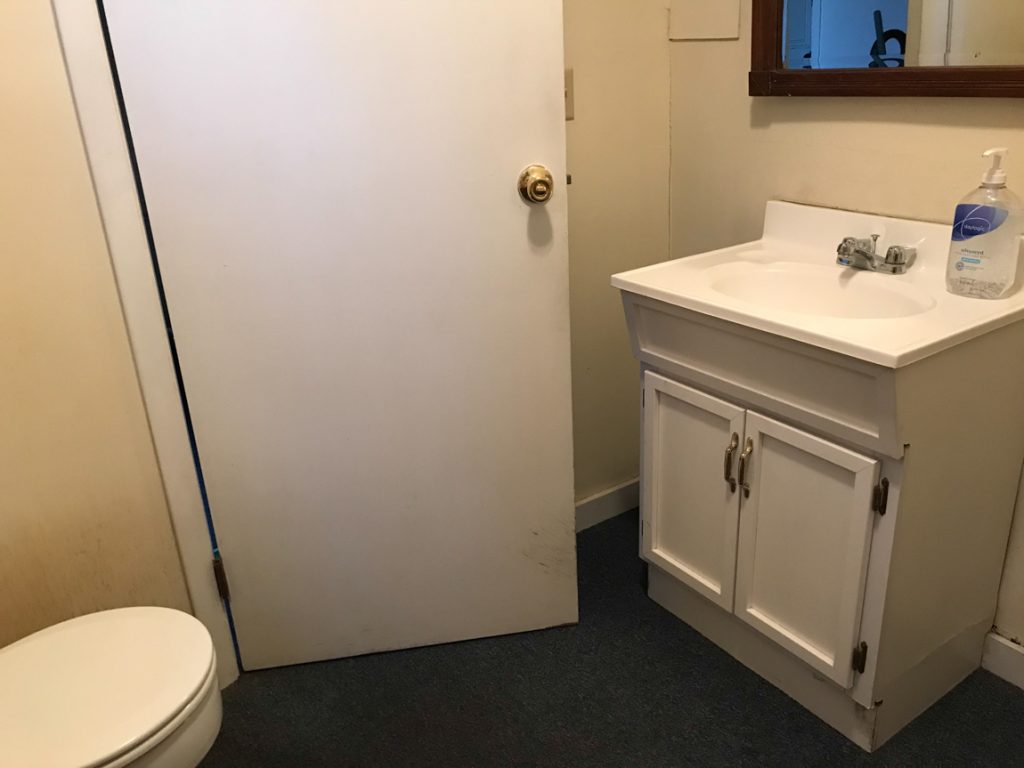
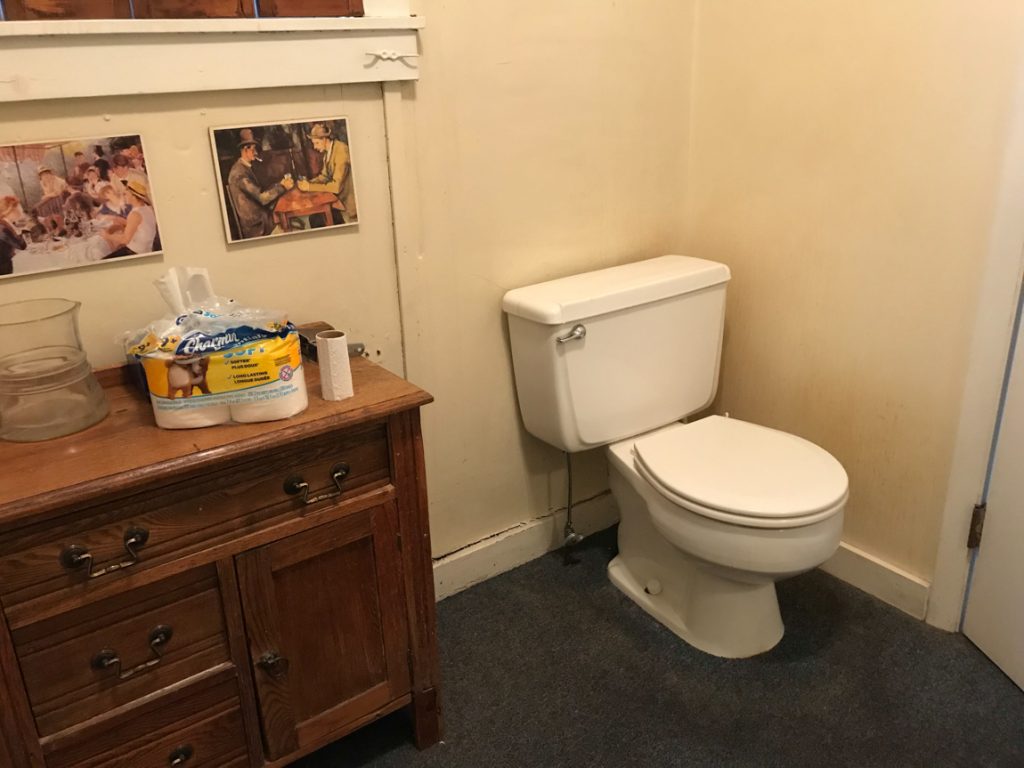
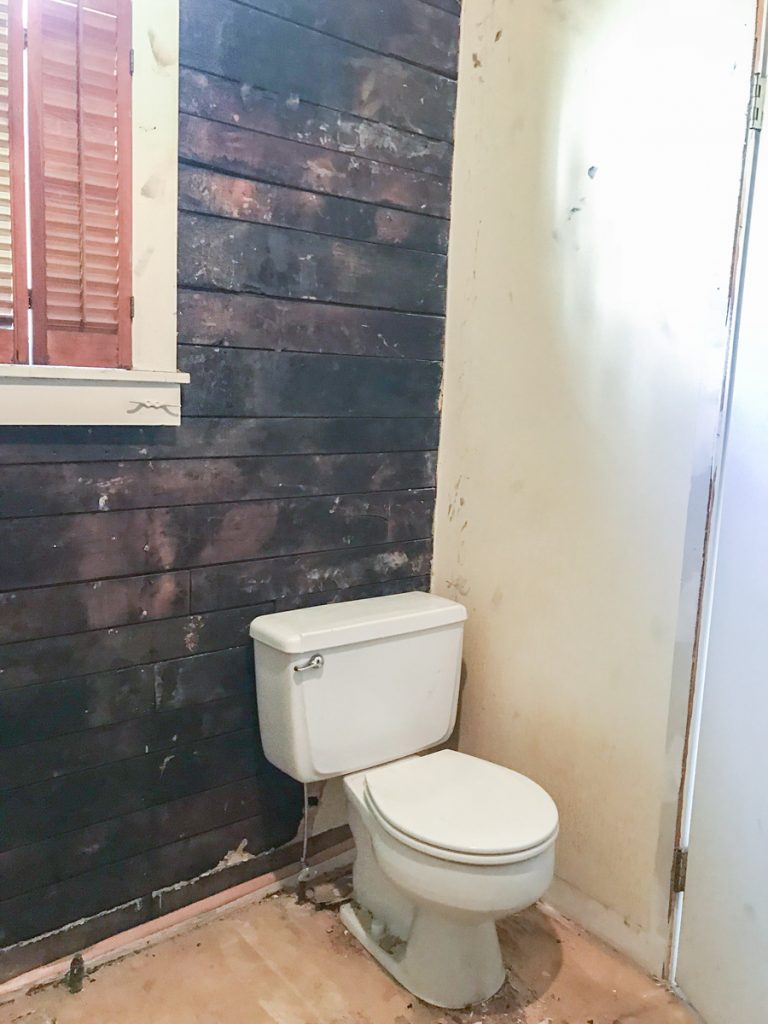
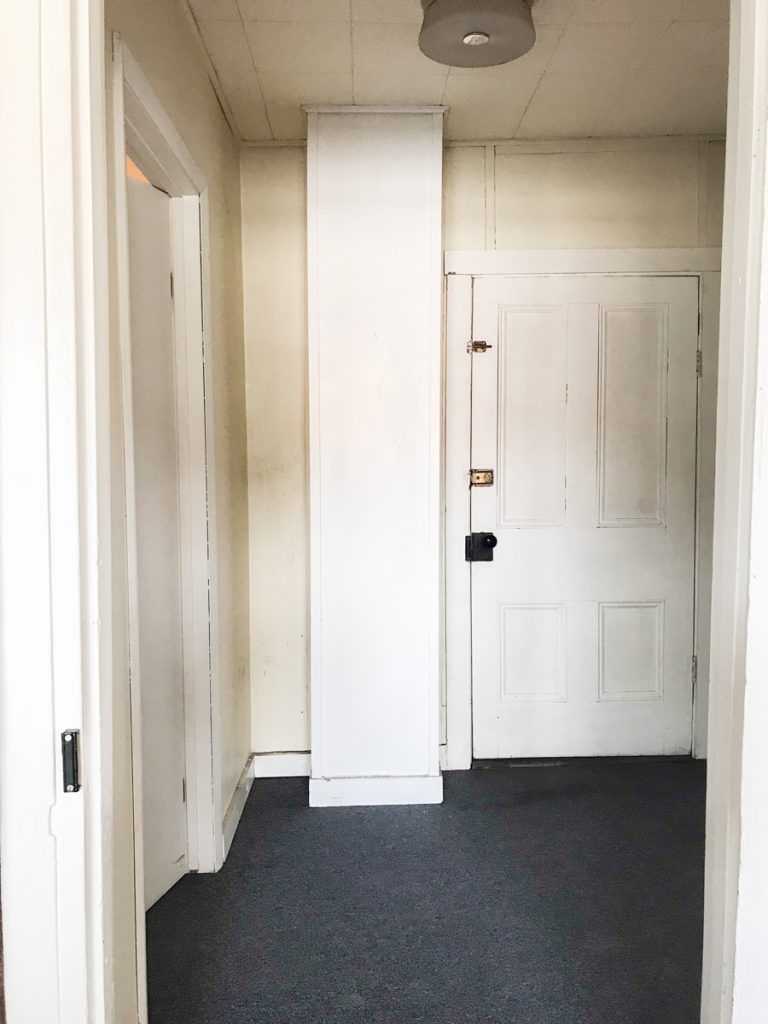
bathroom before

DIY craft studio // workshop - before room makeover @diyshowoff

bathroom before ownership

DIY craft studio // workshop - before room makeover @diyshowoff

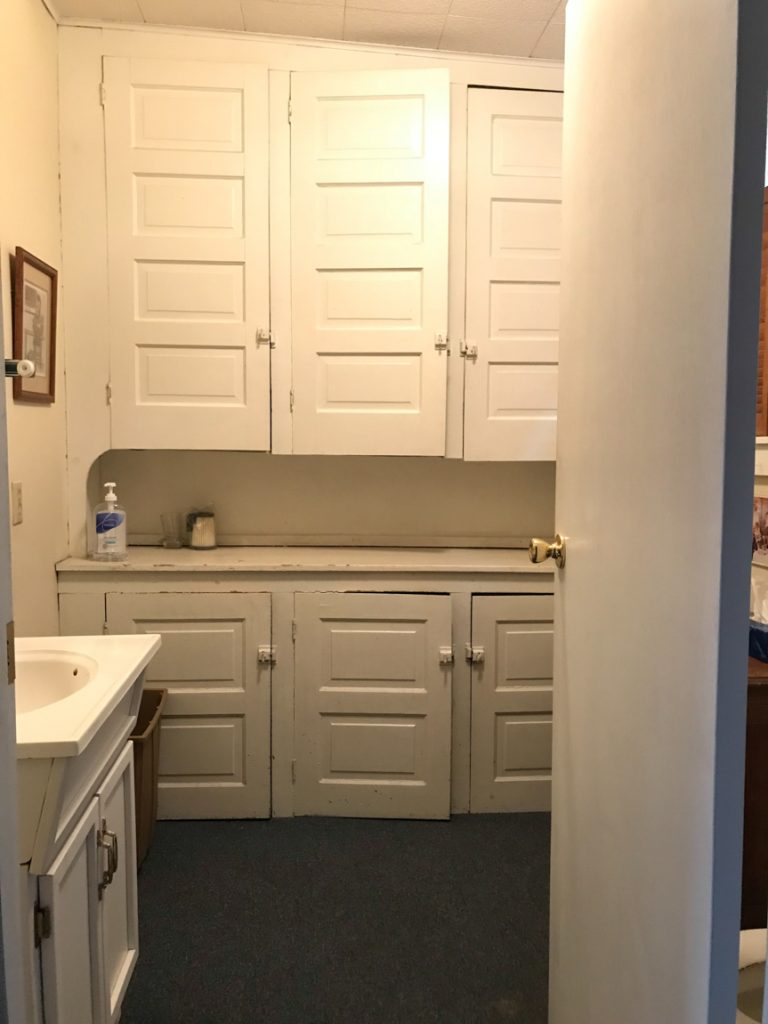
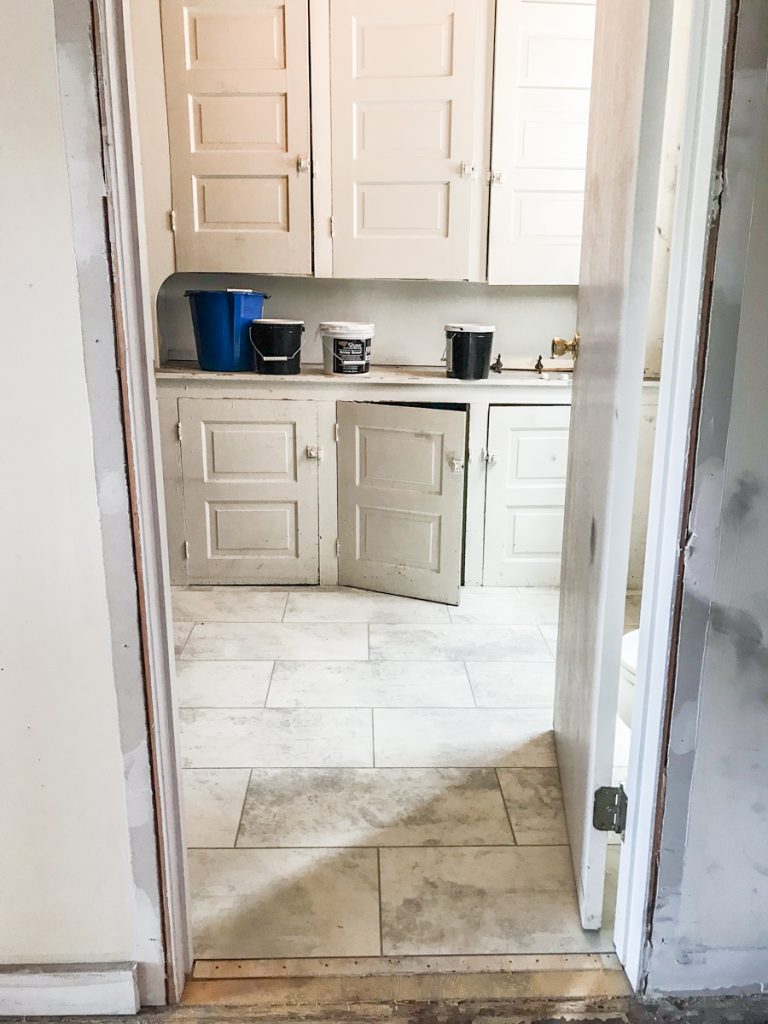
bathroom before – those cabinets were from the original kitchen over 100 years ago!

DIY craft studio // workshop - before room makeover @diyshowoff

Okay, the floor before had blue industrial carpeting (in.a.bathroom!, you guys!). ::gag:: That definitely had to come out!  Good bye flimsy walls. Good bye ceiling tiles. Good bye carpet! Good bye!

Demo day: 

Behind those walls? SO much black sooty dirt. It was everywhere! Fingerprints for months! 

diyshowoff demo day demoday

We kept the original pine floors throughout the rest of the main floor. 

studio renovationlathe before drywall

Product Choice: 

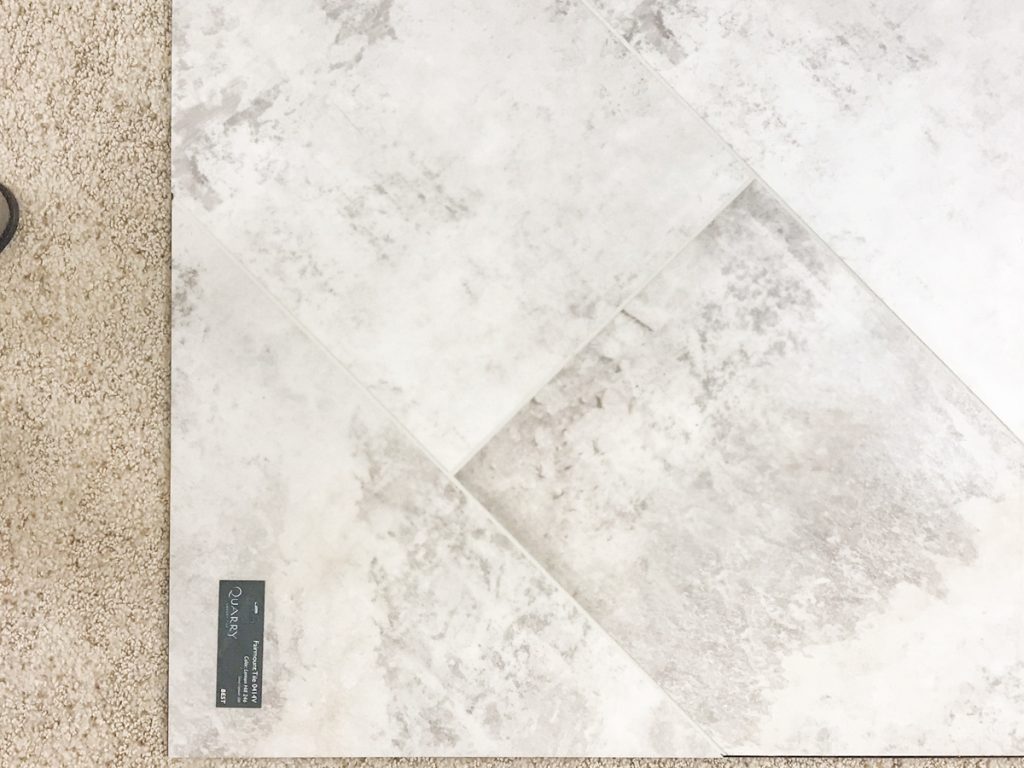
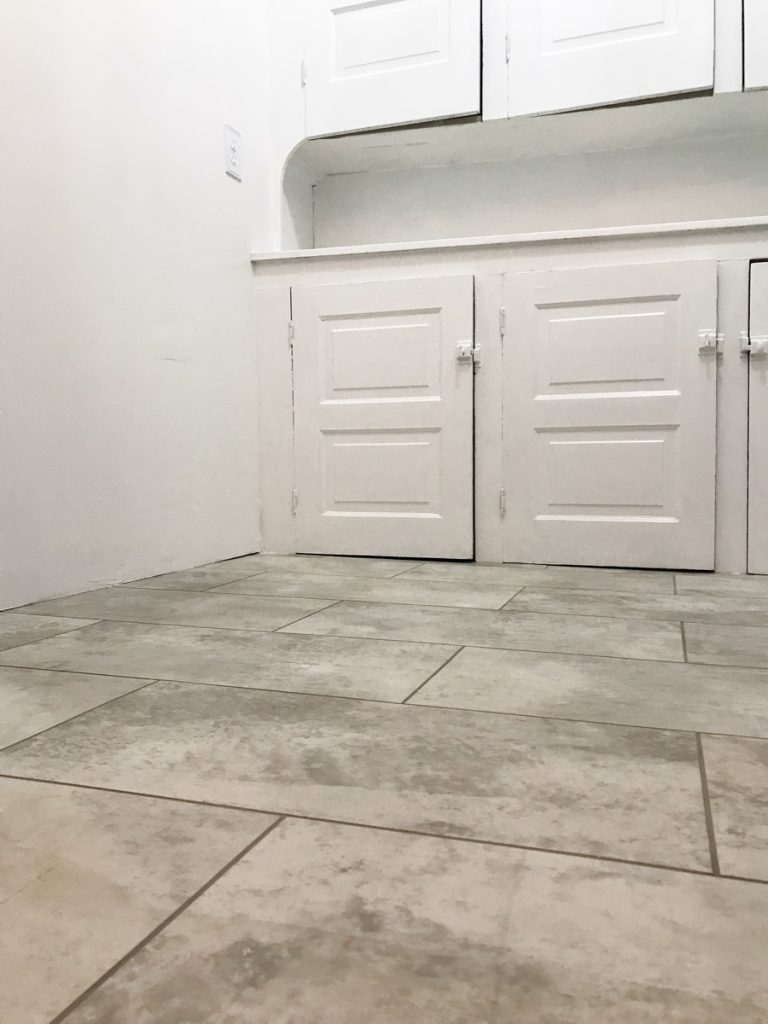
I chose these gorgeous grouted vinyl tiles for their durability, beauty and warmth – a perfect choice for this space. It’s a product from the Shaw Fairmount collection. Design is “Sweetbriar”.  

Fairmount Sweetbriar

fairmount sweetbriar

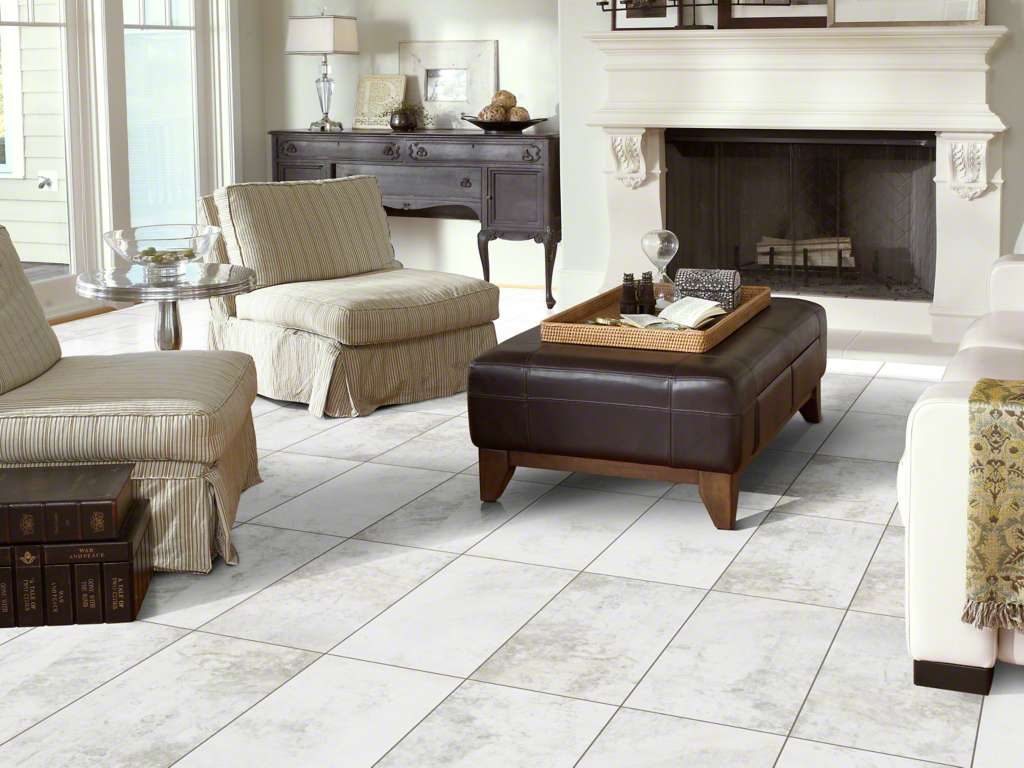
From the Shaw inspiration gallery: 

Shaw Fairmount Sweetbriar

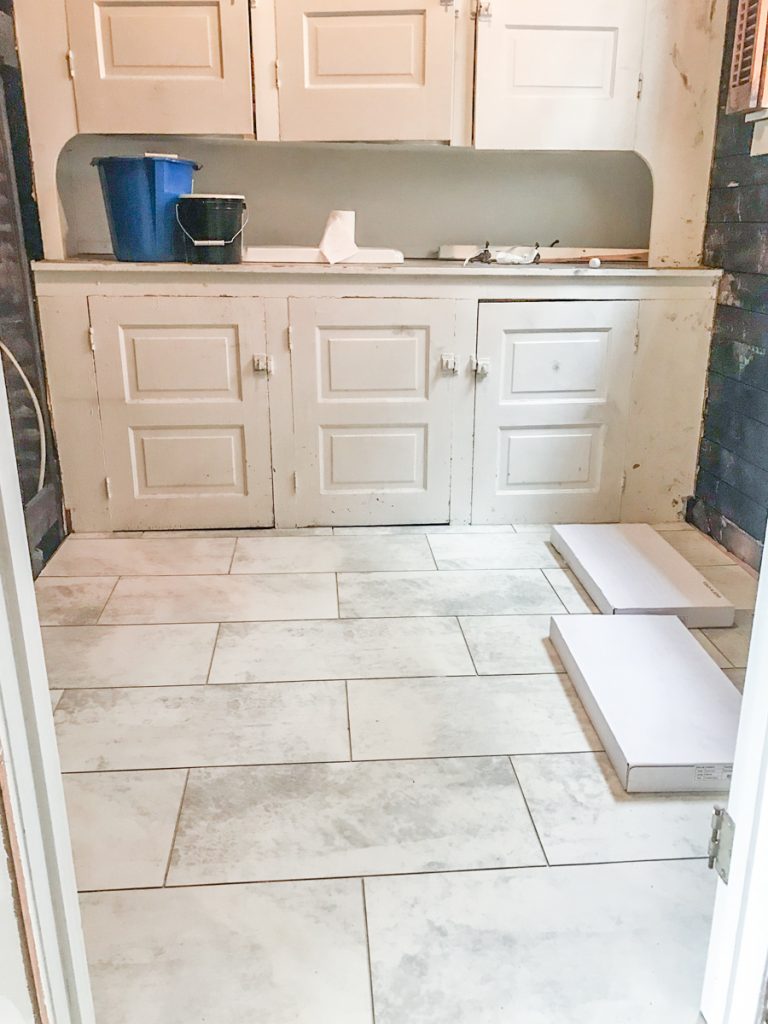
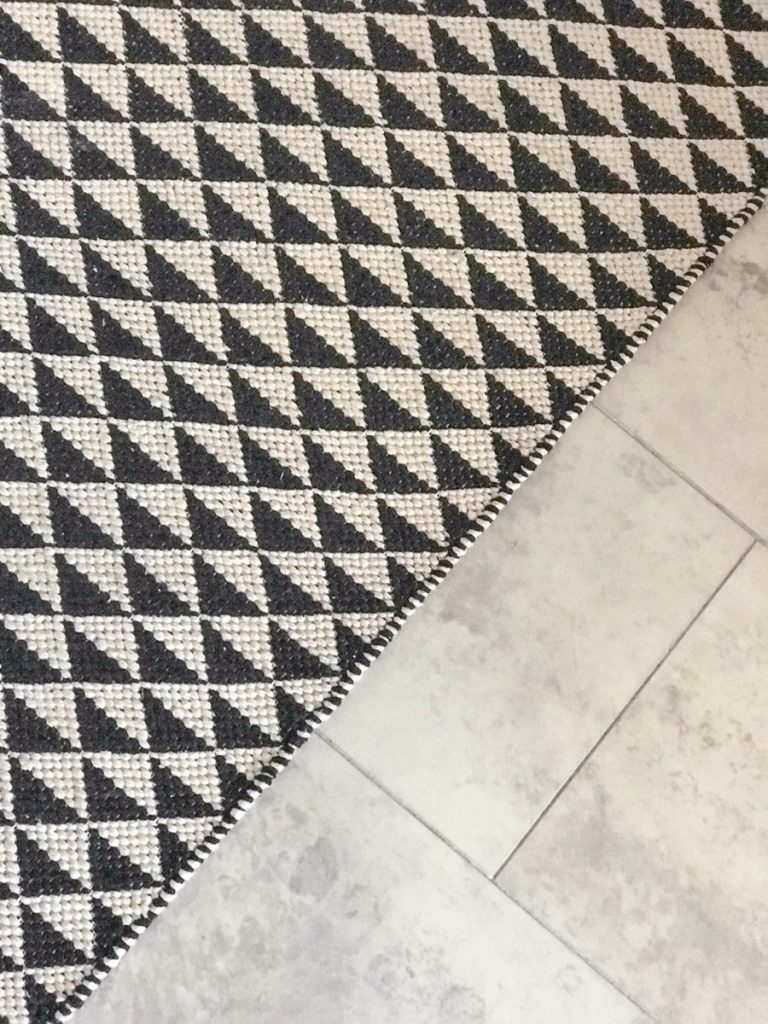
Fairmount is a 12×24 rectangle vinyl tile. I love the color variation and that it’s super resilient! And boy can we ever attest to that! 

Installation: 

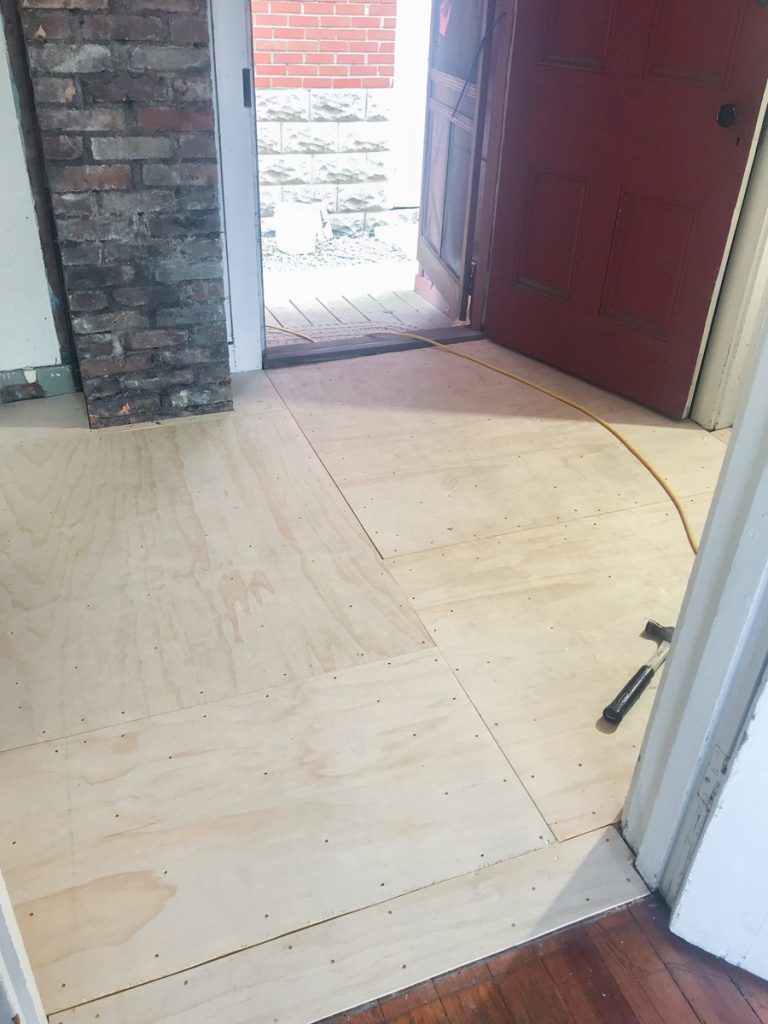
Mike, a subcontractor with A&S Carpet in Allison Park, PA utilized a glue-down installation in a brickwork pattern. The fun part? This product can be installed with or without grout! How cool is that? I went with the grouted installation. 

subfloor bathroom renovation See how the flooring was installed before the walls? When I say this floor is durable, I speak from experience! More on that below. vinyl floor tile installation

Progress // After:

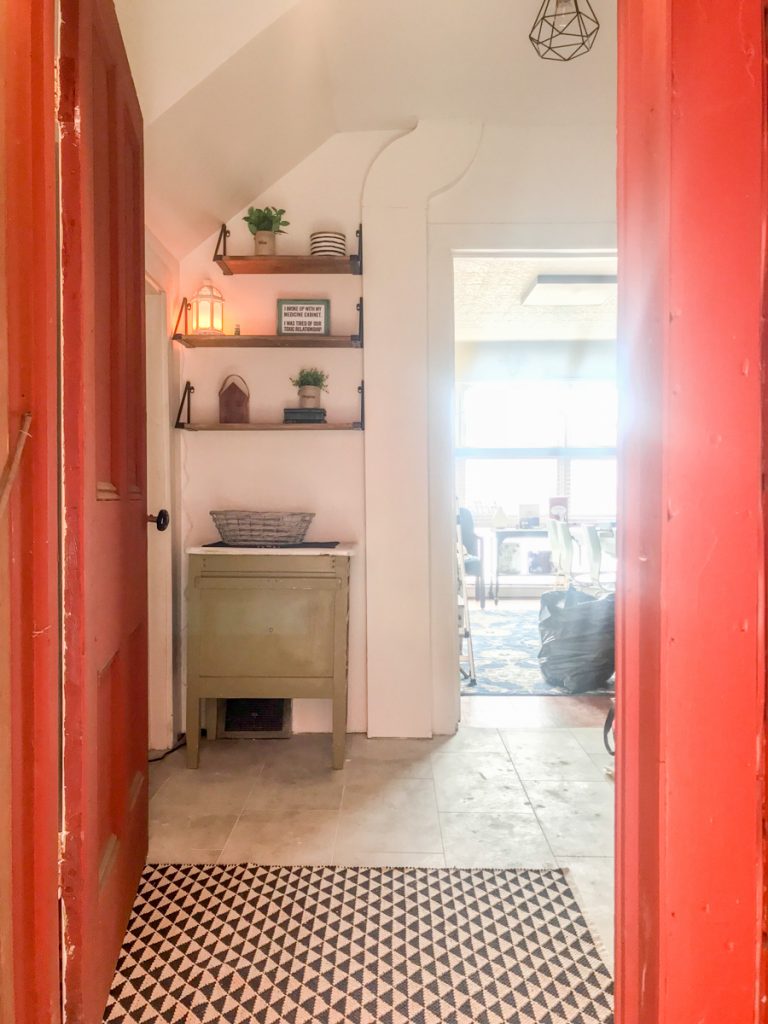
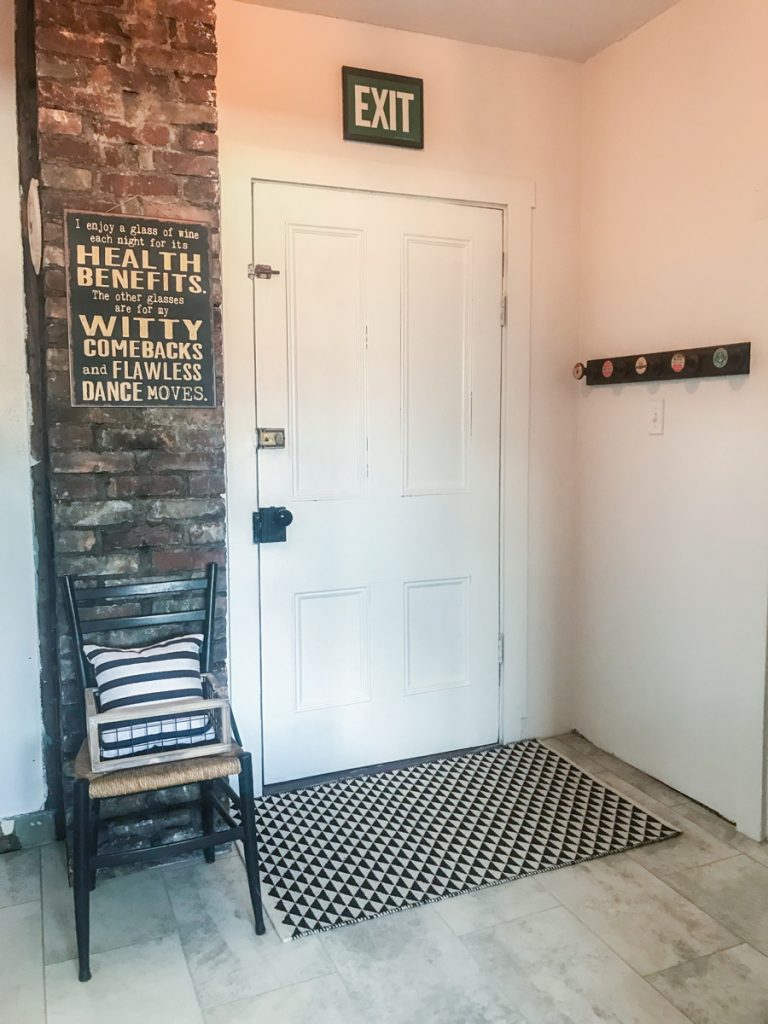
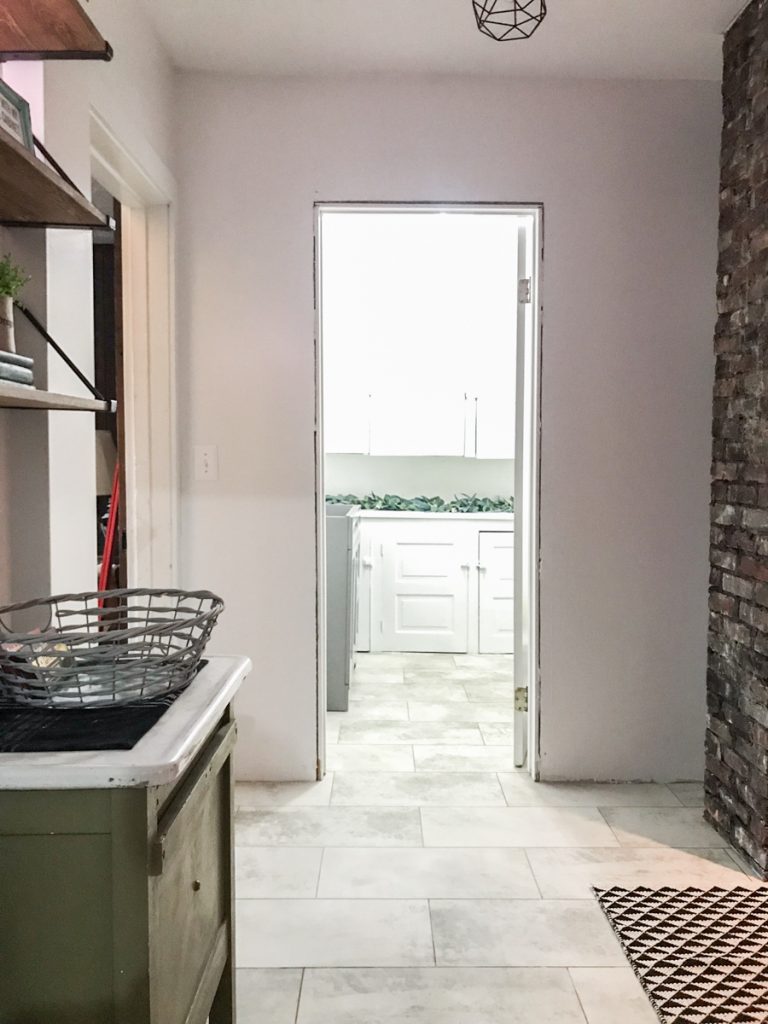
Since it’s not fully completed, I don’t have true reveal photos just yet but here are some sneak peeks. This space is a back entryway which will also house a small beverage station, built in wine storage and a place to hang coats. 

shaw fairmount sweetbriar flooring

view through the back door 

beverage station

back room

fairmount sweetbriar vinyl flooring

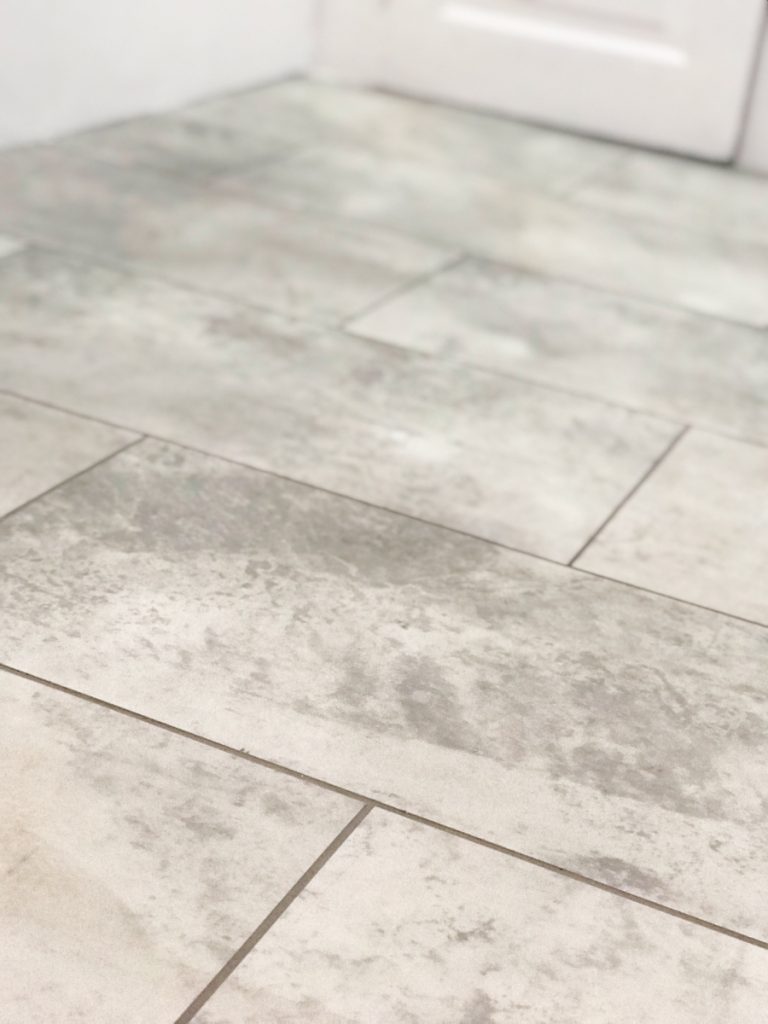
And this is the main floor restroom for the studio/office/workshop. I love the durability and warmth of the vinyl tile, especially since we may be working with glass…a harder surface wouldn’t have been as forgiving or functional in that case so this softer surface was a pretty and wise choice. 
fairmount sweetbriar vinyl tile flooring fairmount sweetbriar flooring

So, what do you think? Isn’t it gorgeous? If you’re choosing a vinyl flooring for it’s warmth, durability and beauty, you’re going to want to add this to your list of options for sure!

fairmount sweetbriar flooring shawstyleboard

Stay tuned for a completed reveal of these two spaces! 

Care and Maintenance:

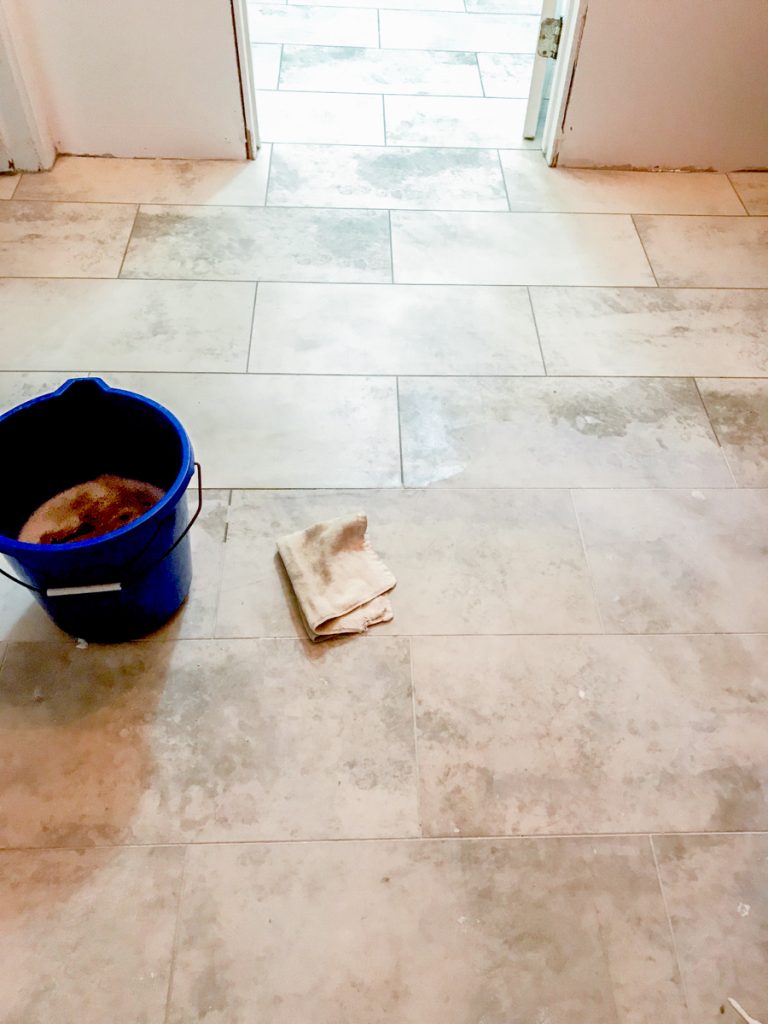
vinyl floor care

How do I know this floor is durable and the right choice? Because of timing, the flooring was installed prior to the walls, so you can just image the mess (drywall mud and dust, caulk, paint, dirty shoes, tools, renovation, etc.). It stood the test of time and workers! All of that grime and dirt, dragging ladders, tools, supplies and drywall, all that comes along with renovating, the behind the scenes not so pretty stuff. And despite my warnings, I didn’t see a drop cloth in sight! 

No worries! When I reached out to Shaw, they provided me with some great vinyl floor cleaning tips: 

Proper care will help protect and maintain the appearance and performance of your Shaw resilient floor!. A care program consists of key areas: 1) Preventive maintenance; 2) routine maintenance; and 3) spot and spill removal.

1) Preventative Maintenance

Always protect floors when moving heavy objects to prevent permanent scratches and tears.
Walk-off mats should be used at all externally facing entrances to absorb soil and moisture.

2) Routine Maintenance:

Daily removal of dirt and dust is important to prevent particles from abrading the surface of resilient floors.

Sweeping, dust mopping and vacuuming are recommendations to remove soil particles that can result in scratches and worn appearances. IMPORTANT: Do not use vacuums with rotating beater bars on hard surfaces.

Periodic wet cleaning will be necessary to help maintain the floors appearance.

3) Spot and Spill Removal

Absorb wet spills as quickly as possible by white paper or cloth towels.
Recommended by Shaw: Use Shaw’s R2X® Hard Surface cleaning products or products formulated for vinyl floor cleaning.

Remember: The most effective part of any floor maintenance program is the simplest: sweep, dust mop, or vacuum your Shaw resilient flooring daily, or more frequently if needed.

Next up on the renovation: 

Baseboards and door trim, a fun door DIY to dress up the cheap hollow bathroom door, light fixtures, sealing brick, a wine cubby and beverage station, decorating and then the reveal! Then we’ll be back in business!

The building has so much historical charm. It’s about one block from our town’s Main Street. The bus stop is literally steps away. There are breweries, the YMCA, shops, restaurants, salons, florists, candy/coffee shop, holiday parades and festivals within walking distance. So fun! If renovation from blah to ahhhhh is your thing, stay tuned!

So subscribe and be reminded of updates as the renovations progress! I’ll share before and after photos, projects underway and updates, plans and design boards, sources and links as they relate as well as fun events going on in and around the downtown area. I’ll be using a specific hashtag on social media to keep things all neat and tidy and organized.

#helloredreno

I welcome your thoughts and ideas! And as always, thanks for your encouragement and support and for sharing in my joy and vision! Watch for #helloredreno!


Project Diary #9: Carpeted Stairs

Featured

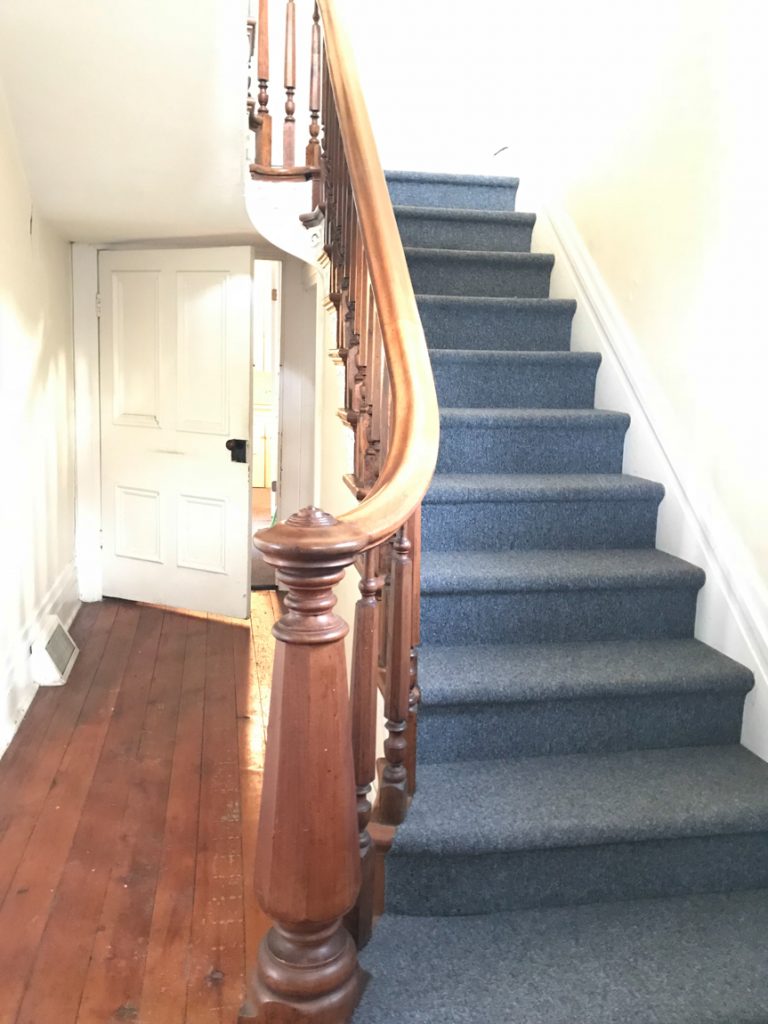
The #helloredreno series continues! The stairs at the studio needed some attention. We started with carpeted stairs and I knew that I wanted to go in the same direction. Choosing carpeting for the studio space from the entrance of the commercial area to the residual space upstairs makes a lot of sense.

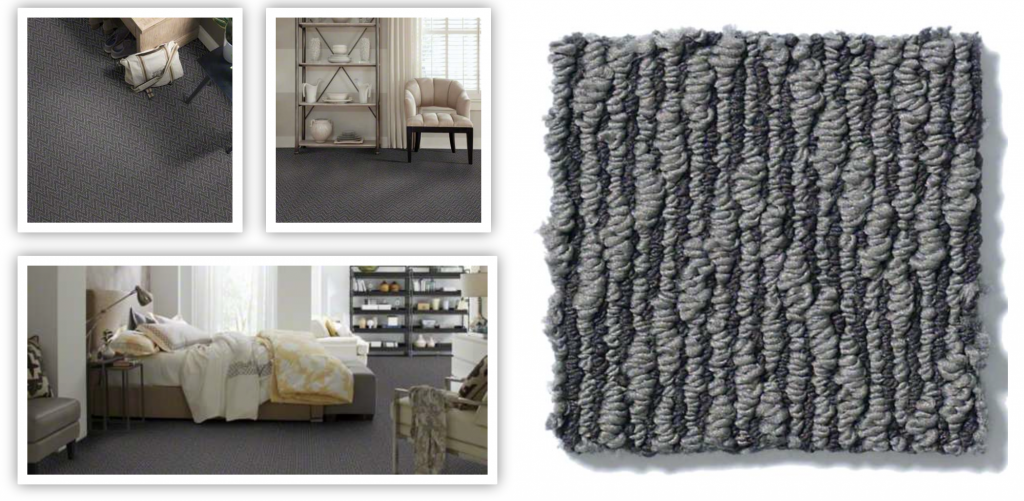
My choice: Shaw Carpet Final Piece Coatbridge 

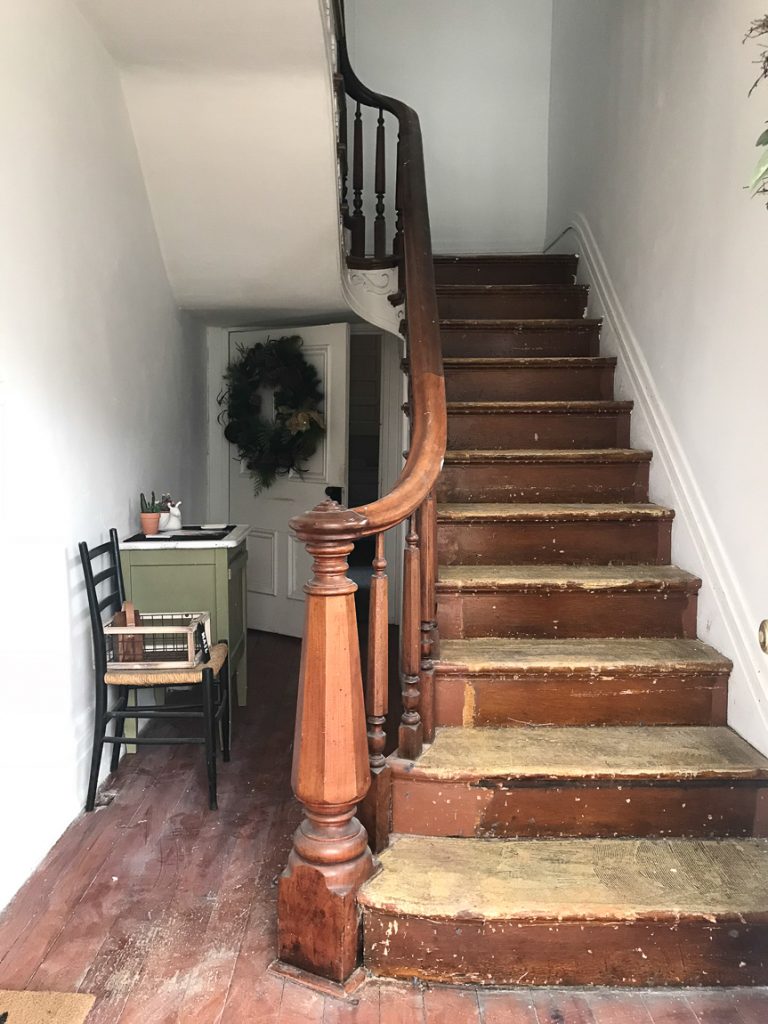
The before: 

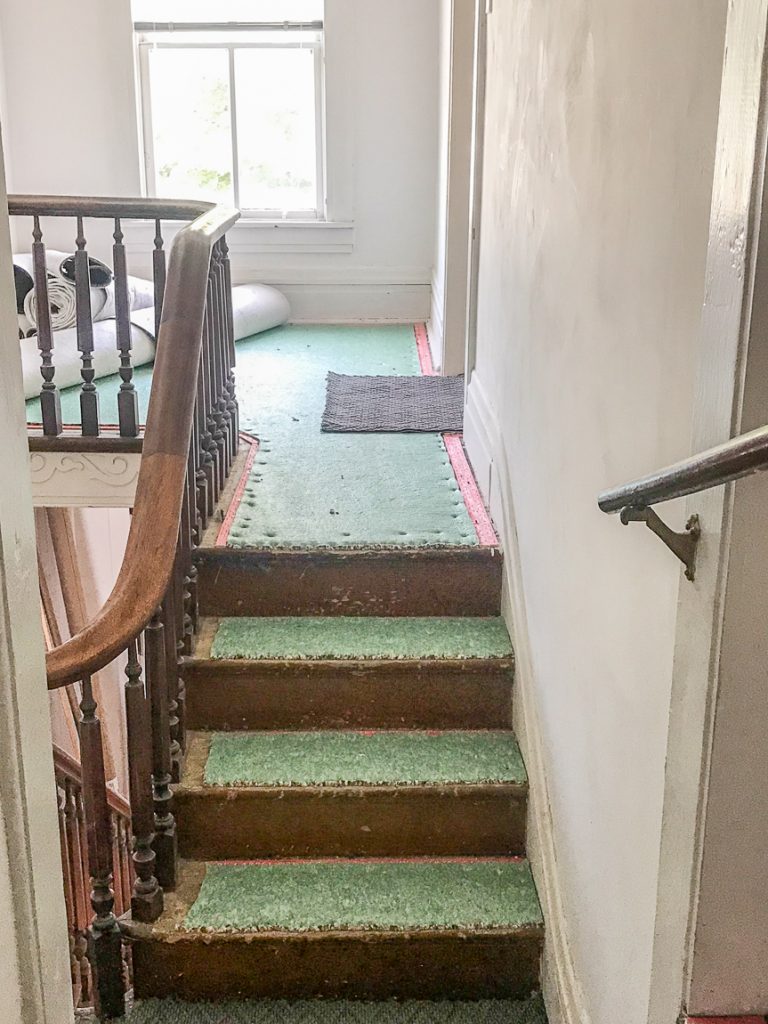
A commercial grade glued down blue with no padding.

DIY craft studio // workshop - before room makeover @diyshowoff DIY craft studio // workshop - before room makeover @diyshowoff

At our house, our stairs are noisy and the painted risers show a lot of scuffs so while I don’t anticipate daily use of the stairs at the studio, I wanted to soften the vibe, cut down on the noise, and add warmth to the space. I also wanted something more neutral than the original blue as well as something that contributed to adding a beautiful statement to the area. 

DIY craft studio // workshop - before room makeover @diyshowoff

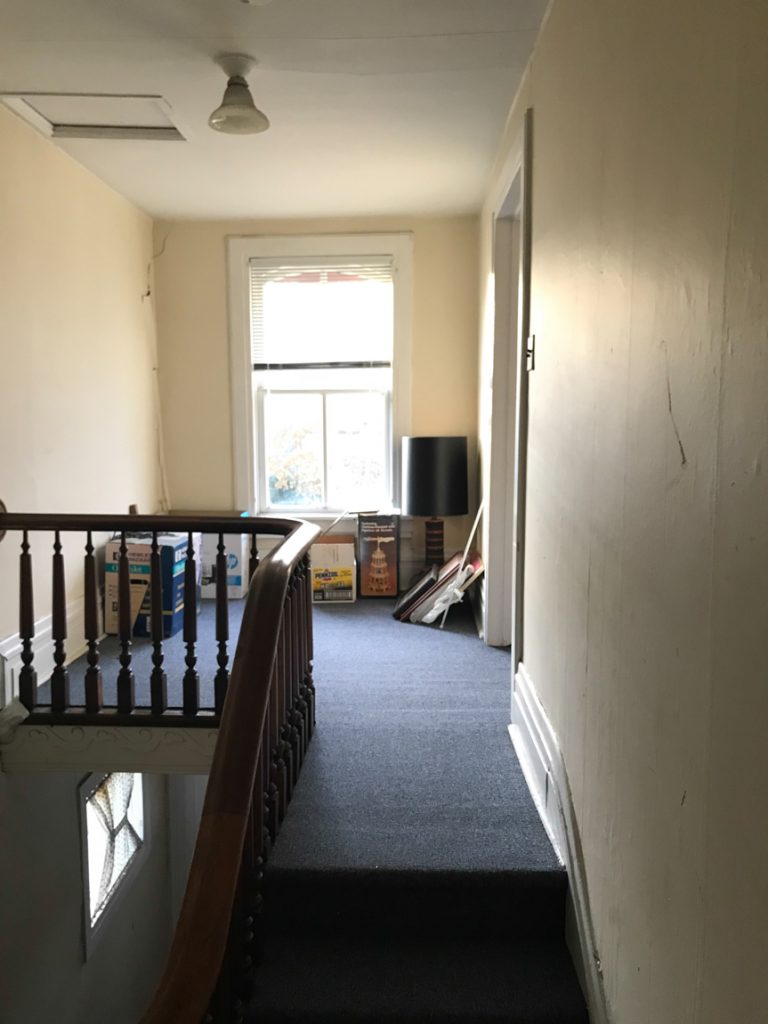
The landing will be the entrance to the future studio apartment. So I want something warm and inviting.

DIY craft studio // workshop - before room makeover @diyshowoff

My choice: 

As a member of the Shaw Styleboard, I had the opportunity to choose from their carpet collection. I wanted something neutral but with texture, something durable but pretty. Read the description: Warm up rooms and reduce energy bills with the natural insulation and comfort of carpet. With many styles to choose from and the best stain-fighting technology in the industry, Shaw carpet brings color, texture and value to your floors. Create distinctively stylish looks when you play with texture, loop, pattern and twist options.

Final Piece Coatbridge Shaw Carpet

Shaw Carpet Final Piece Coatbridge 

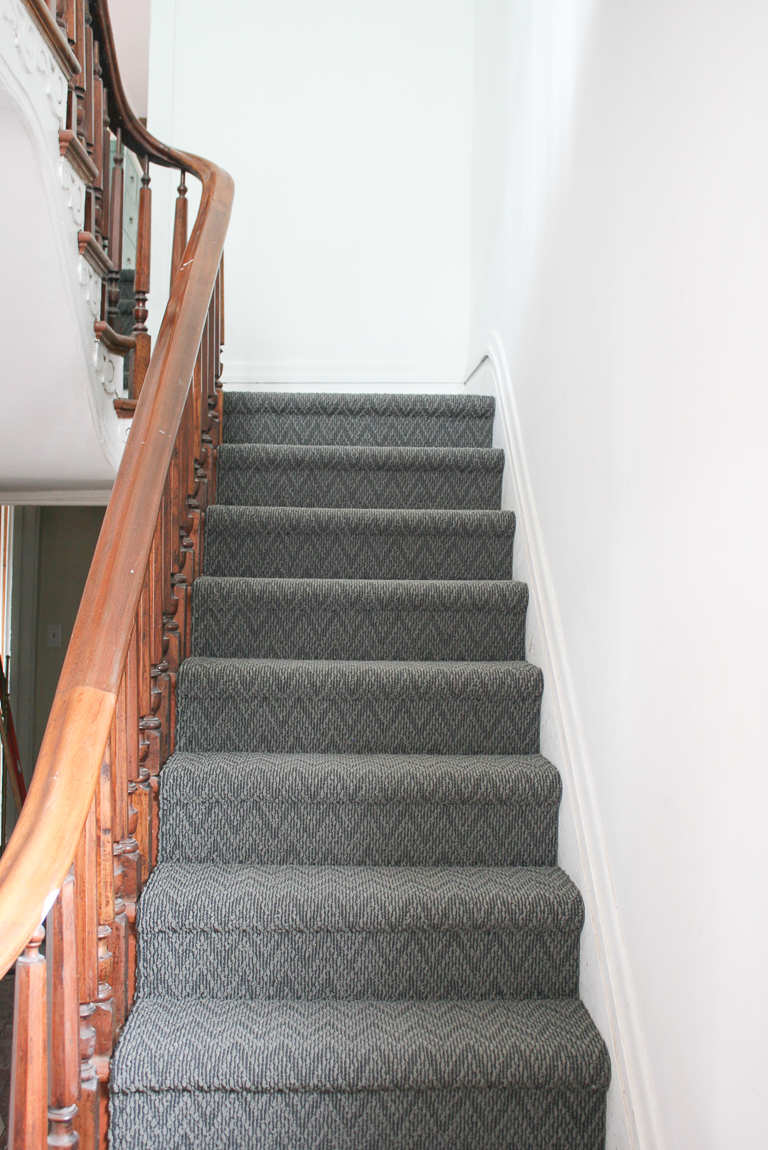
A perfect fit! I chose the color “coatbridge” from the “Final Piece” collection. It feels timeless and classic. I like to switch things up when it comes to design and decor so this option gives me the freedom to go any direction when it comes to decorating. It’s the perfect base palette and texture for any style. 

Installation: 

The same installer, Mike, who did worked with me on the Floorté vinyl floor planks in our home installed the carpeting. We had removed the former blue carpets to prepare for placing the new carpet.

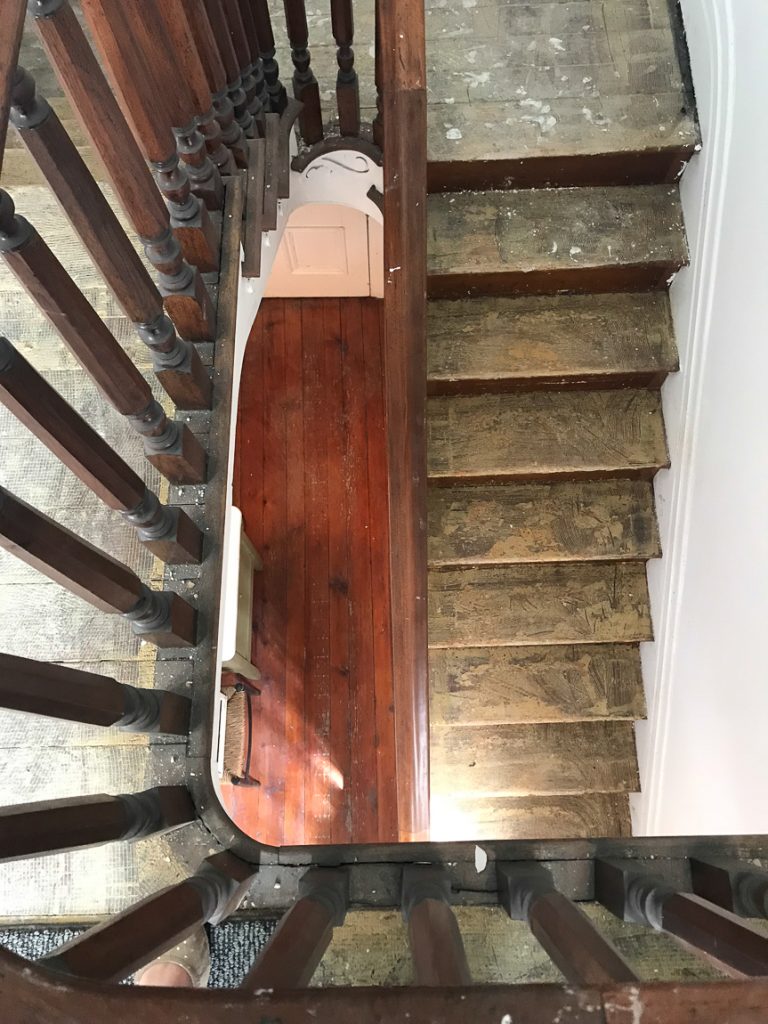
The stairs before:

staircase before carpeting before and after carpeting stairs

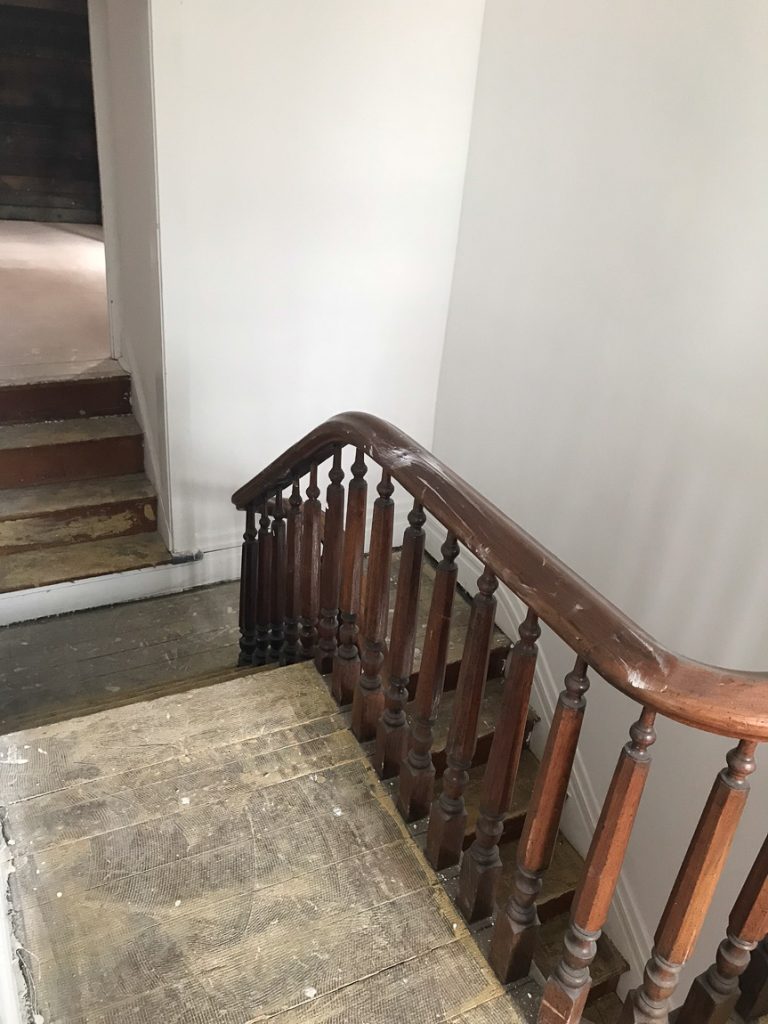
The landing at the top of the stairs before:

stairs before

He set to work with the underlayment and prep work. Who knew that carpet padding is just as important as the carpet itself? I kind of assumed it wasn’t something really necessary but luscious, soft carpet padding minimizes noise, maximizes warmth and extends the life of your floor! I had no idea! 

shaw carpet padding

After: 

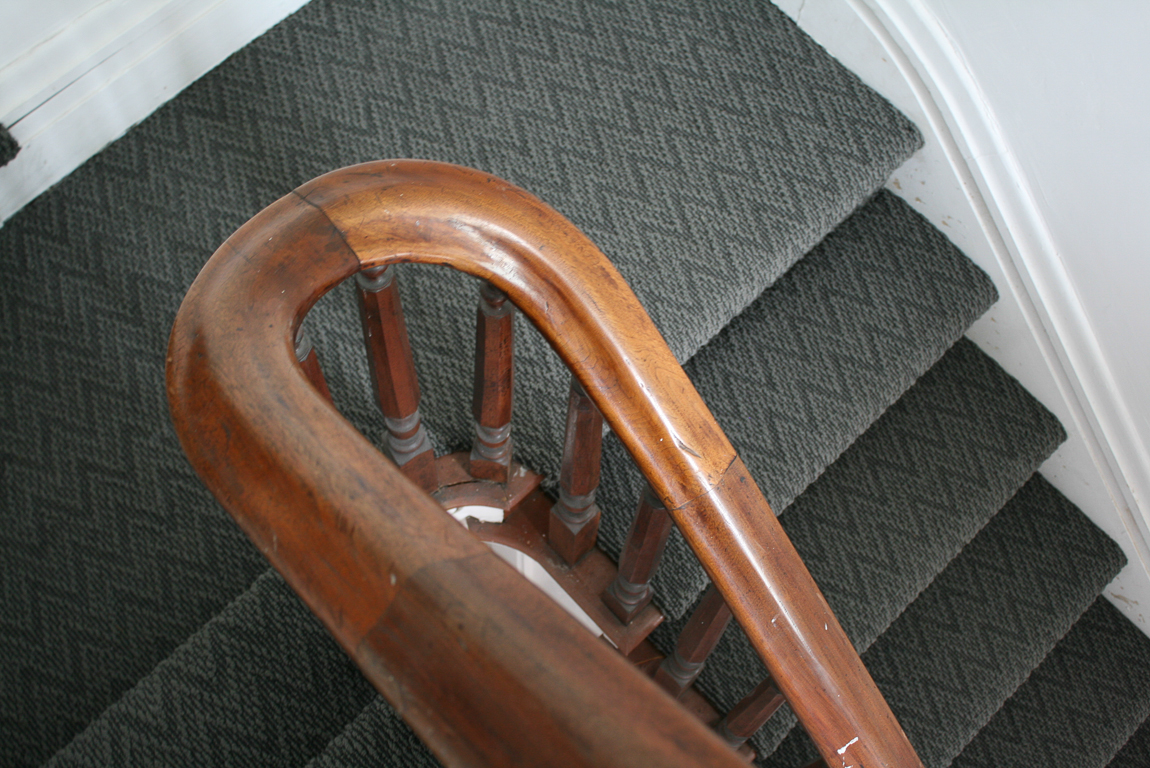
You guys! IT IS GORGEOUS! I am in love with my choice! The texture and pattern add interest to the space, without an overpowering or super trendy style. It’s the perfect base for whatever I choose to do with wall paint and decorative accessories. It’ll work when I change my mind and swap out decor. It’ll work with seasonal decorating colors. It’s warm and inviting.

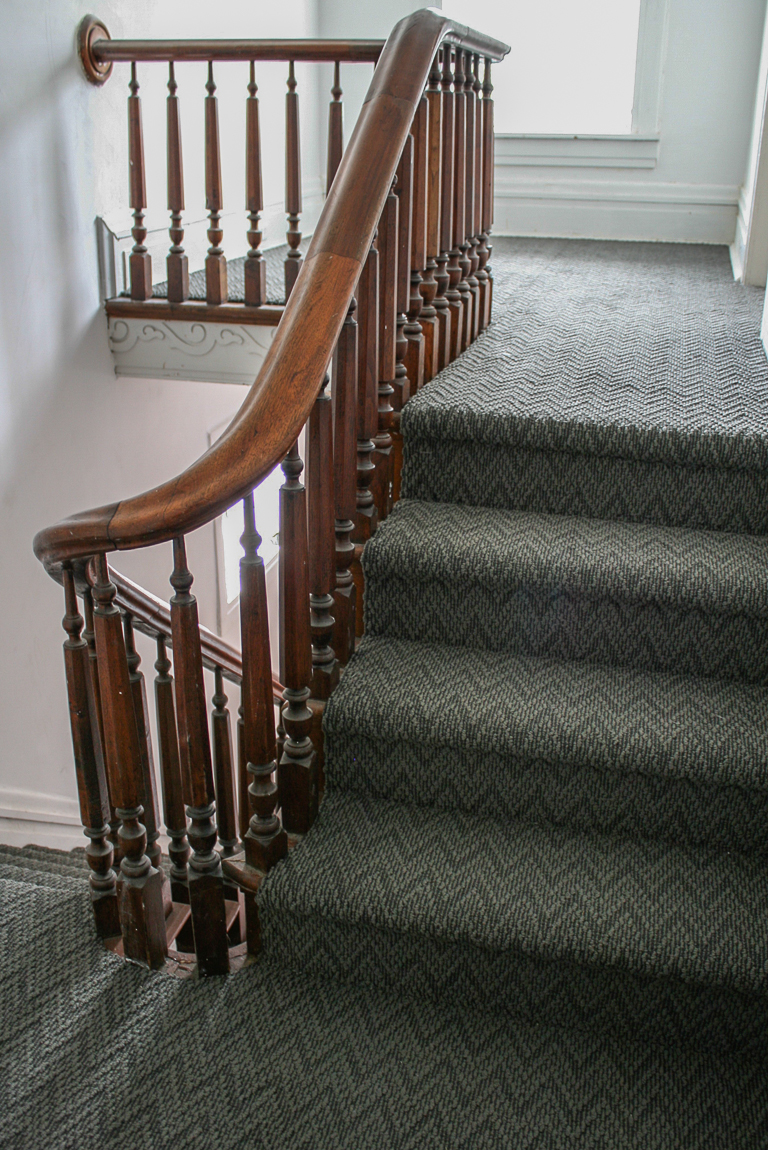
The stairs: 

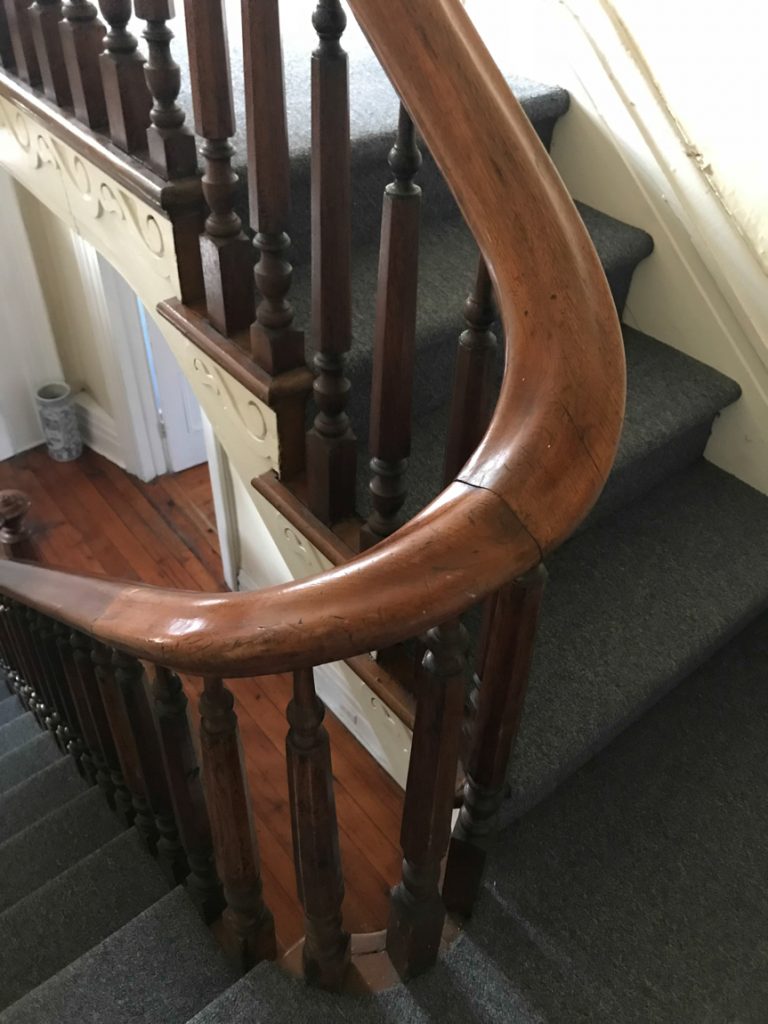
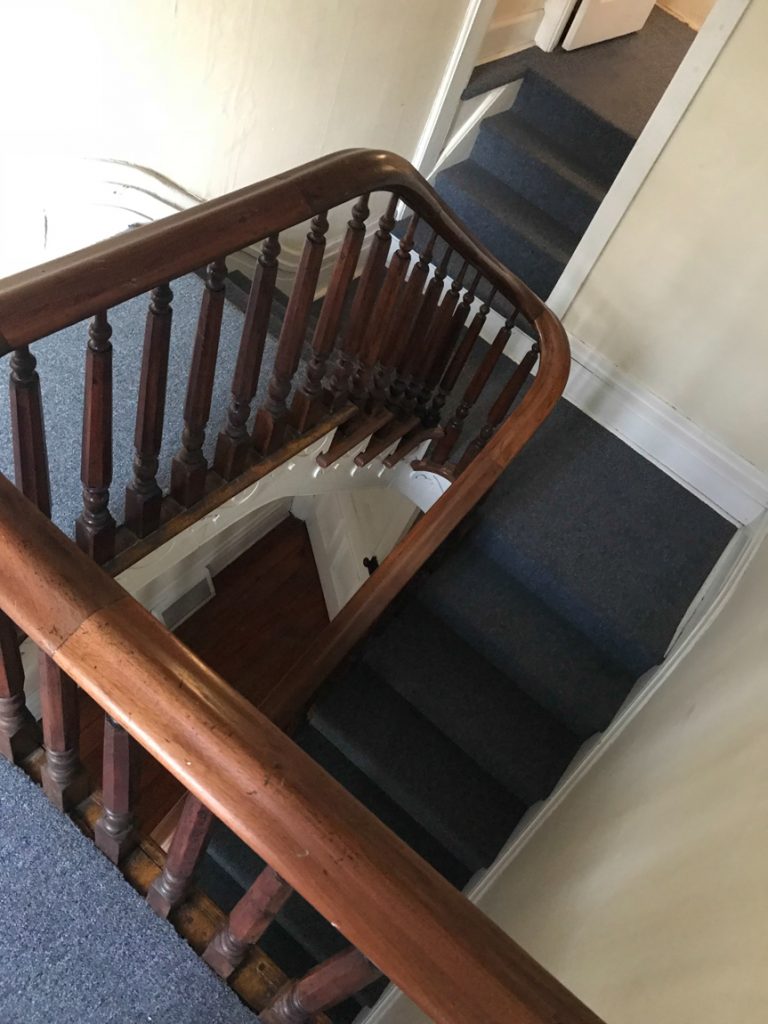
Shaw Carpets Final Piece Coatbridge Shaw Carpets Final Piece Coatbridge stairs

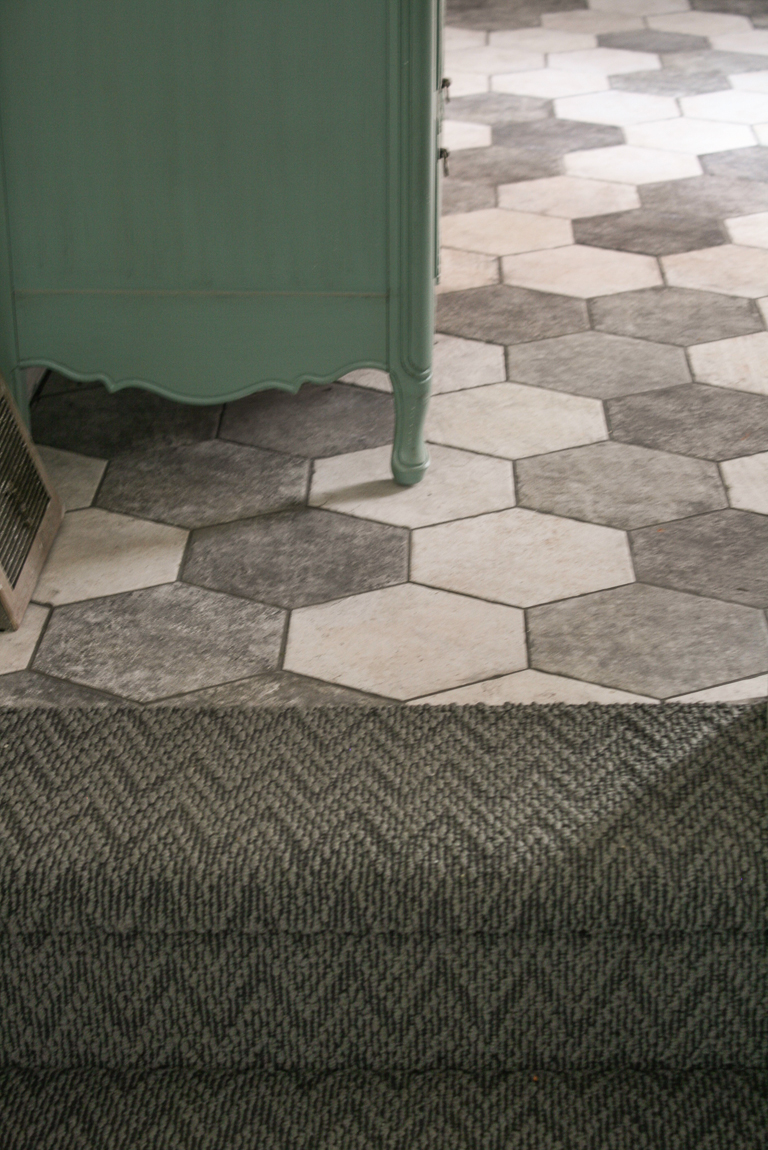
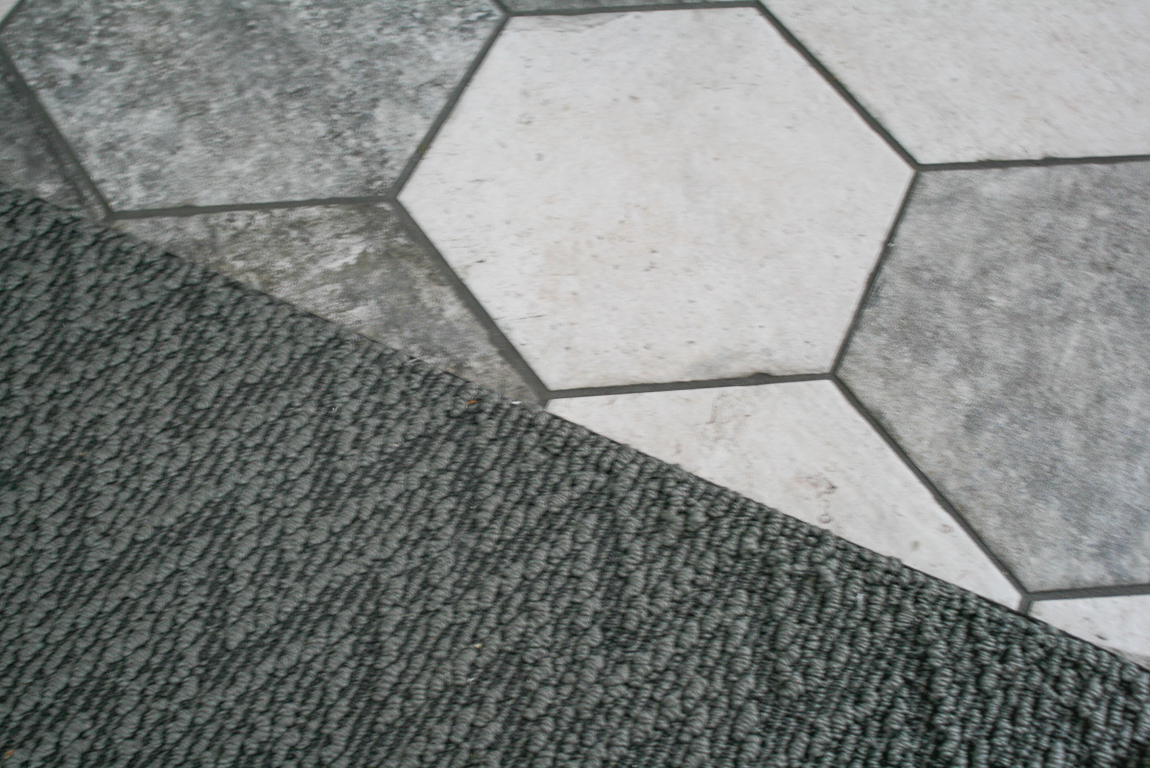
Shaw Final Piece Coatbridge carpet meets SanFrancisco hexagon tile

carpet tile transitionShaw Final Piece Coatbridge carpet San Francisco

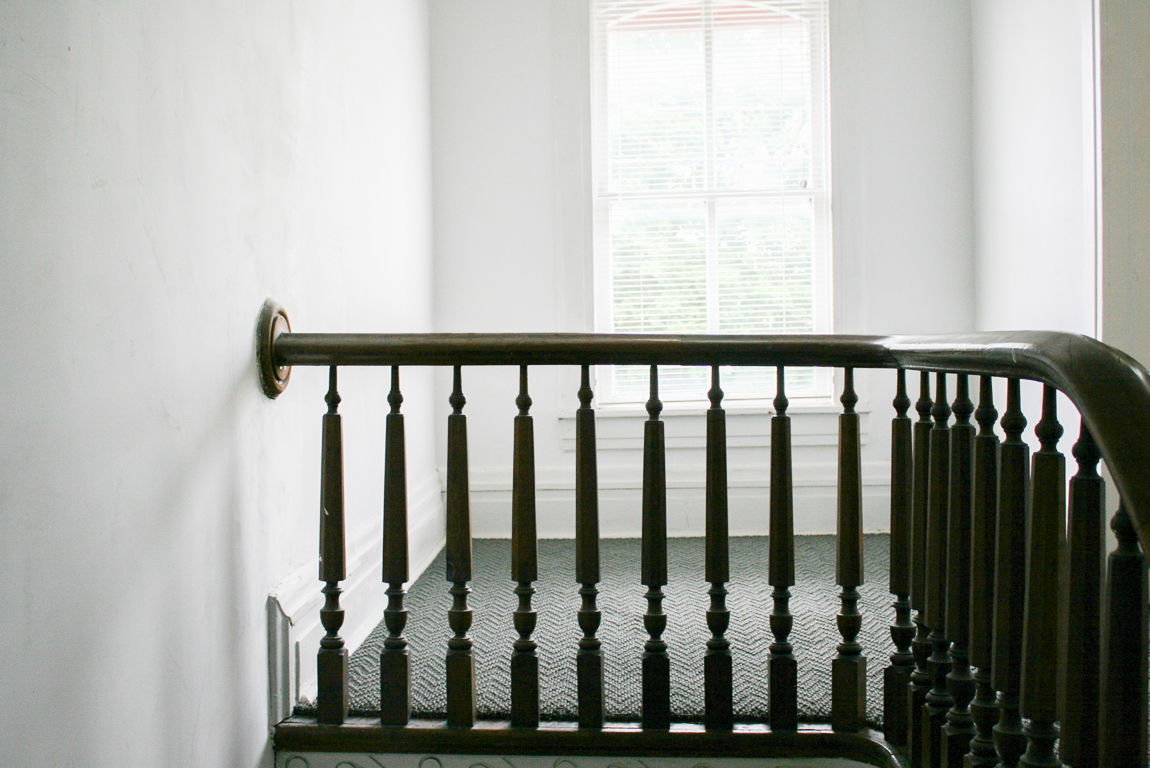
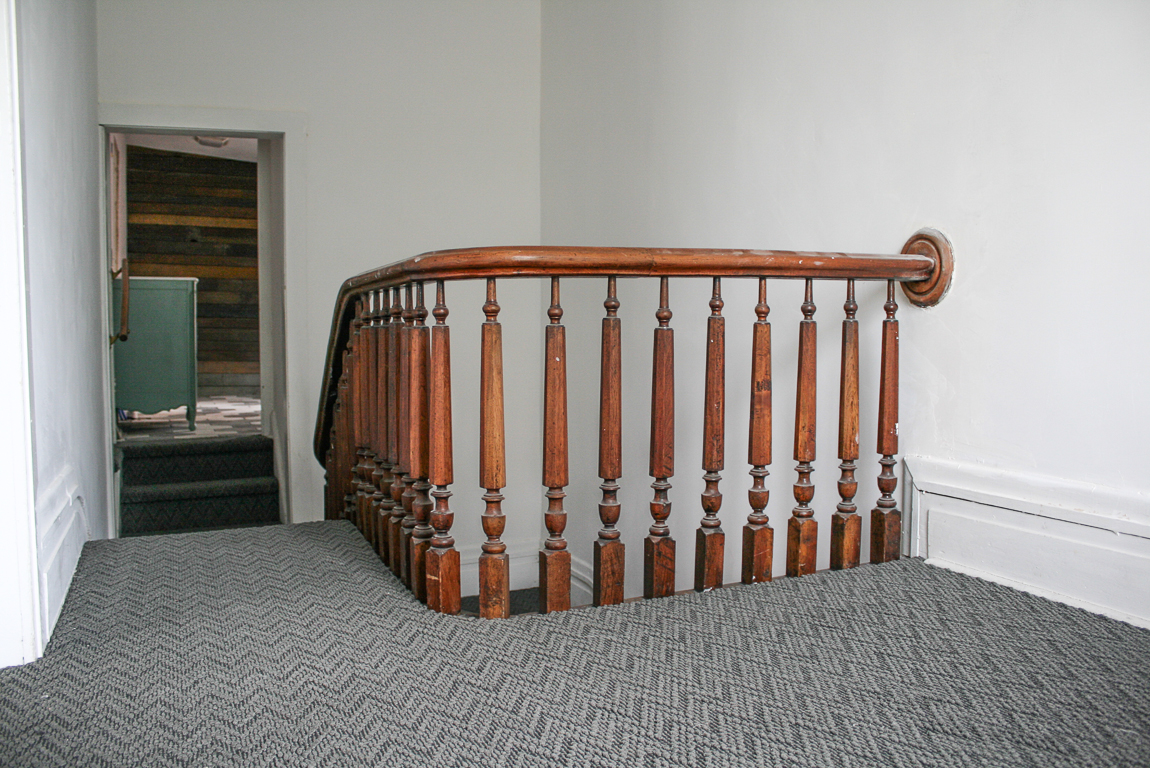
The landing at the top of the stairs: 

stair landing Shaw Carpets Final Piece Coatbridge staircasestair landing Shaw Carpets Final Piece Coatbridge

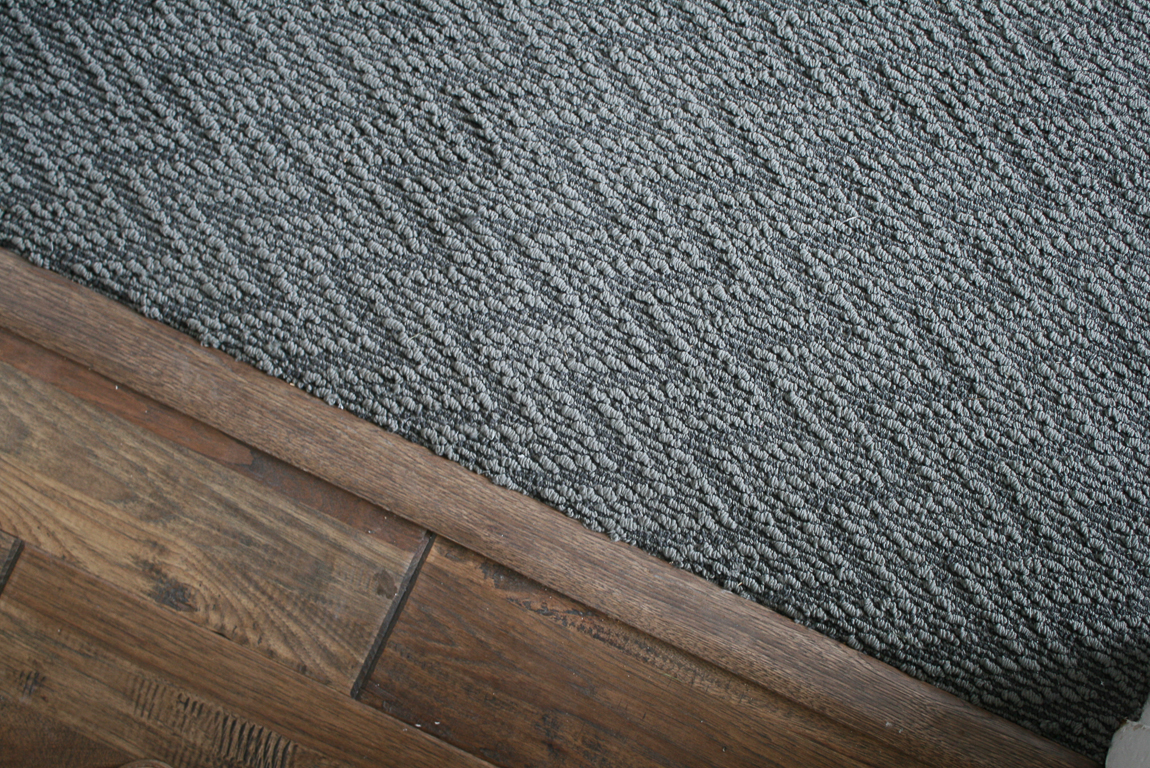
Shaw Final Piece Coatbridge carpet meets Monterrey Grandview rustic wide plank hardwood floors.

Shaw Final Piece Coatbridge carpet Grandview Monterey hardwood


And that padding? Luxurious! Seriously. I don’t think I’d need an air mattress if I decided to camp out in this space! It’s that cushioned! Slumber party, anyone? Oh! And ever accidentally bounce down the stairs on your back side? This makes for a better ride and less painful experience. lol

More decisions: 

I cannot wait to get started with decorating and to call this area complete. I’m still deciding how to finish it. Options:  

  • To make it an entry space for the apartment with a bench, shoe storage, coat hooks, plants and a side table. (The apartment will not have a full time tenant. It’s for overnight/short term guests.)
  • To furnish it with a small writing desk in front of the window, book shelves on either side, plants, a lamp, curtains, a comfy chair, fun wallpaper on the back wall. 
  • To suspend some swinging chairs or a bamboo-type porch swing, fun wallpaper, a coffee table, plants. 
  • A small conversational area with a love seat or two comfy chairs.
  • A window seat and comfy reading nook, plants, diffuser, book cases. 

So many options. I’m all set with a beautiful blank slate, gorgeous cushion-y textured patterned floor that I love! I’m leaning towards the window seat and a hanging chair with a shelf for plants and a small accent table for a cup of tea or a good book…a little escape and restful spot for meditation with the vibe of a private porch area only indoor and then creating a small entry area inside of the apartment right inside the door instead. What do you think? What would feel more welcoming to you as a guest? 

As we keep checking projects off of the ‘to-do’ list, I’m getting so excited for fun parts – decorating and furnishing! I can’t wait!

Next up on the remodel:

Clean up the railing and banister, paint, baseboards, installing doors, light fixtures, fun feature wall, possibly creating a kitchenette then furnishing, decorating and then the reveal! Then moving in! Okay, not that last part but I do plan to extend the invitation and welcome you to visit! 

The building has so much historical charm. It’s about one block from our town’s Main Street. The bus stop is literally steps away. There are breweries, the YMCA, shops, restaurants, salons, florists, candy/coffee shop, holiday parades and festivals within walking distance. So fun! If renovation from blah to ahhhhh is your thing, stay tuned!

So subscribe and be reminded of updates as the renovations progress! I’ll share before and after photos, projects underway and updates, plans and design boards, sources and links as they relate as well as fun events going on in and around the downtown area. I’ll be using a specific hashtag on social media to keep things all neat and tidy and organized.

#helloredreno

I welcome your thoughts and ideas! And as always, thanks for your encouragement and support and for sharing in my joy and vision! Watch for #helloredreno!