Halloween Mantel

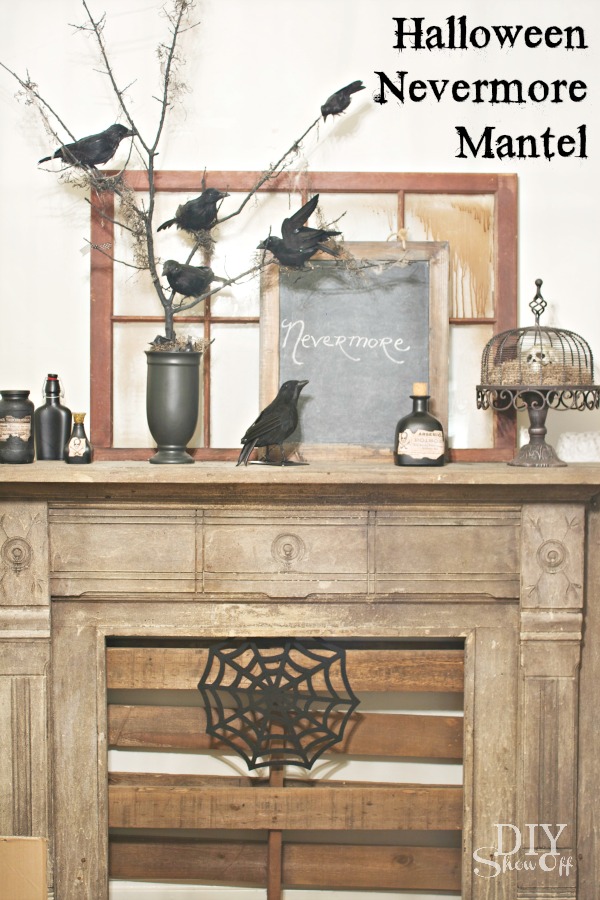
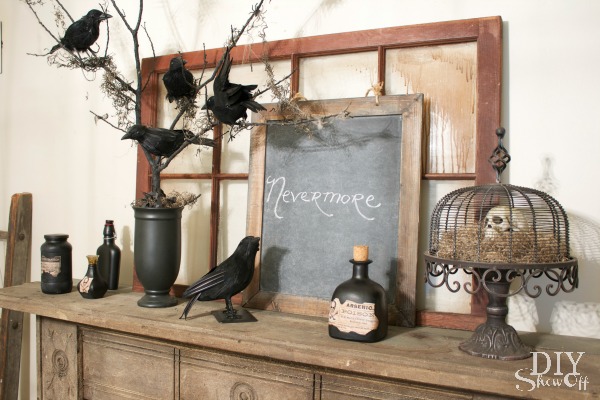
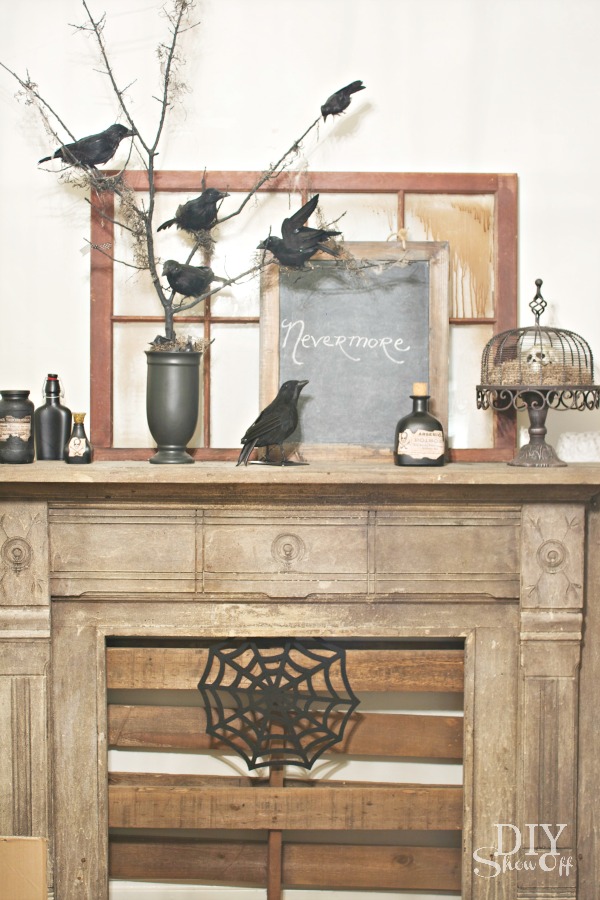
The Raven (Nevermore) Halloween Mantel:

Nevermore Halloween Mantel

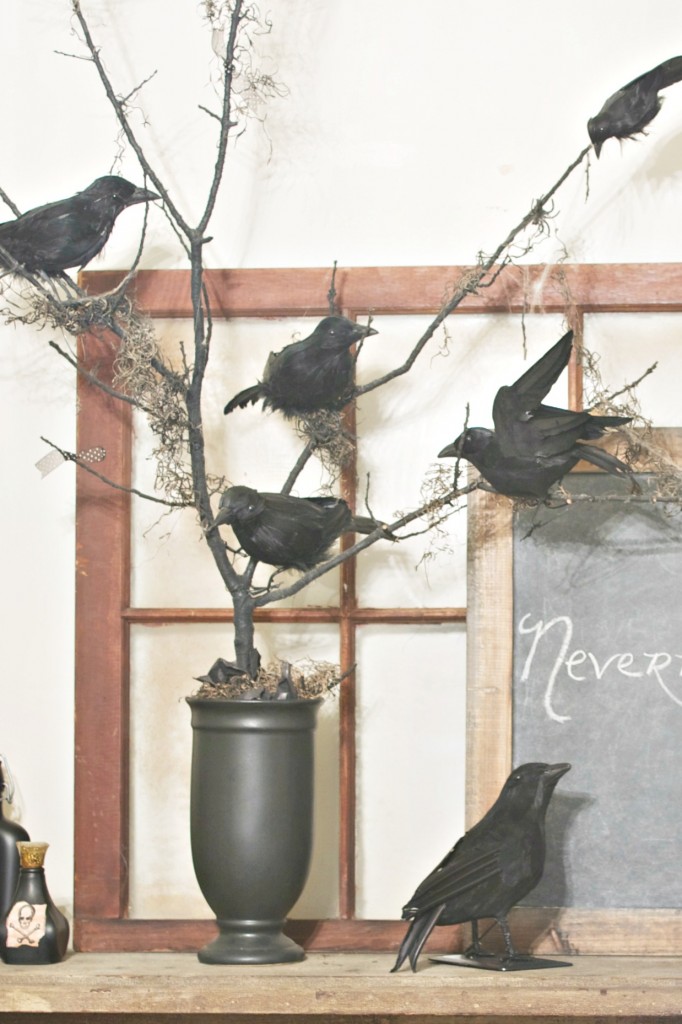
nevermore Halloween tree

The Raven Halloween Mantel 

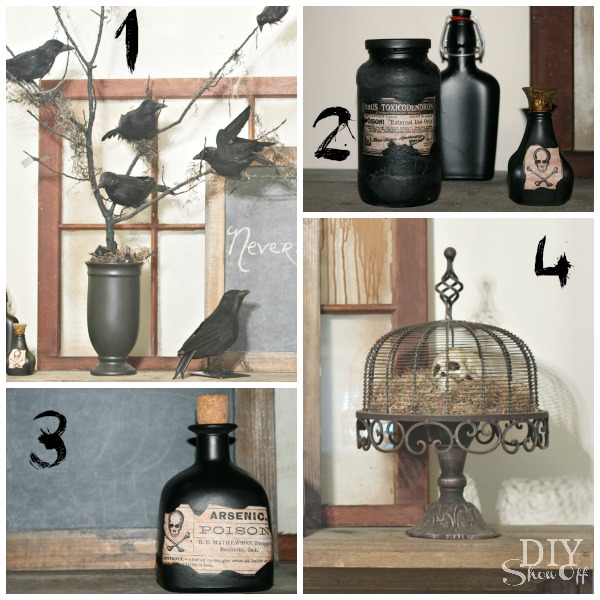
  1. Halloween Nevermore Tree Tutorial
  2. Halloween potion bottles and jars (DIY by my daughter, Ali)
  3. Halloween poison bottle (Thanks, Ali! Love them!)
  4. Iron cake stand with skull {affiliate link}

Halloween raven mantel

The Raven ~ Edgar Allan Poe

  Once upon a midnight dreary, while I pondered weak and weary,
Over many a quaint and curious volume of forgotten lore,
While I nodded, nearly napping, suddenly there came a tapping,
As of some one gently rapping, rapping at my chamber door.
`’Tis some visitor,’ I muttered, `tapping at my chamber door –
Only this, and nothing more.’Ah, distinctly I remember it was in the bleak December,
And each separate dying ember wrought its ghost upon the floor.
Eagerly I wished the morrow; – vainly I had sought to borrow
From my books surcease of sorrow – sorrow for the lost Lenore –
For the rare and radiant maiden whom the angels name Lenore –
Nameless here for evermore.And the silken sad uncertain rustling of each purple curtain
Thrilled me – filled me with fantastic terrors never felt before;
So that now, to still the beating of my heart, I stood repeating
`’Tis some visitor entreating entrance at my chamber door –
Some late visitor entreating entrance at my chamber door; –
This it is, and nothing more,’Presently my soul grew stronger; hesitating then no longer,
`Sir,’ said I, `or Madam, truly your forgiveness I implore;
But the fact is I was napping, and so gently you came rapping,
And so faintly you came tapping, tapping at my chamber door,
That I scarce was sure I heard you’ – here I opened wide the door; –
Darkness there, and nothing more.Deep into that darkness peering, long I stood there wondering, fearing,
Doubting, dreaming dreams no mortal ever dared to dream before;
But the silence was unbroken, and the darkness gave no token,
And the only word there spoken was the whispered word, `Lenore!’
This I whispered, and an echo murmured back the word, `Lenore!’
Merely this and nothing more.Back into the chamber turning, all my soul within me burning,
Soon again I heard a tapping somewhat louder than before.
`Surely,’ said I, `surely that is something at my window lattice;
Let me see then, what thereat is, and this mystery explore –
Let my heart be still a moment and this mystery explore; –
‘Tis the wind and nothing more!’Open here I flung the shutter, when, with many a flirt and flutter,
In there stepped a stately raven of the saintly days of yore.
Not the least obeisance made he; not a minute stopped or stayed he;
But, with mien of lord or lady, perched above my chamber door –
Perched upon a bust of Pallas just above my chamber door –
Perched, and sat, and nothing more.Then this ebony bird beguiling my sad fancy into smiling,
By the grave and stern decorum of the countenance it wore,
`Though thy crest be shorn and shaven, thou,’ I said, `art sure no craven.
Ghastly grim and ancient raven wandering from the nightly shore –
Tell me what thy lordly name is on the Night’s Plutonian shore!’
Quoth the raven, `Nevermore.’Much I marvelled this ungainly fowl to hear discourse so plainly,
Though its answer little meaning – little relevancy bore;
For we cannot help agreeing that no living human being
Ever yet was blessed with seeing bird above his chamber door –
Bird or beast above the sculptured bust above his chamber door,
With such name as `Nevermore.’

But the raven, sitting lonely on the placid bust, spoke only,
That one word, as if his soul in that one word he did outpour.
Nothing further then he uttered – not a feather then he fluttered –
Till I scarcely more than muttered `Other friends have flown before –
On the morrow he will leave me, as my hopes have flown before.’
Then the bird said, `Nevermore.’

Startled at the stillness broken by reply so aptly spoken,
`Doubtless,’ said I, `what it utters is its only stock and store,
Caught from some unhappy master whom unmerciful disaster
Followed fast and followed faster till his songs one burden bore –
Till the dirges of his hope that melancholy burden bore
Of “Never-nevermore.”‘

But the raven still beguiling all my sad soul into smiling,
Straight I wheeled a cushioned seat in front of bird and bust and door;
Then, upon the velvet sinking, I betook myself to linking
Fancy unto fancy, thinking what this ominous bird of yore –
What this grim, ungainly, ghastly, gaunt, and ominous bird of yore
Meant in croaking `Nevermore.’

This I sat engaged in guessing, but no syllable expressing
To the fowl whose fiery eyes now burned into my bosom’s core;
This and more I sat divining, with my head at ease reclining
On the cushion’s velvet lining that the lamp-light gloated o’er,
But whose velvet violet lining with the lamp-light gloating o’er,
She shall press, ah, nevermore!

Then, methought, the air grew denser, perfumed from an unseen censer
Swung by Seraphim whose foot-falls tinkled on the tufted floor.
`Wretch,’ I cried, `thy God hath lent thee – by these angels he has sent thee
Respite – respite and nepenthe from thy memories of Lenore!
Quaff, oh quaff this kind nepenthe, and forget this lost Lenore!’
Quoth the raven, `Nevermore.’

`Prophet!’ said I, `thing of evil! – prophet still, if bird or devil! –
Whether tempter sent, or whether tempest tossed thee here ashore,
Desolate yet all undaunted, on this desert land enchanted –
On this home by horror haunted – tell me truly, I implore –
Is there – is there balm in Gilead? – tell me – tell me, I implore!’
Quoth the raven, `Nevermore.’

`Prophet!’ said I, `thing of evil! – prophet still, if bird or devil!
By that Heaven that bends above us – by that God we both adore –
Tell this soul with sorrow laden if, within the distant Aidenn,
It shall clasp a sainted maiden whom the angels name Lenore –
Clasp a rare and radiant maiden, whom the angels name Lenore?’
Quoth the raven, `Nevermore.’

`Be that word our sign of parting, bird or fiend!’ I shrieked upstarting –
`Get thee back into the tempest and the Night’s Plutonian shore!
Leave no black plume as a token of that lie thy soul hath spoken!
Leave my loneliness unbroken! – quit the bust above my door!
Take thy beak from out my heart, and take thy form from off my door!’
Quoth the raven, `Nevermore.’

And the raven, never flitting, still is sitting, still is sitting
On the pallid bust of Pallas just above my chamber door;
And his eyes have all the seeming of a demon’s that is dreaming,
And the lamp-light o’er him streaming throws his shadow on the floor;
And my soul from out that shadow that lies floating on the floor
Shall be lifted – nevermore!

Halloween mantel

 More DIY Halloween here and here

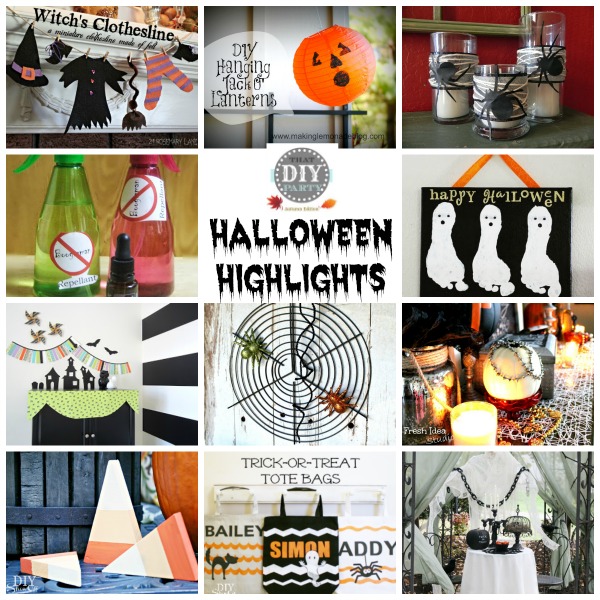
DIY Halloween Highlights – Part 1

DIY Halloween Highlights: I’ve been collecting some awesome DIY Halloween features from the weekly That DIY Party. Looking for some last minute Halloween ideas? These are awesome!DIY Halloween

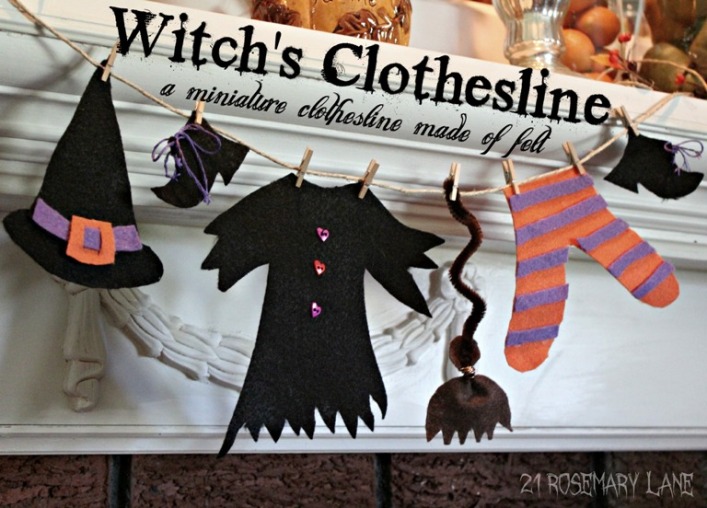
Witch’s Clothesline at 21 RoseMary Lane – so cute! 

witch's laundry at 21 RoseMary Lane

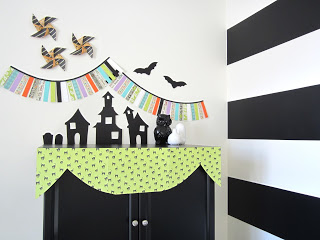
Paper Halloween Display at Design Sprinkle – fun free printables to create your own spooky vignette.

paper halloween display at Design Sprinkle

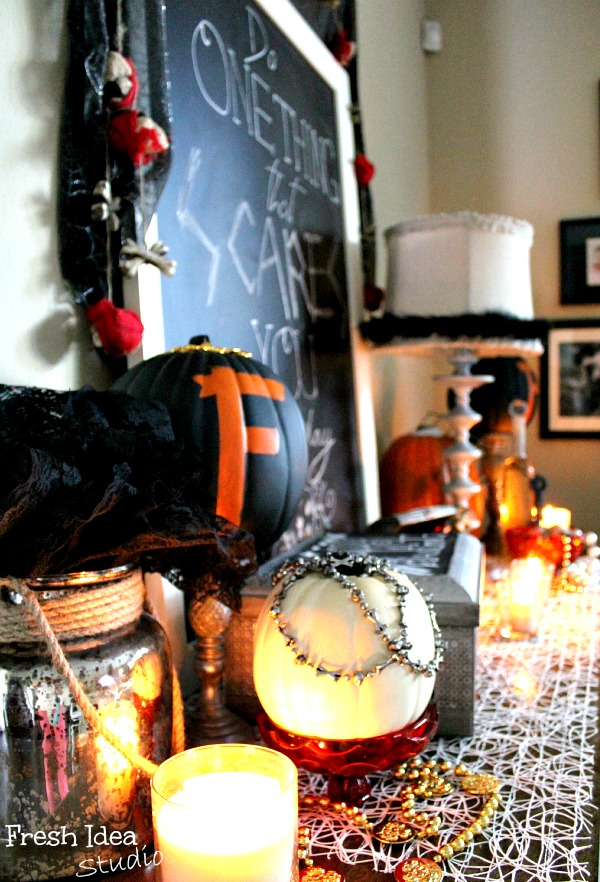
Scary Halloween Vignette at Fresh Idea Studio – I can almost hear the spooky organ music.

Scary-Halloween-Vignette at Fresh Idea Studio

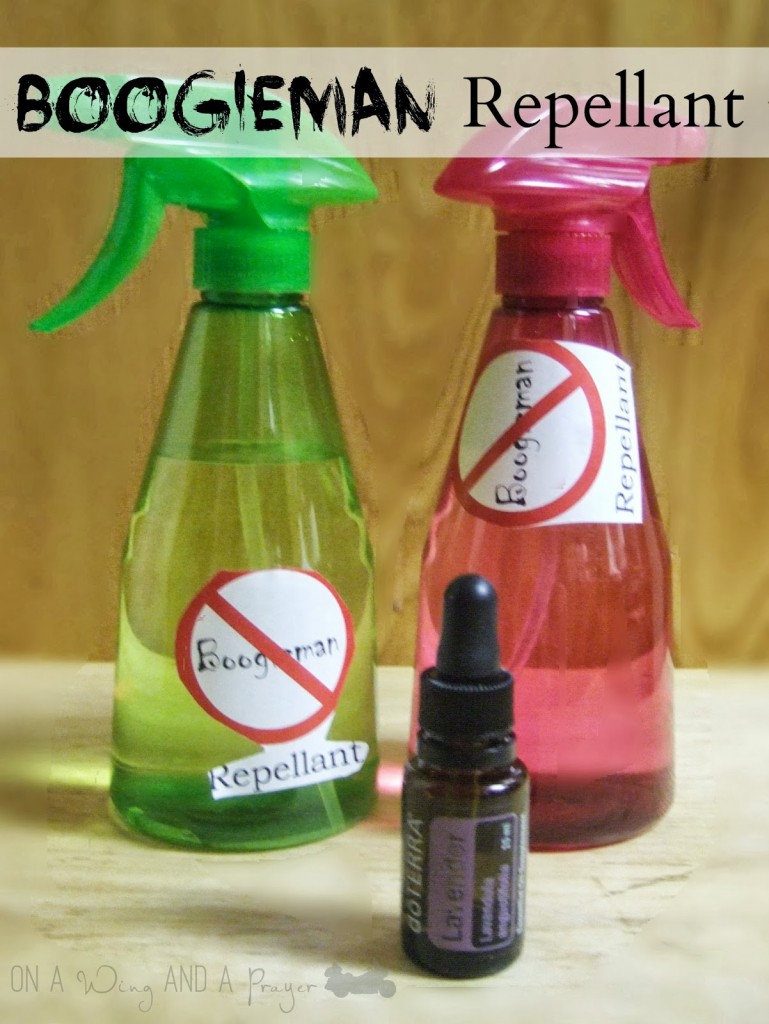
Boogieman Repellant at On a Wing and a Prayer – so important and necessary for this time of year!

Boogieman Repellant at On a Wing and a Prayer

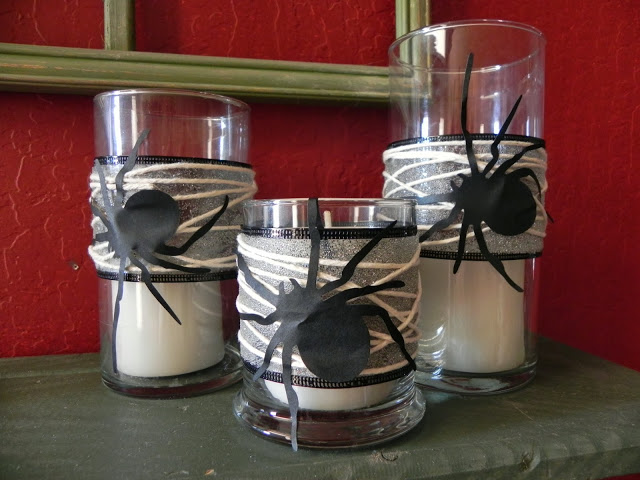
Glittery spidery candles from The Messy Roost – glitter, glam and 8 legs. 

spider candles - messy roost

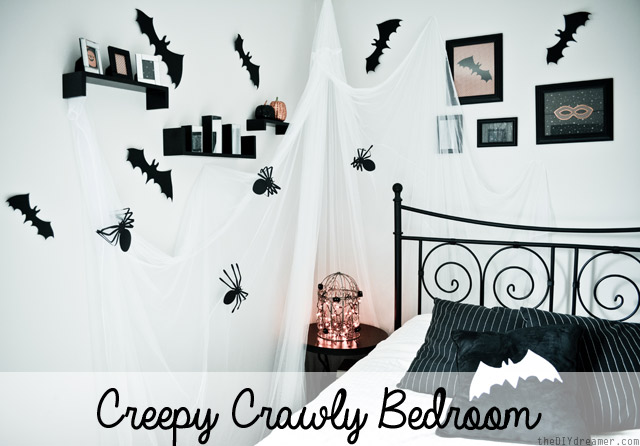
a Halloween bedroom at the DIY Dreamer – sweet dreams. bahahahahaha!

Creepy-Crawly-Bedroom at The DIY Dreamer 

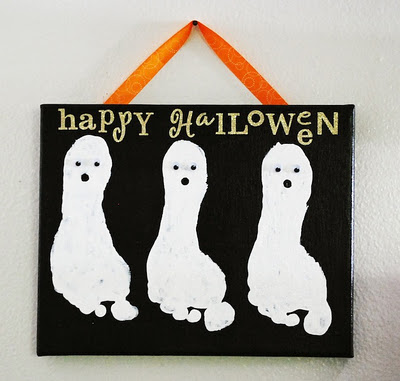
Halloween Ghost Feet at the Moody Fashionista – awesome sweet keepsake gift idea!

Halloween ghost feet at The Moody Fashionista

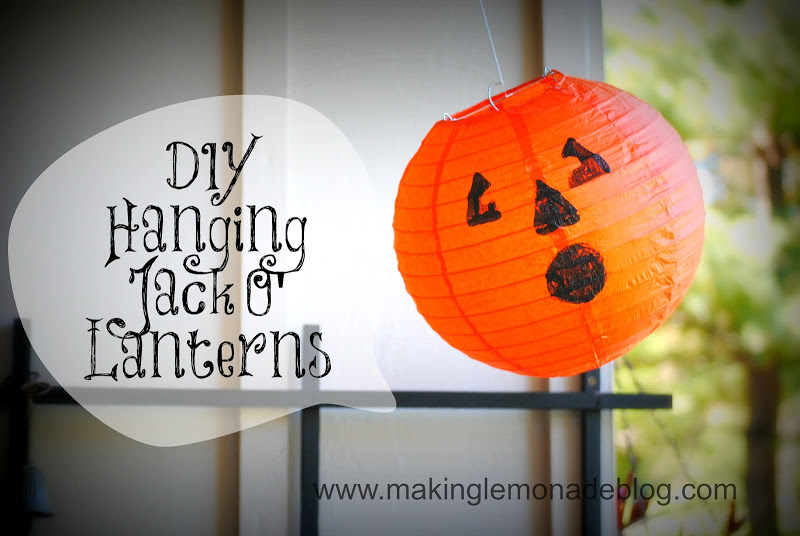
Halloween Jack O Lantern at Making Lemonade – so creative and festive!

Halloween Jack O Lantern at Making Lemonade

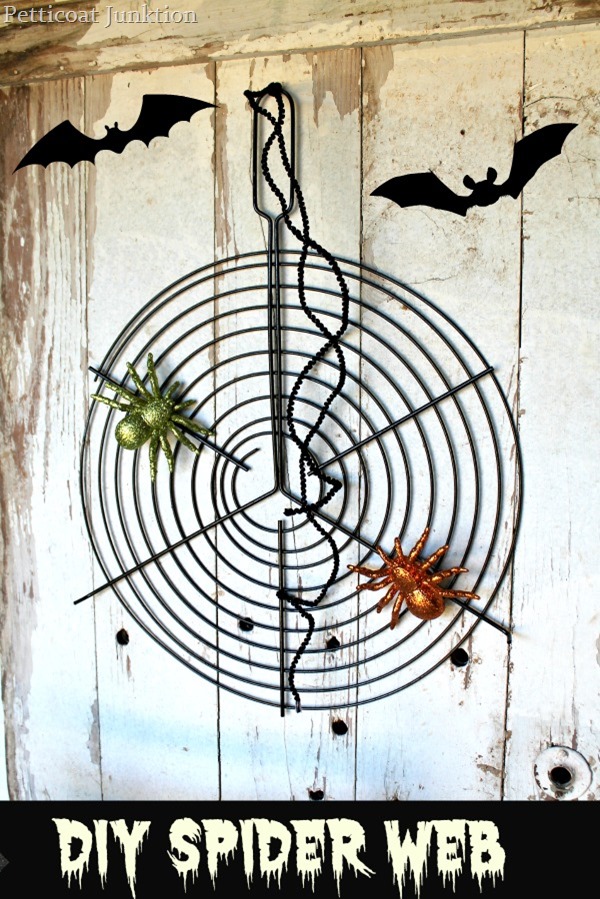
Repurposed grill rack spider web at Petticoat Junktion – clever and creepy! Love the simplicity too!

grill rack spider web at Petticoat Junktion

and three of my own most recent:

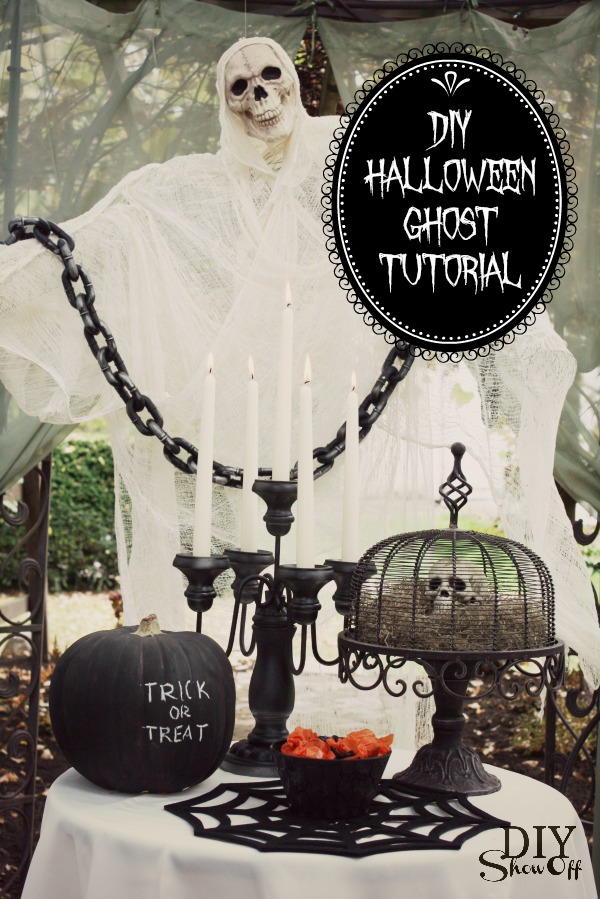
DIY skeleton ghost

DIY Halloween Ghost

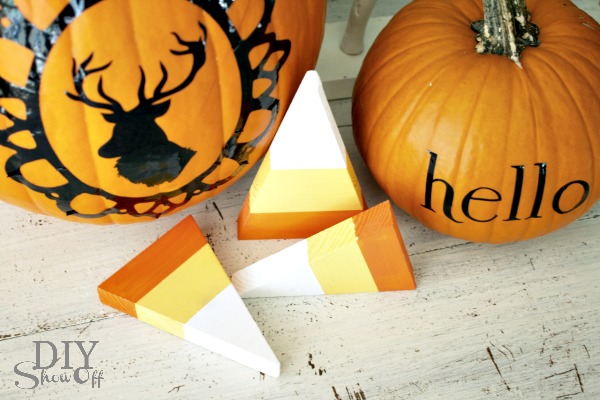
wooden candy corn accents

DIY vinyl pumpkin decals 

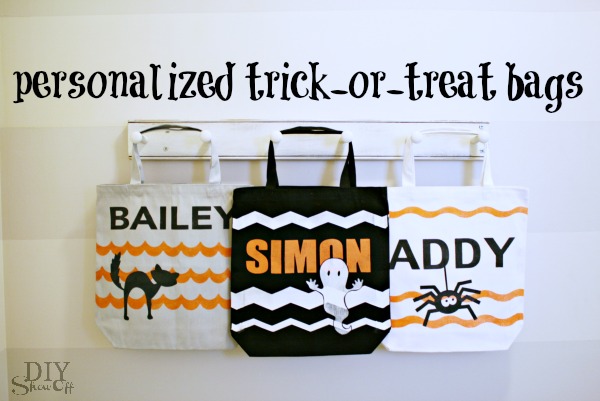
trick or treat tote bags

DIY personalized trick or treat bags

I’ll be sharing more Halloween this week! Stay tuned! 

Please remember to pin from the original source by clicking the links above or easily repinning from the That DIY Party Pinterest board

thatdiyparty.pinboard

A BIG thanks to these talented ladies for linking up their spooky fun DIY!

Do you have a Halloween DIY to ‘show off’? Link up at this week’s That DIY Party!

Personalized Trick or Treat Bags

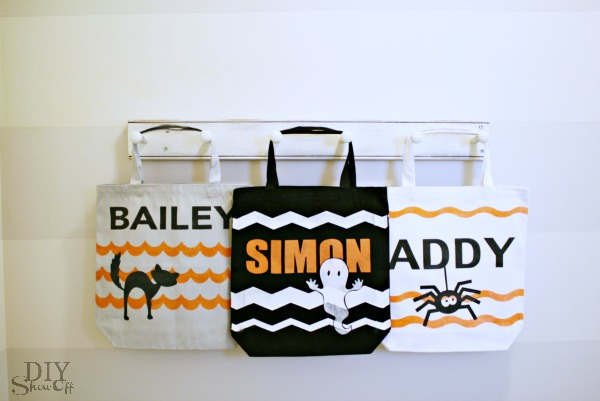
Trick or Treat is coming up at the end of the month. I sure do miss having little ones at home. We don’t even get trick-or-treaters in our neighborhood but I do have two nieces and one nephew, all under the age of 5. With help from FrogTape® and Happy Crafters, I whipped up a little Halloween surprise for them. They’re going to love these personalized trick or treat bags!

DIY personalized trick or treat bags

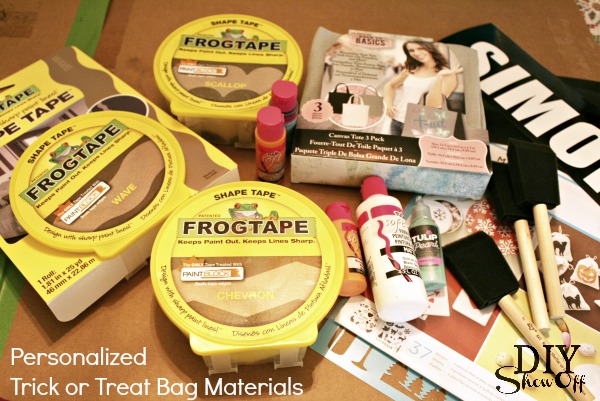
Materials:DIY personalized trick or treat bags

  • canvas/linen tote bags
  • fabric paints
  • FrogTape® Shape Tape (I used all 3 patterns: chevron, wave and scallop)
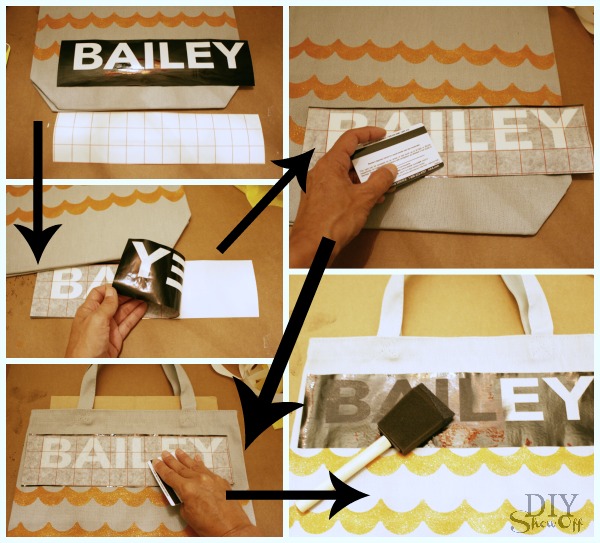
  • stencils (I created my own stencils using glossy black vinyl and transfer paper from Happy Crafters)

Tutorial: (please pardon the poor lighting…it’s raining today)

Part 1 – Shape Tape

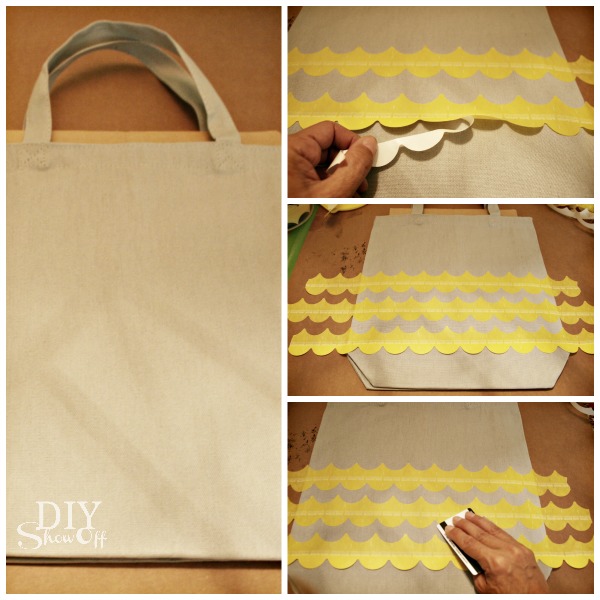
Iron the tote bags to remove wrinkles.

Insert cardboard into the tote bag (to block bleed-through to the other side).

Cut a piece of FrogTape Shape tape a little wider than the bag. Decide placement. Remove half of the strip of wax paper backing from the Shape Tape. Position and press into place. Remove the other half of the wax paper backing and smooth into place. I found that securing the edges of the tape to the table underneath on the sides, kept my tote bag from sliding around, holding it in place for painting.

DIY personalized trick or treat bags

Repeat step 3 to create a ‘stencil’ border/line for the design. 

Using a credit card, I rubbed the Shape Tape to make sure it was nice and secure, sticking to the canvas…check closely to be sure the Shape Tape is complete adhered to the canvas. 

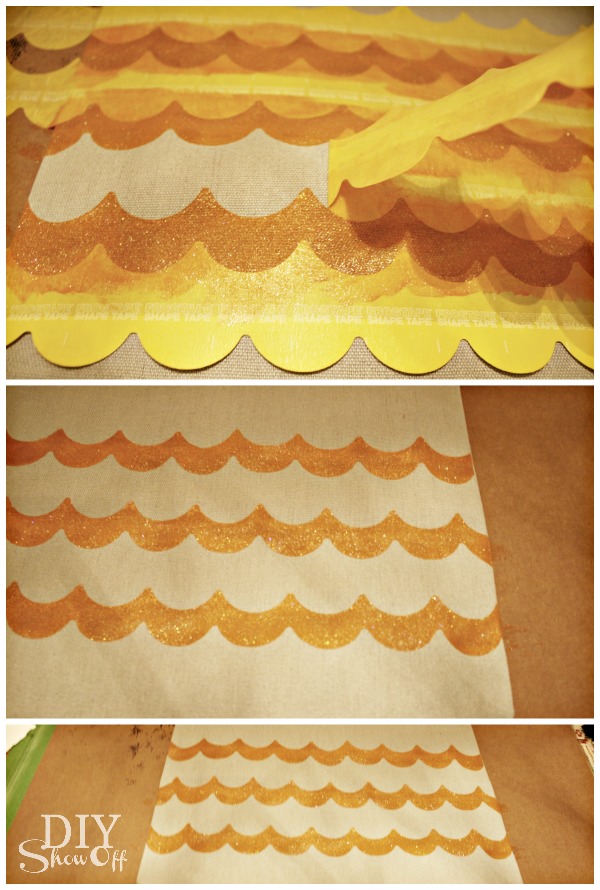
Paint! Be careful not to lift the Shape Tape with brush strokes. It helps to move the paint brush from ‘on the tape’ moving to the fabric rather than starting on fabric and pushing paint to the tapeline. 

Remove Shape tape. Nice crisp lines!!! Let the paint dry. DIY personalized trick or treat bags

Part 2 – vinyl stencils

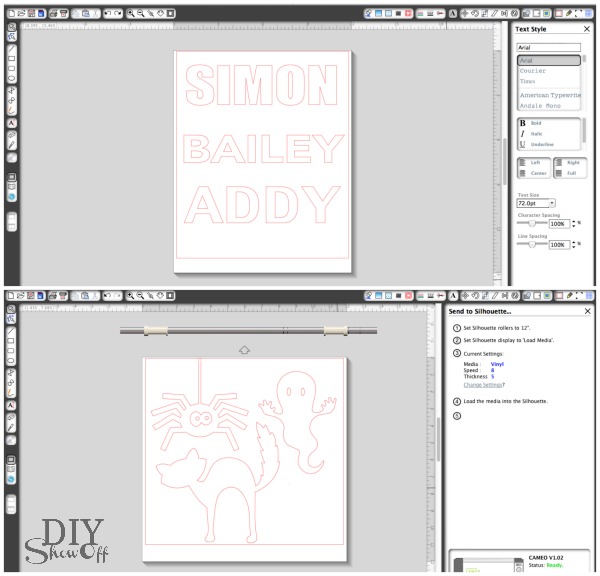
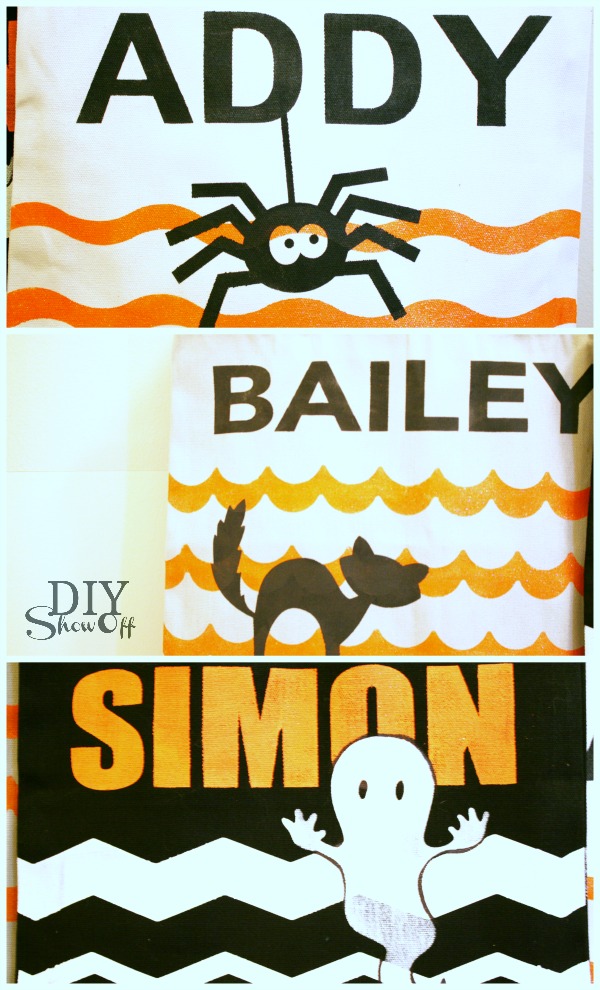
Using my Silhouette designer studio software, I created name stencils as well as purchased a few Halloween shapes from the Silhouette American online store. Then sent it to cut to create vinyl stencils. DIY personalized trick or treat bags

Peel away lettering and design to create a stencil. Using transfer paper, position vinyl stencil on tote, rub with a credit card and remove transfer paper – leaving the vinyl stencil in place on the canvas. DIY personalized trick or treat bags

Paint and remove vinyl. Allow paint to dry 4 hours. 

DIY trick-or-treat bags

*Using a black Sharpie, I traced around the ghost where his white body met with the white chevron. 

DIY trick-or-treat bags

Aren’t they darling? Years of use! Machine washable (inside out) after 72 hours. Cute.Cute.Cute!DIY personalized trick or treat bags


Now I have three little trick-or-treaters! Treators? What’s your favorite kind of Halloween candy?

FrogTape Blog Squad

*I’m a member of the FrogTape® Blog Squad. This post is sponsored by FrogTape®. As always, the opinions are completely my own based on my own experience. See more DIY from the FrogTape® blog squad.

*This post is sponsored by Happy Crafters. Tutorial, experience and opinion is my own. See more projects at Happy Crafters blog.

HClogopngsmall

DIY chicken wire cheesecloth Halloween ghost tutorial

October? Already?! Let’s start off the month with a Halloween DIY. As a part of the Lowe’s Creative Ideas team, I received a gift card to purchase the materials for a Halloween decor challenge. I made a cheesecloth ghost and what a challenge it was! Because of the large life-size, I ran into some obstacles and almost threw in the towel, accepting defeat and attempted to think of another project. The joys of DIY: sometimes a big fat fail. 

BUT I switched direction and saved the project! Below I share what I did, recommendations for what I’d do different and how I rescued the project making it a success. If this is something you’d like to tackle, read through my tutorial to decide the best way to go about making your ghost.DIY Halloween Ghost

Materials for a chicken wire cheesecloth ghost:

Tools:

  • wire cutters
  • drill will very small drill bit

Tutorial:

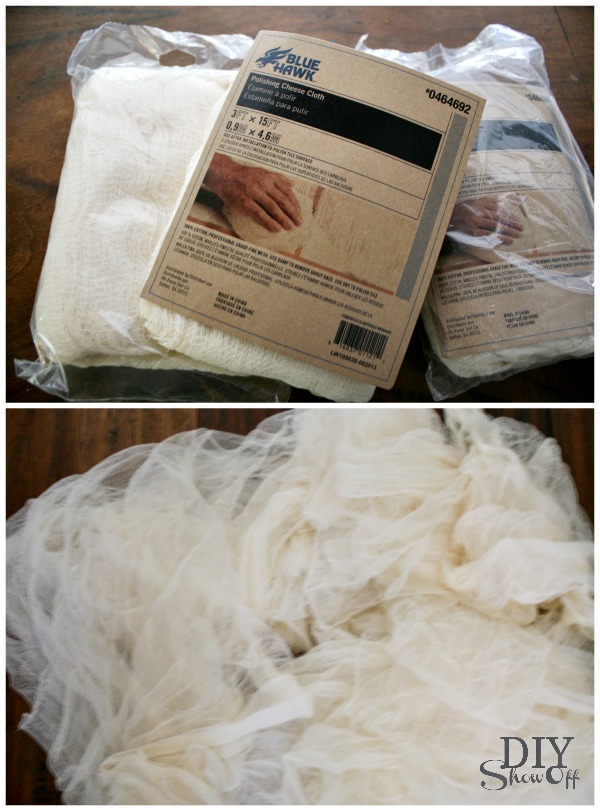
Open the cheesecloth packages. Unravel and unfold cheesecloth.how to make a cheesecloth ghost

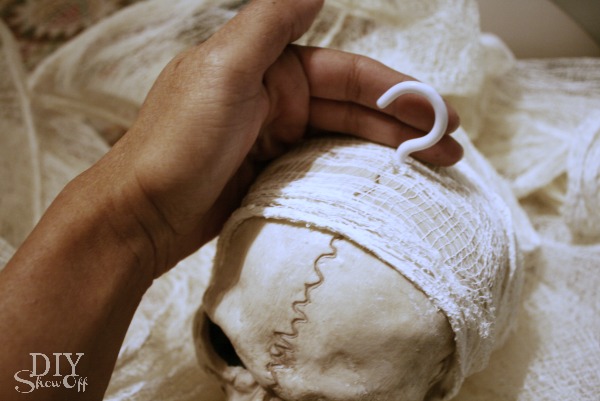
Spray the top of the skull with spray adhesive. Wait a few seconds/fan with your hand a few times. Attach one strip of the center of the cheesecloth to create a “hood” around the skull. Let dry.

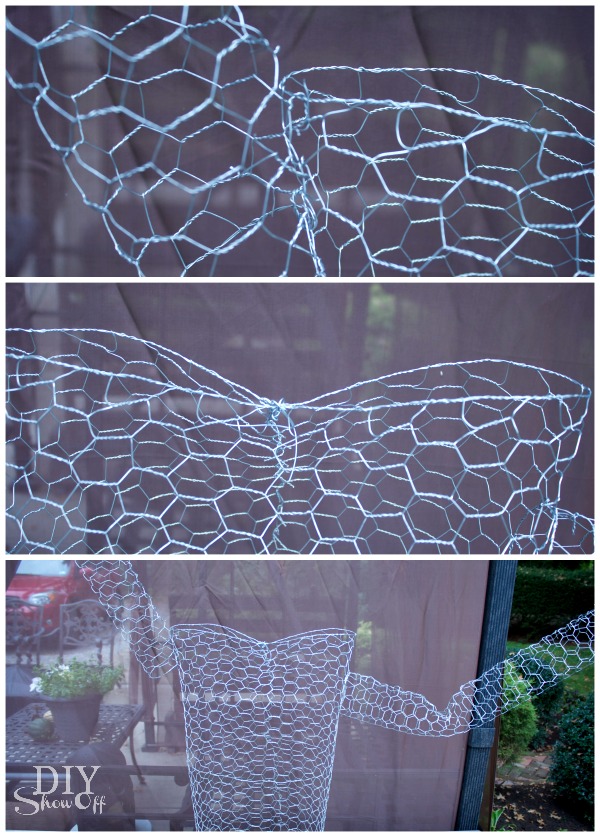
Using wire cutters, cut the chicken wire to create a torso and arms. I attached the arms using the cut side pieces of my strip of chicken wire along with extra wire.ghost tutorial

When skull/cheesecloth glue is dry, using a drill bit smaller than the cup hook screw, drill a small hole into the top of the skull, towards the back. Too far towards the front of the skull will have it looking up, more towards the back, the skull will look down when hanging. Screw in the cup hook. (Add a dab of Gorilla Glue if needed and then screw in the cup hook.) scary DIY Halloween ghost

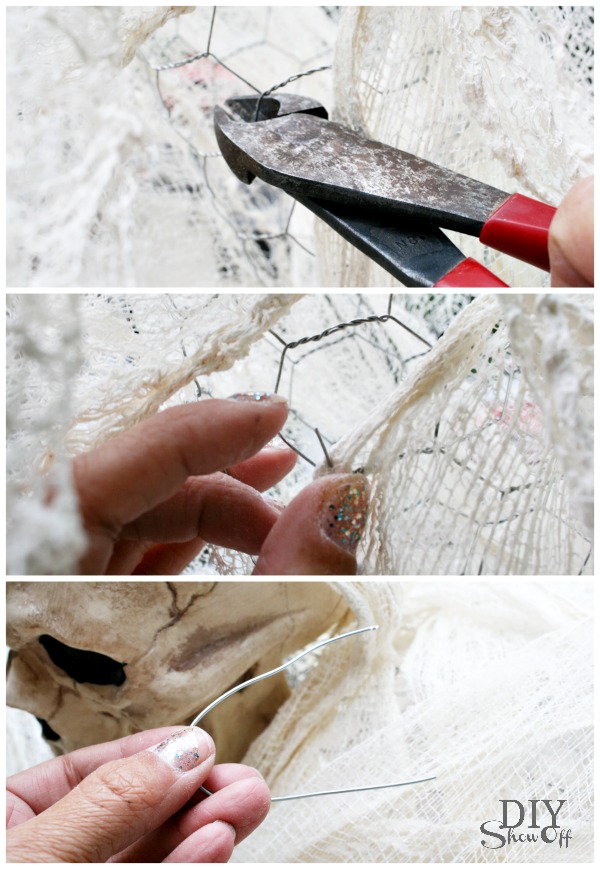
Place the skull onto the chicken wire torso. I used small cut pieces of wire through the cheesecloth hood at the base of the skull like a twist-tie , securing/twisting inside of the chicken wire torso frame to secure the skull into place. Drape more cheesecloth over the arms and torso, covering the chicken wire. Use more wire twist-ties where needed to keep cheesecloth in place.Halloween ghost DIY

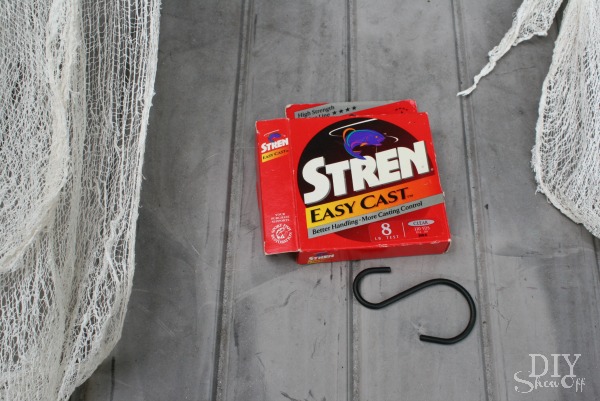
Hang using fishing line and an s-hook. Bend arms and torso if needed after hanging.cheesecloth chicken wire ghost

Things I attempted, failed and learned. Optional:

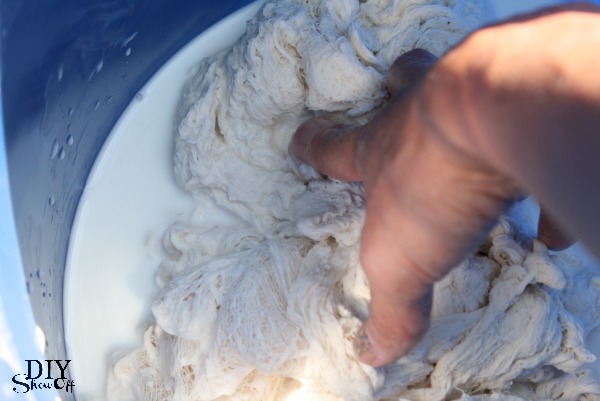
  • You can search Google for starch ghost recipes for success in making smaller ghosts. I used 1 1/2 containers of cornstarch and 6 cups of water which did not hold my extra large ghost’s shape when dry. I think less water and making more of a wet paste would have maybe had better results. However, I still would NOT use the starch method if you plan to hang your ghost outdoors. Water (rain/dew/frost) will deactivate the starch and your ghost will lose it’s shape. That’s why the chicken wire frame is a better option. There’s less room for failure.  

    cheesecloth ghost

    Mistake: starch is too watery and not a good option for an outdoor ghost.

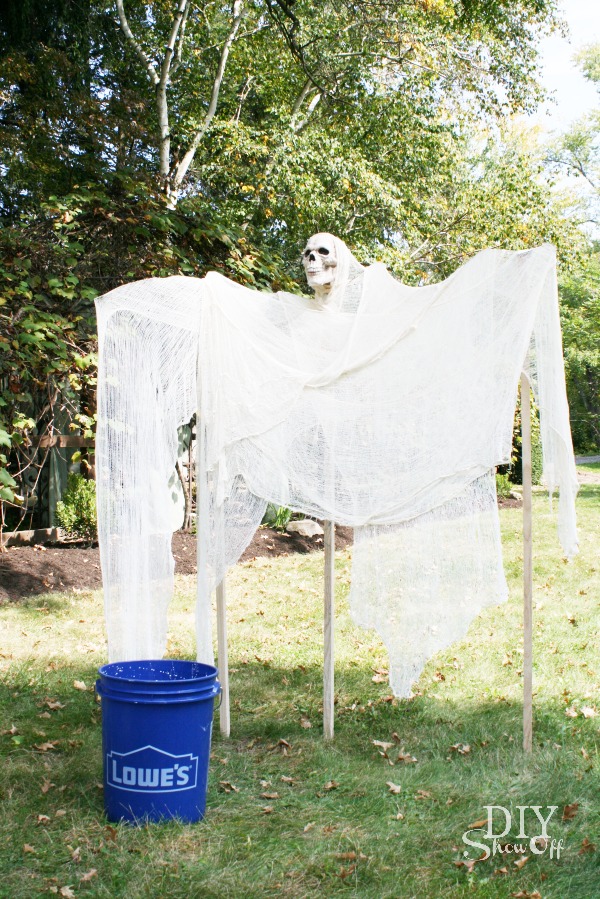
  • Also, I used garden stakes and wire to create a frame for forming/drying the starched cheesecloth. A super heavy gage wire is necessary. Even coat hangers weren’t really strong enough for starch soaked cheesecloth, causing the arms to droop, which is why you’ll notice I had to use more stakes. This still didn’t work for me. My ghost did not hold it’s shape, although my cheesecloth is a little stiffer.

    cheesecloth ghost tutorial

    Even with a frame/mould for the starched cheesecloth, the large size ghost is too heavy to stand hold it’s shape when dry.

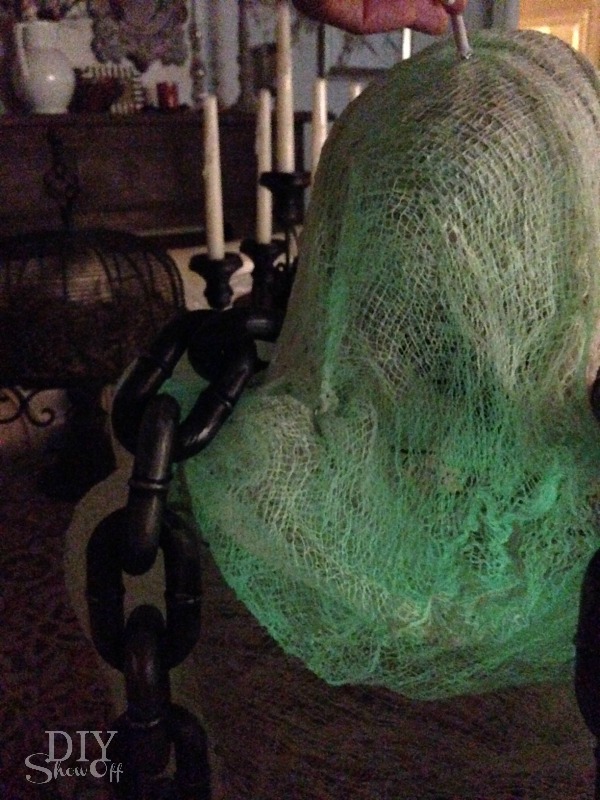
  • Rustoleum’s Glow in the Dark spray paint (sold in the Halloween/seasonal dept. at Lowe’s) does show up on mesh/cheesecloth! However, it’s difficult to tell where it’s been sprayed and needs a generous coat. The weather forecast is calling for rain so I’ve brought everything back inside but I will be updating with a better photo once I give it a more thorough spraying.Rustoleum Glow in the Dark spray paint

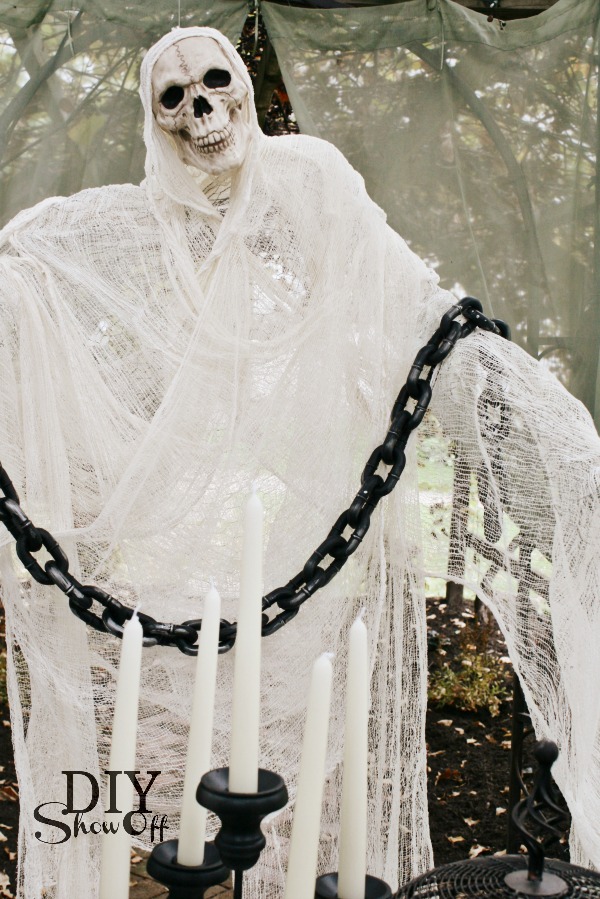
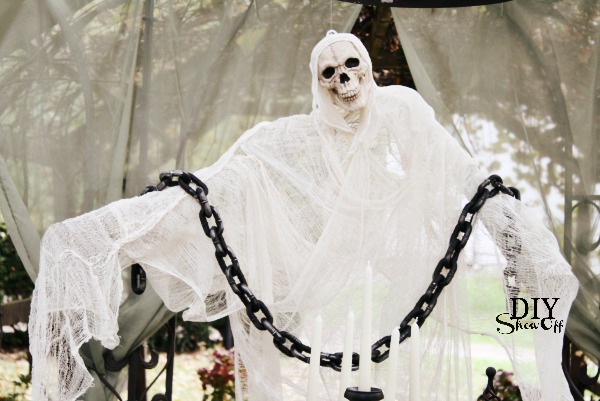
DIY friends, meet phantom of DIYShowOff…DIY ghost tutorial

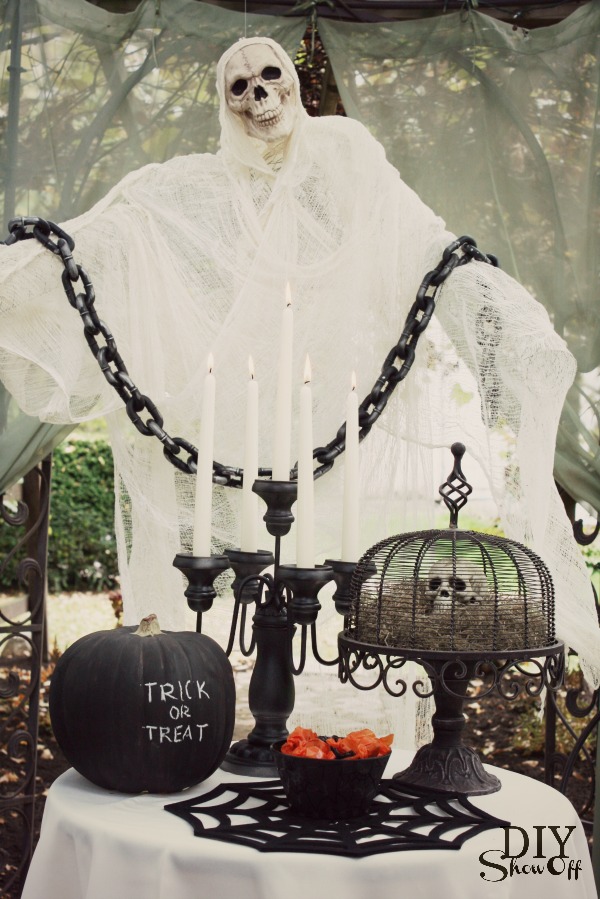
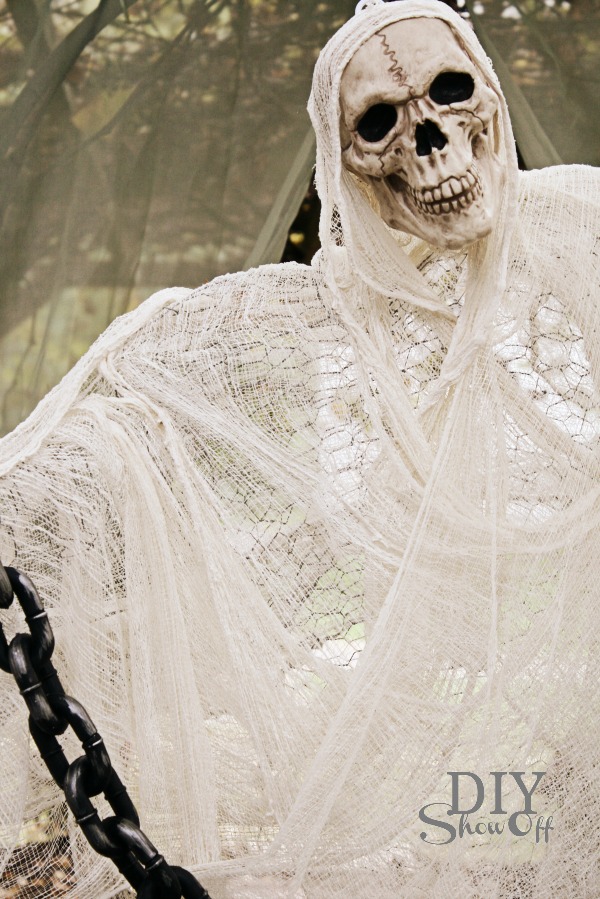
Despite the trial and error, the final result…spooky, right? He’s transparent, blows in the breeze and real-enough-looking. Creepy! scary DIY Halloween decor

Looks to me like he’s inviting you to have a snack. Service with a smile.scary DIY Halloween decor

 ::evil laugh::DIY cheesecloth chicken wire ghost

 He is smiling. He just wants a hug, I think. YOU GO FIRST!spooky ghost tutorial

It’s almost too scary for me. Scary Halloween … not my thing. My reaction is to cry. Real tears. And did you ever see a fainting goat? Hilarious! {search youtube videos} That’s so me. Frozen with fear.

How about you? Do you love scary?

And yep! That’s a sneak peek of the finished grape arbor/gazebo with recycled brick patio/path you see – all complete! More on that coming up. So.many.pictures.

Sharing at Centsational Girl.

See more fun DIY ideas at Lowe’s Creative Ideas, follow Lowe’s on InstagramPinterest and sign up for the Creative Ideas magazine and app!

Lowes-Creative-Ideas-Fall

*Disclaimer: As a member of the Lowe’s Creative Ideas Creators and Influencers network, I received a Lowe’s gift card to complete this project challenge, however the tutorial images, instructions and opinions are my own. 

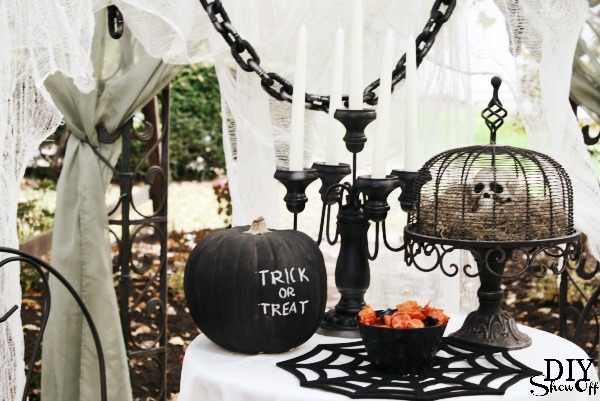
Love that cake plate too? For those of you who’ve asked, you can buy it here:

Charlotte Footed Cake Plate With Dome {affiliate link}

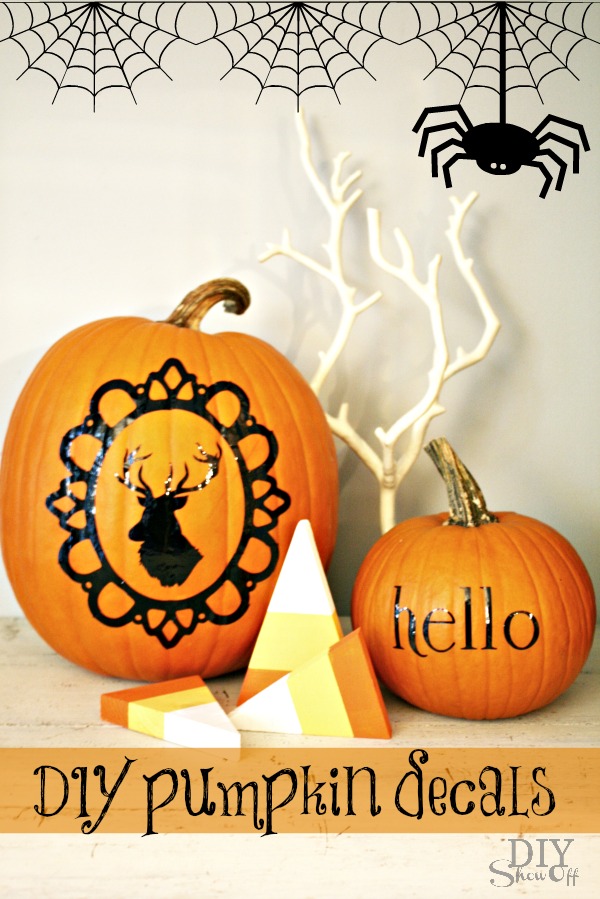
DIY Vinyl Pumpkin Decals

With the girls all grown up and on their own, I have little desire to carve a pumpkin to create a jack-o-lantern. And my pumpkin carving skills are a bit juvenile so I’m loving this alternative to carving…my pumpkins look so pretty! 

DIY vinyl pumpkin decals

Materials:

  • large glossy adhesive vinyl from Happy Crafters
  • transfer paper  
  • pumpkins

Tools:

  • Silhouette Cameo

What I did:

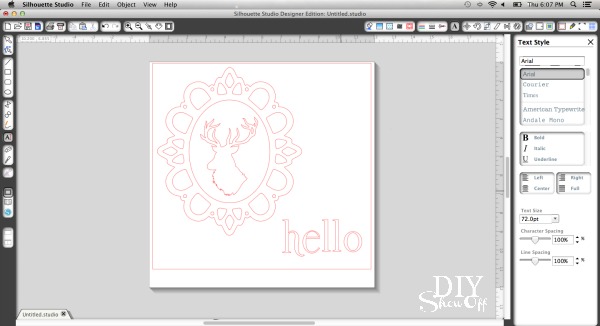
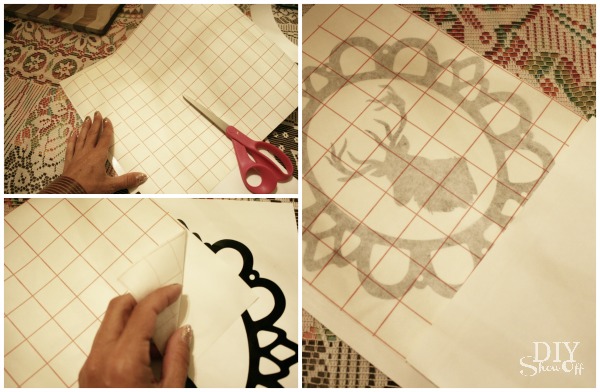
1. I purchased a deer silhouette and frame from the online store and sized them in my Silhouette Studio designer software to fit my pumpkins.

DIY vinyl pumpkin decals

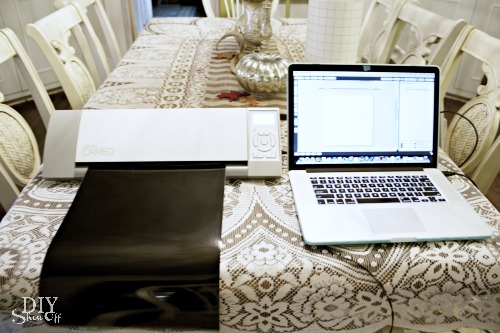
2. Then sent my decals to “cut”. 

DIY vinyl pumpkin decals

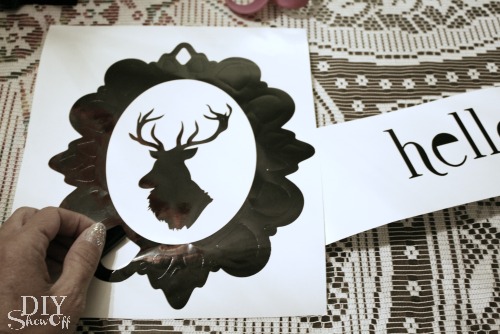
3. Peel away (weed) the negative part of the design.

DIY vinyl pumpkin decals

4. Cut transfer paper to size. Peel away wax paper backing and smooth transfer paper into place.

DIY vinyl pumpkin decals

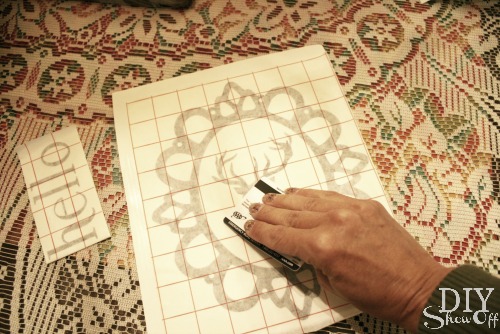
5. Rub design with a credit card.

DIY vinyl pumpkin decals

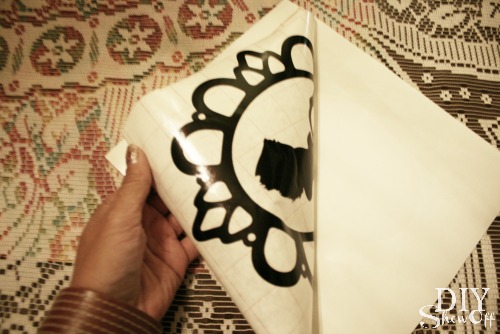
6. Peel away paper backing from the vinyl decal, transferring it to the sticky transfer paper. 

DIY vinyl pumpkin decals

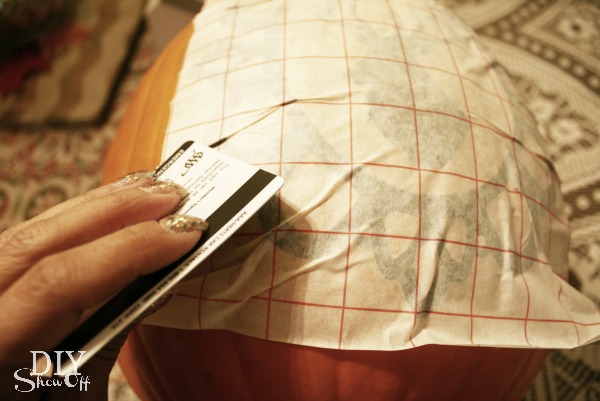
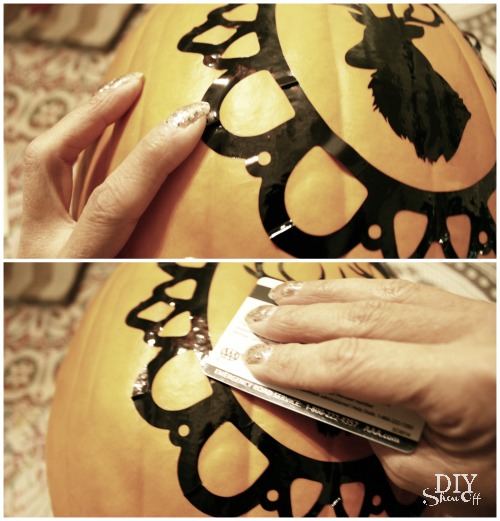
7. Position on pumpkin and lightly rub decal with a credit card. 

DIY vinyl pumpkin decals

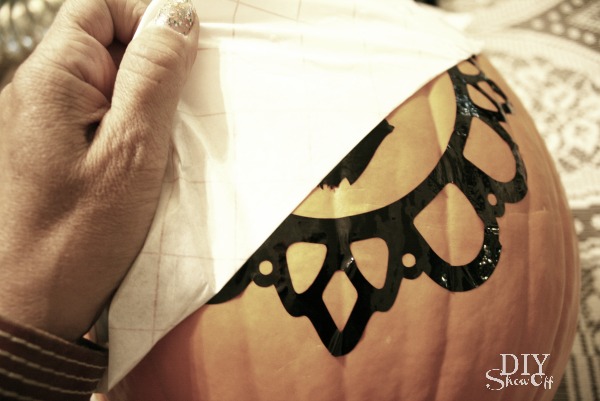
8. Peel away transfer paper. This might get a little tricky because of the pumpkin’s uneven surface. You may have to use your fingernail to help with the transfer.

DIY vinyl pumpkin decals


9 .There are also wrinkles in my vinyl decal…but it doesn’t take away from the design. I just smoothed it down the best I could using my fingernail and credit card. 

DIY vinyl pumpkin decals

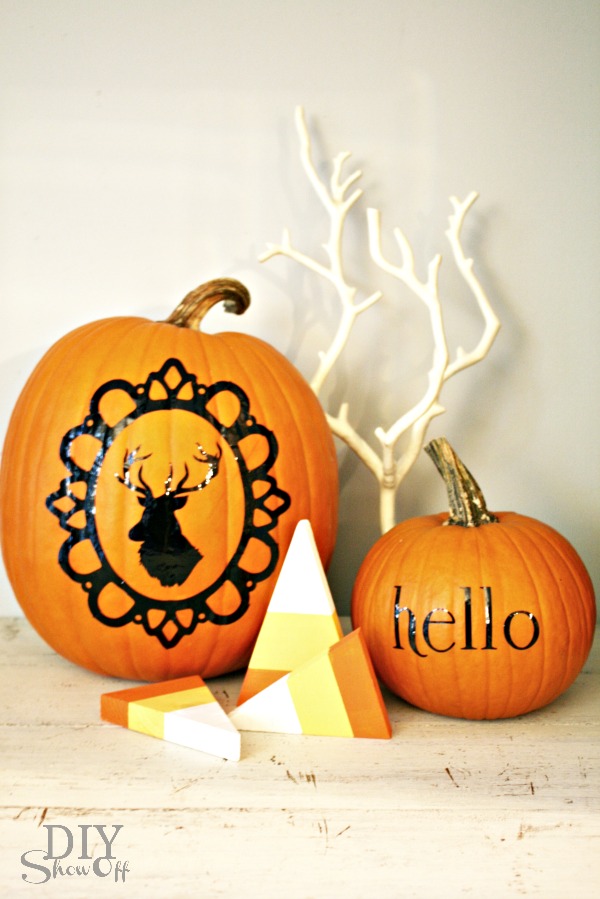
All done and so cute! SO many options. I noticed that the Silhouette America online store even had sets of eyes, noses and mouths for jack-o-lantern faces. A monogram or spooky ghost or black cat would be great too!

DIY vinyl pumpkin decals

See the tutorial for the candy corn here.

DIY vinyl pumpkin decals


Linking up to the Lettered Cottage, Pumpkin Party and Cuckoo4Design Pumpkin Parade

*This post is sponsored by Happy Crafters. Tutorial, experience and opinion is my own. See more projects at Happy Crafters blog.

HClogopngsmall

Wooden Candy Corn Accents

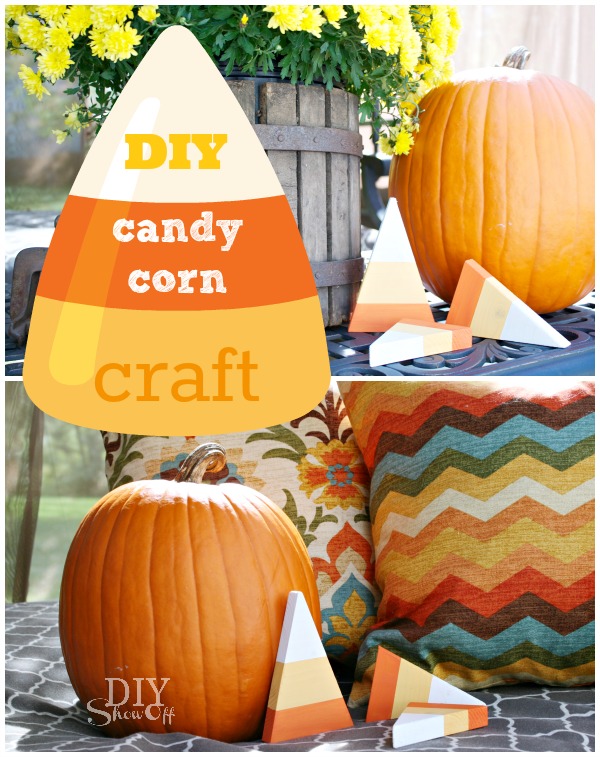
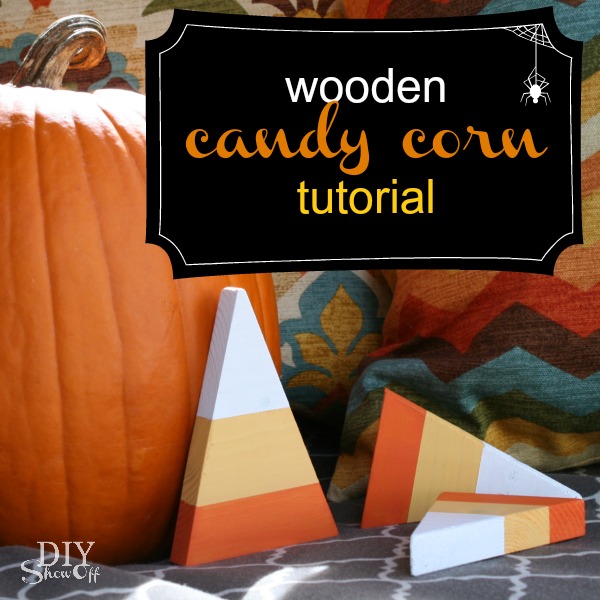
We’re making progress on the grape arbor/gazebo, recycled brick path and patio AND a laundry room makeover and in between those bigger DIY projects, I’m having fun with some stress-free easy DIY. I just saw the cutest little candy corn bean bags somewhere which inspired this project…a scrap wood version. 

DIY Halloween/Fall craft: decorative wooden candy corn pieces 

Materials:

  • Scrap 1 x 6 wood
  • FrogTape®
  • Sandpaper
  • Craft paint

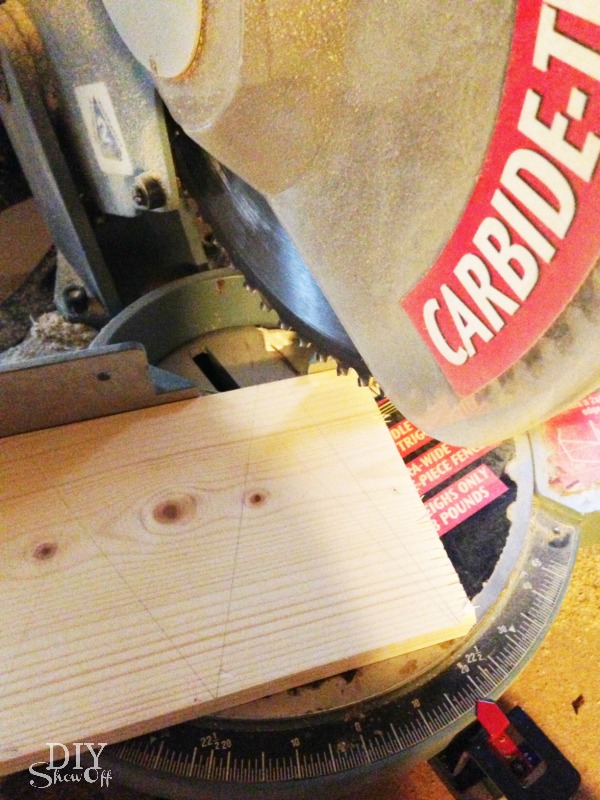
I used the miter saw to cut three triangle shapes from my scrap wood, then sanded the edges.

DIY Halloween craft

Candy Corn Fact: My DIY version goes from orange to yellow to white but the official candy corn striping starts with yellow on the bottom, orange in the middle and white on top. 

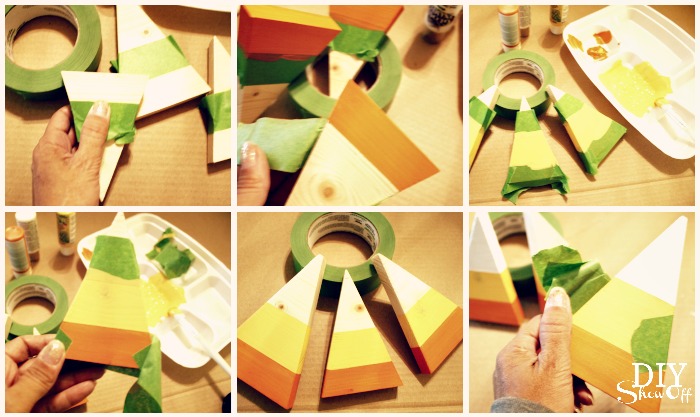
I taped off each section using FrogTape®, rubbing my thumbnail along the edge of the tape. I started at the bottom with orange craft paint. After I applied a second coat, I removed the FrogTape®. Let dry and move on to the middle yellow section following the same steps, finishing with white craft paint on the pointy part of the triangle.  Allow drying time between each color. 

DIY Halloween/Fall craft: decorative wooden candy corn pieces

DIY Halloween/Fall craft: decorative wooden candy corn pieces

Optional: seal with a protective clear coat. 

DIY Halloween/Fall craft: decorative wooden candy corn pieces

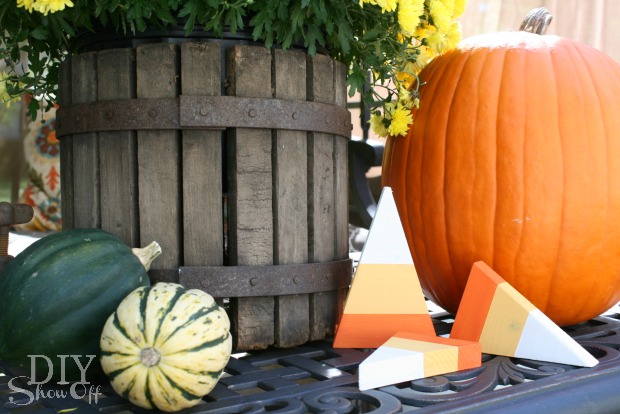
Aren’t they cute?

DIY Halloween/Fall craft: decorative wooden candy corn pieces

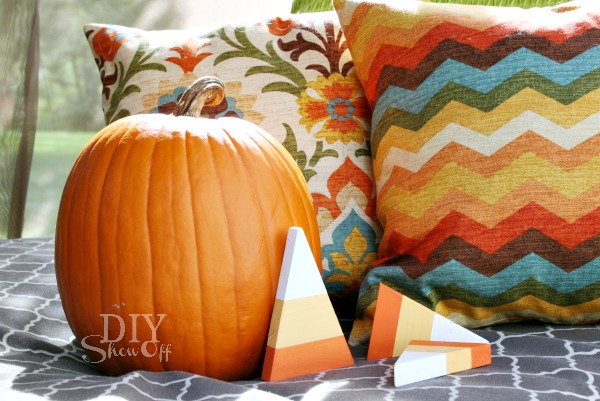
I think these would make a great fall hostess gift tied up with ribbon.

DIY Halloween/Fall craft: decorative wooden candy corn pieces 

Sharing at the Lettered Cottage and Centsational Girl.

FrogTape Blog Squad

*I’m a member of the FrogTape® Blog Squad. This post is sponsored by FrogTape®. As always, the opinions are completely my own based on my own experience.