DIY Wire Cloche SucculentTerrarium

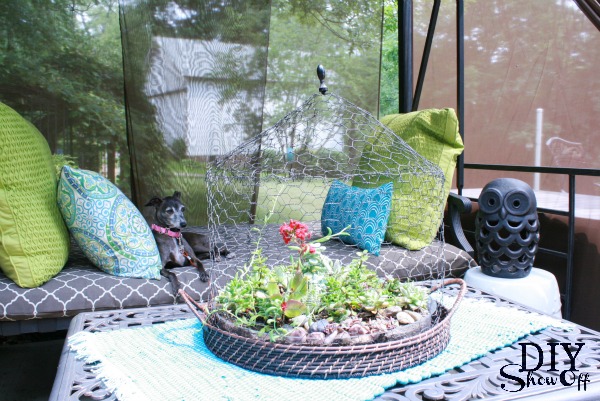
Succulents make for a great indoor/outdoor centerpiece. I’ve been using this wire cloche succulent garden as a centerpiece on our patio coffee table all summer. I love that it requires little maintenance. 

DIY wire succulent garden tutorial

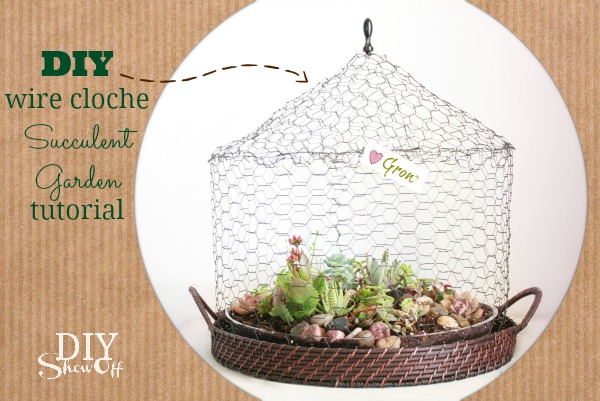
DIY wire cloche succulent terrarium tutorial:
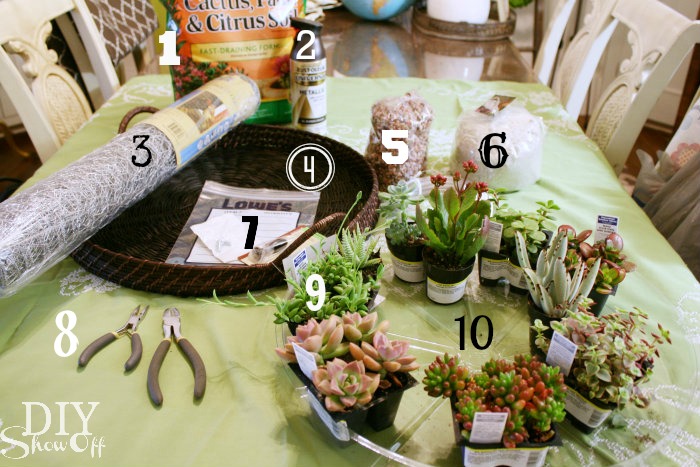
diy wire cloche succulent garden

Materials I used:

  1. Miracle Gro Cactus & Citrus Potting Soil
  2. Rustoleum Oil Rubbed Bronze Spray Paint
  3. Chicken Wire 
  4. Allen & Roth Round Serving Tray
  5. Pebbles
  6. Sand
  7. Finial
  8. Tools: Needle Nose Pliers & Wire Cutters
  9. Assorted Succulents
  10. Plastic Planter Liner
  11. Decorative Rocks & Accessories (not shown)

What I did:

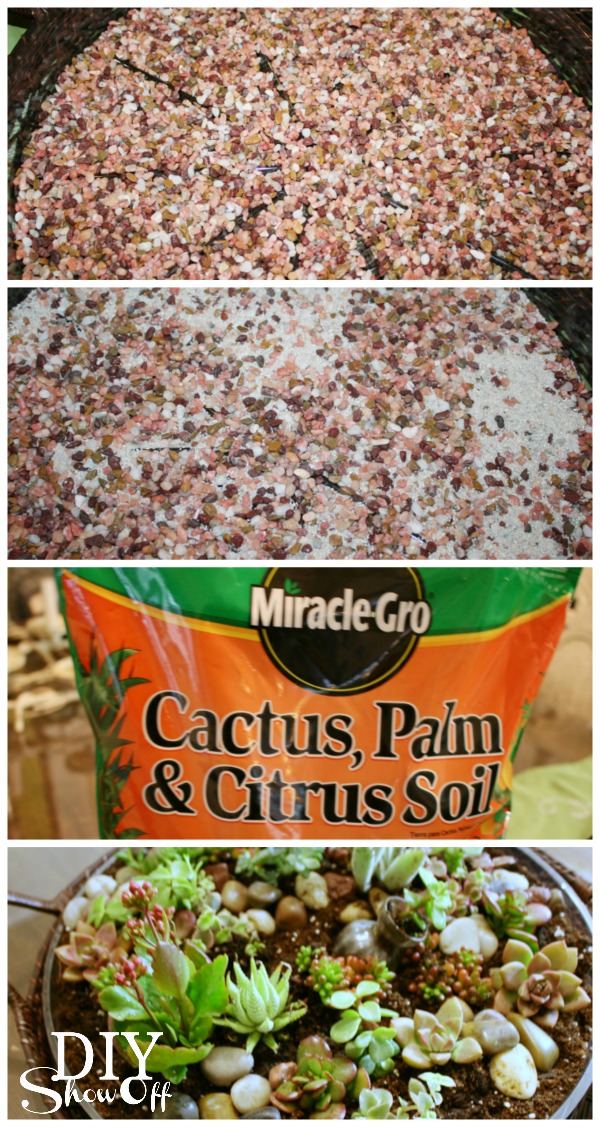
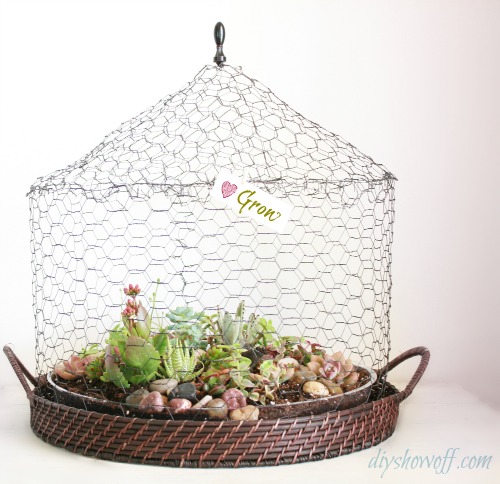
In the plastic planter liner, I layered pebbles, sand and topped with the potting soil. Then planted the succulents and added decorative rocks. And placed the plastic planter liner into the round serving tray.

DIY succulent garden

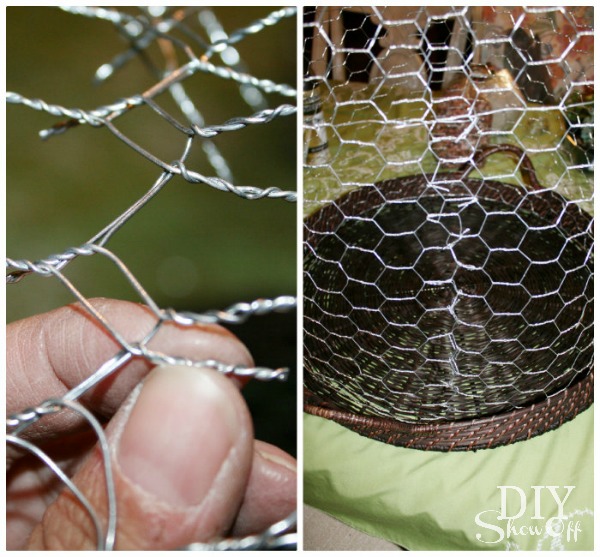
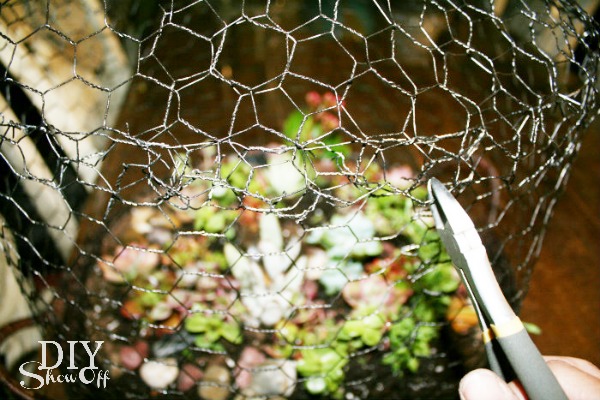
I measured the diameter of the plastic planter liner and decided on the height of my wire cloche and using wire cutters, cut out my shape to create a cylinder to go around the terrarium.

DIY wire succulent garden tutorial

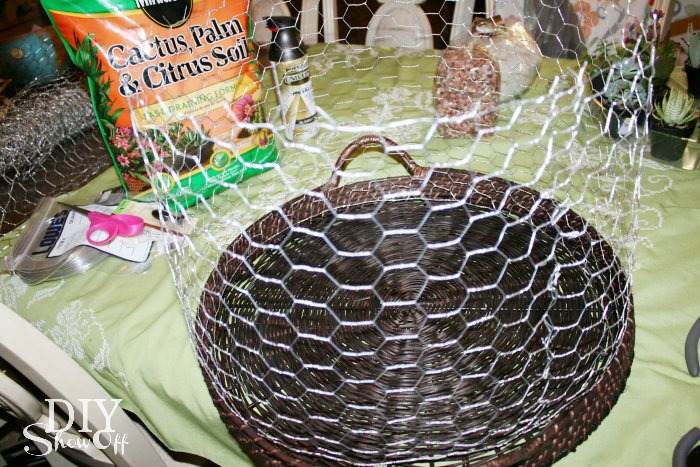
I cut the wire so that I’d have little wire “tabs” to secure the shape up along the side.

DIY wire succulent garden tutorial

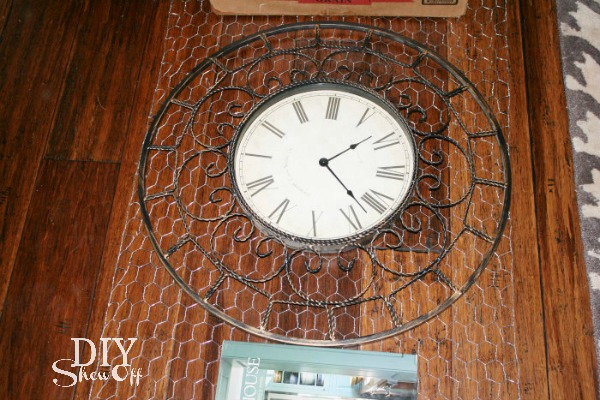
To make the top (roof) of my wire cloche, I used a large round clock as a circle template (the biggest circle size I could cut from my chicken wire width) and cut using wire cutters.

DIY wire succulent garden tutorial

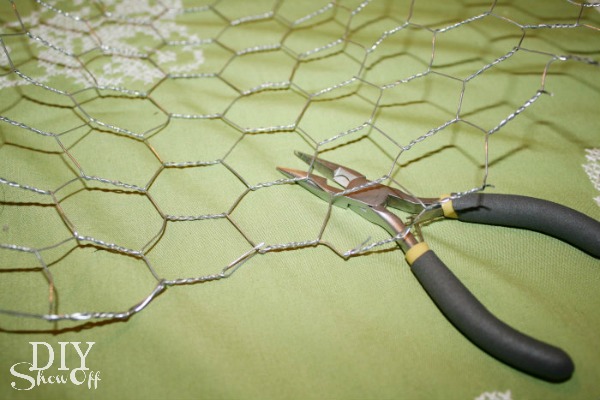
I cut a straight line to the center of the circle and created a ‘cone’ shape top for my terrarium and again used the small cut chicken wire tabs to secure my shape. Then I spray painted my cylinder and top.

DIY wire succulent garden tutorial

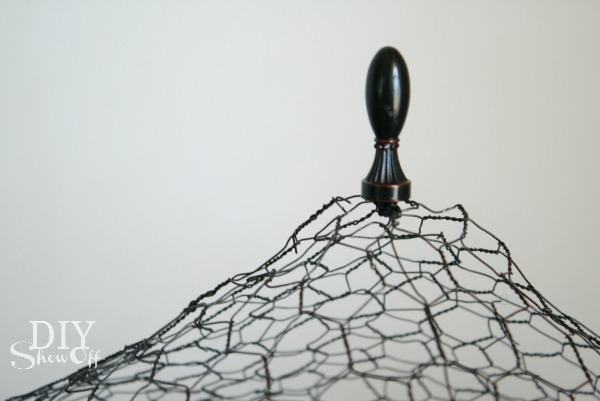
Once dry, I used an extra piece of wire (a twist tie will work) to attach a finial to the top. Glue and screws weren’t working so this takes some playing with, but the wire cloche is light so lifting it from the garden will be easy to do, even if it’s simply twisted in the chicken wire. 

DIY wire succulent garden tutorial

And using the same technique with ‘tab’ piece of wire from the cylinder, I attached the “cone” (sort of like a “roof”) to the cylinder.

DIY wire succulent garden tutorial

Then just slip the wire cloche over the terrarium.

DIY wire succulent garden

Here it is on the patio:

succulent patio garden

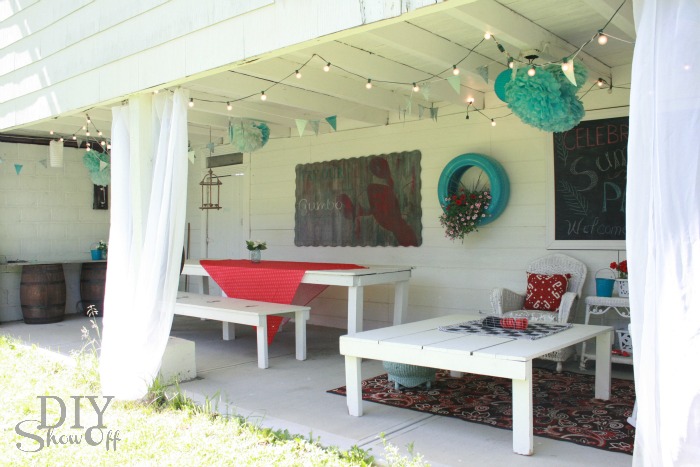
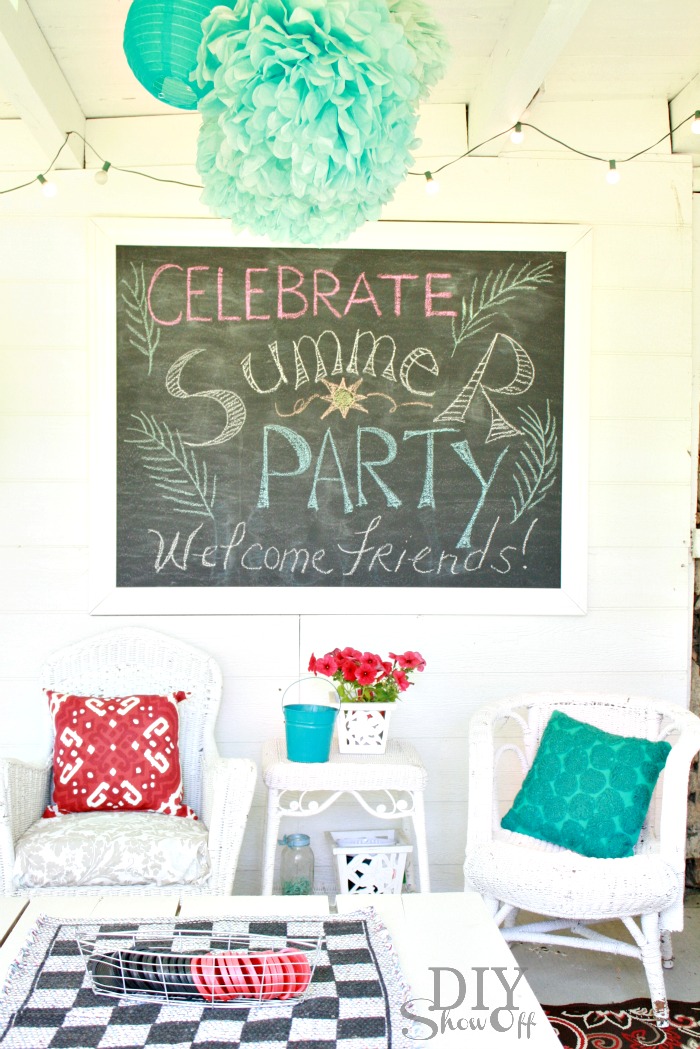
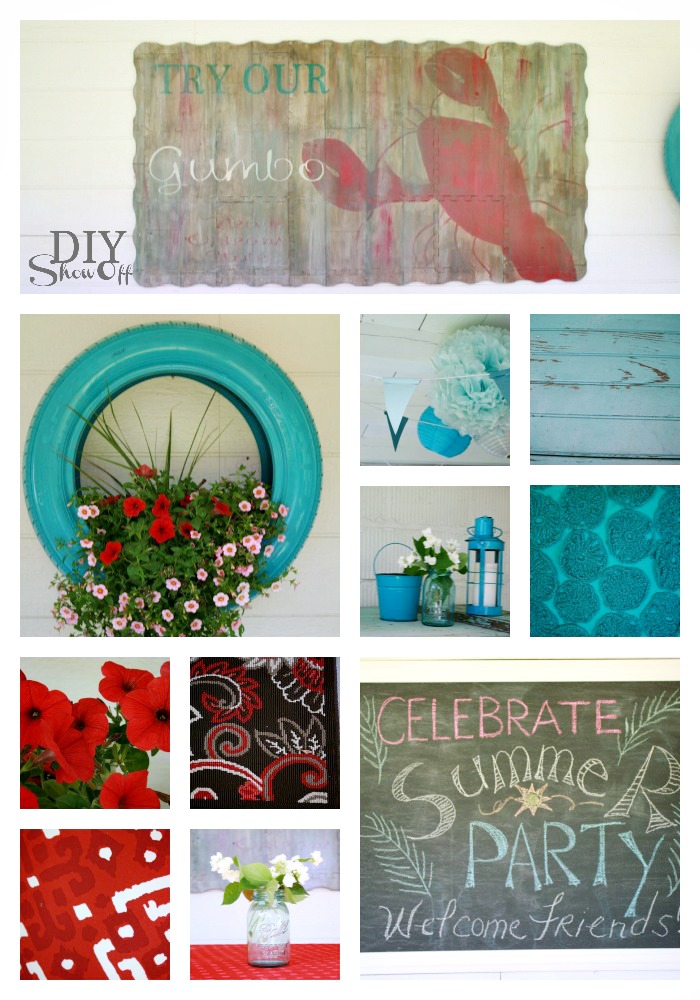
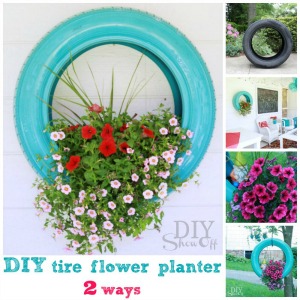
See more patio and outdoor projects in the DIY Show Off Project Gallery

And more fun DIY ideas at Lowe’s Creative Ideas, follow Lowe’s on InstagramPinterest and sign up for the Creative Ideas magazine and app.

Spring 13 Blogger Badge Subscribe Banner Version

*Disclaimer: As a member of the Lowe’s Creative Ideas Creators and Influencers network, I received a Lowe’s gift card to complete a DIY terrarium project, however the tutorial images, instructions and opinions are my own. 

Covered Patio Transformation

When we bought our home, the lower area of our bank barn was junky and scary.

Before – previous owner’s things. It’s dark, scary, spidery and a little dangerous with broken glass. Old picture…sorry about the tiny size.

barn-before

I shared some photos in our summer home tour but I wanted to share some true before along side the after pictures. 

After – paneled wall, a LOT of paint and a concrete patio. 

barn patio 

The transformation in pictures:

Yikes!

New Back Wall

The harvest table looked liked this before and was actually nailed to the back wall…we gave it a makeover too.

New Concrete Patio
 
Russ tries out the paint sprayer

Now:

barn party patio

On the far wall, two old barrels topped with a door serves as a buffet table near the electrical outlet…great for serving and keeping crockpots and slow cookers warm. 

barn patio makeover

Doesn’t the harvest table look 100% better with a paint job? The bench was ‘rescued’ too. 

party patio

A framed chalkboard gets a new message with each party. Birthdays, graduations, etc. The tire planter is on the wall when we entertain but gets moved to the sun/rain otherwise. My giant painted puzzle playmat serves as wall art. 

outdoor entertaining

Wicker furniture is all from estate and yard sales – just a fresh coat of spray paint. 

outdoor living

I still need to get two outdoor pendants/lighting. I’d love to stain/paint the concrete. I also have plans for moving things around and building a ‘bar’ type area. But for now, it’s perfect for parties and sometimes I come down here for some quiet time too. 

red and turquoise patio

It’s a fun area for hosting cookouts since it opens up into our huge back yard with plenty of room for volley ball, badminton, corn hole and a fire pit. 

tire flower planter tutorial at DIYShowOffWall art….

Painted Foam Playmat

Games…

DIY giant outdoor LCR dice game tutorial


Kids’ Plastic Picnic Table Makeover

As you know, we entertain a lot in the summer, hosting quite a few family picnics. Guests include my 3-year-old nephew and 2 and 4-year-old nieces. It was decided that I needed a kid’s table and mom scored a Little Tykes picnic table at a yard sale for me for $15. Hurray for yard sale season (and moms)!

How to paint a child's plastic picnic table 

But when you don’t have a yard full of fun brightly colored kids’ toys; the red, blue and yellow looks out of place, not to mention it was faded and a little worse-for-wear. 

kids picnic table before

I decided a little makeover was in order. 

Materials:

  • Spray primer (2 cans)
  • Spray paint (2 cans for all over) I used Rustoleum Oil Rubbed Bronze.
  • Another can for decorative purposes (optional)
  • Spray clear coat
  • FrogTape
  • Vinyl decals (I made my own using supplies from Happy Crafters)

Tutorial:

First, I lightly sanded the picnic table with a fine grit sandpaper and gave it a good spraying with the pressure washer. (Thanks, Steve!)

washing picnic table

This also comes apart some how, but I couldn’t figure it out so I didn’t bother. Apply a coat of primer: 

DIY plastic picnic table transformation

Then spray paint:

painting plastic picnic table tutorial

I let it dry and ‘cure’ for a few days. 

Using my FrogTape, I created a rectangle (table runner) outline on the table part of the picnic table and taped off the rest of the table top. 

child's picnic table makeover

Using my Silhouette Cameo and Silhouette Design Studio software, I created and cut out the letters for a dinner time prayer.

Silhouette Studio designer software

Happy Crafters

I applied the sticker type vinyl letters to the center of my rectangle and made sure FrogTape and vinyl letters were pressed down securely.

kids picnic table makeover

Then gave it a coat of spray paint in Rustoleum’s Lagoon. (I used a large piece of cardboard to shield the benches.)

painting plastic picnic table

I peeled away the FrogTape and decals while the paint was still wet. I still have blue fingernails to prove it. 

picnic table makeover

I let that dry for a few days (in my vehicle mostly since it’s been raining off and on so much)…which is why I had no choice but to be patient as well! Then I used my FrogTape again to create a border around my “place mat” and filled it in with DecoArt’s Patio Paint. Then peeled away my FrogTape and again…let it dry for a few days.

painting kids plastic picnic table

I had to touch up the paint here and there. Then sealed it with a spray clear coat (satin finish) and let that dry.

clear coat

Much better! And a sweet little reminder for the little ones to pray before digging in. 

childs picnic table makeover after


We tested it out over the fourth of July. Now it fits in with our patio…

plastic picnic table makeover

*This sponsored by FrogTape. FrogTape provided by Shurtech. The opinions are completely my own based on my own experience.

 FrogTape Blog Squad

 *Vinyl provided by Happy Crafters.

HClogopngsmall