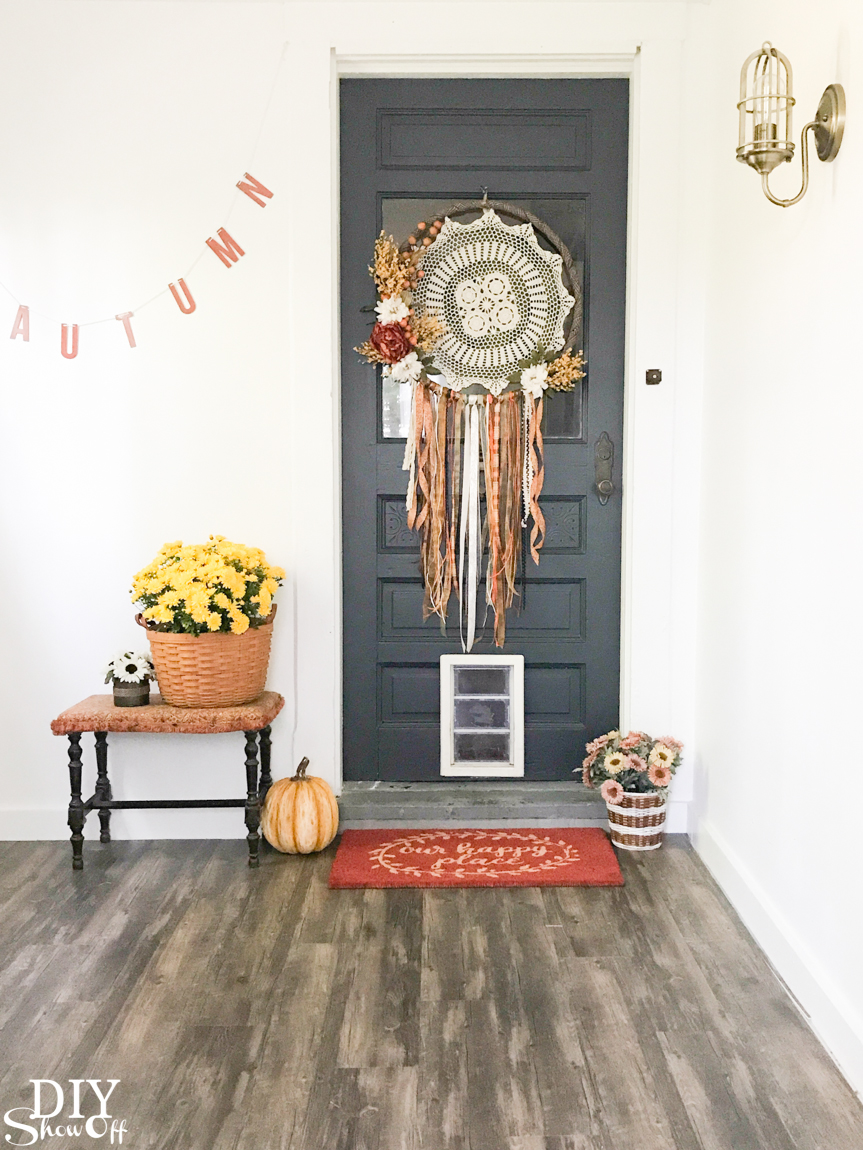
Ready to design your dream space without the stress? I created an AI printable DIY planning kit that blends creativity + clarity using AI-generated prompts. It’s the exact system I use for real life projects! And it’s now available in my shop!
What’s Inside the Printable Kit?
💡 Custom AI prompts to unlock your design ideas
📝 Project planner pages to organize your steps
🛒 Shopping + material lists
💸 Budget section to track costs easily
🎯 Works with your style and space, not a one-size-fits-all template
I’d love to know what project you’re planning next? Tell me in the comments or tag me if you use the planner. I can’t wait to see what you create! If you try it, tag @DIYShowOff so I can cheer you on! It truly means the world to see it being used in real-life projects.
Subscribe
Let me know when you publish a blog post! I want to stay up-to-date!
What worked, what didn’t, and how I peacefully evicted our uninvited guest.
A raccoon mama moved her family out after we made the attic a little less cozy. (No traps, no harm, just DIY persistence.)
How I Got Rid of a Raccoon in the Attic (Without Expensive Traps)
Volume up! Because this guest wasn’t on the reservation.
Last spring, A mama raccoon in the attic at the studio made herself right at home. Unfortunately, her new home was directly above the guest bedroom… and the nighttime noises were hard to miss.
Thankfully, our actual guest was incredibly understanding (shoutout to the real MVP). But the situation had to be handled quickly, humanely, and ideally without calling in an expensive wildlife service.
The Clues: Scratches, Sounds, and a Rooftop Break-In
If you’ve ever had a raccoon in the attic, you know the sounds aren’t subtle. One night, a guest messaged me:
“There’s something in the ceiling. It’s chirping.”
Sure enough, it sounded like something was having a party in the attic crawl space.
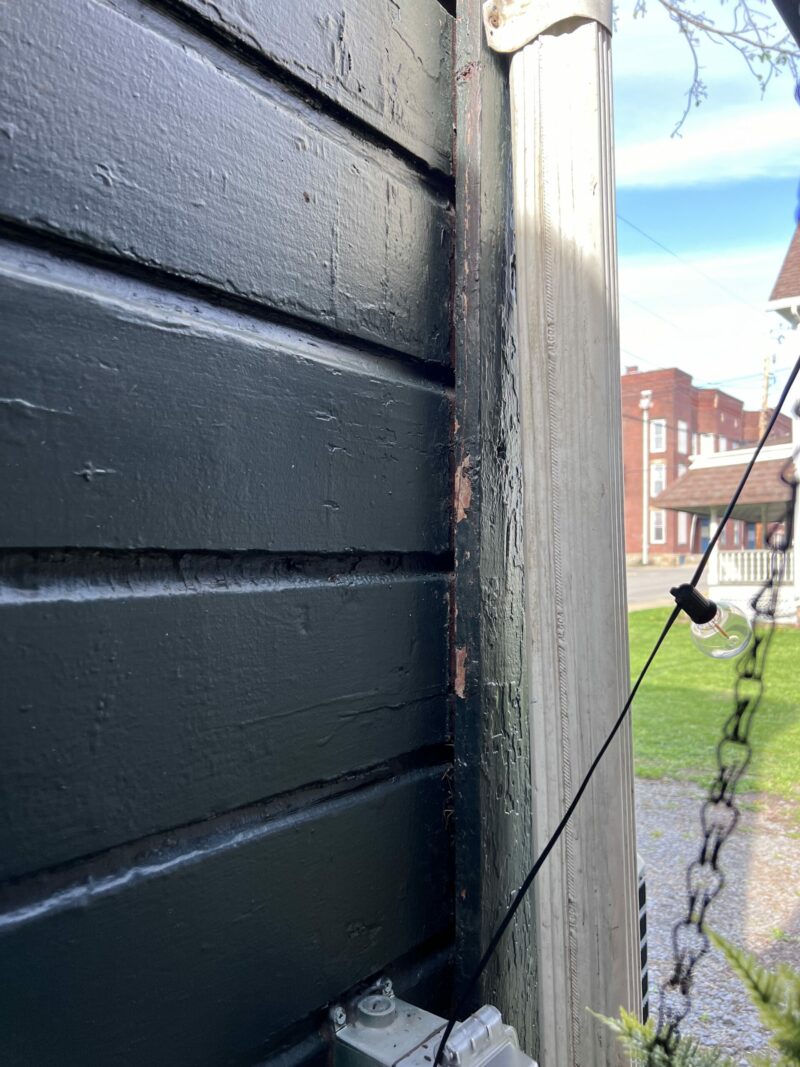
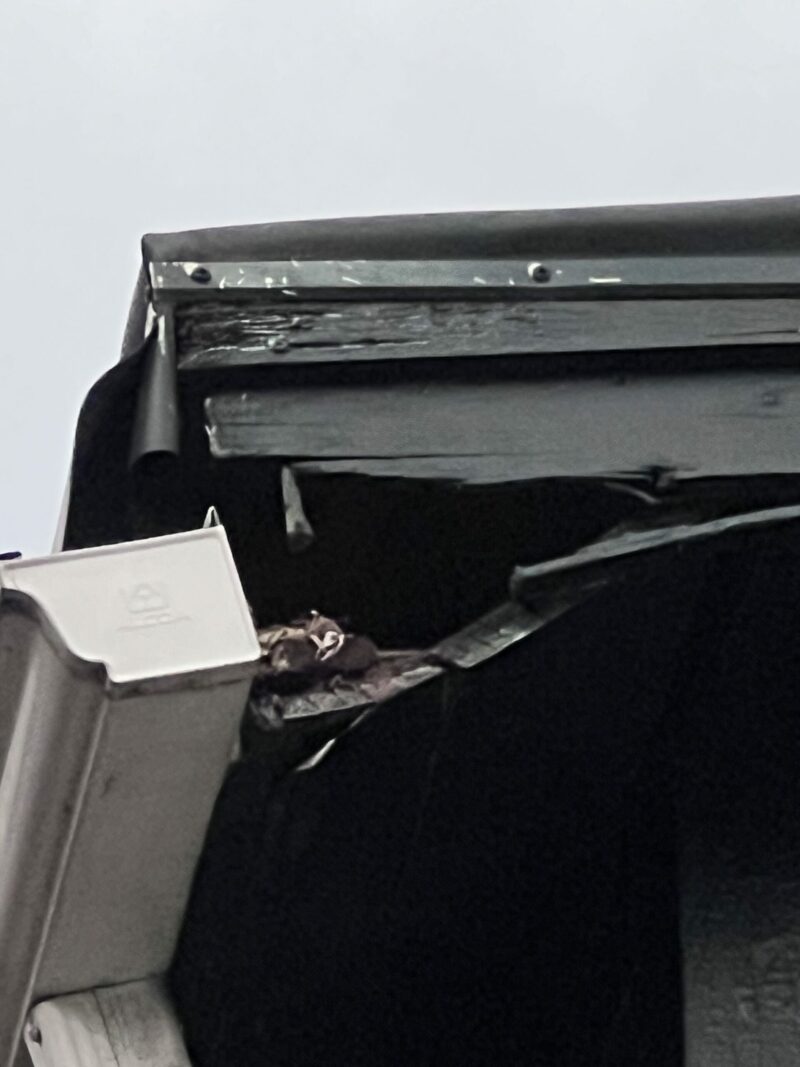
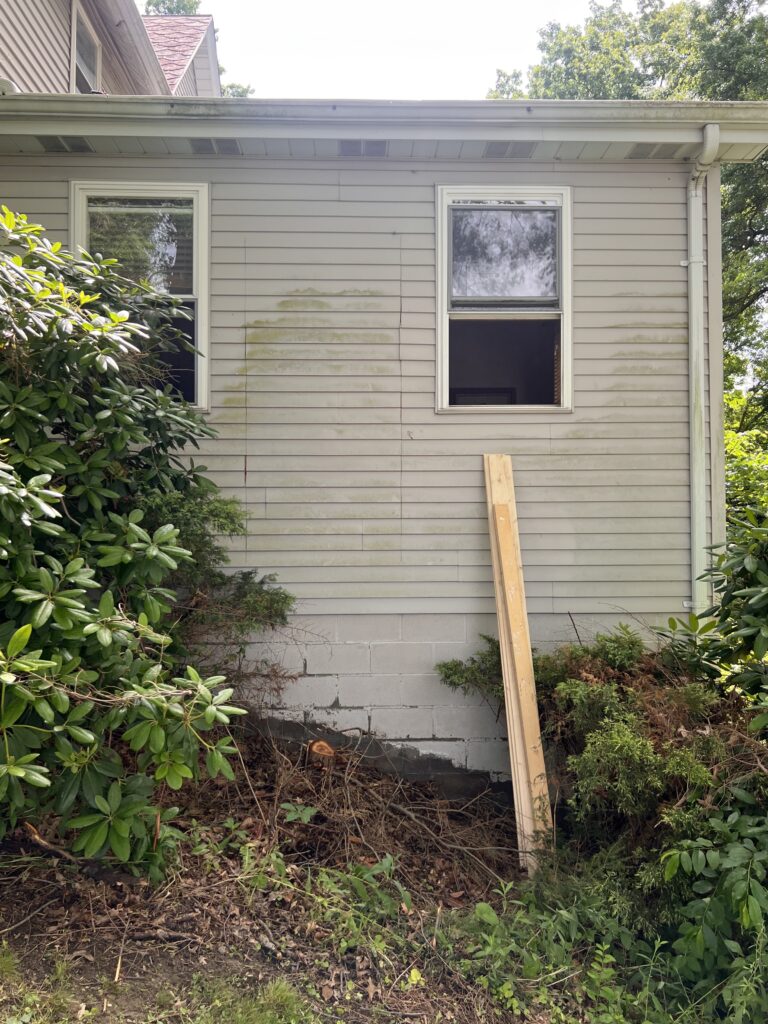
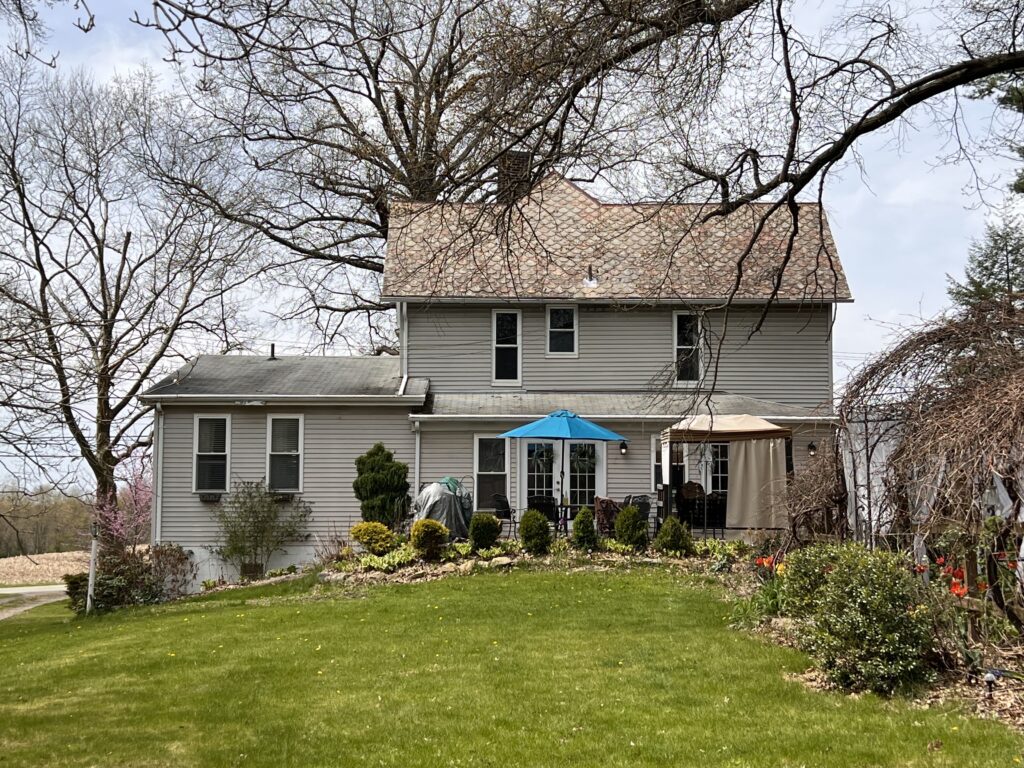
I investigated and spotted muddy paw prints (not visible in photo) and scratch marks going up the white drainpipe and my freshly painted exterior straight to a gaping hole near the soffit and fascia at the roofline. Raccoon. Of course.
Professional Help? Pricey.
I called a few local wildlife services and got the scoop:
Trapping fees were high. They’d set, check in a few days and if she didn’t take the bait,
prices went way up if they had to go into the attic.
There was no guarantee they’d catch her, especially with babies involved.
So… I went into research mode.
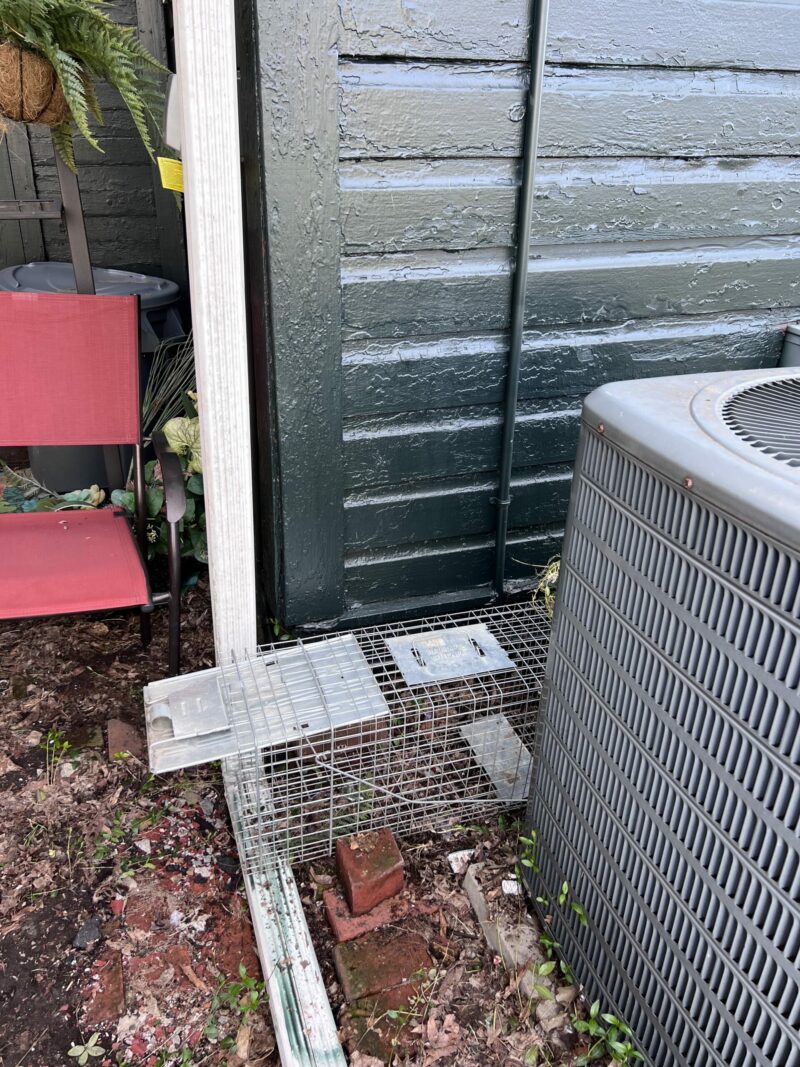
What Didn’t Work: Classic Traps
We placed a humane trap near the entry point and tried a few bait combinations:
Tuna and eggs
Peanut butter and marshmallows
One of our light-hearted bait attempts. Marshmallow banana sheep. Spoiler: she was not impressed. Humor meets trial and error.
Just kidding on the presentation! haha! But I did try peanut butter and marshmallows.
Ps. I didn’t want to use tuna or cat food…I didn’t want to catch a feral stray or neighborhood cat.
She didn’t take the bait. Not once. I later read that raccoons who’ve been trapped before are trap-shy and this clever mama seemed to know the drill.
How I Got a Raccoon in the Attic to Move Out Naturally
My guest was leaving for the weekend. I had a small window to evict the unwanted raccoon-squatter. Raccoons love quiet, dark, undisturbed spaces. So I flipped the vibe completely.
Here’s what I used to encourage a peaceful exit:
Opened the attic crawl space door and placed the following:
Tossed around some old socks soaked in vinegar as far as I could throughout the space
Let the TV run in the room below with the volume all the way up. You could also use a white noise sound machine.
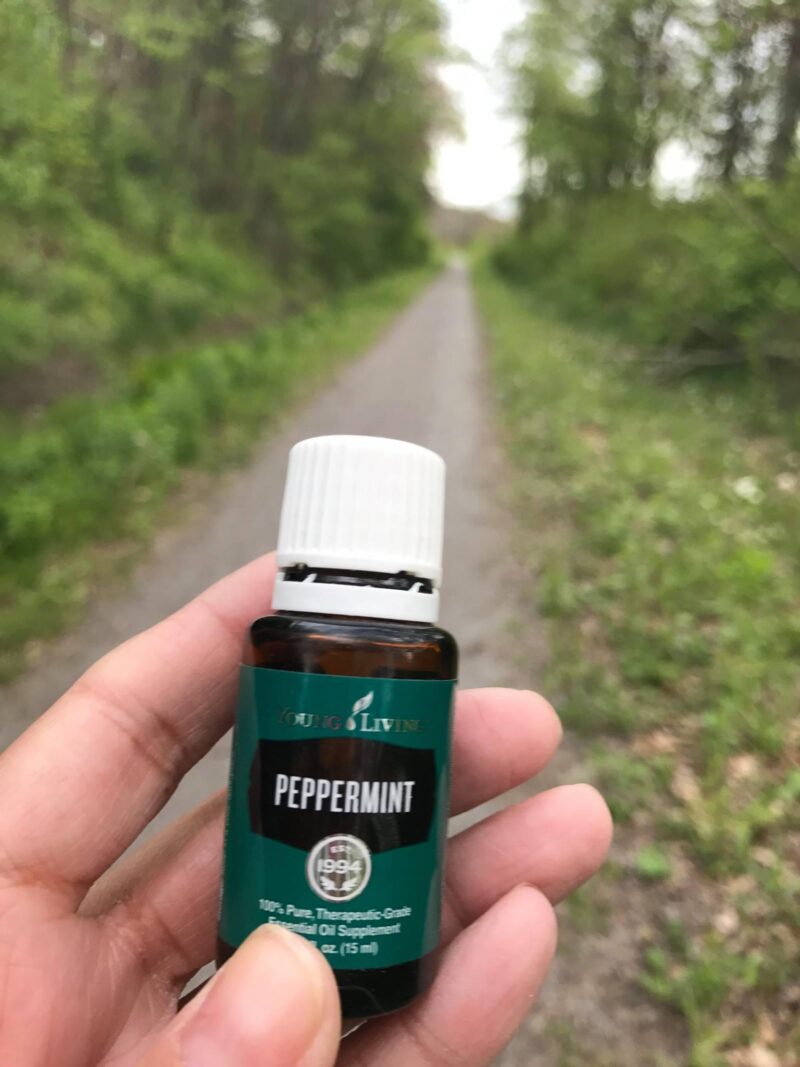
Peppermint essential oil: part of my humane DIY raccoon eviction plan.
*I always have Young Living peppermint essential oil on hand … it’s one of my favorites for DIY, wellness, and even (apparently) raccoon evictions. Here’s my YL referral link if you want to try it too. Just a few drops in the diffuser and the attic smelled like a spa (to me but not a fan favorite for raccoons).
A full-on raccoon rave. Minus the fun.
And… it worked. That night, she packed up her babies and moved out.
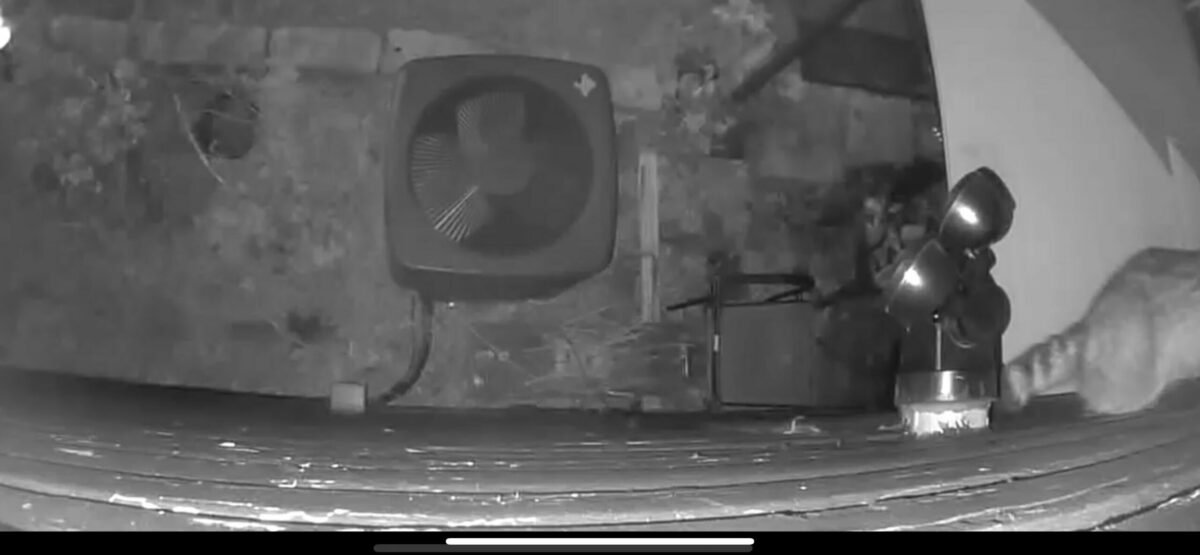
🎥 Watch it happen: Mama raccoon moves out with her baby (caught on cam!)
What We Did Next: Prevention Mode
Once she was out:
We sealed up the hole near the roofline (there was plans for a new roof in the works anyway so that also helped in the long run).
Did a full check of other outdoor structures (sheds, etc.). I read that they usually have a back up plan or two. (In fact, this is in a downtown neighborhood. The abandoned house next door was demolished. I have a feeling that was the original labor and delivery den and since it was no longer there this year, she made her way to her plan B…my attic.)
Gave the neighbors a heads-up. (Raccoons are sneaky and resourceful!)
Raccoon Prevention Tips (Humane + DIY-Friendly)
These are all helpful ways to prevent a raccoon in the attic from returning year after year.
Seal any small gaps around soffits, vents, or eaves—especially in spring.
Use peppermint essential oil or ammonia as deterrents (not poisons).
We got lucky. The mama raccoon moved out peacefully, and no one (no guest, human, or critter) was harmed. This DIY method was a last resort before calling in pros, and it worked because we acted quickly and respectfully.
If you’re dealing with something similar:
Be patient.
Act early in the season if possible.
When in doubt, call a licensed wildlife removal expert.
In addition, for more info on humane wildlife removal, I also found this guide helpful during my research: Humane World: Raccoon Removal Tips
Disclaimer: I’m not a pest control pro. I’m just sharing our personal experience in hopes it helps someone else avoid a costly or stressful situation. We chose humane, non-harmful deterrents and were mindful not to separate a mother from her babies.
Have you had an unexpected attic guest? Share your experience or tips in the comments—I’d love to hear what worked for you!
Some of the links above are affiliate links. That means I may earn a small commission (at no extra cost to you) if you decide to purchase something I’ve linked. I only share what I’ve personally used or researched thoroughly.
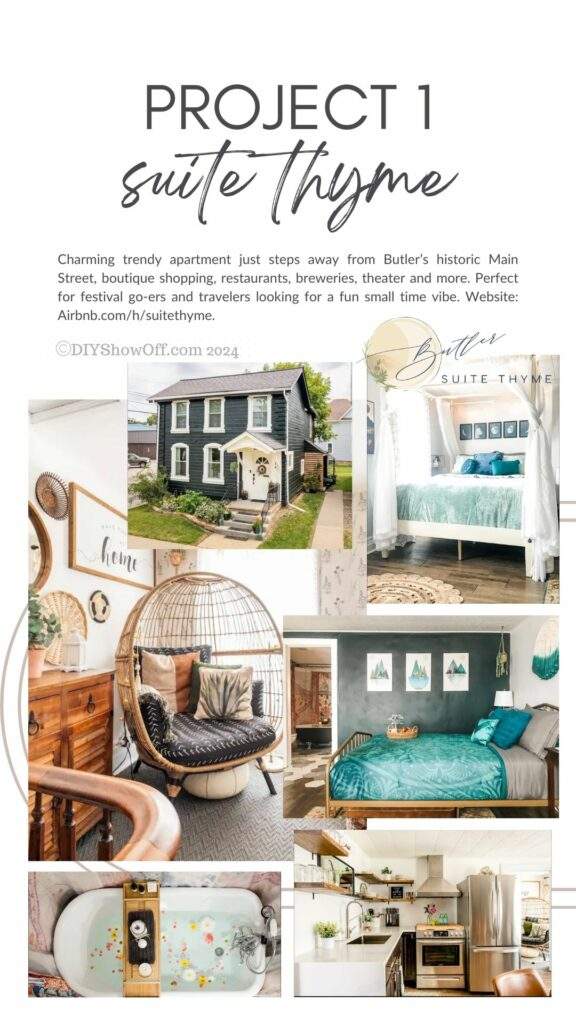
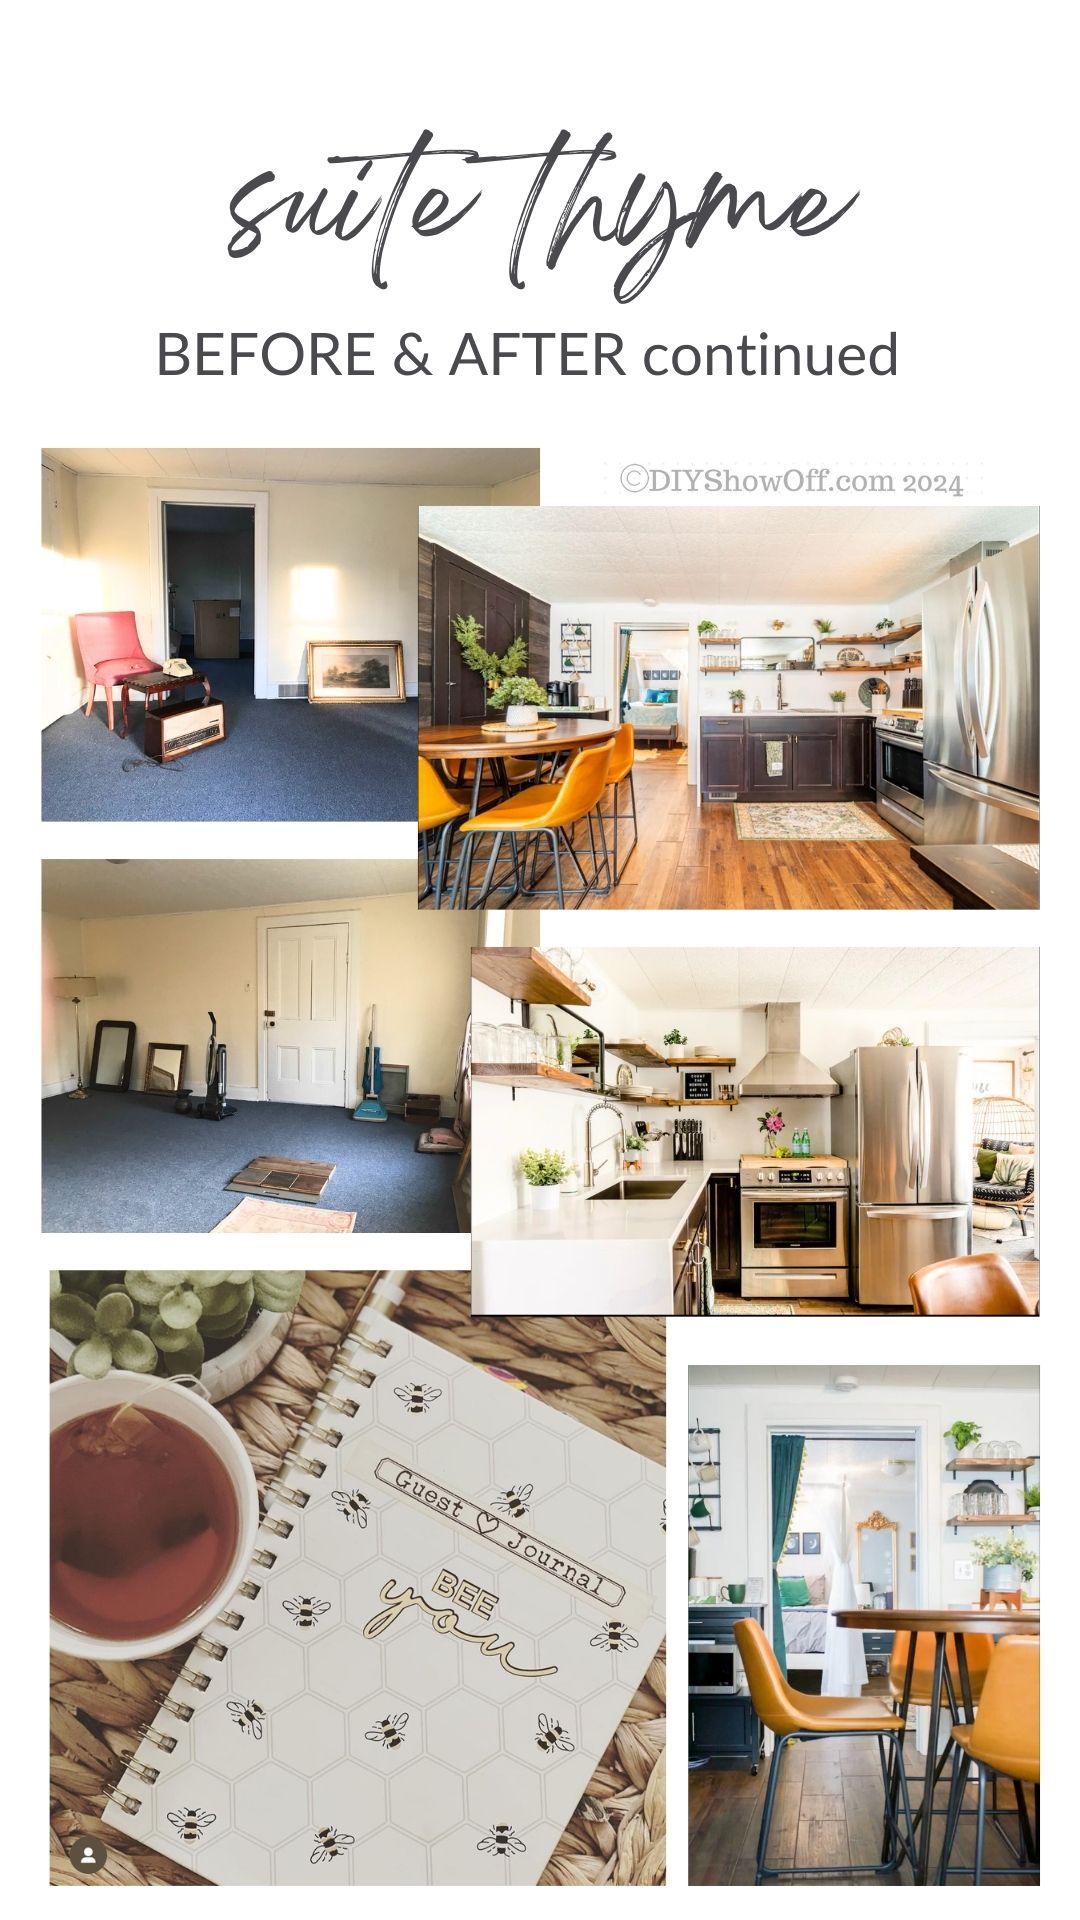
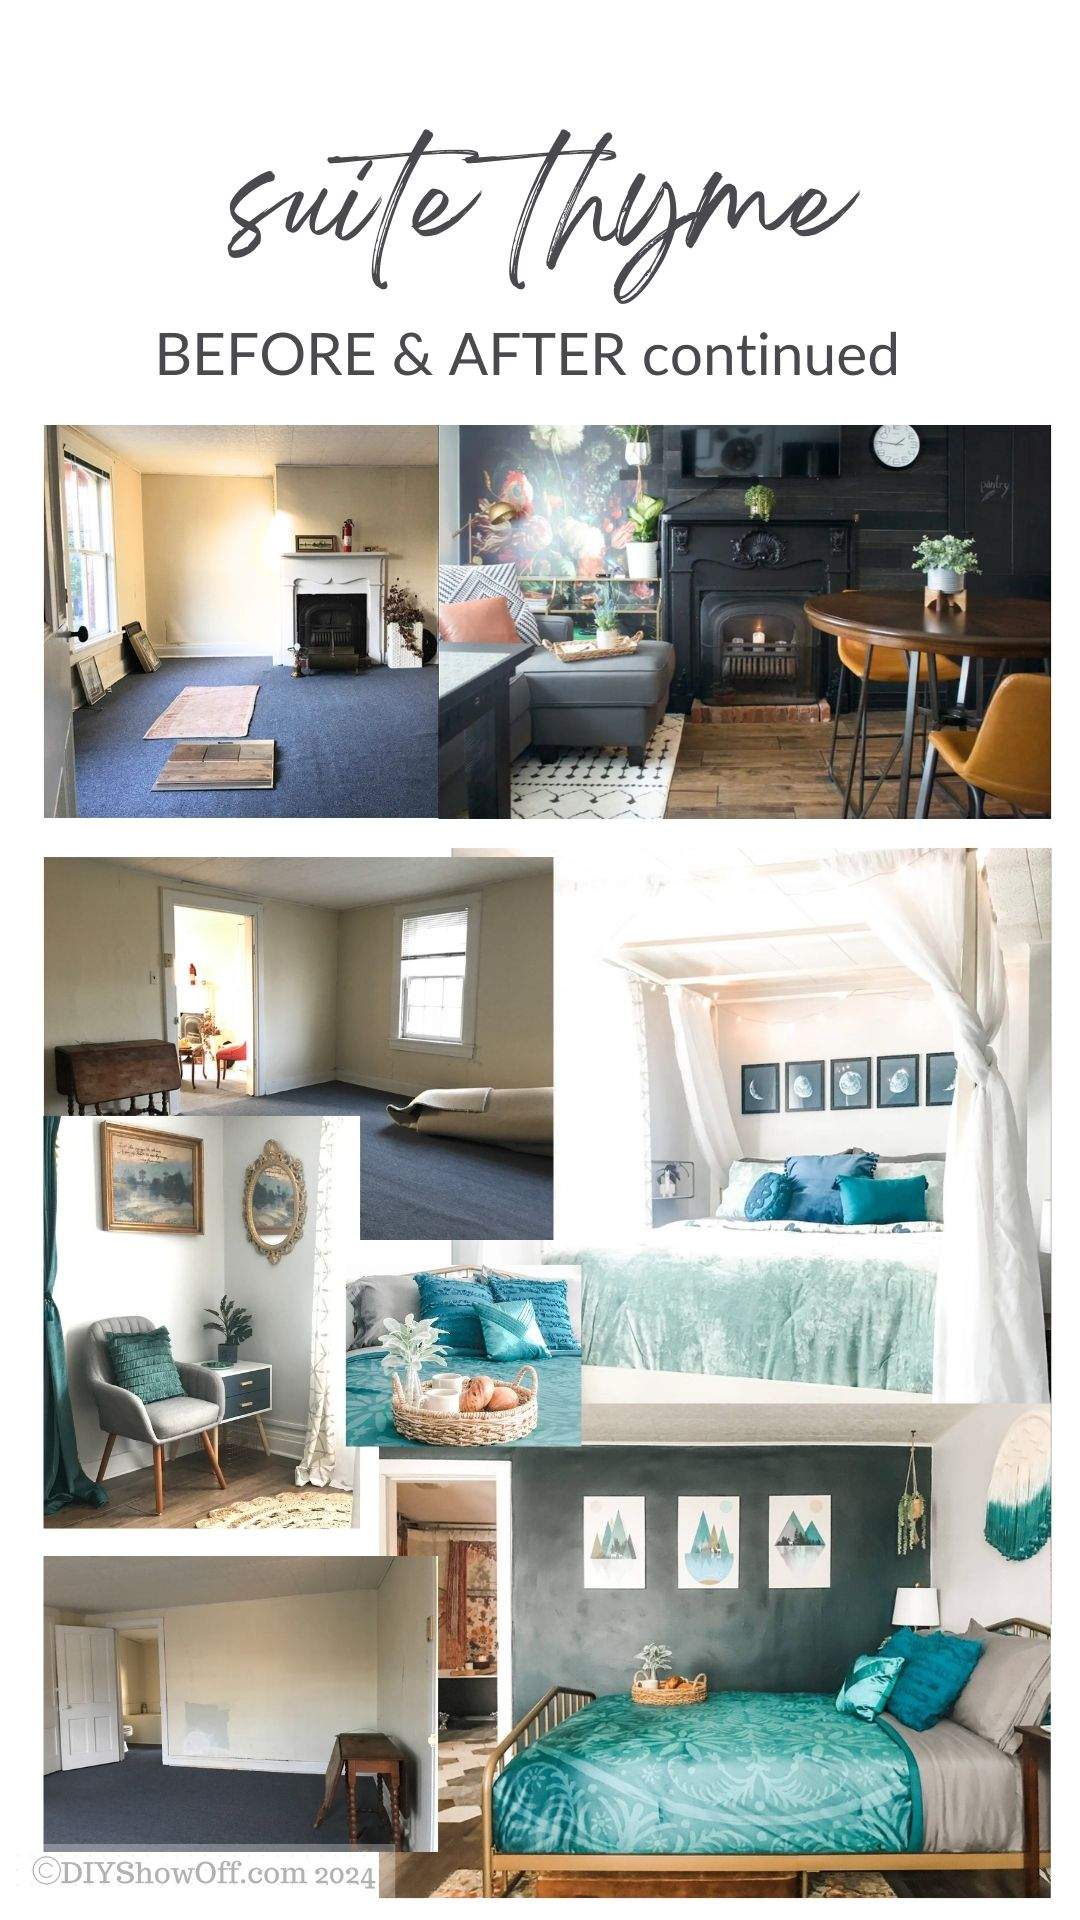
Welcome to Suite Thyme, a lovingly restored historic home nestled in the heart of Butler, Pennsylvania! What began as a vision for a cozy, welcoming short-term rental has blossomed into a full-scale transformation filled with character, charm, and thoughtful DIY design. I wanted each room in this 100+ year-old house to create a relaxing, stylish stay for our guests. Read along for the features of the full Suite Thyme before and after makeover.
I’ve created collages of each space and linked to the before-and-after transformations. From the inviting living areas to the serene bedrooms, you’ll see how I’ve blended vintage elements with modern comforts to create a unique guest experience. I love having complete creative freedom and enjoyed the “wow” change from what was to how it looks and feels now.
Explore the transformations below to discover how Suite Thyme combines historic charm with contemporary design to offer a memorable experience. Whether you’re seeking inspiration for your own home or looking for a delightful getaway, I hope these makeovers spark your creativity too!
Suite Thyme Before and After Makeover: Room-by-Room Collages
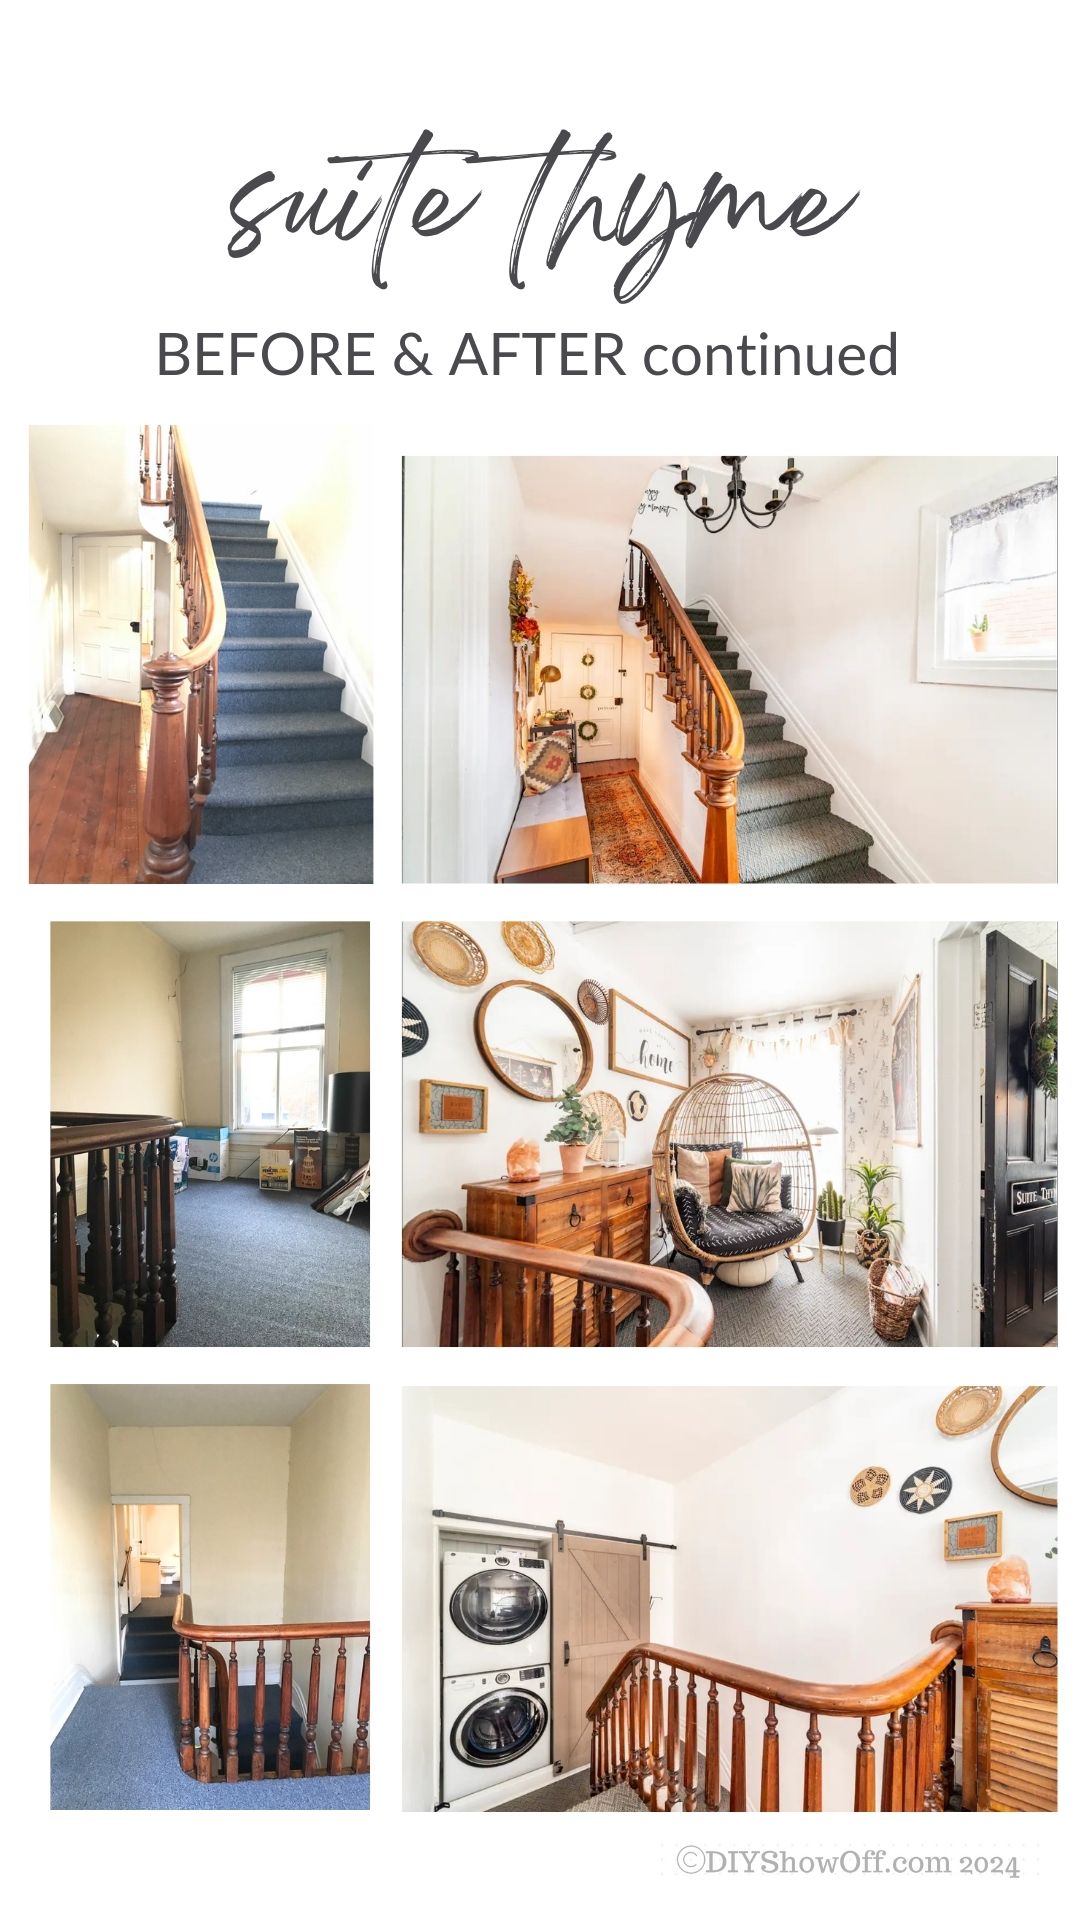
If you’ve been following along, you know this Suite Thyme before and after makeover has been such a rewarding project from start to finish (or always evolving).
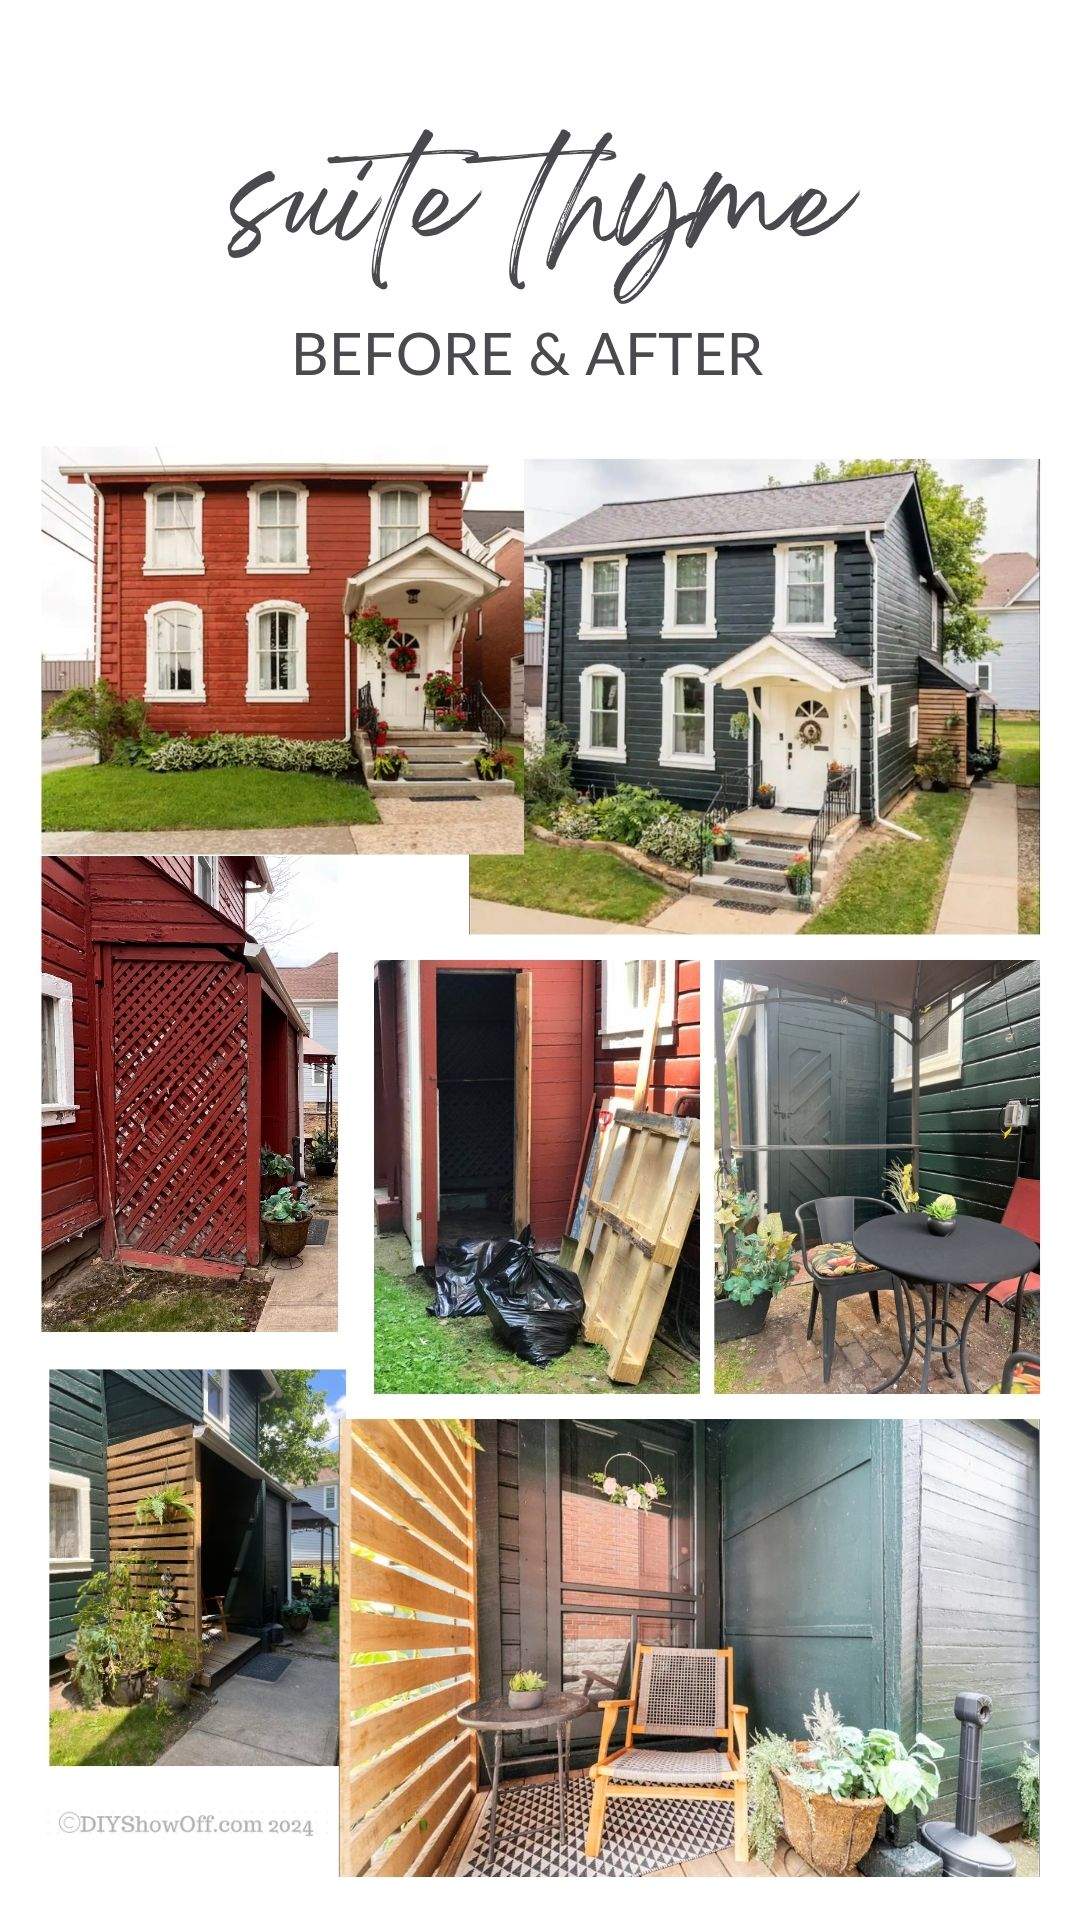
Much of Suite Thyme’s design journey has been shared in my #helloredreno series, but there have been some exciting exterior updates too, including all new windows and a completely fresh look for the outside of the home.
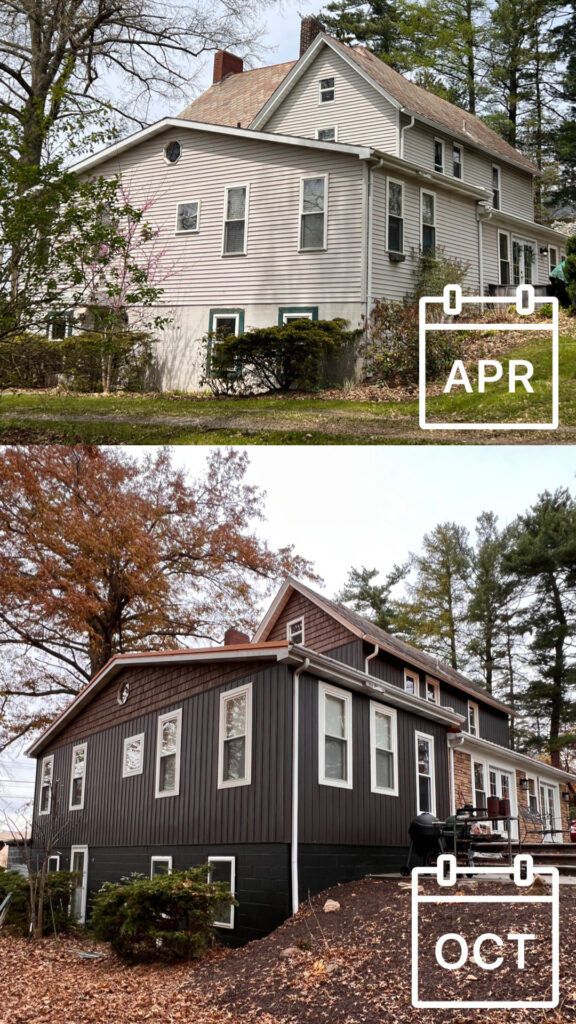
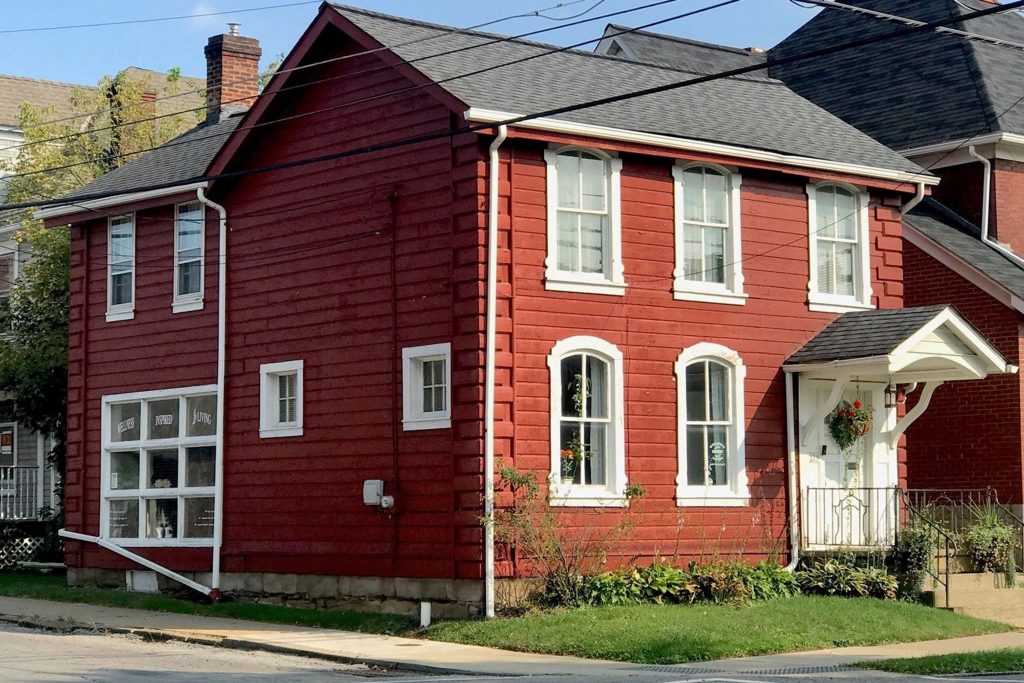
You can’t always see it in photos, but the red paint (which wasn’t original) had become weathered and was peeling badly. And if you’re like me, when a project comes with a big price tag, you want to be wowed by the results. That’s why choosing a new color was such a big deal. I am absolutely over the moon with the decision to go with Benjamin Moore’s Black Forest Green. It’s stunning! Don’t you think?
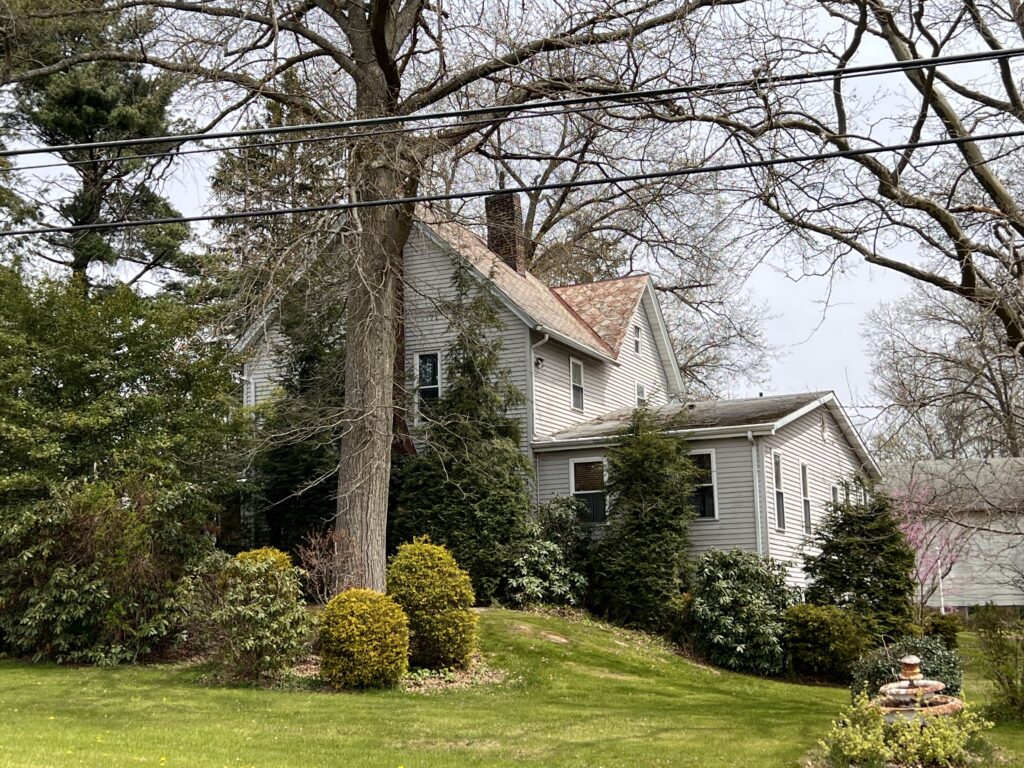
This late 1800s property has quite a history. We purchased it back in 2017 from a lawyer who had used it as his office for over 45 years. I’ve even heard there was maybe an antique shop here at one point. One of the old deeds I found shows a transaction from 1912. I’d love to dig up more details someday. It’s such a charming little spot, sitting proudly on a corner lot in the heart of the city.
The transformation has been a lot of work, but every step has been so worth it.
What’s next for Suite Thyme? There are exciting plans in the works! We’re hoping to purchase the adjoining property to expand the backyard and improve parking. You may have seen the demo of the abandoned house next door. Fingers crossed it all comes together!
Also on the list: a new metal roof, a concrete patio, and a little landscaping TLC. Indoors, I’m dreaming of a fresh kitchen backsplash and a bedroom refresh. It’s hard to believe how far this little home has come or that it’s already been creating special memories for so many travelers.
Love what you see? You can actually stay here! Book your stay at Suite Thyme on AirBnB right here and experiences it’s charm in person!
Love the Look? Stay Connected or Pin for Later
Thanks so much for taking a look around Suite Thyme! Each room has been a labor of love, and I’m so proud of how far it’s come. Whether you’re gathering inspiration for your own space or planning a visit to Butler, I hope you found something that sparked an idea or made you smile.
Want to see more behind the scenes or stay updated on future DIY projects and room refreshes? Be sure to follow along. Don’t forget to pin your favorite space! You can book Suite Thyme on AirBnB
Hello, DIYShowOff friends! If you’ve been a DIYShowOff follower, you’ll remember our farmhouse from back in the day. Ready for a farmhouse before & after exterior update and makeover? It’s undergone the biggest before and after exterior makeover to date. It’s hard to believe it’s the same farmhouse. Of course there are still projects on the list (porch railing, landscaping, etc.) but our property has never looked better! The exterior is so pretty and the yard is now an oasis, our personal retreat.
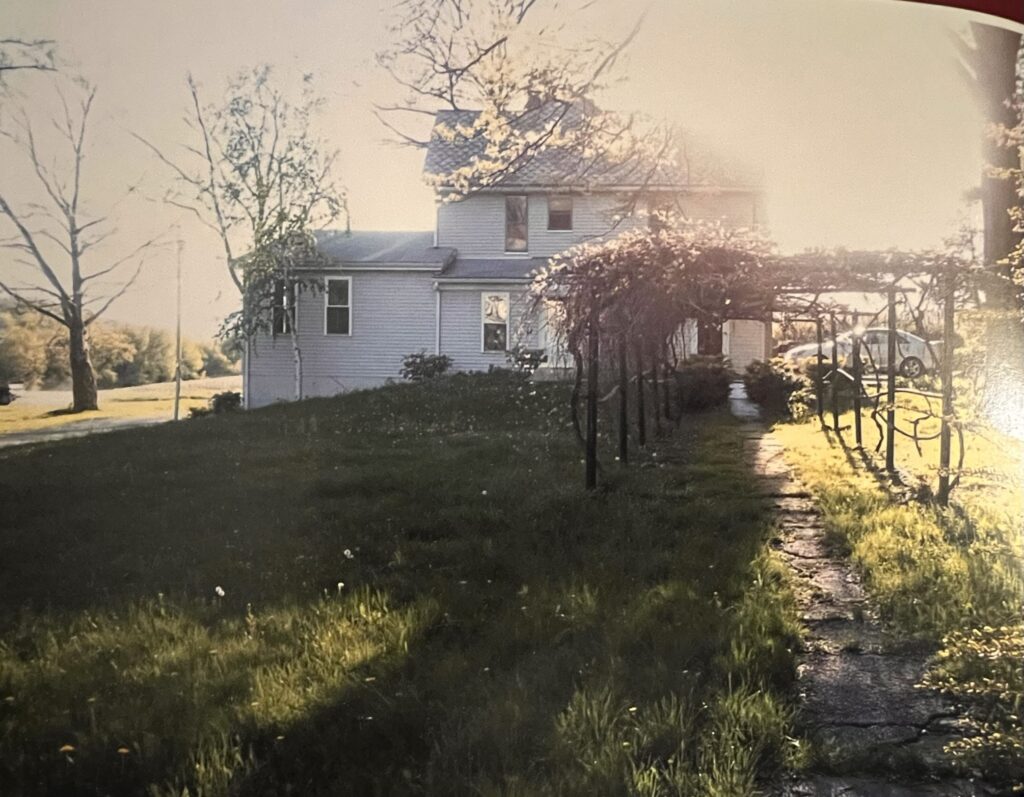
Farmhouse Before
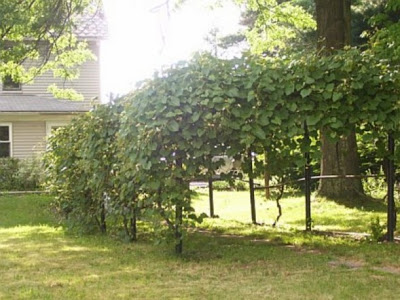
Before…old windows, faded siding, back doors with awnings, sidewalks and a lack of landscaping. An old dilapidated grape arbor.
BEFORE:
We definitely got the side eye when purchasing this fixer upper but my Mr. DIY and I saw the potential.
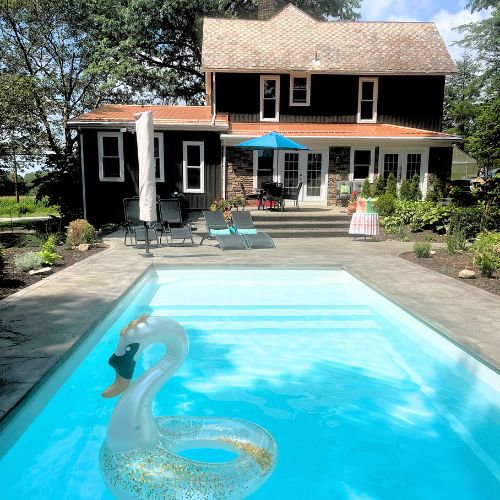
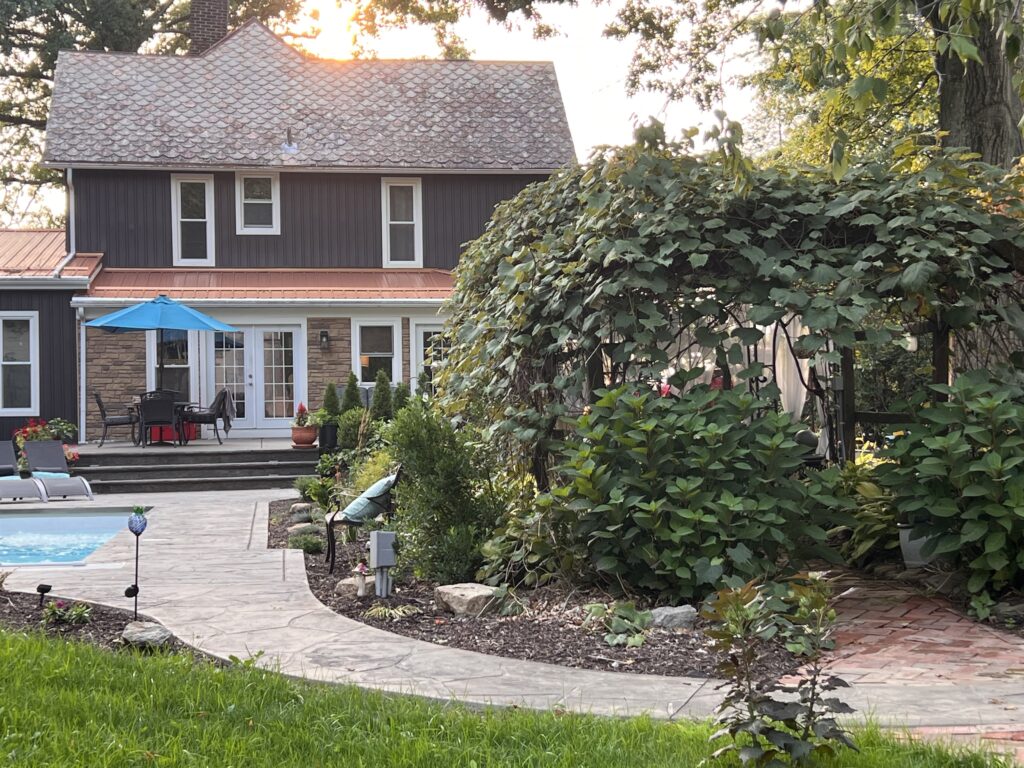
After: French doors, new windows, new siding, a new metal roof, concrete patio, concrete stairs and a stamped stained concrete pool deck and walkways were added, grape arbor rebuild. Years in the making!
AFTER:
Early Makeover Projects
One of the first projects was installing French doors where the single back doors were and removing the awning. Then came a patio and some landscaping.
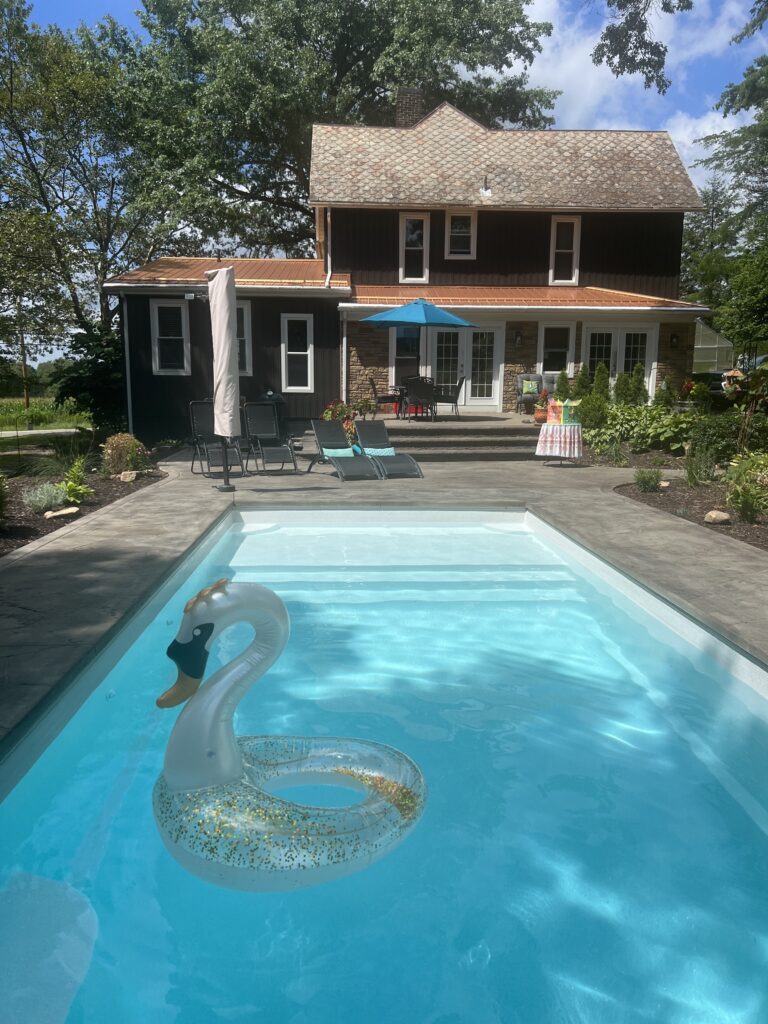
Then last year…a major update starting with an in-ground pool installation, stained & stamped concrete pool deck and patio. Check out our complete in-ground pool installation!
Welcome guests!
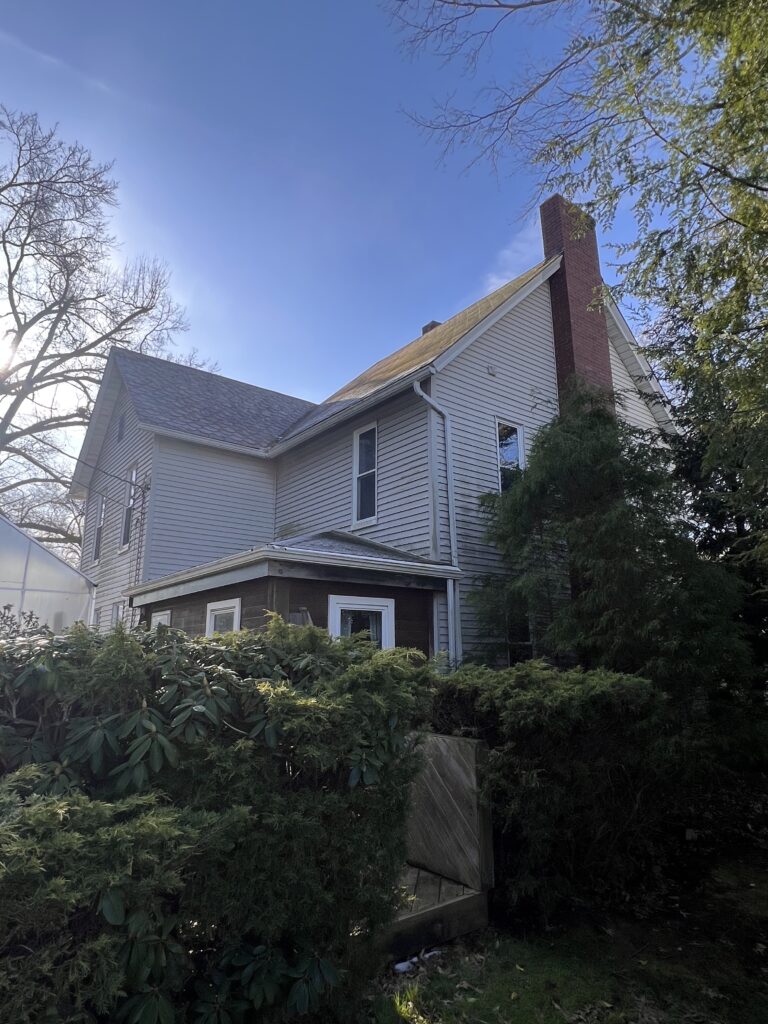
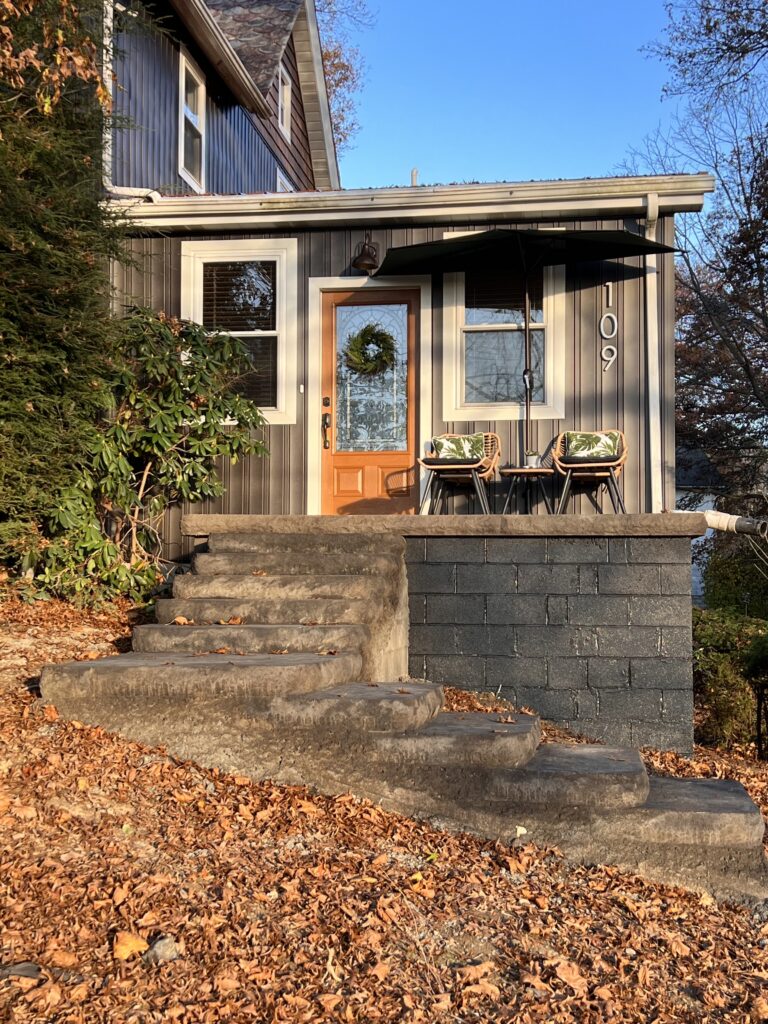
We have a new front door and porch! Our home didn’t have a front door (original was enclosed to create a ‘sun porch’) which we opened up into a home office when we got new windows. Original front door is in the wood sided addition shown below…
Here it is inside…
Other side of the front yard…
BEFORE:
So we added a new front entry door and front porch leading into our family room. It’s still a work in progress with the need for railing and extending the sidewalk from bottom of stairs to the driveway but looking good!
New Siding
Then new board and batten, cedar shake and ledge-stone (vinyl) siding for an amazing transformation for the biggest “wow”.
BEFORE:
AFTER:
Siding is from CVS. Board and Batten color: Carbon Designer. Trim: Linen. Ledge stone siding is Arizona Sandstone and cedar shakes: Rustic Cedar Designer.
BEFORE AND AFTER different view:
Metal Roof
And a new metal roof on additions (keeping the original slate which is still in good condition in a copper color.
After (the transformation)
So, it’s been a minute. Okay, it’s been way longer. But I’m back! I’ve missed our connection. It’s so easy to get lost in the everyday, especially with how blogging has changed over the years and with losing my Facebook page to a hacker leaving me feeling defeated with the disappearance of years of hard work. Time to get back on the horse, ya know?! Time to catch up! I have so much more to share!
Oh you guys, I enjoy hosting at our short term rental, Suite Thyme, here in my small hometown so much! It’s such a joy to make someone’s visit to Butler a memorable experience and to share what I love about where I grew up. The apartment is tiny but big on character and guests love the trendy luxury design and comfortable atmosphere. I really love pampering guests and making them feel so welcomed and special, much as a guest in our own home. I enjoy developing friendships with many of our guests – even if we’ve never met face to face. Although sometimes I’m available for a quick meet and greet, especially if they’ve added services to to their stay. More on that below.
The apartment is located upstairs. There is a wellness studio on the main floor for my office and a place where we hold essential oil classes. We also collaborate with several small business owners and wellness practitioners to offer a “create your own personal wellness retreat” with a la carte menu services in a self care package we refer to as “Thyme & Mint”. Services include yoga from Ambur Waves (Yoga.Movement.Sound), Evangeline (reiki master) from The Lunar Fae Shop and Becca from The Wandering Bramble, Dorothy’s Herb Shop and Herbal Apothecary. We also offer essential oils education, Aroma Freedom and iTovi scans from Wellness Inspired Living. Guests can purchase herbal bath soaks, crystals and essential oils (packaged with their choice of intention collection) in advance and have them ready upon arrival.
The update:
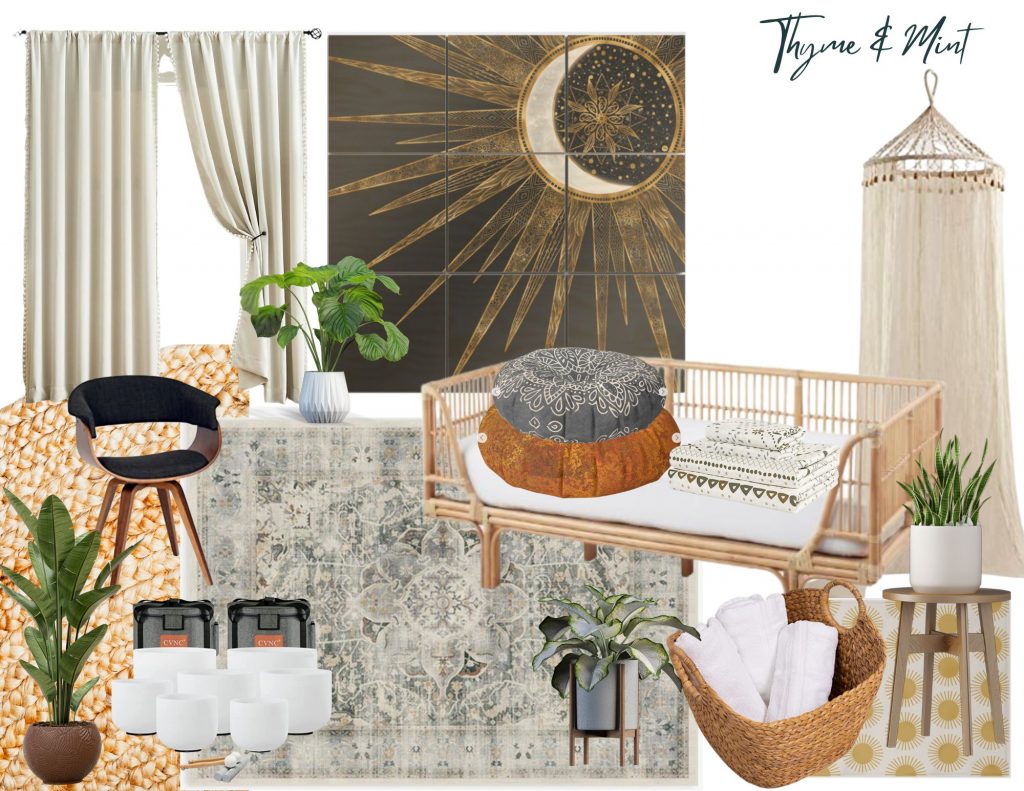
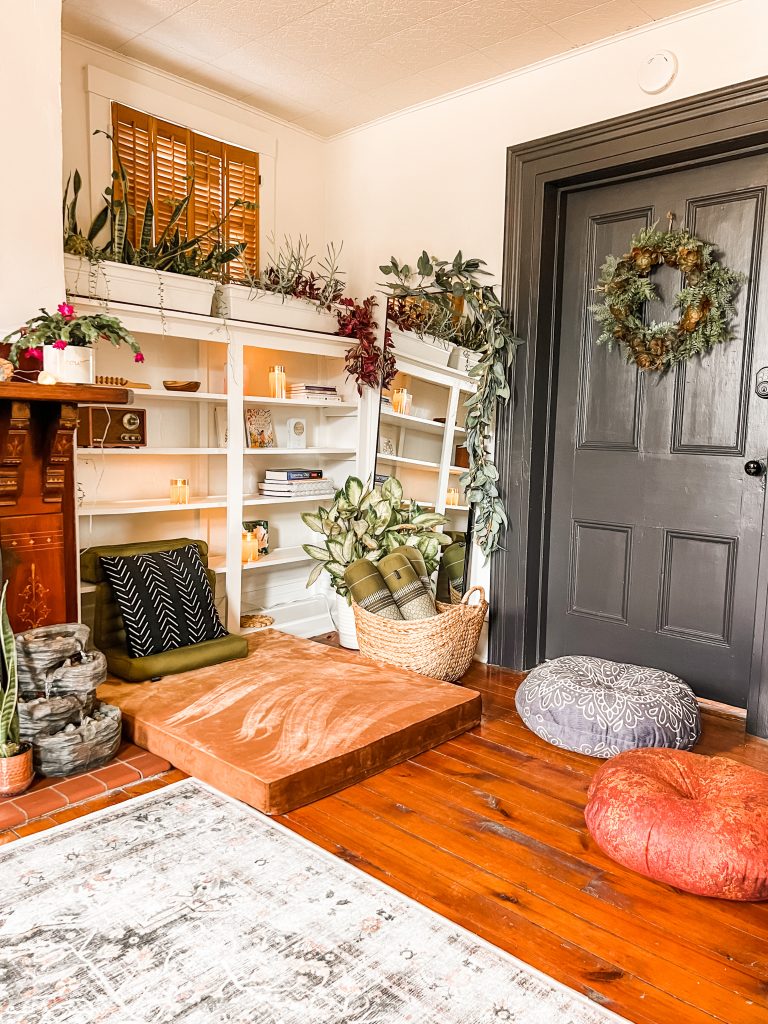
As a member of Butler County Tourism, Suite Thyme recently had the opportunity to put together a proposal for a grant that would enhance Butler visitors’ experiences. I love a creative challenge! The room that is utilized for reiki, sound baths and guided meditation was a bit of a mish mash and in need of some TLC. I designed a medication room with purpose. I submitted by design and plan and was awarded a small grant to make it happen!
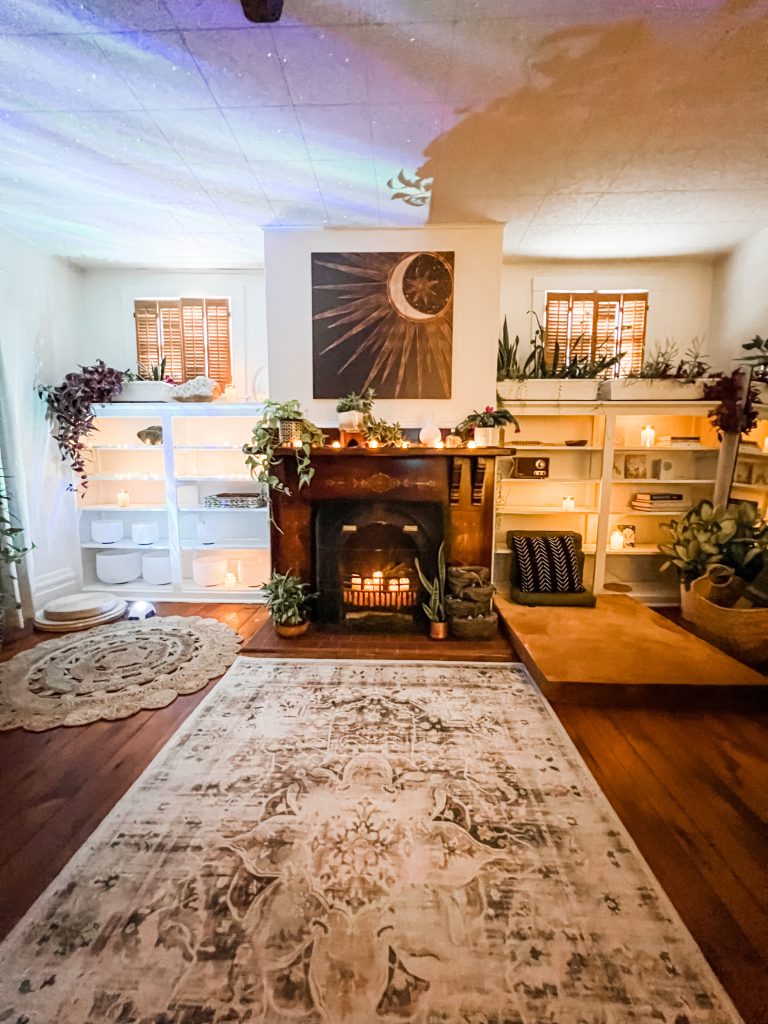
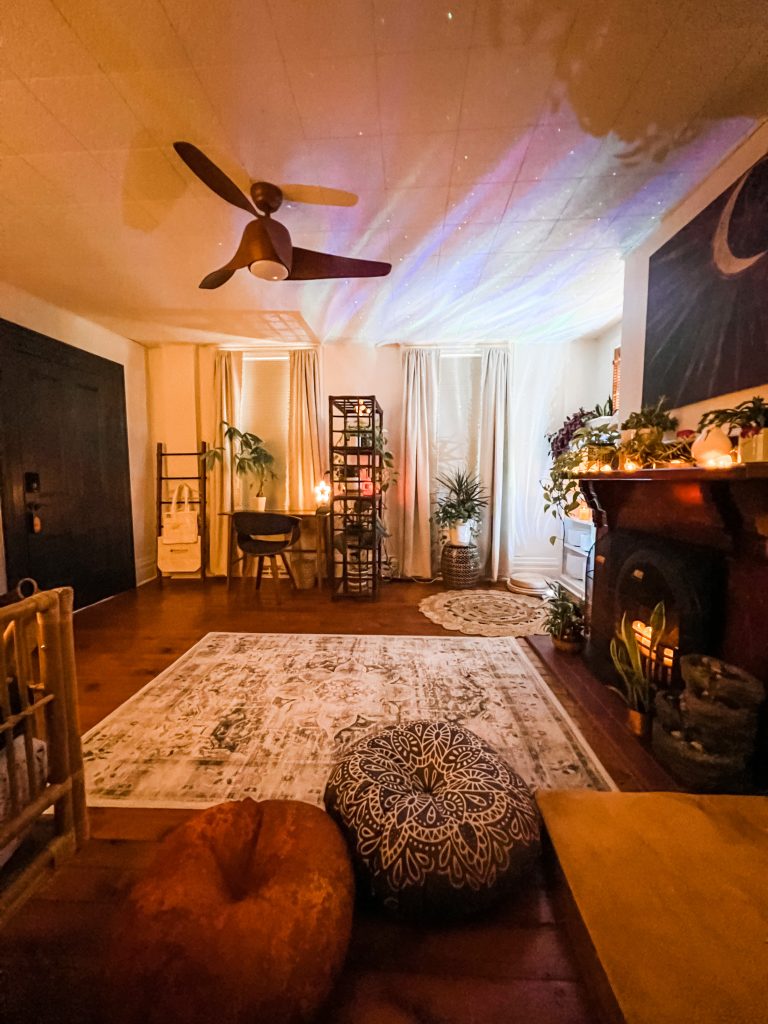
Ready for some meditation room eye candy? Let’s go!
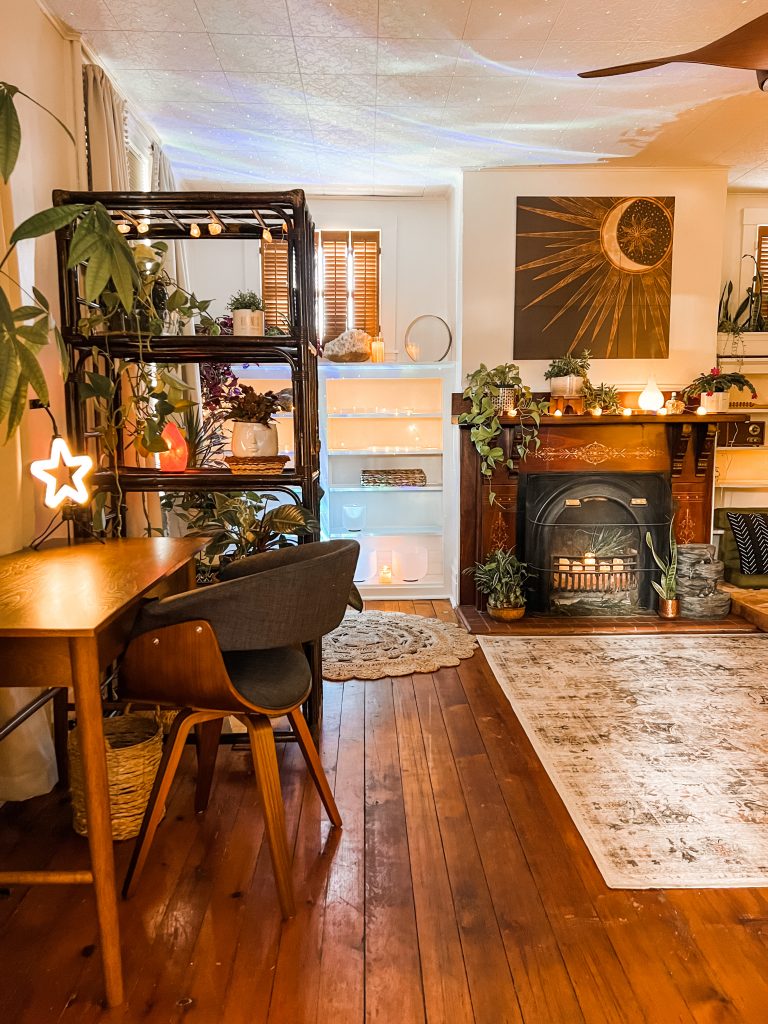
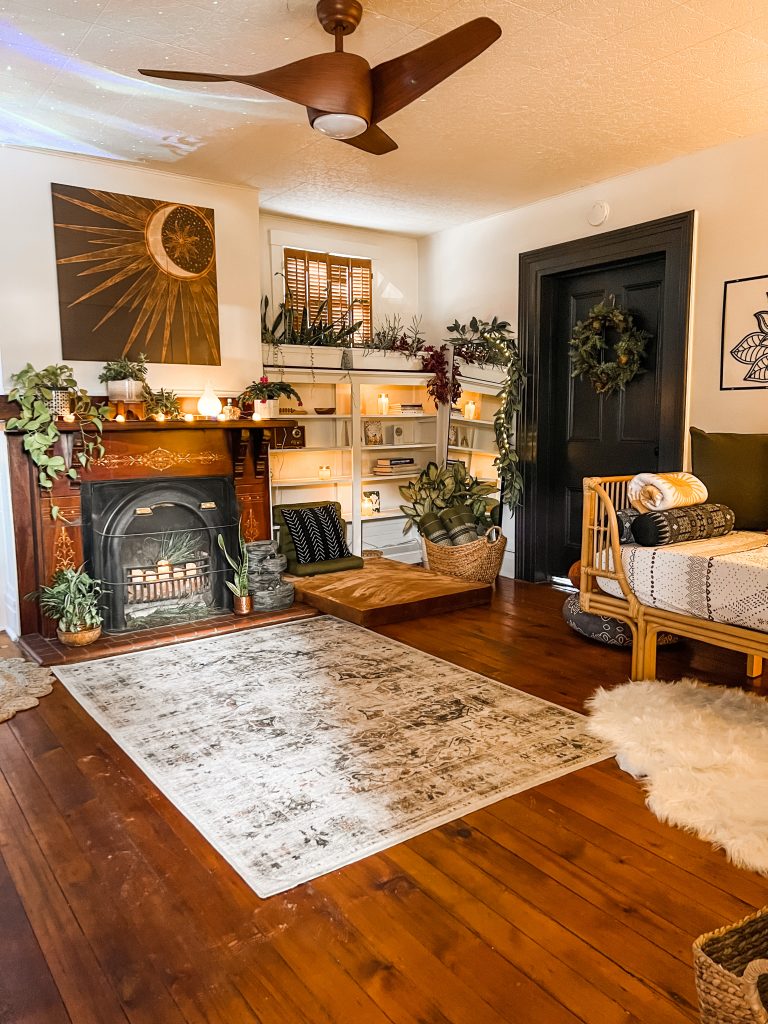
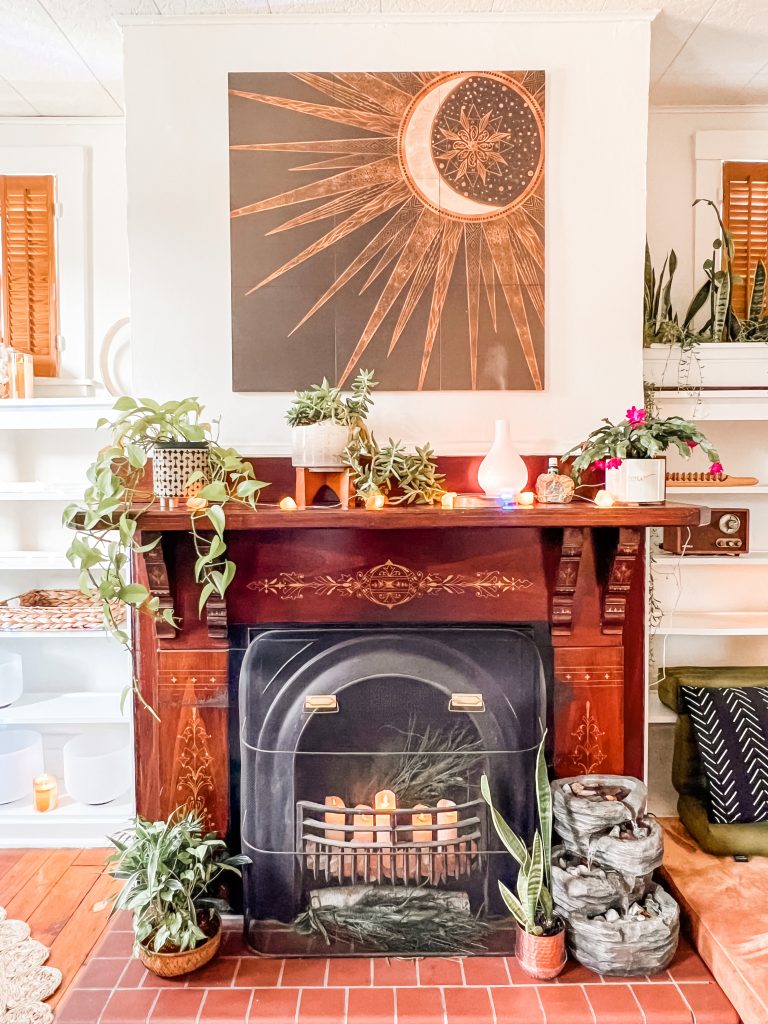
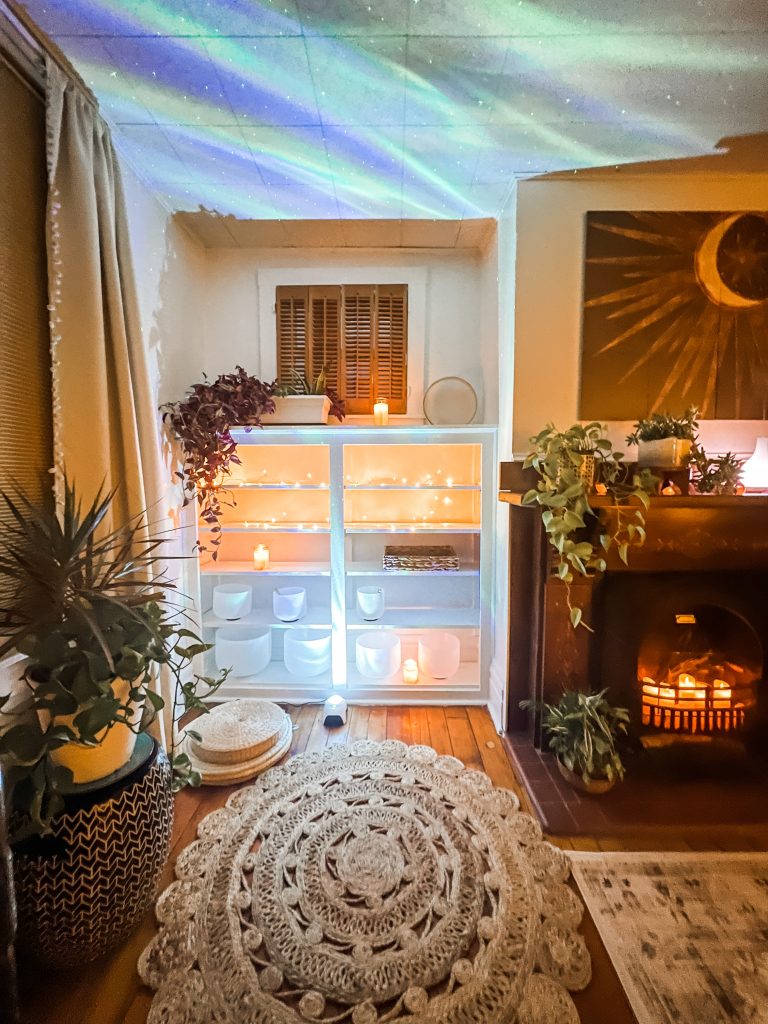
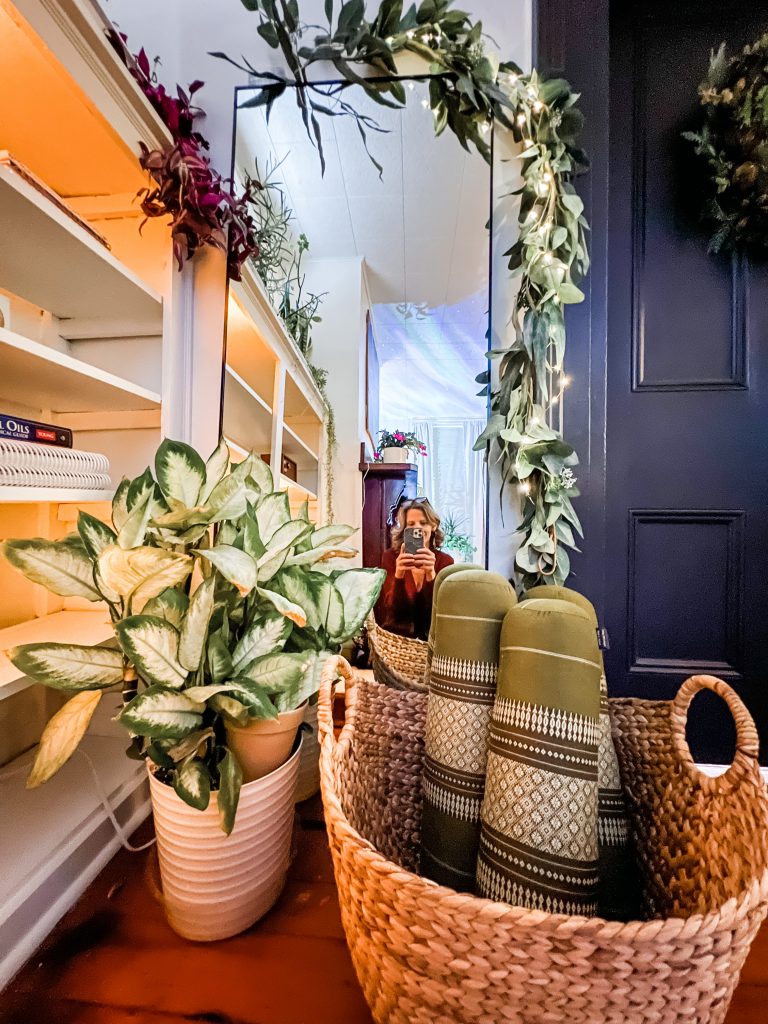
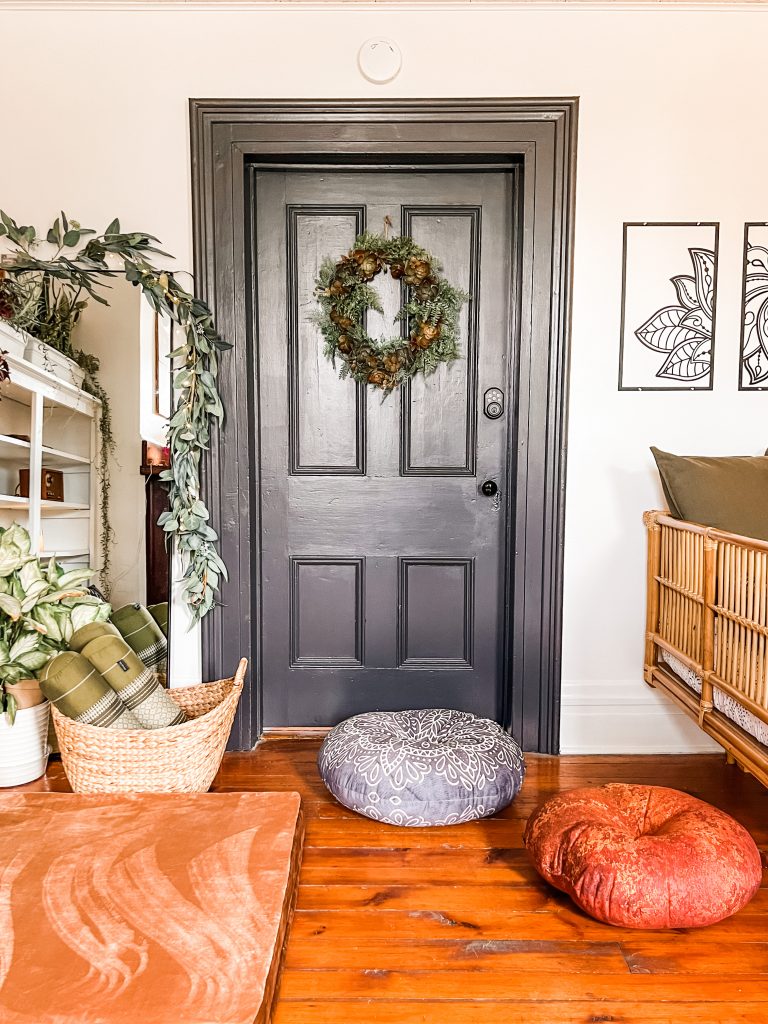
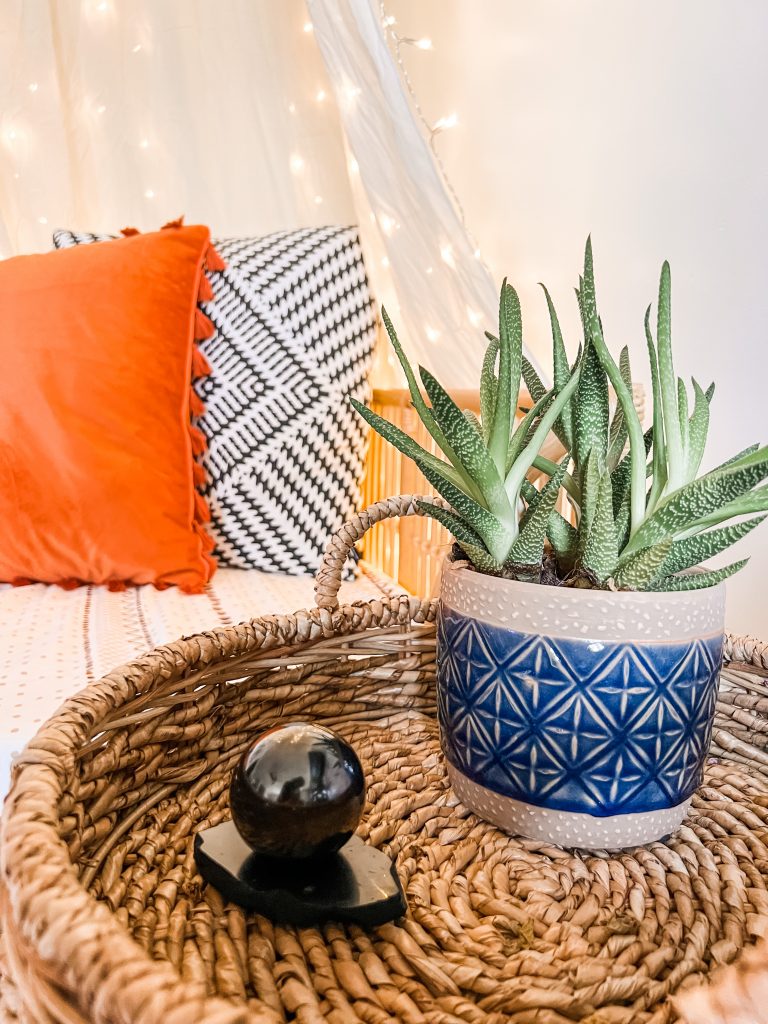
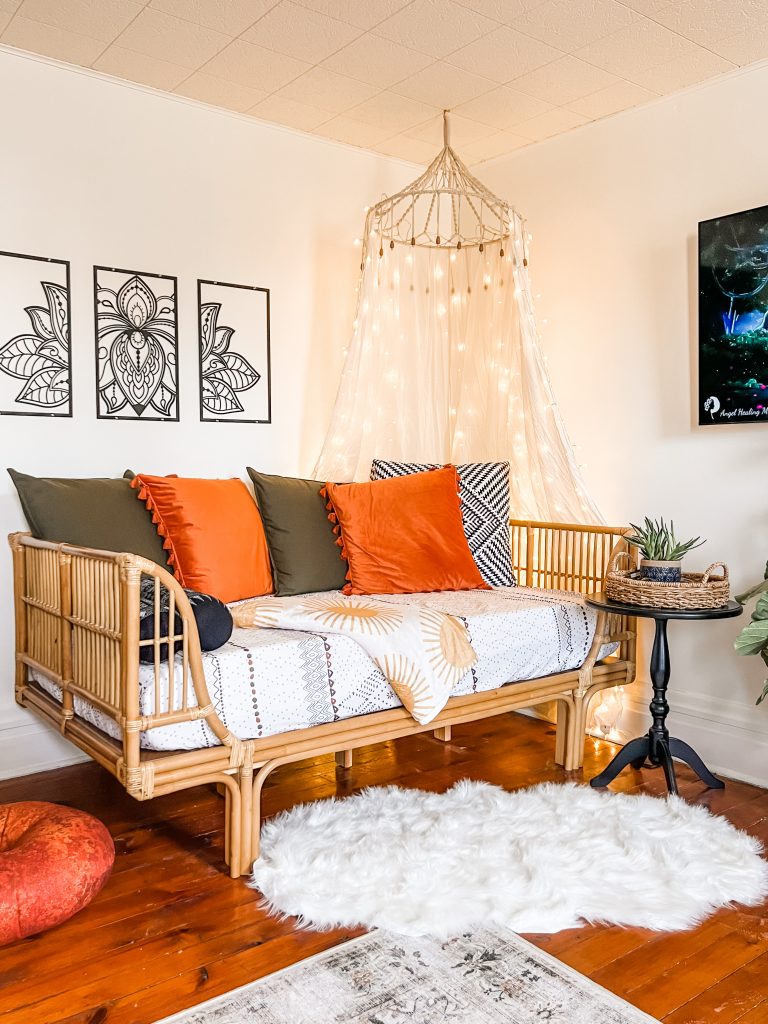
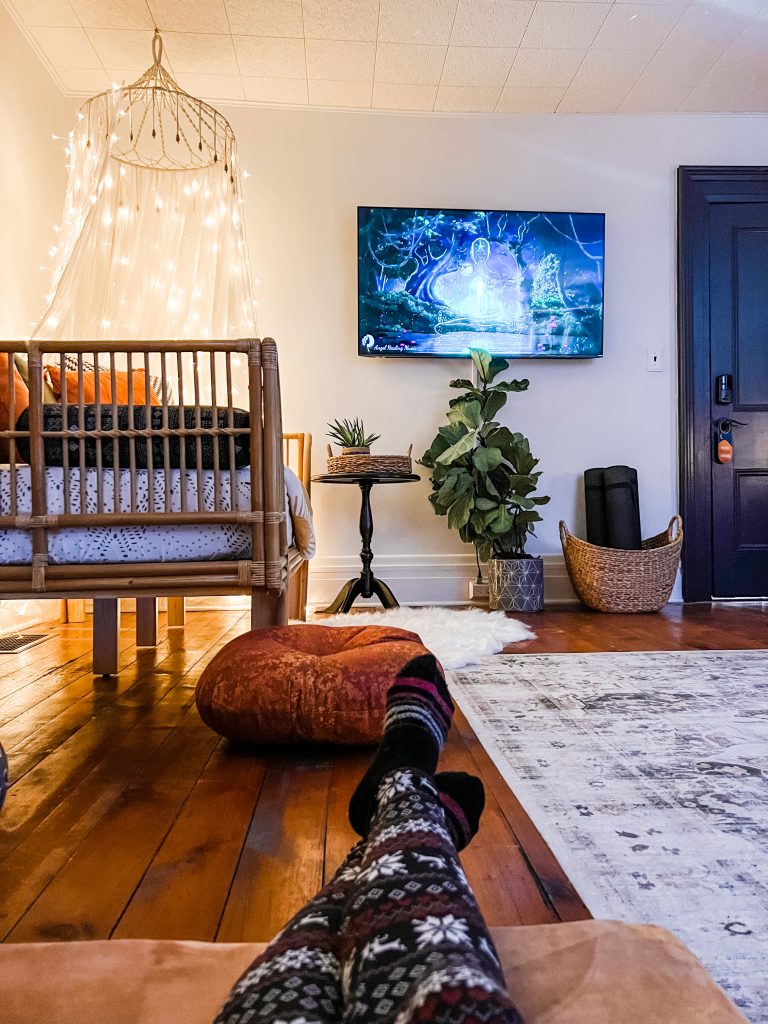
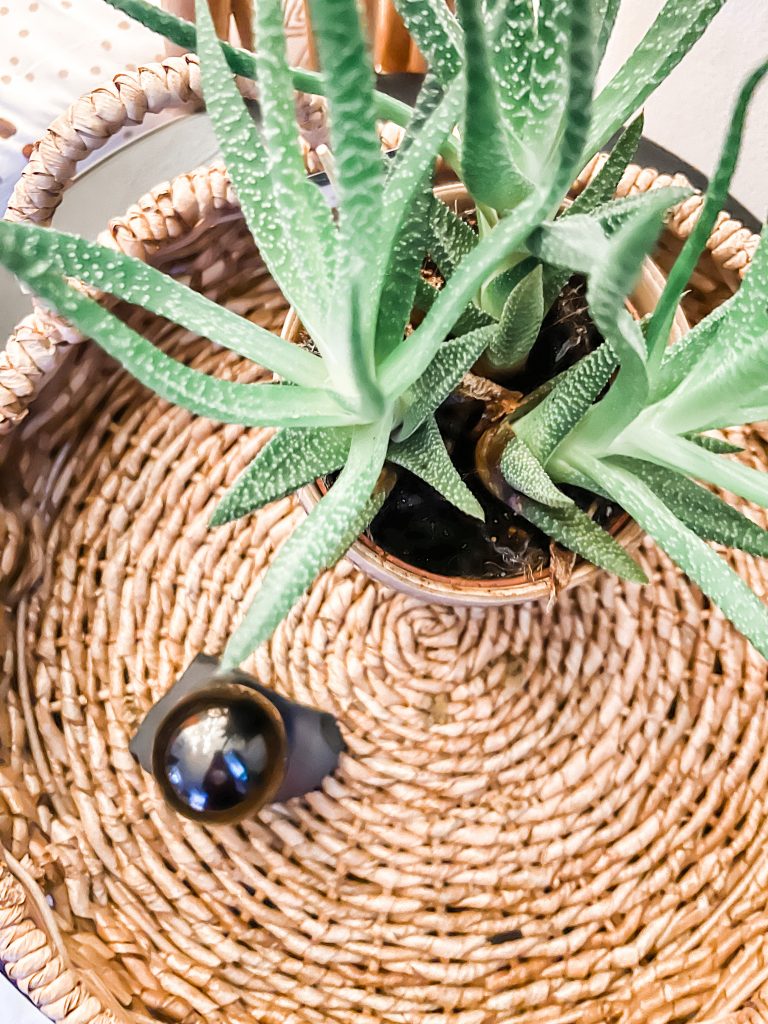
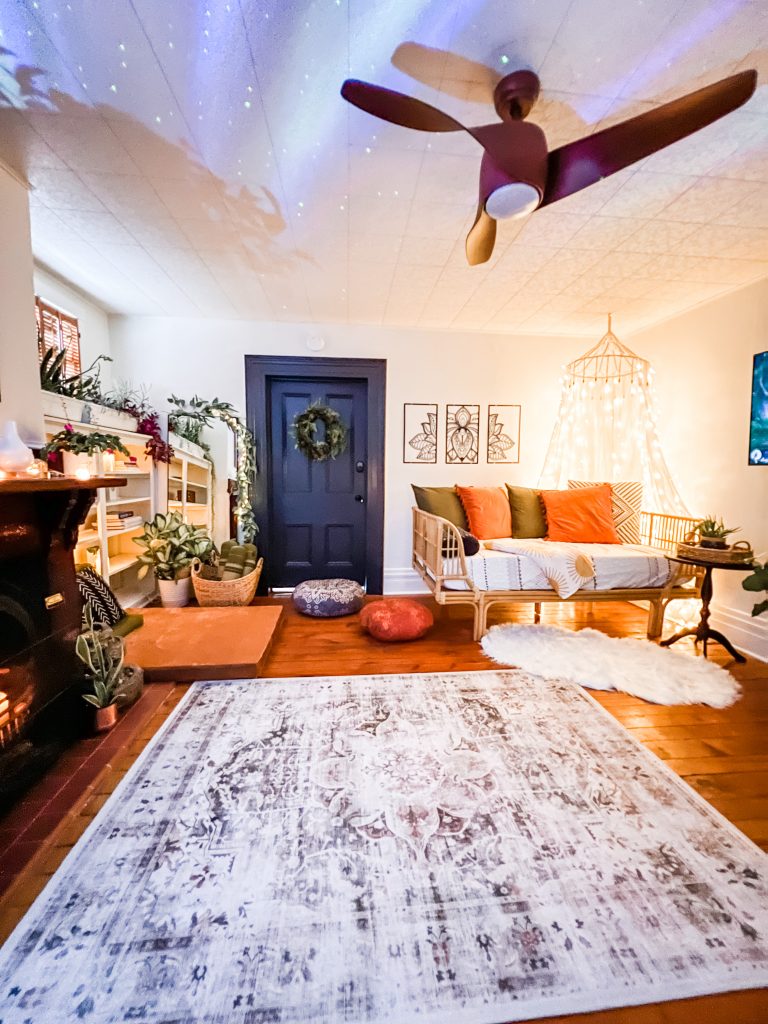
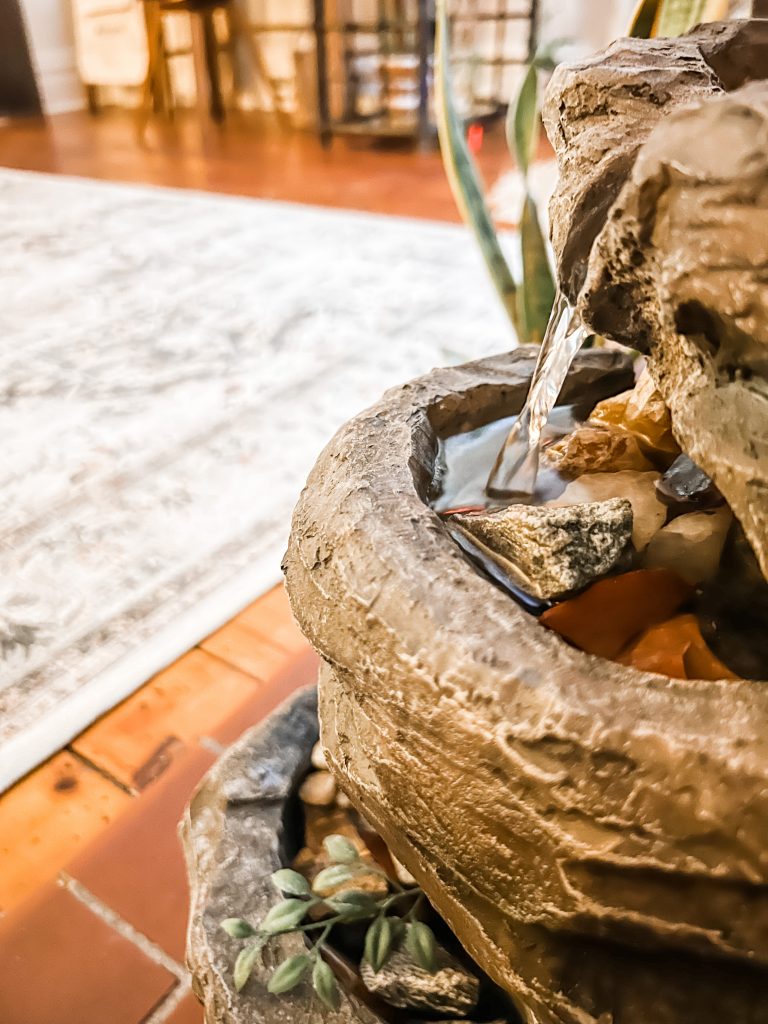
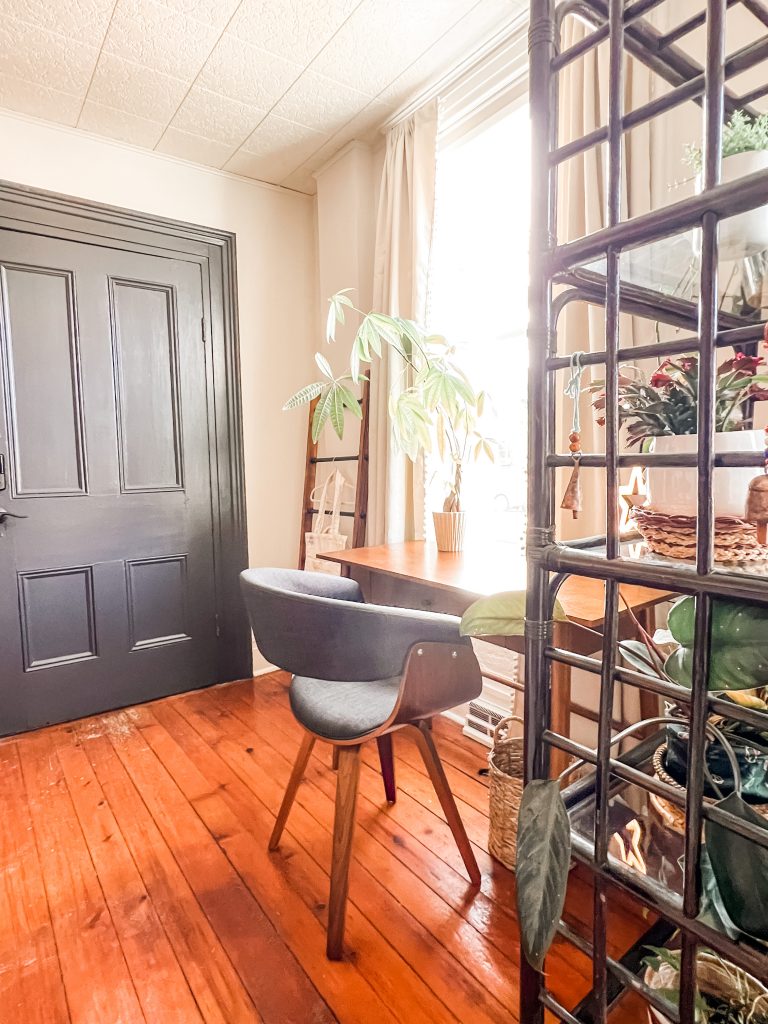
The space went from looking like a living room with a sofa and chairs with a small crystal retail area and shelves filled with essential oils and accessories (a DIY essential oil bar) to a tranquil space dedicated to reiki, sound baths, crystal healing, private yoga and meditation There’s even a cute spot at the window with a desk for journaling. Shelves are lined with crystals, plants and self care books. There’s a small library nook with comfy floor cushions, an area for yoga with a basket of yoga mats. I added a daybed for relaxation, a tv for meditation/yoga videos or relaxing music with a bluetooth speaker, a white noise machine with northern lights projector. There are crystal singing bowls for sound healing, a mini waterfall for blocking out small city traffic noise, black out blinds for closing out the busy street. It wasn’t part of the grant, but we invested in new windows for the property as well this year.
Additional purpose and function of the space:
The apartment is small and at times a bride books the apartment for her special day. Things are tight to say the least as the space is a better fit for 2-4 people! Now, this extra room can be added on for an extra fee to act as overflow space and more square footage for bridal party prep. Or if a guest is staying with family but requires a quiet separate area for work, they have the option to add on a separate private ‘office’ and quiet workspace.
The room is now so magical and peaceful…an experience of a calming energy the minute you step through the doorway.
Suite Thyme
The second story of this updated 1880s home boasts a trendy newly renovated efficiency apartment loaded with charm. It’s located just steps from the main thoroughfare of downtown Butler’s best eateries, antique shops, breweries and more. Perfect for festival-goers and travelers looking to enjoy a small town vibe.
This 2nd floor eclectic space located above a quiet by appointment only wellness studio is loaded with personality and beautiful style. Sleeping arrangements include 2 queen beds in the bedroom + a queen sleeper sofa in the living room for peaceful night’s rest and sweet dreams. There is a beautiful fully equipped modern kitchen area tucked into a combined living room/kitchen/dining area. Bathroom includes a clawfoot tub for soaking away tension. Plus, it’s just a short stroll to Butler’s historic Main Street district.
Traveling to the western PA area? Looking to book a self care getaway? I love showing off my hometown pride! Book Suite Thyme HERE. Now booking!
Wishing you a year filled with wellness, peace and happiness!
Gratitude:
A HUGE thank you to Butler County Tourism for the generous funds to create a special space as well as all they offer to promote Butler County and small business owners. So much appreciation for all you do! See more at VisitButlerCounty.com.
A special thank you to my Mr. DIY for his assistance and support. Thank you to my dear friend Shelby for encouragement and brainstorming with this project. To contractor Troy Douthett for his help, thank you! Thank you to Evangeline at The Lunar Fae for her knowledge and input too! So much appreciation for all of the attention and assistance in making this magical transformation a reality! xo
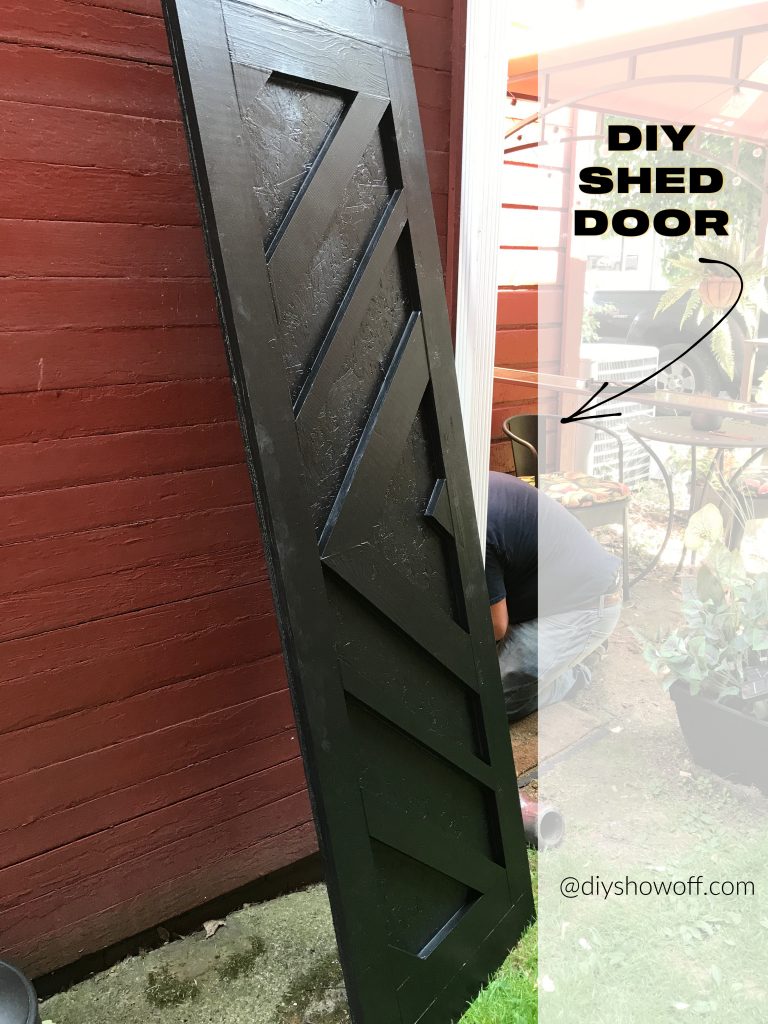
DIY Shed Door! You know those projects you procrastinate, something that just sits around unfinished for years? Until finally, you just can’t take it anymore and the time arrives for getting ‘er done? Yep, that’s this project.
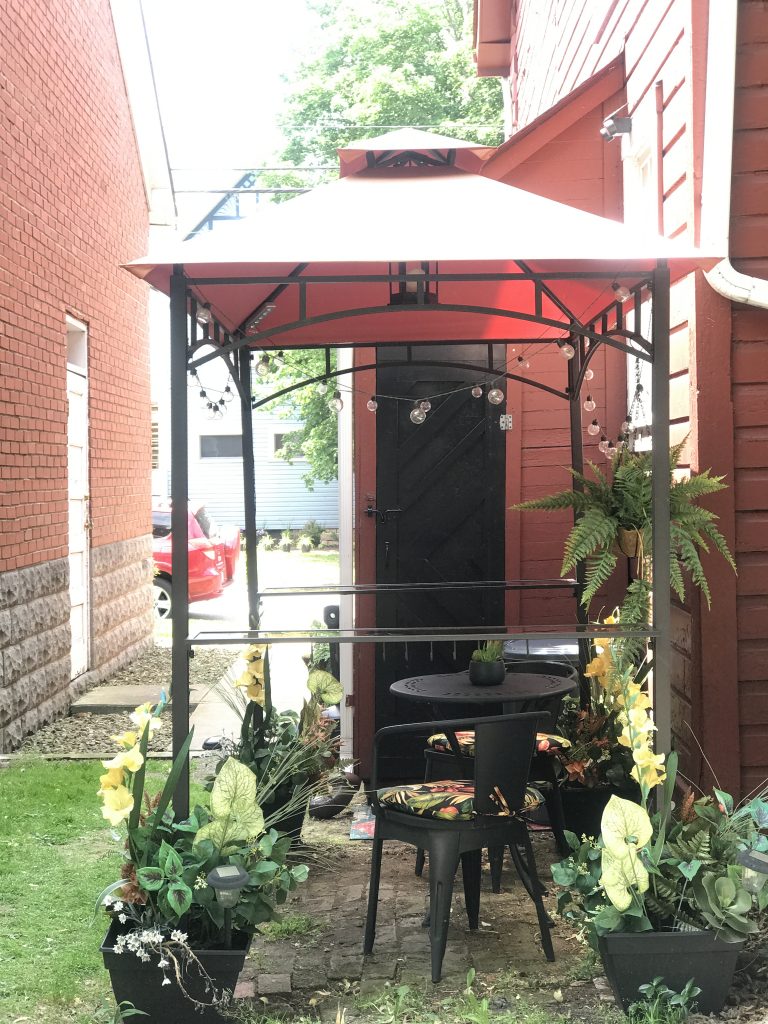
For four years now, the shed at the my downtown property has been wide open! And while it always bugged me, it just kept holding it’s position at the bottom of the to-do list. Until now.
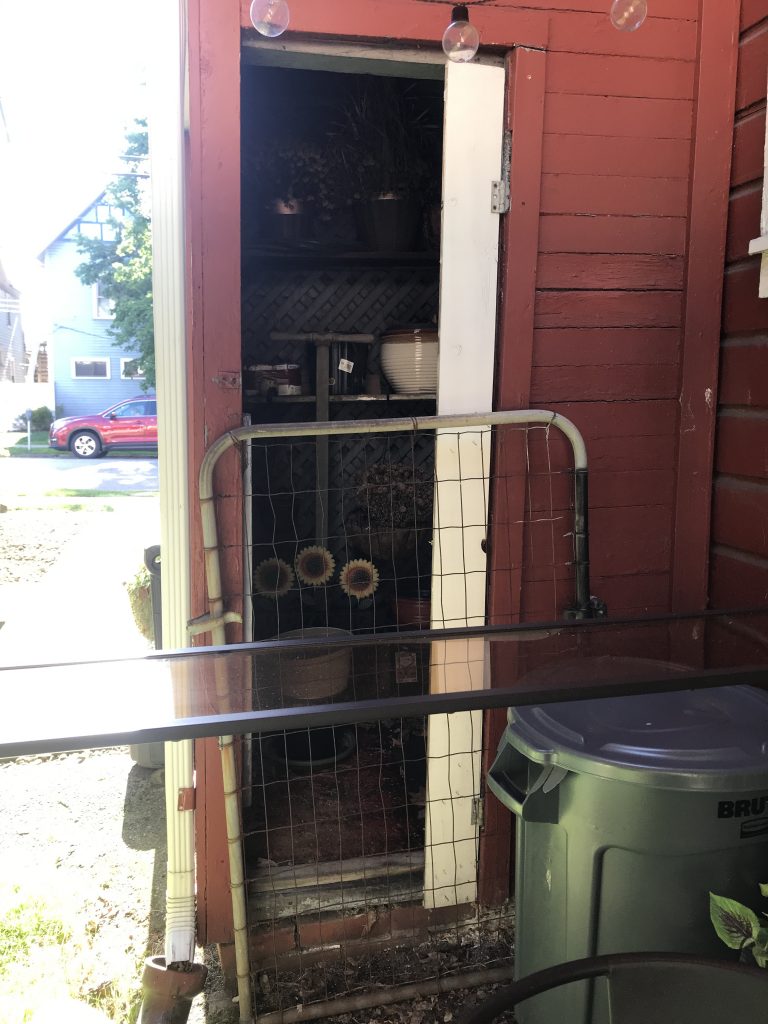
When I bought the property, there was only 1 plank with hinges for a door. lol And it wasn’t high on the list of priorities but with an upcoming photo shoot of the short term rental apartment (Suite Thyme) AND with the only quiet seating area right there beside it AND with summer coming, that eye sore worked it’s way to the top of the list.
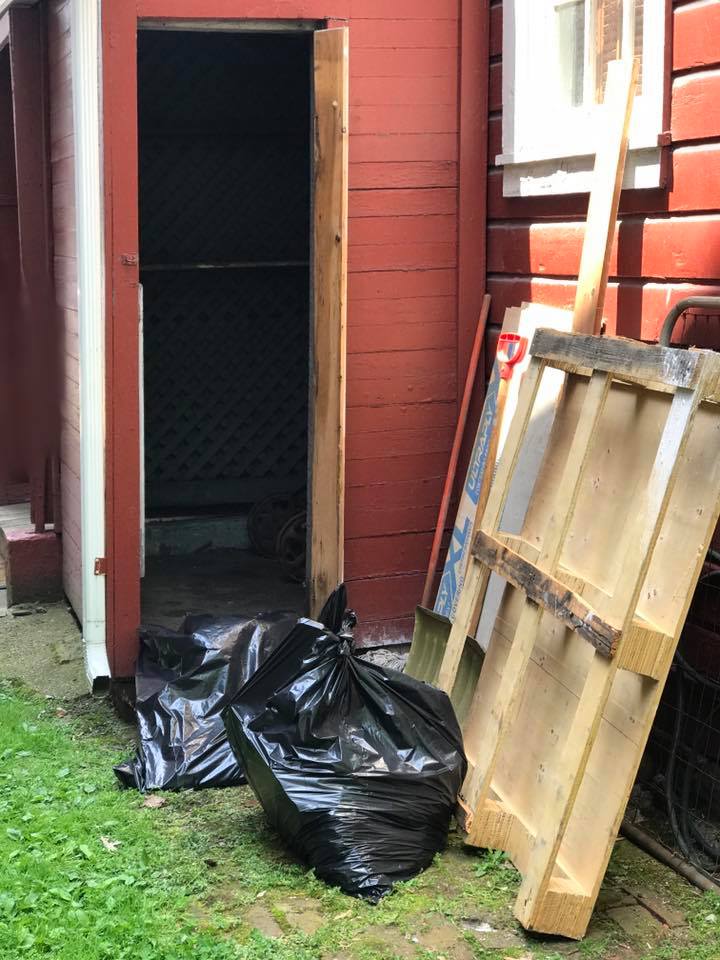
Before: just a small shed, filled with dead leaves, probably home to a few squirrels and lots of spiders. ::shudders::
An old fence gate propped up…really didn’t serve any purpose. Other than it just came with the property and found it’s way there. I don’t even know how it got there. haha!
And so…
Supplies I used for a custom 22.5 x 75 inch shed door:
OSB cut to size.
(5) 1×3 pine boards – I just guessed on what I’d need for all of the wood pieces and over-estimated a bit. I never mind having extra on hand.
(3) 1×2 pine boards
(2) 1×1 pine boards
(1) paintable outdoor rated caulk
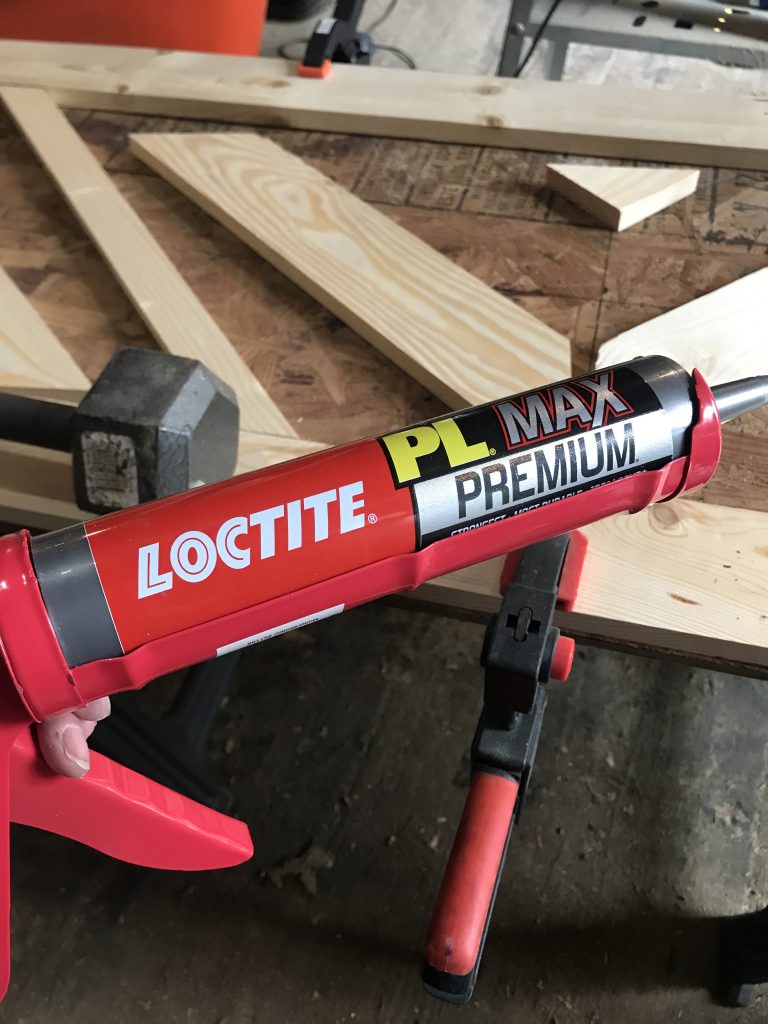
(1) outdoor rated adhesive
(2) outdoor rated primer
outdoor rated paint
this handle
this hasp
these hinges (not used, more on that later)
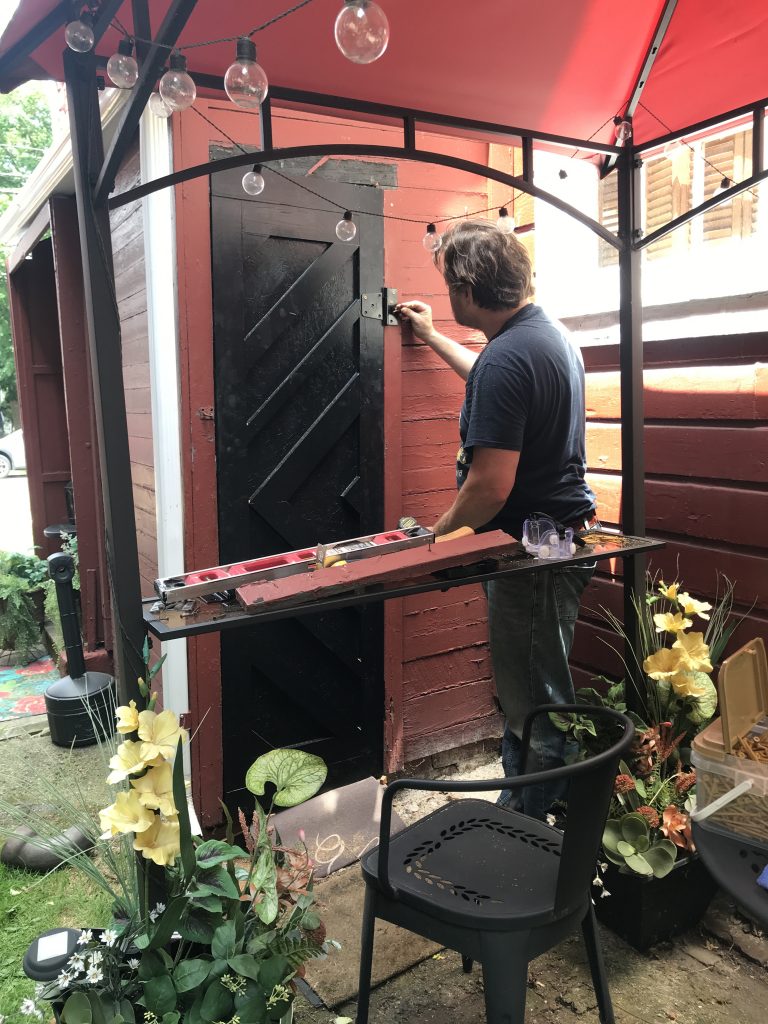
What I did:
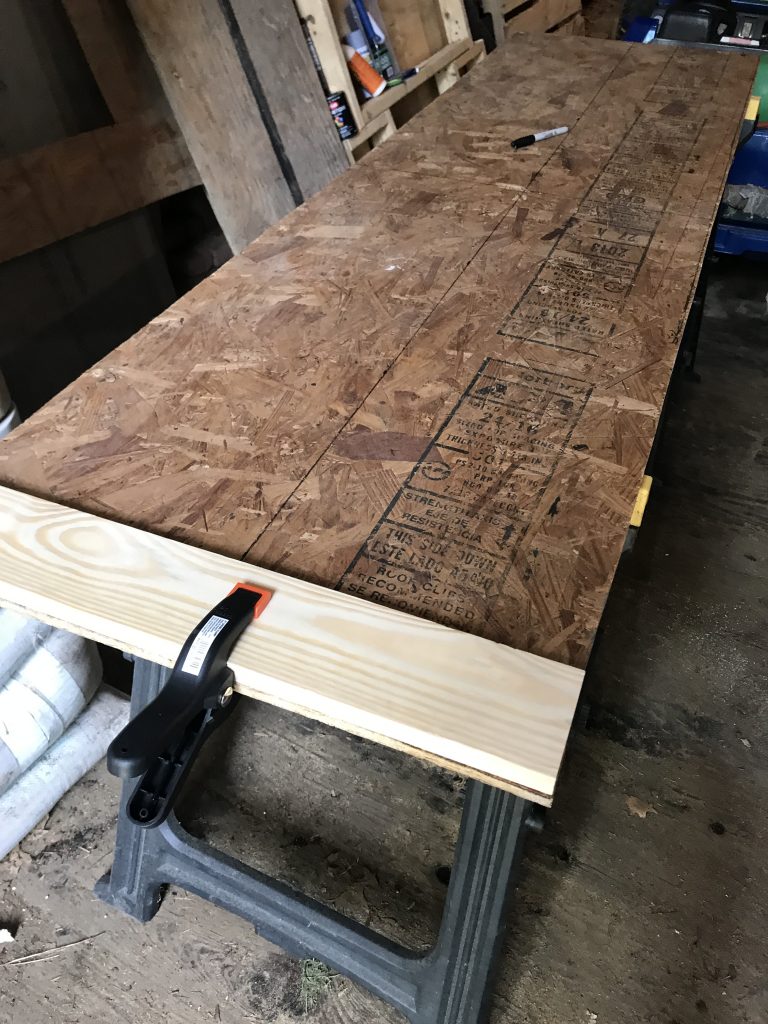
After measuring the space (and believe me, nothing in this old late 1800s property is square…so frustrating), Russ cut an old piece of OSB to size for me to use as my base. OSB isn’t the best product for an outdoor project, but this is the first door I’ve ever built and this was the best and easiest way for me personally to test my design skills. Fingers crossed that with it being the inside of the door/in the shed and that it’s good and sealed, that it works just fine longer term.
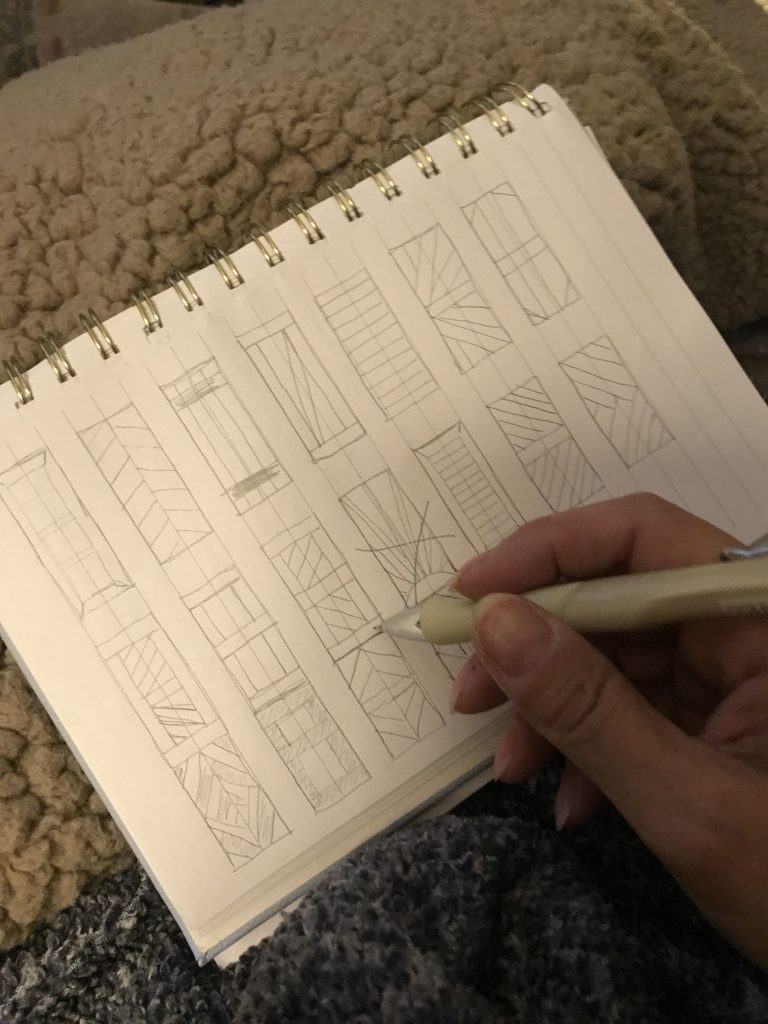
I then set about sketching up some inspiration, nothing to scale but I wanted to get an idea of what I was going for. Something with a little more detail and style than the standard barn style shed door.
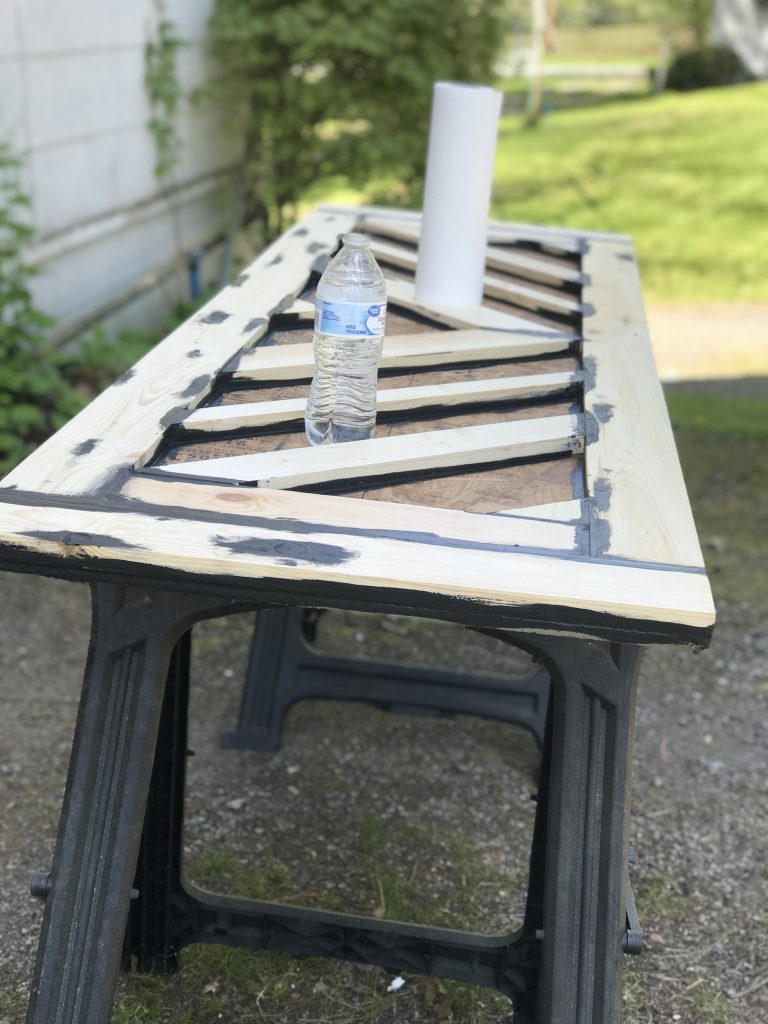
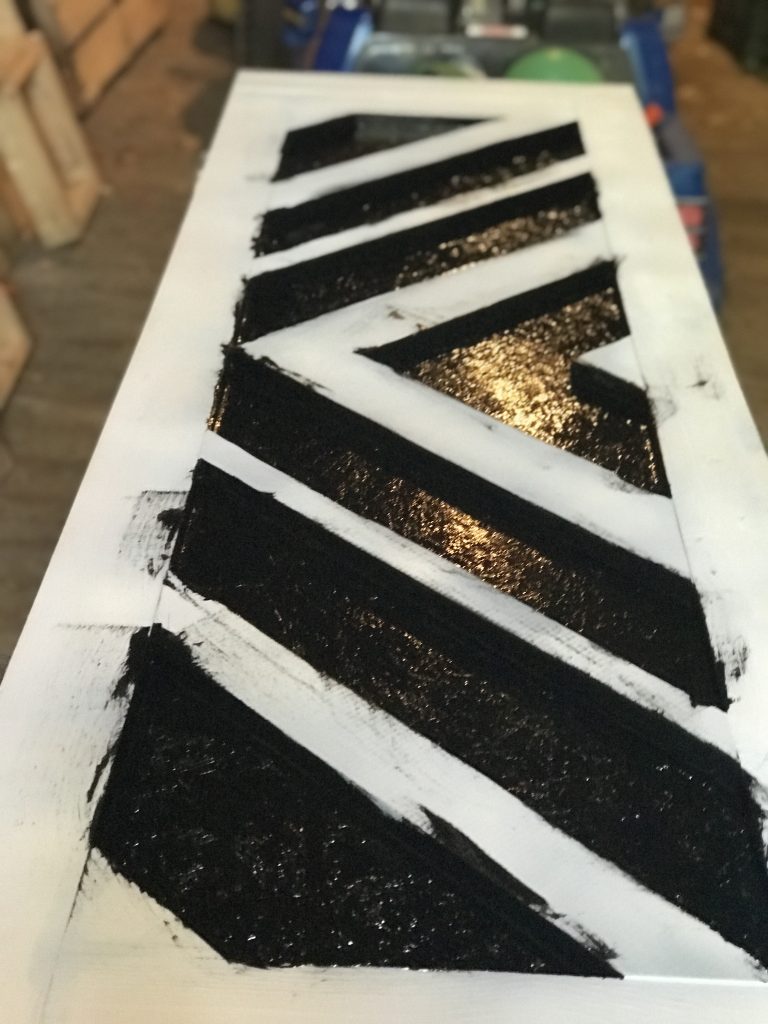
Then I set the OSB on saw horses and created a frame on the face of it with 1x3s.
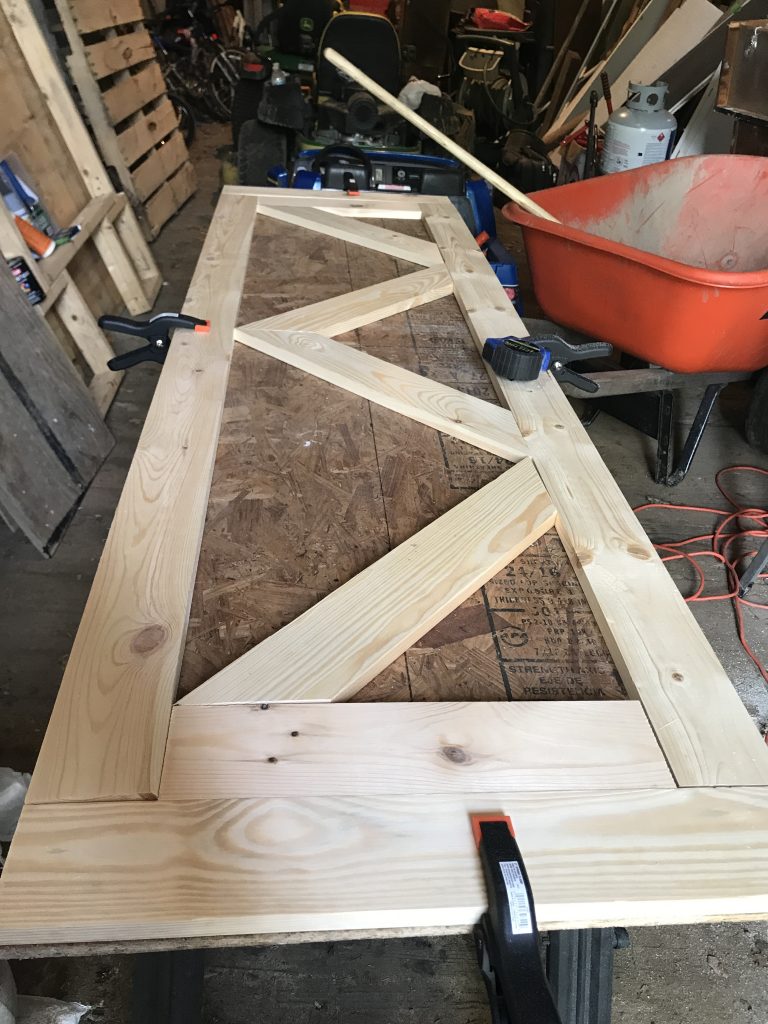
I messed around with the pieces a few times before I decided on a pattern.
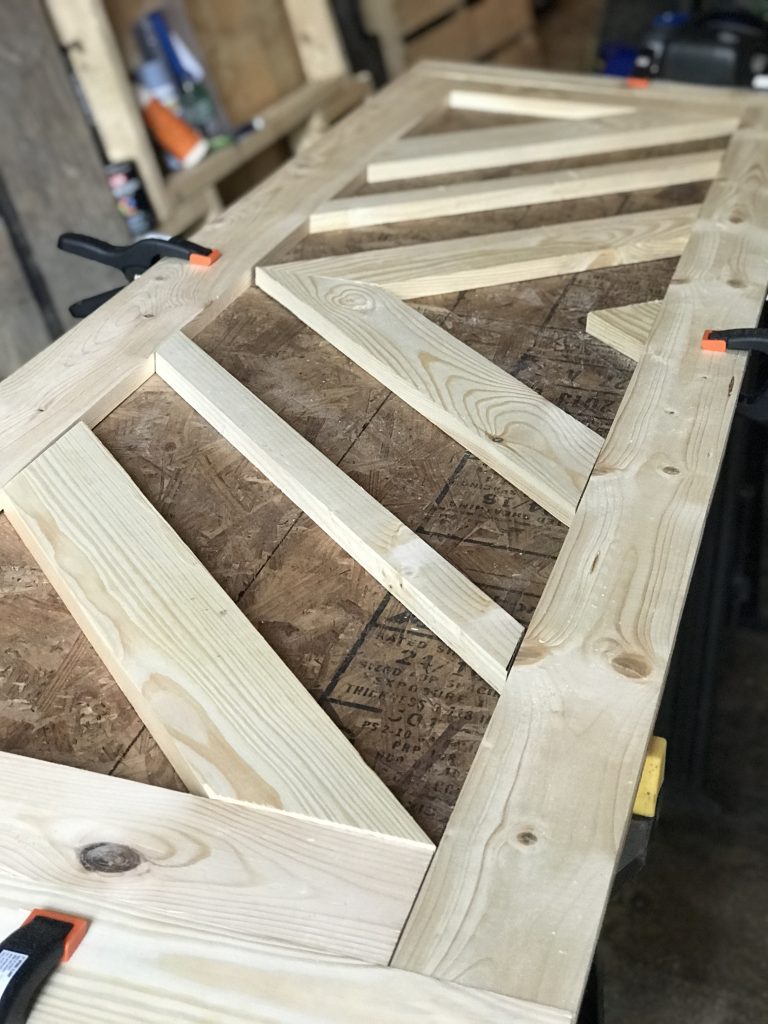
Utilizing a mix of mitered 1x3s, 1x2s and 1x1s, I settled on a chevron design. I enjoyed this part, like putting together a puzzle.
After cutting each piece, I adhered them to the OSB base with adhesive and clamped the edges and weighted the pieces where the clamps couldn’t reach. I did notice what putting them together with adhesive is different than just laying them out and re-cut 2 mitered pieces for a better fit during this process.
Once dry, I caulked all of the joints and cracks.
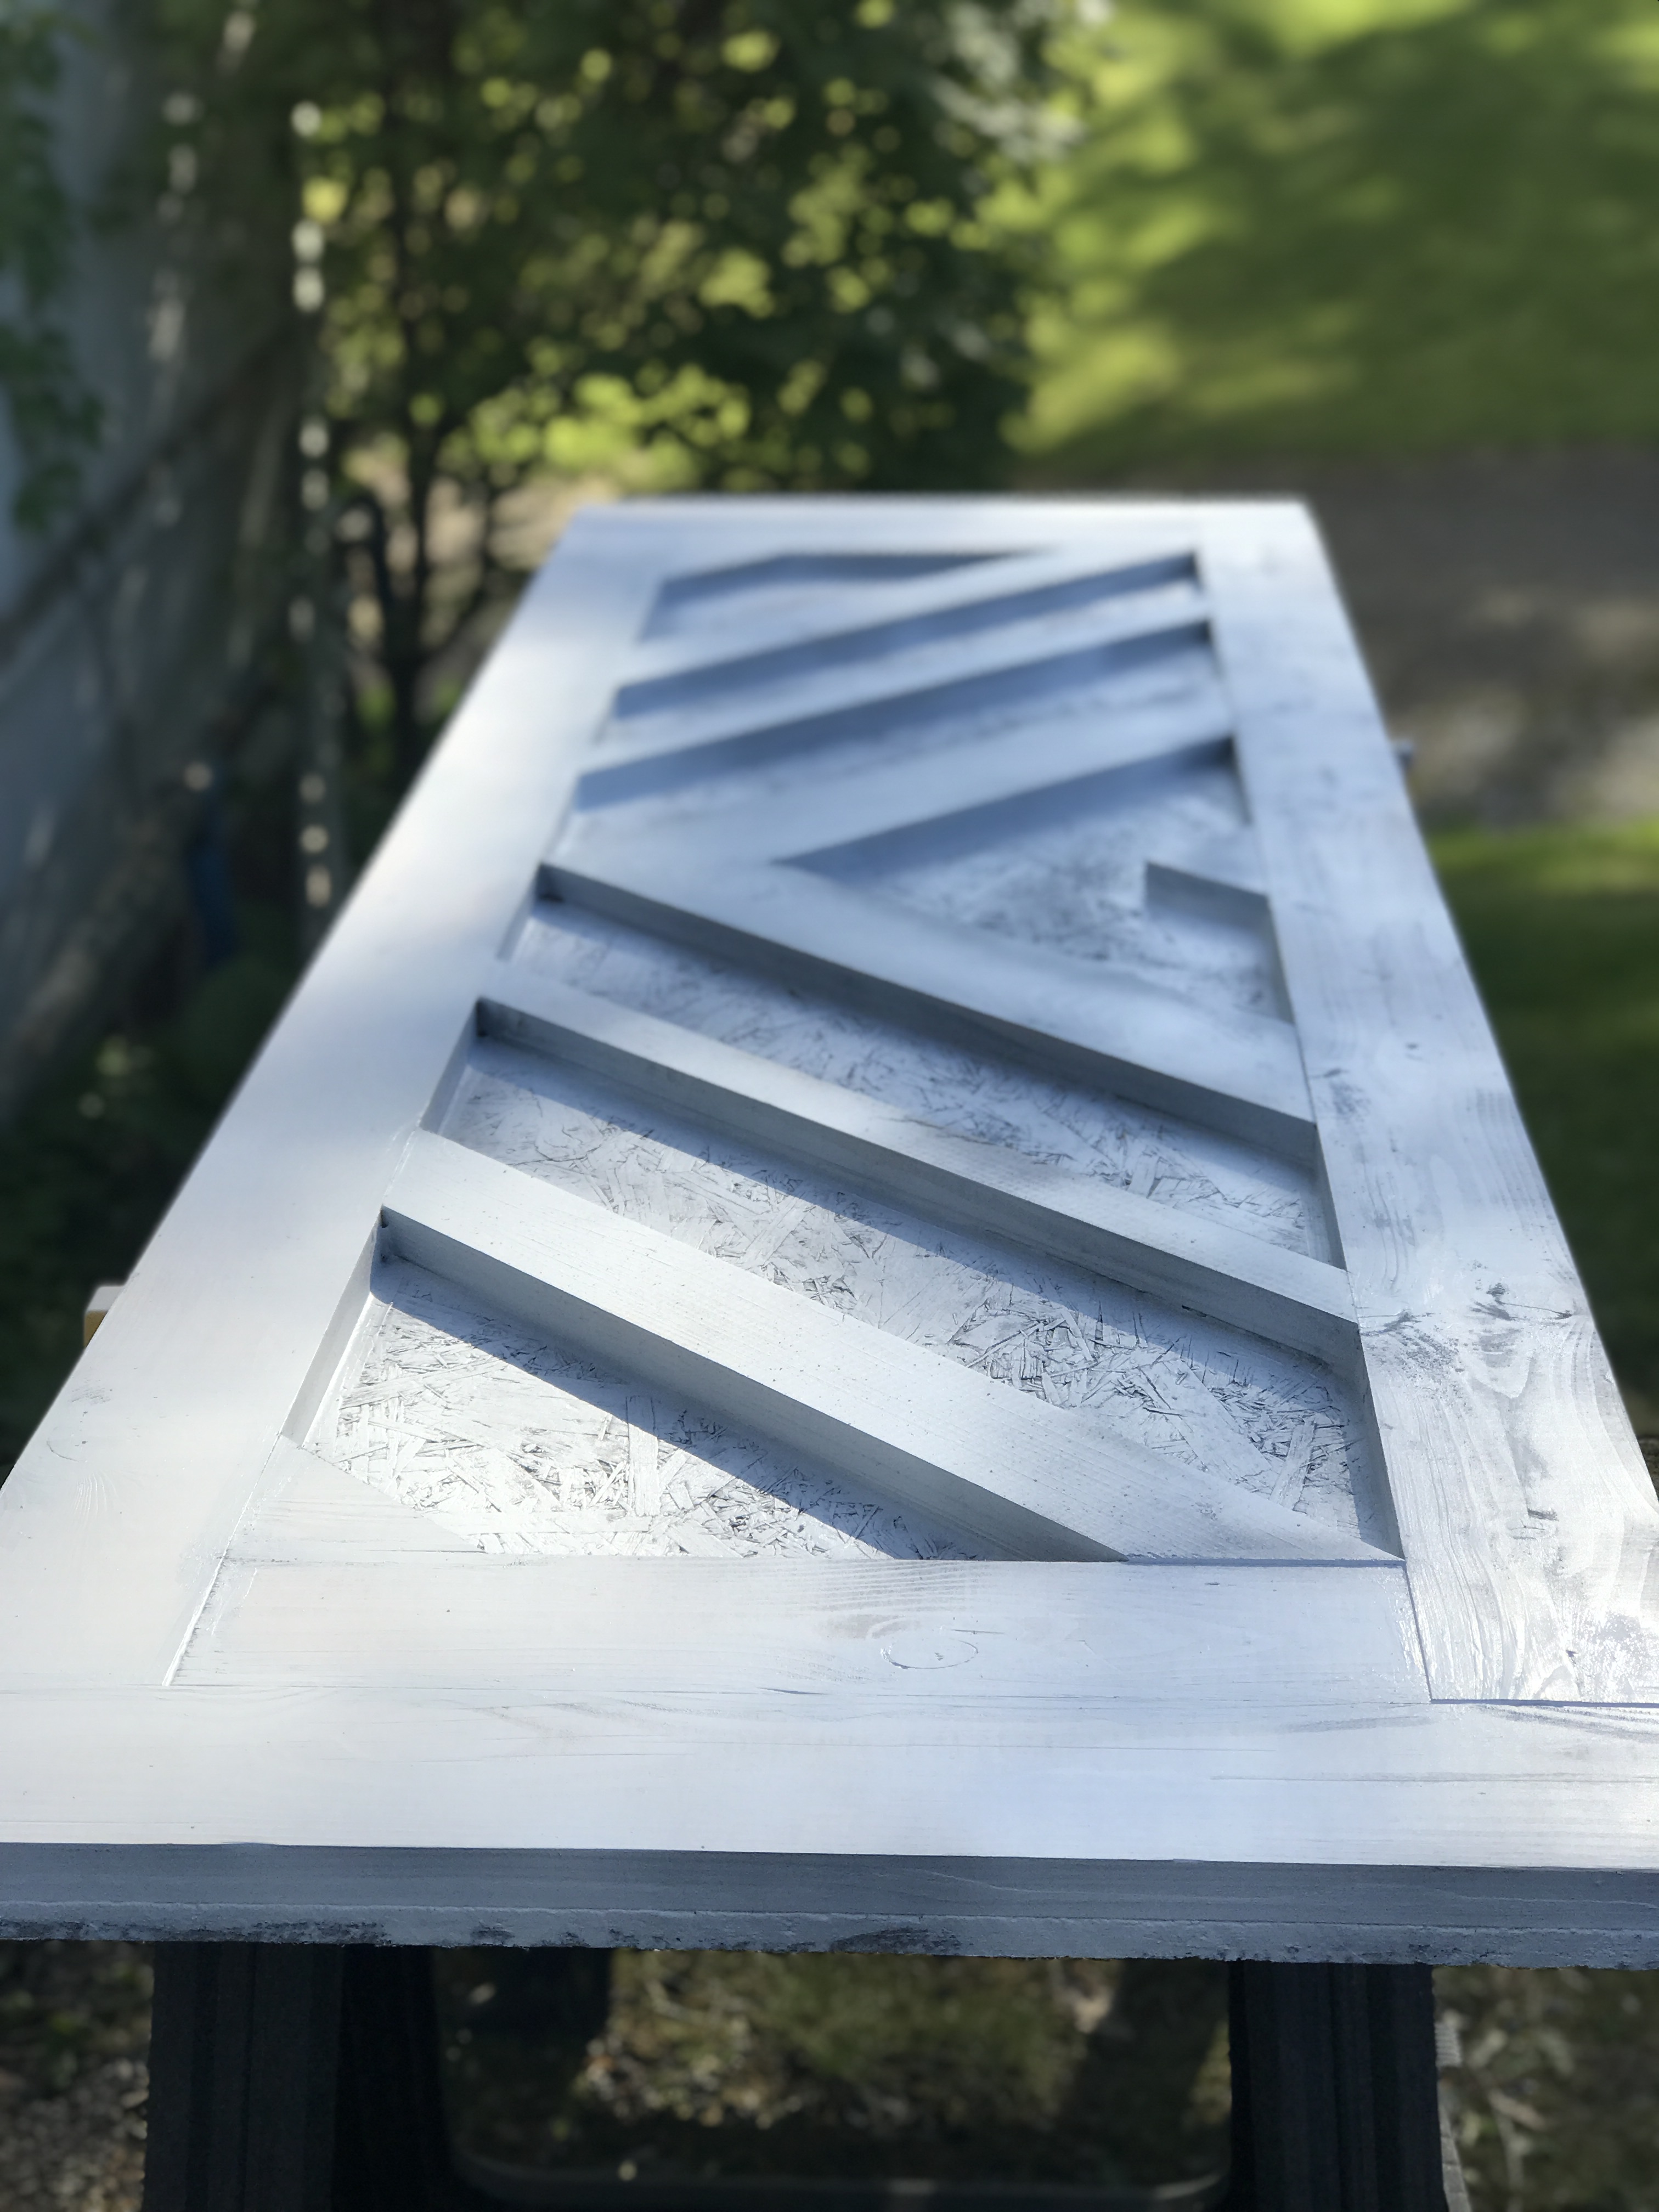
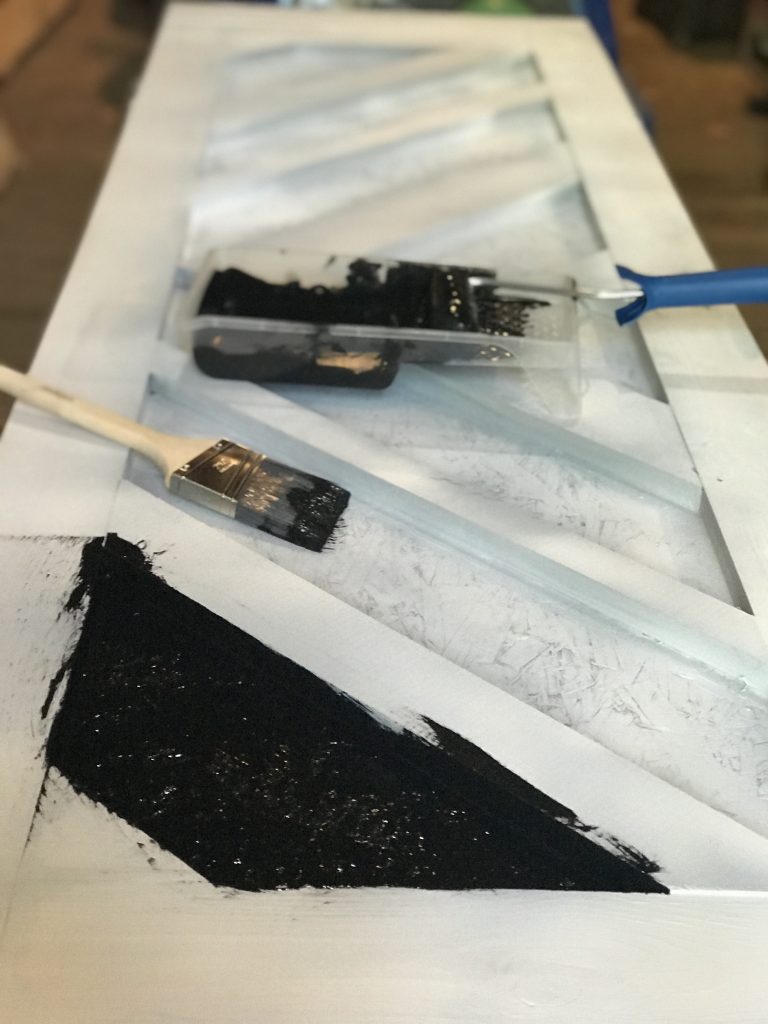
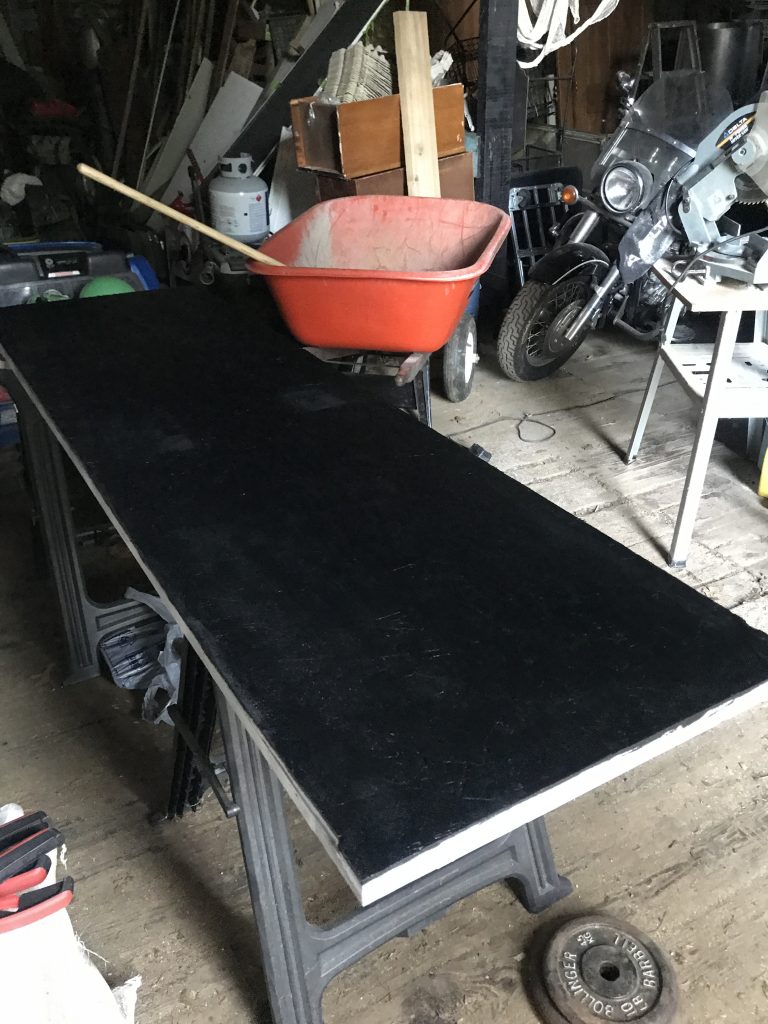
Then applied a coat of primer. I used a spray primer but next time, I’d go with (and recommend) applying with a brush and roller.
All sides got two coats of paint.
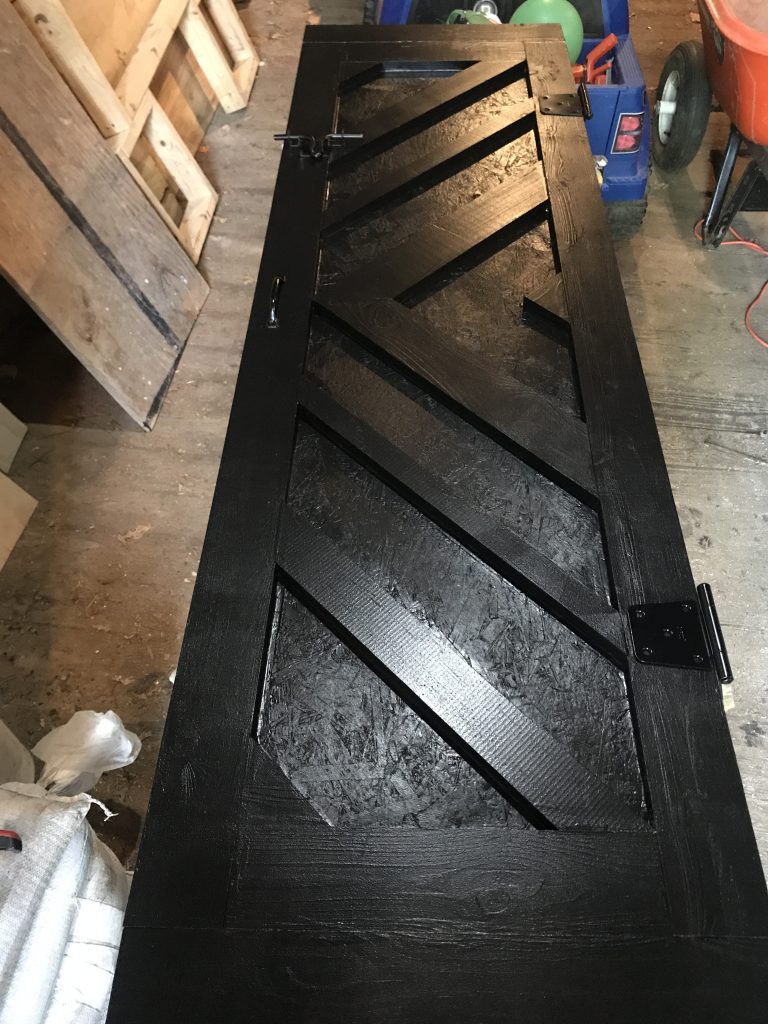
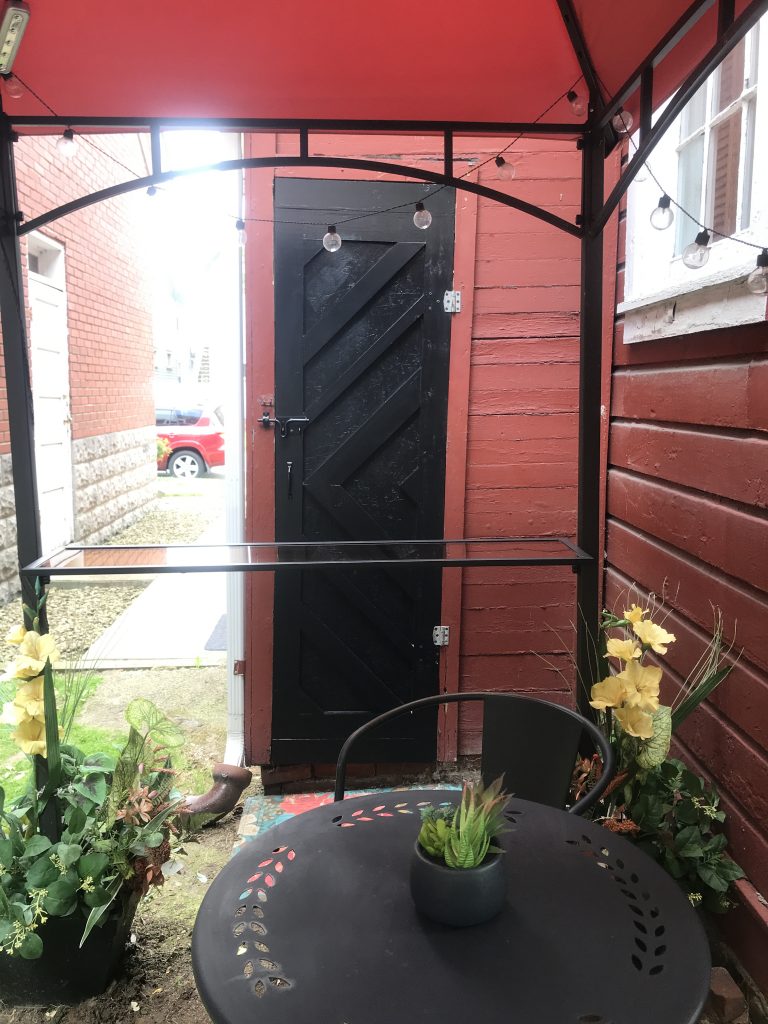
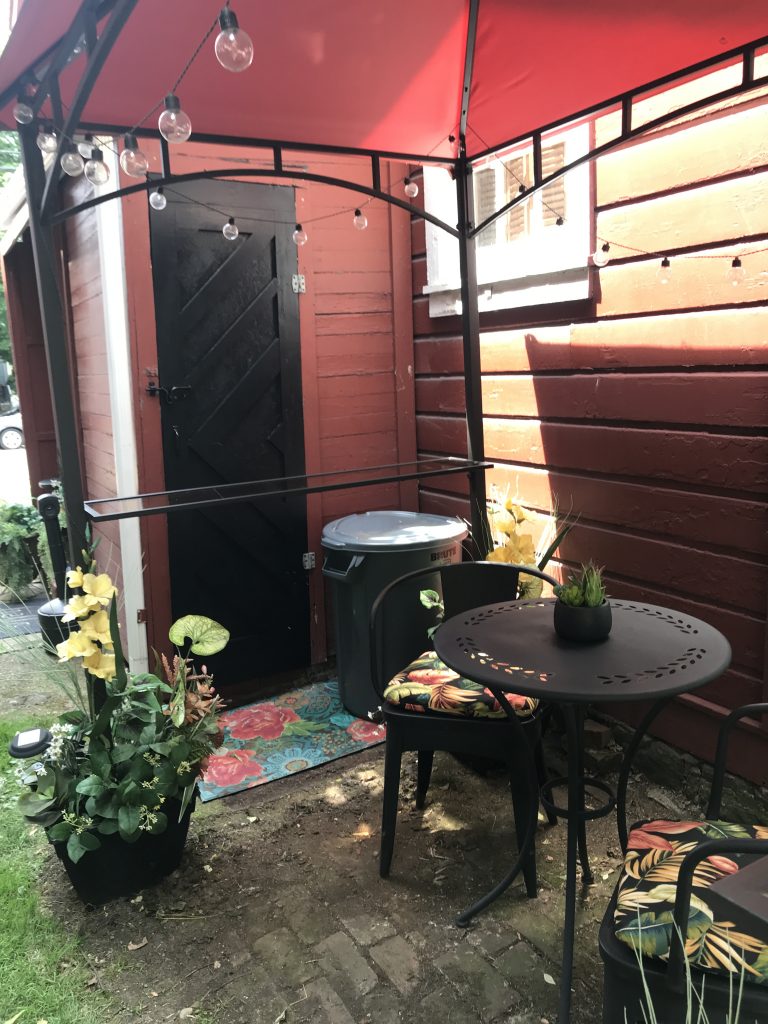
And … tada!
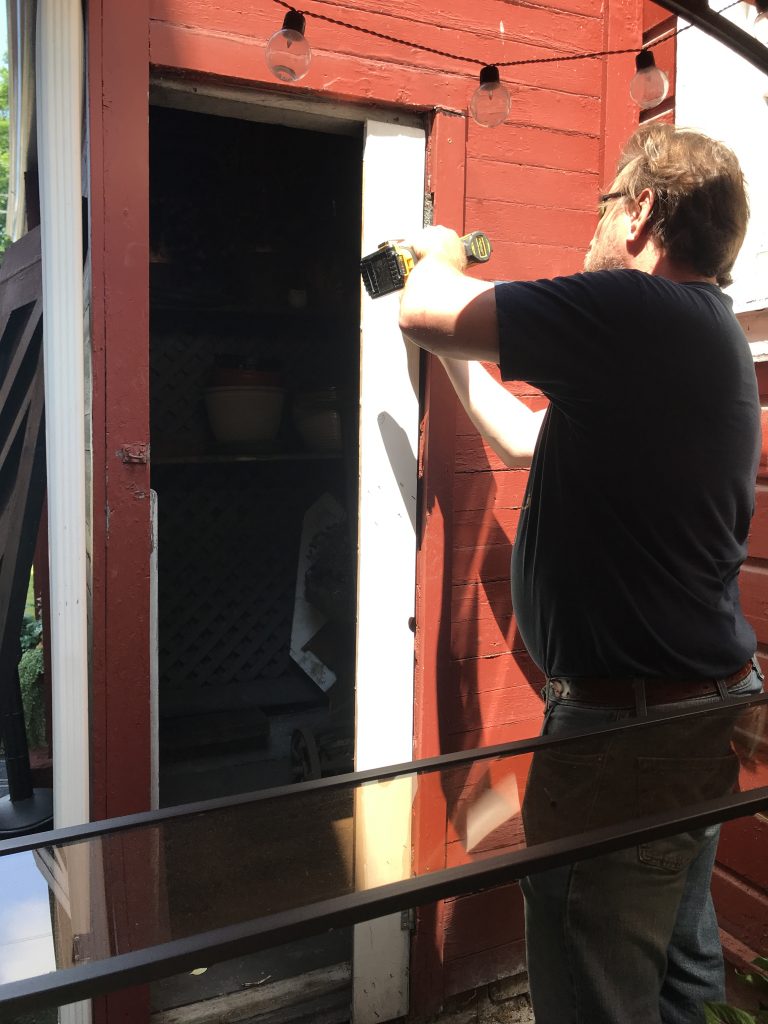
Time to hang. The sizing was pretty much spot on but we did have to make a few adjustments and the new hinges gave us such a hard time that after about an hour, we decided to utilize the old original hinges which took about 10 minutes! Live and learn. lol
Now there’s no longer a gaping hole! Guests enjoying the outdoor seating probably won’t think much of it but I do think they’ll notice. And I’m happy to have a place for outdoor yard tools, pots and salt for winter.