DIY: Removable Decorative Window Frame

DIY MAGIC WINDOW ART TUTORIAL

As a member of the Lowe’s Creative Ideas network, I’m participating in the September “window treatment” challenge. I was provided with a Lowe’s gift card to complete my project…addressing this bathroom window:

DIY Removable Decorative Window Frame Tutorial

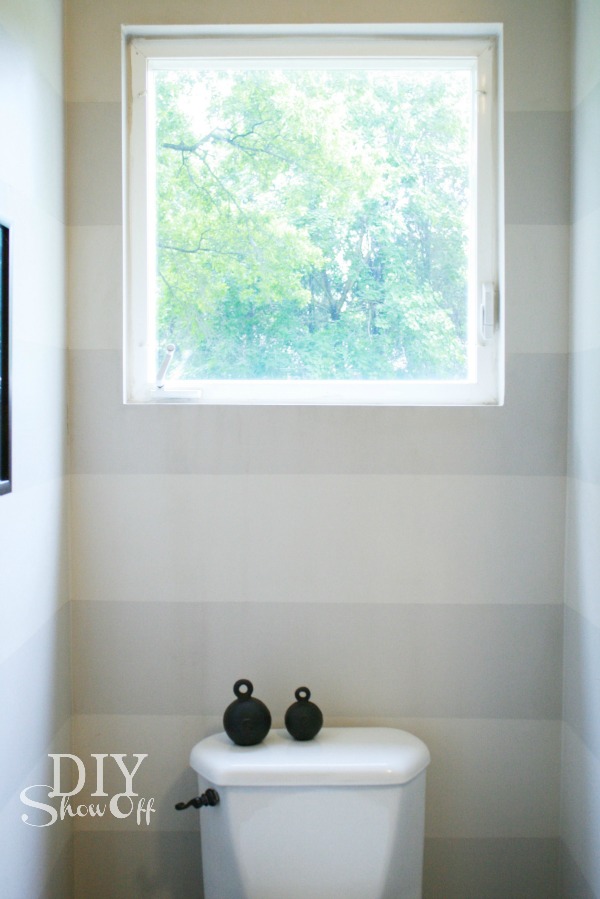
Our main floor bathroom has a window that sits high up (no one can see in and the view out is of the treetops). The window is not framed. I’ve tried a curtain on this window, but with it sitting so high above the toilet tank, it just doesn’t look right.

bathroom window

This project would be great for window privacy too!

Materials I used:

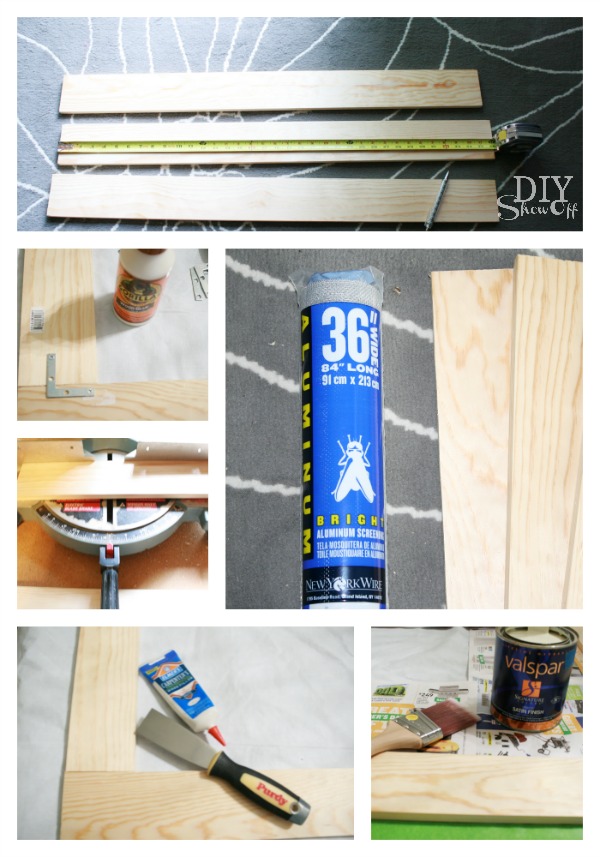
  • 1×3 pine boards to create a frame
  • Flat corner brackets
  • Gorilla Wood Glue
  • Wood filler
  • White paint (leftover Valspar Signature in satin finish)
  • Picture frame hanging hardware
  • Screen (36″ wide)
  • FrogTape
  • Staples
  • Stencil
  • Craft paint
  • White vinyl table cloth
  • Vinyl decals

Removable decorative window frame: 

I started with creating a frame for my window using the 1×3 boards, corner brackets, Gorilla Glue, wood filler and paint. It’s best to miter the joints, add glue to the joints and brackets (be sure that screws are not longer than depth of frame). Fill joint lines with wood filler and lightly sand once dry. Prime/paint frame.

DIY removable wood window frame

Cut screen to fit inside the wooden frame with enough room to fold under borders and to staple to the back side of the frame.

 Removable window frame DIY

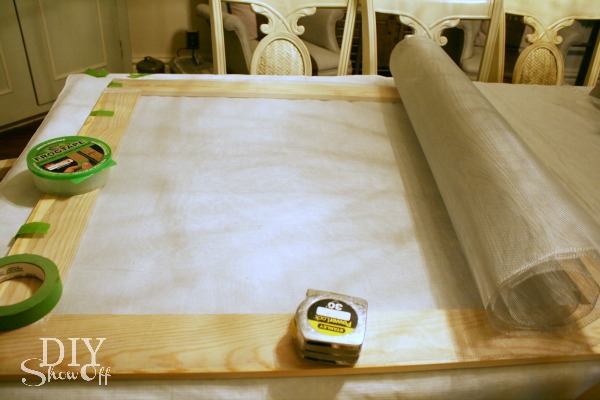
Stencil a design on the screen and let dry. I used Cutting Edge Stencil’s Allium Gladiator Flower Stencil (it sort of looks like dandelions and butterflies). FrogTape was essential in working with the screen by holding it flat and in place. Once paint is dry, staple screen to back of frame. 

removable decorative DIY window frame tutorial

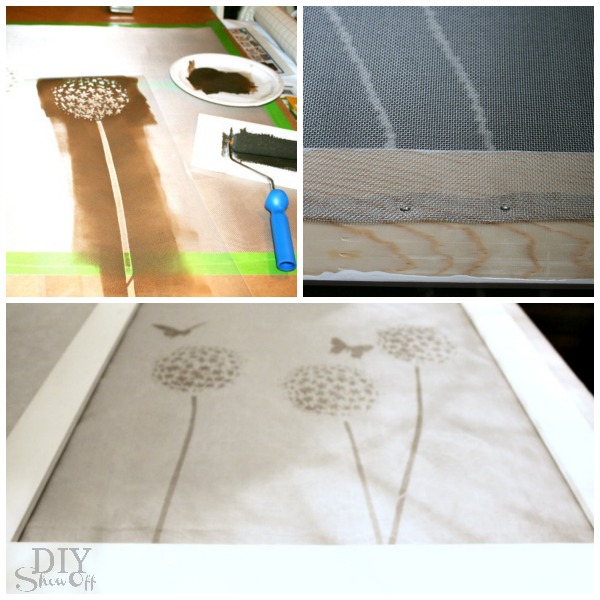
You may think to stop here but when I hung the frame (in the daylight), the stenciled design wasn’t visible. It simply looked as if I only framed the window.

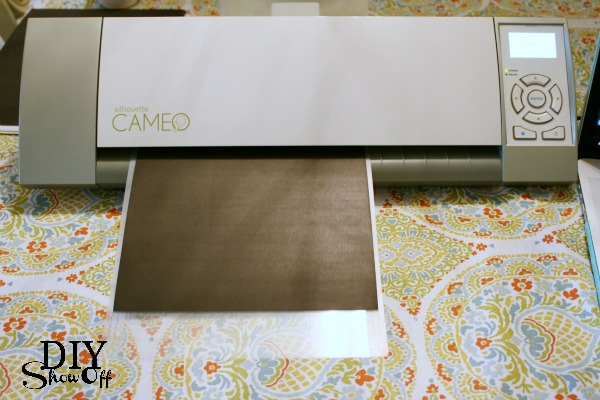
So I cut a piece of white vinyl table cloth to size (a bit bigger than the inner space of my frame with an extra inch around the borders to staple it into place) then I added vinyl decals to the white tablecloth. (I used my Silhouette Cameo to cut out a bike and quote.) You could also try a light colored/patterned fabric or paint your own design on canvas…just remember that your stenciled screen will show when it’s dark outside.

removable decorative DIY window frame tutorial

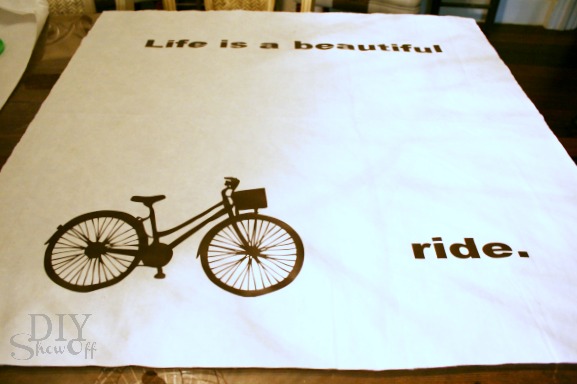
I stapled the white tablecloth into place. 

Simply hang on nails using the sawtooth picture hangers. Easily removable – as simple as taking a picture off the wall.
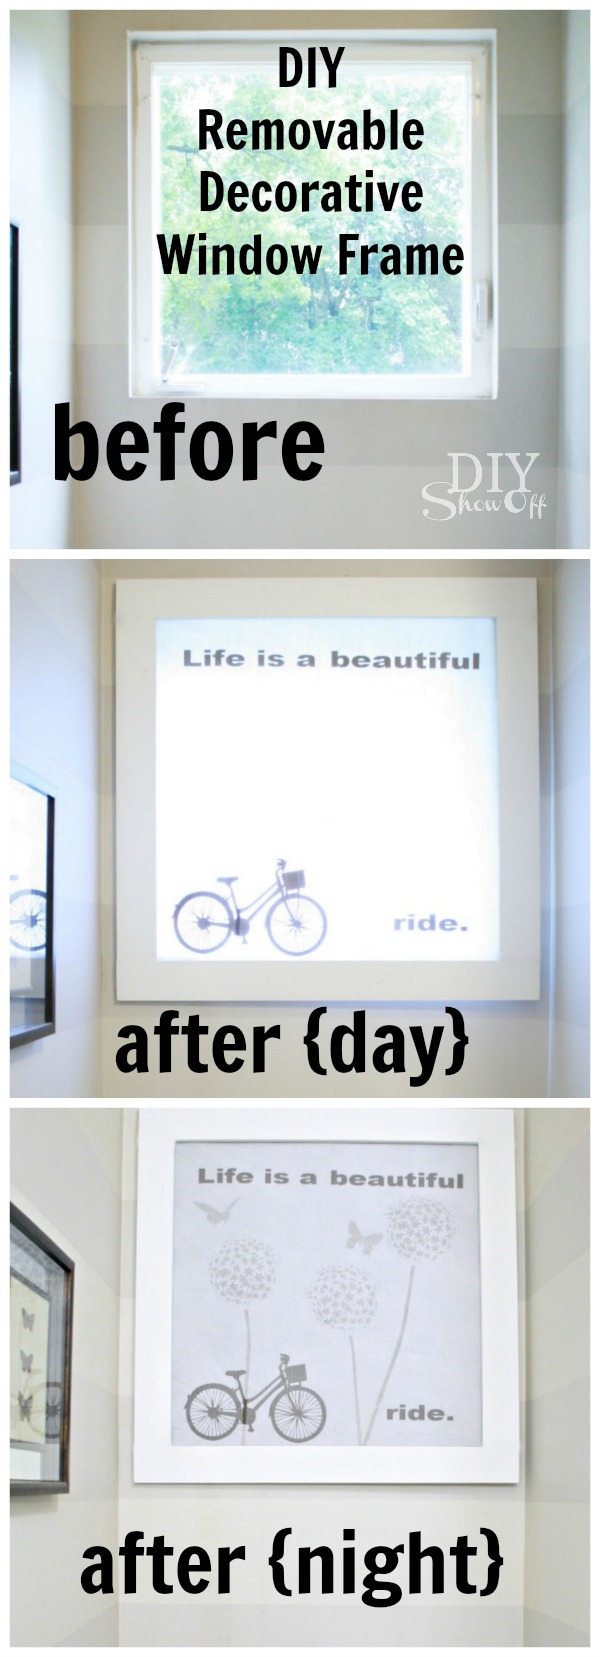
Before…

bathroom window

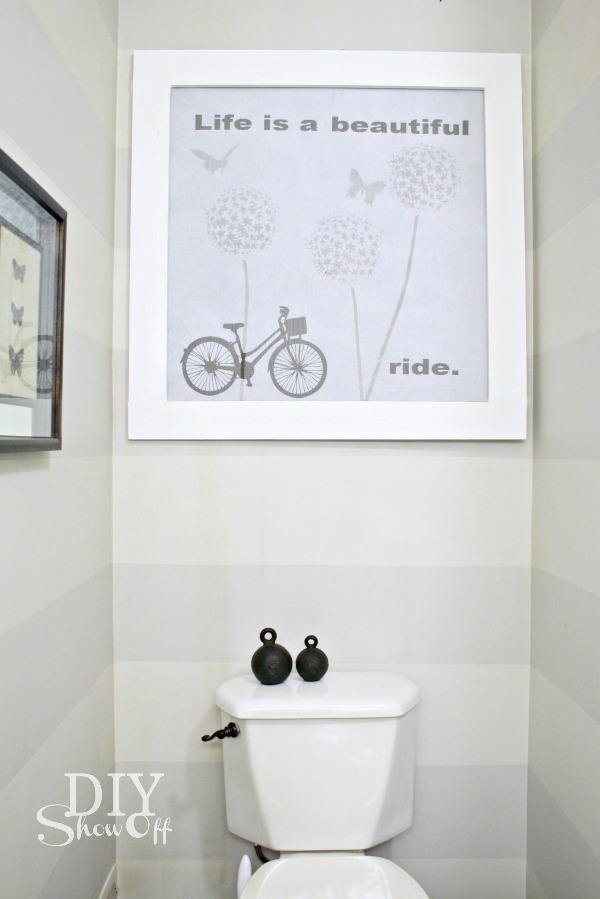
During the day, the bike and quote show up…

bathroom window covering

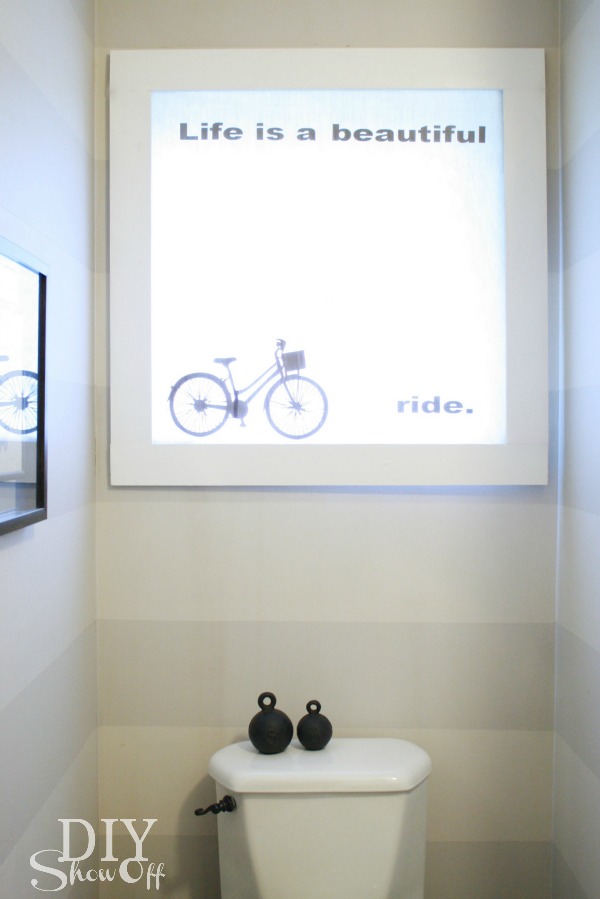
and at night, the stenciled screen shows up as well…

DIY window frame

It’s easily removable for when I want to open/access the window and lets in a lot of light during the day. Yay! Love the result…window dressing, window frame and art. What do you think?

See more fun DIY ideas at Lowe’s Creative Ideas, follow Lowe’s on InstagramPinterest and sign up for the Creative Ideas magazine and app!

Spring 13 Blogger Badge Subscribe Banner Version

*Disclaimer: As a member of the Lowe’s Creative Ideas Creators and Influencers network, I received a Lowe’s gift card to complete this project for a mini outdoor makeover challenge, however the tutorial images, instructions and opinions are my own. 

Framed Pet Silhouettes

I love silhouette shapes, don’t you? In need of some sort of framed art in our hallway, I decided to whip up some silhouettes of my pets to frame.

Framed Pet Silhouettes on Burlap

We have two pets in our home…Lalka, our ragdoll cat:

lalka.ps2

CocoRosie, our Italian greyhound:

rosie italian greyhound

Actual pictures of them are something I haven’t framed but black silhouettes on burlap are just about as sweet!

how to make a framed pet silhouette

Materials I used:

  • Two 8×10 picture frames
  • Burlap
  • Silhouette textured adhesive cardstock from Happy Crafters

What I did:

1. I cut out two 8×10 pieces of burlap (and ironed them using my irons highest setting and spritzing the burlap with water (not steam) on both sides).

burlap craft

2. Using my Silhouette designer studio software, I purchased a cat and greyhound silhouette from the Silhouette store and created two designs for cutting, one of an 8 x 10 matte for my white adhesive card stock and a dog and cat measured to fit inside of the matte on black adhesive card stock. I also saved my designs to cut out more adhesive cat and dog shapes for making handmade cards (using the adhesive card stock is like making your own custom stickers and adhesive labels).

pet silhouettes

matte

3. Then adjusted the settings according to the “adhesive card stock” option and sent to the Silhouette for cutting. 

cutting pet silhouettes

4.  Then simply peeled away my designs and placed them on the burlap. Easy peasy! I like that the adhesive keeps my designs in place on the burlap. 

adhesive cardstock

Italian greyhound silhouette

5. Then framed and hung them up on the wall. 

framed burlap adhesive cardstock pet silhouette tutorial

So cute!

Do you have pet art in your home? I love whimsical pet silhouettes. Remember my Italian Greyhound t-shirt?

DIY chevron greyhound applique

Who knows what I’ll embellish next! I don’t have a pet accented throw pillow yet. It might be next on the list. 🙂 

HClogopngsmall

This post was sponsored. Happy Crafters provided the adhesive card stock. As always, opinion, experience and tutorial are my own. 🙂 

Easy DIY art at Nalle’s House

Meet: Anu from Nalle’s House.

Nalles-house-blog

Anu is sharing a few links to a two part DIY modern art project she created for her living room today.

Part 1: DIY framed merrimeko art

diy-framed-wrapping-paper-art

Part 2: DIY Number Art

diy-number-art


These projects were super simple and the black and white make a big impact in her lovely living rooms…

diy-living-room-art

What’s on display in your living room?

There is a lot more DIY to see over at Nalle’s House. Go ahead, stop by and check out all of her DIY projects and home tour.

nalles-house-collage