


I recently came across Christina’s chalkboard paint post from Designing by Numbers in the DIY Project Parade (thanks for the inspiration, Christina) and remembered that I had bookmarked Martha Stewart’s chalkboard recipe with grand plans that kept getting pushed back. So, the next day I headed to True Value for supplies. (The True Value in Sarver, PA has a ‘mascot’…the sweetest dog who greets customers at the door, with a roll of duct tape in his mouth. Adorable.)
Our basement stairwell is a blank canvas. Lots of plans, just needed to get started.
BEFORE

I wanted a navy chalkboard so custom chalkboard paint was the solution.
Color: Benjamin Moore Hale Navy

I started with having my primer tinted. Primer doesn’t really tint well, so the closest I could get was a bright periwinkle, but every little bit of pigment helps.
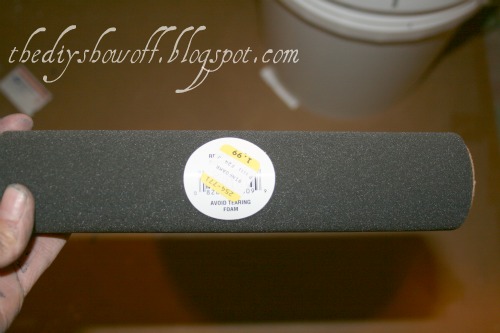
To make my project go quicker and because ceilings are high/scary and complicated, I use an edger.

The secret to using this little treasure is dipping it into the paint at angle, keeping the wheels out of the paint.

Then drag across up the ‘ramp’ of the paint tray to get off excess paint…

I “sneak up” on where the wall meets the ceiling and then move from side to side. (Don’t just smash down near the ceiling and start side to side.) I also ‘smooth’ out the bottom of the edged paint line to keep it from dripping/building up and making a visible line. So: touch the edger to the wall below where you’re going to run your edging, then come back and smooth the line made from the bottom of the edger.

For high up/hard to reach places, I added an extension and stood on a ladder at terrifying heights (remember to keep as little as possible paint towards the side of the edger with wheels)…

Once the primer is applied and dried, it’s time to move on to the next step.
The recipe calls for 2 tbsp. of non sand grout for every cup of latex paint. Here’s the conversion for making one gallon of chalkboard paint:
2 tbsp. for 1 cup
16 cups in a gallon
= 2 cups (32 tbsp.) of non sand grout in one gallon of paint
I used a 5 gallon bucket for mixing.

I alternated adding paint then a bit of grout (thanks to Christina for the tip). Then stirred. Repeat until all paint and grout are mixed.

I used a paint stir. Tilting the bucket helps get the grout/paint mixed that sticks to the sides of the bucket.

The consistency is thick. There are small clumps…keep stirring (a mixer-bit on the drill might be more helpful). I did have a few bumps…but we’re not picky. Most dissolved or smoothed out with a paint brush (a little bit of a pain but overall – it was worth it). If we were perfectionists, we wouldn’t have bought an old fixer-upper farmhouse! This wall will actually be partially covered up (future project) and then a couple of years down the road, it’s being torn out when we get to the big basement renovation. The solution is to lightly sand between coats.
Make sure you use a drop cloth and wear old clothes. Consistency is thick and splatters will occur. (Thankfully we have stairs waiting for slate tile…so although I was careful, it didn’t matter). A mask is preferable too. The fumes were on the strong side. Use same edging technique as mentioned above.
I used a foam roller for the larger/middle task of painting the wall.
Once I finished the wall, I put the lid on my bucket and my paint tray/roller in a baggy and let the wall paint dry overnight.
first coat, drying…

In progress but looking good!

Second day, second coat. Next…the hard part. Rub the entire wall with the side of a piece of chalk.
Then erase.
All set to accept chalk board writing!
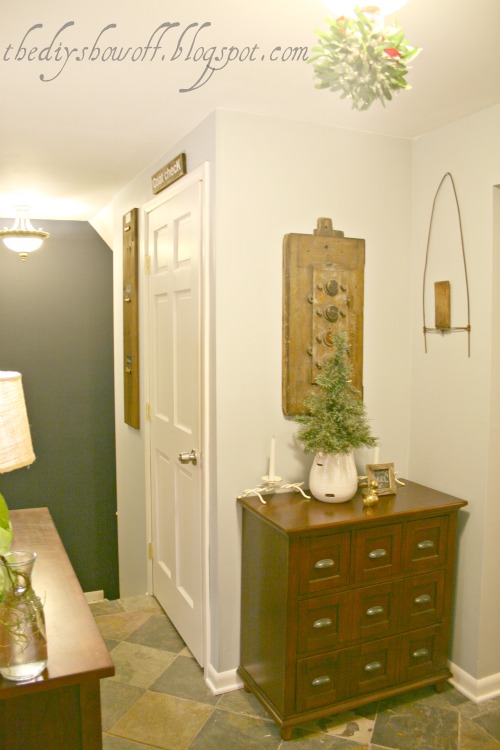

More on our stairwell transformation coming up – you’ll never guess what we have planned.

Let’s see what you’ve been up to!
1. You must use the button above (ADD BUTTON HTML CODE FROM SIDE BAR TO YOUR POST) and link to this post to share the linky love. You post must be recent, shared at one DIY Project Parade only (not continuously) and be DIY related.
2.Include your name or blog name and project title. Add your permalink (not your blog url, but your DIY project post url). Feel free to link a Past Post, just invite your readers in a current post with a quick note.
3.Or email your link to thediyshowoff@gmail.com and I will add it for you.
4.If you notice your link has disappeared -please add the link back to The DIY Show Off to your post today, a button or a quick note to your readers about the party and try again! I love when everyone participates and readers check out everyone’s links, but I think the return favor of linking back is the nice thing to do so everyone plays fair and enjoys all of the projects and links. Also – this blog party is for DIY projects only. Links not related to DIY will be deleted. Please share your link one week only.
5. If reading this in an email, pop over to http://thediyshowoff.blogspot.com to see the inspiring DIY projects linked up!
6. If you have a Holiday link to share, feel free to link up to here too!
7. NOW you can “like” the links! What a fun idea! Most liked links may be included in a post of DIY Project Parade highlights later in the week.
8. Visit a few other links to make some new friends, get some creative ideas and feel free to leave me a comment. I’m likely sitting here on the computer and could use a happy distraction!
*~*~*~*~*~*~*~*~*~*~*~*~*~*~*~*~*~*~*~
I was one of the bloggers selected by True Value to work on the DIY Squad. I have been compensated for my time commitment to the program as well as my writing about my experience. I have also been compensated for the materials needed for my DIY project. However, my opinions are entirely my own and I have not been paid to publish positive comments.
~*~*~*~*~

12 Bloggers, 12 Colors, 12 Days
of Holiday DIY
Dec. 1st ~ GREEN ~ The Design Confidential
Dec. 2nd ~ WHITE ~ Domestically Speaking
Dec. 3rd ~ BLUE/PURPLE ~ Fireflies & JellyBeans
Dec. 4th ~ SILVER ~ Freckled Laundry
Dec. 5th ~ GRAY ~ Primitive & Proper
Dec. 6th ~ SPARKLE/GLITTER ~ A Girl and a Glue Gun
Dec. 7th ~ MIRROR/CLEAR ~ The DIY Show Off
Dec. 8th ~ EARTH TONES ~ Making the World Cuter
Dec. 9th ~ RED ~ It’s So Very Cheri
Dec. 10th ~ GOLD ~ 504 Main
Dec. 11th ~ CHALKBOARD
Dec. 12th ~ MULTI-COLOR ~ The DIY Club
Ahh, wonderful and thanks for doing the math for us (so not my forte).
Often people are afraid to use a dark colour for fear that it will enclose a space, but clearly we can see that the wall now seems to recede.
I am amazed at how you made your own chalk paint. The color looks great, and I can't wait to see the rest of it. I am also in love with your entry! So beautiful!
Thanks for hosting! I love chalkboard walls! Can't wait to see what you do with it! : )
Oh-I love it. I have used edgers for years. I keep a little piece of damp towel to wipe the edge every once in a while so that it doesn't get "gloppy"…or whatever that technical term is!'>)
What? You didn't write any words of wisdom on that wall yet to share with us? Seriously? Not ONE WORD? I would have had to put up at least the word NAUGHTY! xo Diana
I love the color you chose for the wall. Thanks for hosting.
very cool roeshel! Can't wait to see what else you're up to!
thanks for hosting!
gail
Thanks for hosting! Have a great week! 🙂
Ooh. I love the dramatic color you chose! It will be fun writing on that wall with chalk!
Thanks for hosting!
Wow, what fun to have a chalkboard wall – my kids would love it! Thanks for sharing it with us, and thanks for hostessing the party.
Mary
I love the shade of paint that you chose…and it's chalk paint??? I can't wait to see what is to come next!
Thank you for hosting. There are several projects I'm going to check out right away!
Have a great week!
Sharon
PS I'm almost finished with the project that I've been playing with since before Thanksgiving.:-)
YEAH! It's a new week! And I am pulling out all the stops on homemade gifts for Christmas. My family is very much into this-maybe yours is too….
I linked up my DIY Family Board Game-it's all about YOUR family-whoever YOU are. Thanks for hosting and have a great Monday!
LOVE the stairway transformation you've got going on here Roeshel!! And great time on making your own chalkboard paint!! (Gotta try it!)
Thanks for hosting too – especially in between your wonderful projects you do!! You're a true inspiration! xo
😀 Lynda
Thanks so much for the shout out, Roeshel! SO happy you tried the chalk paint recipe – the wall looks fantastic and it's such a gorgeous rich colour! I can't wait to see the wall put to good use 🙂
Take care,
Christina
http://www.designingbynumbers.com
The navy chalkboard wall on your stairwell looks great…can't wait to see what else you come up with. Thanks for hosting another linky…I'm at 165, 167 and 168! 168 is an upcycled radio cabinet with a little DIY chalkboard also! Hope you like them. Have a great week.
P.S. That French Cottage bedroom in the guest post is absolutely gorgeous…eye candy, for sure!
Looks great! Can't wait to see more!
Great color! Thanks for hosting the linky…Oh, and sorry about my multiple posts, I was having technical issues and I can't see how to remove the duplicates.
What a great color!! I LOVE this technique….can't wait to see your plans:-)
I had NO IDEA that there was any such thing as an edging tool. And my hubby just spent the entire day today edging our tiny bathroom with 4 doorways to trim, not to mention around the bath and vanity. Bet he would’ve loved this handy little tool! Thanks for the great tips 🙂