How to Make a NO SEW Ombre Ruffled Tree Skirt

{no sew} Ruffled Ombre Tree Skirt Tutorial

With an eclectic family room makeover in progress, we’re decorating the Christmas tree with fun non-traditional colors for Christmas. I know – my house is a mish mash of themes but I do what I love and I’m loving walking from room to room with a different scene. However, finding a colorful non-traditional tree skirt is nearly impossible. Then I remembered that few years ago, I stumbled across a no-sew ruffled tree skirt and although I don’t remember where I saw it, I remember it was a lot easier than I imagined.

No Sew Ruffled Ombre Tree Skirt tutorial

It’s much harder to explain how to do it in words than actually working on this. It’s so easy! This could even be done using a sewing machine (which was my plan but I had to go to Plan B when my sewing machine stopped working). It is time consuming but can be done in one day if you work on it a lot. I made mine in two days. Crank up the Christmas tunes!

Here’s how I did it: 

Materials:

  • round vinyl/flannel back table cloth
  • 5 colors of lightweight fabric (dark to light in color). I purchased 2 yards of the darkest, 2 yards of the second darkest, 1.5 years of the next color, 1 yard of the lightest colors. Yes, a lot. I bought 7.5 yards of fabric. {Use coupons! Look for sales/clearance fabric.}
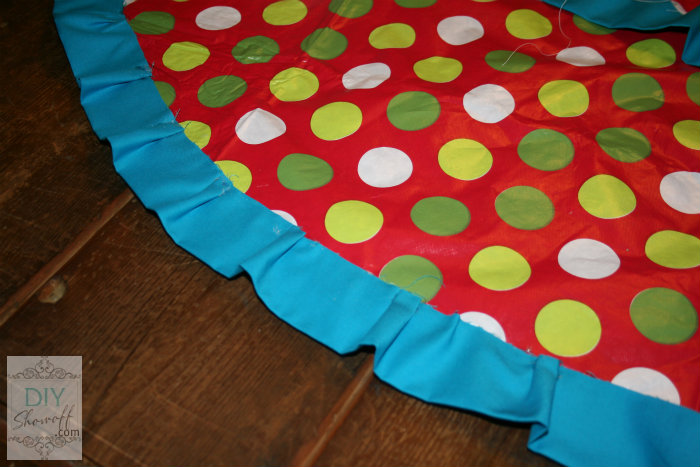
  • Hot glue (approx. 100 glue sticks) OR swap out hot glue for sewing
  • Duct tape

Tools: scissors, iron

Tutorial:

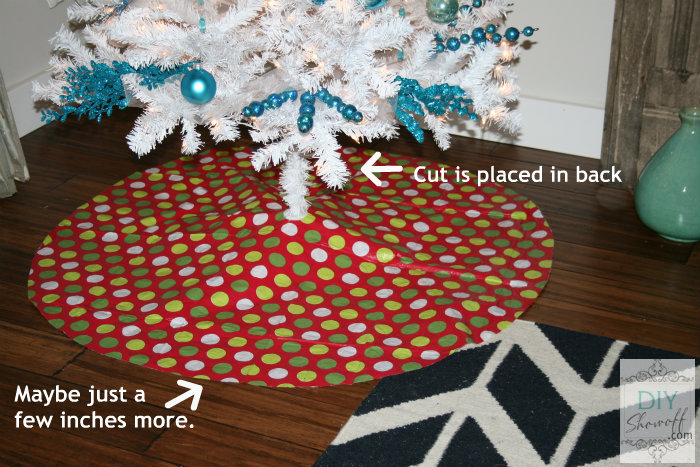
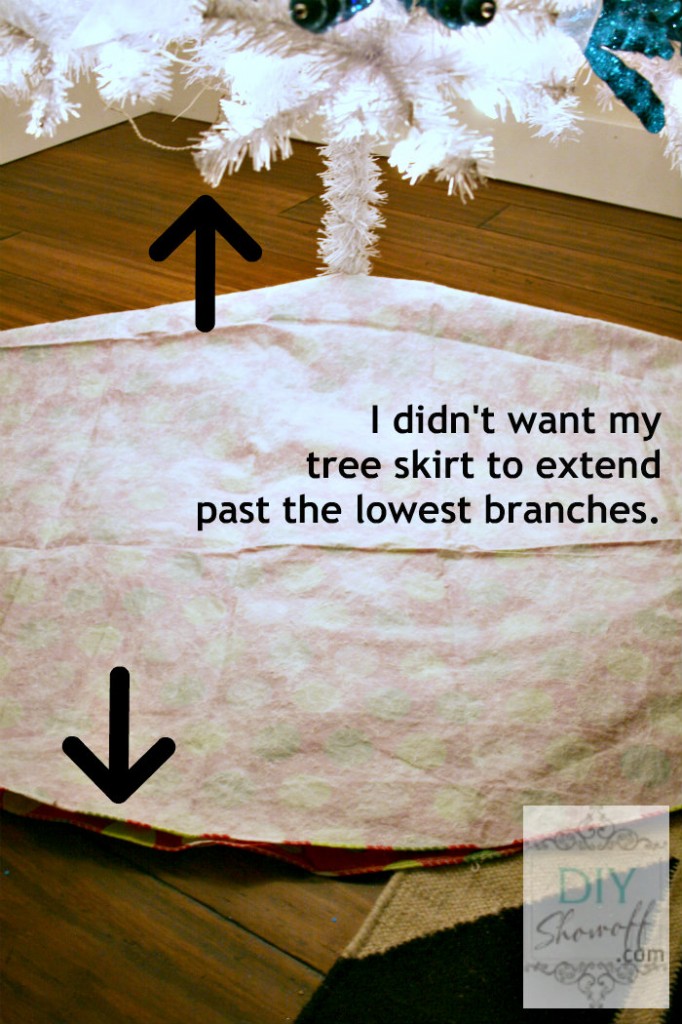
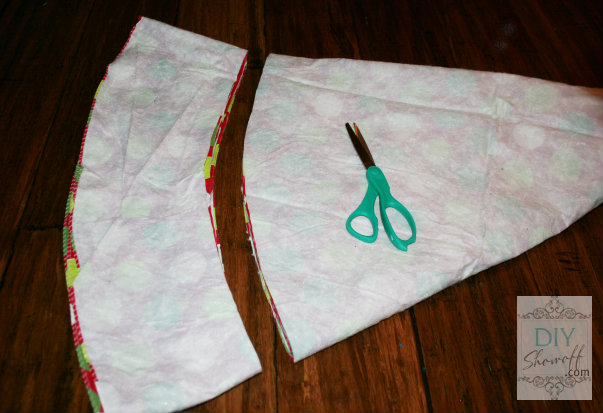
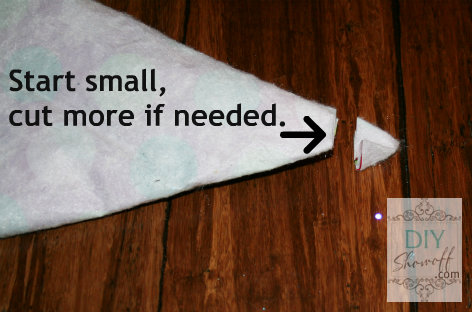
1. My round table cloth was was too large. I started by folding it in half and placing it under the tree. This gave me an idea of where I’d want to cut. I didn’t measure. Just decided I needed to cut off about 10-12 inches. no sew tree skirt2. I folded the half circle table cloth in half again to create a pie-slice shape. Then just cut {rounding it} approx. 10″ from the outer edge. how to make a no sew tree skirt 3. Snip the pointed edge of the folded table cloth. no sew ruffled tree skirt 4. Cut along one fold from outer circle to inner. no sew tree skirt tutorial5. Place under the tree and decide if more needs to be trimmed. And if I liked the “Twister” vibe of my vinyl table cloth, I’d be done! But, um. No. Something better in mind.
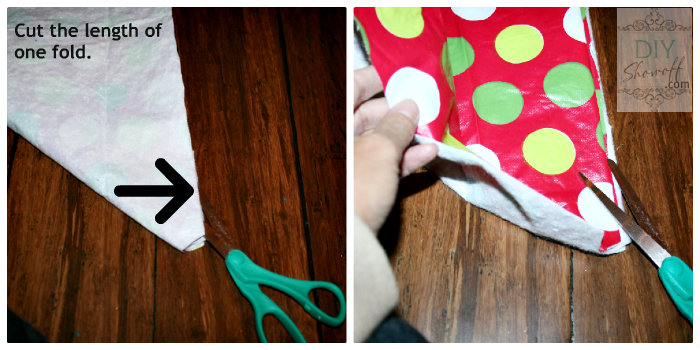
no sew tree skirt

Tip: cover edges of smaller hole {where tree trunk will be}  with duct tape. I used FrogTape. This little area is susceptible to tearing…tape will help prevent tears.

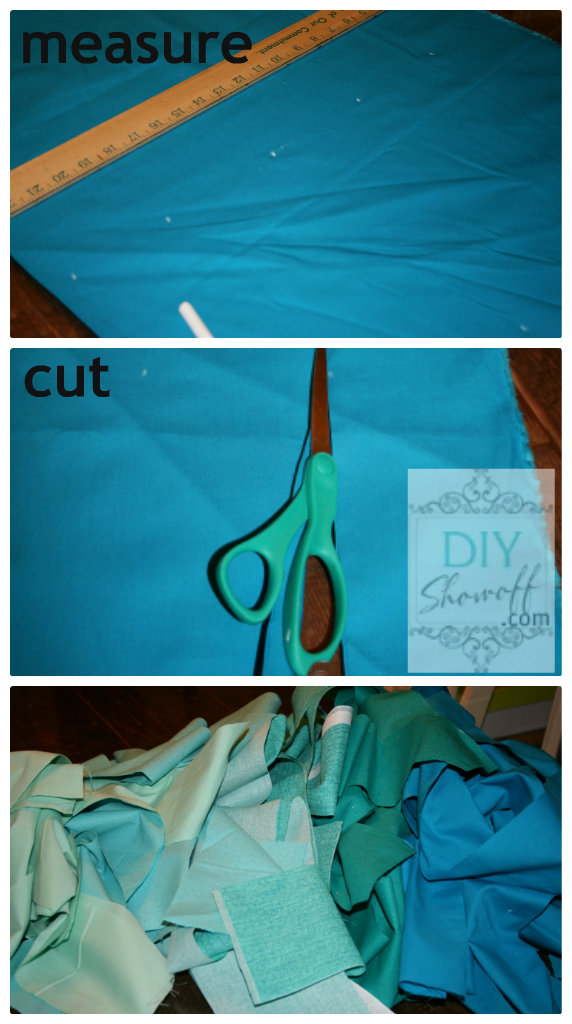
6. Spread out fabric {keep folded}. Any size strips will do. Larger widths will create bigger ruffles. Smaller widths, smaller/more ruffles. I decided on small 4 1/2 inch wide strips. I marked the fabric and cut my strips (no need to be a perfectionist about perfectly straight strips but keep as straight as possible). Length doesn’t matter. Most of my fabric was 54″ wide, but one of my fabrics had a smaller width.

no sew ruffled tree skirt

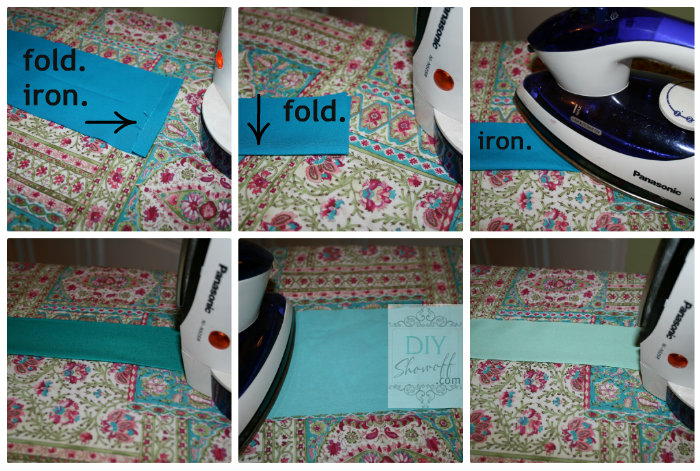
A lot of strips! 7. Time to iron. And iron. And iron some more.

no sew tree skirt tutorial

Take a break.

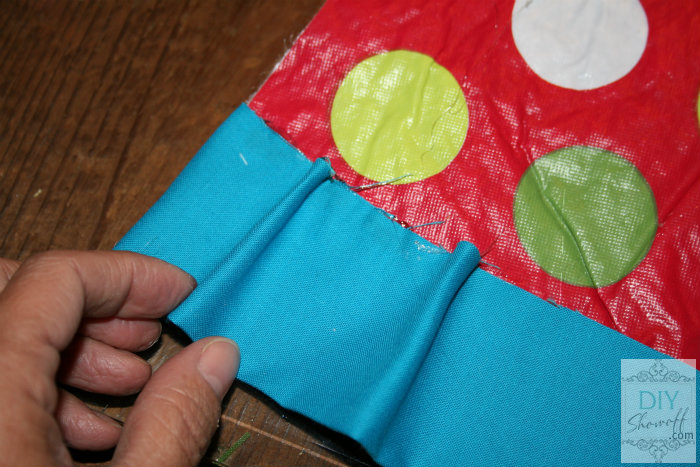
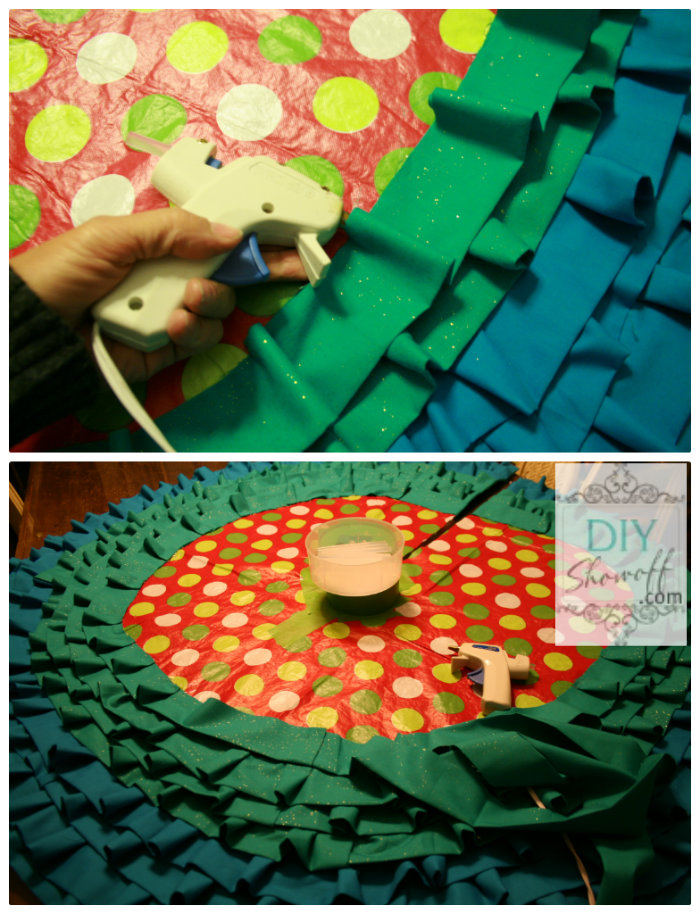
8. Start at the outer edge, along the vertical cut (the back of the tree skirt). Folded edge towards you, raw edge will be glued. Place the strip of fabric so it hangs off the vinyl table cloth.  I applied hot glue to the end of a strip of fabric, attach to back side on flannel and wrap around to the front of the vinyl (only about an inch or so on the back). no sew ruffle tree skirt9. I worked in about 4-6inch sections (just eye-balling it, making sure to hide the outer edge of the vinyl table cloth. I applied a line of hot glue, then pressed the raw edge of the folded fabric strip onto the hot glue line. AS I WENT, I’d create “pinch” pleats (glue a straight 2-3 inches, fold the fabric up towards you, then press down another 2-3 inches of fabric strait onto the hot glue line.
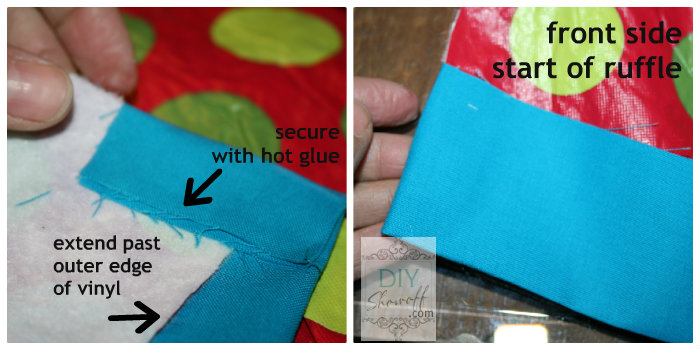
no sew ruffled ombre tree skirt tutorial

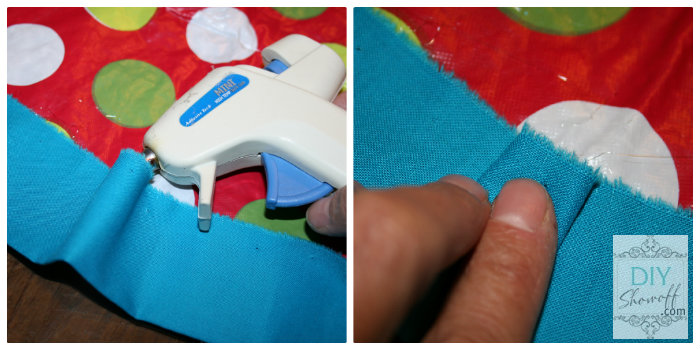
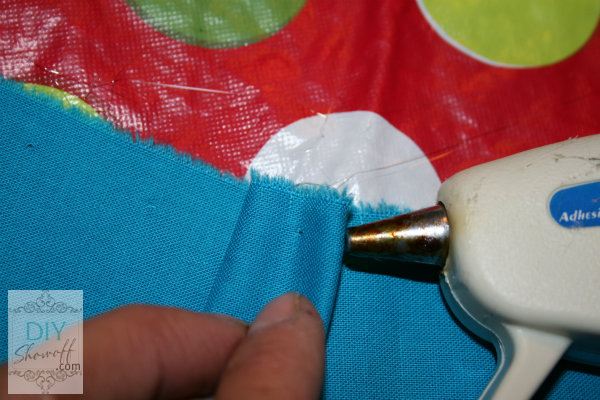
10. Insert a small amount of hot glue into the folded fabric. Press down flat.

no sew ruffled ombre tree skirt tutorial

11. Attach the little flaps with a dab of hot glue if needed.

no sew ruffled ombre tree skirt tutorial

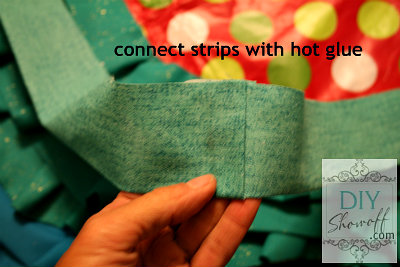
12. Repeat and continue. no sew ruffled ombre tree skirt tutorial13. When another strip of fabric is needed, open end of fabric, place the end of the last fabric strip, add some glue and fold. (Just create an extended strip of fabric).

no sew ruffled ombre tree skirt tutorial

14. When completing the row around the edge of the circle, cut strip of fabric about an inch and fold onto the flannel back and secure in place with hot glue {as shown in step 8}.

15. Continue onto the next row. Since my ruffles were smaller, I used up all of my darkest color then continued onto the next color. Sometimes it was in the middle of a ruffle, most of the time, I ended a color at the end of a row. My fabric mostly ran four rows. Working towards the center, will require less fabric.

no sew ruffled ombre tree skirt tutorial

16. I noticed that as I worked, my circle wasn’t so perfect anymore. I kept going. Around the trunk area, inner tree skirt, I did have to fill in with fabric strips…again, it’s not perfect…just play with creating more ruffles under what you’ve done, if you see vinyl showing through or have vinyl that’s not circle shaped towards the end. No one will be able to tell…just create pleats/ruffles with the same color to fill in.

17. Near the “trunk” part of the tree skirt, I finished off with a sheer white double ruffle from my scrap supply. You can use wide ribbon…create a double ruffle by hand with a running stitch with thread (no knot) in the center length wise and pulling ends to “gather”. Or use ribbon or bias tape, or follow the same steps but do the last row upside down, gluing raw edge to raw edge, creating pleats/ruffles. Cover hot glued raw edges with thin piece of pretty ribbon using hot glue. no sew ruffled ombre tree skirt tutorial 18. I ran a length of duct tape up the ends of the ruffles on the back side just to keep things neatly tucked down.
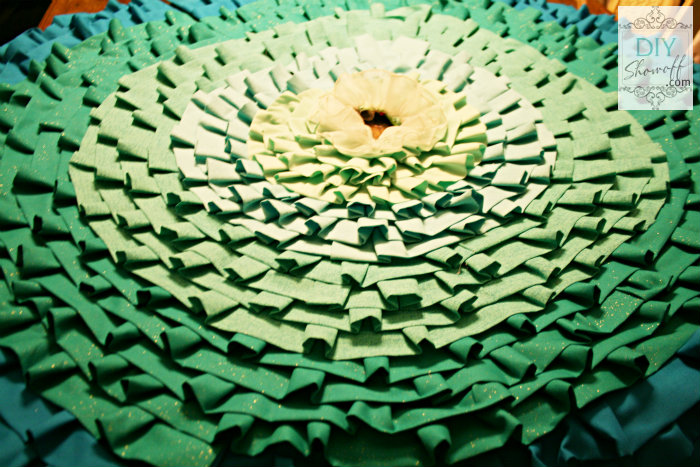
ruffled tree skirt

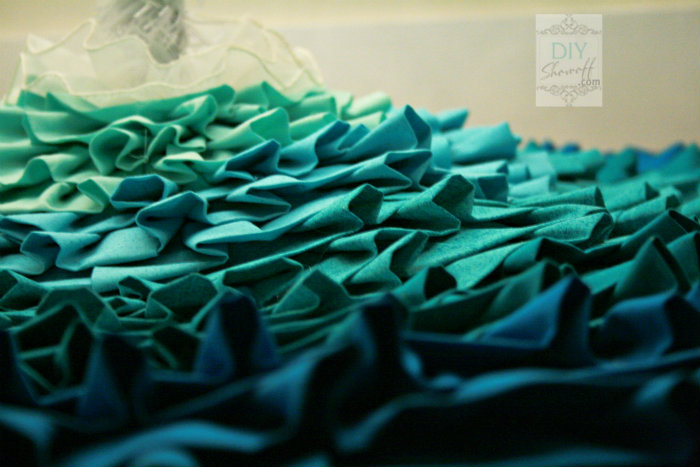
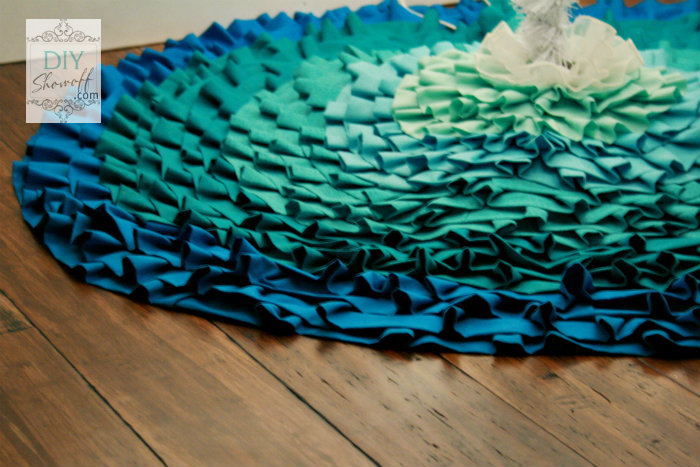
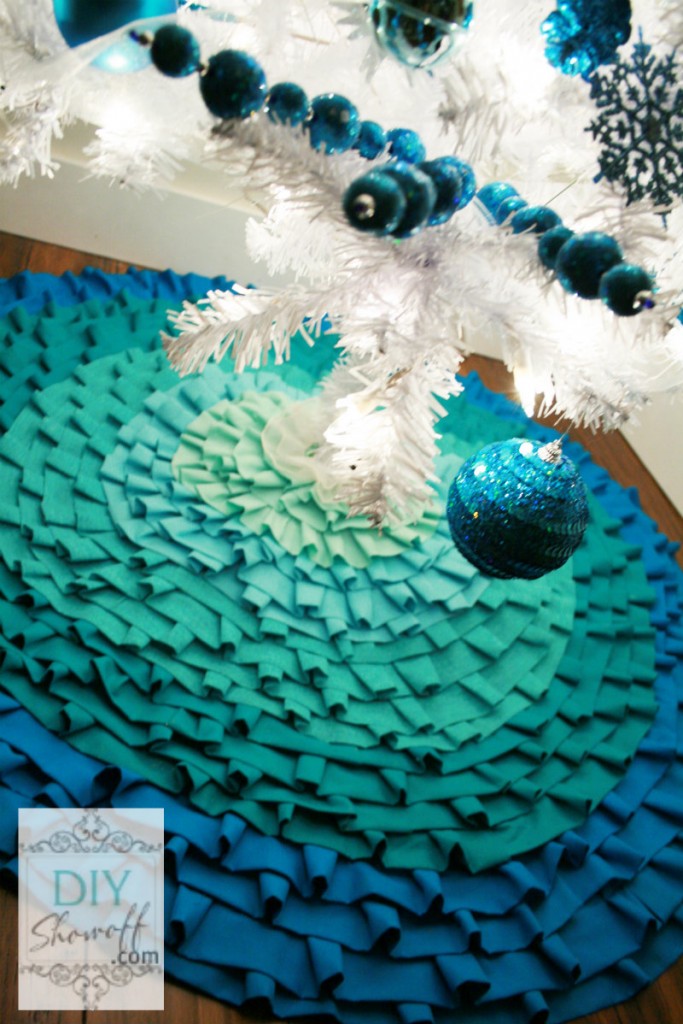
Looks like an expensive professionally sewn beautiful tree skirt, right? So pretty in any color, even drop cloth or burlap or how about using white flat sheets? You’ll have to let me know if you give this a try {or if you already have!}. I’d love to see it!

ombre ruffled tree skirt

Oh – and you will experience some hot glue burns. No sew doesn’t mean no pain. Ouch! But they only hurt for a few seconds.

teal ombre ruffled tree skirt

{Leftover fabric strips were torn into thinner strips and used as garland.} Stop back later this week for Christmas tree pictures!

Don’t miss a post and see sneak peeks first by following along:

DIY Show Off DIY Holiday Highlights

Partying here:

Home Stories A2Z

Holiday Craft Party at Centsational Girl

6 Tips for decorating a Christmas tree {DIY Project Parade}

Decorating the Christmas Tree

This is the weekend that we {I} decorate for Christmas! Yesterday and today {probably tomorrow too}, Christmas decorations have exploded in the living room, family room and dining room. There are boxes everywhere. Is it like that for you too? {I apologize for the poor quality pics…but it wasn’t a priority. Not like getting great “after” decorating pictures will be!}

artificial Christmas tree decorating tips

Today I wanted to share a few tips for setting up and decorating an artificial tree, some that help make it look more ‘real’ and full. For our living room, we have a rather nice artificial tree. It’s always mistaken for being real but there are some things I do to make the best of having a fake tree:

Pine Scent

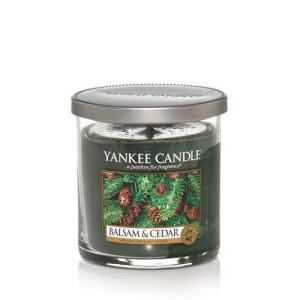
Tip #1: I do burn a Yankee Balsam and Cedar candle to create a real pine smell. Love it! Pretty pine scent without smelling like a pine tree car air freshener.

Yankee Balsam and Cedar candle

Faux Root Ball {and adding height}

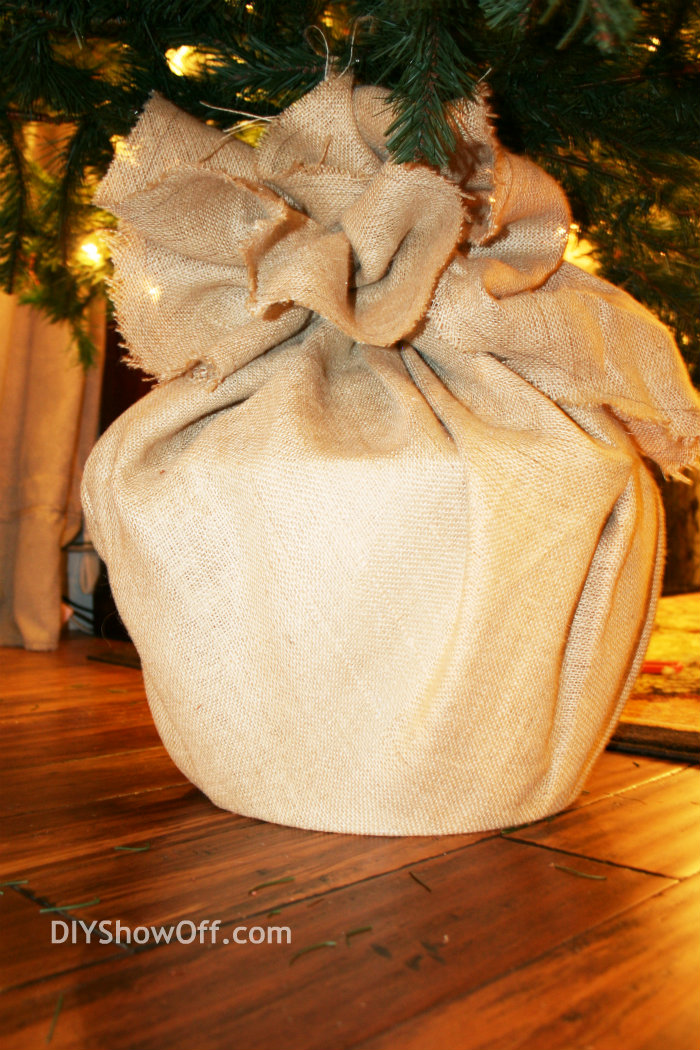
Tip #2+3: Rather than a skirt for this tree (our main one where Santa leaves the gifts), we create a faux root ball and giving the tree more height. First, make sure you have room to lift your tree about a foot higher! I set a galvanized tub in the center of a circle of burlap. We add weights to the tub {25 lbs.}. Then I set the stand of our tree onto the tub. I use twist ties to secure two of the feet of the stand to the handles of the tub. I gather up the burlap and tie it around the tub and stand and secure with twine at the “trunk”.

directions: Christmas tree faux root ball

Pull the top of the burlap to make sure it’s over the tied twine. Fluff a little. Lots of room underneath as it lifts our 7.5′ tree about a foot higher. I love that about doing this too!

artificial Christmas tree faux root ball

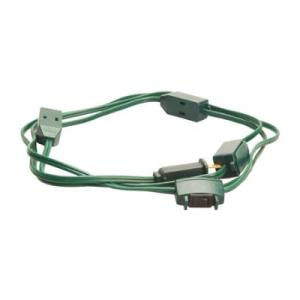
Tip #4: I also use a 9 outlet Christmas tree extension cord. I like that the outlets are spaced along the extension cord. One plug into the wall outlet and an off/on switch for the Christmas lights. I found mine at True Value Hardware along with lots of lights and decorations!

Christmas tree extension cord

String lights vertically

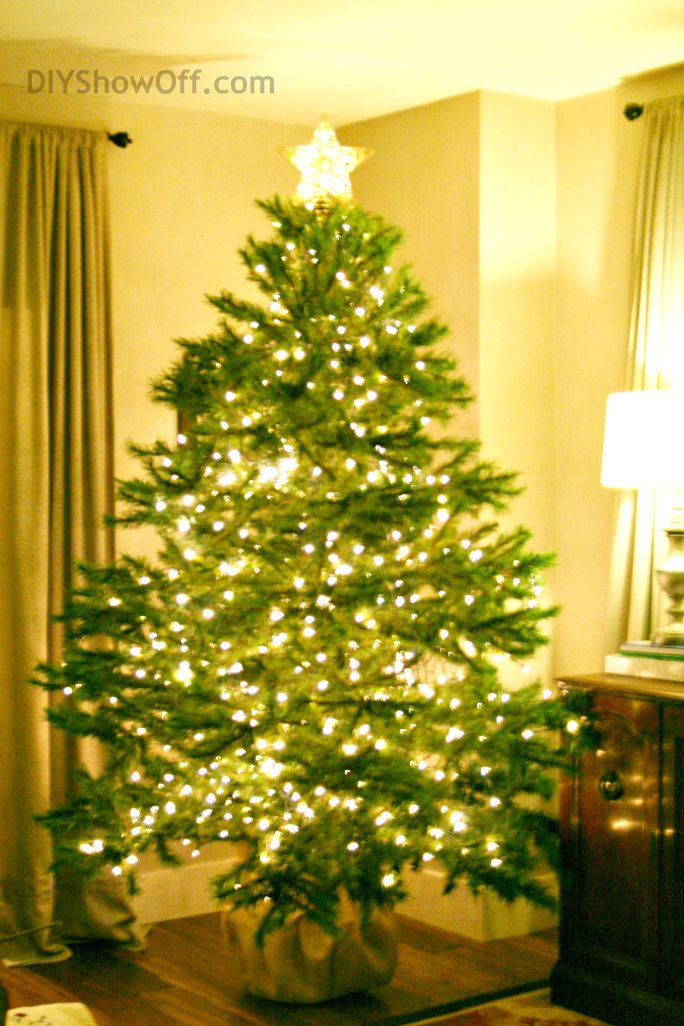
Tip #5: I was surprised that not many Facebook fans knew this tip, so I’ll share here too: I add my lights to the tree vertically {up and down} rather than around. I can’t tell the difference and when the tree is in a corner like it is in our home, it’s a lot easier than trying to get around it’s width, pulling it out and pushing it back into the corner, moving a ladder all around while trying to “lasso” the tree with strings of lights.

Christmas tree with lights Filling in the tree

Tip #6: If your artificial tree isn’t as full as you’d like it to be, add faux pine garland or silk flower bunches to fill in the gaps {large faux poinsettias help to fill in space and look pretty too}. Even dollar store green garland pushed near the center of the tree will help hide seeing the “pole” through sparse branches. Try larger ornaments and use wide ribbon or tulle as a garland to help fill the empty spaces.

I only have the lights on at the time of writing this post but will share it all decorated soon. I do a traditional tree in our living room with red and gold. Dining room gets a more rustic decorated smaller tree and I can’t wait to do something fun in the family room this year {to go with our eclectic colorful decor}.

Sharing at Beth’s party:Home Stories A2Z

Now, let’s get this party started! Remember, there’s the DIY Show Off Holiday Highlights party every Wed., but you’re welcome to link up holiday related posts today as well.

DIY Show Off DIY Holiday Highlights

Show off your latest DIY project! I’ll be showing off your links all week, follow along:

DIY Show Off - FacebookDIY Show Off - TwitterDIY Show Off - Pinterest DIY Show Off - HomeTalkDIY Show Off - G+

DIY Show Off

{grab the html button code here}

1. Please use the button above or text and link to this post to share the linky love. Here is the link: https://diyshowoff.com/category/other/diy-project-parade/. I’d love for you to share a link on your FB or by tweeting too if you have the time. Thanks!

2. This blog linky party is for DIY projects only. Links not related to DIY will be deleted. Please share your link one week only.  Please do not link recipes, giveaways, linky parties, promotions or a collection of inspiration. 

3. By joining the party, you give permission for your project to be featured and ‘shown off’ via blog highlight, Twitter, Facebook, Pinterest, G+, etc.


Getting ready for Cyber Monday! How about you?

We were chosen by True Value to be one of the members of the 2012 DIY Squad. I have been compensated for the materials needed for my DIY projects. However, the thoughts and opinions expressed are completely honest and my own. I have not been paid to publish positive comments and no one has twisted my arm to participate. 


Chevron Reindeer Games sign tutorial

DIY Chevron Reindeer Games Sign 

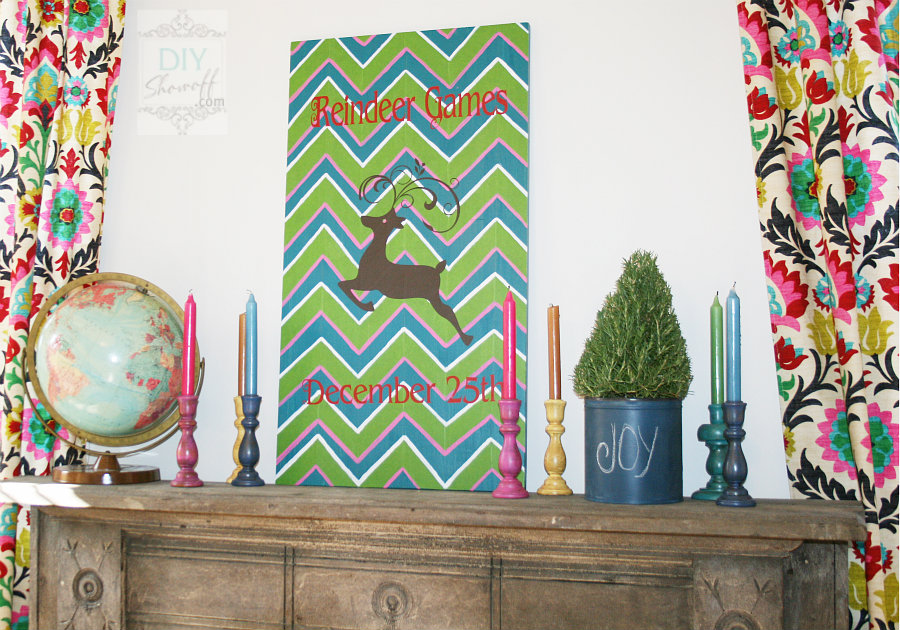
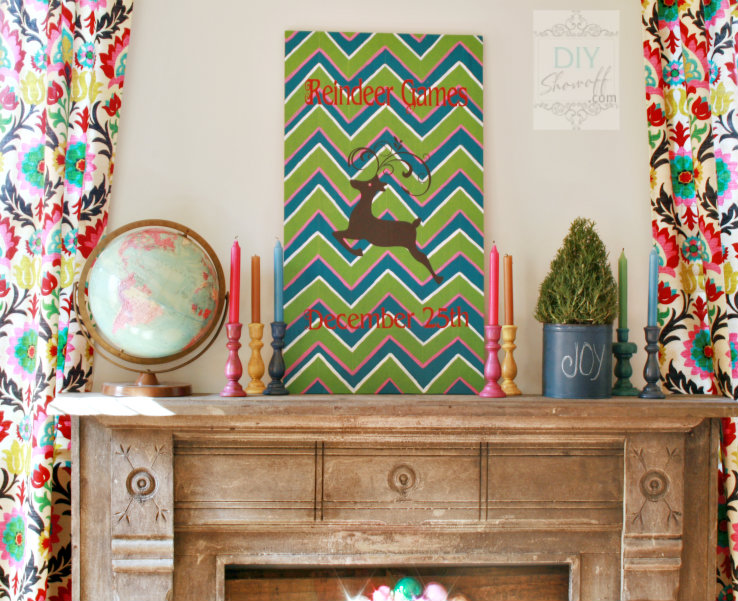
DIY colorful Christmas chevron reindeer games sign

It’s officially time for Christmas decorating in our home! I know! By blogging standards, I’m late to the game. With a family room makeover in progress, it’s at a point where plans for completion can be put on hold until after the holidays and I can still decorate that room to be pretty once I put away the ladder and some tools. I really loved the chevron garden sign I made for summer {here}. I decided I wanted to create a fun colorful Christmas sign incorporating some of the fun colors in the fabric I chose for the curtains.

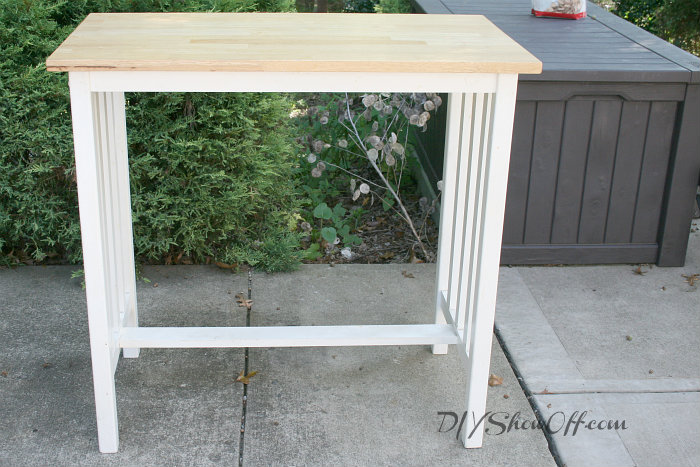
Remember the tabletop I replaced on the kitchen bar for the apartment? {If not, you can see my post on my DIY wood plank kitchen bar top.} Time to recycle it! I knew it’d be a great material for a DIY sign one of these days. Tabletop to holiday decoration. Why not? To prep for making a sign, I scuffed up the finish with sandpaper and gave it a coat of left over teal paint and let it dry. I’ll call it my “canvas”.

This is what the top looked like before:

kitchen island before

Tips for creating a chevron pattern using FrogTape:

It’s hard to explain how to create a chevron pattern words/pictures {next time I’ll do a video} but some tips:
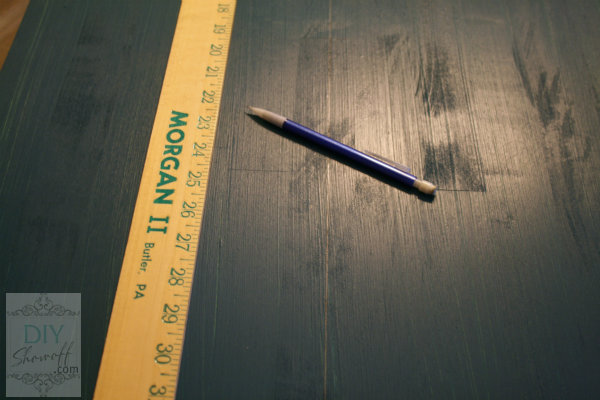
My first row is measured. 5″ strips of FrogTape.

DIY chevron Christmas Reindeer Games sign

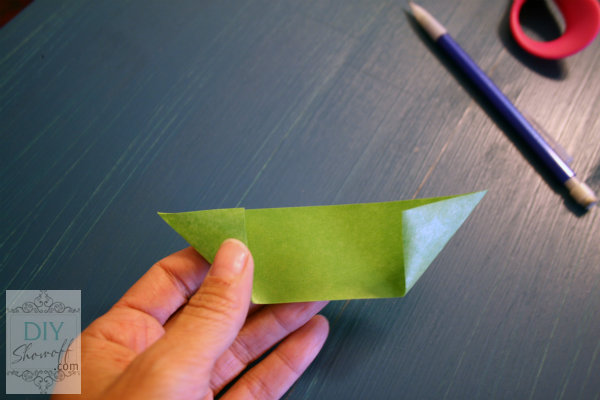
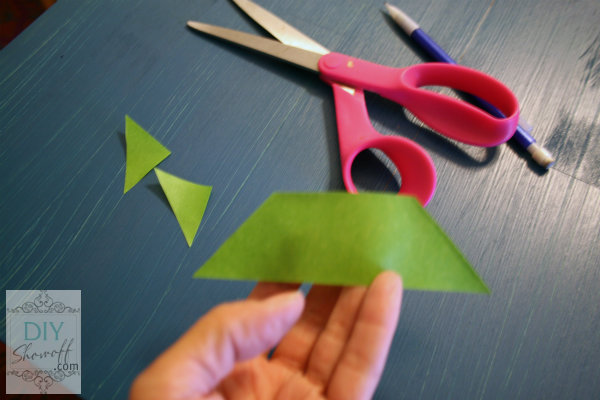
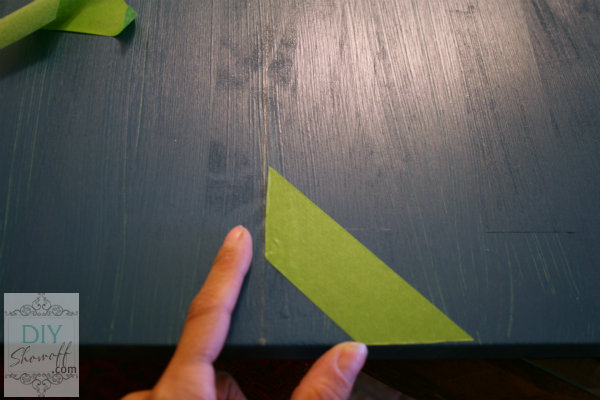
Depending on how it would line up, I creased the edges of the tape (non-sticky side) to create a line for cutting.

DIY chevron Christmas Reindeer Games sign

Cut on fold.

DIY chevron Christmas Reindeer Games sign

I placed the angled side on my center pencil line and cut the bottom flush with the bottom of the canvas and smoothed it into place.

DIY chevron Christmas Reindeer Games sign tutorial

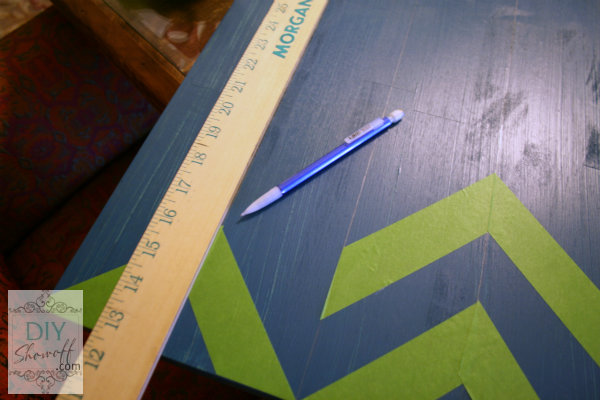
I drew vertical lines with my pencil from the peaks and “v’s” of my first chevron row.

DIY chevron Christmas Reindeer Games sign tutorial

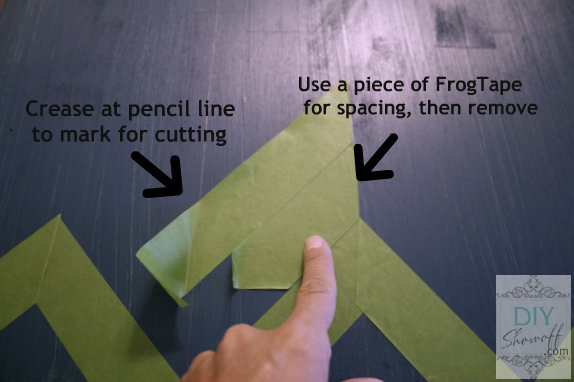
Once my first line was in place, I used a piece of FrogTape for spacing, I worked from the center out by placing another longer piece of tape angled from the center pencil line down to the right pencil line.

DIY chevron Christmas Reindeer Games sign tutorial

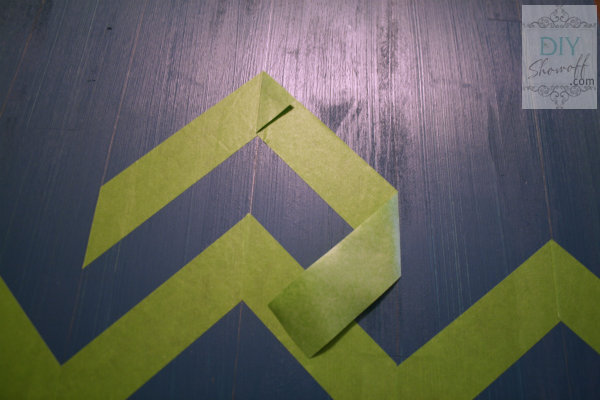
Then I pulled up a corner and folded it on the pencil line so I would know where to cut. Most of the time, the pencil transferred to the sticky side of the tape, creating a cutting guide.

DIY chevron Christmas Reindeer Games sign tutorial

I repeated those steps until I reached the top and finished.

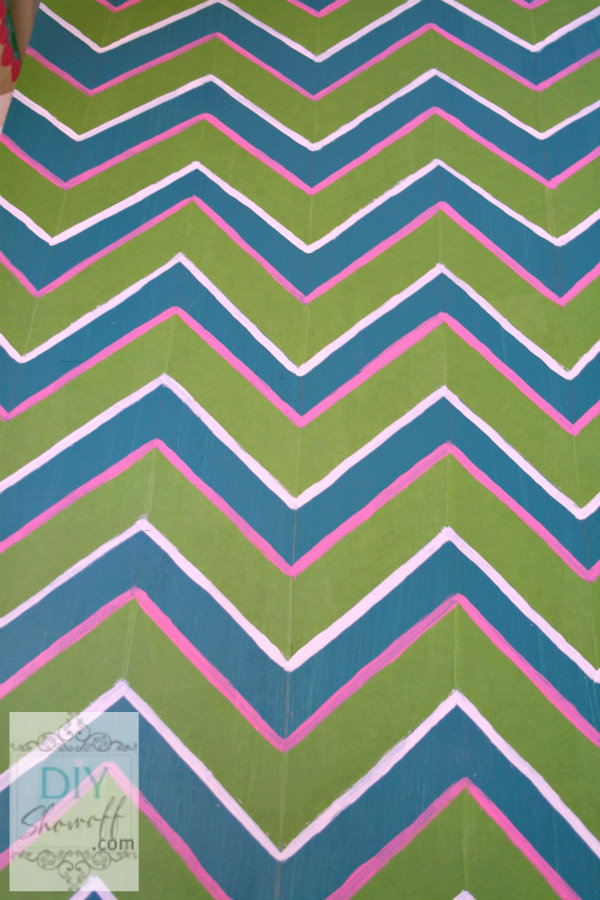
I used pink and white craft paint to add more color.

DIY chevron Christmas Reindeer Games sign tutorial

My plan was to paint the blue area showing green and peel away the FrogTape, but I decided to keep the FrogTape in place. {Paint colors: Benjamin Moore Pacific, DecoArt Pretty in Pink “Hope Pink” and Americana Warm White, Green is FrogTape}

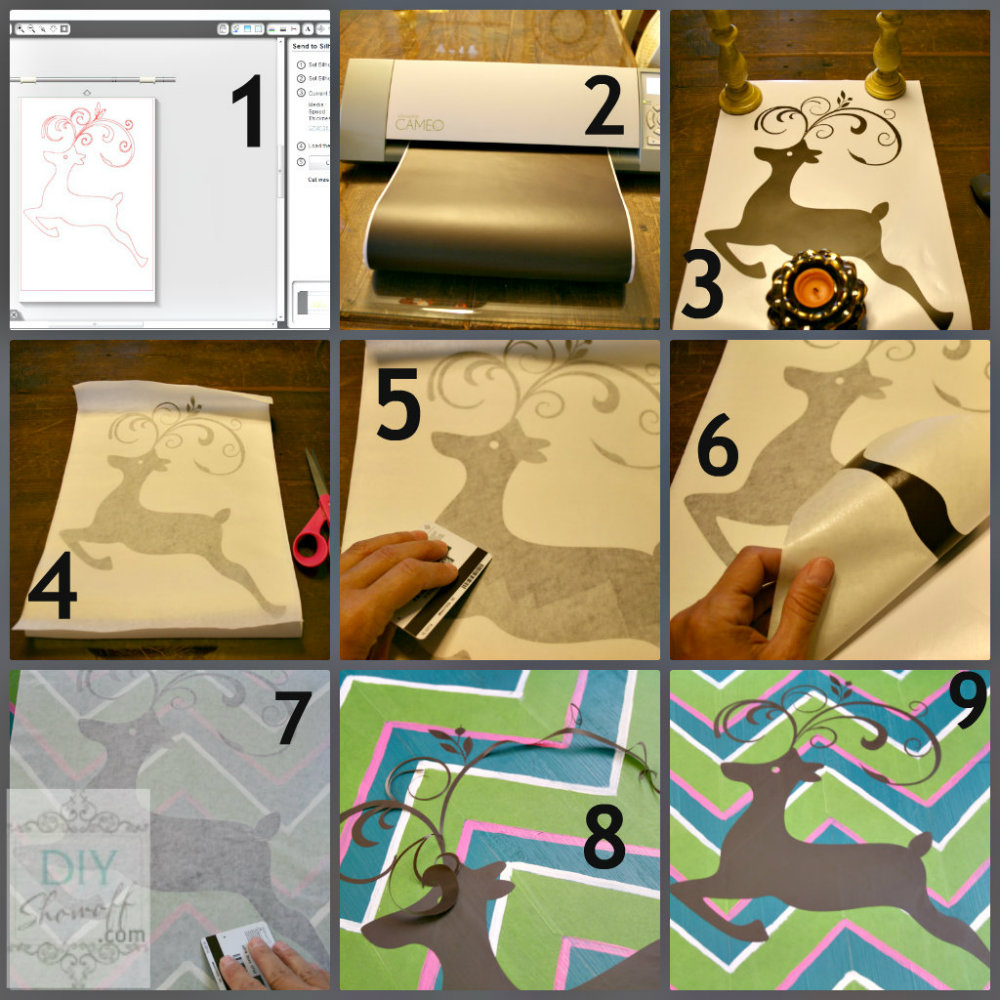
Using my Silhouette Cameo, I chose a reindeer from the online store and my Cameo cut it out {brown vinyl}. I created my letters for “Reindeer Games December 25th” using the software and chose the premium dark red vinyl and LDI Fancy Font. I peeled away the negative vinyl (the parts that are not the design) and applied my transfer paper. I made sure the transfer paper was secure by rubbing with a credit card.

DIY chevron Christmas Reindeer Games sign tutorial

Peel away the backing {the vinyl is transferred to the tacky transfer paper} and place on canvas. Rub the design with a credit card to get it to stick and peel away the transfer paper. In my case, all of the design wasn’t transferring, so I had to be careful and some of my reindeer was applied just as I would a sticker.

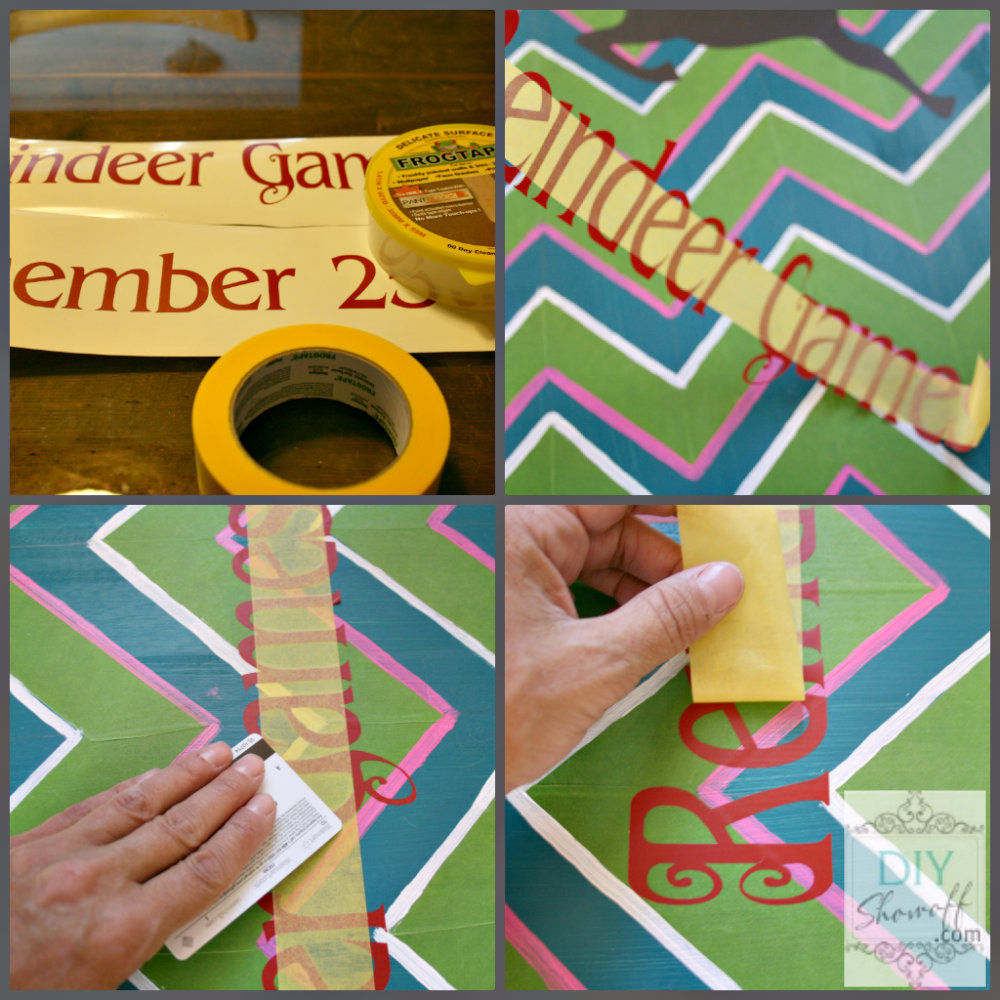
I followed the same steps for my lettering, however, knowing that the transfer paper was tricky for my project, I chose to use Delicate Surface FrogTape (the yellow tape) to help transfer my letters. This worked a little easier than applying by hand like stickers and kept my lettering evenly spaced and level.

DIY chevron Christmas Reindeer Games sign tutorial

I haven’t had time yet, but since I have FrogTape and vinyl on my sign, I’m going to seal everything with a coat or two of ModPodge. Ta-da!

Colorful Christmas DIY reindeer sign tutorialNon-traditional. Colorful. Fun. I love it. It fits in perfectly with my eclectic colorful family room.

DIY chevron Christmas Reindeer Games sign

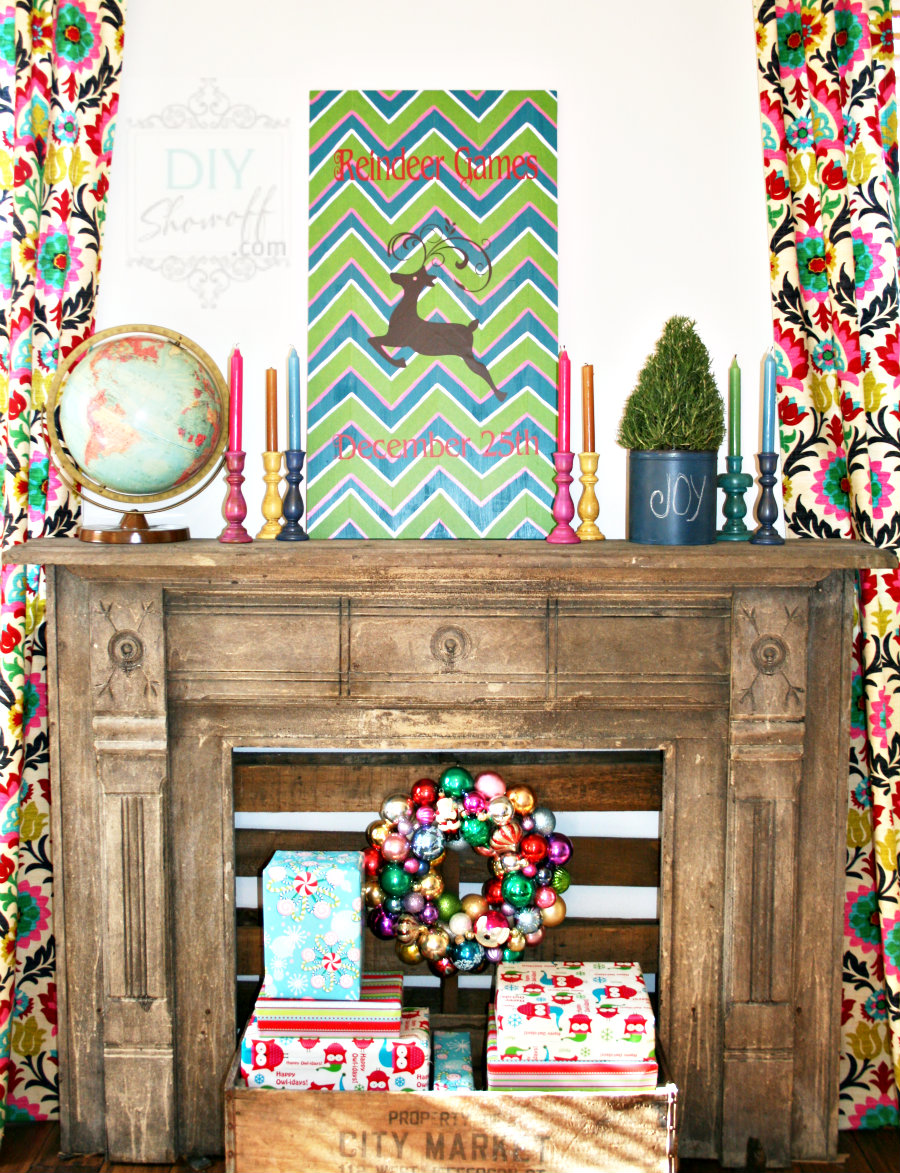
What do you think? I just sort of quickly staged for photos so I could share this today. I’ll be re-arranging, re-decorating. In fact, this mantel is even moving to another wall. More on the family room renovation and Christmas decorating coming soon.

colorful Christmas decor

I will attach a saw tooth hanger to the back and hang and rearrange but…I wanted to get this done to share and to tell you something important:


*I was not compensated for my review but I did receive vinyl and I participate in the Silhouette America affiliate program and will earn a percentage of sales when you use the code “SHOWOFF” for your purchase. This is a sponsored post brought to you by FrogTape. The opinions are completely my own based on my experience. Results may vary. 

FrogTape Blog Squad

Party time:

52 Mantels

DIY Show Off DIY Holiday Highlightsshabby creek cottageThe Shabby NestWeekend Bloggy Readingchristmas-linky-parade-button-songbirdHome Stories A2Z

Songbird & Cottage Magpie