Apartment: Before Pictures & Plans

Since I’m up to my eyeballs in apartment renovations, you’ll be seeing quite a few posts of our progress leading up to the reveal. Please bear with me until I get to the fun/creative/decorating stuff…I can’t wait for that part myself! It’s the reward for the dirty work, isn’t it? I shared the first project yesterday {sanding floors} and here is the apartment “before-before” and after cleaning/’in progress’ but before paint. Got that? lol It’s just the before pictures before and after cleaning, before and after sanding hardwood floors.

Everything got a bath. E.v.e.r.y.t.h.i.n.g! It went from disgusting to clean. As you can tell, someone was a heavy indoor cigarette smoker. Thankfully with washing/scrubbing everything, sanding floors and primer+paint, airing out and sitting empty for quite a while, the smell will diminish. I apologize in advance for these ‘before’ cleaning pictures. I did spare you worse ones, I promise!

Okay, ready?

Dirty kitchen ‘before’ and before cleaning…{gag…what is the brown stuff all over the walls? Tobacco? Cooking grease? Coke explosion? Maybe we don’t want to know!}

rental kitchen before

All cleaned up and in progress…ready to move forward

  • paint ceiling {done!}
  • paint walls
  • paint trim
  • paint cabinets
  • redo countertop
  • storage and organizing solutions
  • thrifty furnishings
  • decorate!

There’s a paint fest going on! Envious, aren’t ya?

clean kitchen before

Pantry under the stairs – before

apartment pantry

Apartment before then ‘after’ cleaned/sanded…

wall 1

apartment living room entryway before

living room before

wall 2

living room before

apartment makeover - before

wall 3 – dirty before

apartment living room before

in progress…

apartment before

{You just turned 360 degrees and saw the entire first floor!}

Stairs are so narrow with a bend…we’ll have to get creative with upstairs furniture/getting furniture up!

before:

apartment stairs before

  • clean (done as of yesterday)
  • sanded (done as of yesterday)
  • stain stair treads
  • fun paint technique on the risers
  • paint trim and ceiling
  • patch ceiling/trim

Someone obviously wasn’t too careful with moving furniture out {it’s a super tight squeeze and odd angle for furniture} and tore off the trim and part of the ceiling on the way down…uh oh!

trim before

I love the vintage light fixture hanging in the hallway upstairs…

vintage light fixture

  • patch and paint ceiling
  • fun idea for the small wall space coming up!

Bathroom needs a complete overhaul, but we’ll see what’s in the budget. Hate.hate.hate the faux tile walls and yellowed tub surround. Actually, I hate it all! I may be able to get away with a new floor, vanity and lighting but that’s probably all we can manage financially for right now. Those walls and tub surround have to stay for now. Wahhhh!

  • new flooring
  • new baseboard trim
  • new vanity
  • new mirror/medicine cabinet
  • storage solutions
  • new lighting
  • paint
  • caulking
  • decorating!

This bathroom is so tiny, the sink/vanity only leaves a small entrance…
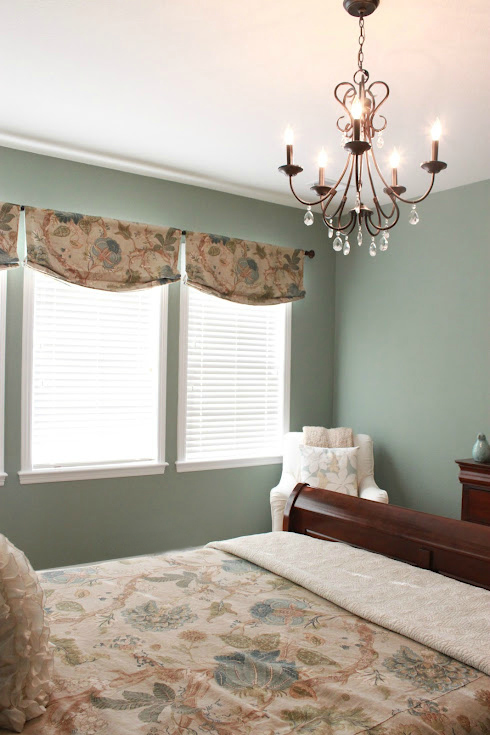
apartment bathroom before makeover

Bedroom before…

apartment bedroom before

who paints half a room and walks away?

apartment bedroom before

After will turn this small room into 3 areas:

  • office/study area
  • bedroom for one
  • dressing room

Improving with every little bit of TLC and elbow grease. Ah, progress. Still a ways to go, but getting started is always the tough part for me and we’ve passed that goal! 😉
DIY Show Off - FacebookDIY Show Off - TwitterDIY Show Off - PinterestDIY Show Off - Feed


The Sweet Survival – Master Bedroom Makeover

Hi everyone I am Trisha @ The Sweet Survival!  I am so happy to be guest posting my master bedroom over here at DIY Showoff!  Roeshel is a special lady and I just love her blog.  So I can’t wait to share with you all our master bedroom transformation.

I wanted to use our existing bedroom furniture but give the room and bright and fresh makeover.  It started with the duvet I found on sale at Horchow.  I am sure they do longer have it it was last year when I got it.  I purchased the duvet and standard shams from there.  I added the white euro shams from West Elm and the ruffle pillow from Etsy.  The white coverlet came from Homegoods.

From the bedding I picked the dramatic teal wall color. It is Scenic Drive from Benjamin Moore.  My Mom helped me paint the room. She is a pro painter.  I had the valences made from coordinating fabric by a seamstress on Etsy – she no longer has a shop.  Last spring I completed the gallery wall and my light fixture make over.  The frames are a mix of old and new from Pottery Barn, Michael’s and Target.
I only had one nightstand from my original set so I was out to find something else to work as nightstands for the room.  Our guest room upstairs recently got converted to Carson’s nursery (it is a work in progress – almost complete) so I decided to borrow the nightstands from that room. They are the Charlotte nightstands from Pottery Barn.  The hardware was replaced with these gorgeous knobs from Anthropologie.  The lamps were purchased from Home Goods last year.
We had a old chair that we used in our living room at our old house that was completely ruined by my cat.  So I decided to have it slip covered by a local seamstress. She did an absolutely amazing job.  I love it.  I made the pillow with fabric from Denver Fabrics and purchased the throw from Overstock.
I just love how everything turned out!  Thanks so much for letting me share my space with you all.  Feel free to stop on by The Sweet Survival and check out the rest of my house and my crafting addiction!

DIY Show Off - FacebookDIY Show Off - TwitterDIY Show Off - PinterestDIY Show Off - Feed


DIY inspiration from the Project Parade

These links in the DIY Project Parade are inspiration to me personally this week. I’m so thankful to all of the talented blog friends who take the time to link up and show off…it’s just the motivation I need for a few things I have going on with helping my sister decorate her new home next month.

Carmel at Our Fifth House shared her DIY pegboard headboard and I’ve been looking for budget friendly DIY ideas to surprise my nephew. Isn’t this awesome? I love all of the DIY details in this room. And I need to make that bed frame too! Great job, Carmel!

DIY pegboard headboard

My teenage niece is going to want a glam bedroom and I see a pretty DIY chandelier makeover in my near future like this beautiful one shared by Ada’s Interior Design

DIY chandelier makeover

We’re going to need some fabric and Dear Emmeline has reminded me that repurposing vintage curtains {sheets too} is a beautiful, affordable option with yard sale season in full swing…

see the coffee table and end table tops:

coffee table makeover

My sister has an old dining room table and a thrift store eat-in kitchen table and we can’t wait to give them a ‘makeover’. The table makeover from Art is Beauty is bookmarked in our idea folder…

table and chairs makeover

As soon as my sister goes back to FL to pack up the last of her things, I’m sneaking over to redo her master bedroom. I’d love to surprise her with a beautiful romantic master bedroom. Have you seen the master bedroom reveal at Raising Up Rubies? Breathtaking!

master bedroom reveal

Have you seen the awesome links in the DIY Project Parade this week? Have you linked up your DIY? Time to ‘show off’! Let’s see what you’ve been up to:

DIY Project Parade

TGIF! Have a wonderful long holiday weekend!

DIY Show Off - FacebookDIY Show Off - TwitterDIY Show Off - PinterestDIY Show Off - Feed


Bedroom Makeover Design Board

The master bedroom is on the DIY to-do list this year. I’m starting to put together some ideas and this is the first draft. However, if you know me, you know this will change. Still, just for fun, here is what I’ve come up with. A lot of items are things we already own that I’m trying to work into the design.

farmhouse bedroom design board

The details:

  1. DIY Styrofoam/Convex Mirrors – using DecoArt MagiKote, Americana craft paints and Styrofoam wreath forms and PARTSMART SMR729193 8-1/2″ Offset Mount Convex Mirror
  2. Rubbed Bronze Ceiling Fan (a Mr. DIY must) – Overstock
  3. Vintage Inspired Industrial Large Number Signs (our anniversary date) – Antique Farmhouse
  4. Distressed European Wall Clock – Wisteria
  5. Sage Chinese Pots & Vases – Wisteria
  6. Burlap Crewel Damask Draperies – Ballard Designs
  7. Beach Postcard Lumbar Pillow Cover – Pottery Barn
  8. Beach Postcard Lumbar Pillow Cover – Pottery Barn
  9. Benjamin Moore –  Morning Dew
  10. Black Bowfront Chest – Wisteria
  11. Handwoven Rustic Rug – Wisteria
  12. Vintage Ticking Stripe Duvet Cover – Pottery Barn
  13. Old vintage steamer trunk

Other things in the room:

  • Hardwood floors
  • Two mismatched windows – a challenge!
  • King sized sleigh bed
  • Old dressers
  • Built-in dresser with hutch/shelving

And of course the design board is only a wishlist/dream since some of the items are not in my budget so imagine a DIY spin on some of those numbered items. We’ll use dressers we already have. Curtain panels will be stenciled drop cloths, a DIY knock off on the accent pillows. Vases/planters will be thrift store finds + spray paint. #13 – I already have those trunks but hope to do something fun with it. And #1, the Styrofoam Convex mirrors are a DIY project. I’m sharing the tutorial today at the DIY Club.

DIY convex mirrors

Do you take the time to ‘dream’ up a mood board for your room makeovers? It’s a great way to see how things coordinate and come together. Sometimes catalogs/a little internet window shopping is a great source of DIY inspiration.

DIY Club


Drop Cloth Headboard Tutorial

Don’t you just love a good Pottery Barn inspired DIY project? I’m so inspired when I see something not in my budget recreated for a fraction of the price and it’s rewarding. Stretching a budget further with more to spend in other areas or just the ability to have the same look when it’s not otherwise possible. Meet: Susanne from

Tenth Avenue South blog

Can you believe that her headboard is a do-it-yourself version, upholstered using a drop cloth?