Painted Chalkboard Labels

DIY painted chalkboard labels on storage cubes @diyshowoff

Our guest bathroom has some bins for keeping things stocked and organized. I know what’s in them, however guests have no idea. So I grabbed:

  • the bins from the shelf in the guest bathroom
  • FrogTape® Multi-Surface
  • chalkboard paint
  • foam paint brush

Here’s what I did:

Using my FrogTape, I taped off rectangles onto the front of the bins…. 

DIY painted chalkboard labels on storage cubes @diyshowoff

I burnished the edges of the tape with my thumbnail…

DIY painted chalkboard labels on storage cubes @diyshowoff

and gave each rectangle label area two coats of chalkboard paint.

DIY painted chalkboard labels on storage cubes @diyshowoff DIY painted chalkboard labels on storage cubes @diyshowoff

While the paint was still wet, I carefully removed the FrogTape to reveal crisp clean paint lines! I let the paint dry. 

DIY painted chalkboard labels on storage cubes @diyshowoffDIY painted chalkboard labels on storage cubes @diyshowoff

I labeled the bins using a chalkboard marker.

DIY painted chalkboard labels on storage cubes @diyshowoff DIY painted chalkboard labels on storage cubes @diyshowoff

Now toiletries, first aid supplies and extras can be easily spotted. 

DIY painted chalkboard labels on storage cubes @diyshowoff #FrogTape

FrogTape Blog Squad

Disclaimer: I received compensation to complete this project for using FrogTape® products. All opinions, projects and ideas are based on my own experience.

Felted Soap Tutorial

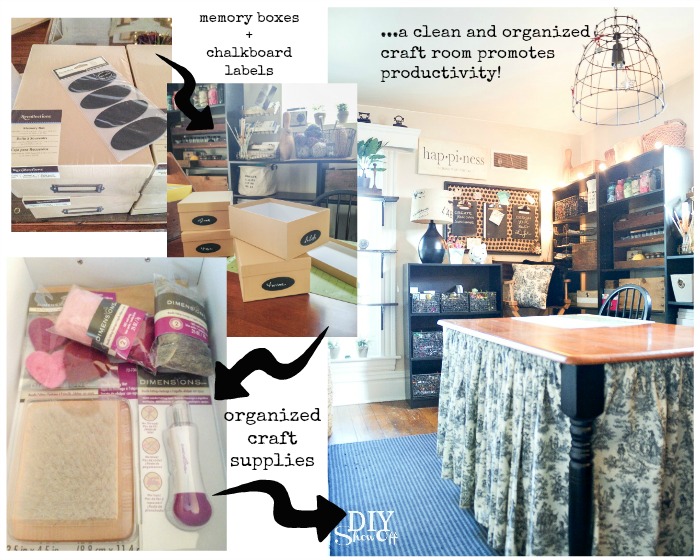
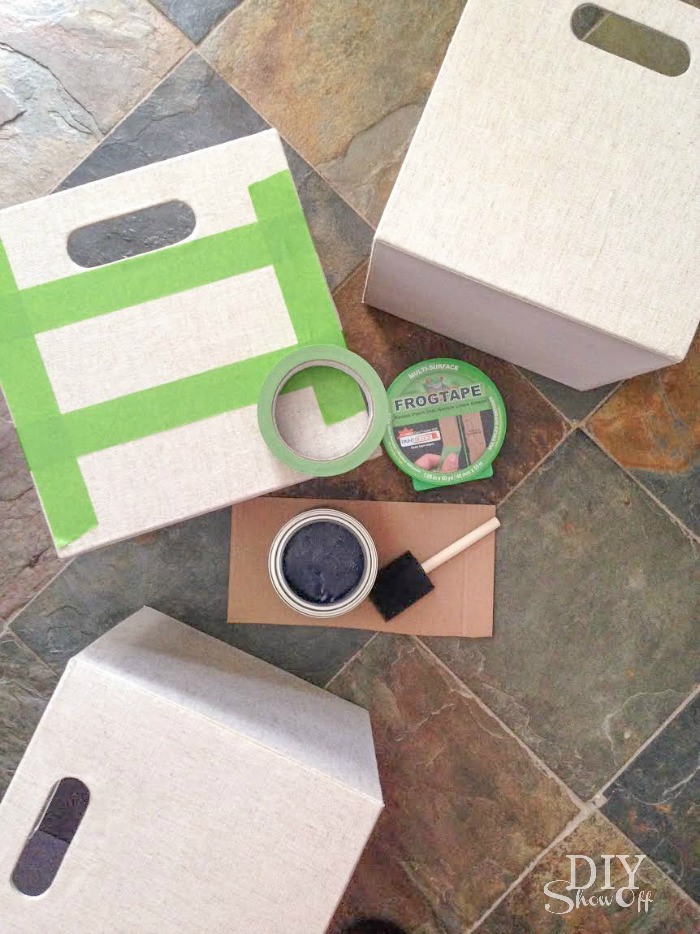
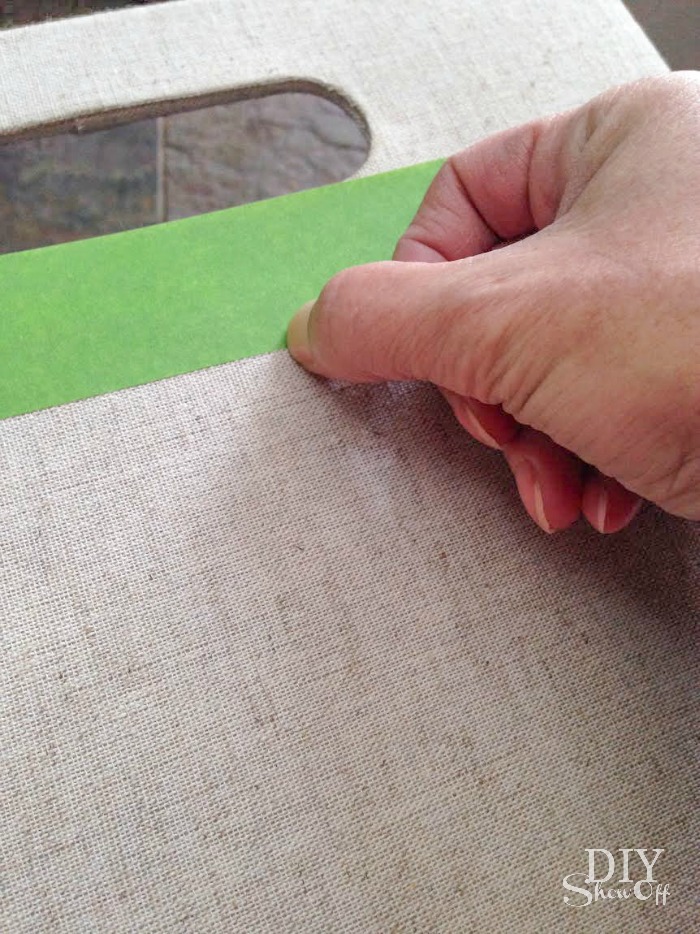
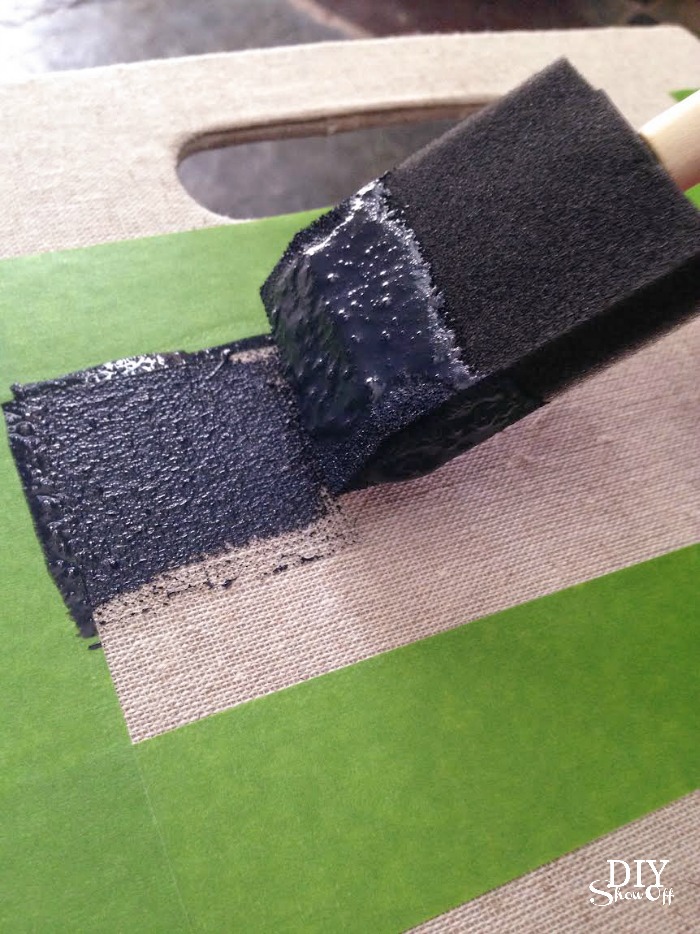
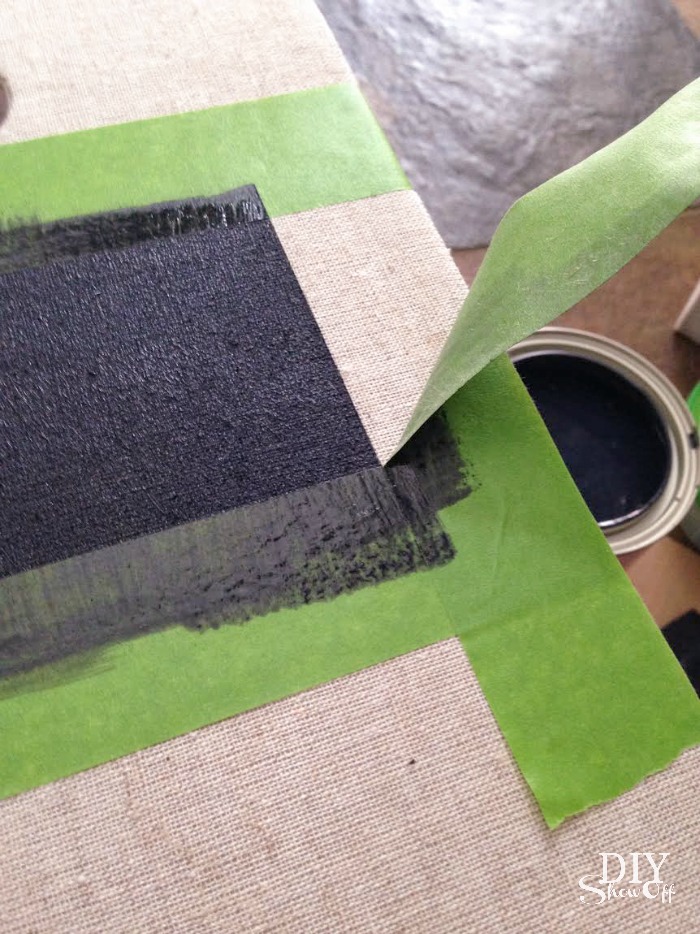
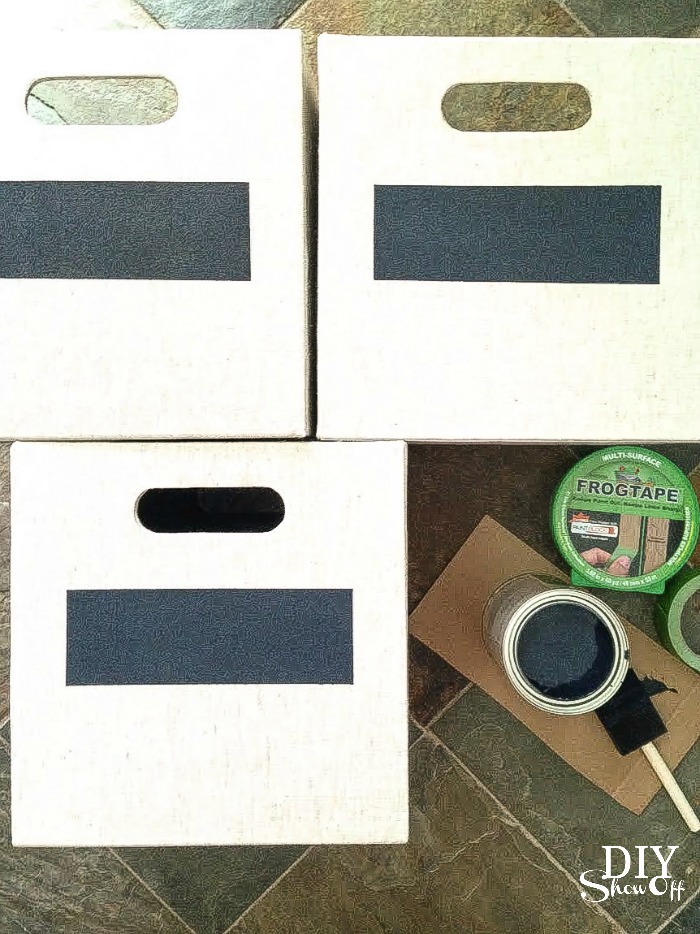
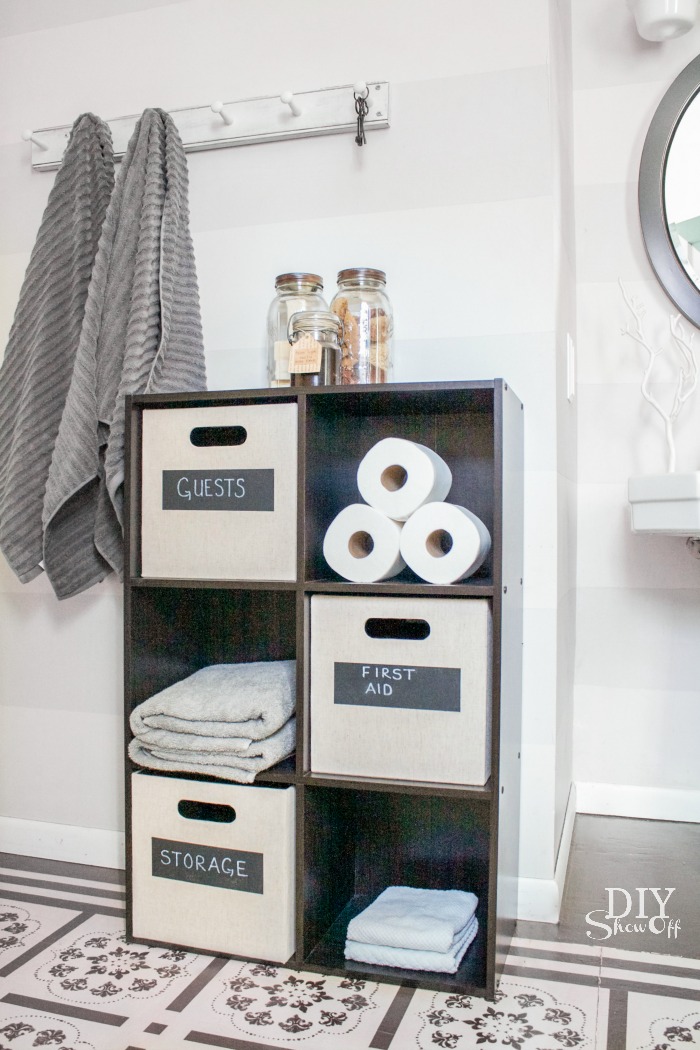
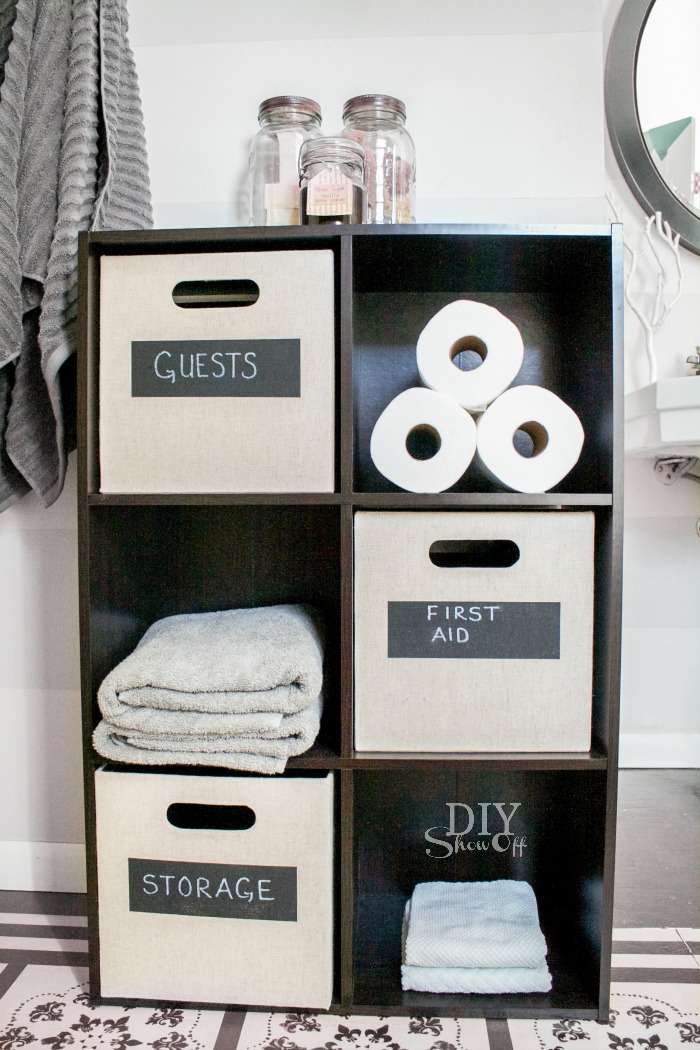
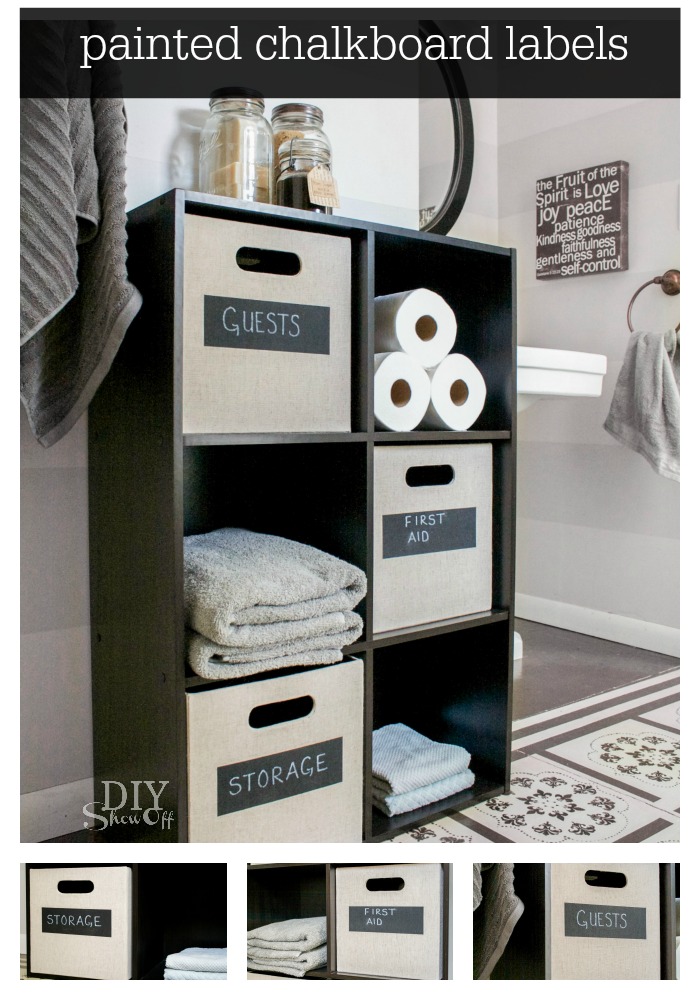
It’s time for the monthly Michael’s Makers challenge! I’ve been wanting to/meaning to make felted soap for years and I can finally check it off my craft bucket list. But first, January is a great time of year for getting organized. I love these Recollections Memory Boxes with chalkboard labels for keeping crafting supplies organized in my craft room…

organized craft room @diyshowoff 

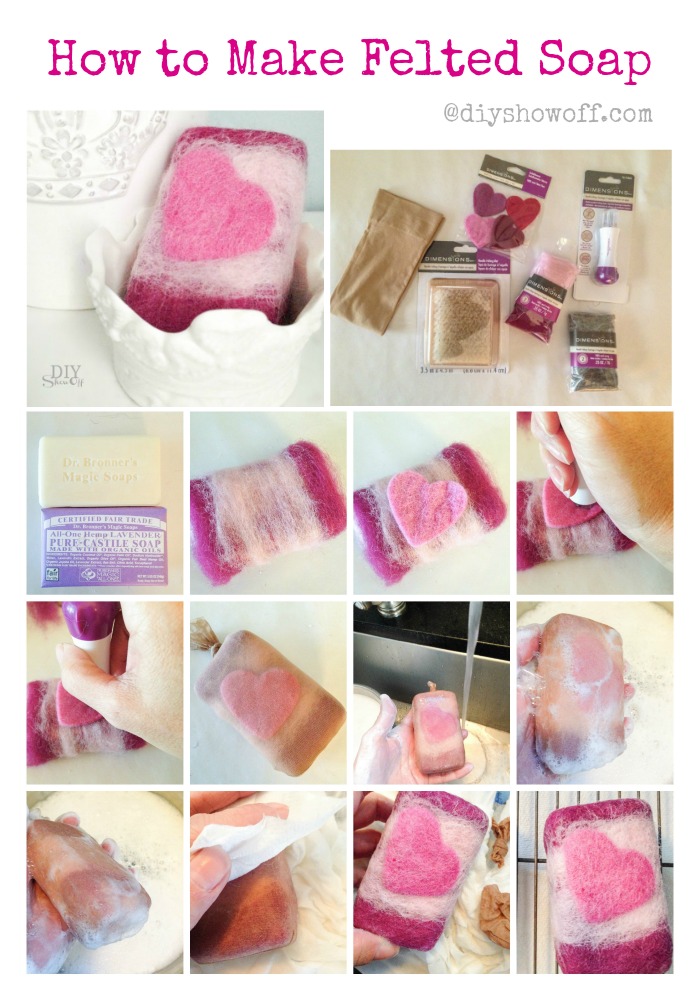
My craft project this month is felted soap. It’s something I usually purchase, handmade from boutiques…always for gifts but never for myself. I’ve always wanted to attempt to make my own but just never made the time to give it a try. Just one of those crafts that seemed time consuming or difficult. Boy, was I ever wrong! It’s so easy! No craft-talent required, although I bet it’s something we can acquire a skill at doing, to create some beautiful works of art maybe even too pretty to use. A fun craft to do with the kids as well.

DIY felted soap tutorial @diyshowoff #michaelsmakers

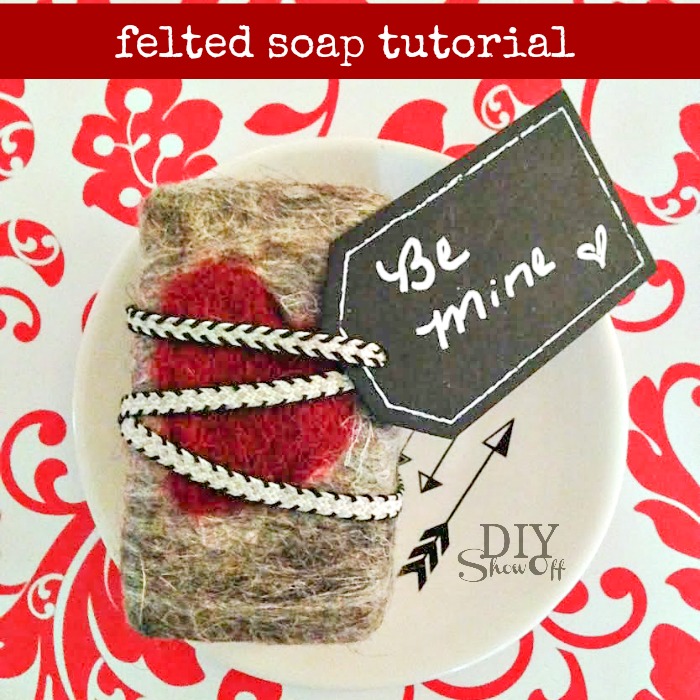
What is felted soap? It’s like having your bar of soap wrapped in a felt washcloth. It lengthens the number of uses of a bar of soap and there’s lots of lather! It’s also pretty…you decide on colors or designs to coordinate with your bathroom decor, seasons or holidays, etc. You choose the soap brand or scent or even make your own.  

Materials I used: Shop Michaels Online

  • bar of soap (I made 3 this time around: lavender, peppermint and even an activated charcoal soap.)
  • wool roving
  • nylon stocking (cut to fit over soap with room to tie opening)
  • water, paper towels, drying rack
  • optional: felt appliqué and felting needle tool

50% Off Any One Regular Price Item

This Week's Coupon at Michaels.com

Do a search for felted soap tutorials. There are a lot of different ways to go about this. This is what I did:

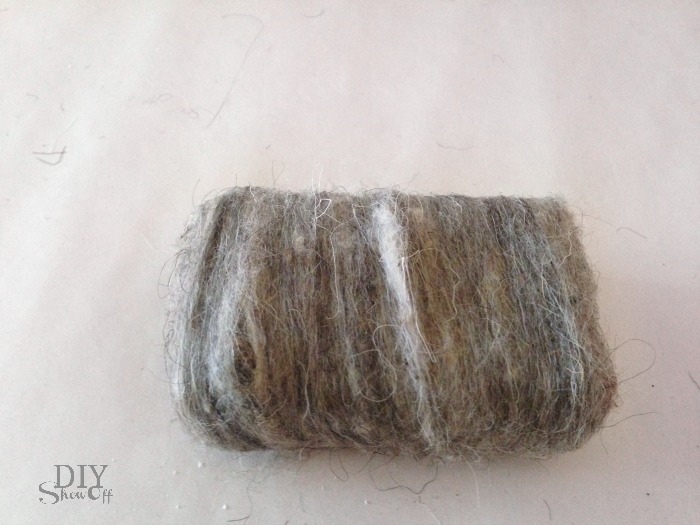
1. I wrapped the bar of soap with a piece of wool roving in the long direction around a bar of soap, as tight as I could get it to stay. I left a little overlap on the edges/corners. I used a thin sheet of roving and kept the overlapping the pieces on the back to a minimum.

DIY felted soap tutorial @diyshowoff #michaelsmakers

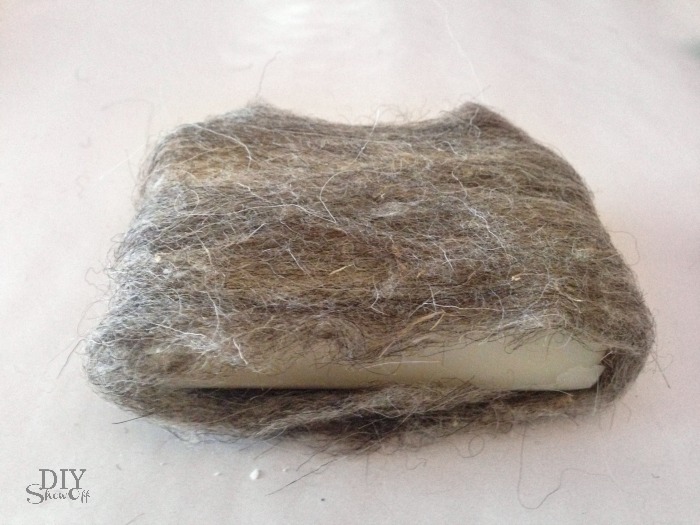
2. I then wrapped wool roving the other direction. I tucked in the overlap on the corners from the first piece of wool roving placed. 

DIY felted soap tutorial @diyshowoff #michaelsmakers

3. Optional: add thin strands of different colors. Add an appliqué using a felting needle tool. Just place and punch. I didn’t really notice that it ‘stuck’ well (I could easily pull it back off) but it did seem to grab a few fibers and that seemed to be all that was needed to keep it sort of secure and in place. Maybe I did it wrong, I’m not a felting expert. lol! 

DIY felted soap tutorial @diyshowoff #michaelsmakers

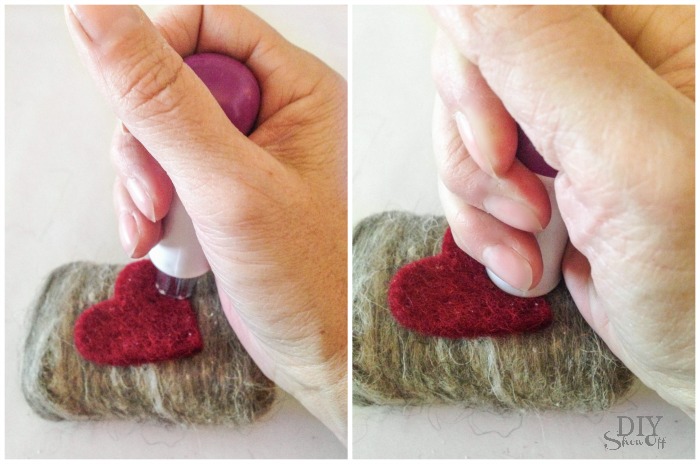
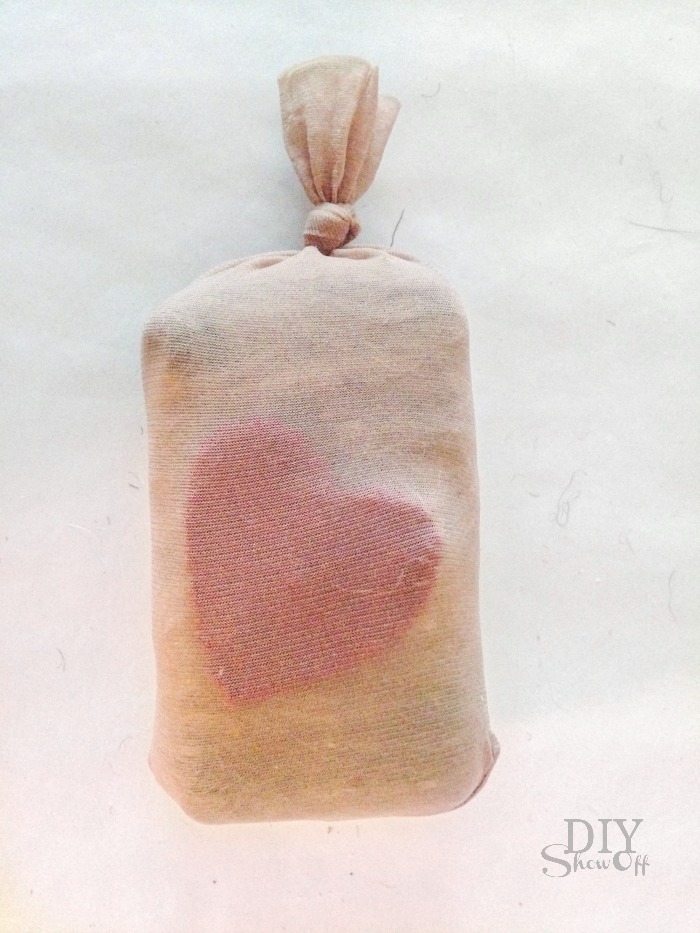
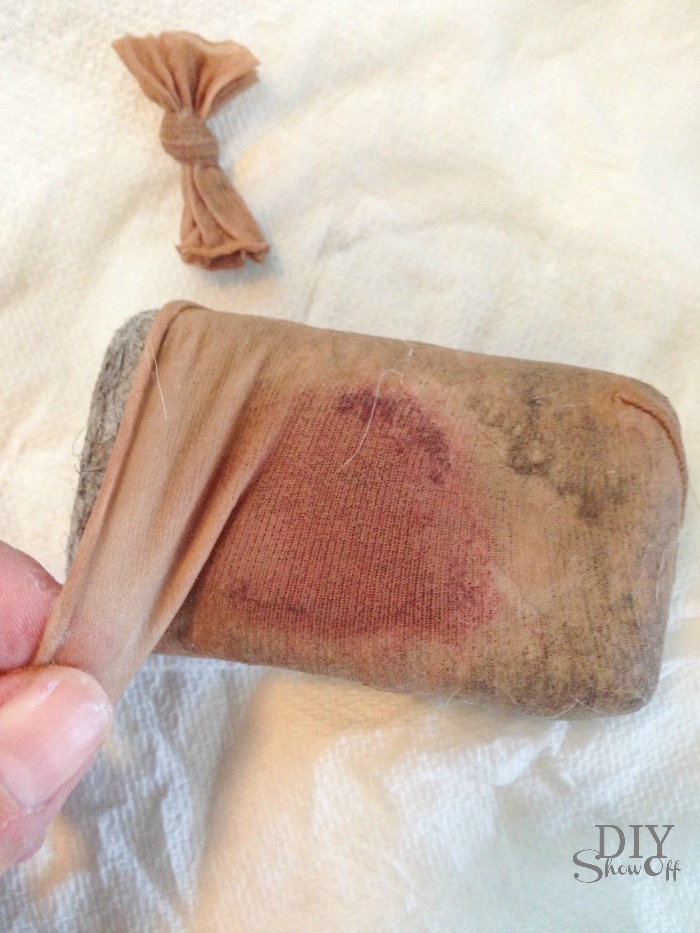
4. I carefully placed the wrapped bar of soap into a piece of nylon stocking. If it was the toe piece, I tied a knot in one end. When I ran out of toe/foot stocking pieces, I used the leg parts of stocking and tied both ends. This just holds everything all together and in place.

DIY felted soap tutorial @diyshowoff #michaelsmakers

5. In the kitchen sink, I prepared a bowl of hot water. I dipped the nylon covered soap into the hot water and started “washing my hands” with the soap. Rubbing each side of the soap, lathering. Repeating for 15 minutes. Yes, it feels like a long time standing there, but it’s not really a long time for a DIY craft project. It’s worth it. Pull up a stool or chair! Be aware of the appliqué so that it doesn’t slide around or change shape. And don’t forget to give attention to the corners and edges of the bar of soap.

DIY felted soap tutorial @diyshowoff #michaelsmakers

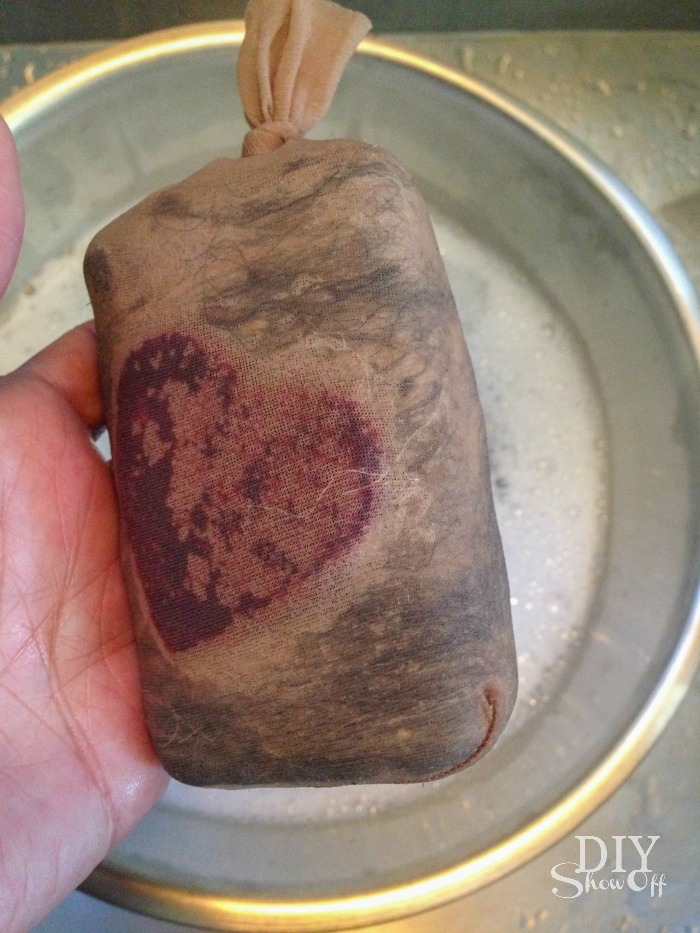
6. Next I did a rinse in cold water, lathered one more time for a minute or so then a cold rinse and squeezed to remove some of the water.

DIY felted soap tutorial @diyshowoff #michaelsmakers

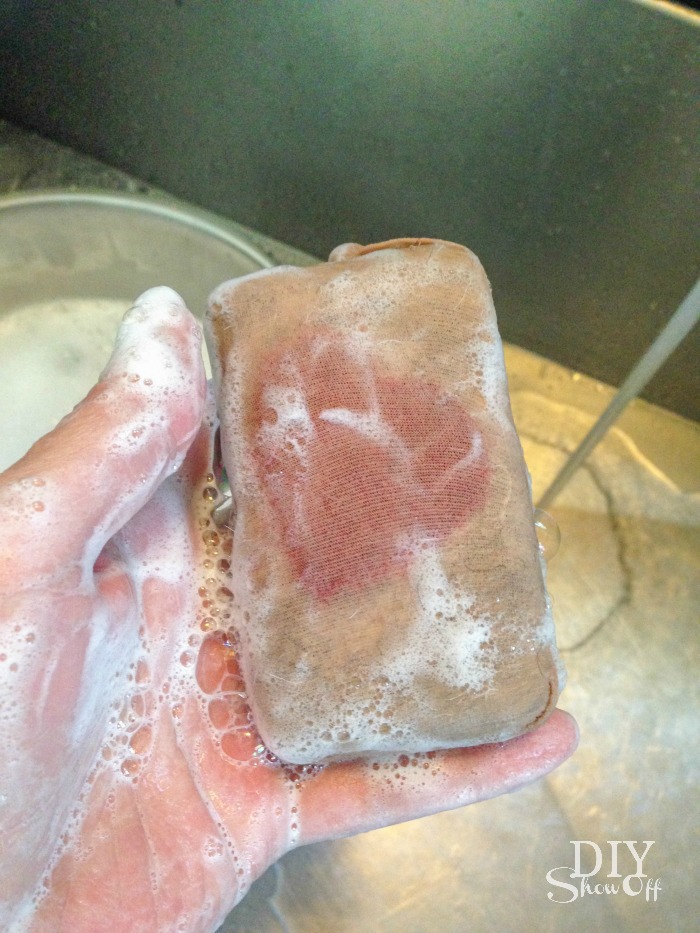
7. I then cut away/removed the nylon stocking and patted with a dry paper towel. If it does look as if the felt is not adhered well, repeat steps 5 and 6…without the nylon. 

DIY felted soap tutorial @diyshowoff #michaelsmakersDIY felted soap tutorial @diyshowoff #michaelsmakers

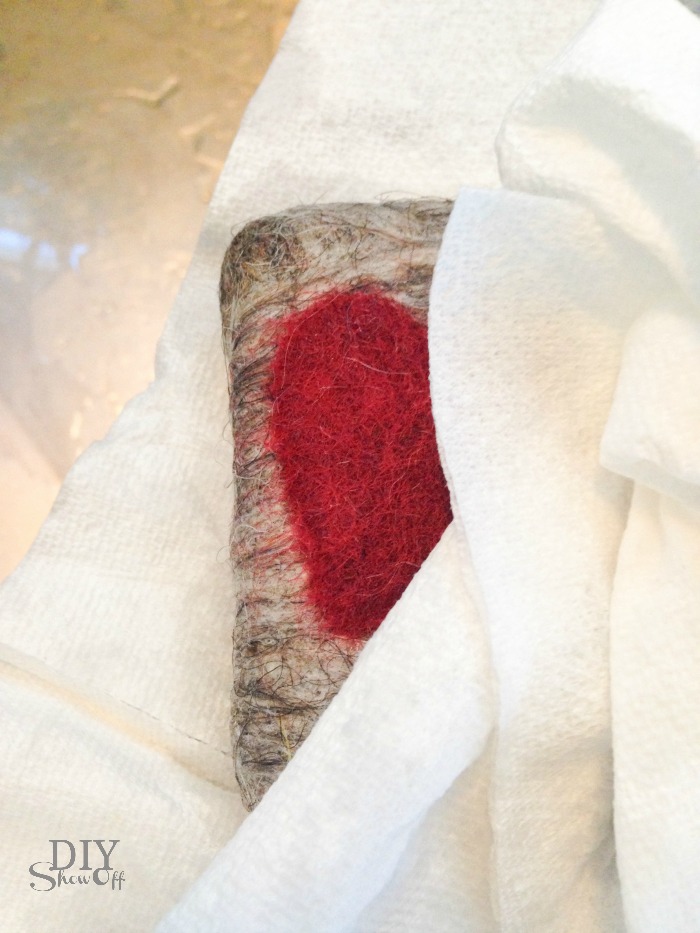
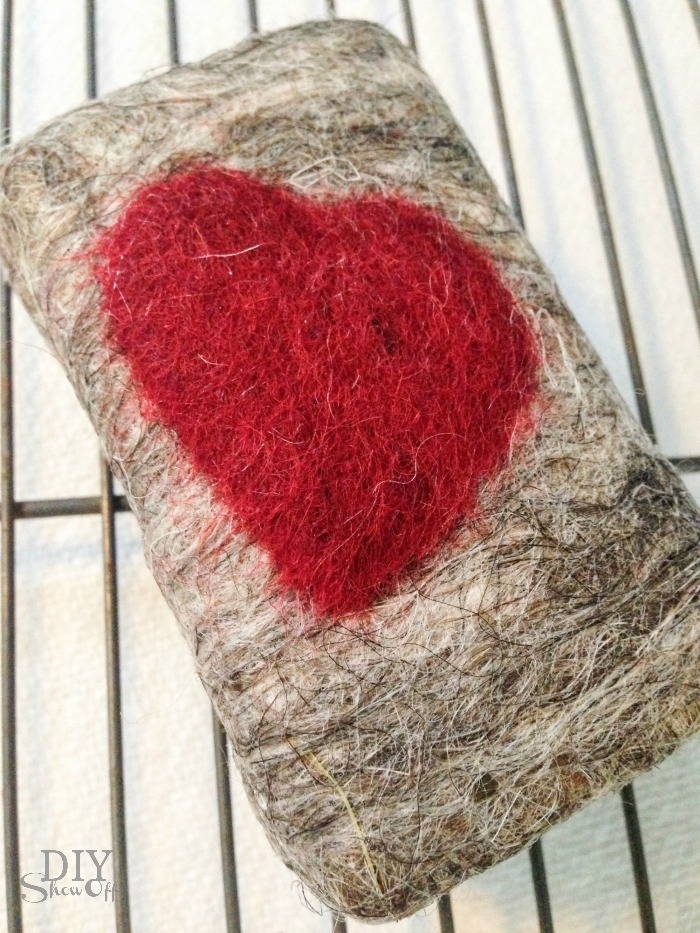
8. Set aside to dry overnight (I put mine on a rack with paper towels underneath). 

DIY felted soap tutorial @diyshowoff #michaelsmakers

It’s addicting…

How to Make Felted Soap @diyshowoff.com #michaelsmakersHow to Make Felted Soap @diyshowoff.com #michaelsmakers

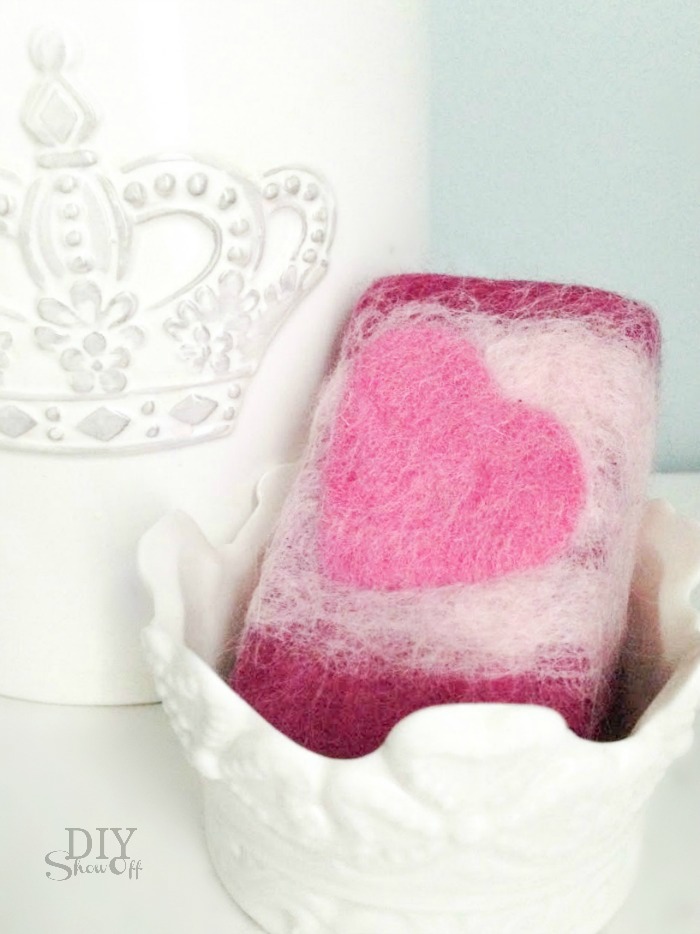
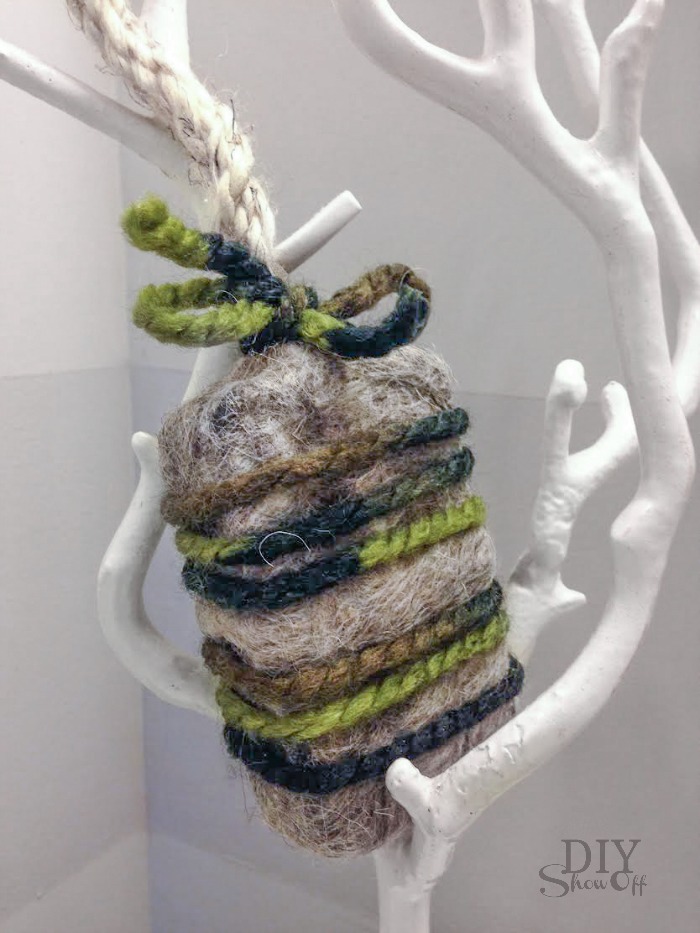
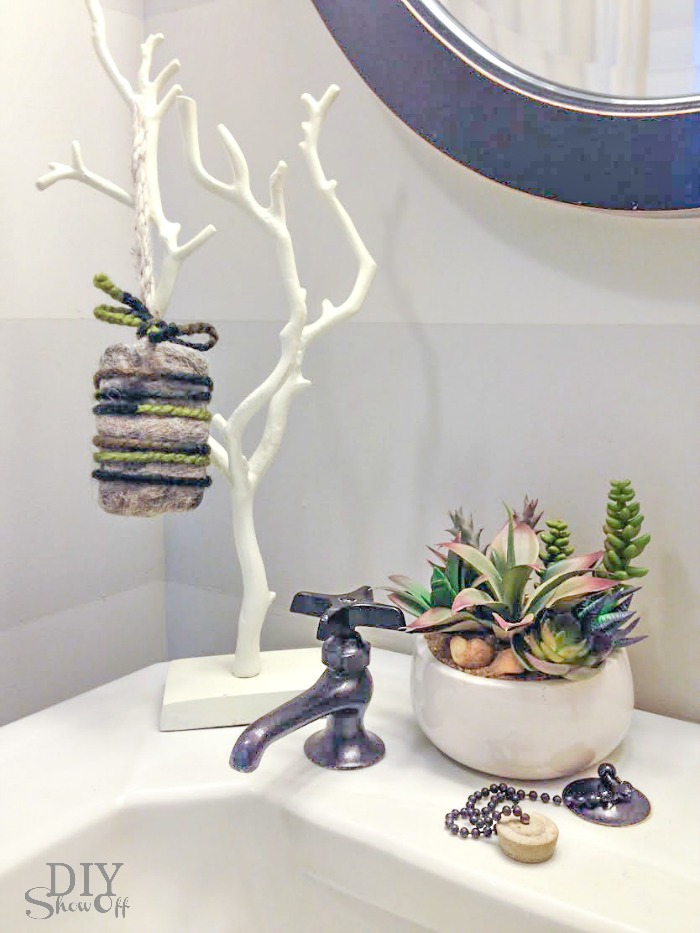
I want to make more, try more detailed designs! Maybe add a few drops of essential oil. Open my own shop! Okay, I wouldn’t go quite that far. But, I even made up a felted soap-on-a-rope by tying on wool yarn before felting (then simply decorated it by adding some wool yarn stripes). 

DIY felted soap tutorial @diyshowoff #michaelsmakersDIY felted soap tutorial @diyshowoff #michaelsmakers

What do you think? Something you want to try? Looking for more fun craft ideas? Check out these January projects from the Michael’s Makers team:

 Loading InLinkz ...


#michaelsmakers

Haven’t decided what project you’re going to kick off 2015 with? Stop by Michaels’ blog  The Glue String  for inspiration from all 30 of the Michaels Makers.

If one of your New Year’s resolutions is to clean out your closet, your office or even your bedroom, but you’re sick of the typical containers and boxes – here are some cool and creative DIY storage ideas that might help!

For those of us that just need a place to store our craft materials and organize our scrapbook paper, paint, markers and yarn, you must check out these nifty craft storage systems.

Toilet Paper Holder Shelf and Bathroom Accessories

Lowe’s Creative Ideas Monthly Challenge: For as long as we’ve lived here (going on 8 years), the guest bathroom’s toilet paper rested in a basket on the floor. Not ideal. So, rather than just secure a pretty oil rubbed bronze holder to the wall, I attached it to a piece of stained scrap wood to create a shelf for decorative accessories like a small plant, air freshener, vase of flowers, extra t.p. or even just cell phone accident prevention, if you know what I mean. 

DIY Toilet Paper Holder with Shelf tutorial @diyshowoff

What I used:

What I did:

1. Cut, sand and clean a piece of scrap wood. 

DIY shelf toilet paper holder at diyshowoff

2. Stain wood shelf by applying stain. Then wipe away with a clean rag.  I use RustOleum Ultimate Wood Stain since it dries in about an hour.

DIY shelf toilet paper holder at diyshowoff

3. Seal wood. I did two coats. 

DIY shelf toilet paper holder at diyshowoff

4. Attach the toilet paper holder to the under side of the shelf. Allowing room for toilet paper to roll (not be tight agains the wall when installed).

DIY shelf toilet paper holder at diyshowoff

Optional: Have inspector approve your work.

Lalka (ragdoll) at diyshowoff

5. Attach corner brackets on one side where shelf will rest against the wall.

DIY shelf toilet paper holder at diyshowoff

6. Decide placement (keeping everyone’s size in mind – not too far of a reach but not so close that it’s in the way of someone’s knees or thighs) and using a level (there’s one in my iPhone’s compass), secure shelf to the wall with screws (use wall anchors if needed). 

DIY shelf toilet paper holder at diyshowoff

7. Add a roll of toilet paper. 

DIY Toilet Paper Holder with Shelf tutorial @diyshowoffDIY Toilet Paper Holder with Shelf tutorial @diyshowoffDIY Toilet Paper Holder with Shelf tutorial @diyshowoffDIY Toilet Paper Holder with Shelf tutorial @diyshowoffDIY Toilet Paper Holder with Shelf tutorial @diyshowoff

Other bathroom updates: 

Pedestal sink means no storage. Storage cubes with linen milk crates/bins for organizing towels and bath products…

bathroom storage shelves{It’s been nearly SIX years and the painted floor is still in good shape!}bathroom storage cube and bins


A towel ring for hand towels…towel barbathroom updates

Just a few finishing but helpful/functional accessories make a big difference!

Bathroom Updates @diyshowoff

DIY Toilet Paper Holder with Shelf tutorial @diyshowoff

DIYShowOff #lowescreator

I received a Lowe’s gift card to put towards this challenge. Opinion and above idea is 100% my own. More DIY ideas at Lowe’s Creative Ideas or follow Lowe’s on InstagramPinterest and sign up for the Creative Ideas magazine and app.