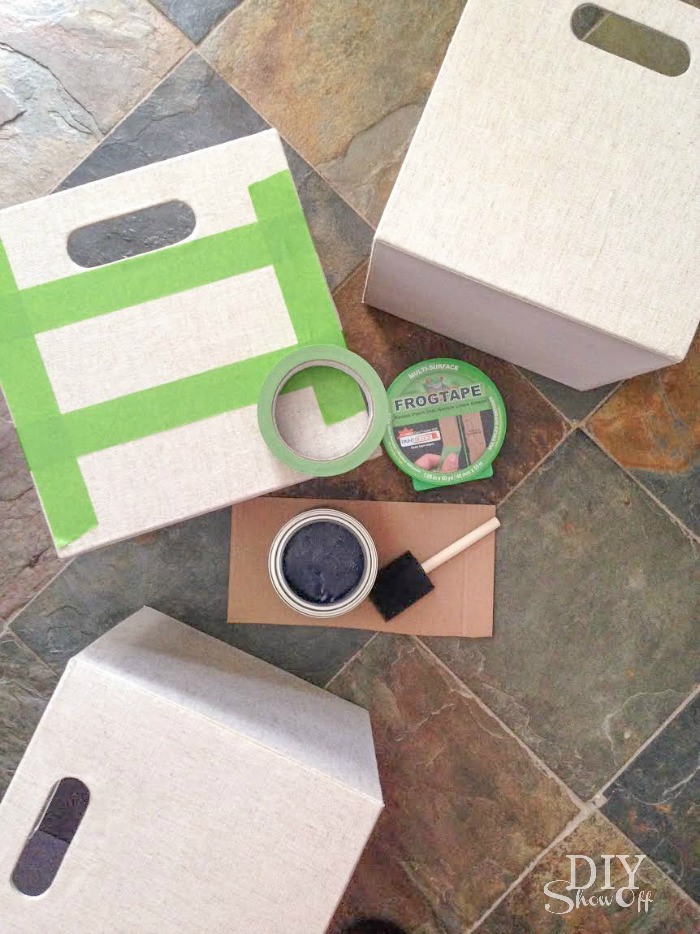
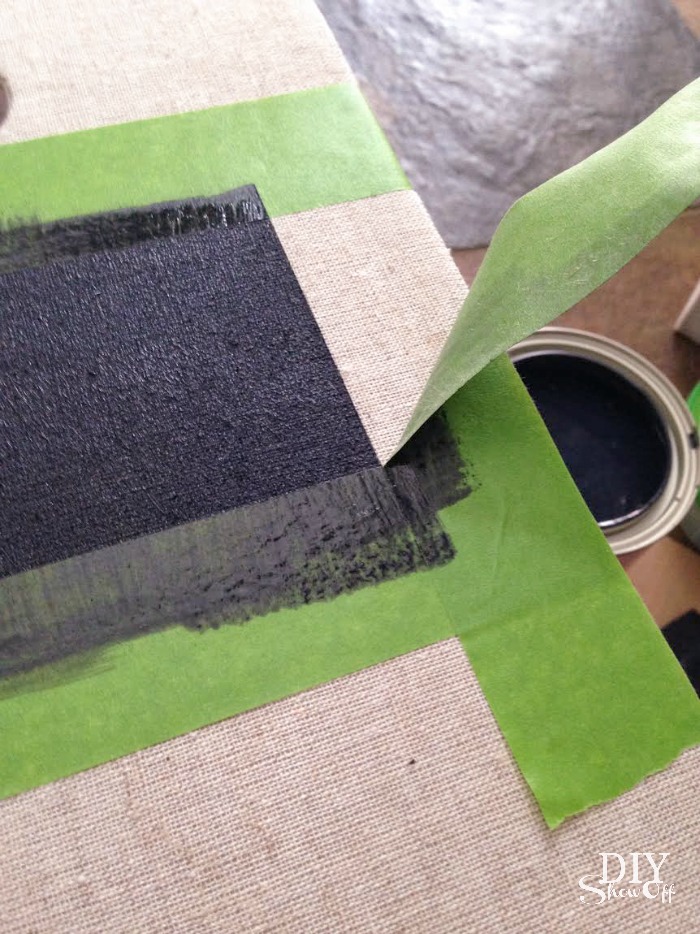
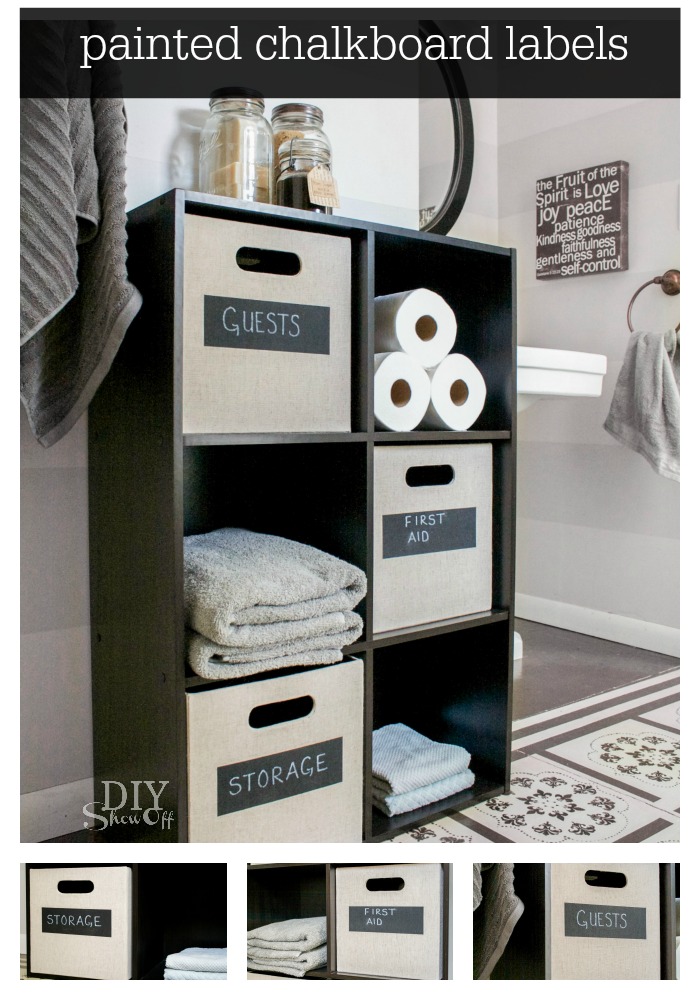
Using my FrogTape, I taped off rectangles onto the front of the bins….
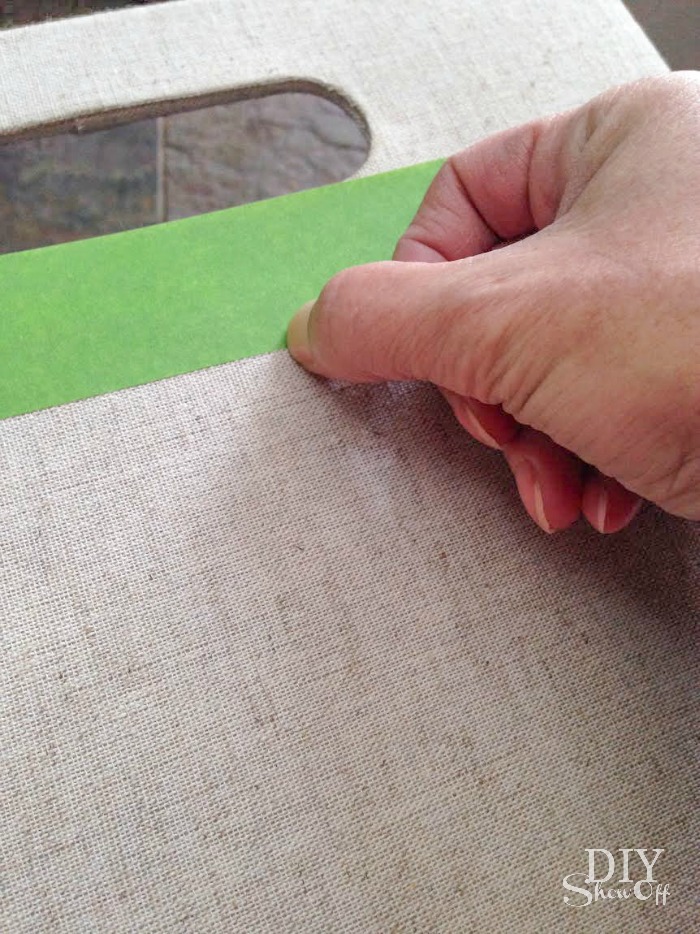
I burnished the edges of the tape with my thumbnail…
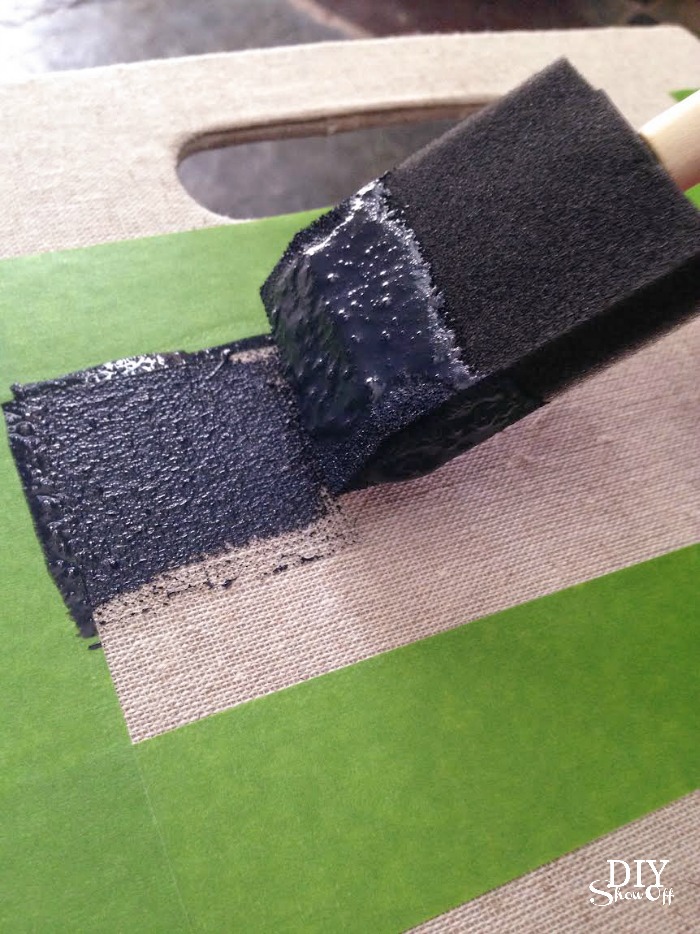
and gave each rectangle label area two coats of chalkboard paint.
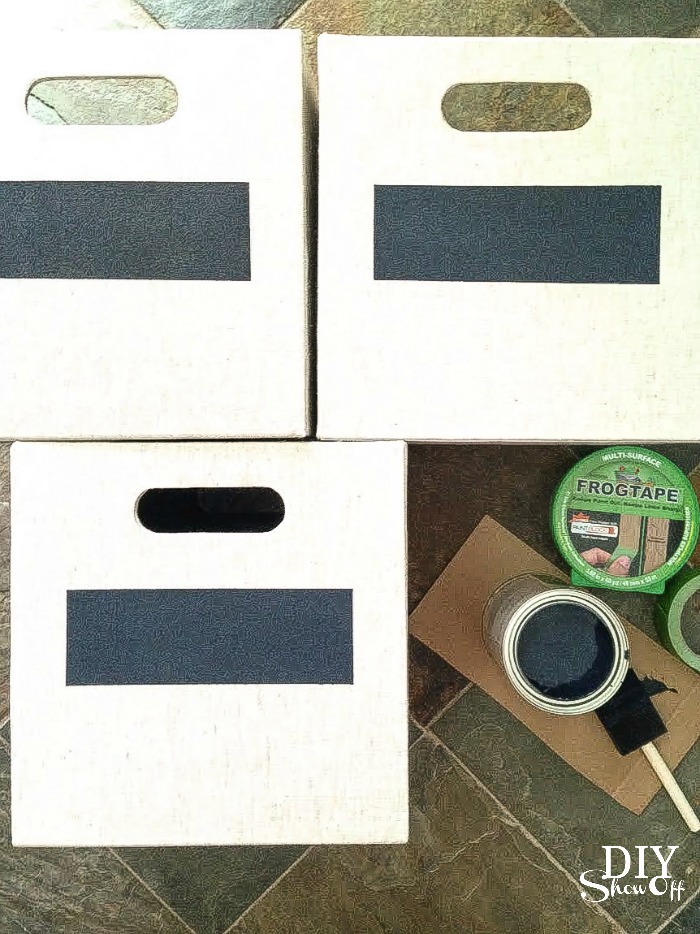
While the paint was still wet, I carefully removed the FrogTape to reveal crisp clean paint lines! I let the paint dry.
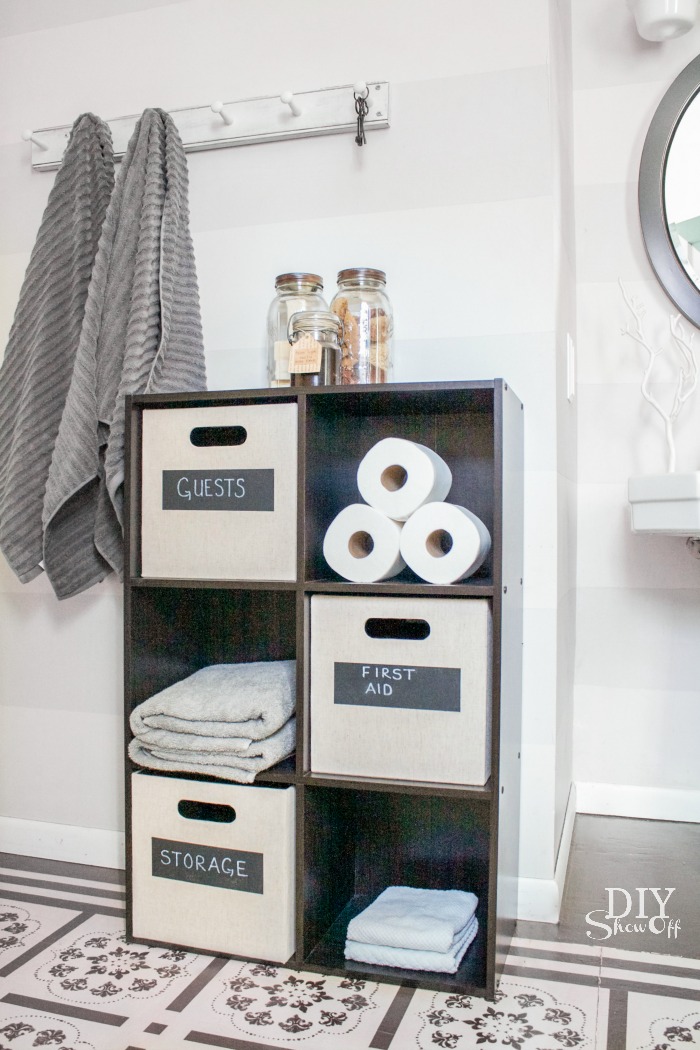
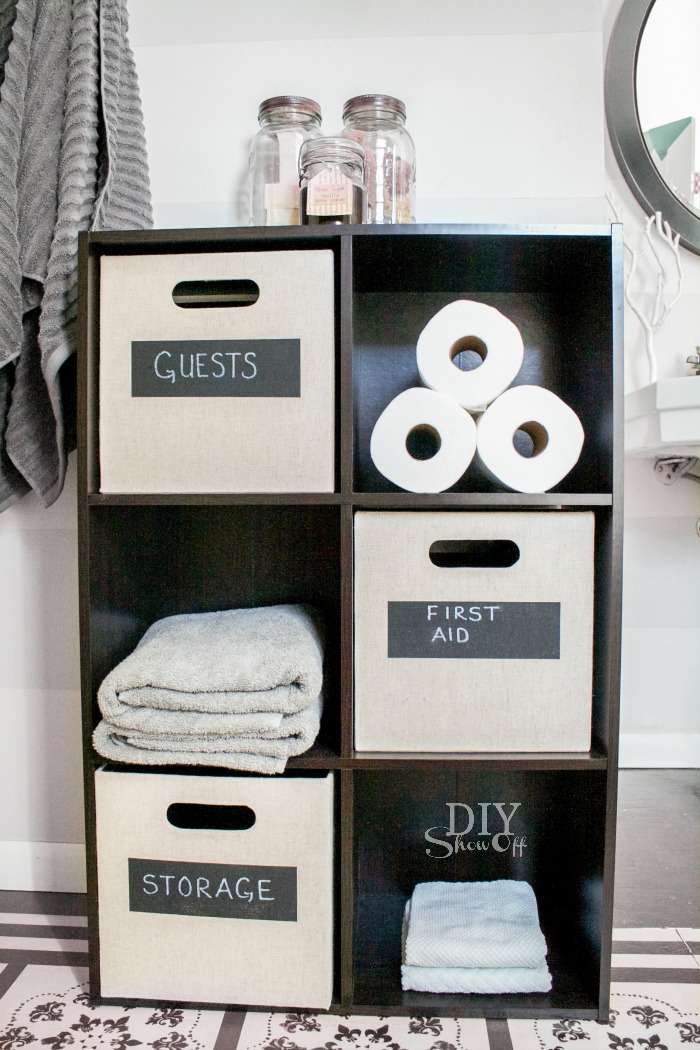
I labeled the bins using a chalkboard marker.
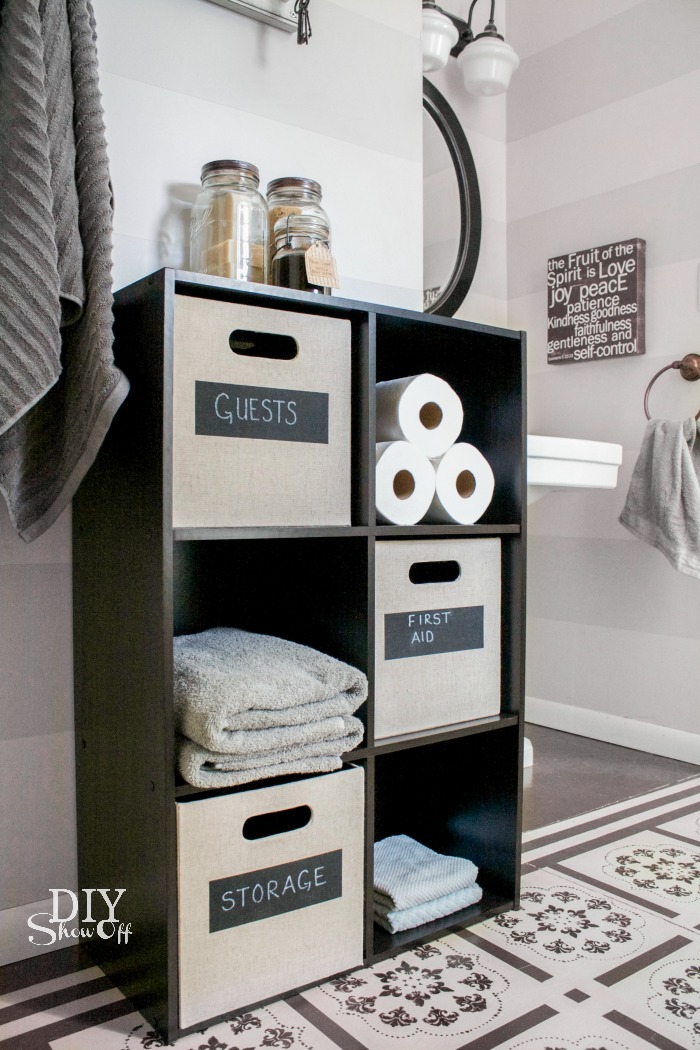
Now toiletries, first aid supplies and extras can be easily spotted.
Disclaimer: I received compensation to complete this project for using FrogTape® products. All opinions, projects and ideas are based on my own experience.
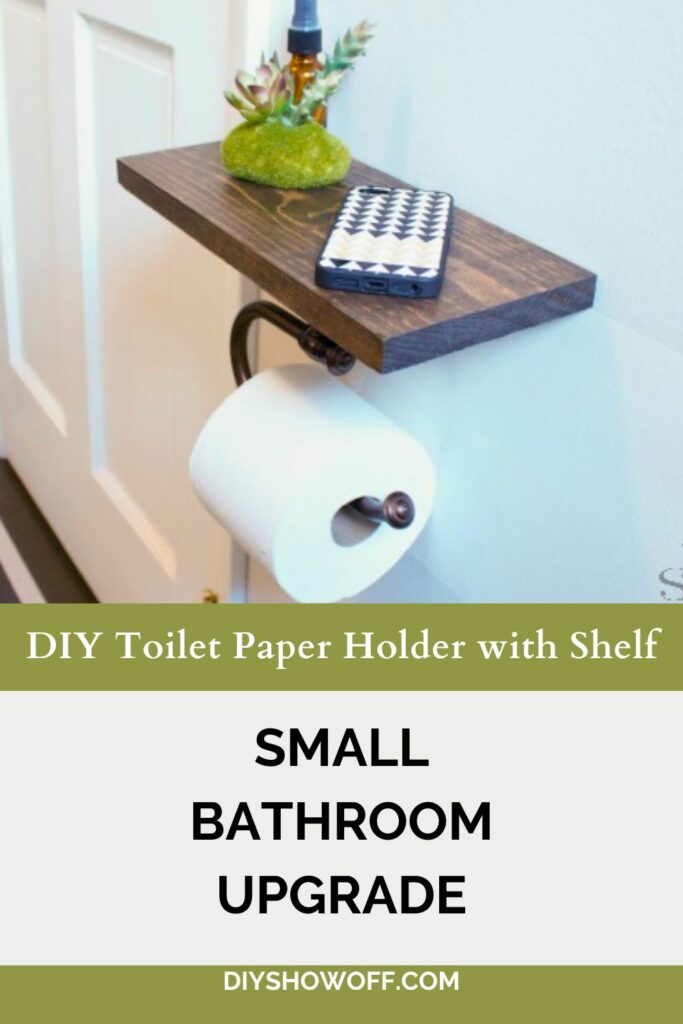
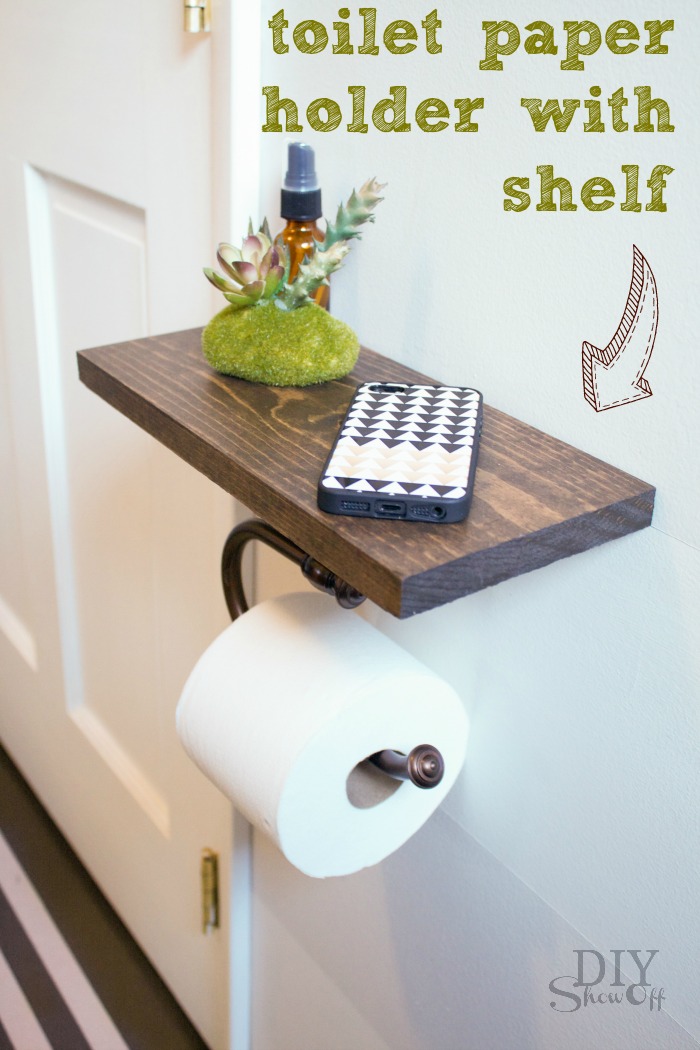
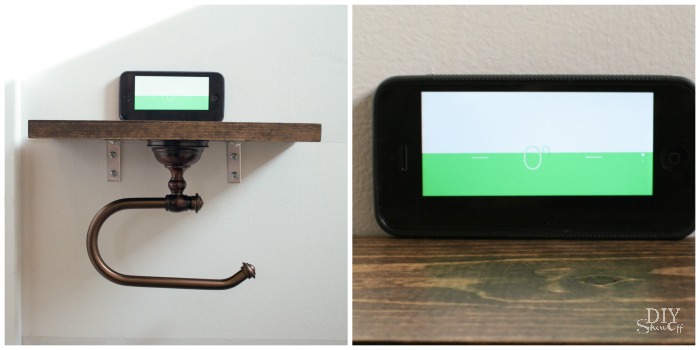
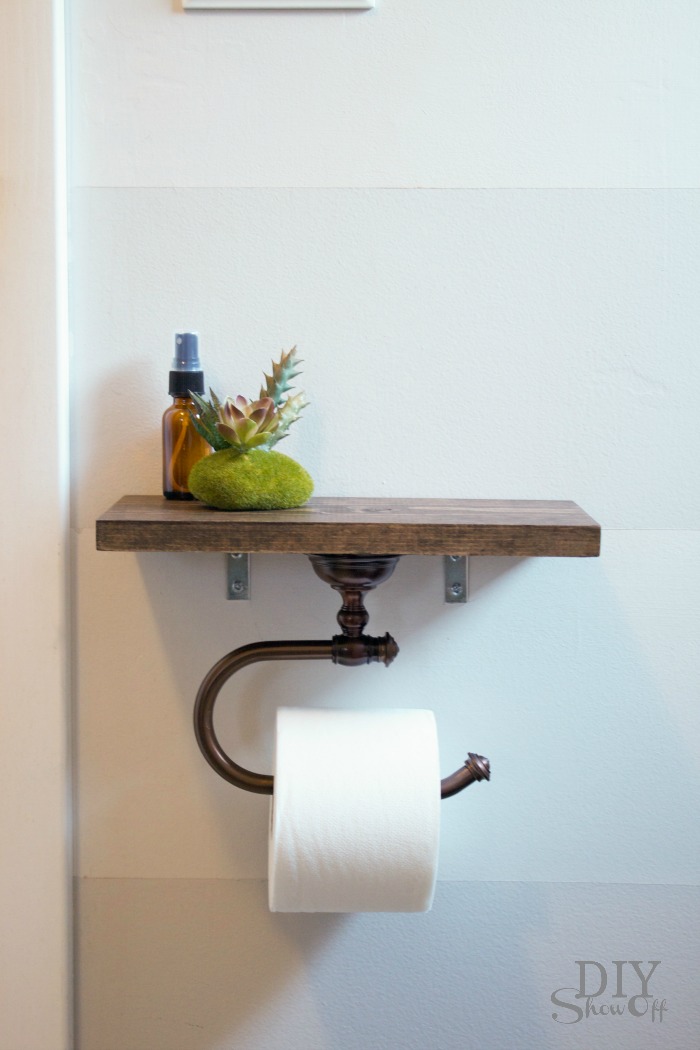
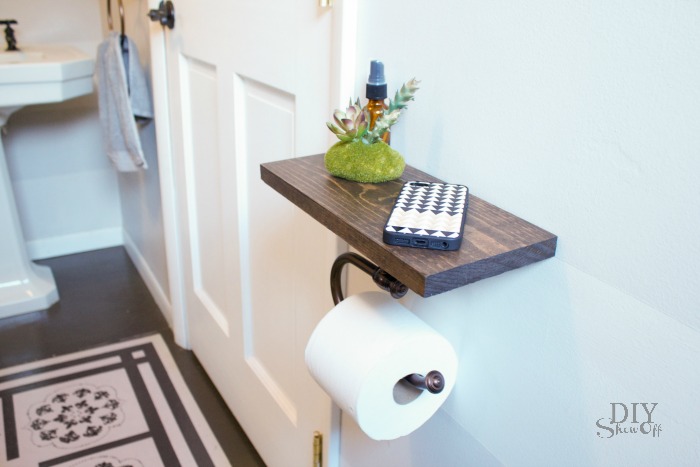
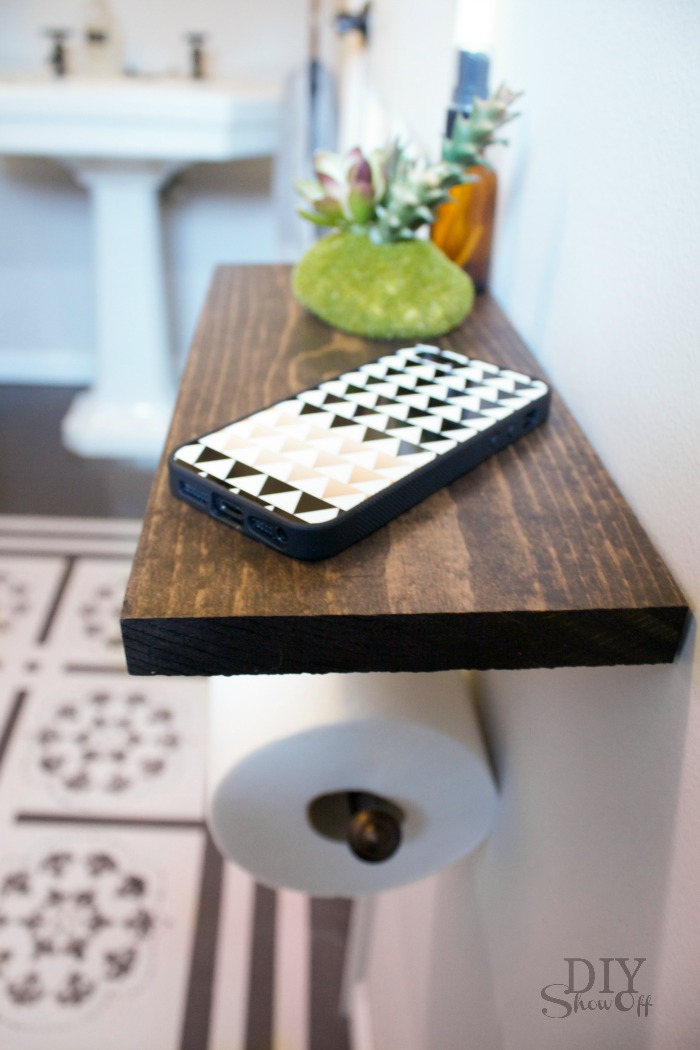
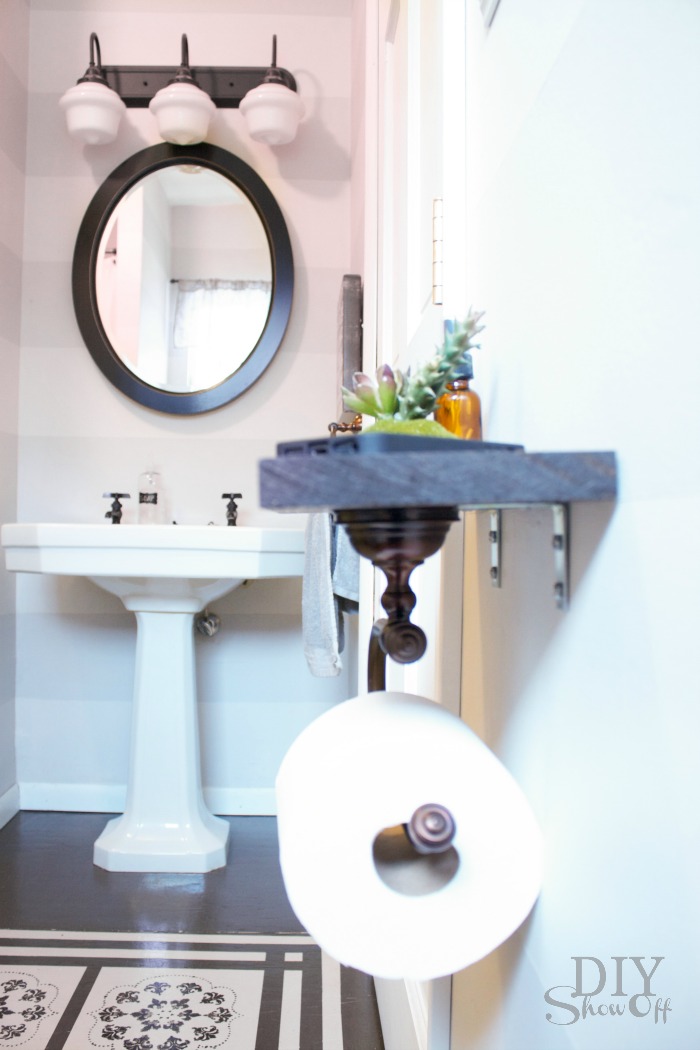
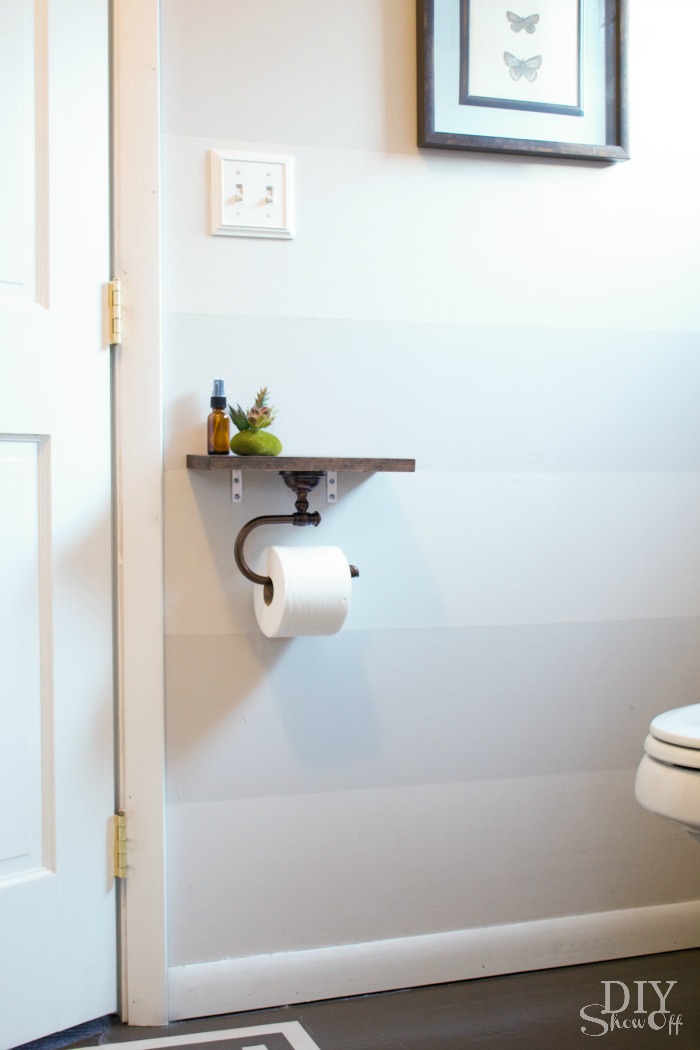
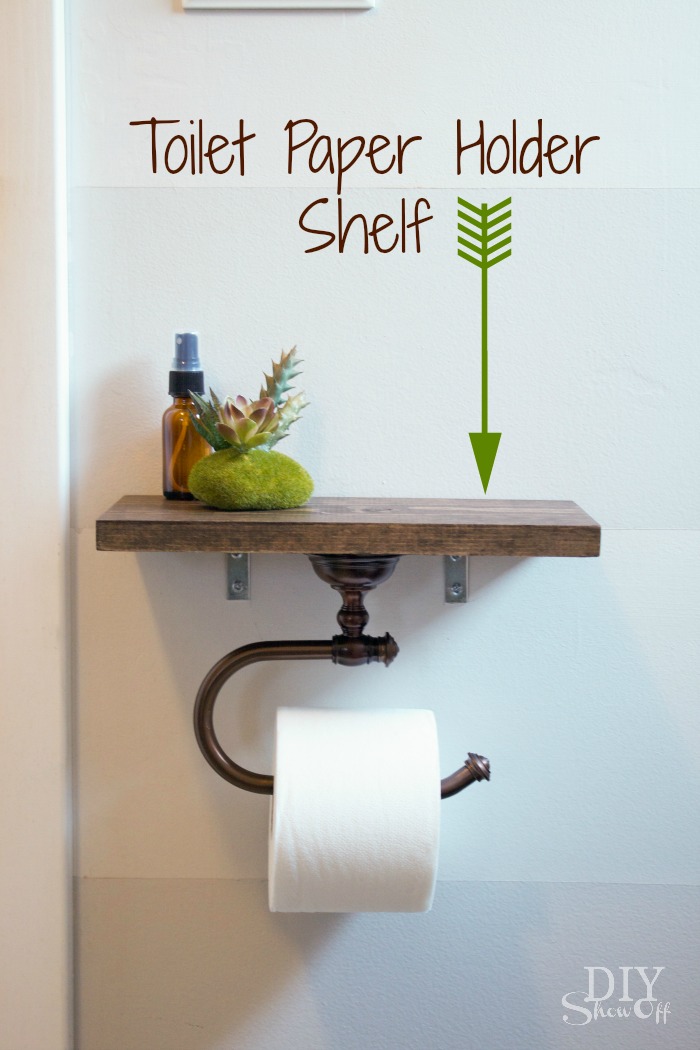
If you’re working with a small bathroom, every inch matters. I wanted something simple and functional—but also a little more stylish than a basic toilet paper holder. This easy DIY toilet paper holder with a shelf adds just enough space for essentials (like your phone, spray or a small plant) while keeping things clean and uncluttered. It’s a quick project that makes a big difference.
For as long as we’ve lived here, the guest bathroom’s toilet paper rested in a basket on the floor. Not ideal. So, rather than just secure a pretty oil rubbed bronze holder to the wall, I attached it to a piece of stained scrap wood to create a shelf for decorative accessories like a small plant, air freshener, vase of flowers, extra t.p. or even just cell phone accident prevention, if you know what I mean.
What I Used:
Some affiliate links included for your convenience.
2 corner brackets and screws (try decorative brackets if they work with your holder/wood measurements)
What I Did:
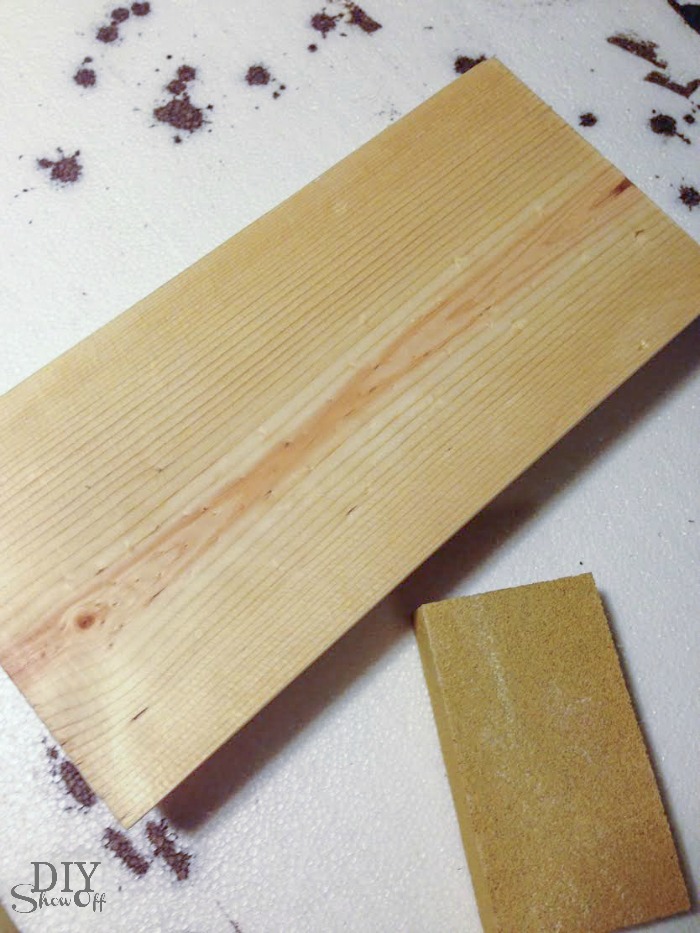
1. Cut, sand and clean a piece of scrap wood.
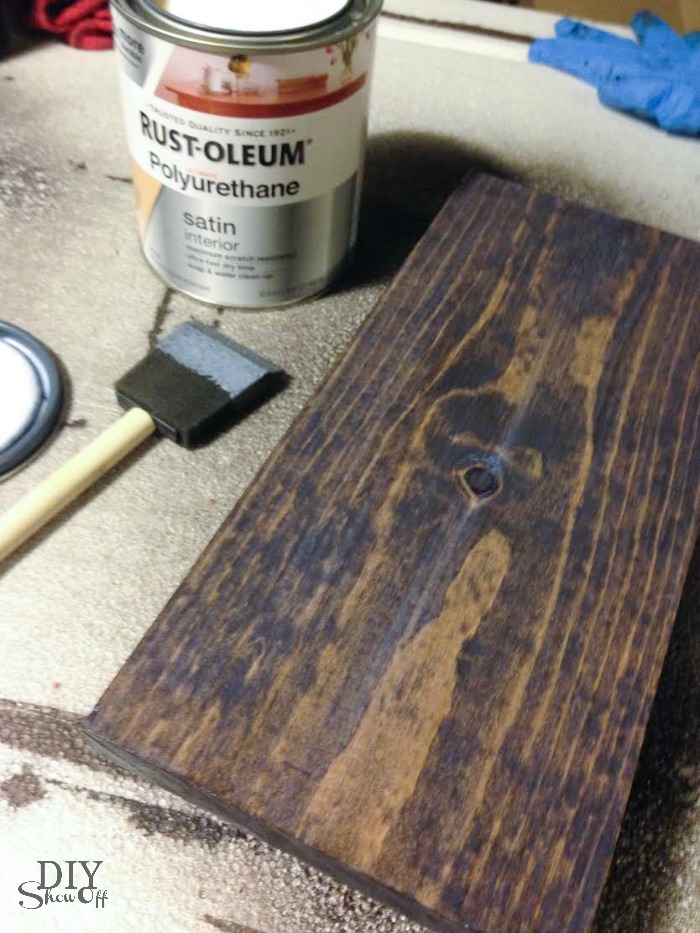
2. Stain wood shelf by applying stain. Then wipe away with a clean rag. I use RustOleum Ultimate Wood Stain since it dries in about an hour.
3. Seal wood. I did two coats.
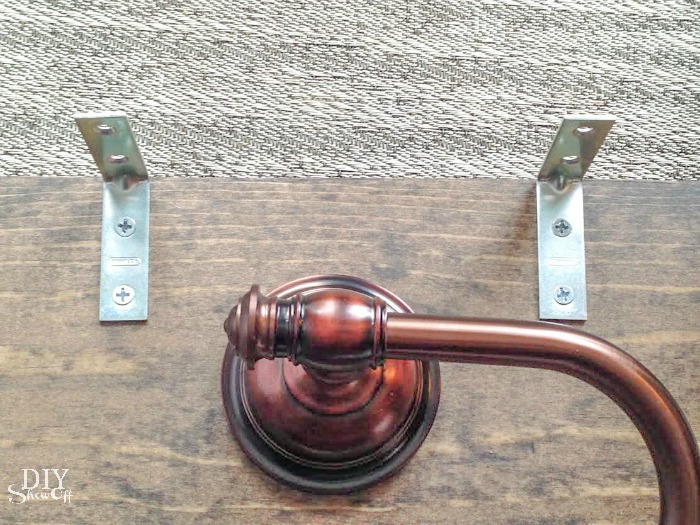
4. Attach the toilet paper holder to the under side of the shelf. Allowing room for toilet paper to roll (not be tight agains the wall when installed).
Optional: Have inspector approve your work.
5. Attach corner brackets on one side where shelf will rest against the wall.
6. Decide placement (keeping everyone’s size in mind – not too far of a reach but not so close that it’s in the way of someone’s knees or thighs) and using a level (there’s one in my iPhone’s compass), secure shelf to the wall with screws (use wall anchors if needed).
7. Add a roll of toilet paper.
What I Wish I Had Done Differently:
Here is where I’d recommend choosing brackets that are a little more decorative as at certain angles, they can be seen.
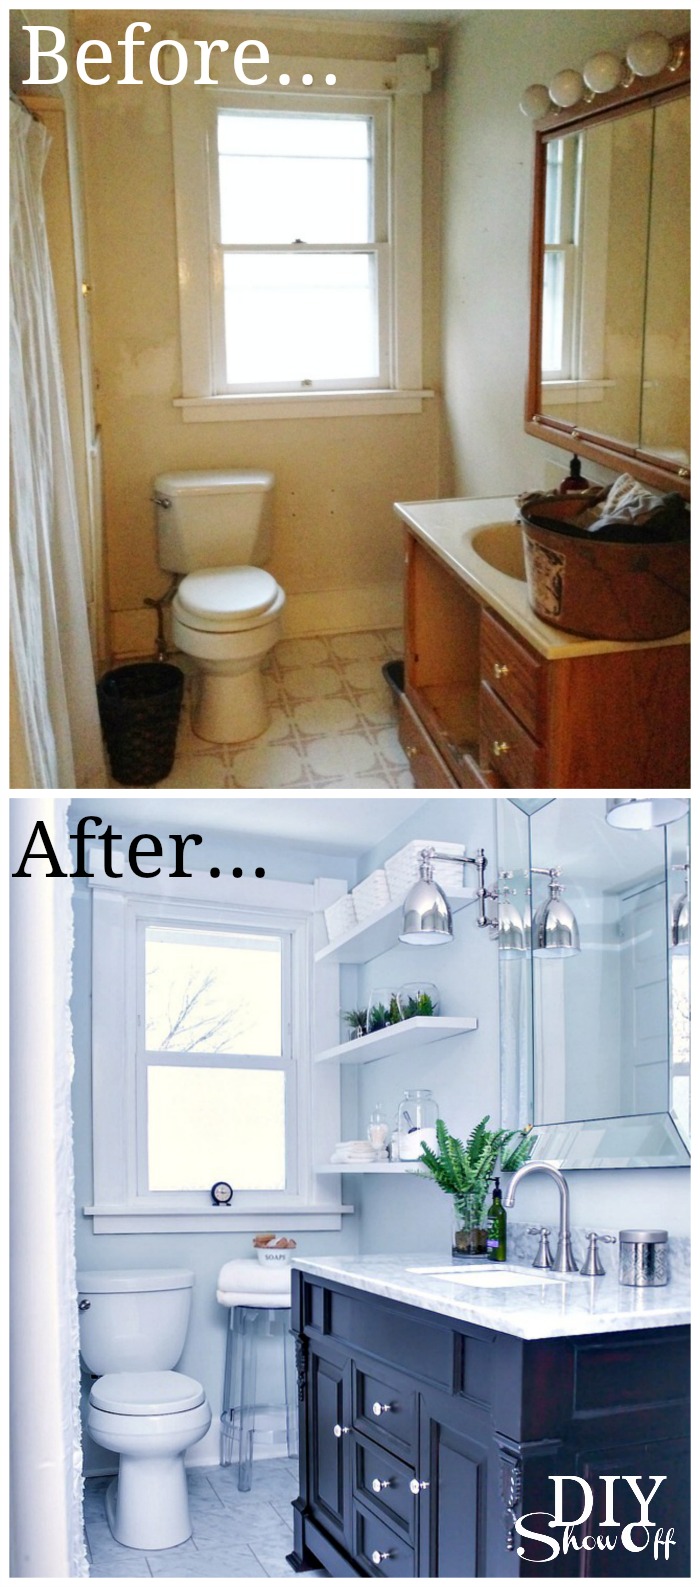
Other Bathroom Updates:
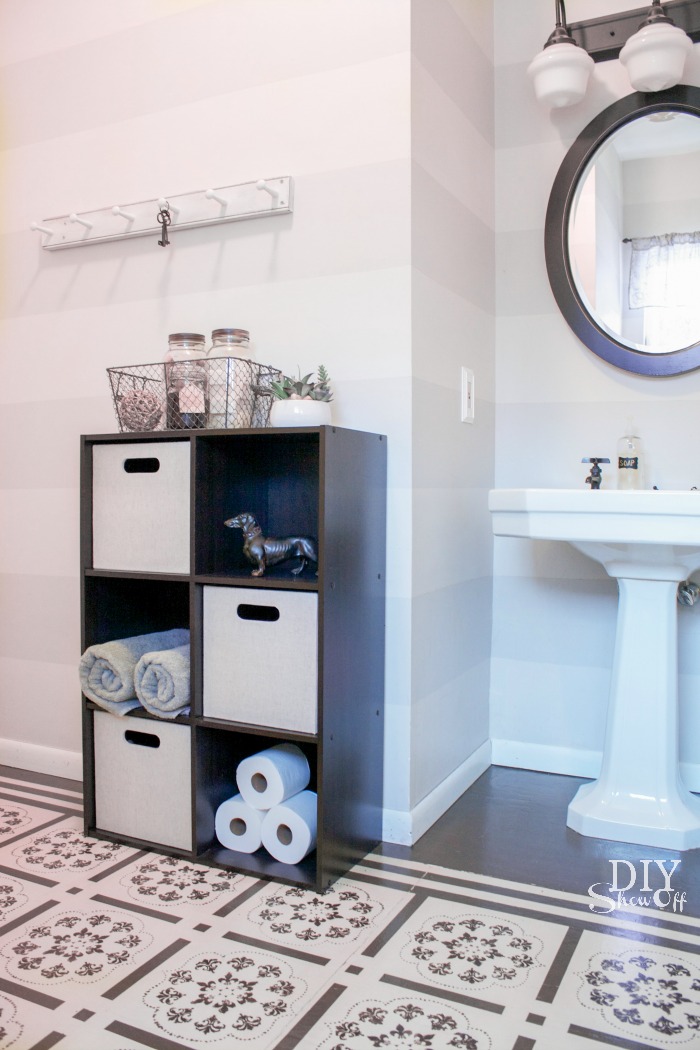
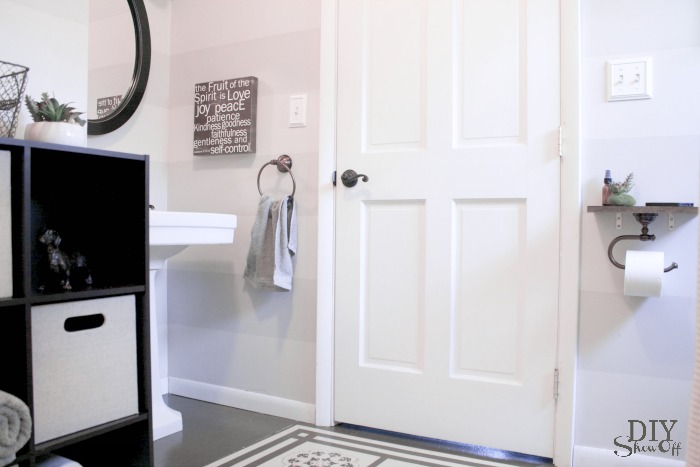
Pedestal sink means no storage. Storage cubes with linen milk crates/bins for organizing towels and bath products…
{It’s been nearly SIX years and the painted floor is still in good shape!}
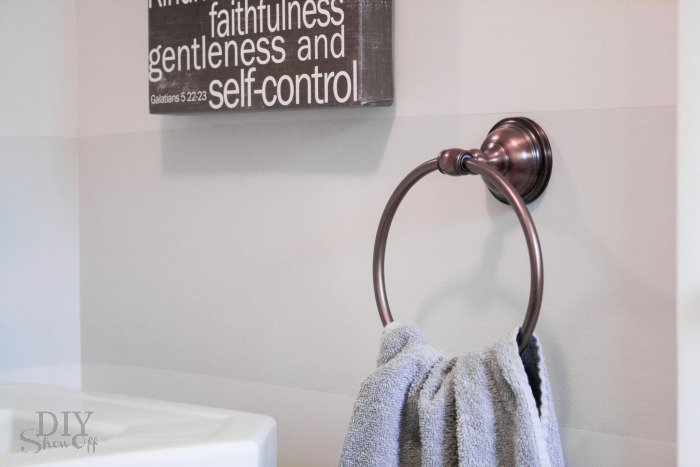
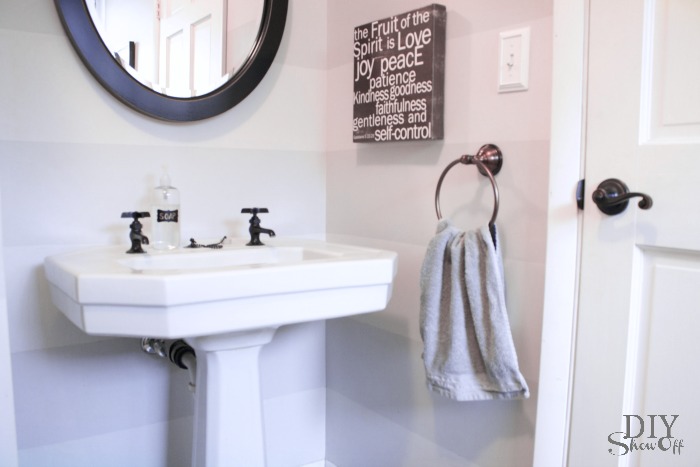
A towel ring for hand towels…
Just a few finishing but helpful/functional accessories make a big difference!
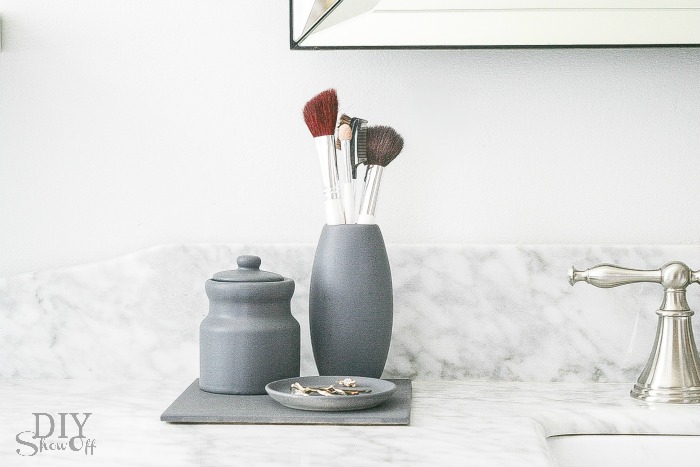
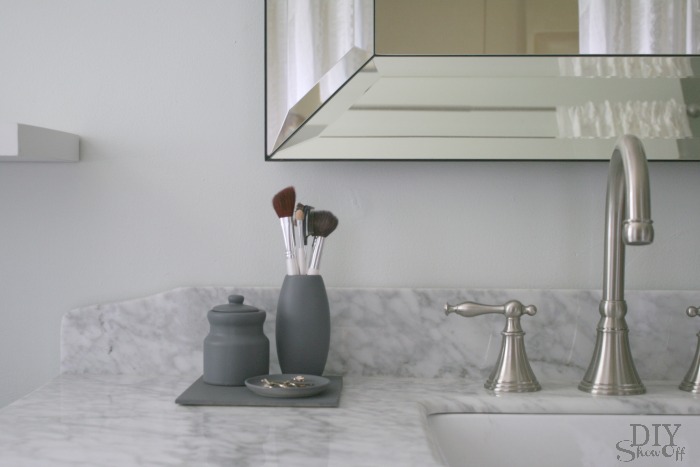
Thrifty bathroom counter organizer (this would be cute on a desktop in my home office too)…
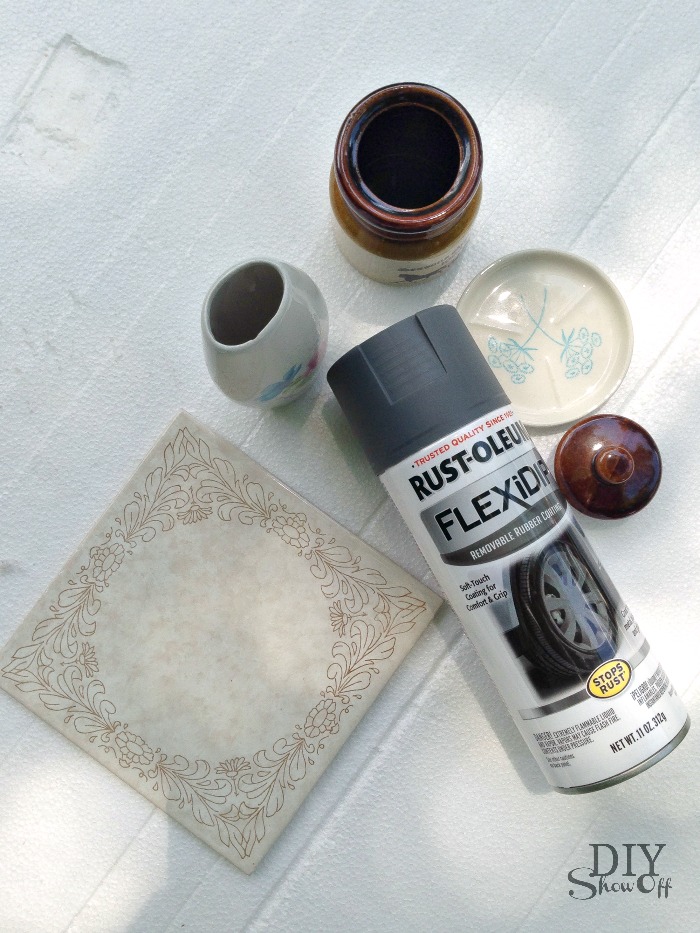
Materials:
Thrift store scores: mismatched vase, ceramic jar with lid, tiny dish and tile trivet
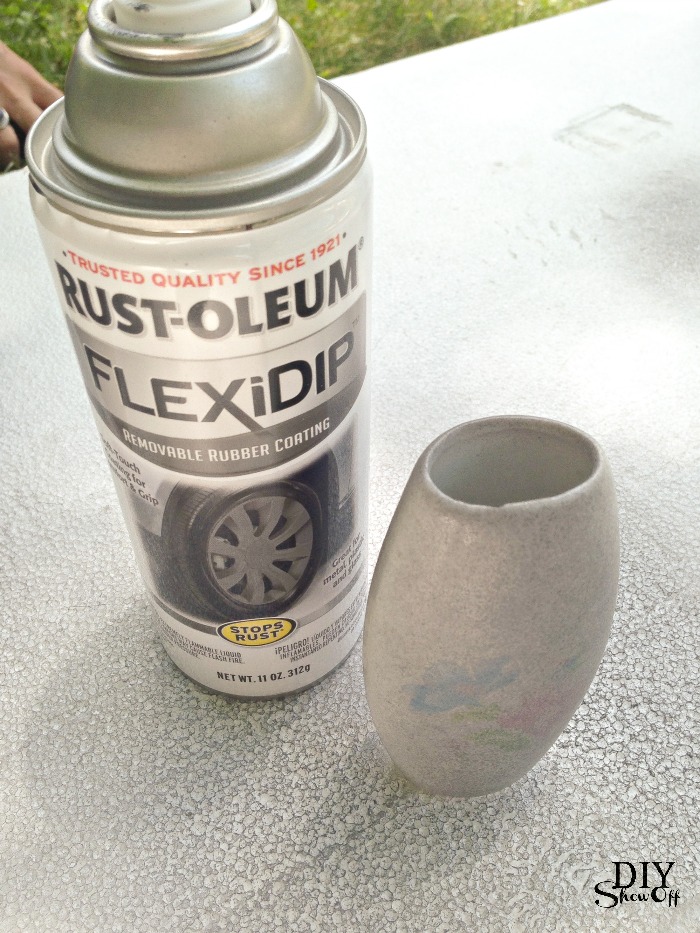
RustOleum FlexiDip (removable rubber coating in gray) or spray paint
How to: Clean and dry ceramic pieces. Apply 4-6 light even coats allowing 5 minutes dry time between each coat. Let dry overnight. Optional: Glue pieces together with an epoxy glue. Rubber coating is removable (within three months) when adhered to plastic, metal and glass…pretty cool!
That’s it. I love the matte color, texture, that if I had used something ‘precious’, I’d be able to peel away the rubbing coating, and that it’s waterproof too.