Holiday Ready Home

It’s too early to start decorating but it’s not too early to think about getting our homes ready for the holidays by finishing up projects, painting, organizing and cleaning and prepping the outdoors for winter so that when the time does come for holiday decorating, it’ll be much more stress-free.

Last week Lowe’s hosted a Holiday Ready Home Showcase. Surrounded by family and friends, we “tagged along” (via live stream in my living room tv) hosted by the Kitchen Cousins (John & Anthony)  sharing home design bloggers’ room makeovers for some great tips on having a holiday ready home. Talk about inspiration for getting into the holiday spirit! So.many.ideas!

holidayreadyhome

Here is how I get my home ready for the holidays:

1. Project completion. We seem to be in a constant state of construction so my first step is to finish up the projects that I’m working on. For me that means finishing up the DIY details in a room, sweeping up the sawdust, then putting away the materials and tools. So I’ll be finishing up a laundry room makeover, family room “polishing” and hopefully fitting in that pantry makeover I’ve been meaning to get to before getting serious about my holiday decorating. I better get busy!

2. Clean and declutter. I can’t get started with holiday decorating unless I have a clean slate. This means cleaning the rooms I decorate then decluttering by removing all-year-around decorative accents to make room for Christmas accents. 

3. Re-arrange furniture. Sometimes that means simply changing the orientation of our dining room table. Just that small thing gives the room a fresh look. I also re-arrange the living room and family room furniture to make space for the Christmas trees. It’s always a challenge and I try different spots but always go back to the same usual Christmas tree location.

4. Outdoors. Winter is sneaking up on us. Time to winterize the patio by putting away decorative accents, patio furniture and cushions. I also watch the weather for a warmer day to get holiday lighting up and installed so that when it is cold, wintery, snowy December, all I have to do is plug in the lights and hang the wreaths. 

5. Decorate. After digging out the boxes marked “Christmas” from the basement (it’s like hunting for buried treasure except not as fun. ha!), I like to organize my seasonal decor by room and laying out what I have before decorating, especially since I may have items I purchased on clearance after the holidays the previous year. It gives me an idea if there’s anything I need to add to my holiday decorating stash too. Tips for decorating a Christmas tree

6. Scents. Since we use artificial trees, a subtle pine scented candle is a must buy every year. 

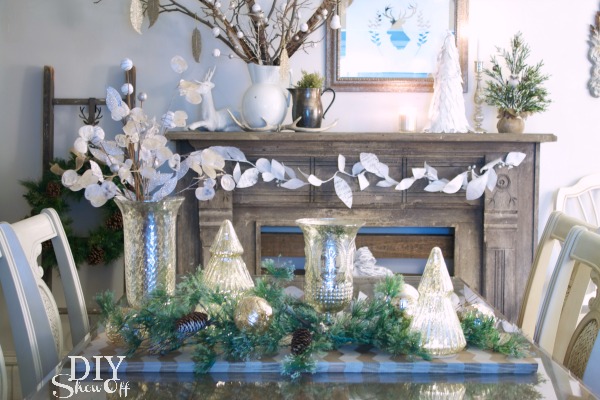
I may have been humming a little “Winter Wonderland” while decorating the dining room early for my holiday ready home viewing party using some beautiful holiday accents from the Allen + Roth collection at Lowe’s – beautiful LED mercury glass trees, ornaments, white script leaf garland with silver glitter bling and gold feathers accents.

mixed metallics Christmas

More great tips for a holiday ready home:

  • Holiday lighting is an affordable way to add a big statement to holiday decorate.  Holiday lighting and candles add a special touch – that glow! so warm and welcoming! – especially with darkness arriving earlier these days. Don’t forget the outdoors…luminaries are an easy budget-friendly way to lighten the path to the front door.
  • Need something fresh and new? Paint makes a big statement! It’s by far the easiest and quickest way to brighten up a room. 
  • Accessorize a neutral room with color in holiday decorating. Add accent pillows and throws for extra color, warmth and comfort.
  • Mixed metallics are a great way to add some sparkle and shine!
  • Mix old and new and look for fun non-traditional ways to use existing things, thinking outside of the box.
  • Try bringing in living/natural elements (succulents, sticks, twigs, birch branches/logs). 
  • Don’t forget to incorporate family traditions or start a new one!

Looking for some fun holiday DIY projects? Check out these Lowe’s Creative Ideas. One of these inspired a DIY Show Off project I’ll be sharing sometime next month.

o    Kitchen: http://www.lowes.com/creative-ideas/decorate-and-entertain/terra-cotta-serving-tray/project or http://www.lowes.com/creative-ideas/kitchen-and-dining/apple-butter-party-favors/project#noop

o    Living Room: http://www.lowes.com/creative-ideas/decorate-and-entertain/frosted-glass-mirror/project#noop

o    Outdoor/Curb Appeal: http://www.lowes.com/creative-ideas/porch-deck-and-patio/twine-star-decoration/project or http://www.lowes.com/creative-ideas/woodworking-and-crafts/shining-dowel-star/project or http://www.lowes.com/creative-ideas/other-activities/vinyl-luminaries/project

o    Bath/Guest Bath: http://www.lowes.com/creative-ideas/bed-and-bath/update-your-bathroom-for-the-holidays/article

o    Entryway: http://www.lowes.com/creative-ideas/woodworking-and-crafts/make-your-own-holiday-wreaths/article

o    Guest Room: http://www.lowes.com/creative-ideas/woodworking-and-crafts/nuts-and-bolts-christmas-tree/project

o    Dining Room: http://www.lowes.com/creative-ideas/woodworking-and-crafts/how-to-make-mini-chalkboards/project

See more fun DIY ideas at Lowe’s Creative Ideas, follow Lowe’s on InstagramPinterest and sign up for the Creative Ideas magazine and app!

Lowes-Creative-Ideas-Fall

*Disclaimer: As a member of the Lowe’s Creative Ideas Creators and Influencers network, I received a Lowe’s gift card to complete this project challenge, however the tutorial images, instructions and opinions are my own. 

DIY chicken wire cheesecloth Halloween ghost tutorial

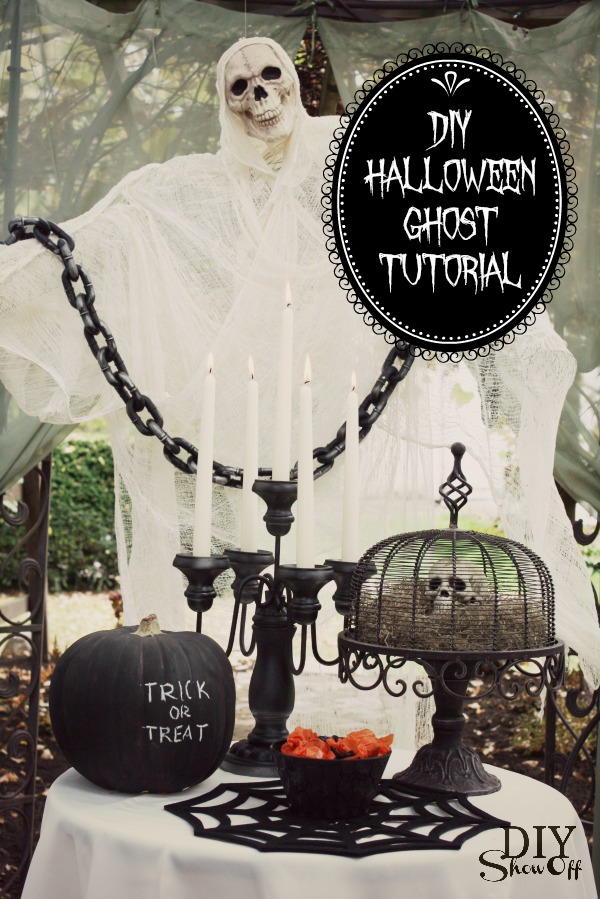
October? Already?! Let’s start off the month with a Halloween DIY. As a part of the Lowe’s Creative Ideas team, I received a gift card to purchase the materials for a Halloween decor challenge. I made a cheesecloth ghost and what a challenge it was! Because of the large life-size, I ran into some obstacles and almost threw in the towel, accepting defeat and attempted to think of another project. The joys of DIY: sometimes a big fat fail. 

BUT I switched direction and saved the project! Below I share what I did, recommendations for what I’d do different and how I rescued the project making it a success. If this is something you’d like to tackle, read through my tutorial to decide the best way to go about making your ghost.DIY Halloween Ghost

Materials for a chicken wire cheesecloth ghost:

Tools:

  • wire cutters
  • drill will very small drill bit

Tutorial:

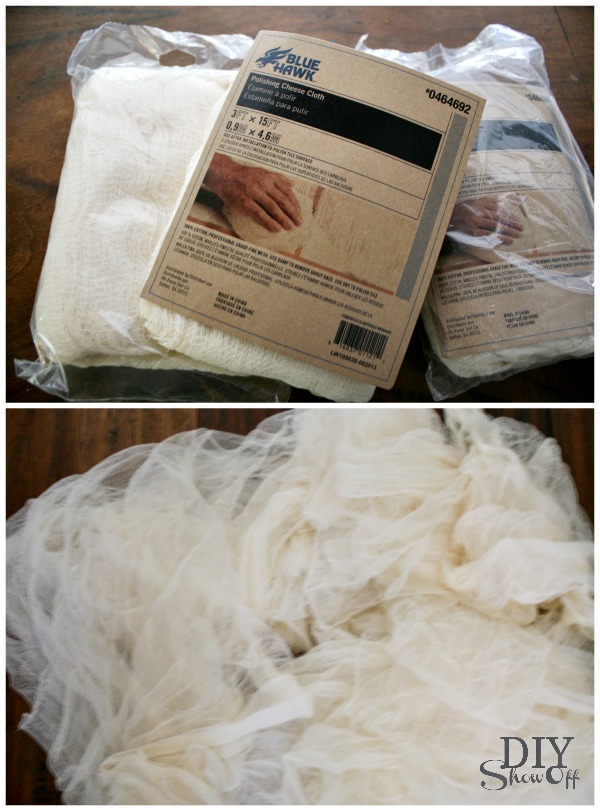
Open the cheesecloth packages. Unravel and unfold cheesecloth.how to make a cheesecloth ghost

Spray the top of the skull with spray adhesive. Wait a few seconds/fan with your hand a few times. Attach one strip of the center of the cheesecloth to create a “hood” around the skull. Let dry.

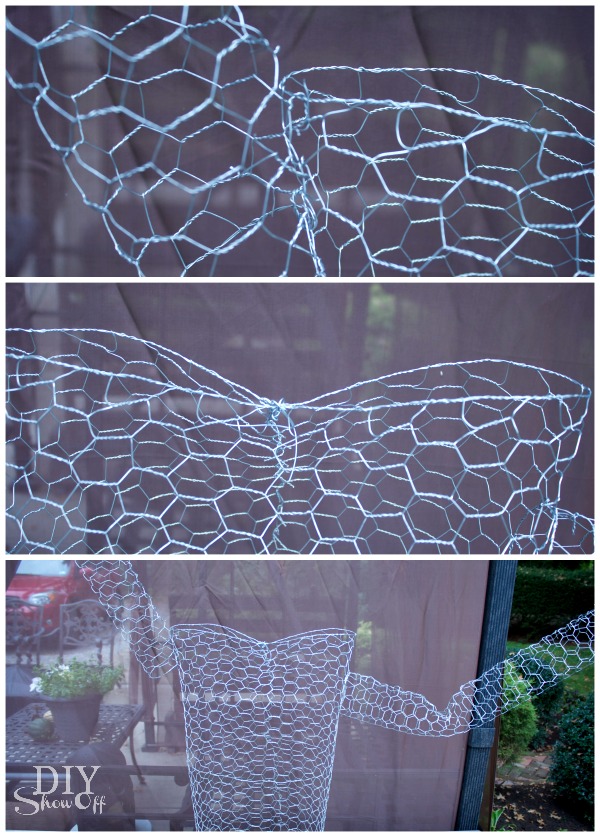
Using wire cutters, cut the chicken wire to create a torso and arms. I attached the arms using the cut side pieces of my strip of chicken wire along with extra wire.ghost tutorial

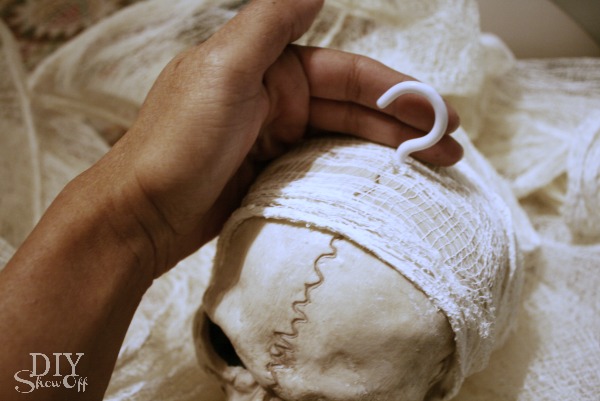
When skull/cheesecloth glue is dry, using a drill bit smaller than the cup hook screw, drill a small hole into the top of the skull, towards the back. Too far towards the front of the skull will have it looking up, more towards the back, the skull will look down when hanging. Screw in the cup hook. (Add a dab of Gorilla Glue if needed and then screw in the cup hook.) scary DIY Halloween ghost

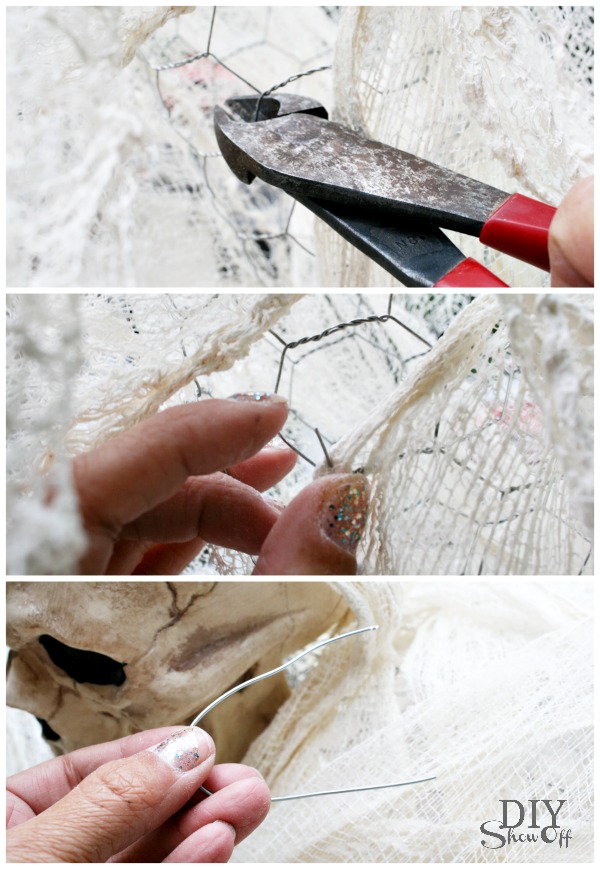
Place the skull onto the chicken wire torso. I used small cut pieces of wire through the cheesecloth hood at the base of the skull like a twist-tie , securing/twisting inside of the chicken wire torso frame to secure the skull into place. Drape more cheesecloth over the arms and torso, covering the chicken wire. Use more wire twist-ties where needed to keep cheesecloth in place.Halloween ghost DIY

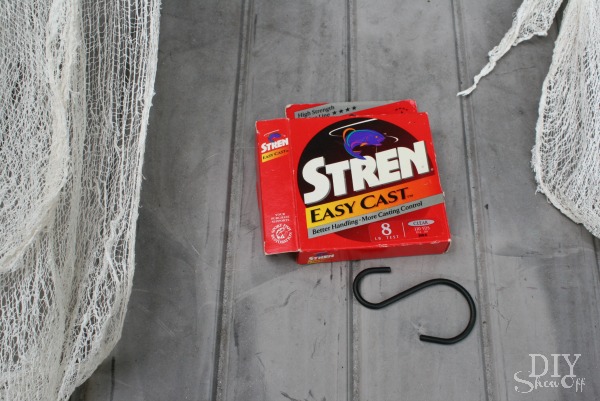
Hang using fishing line and an s-hook. Bend arms and torso if needed after hanging.cheesecloth chicken wire ghost

Things I attempted, failed and learned. Optional:

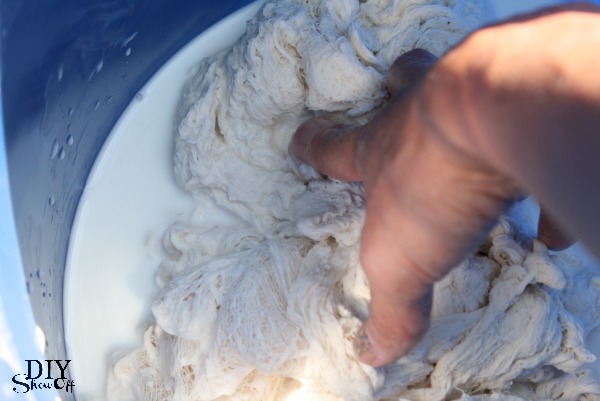
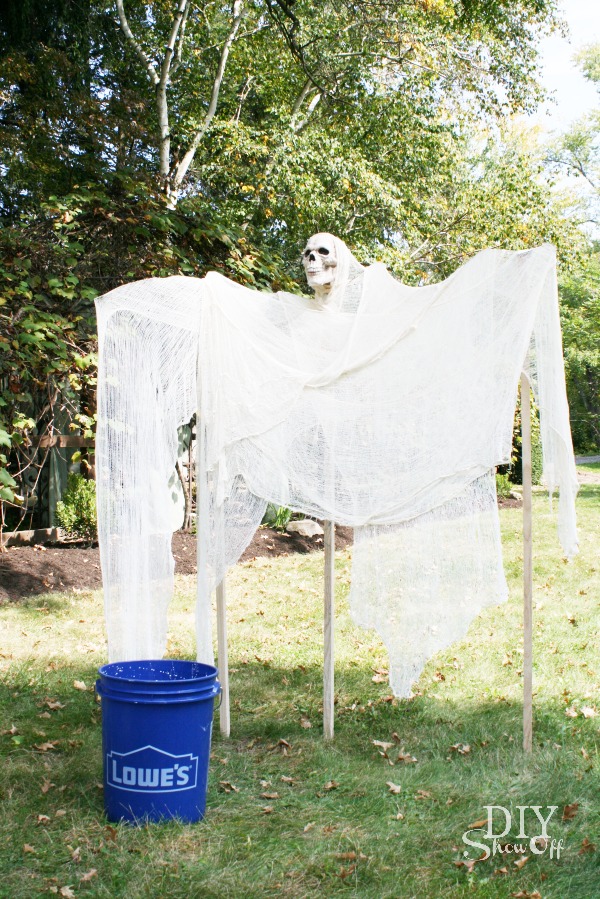
  • You can search Google for starch ghost recipes for success in making smaller ghosts. I used 1 1/2 containers of cornstarch and 6 cups of water which did not hold my extra large ghost’s shape when dry. I think less water and making more of a wet paste would have maybe had better results. However, I still would NOT use the starch method if you plan to hang your ghost outdoors. Water (rain/dew/frost) will deactivate the starch and your ghost will lose it’s shape. That’s why the chicken wire frame is a better option. There’s less room for failure.  

    cheesecloth ghost

    Mistake: starch is too watery and not a good option for an outdoor ghost.

  • Also, I used garden stakes and wire to create a frame for forming/drying the starched cheesecloth. A super heavy gage wire is necessary. Even coat hangers weren’t really strong enough for starch soaked cheesecloth, causing the arms to droop, which is why you’ll notice I had to use more stakes. This still didn’t work for me. My ghost did not hold it’s shape, although my cheesecloth is a little stiffer.

    cheesecloth ghost tutorial

    Even with a frame/mould for the starched cheesecloth, the large size ghost is too heavy to stand hold it’s shape when dry.

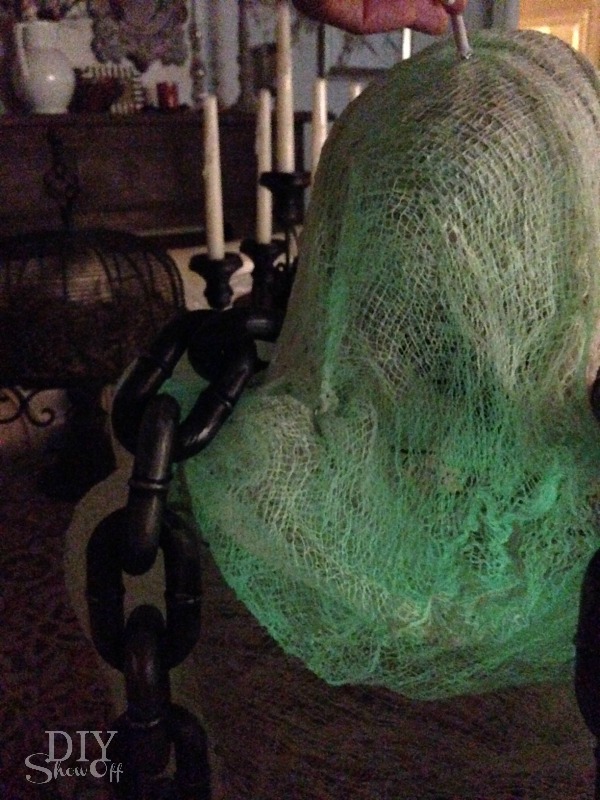
  • Rustoleum’s Glow in the Dark spray paint (sold in the Halloween/seasonal dept. at Lowe’s) does show up on mesh/cheesecloth! However, it’s difficult to tell where it’s been sprayed and needs a generous coat. The weather forecast is calling for rain so I’ve brought everything back inside but I will be updating with a better photo once I give it a more thorough spraying.Rustoleum Glow in the Dark spray paint

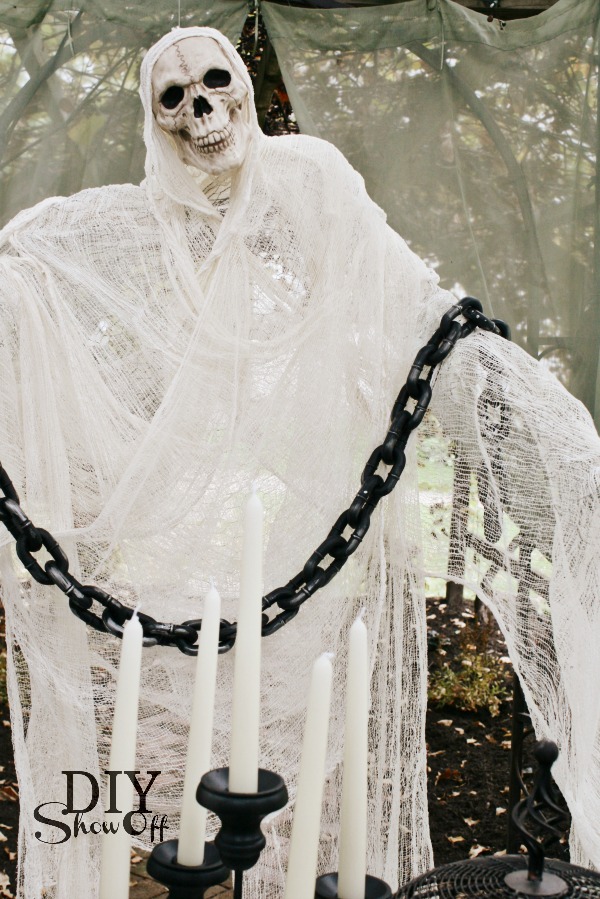
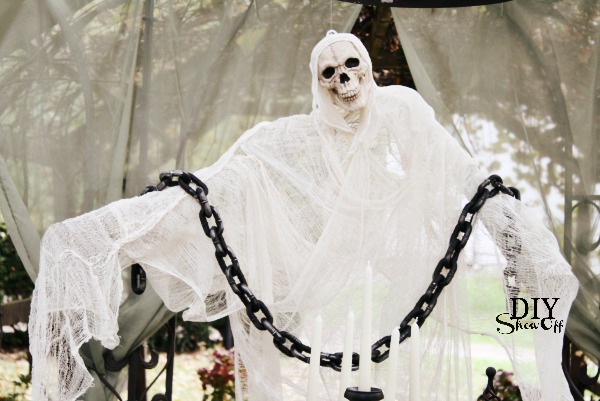
DIY friends, meet phantom of DIYShowOff…DIY ghost tutorial

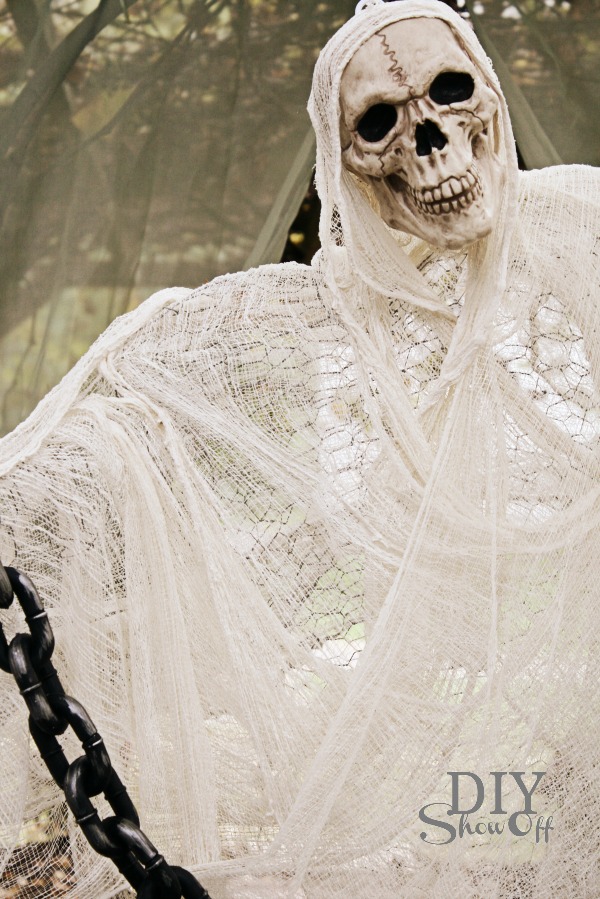
Despite the trial and error, the final result…spooky, right? He’s transparent, blows in the breeze and real-enough-looking. Creepy! scary DIY Halloween decor

Looks to me like he’s inviting you to have a snack. Service with a smile.scary DIY Halloween decor

 ::evil laugh::DIY cheesecloth chicken wire ghost

 He is smiling. He just wants a hug, I think. YOU GO FIRST!spooky ghost tutorial

It’s almost too scary for me. Scary Halloween … not my thing. My reaction is to cry. Real tears. And did you ever see a fainting goat? Hilarious! {search youtube videos} That’s so me. Frozen with fear.

How about you? Do you love scary?

And yep! That’s a sneak peek of the finished grape arbor/gazebo with recycled brick patio/path you see – all complete! More on that coming up. So.many.pictures.

Sharing at Centsational Girl.

See more fun DIY ideas at Lowe’s Creative Ideas, follow Lowe’s on InstagramPinterest and sign up for the Creative Ideas magazine and app!

Lowes-Creative-Ideas-Fall

*Disclaimer: As a member of the Lowe’s Creative Ideas Creators and Influencers network, I received a Lowe’s gift card to complete this project challenge, however the tutorial images, instructions and opinions are my own. 

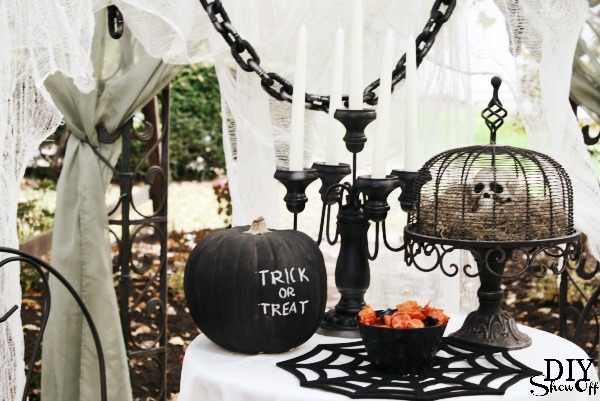
Love that cake plate too? For those of you who’ve asked, you can buy it here:

Charlotte Footed Cake Plate With Dome {affiliate link}

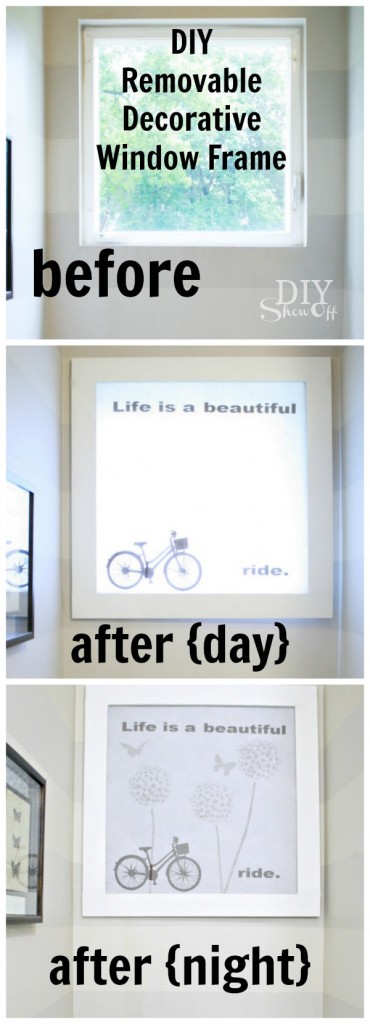
DIY: Removable Decorative Window Frame

DIY MAGIC WINDOW ART TUTORIAL

As a member of the Lowe’s Creative Ideas network, I’m participating in the September “window treatment” challenge. I was provided with a Lowe’s gift card to complete my project…addressing this bathroom window:
DIY Removable Decorative Window Frame Tutorial

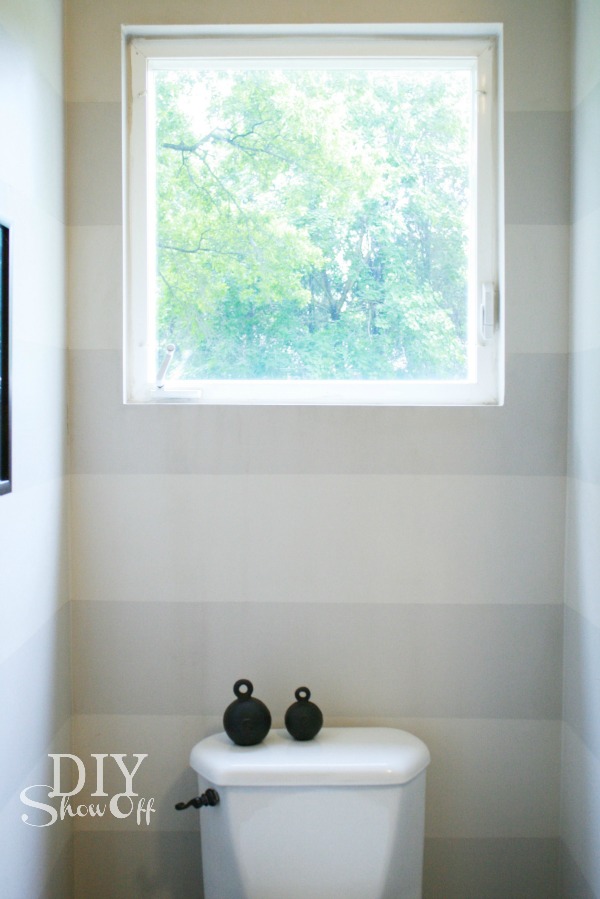
Our main floor bathroom has a window that sits high up (no one can see in and the view out is of the treetops). The window is not framed. I’ve tried a curtain on this window, but with it sitting so high above the toilet tank, it just doesn’t look right.

bathroom window

This project would be great for window privacy too!

Materials I used:

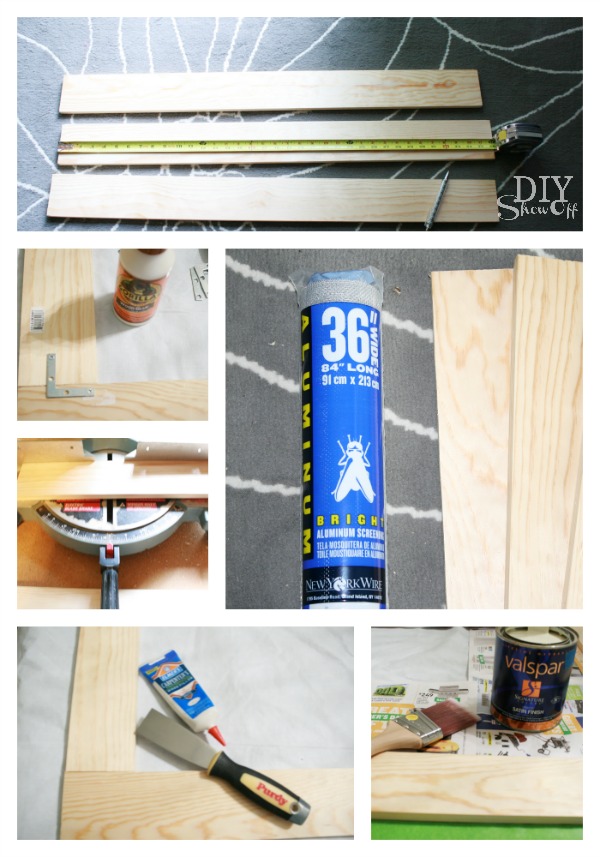
  • 1×3 pine boards to create a frame
  • Flat corner brackets
  • Gorilla Wood Glue
  • Wood filler
  • White paint (leftover Valspar Signature in satin finish)
  • Picture frame hanging hardware
  • Screen (36″ wide)
  • FrogTape
  • Staples
  • Stencil
  • Craft paint
  • White vinyl table cloth
  • Vinyl decals

Removable decorative window frame: 

I started with creating a frame for my window using the 1×3 boards, corner brackets, Gorilla Glue, wood filler and paint. It’s best to miter the joints, add glue to the joints and brackets (be sure that screws are not longer than depth of frame). Fill joint lines with wood filler and lightly sand once dry. Prime/paint frame.

DIY removable wood window frame

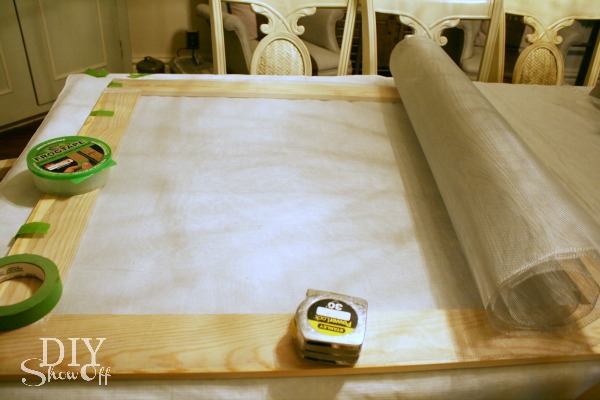
Cut screen to fit inside the wooden frame with enough room to fold under borders and to staple to the back side of the frame.

 Removable window frame DIY

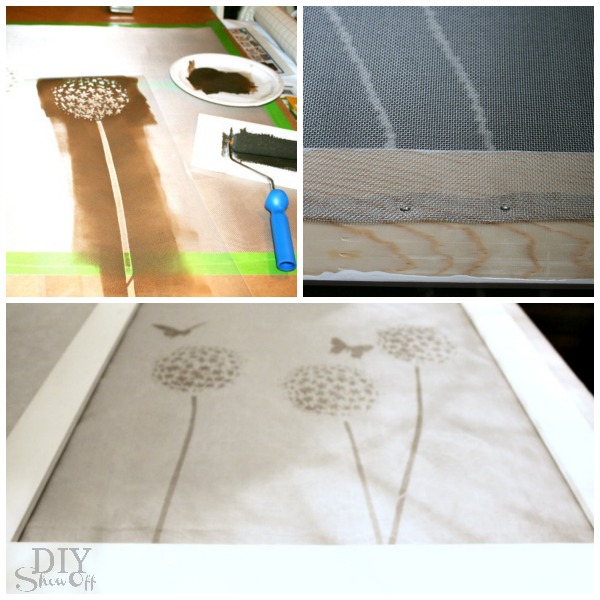
Stencil a design on the screen and let dry. I used Cutting Edge Stencil’s Allium Gladiator Flower Stencil (it sort of looks like dandelions and butterflies). FrogTape was essential in working with the screen by holding it flat and in place. Once paint is dry, staple screen to back of frame. 

removable decorative DIY window frame tutorial

You may think to stop here but when I hung the frame (in the daylight), the stenciled design wasn’t visible. It simply looked as if I only framed the window.

So I cut a piece of white vinyl table cloth to size (a bit bigger than the inner space of my frame with an extra inch around the borders to staple it into place) then I added vinyl decals to the white tablecloth. (I used my Silhouette Cameo to cut out a bike and quote.) You could also try a light colored/patterned fabric or paint your own design on canvas…just remember that your stenciled screen will show when it’s dark outside.

removable decorative DIY window frame tutorial

I stapled the white tablecloth into place. 

Simply hang on nails using the sawtooth picture hangers. Easily removable – as simple as taking a picture off the wall.

Before…

bathroom window

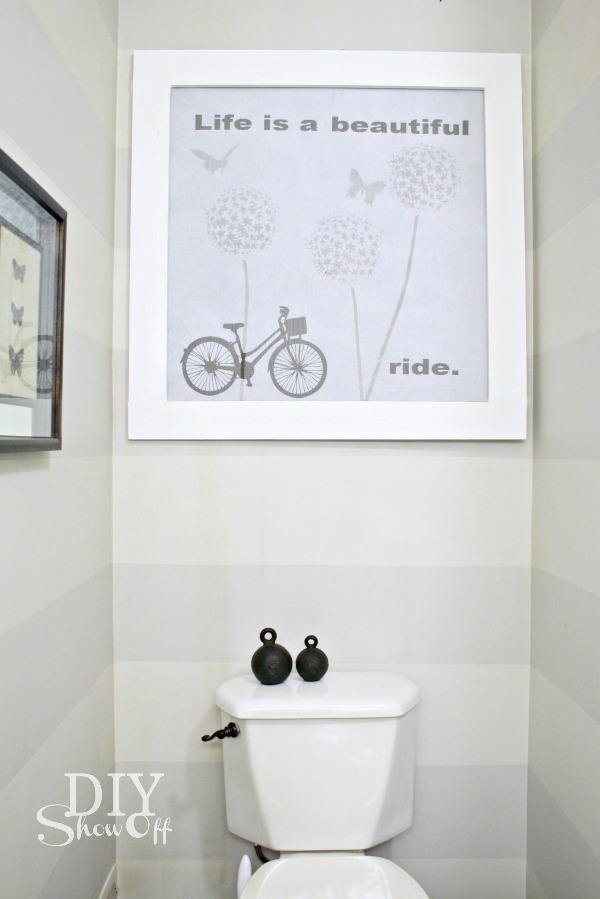
During the day, the bike and quote show up…

bathroom window covering

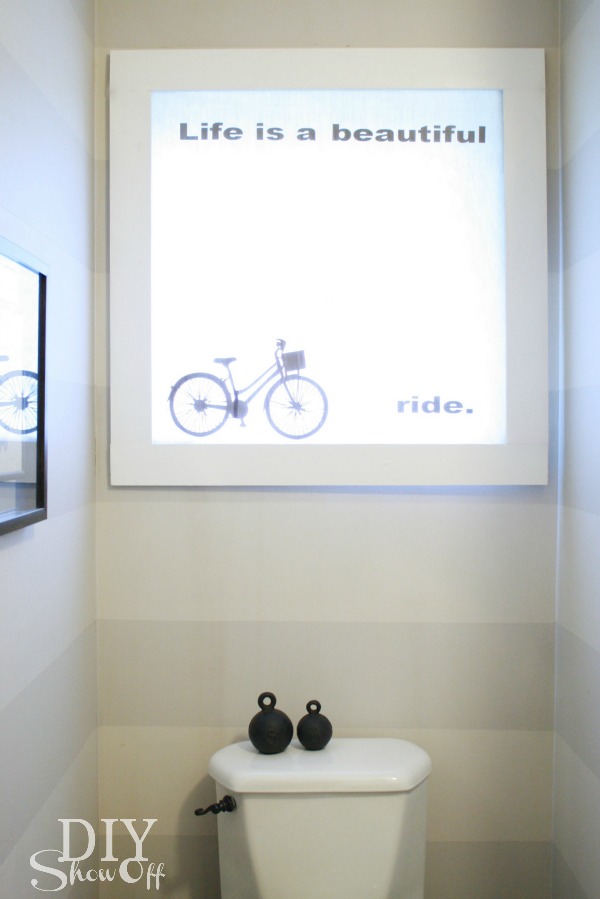
and at night, the stenciled screen shows up as well…

DIY window frame

It’s easily removable for when I want to open/access the window and lets in a lot of light during the day. Yay! Love the result…window dressing, window frame and art. What do you think?

See more fun DIY ideas at Lowe’s Creative Ideas, follow Lowe’s on InstagramPinterest and sign up for the Creative Ideas magazine and app!

Spring 13 Blogger Badge Subscribe Banner Version

*Disclaimer: As a member of the Lowe’s Creative Ideas Creators and Influencers network, I received a Lowe’s gift card to complete this project for a mini outdoor makeover challenge, however the tutorial images, instructions and opinions are my own.