DIY Alphabet Burlap Cork Board Message Center

Hello DIY friends! One of my favorite stores is Michaels – although it’s one of those stores that I can’t run in for just one thing because I end up with a cart full of the cutest decorative accents and more materials for my craft stash. You too, right? Well, Michaels just announced the addition of pre-cut craft fabric to the thousands of creative products available in its stores, providing us with one-stop shopping for DIY projects. This is BIG HUGE news when you live in a smaller city with only one local fabric store! While I was there, I also discovered that Michaels sells a complete line of sewing supplies as well…this cuts my shopping time in half. One store instead of two. Bonus!

DIY burlap message center

Michaels supplied me with this awesome stash of fabric as a part of a promotion for their new line of home decor fabric. Isn’t it darling? 

Michaels fabric line

The alphabet burlap is ADORABLE! and a perfect match for my craft room so I decided I would make myself a burlap covered corkboard message center to help keep me organized. Cork board, Chalk board, Clip board AND burlap? That’s what I’m talking about! A fun combo!

Materials:

  • 36″ x 24″ framed corkboard
  • Crafty Cuts alphabet burlap
  • 4 pieces of thin wood trim (Michael’s also sells a small miter box & saw)
  • Black spray paint (or you could probably get away with one can of chalkboard spray paint)
  • Spray adhesive
  • 3 clipboards
  • Chalkboard spray paint
  • Hot glue (and hot glue gun)
  • Embellishments
  • Push pins

Corkboard/Chalkboad/Clipboard Message Center Tutorial:

DIY message center

1. Measure and (miter) cut small trim pieces to fit inside of the corkboard’s frame. 

DIY burlap covered cork board

2. Iron burlap. I used my iron’s highest setting and sprayed water (not steamed) to get out wrinkles. Iron both sides. 

ironing burlap

3. Measure inside of corkboard frame and cut a piece of the burlap to those measurements (mine was 34.5″ x 22.5″). If you subtract 1/4″, it will save you from having to trim the fit later. If it’s a smidge small, it’s okay (and actually better) and will be hidden by the added wood trim later. Set fabric piece aside. 

alphabet burlap

4. Spray paint the corkboard frame and trim pieces black. I was okay with imperfect coverage for a distressed look. (You could also sand edges when dry.) No need to tape the corkboard since it’ll be covered later. Let paint dry. 

DIY burlap corkboard message center

5. Give the cut burlap piece a coat of spray adhesive on the back side.  (I do this outside because of the overspray but be mindful of the wind direction blowing the adhesive spray mist as well as when picking up the sticky burlap, not to touch/fold which mine did but easily quickly pulled apart.) Immediately move to step 6.

DIY burlap covered cork board message center

6. Working from the middle out, smooth the burlap over the corkboard (inside the frame). It’ll be reposition-able right away if needed. 

DIY burlap covered cork board

7. Next I used hot glue to attach my small mitered trim pieces over the burlap edges, right next to the inside of the corkboard frame. This covers the edge of the burlap.

DIY burlap covered cork board

If you need to re-cut a mitered piece or accidentally scratch the black paint finish, simply fix it with a black Sharpie.

DIY burlap covered cork message center

8. Embellish as desired. My mitered edges surprisingly were a great fit after the mitered cut fix above, but these adorable flower embellishments attached with hot glue would work for covering a not so professional {tricky cuts!} mitered fit too. 

flower embellishments

9. Clipboards: Remove metal clip hardware, coat with chalkboard paint, let dry and repeat a second coat and let dry. 

chalkboard clipboard

10. Season chalkboard by rubbing the length of a piece of chalk over the complete surface then erasing. 

seasoning chalkboard

11. Re-attach clips. I found that using a twist tie to hold the clip open then lining up screws made reattaching the clip to the board a lot easier (because of the spring in the clip). Once screws are in place and tightened, remove twist tie. 

reattaching clipboard hardware

12. Embellish chalkboard clipboards if desired. I numbered mine and added some cute stickers. 

decorating chalkboard clipboard

13. Hang! Corkboard should come with hanging hardware but large Command strips will work too. 

alphabet burlap message center

It’s perfect for my black, natural, vintage inspired craft room. Lovin’ it!

craft room

There’s a lot of “stuff” in this room but it is clean and organized!

craft room / home office

I was provided with fabric and a Michaels gift card to complete the challenge. Michaels.com and Michaels Pinterest Boards feature project ideas that use fabric, including throw pillowslamp shadeschair seat covers, and bracelets. Laminated burlap, a Michaels limited exclusive, can be fed through most home printers to add personalized messages and images to fabric projects…I want to try that next!

One room, multi-functional – a makeover story {dining room/home office}

Meet: Sweet Monica from Monica Wants It. I’ve e-known Monica and her amazing DIY talents for quite a while. I’m super excited to ‘show off’ her most recent project. This girl (and her hubby) put in some long hours and hard work and it’s well did an amazing job!

Combined Home Office/Dining Room Makeover

They started with a room which is a combined home office and dining room with dark paneling, wall paper and nothing Monica’s style…

before

dark cabinets and paneling before

They took down the cabinets, removed the dark paneling and stripped old wallpaper…

old panelingold wallpaper

put the cabinets back, gave them a fresh new look with paint, new countertops and hardware.

in progress…

painting cabinets

after

painted cabinets

Huge difference from the old dark before…

painted cabinets

They painted the walls and installed crown molding. The installed new flooring and swapped out the ceiling fan. Makes you crave a break just reading about it, doesn’t it?

DIY room makeover

Then Monica worked her decorating magic…

Wow!

home office

My favorite of her DIY decorative accents is this chair

chair makeover

and framing Restoration Hardware catalog pages…brilliant and so pretty!

DIY framed Restoration Hardware catalog page

The entire room is a beautiful place to entertain, dine, work, relax…I might even sleep in there!

DIY dining room makeover

dining room makeover

dining room makeover

What do you think? It’s so hard to believe it’s the same space. Glam and comfy and so functional! Love it! There is so much more to see! Pop over to see the full original post with more pictures and details at

Monica Wants It

DIY Show Off - FacebookDIY Show Off - TwitterDIY Show Off - PinterestDIY Show Off - Feed


Vintage craft/office makeover

Meet: Shelby from

Honeysuckle blog

She’ll be having a baby in a few short months and to make room for baby, switched around several rooms in her house. One of Shelby’s biggest challenges was to combine her office and craft spaces into one multi-functional, organized splace.

The large L-shaped desk was a DIY project…

vintage craft room/office

Don’t you love the windows, the light and that view?

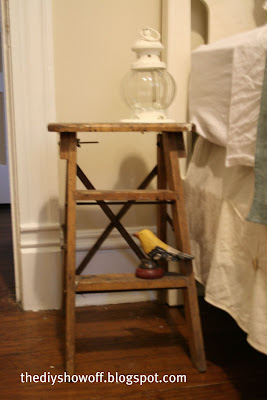
The rest is creative fun vintage finds turned useful. So many treasures, such clever ideas.

craft room pegboard

wrapping paper roller

gallery wall

vintage office chair

craft room/office French doors

vintage mail sorter

craft supplies

vintage canisters

vintage office/craft room makeover

Shelby shares all of her DIY at

honeysuckle
and vintages treasures in her Etsy shop…

honeysuckle

Ps. Look for her beautiful mud room – gorgeous transformation!
DIY Show Off - FacebookDIY Show Off - TwitterDIY Show Off - PinterestDIY Show Off - Feed