Mailbox DIY Vinyl Decals

This poor mailbox had seen better days…don’t you think? 
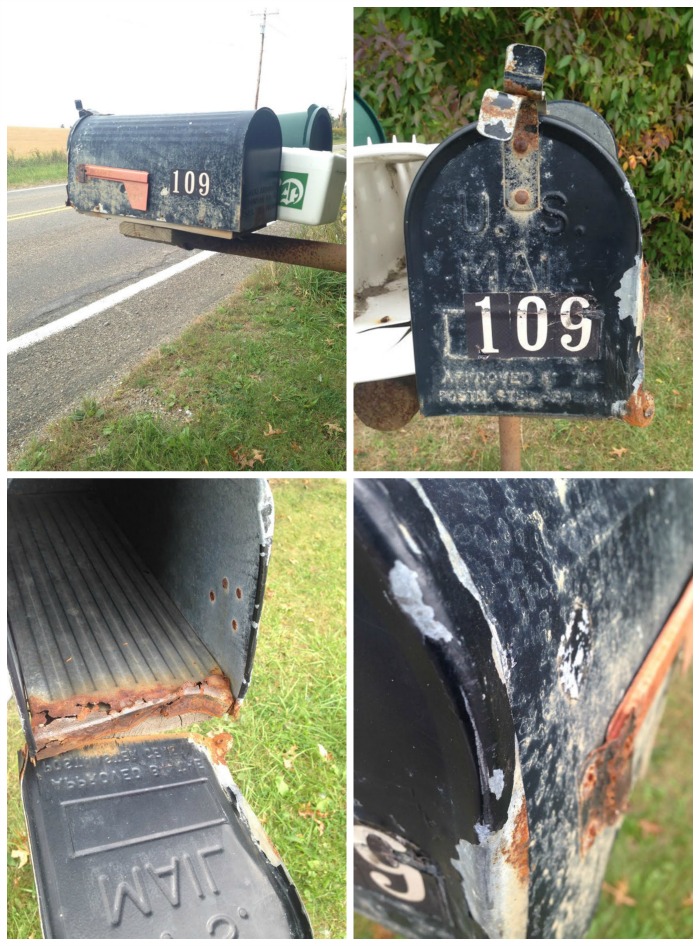
DIY mailbox vinyl decals tutorial at diyshowoff

Time for a new one…

DIY mailbox vinyl decals tutorial at diyshowoff

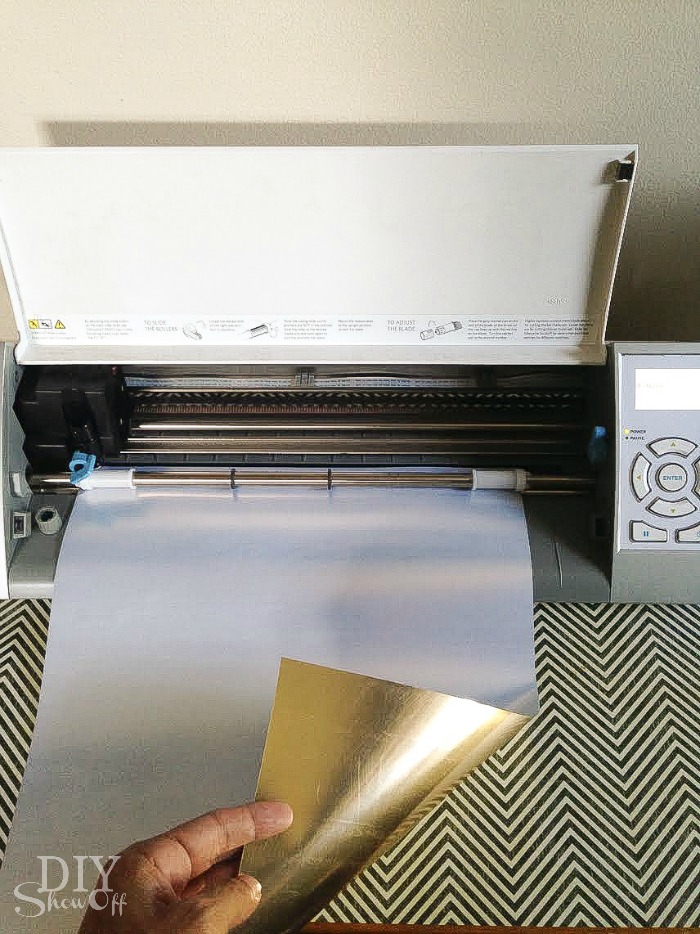
One of the perks of owning a vinyl cutter (I have a Silhouette Cameo) is the convenience of making my own vinyl labels/stickers/decals. 
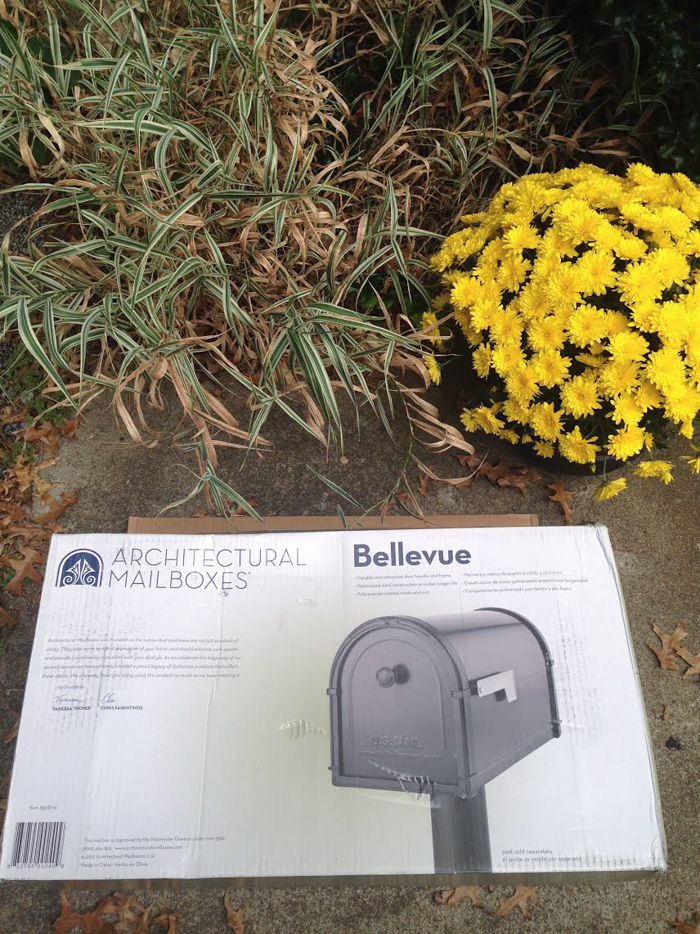
Mailbox Upgrade

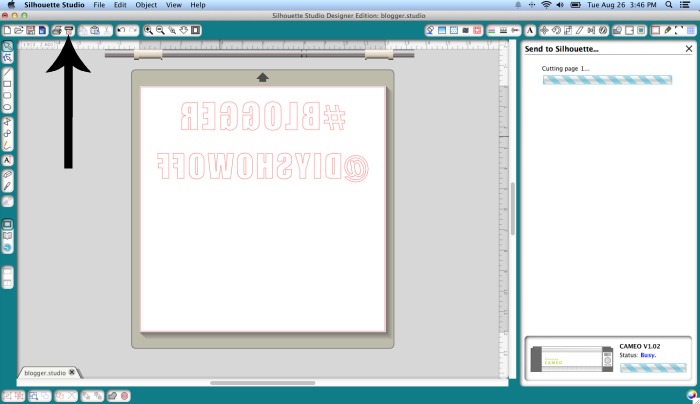
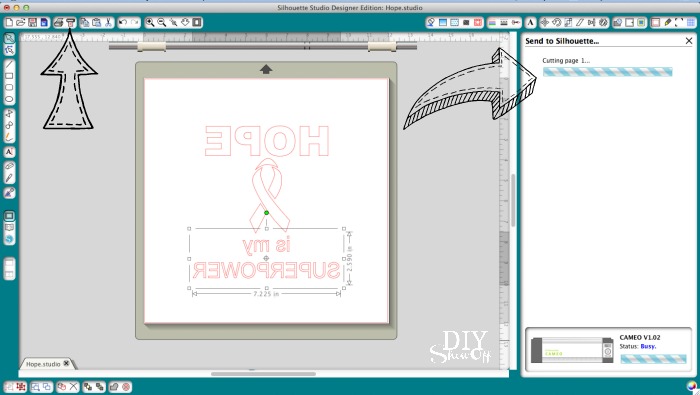
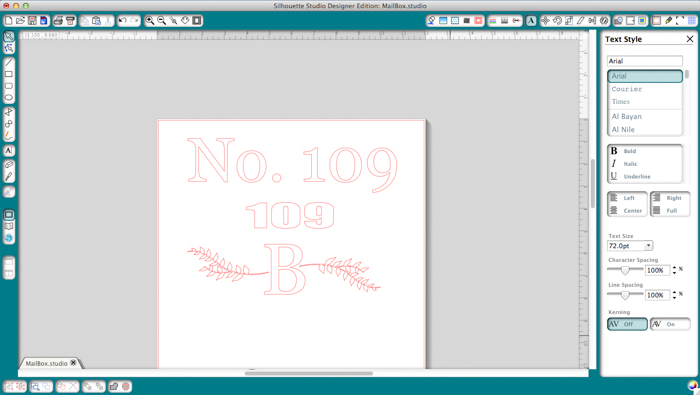
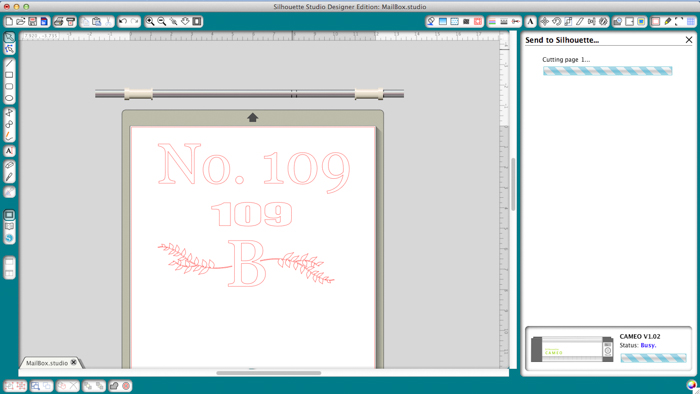
Open up the Silhouette Studio Designer Edition software. Click the text button on the left, choose font and type house numbers and a monogram design. Size to fit flat mailbox surface.

DIY mailbox vinyl decals tutorial at diyshowoff

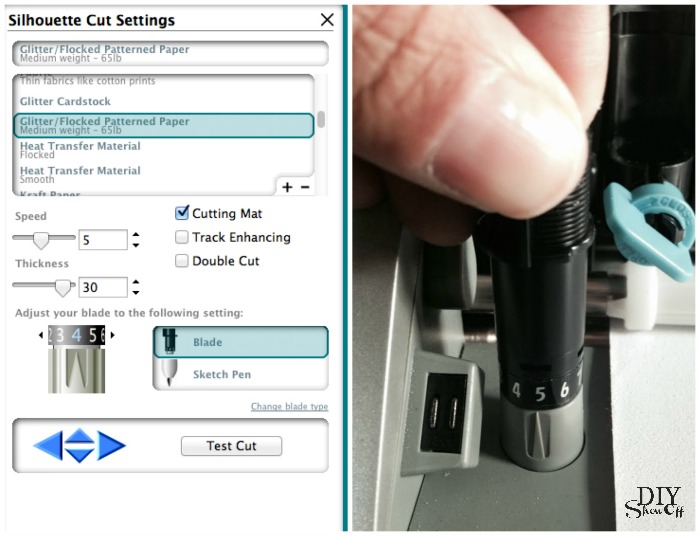
Click the “cut” button on the navigation bar. Choose “vinyl” and adjust blade settings. Insert vinyl color side up into the machine and click “cut”. 

DIY mailbox vinyl decals tutorial at diyshowoffDIY mailbox vinyl decals tutorial at diyshowoff

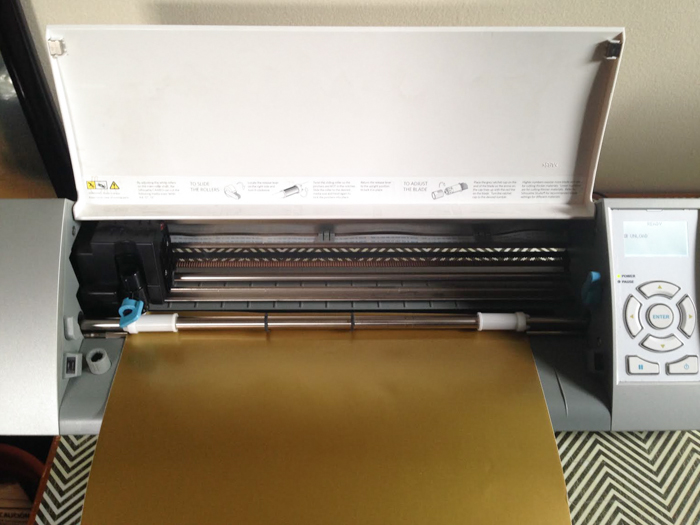
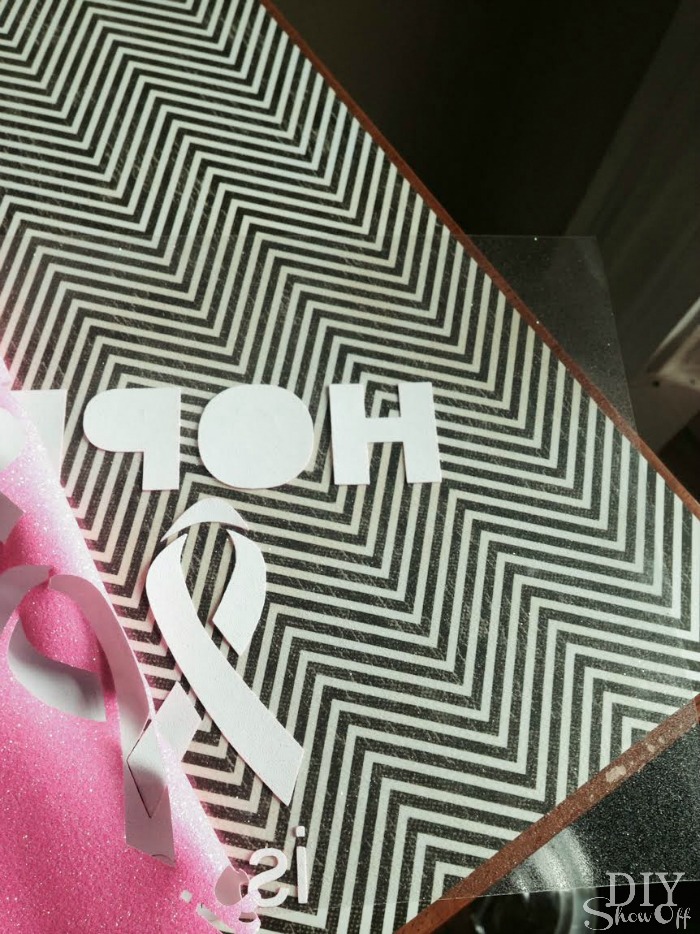
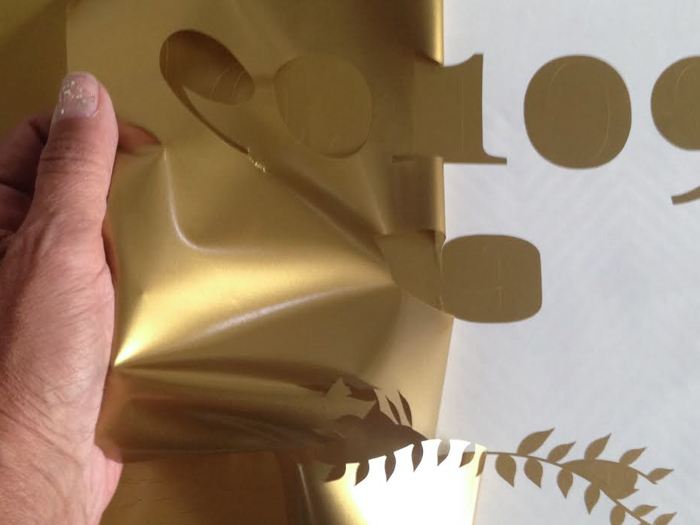
Remove vinyl from machine and weed away excess vinyl. 

DIY mailbox vinyl decals tutorial at diyshowoffDIY mailbox vinyl decals tutorial at diyshowoff

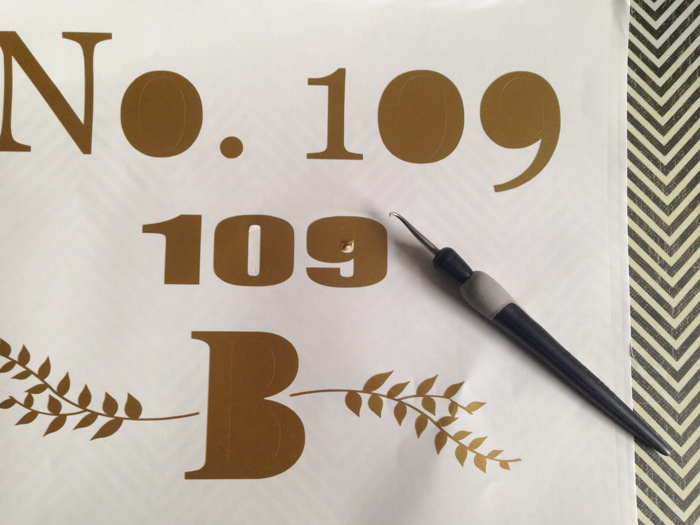
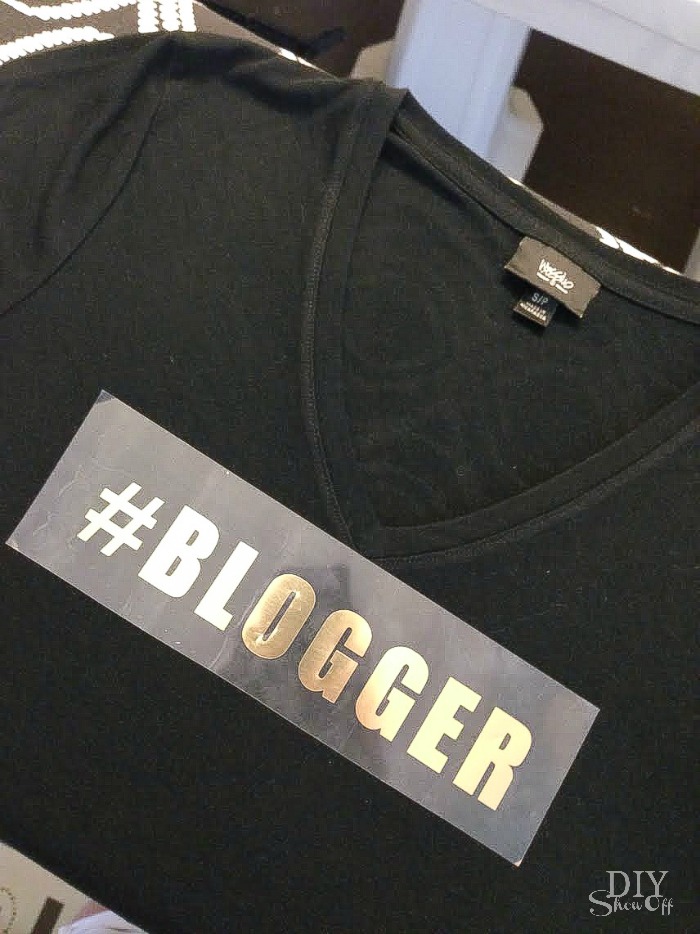
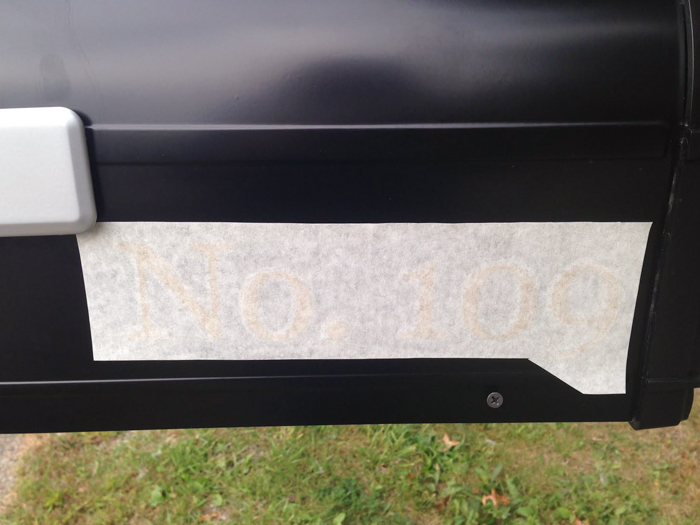
Apply a piece of transfer paper and cut apart individual designs. I have three. Numbers for the front of the mailbox, a monogram design and numbers for the side. 

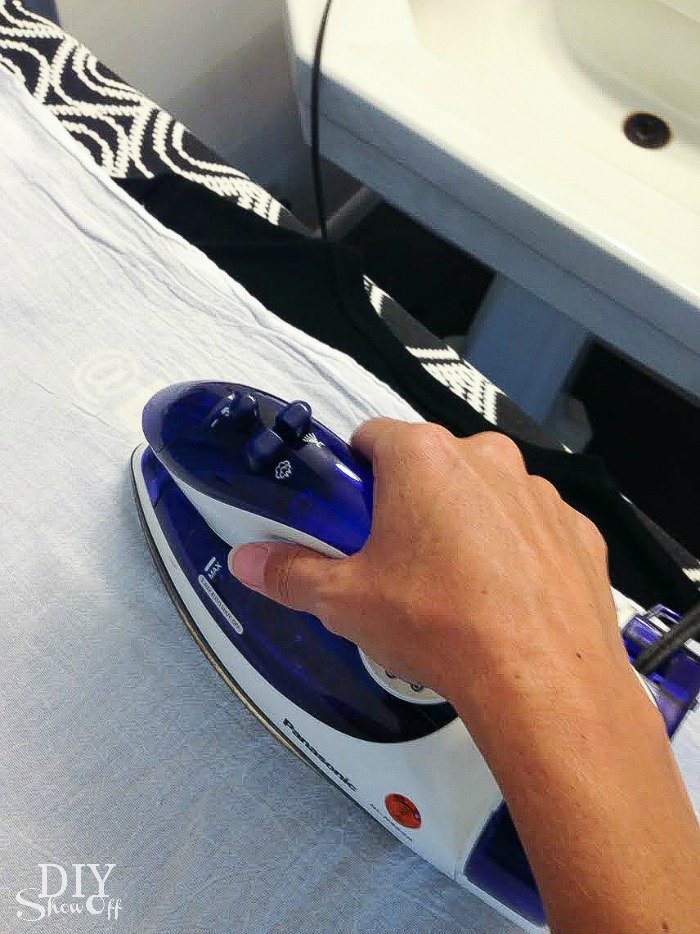
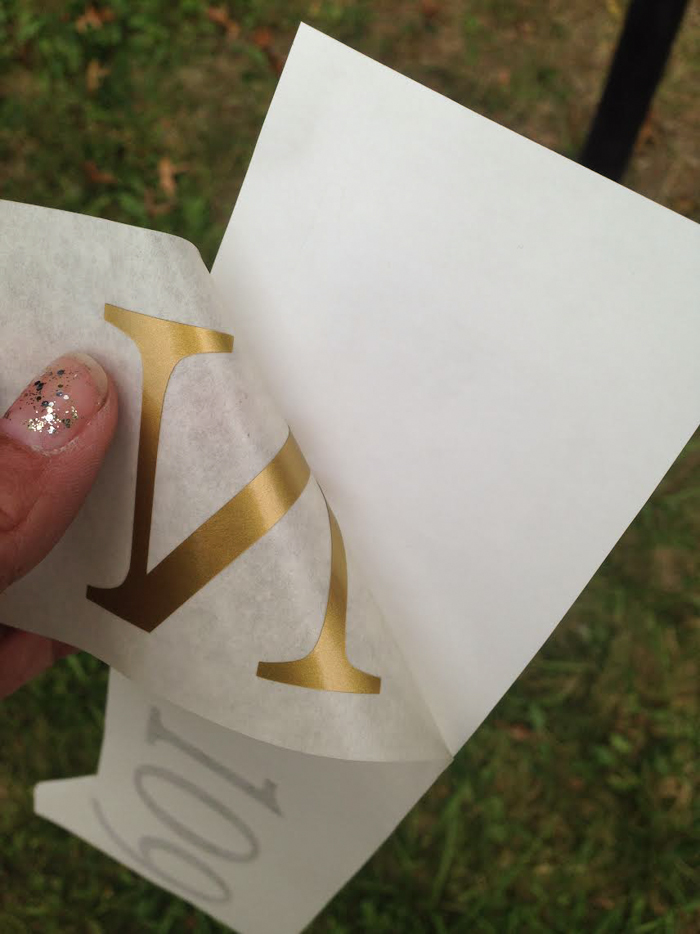
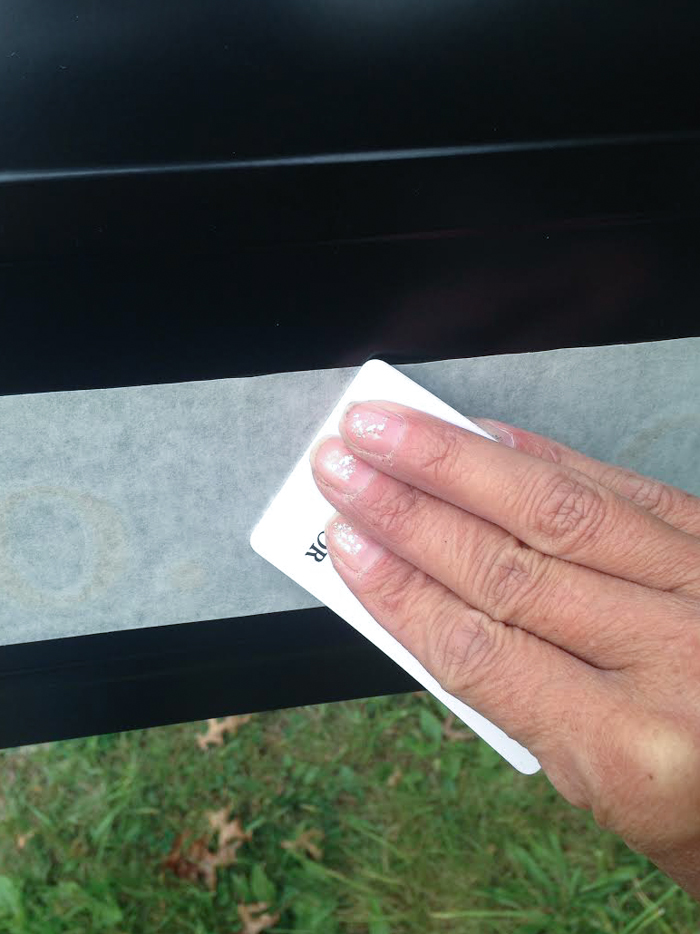
Rub with a credit/gift card to ‘transfer’ the vinyl decals from wax paper to transfer paper. 

DIY mailbox vinyl decals tutorial at diyshowoff

Peel away transfer paper (vinyl decals should be stuck to tacky transfer paper). 

DIY mailbox vinyl decals tutorial at diyshowoff

Place onto clean, dry, flat surface of mailbox. 

DIY mailbox vinyl decals tutorial at diyshowoff

Rub with credit/gift card to transfer design. 

DIY mailbox vinyl decals tutorial at diyshowoff

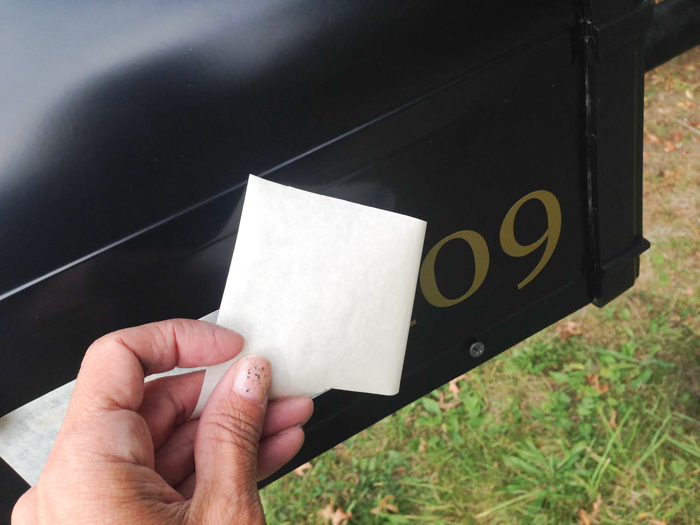
Peel away transfer paper. 

DIY mailbox vinyl decals tutorial at diyshowoff

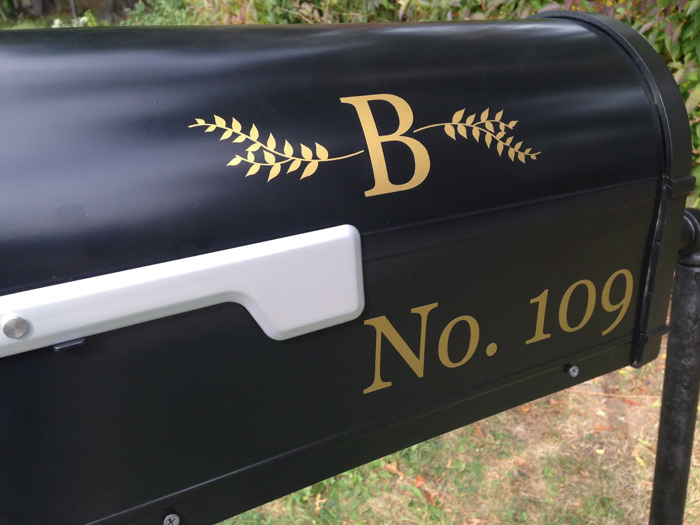
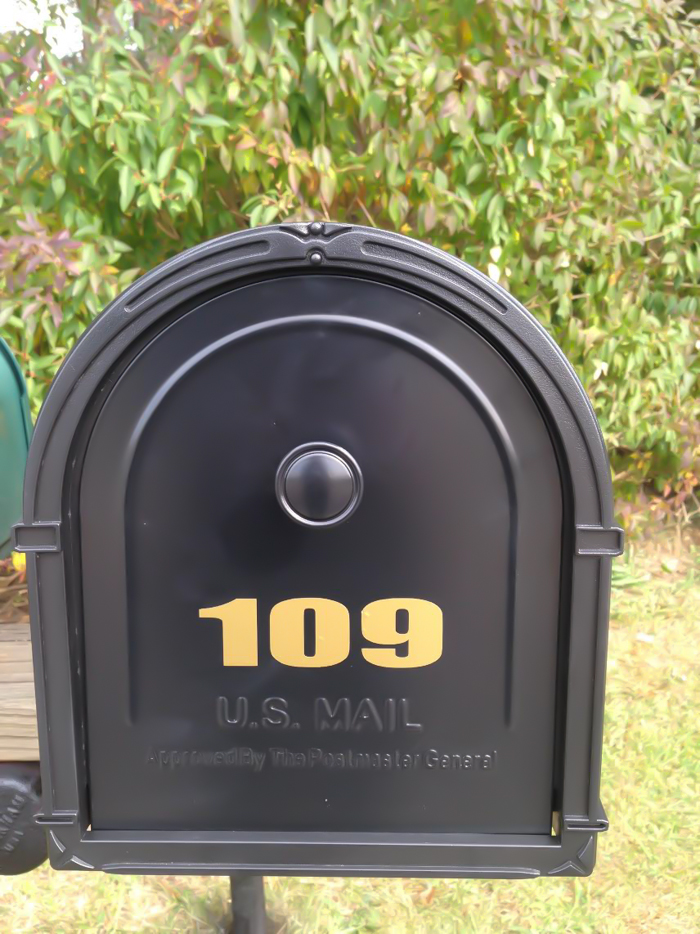
Ta-da! Pretty new address decals for the new mailbox.

DIY mailbox vinyl decals tutorial at diyshowoff DIY mailbox vinyl decals tutorial at diyshowoff DIY mailbox vinyl decals tutorial at diyshowoff

*This post is sponsored by Happy Crafters. Tutorial, experience and opinion is my own.  Check out all the supplies at Happy Crafters for inspiration for your next project. 

HClogopngsmall

DIY Metallic Iron On Decal Tutorial

DIY metallic iron on decal tutorial @diyshowoff

I know, I know. I just shared a t-shirt tutorial a few weeks ago that I created for my sister but making up your own personalized iron on decals is so fun! Recently my blog buddy Julia from Cuckoo 4 Design (love her!) shared on her FB page the coolest t-shirt. It read “#BLOGGER”, however it’s only available in Germany so thinking along the lines of DIY (as usual), I decided to make my own for my August Happy Crafters project. They have a great selection of metallic iron on vinyl that I couldn’t wait to use.

DIY metallic iron on decal tutorial @diyshowoff

Materials:

What I did:

Open up your Silhouette Studio Design Edition software and create the text “#BLOGGER” for the front of the shirt. I also added “@DIYSHOWOFF” for the back of mine. Center on a 12×12 space. 

metallic gold #blogger vinyl decal tutorial @diyshowoff #happycrafters

Right click the text box to bring up the edit menu and select “flip horizontally”. You’ll need to mirror the text for cutting. 

metallic gold #blogger vinyl decal tutorial @diyshowoff #happycraftersmetallic gold #blogger vinyl decal tutorial @diyshowoff #happycrafters

Load the iron on vinyl into the machine gold side down (back side up). 

metallic gold #blogger vinyl decal tutorial @diyshowoff #happycrafters

Adjust blade setting for heat transfer and send to cut. 

metallic gold #blogger vinyl decal tutorial @diyshowoff #happycrafters

Unload from the machine and weed away excess vinyl. The silver/gold side will peel away from a tacky transparent side (your text will be stuck backwards to the tacky side). 

metallic gold #blogger vinyl decal tutorial @diyshowoff #happycrafters

Smooth out the shirt onto an ironing board. Place iron on vinyl decal tacky side down in the spot where you’d like it to show on the front of the shirt. 

metallic gold #blogger vinyl decal tutorial @diyshowoff #happycrafters

Cover the decal with a cotton dish towel (or scrap fabric). Iron on high adding pressure according to the instructions provided with the Happy Crafters iron on vinyl. 

metallic gold #blogger vinyl decal tutorial @diyshowoff #happycrafters

Slowly peel away the transparency. If you notice that the vinyl hasn’t adhered, replace transparency and iron again applying more pressure. 

metallic gold #blogger vinyl decal tutorial @diyshowoff #happycrafters

Once transparency is removed, I replaced my cotton dish towel and ironed the lettering flat. 

metallic gold #blogger vinyl decal tutorial @diyshowoff #happycrafters

Repeat the same steps for adhering the iron on vinyl decal to the back you may want to slide a piece of cardboard inside of the shirt first to prevent re-heating the front iron-on decal. 

metallic gold #blogger vinyl decal tutorial @diyshowoff #happycrafters

That’s it. I may have ironed mine on too high a temp so I have a sort of distressed look to my decal … which I love! So you may want to do a practice run/test to get it just right if you’re not a fan of the distressed lettering. Good luck! 

metallic gold #blogger vinyl decal tutorial @diyshowoff #happycrafters

And…it coordinates with my black and gold polka dotted iPhone case. #stylish haha!

metallic gold #blogger vinyl decal tutorial @diyshowoff #happycraftersmetallic gold #blogger vinyl decal tutorial @diyshowoff #happycrafters

What hashtag would you choose for your shirt? 

*This post is sponsored by Happy Crafters. Tutorial, experience and opinion is my own.  Check out all the supplies at Happy Crafters for inspiration for your next project. 

HClogopngsmall


Glitter Iron On Vinyl Decal Tutorial

Many of you have asked how my sister is doing and guess what? She’s finally completely “all done” with her treatments! Hurray! Confetti & champagne! My hero! And my hero’s superpower is “hope”…

DIY glitter iron-on decal tutorial at diyshowoff…and like most heroic milestones, it’s an occasion for a celebration, right?! Right! Well, that’ll be coming up in just a few weeks when we celebrate her birthday with a super-hero themed “Bobbi-fest” but in the meantime, I whipped up a cute breast cancer survivor shirt. 

What I used:

What I did:

1. Using my Silhouette design studio software, I created a design using text and a breast cancer ribbon, keeping the overall size in mind for a good fit on the shirt. 

pink glitter iron on - hope is my superpower breast cancer shirt

2. Right click each part of the design and choose “flip horizontally” to mirror the text and image. 

pink glitter iron on - hope is my superpower breast cancer shirt pink glitter iron on - hope is my superpower breast cancer shirt

3. Load the vinyl shiny-side (pink glitter side) facing down into the vinyl cutting machine. 

pink glitter iron on - hope is my superpower breast cancer shirt

4. Choose glitter/flocked iron on adhesive from the drop down menu in the cut settings. Adjust blade settings. (Always do a test cut first to ensure the blade doesn’t cut too deep or too shallow.)

pink glitter iron on - hope is my superpower breast cancer shirt

5. Hit “cut”.

pink glitter iron on - hope is my superpower breast cancer shirt

6. When cutting is complete, remove from machine and peel away excess vinyl. Weed away the vinyl surrounding the design. 

pink glitter iron on - hope is my superpower breast cancer shirt

7. Following the iron on’s printed instructions, I laid out the shirt on an ironing board and smoothed out the wrinkles. Place vinyl onto shirt.

pink glitter iron on - hope is my superpower breast cancer shirt

pink glitter iron on - hope is my superpower breast cancer shirt

8. Cover with a cotton dish towel or cotton fabric and iron, applying pressure 25-30 seconds and then moving to the next spot on the design and repeating. I used the highest setting on my iron (no steam).

pink glitter iron on - hope is my superpower breast cancer shirt

9. Slowly peel away the transparency. (If letters peel away too, repeating step 8, applying more pressure/holding a few seconds longer.)

pink glitter iron on - hope is my superpower breast cancer shirt

Ta-da!

Hope is my super power breast cancer iron on decal tutorial

Despite nausea and having tests done the same day, she agreed to model my handiwork. Isn’t she beautiful? {I love how despite not feeling 100%, she smiles. And how her hair is growing back with curls!}

breast cancer (hope is my superpower) - Bobbi at diyshowoff.com

Now that the treatment is behind her, she’s free to focus on recovering, building up strength and feeling better every single day. Thanks for your prayers! xoxo

Glitter is so difficult to photograph. It’s a more uniform and sparkly than shown above. 

hope is my super power


party pink bling glitter iron on vinyl

*This post is sponsored by Happy Crafters. Tutorial, experience and opinion is my own.  Check out all the supplies at Happy Crafters for inspiration for your next project. 

HClogopngsmall