






DIY Keepsake Mother’s Day Gift

Mother’s Day is near and this project will be for celebrating my daughter who’s now a mom too. I couldn’t resist scooping up this opportunity to get creative and practice a little DIY influence on the littlest one in our family by making up a DIY keepsake Mother’s Day gift.
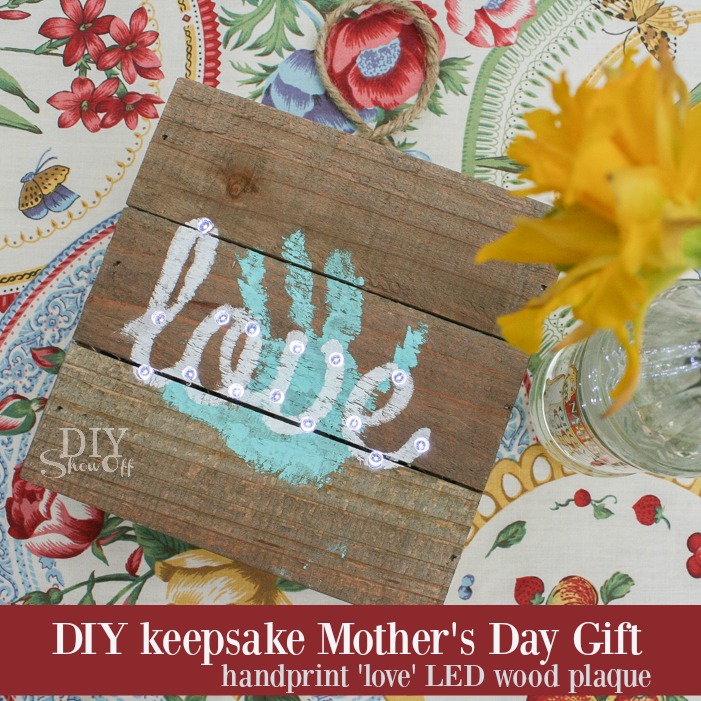
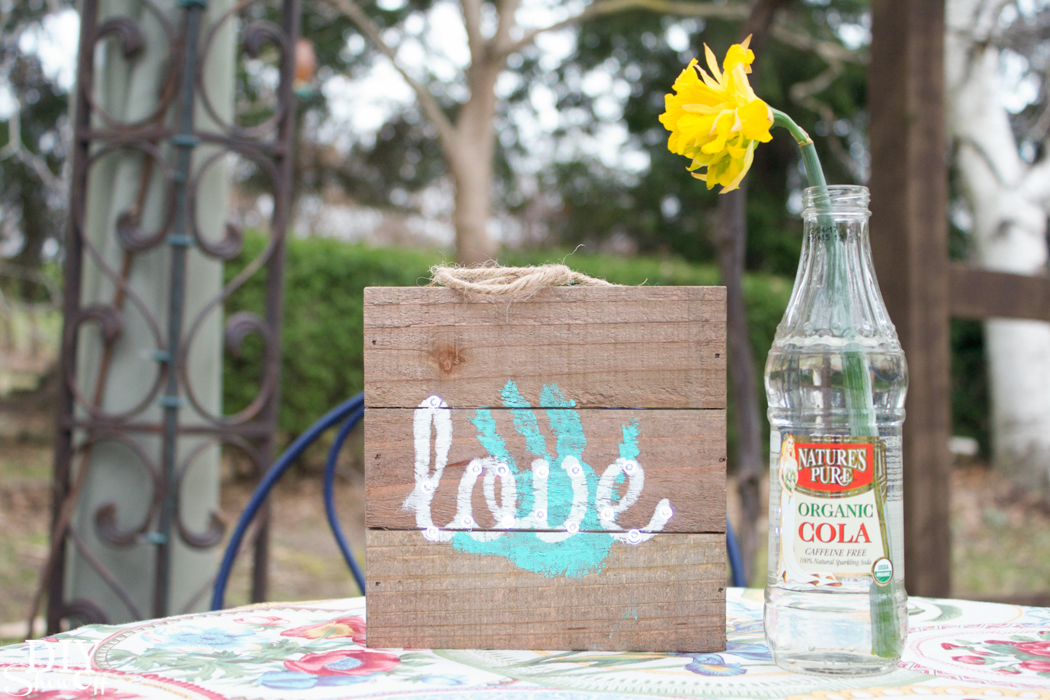
Awe! A cute DIY keepsake handprint Mother's Day gift (LED 'love' wood plaque) tutorial @diyshowoff #michaelsmakersAwe! A cute DIY keepsake handprint Mother's Day gift (LED 'love' wood plaque) tutorial @diyshowoff #michaelsmakers

Shop the Project:

(Some affiliate links included)

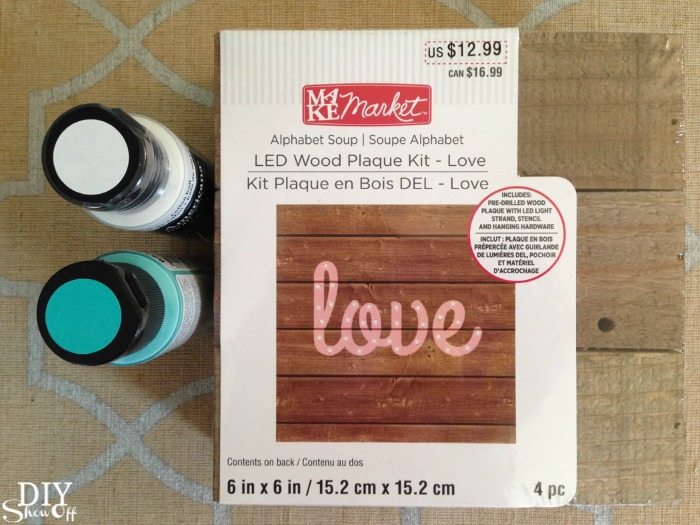
  • MAKE Market LED wood plaque kit – LOVE (Alphabet Soup Collection) available at Michaels’ Craft Store
  • 2 colors of paint and 2 foam brushes (or sponges)
  • painter’s tape

Awe! A cute DIY keepsake handprint Mother's Day gift (LED 'love' wood plaque) tutorial @diyshowoff #michaelsmakers

Time we invested: Less than an hour (+ paint drying time)

What we did:

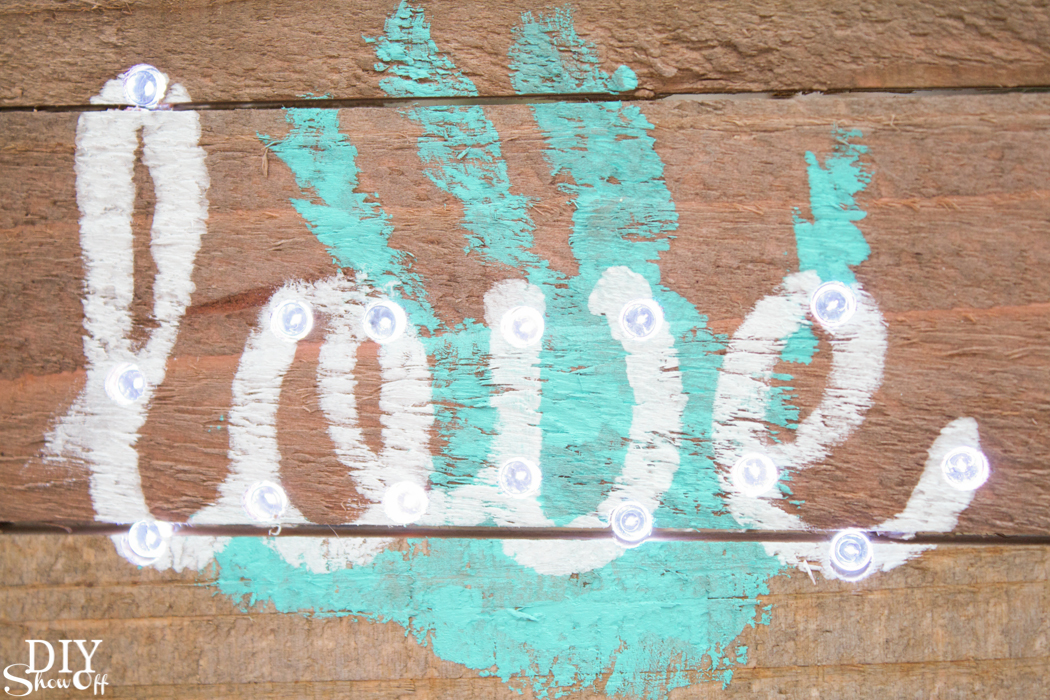
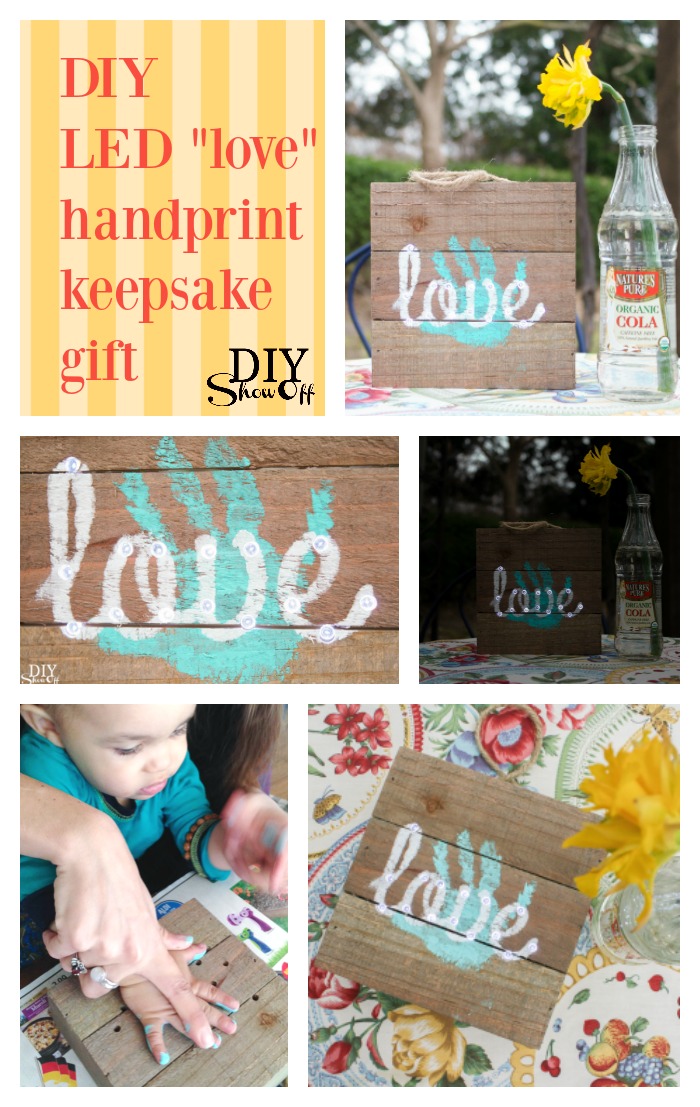
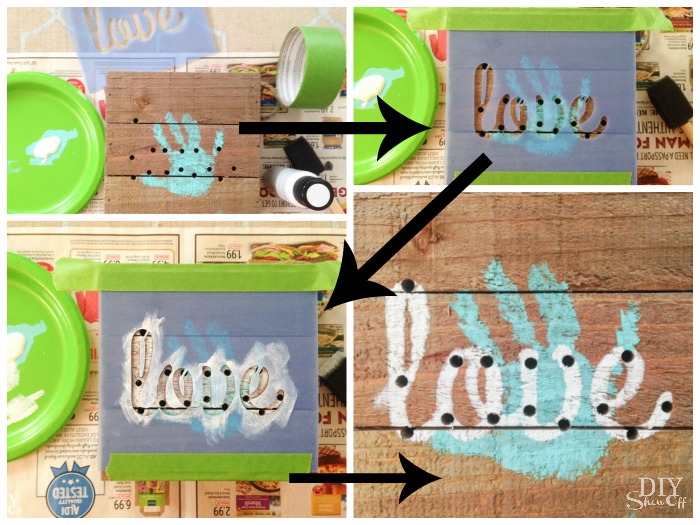
1. We protected our work surface and applied a thin coat of paint to his little hand then carefully pressed it to the wood plaque. We washed his hands immediately and let painted handprinted plaque dry. 
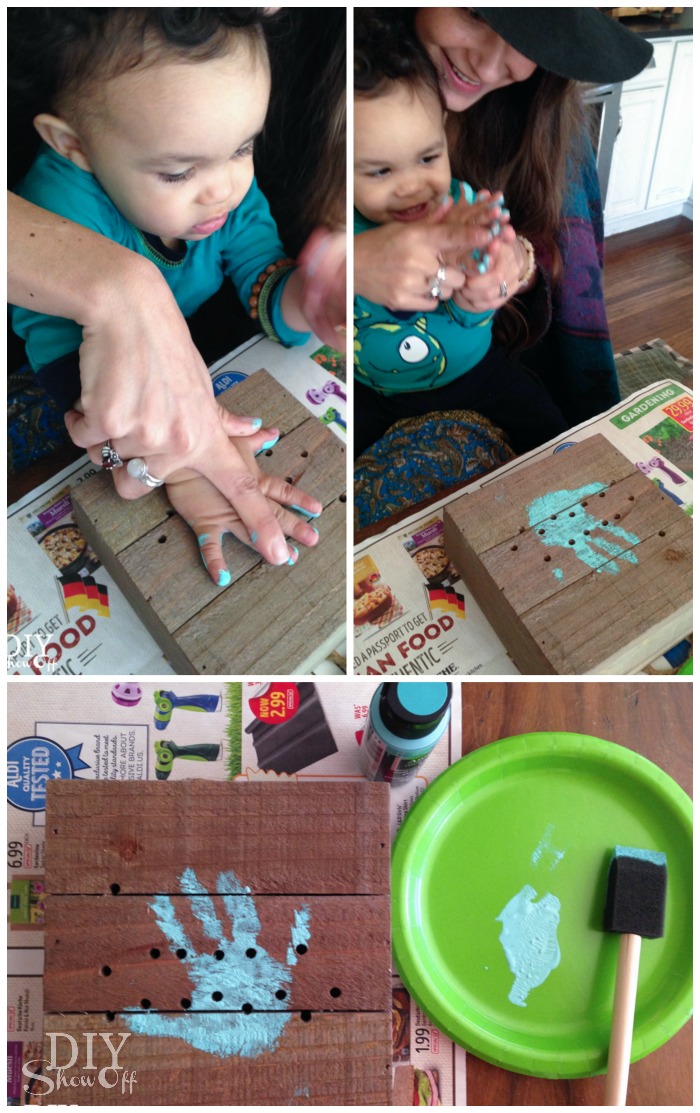
Awe! A cute DIY keepsake handprint Mother's Day gift (LED 'love' wood plaque) tutorial @diyshowoff #michaelsmakers

2. Using painter’s tape, we secured the stencil to the plank sign, lining up the word “love” so we could see the drilled holes in the empty stencil space. 
Awe! A cute DIY keepsake handprint Mother's Day gift (LED 'love' wood plaque) tutorial @diyshowoff #michaelsmakers

3. Next, with a foam brush we applied paint to the stencil (using a sponge technique using a little paint…don’t glop it on or it will seep under the stencil) to paint on the word “love”. We removed the stencil, filled in any spaces and let the paint dry. 

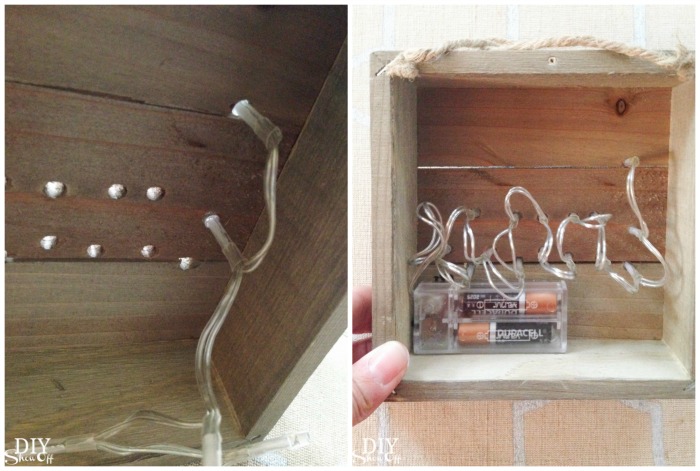
4. Last, we pushed the string of LED lights through the drilled holes from the back side and added 2 AA batteries. 
Awe! A cute DIY keepsake handprint Mother's Day gift (LED 'love' wood plaque) tutorial @diyshowoff #michaelsmakersAwe! A cute DIY keepsake handprint Mother's Day gift (LED 'love' wood plaque) tutorial @diyshowoff #michaelsmakers

5. The kit comes with hanging hardware and foam/felt for protecting the wall. Attach according to packaged instructions. 
Awe! A cute DIY keepsake handprint Mother's Day gift (LED 'love' wood plaque) tutorial @diyshowoff #michaelsmakers

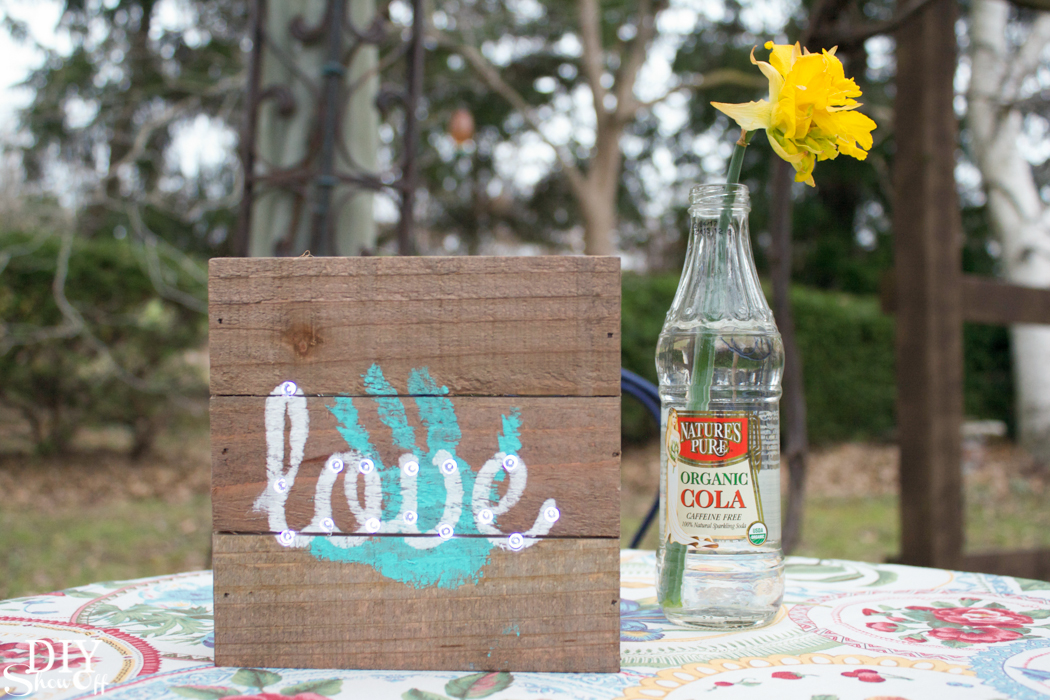
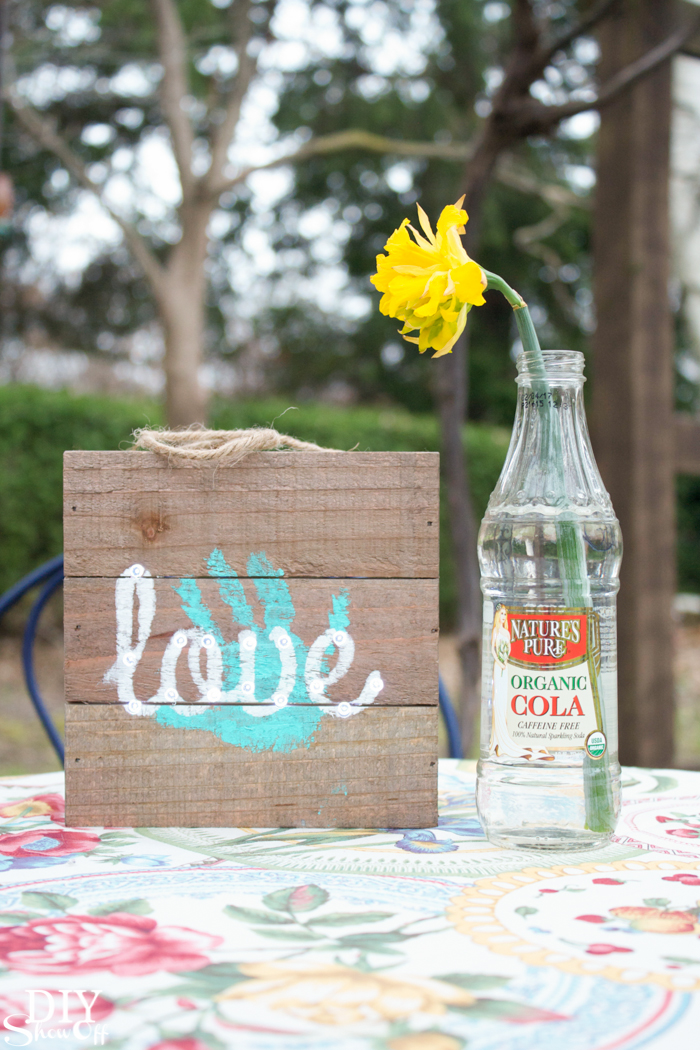
Very simple. Very cute. And a special keepsake from baby to mom. Display on a shelf or add to a gallery wall. So sweet! 

Awe! A cute DIY keepsake handprint Mother's Day gift (LED 'love' wood plaque) tutorial @diyshowoff #michaelsmakers

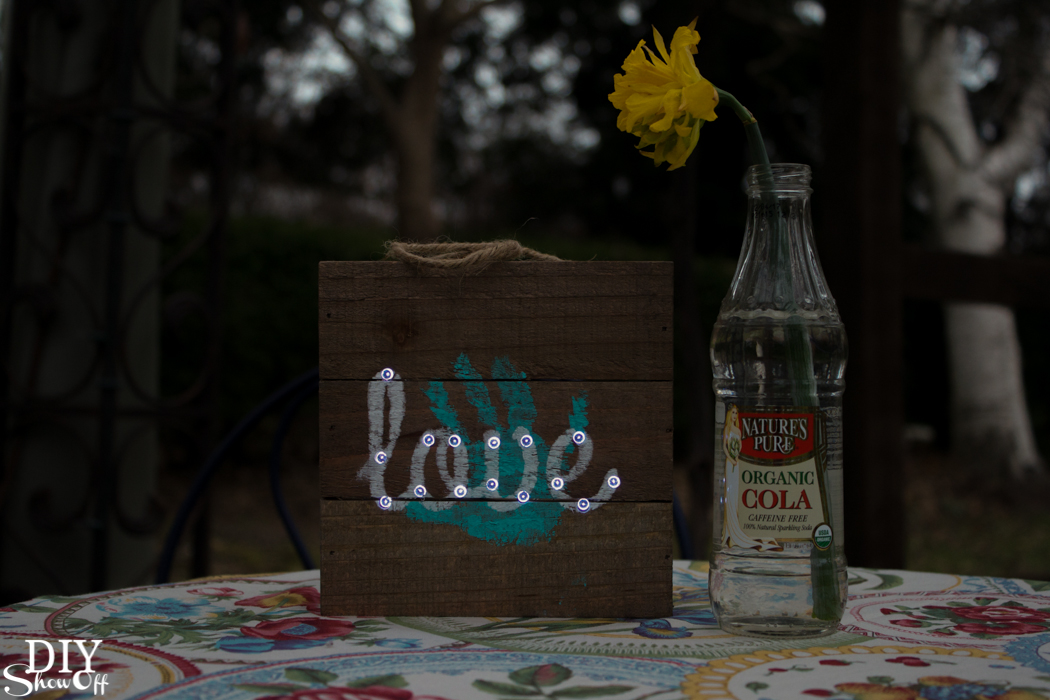
Those little LED lights provide a powerful glow in the dark!Awe! A cute DIY keepsake handprint Mother's Day gift (LED 'love' wood plaque) tutorial @diyshowoff #michaelsmakersAwe! A cute DIY keepsake handprint Mother's Day gift (LED 'love' wood plaque) tutorial @diyshowoff #michaelsmakers
mothers day challenge #michaelsmakers

Awe! A cute DIY keepsake handprint Mother's Day gift (LED 'love' wood plaque) tutorial @diyshowoff #michaelsmakers

Simple, Meaningful, and Easy to Give

If you’re:

  • tired of buying things that don’t last
  • wanting something more thoughtful (without making it complicated)
  • looking for a gift that actually brings loved ones closer

This is a beautiful place to start!

Wrap it. Pair it with a handwritten note. Or sit down and start it together. Shop Grand Moments.

Grand-Moments card with orange flowers and monarch butterfly

Create Moments That Matter
It’s not about recording the past. It’s about showing up with heart, faith, and joy in the present. No overthinking. No “doing it perfectly.” Just a starting point. Again, this isn’t a “grandma’s history or stories”, it’s a faith filled weekly reminder/pause to be intentional.

A Free Way to Get Started (If You Want to Try It First)

If you love the idea of creating more meaningful moments, but want something simple to start… I created a free printable you can use right away. It’s a gentle way to spark conversation, share stories, and spend a few intentional minutes together.

Download the free printable here.
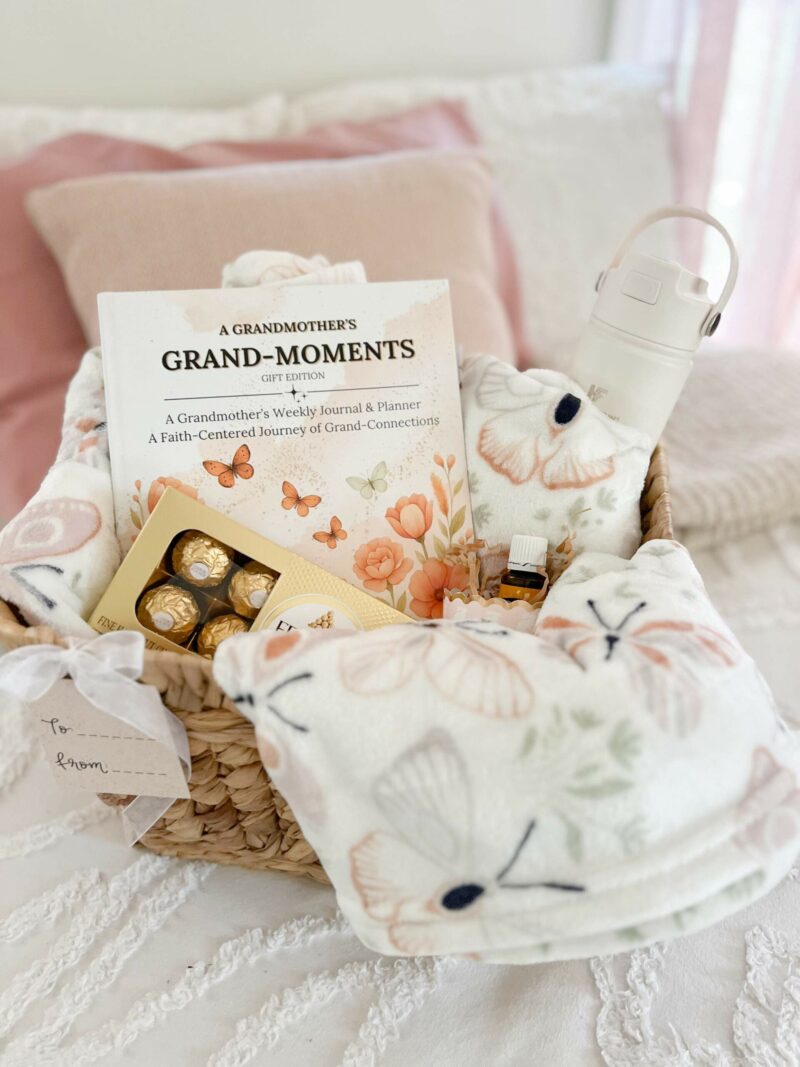
Gift basket with A Grandmother’s Grand-Moments journal, chocolates, essential oils, and a cozy blanket

Spring Succulent Arrangement Ideas to Refresh Your Home Decor

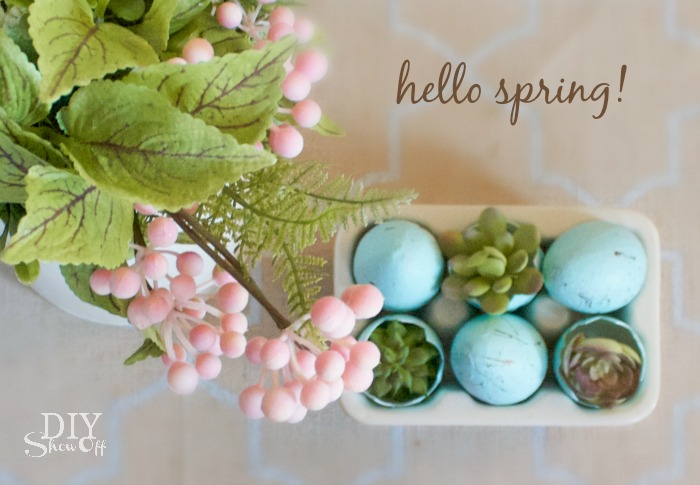
Spring is right around the corner (so they say) and I couldn’t be cheering any louder! BRING IT ON! …with a spring succulents arrangement!

Spring always makes me want to open the windows, let in fresh air, and bring a bit of new life into every room, even the smallest corner. One simple way to add seasonal charm is with a spring succulent arrangement, like these tiny succulents tucked into hand-painted robin’s egg shells that feel playful and bright. Whether you’re crafting for your dining table, shelf, or entryway, this project adds a touch of greenery and personality without a lot of fuss. Let’s walk through how to make yours and get a fresh seasonal look started.

After the gloom of winter, I’m ready for happy spring buds and bouquets and freshening up each room with some happiness and color. How about you?

Okay, on to the spring succulents arrangement tutorial and pretty decorative accents, eh?

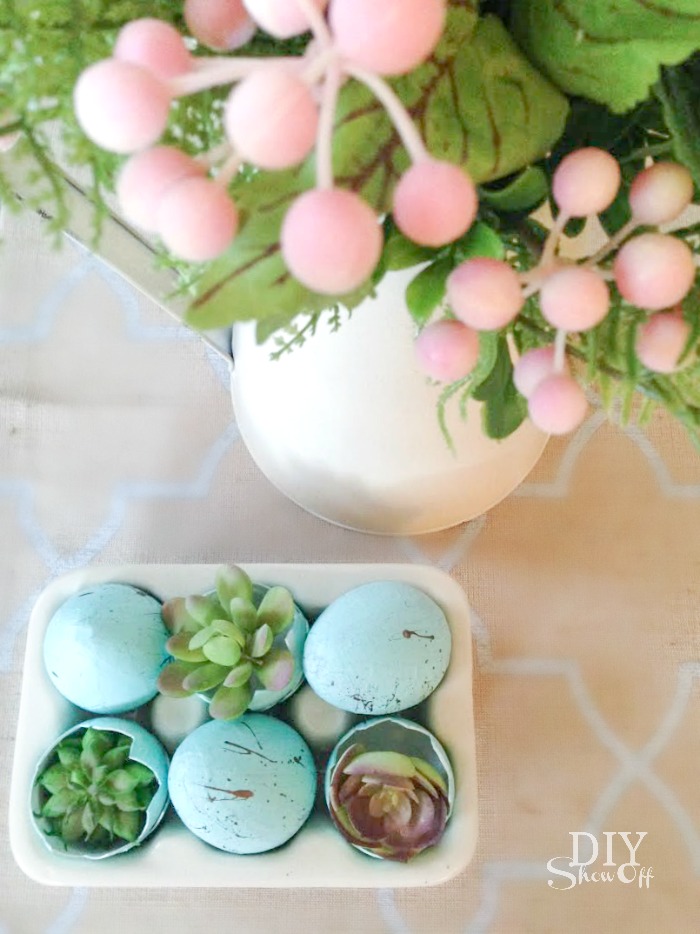
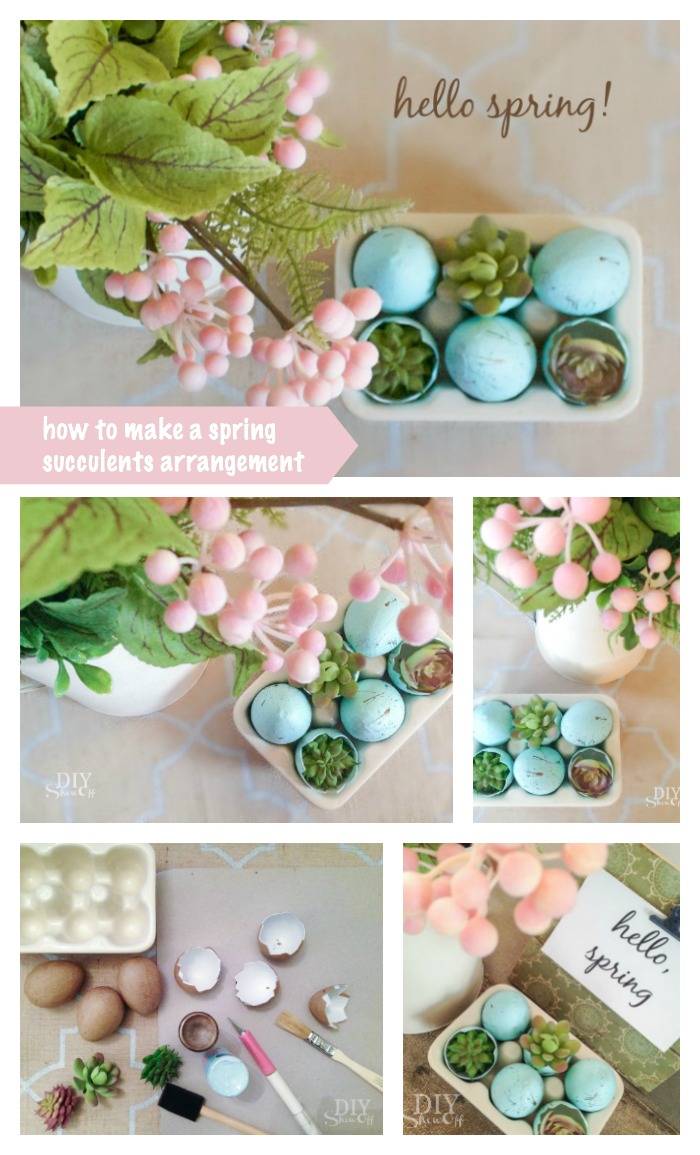
Freshen up your home with spring decor! DIY tutorial for spring succulents arrangement! #michaelsmaker

Succulent arrangements are a perfect spring decorating idea because they combine easy-to-style plant elements with seasonal color and texture. Unlike traditional spring flowers, succulents require minimal care and stay beautiful year-round with just bright light and light watering, making them ideal for apartment spaces, home offices, or gifts. Mixing succulents of different shapes, sizes, and tones can create a balanced and eye-catching display that fits anywhere from a dining table centerpiece to a cozy mantel vignette. That said, I opted for the no-maintenance faux succulents. 

spring succulents arrangement

(or succulent robin’s eggs and no, that’s not a recipe for breakfast)

Freshen up your home with spring decor! DIY tutorial for spring succulents arrangement! #michaelsmaker

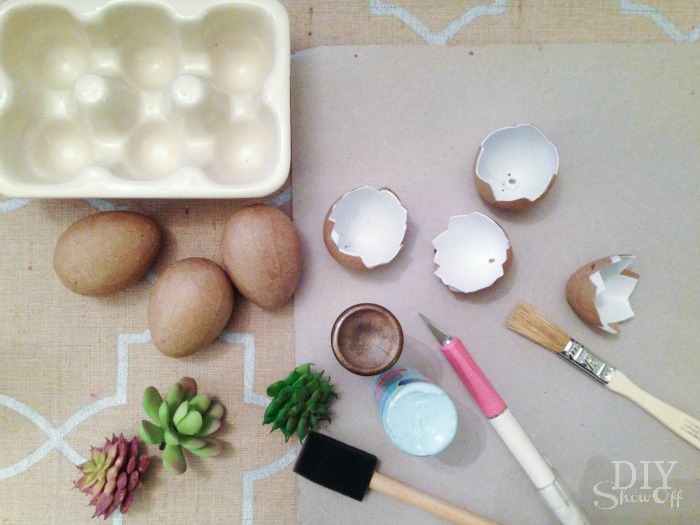
What I used:

  • paper mache´eggs
  • acrylic craft paint (robin’s egg blue and something dark like espresso brown)
  • paint brushes (one with short bristles)
  • X-acto knife/utility knife
  • faux mini-succulents
  • optional: hot glue
  • decorative accessories: ceramic egg crate, pitcher/vase, your choice of gorgeous blooms from the floral dept.

What I did:

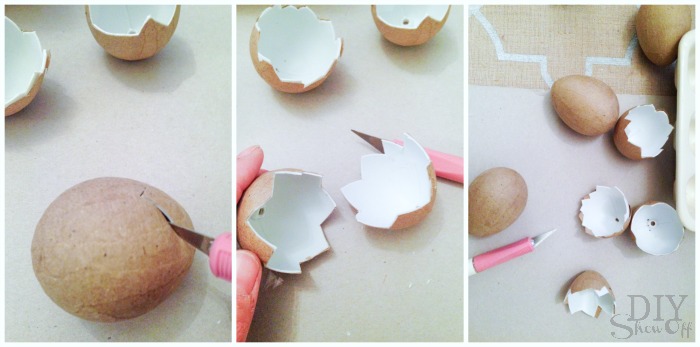
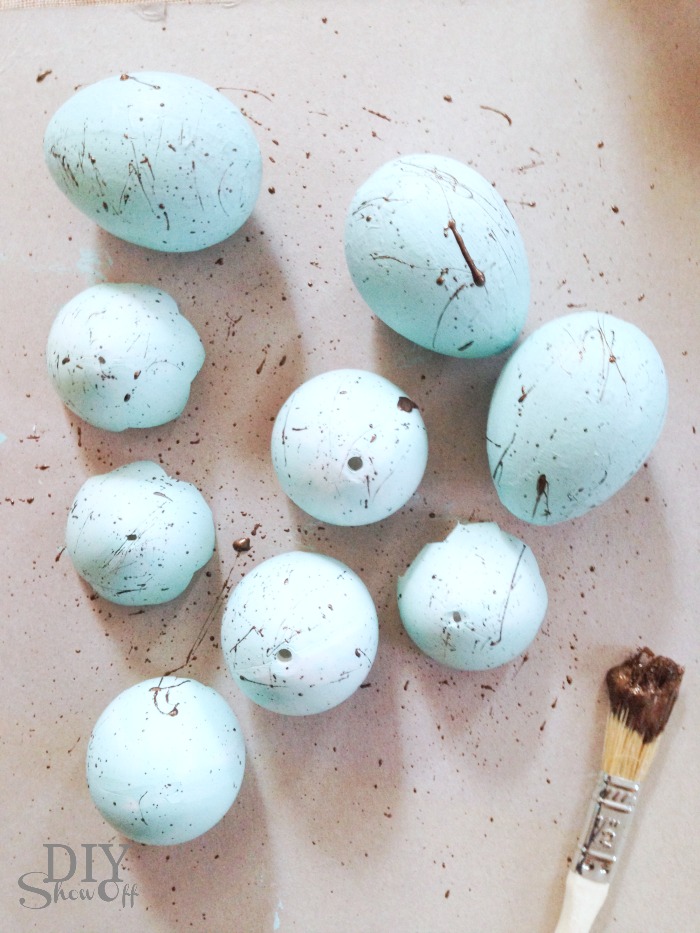
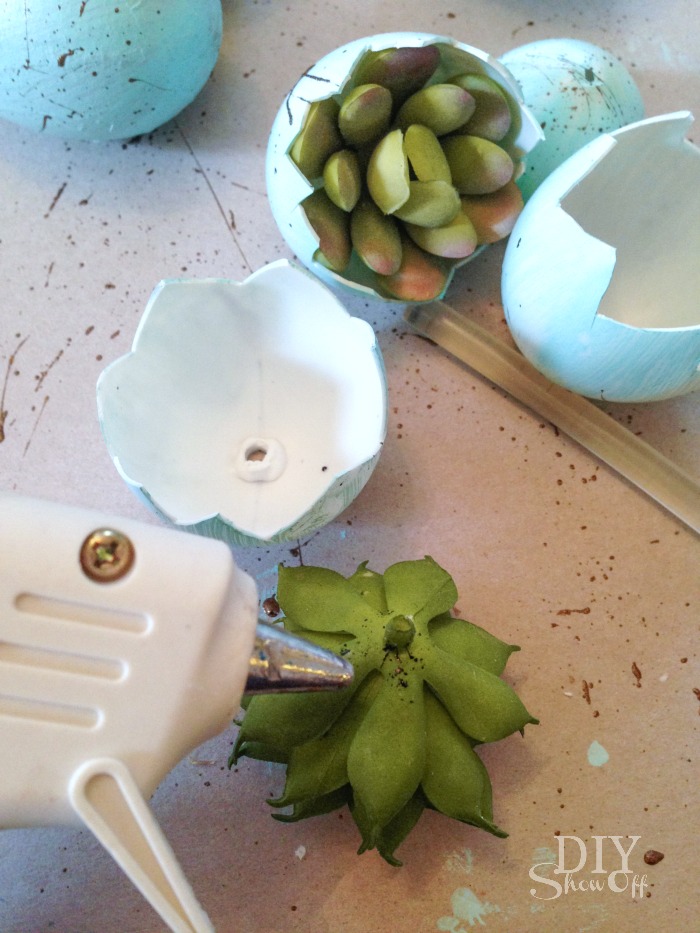
I ‘cracked’ my paper mache´ eggs using an X-acto knife, cutting them in half with a zigzag pattern. 

Freshen up your home with spring decor! DIY tutorial for spring succulents arrangement! #michaelsmaker

I pulled them apart. If the paper pulls away, great! If it stays attached, great! Go with the flow. Mine pulled off. I used the plastic layer instead.

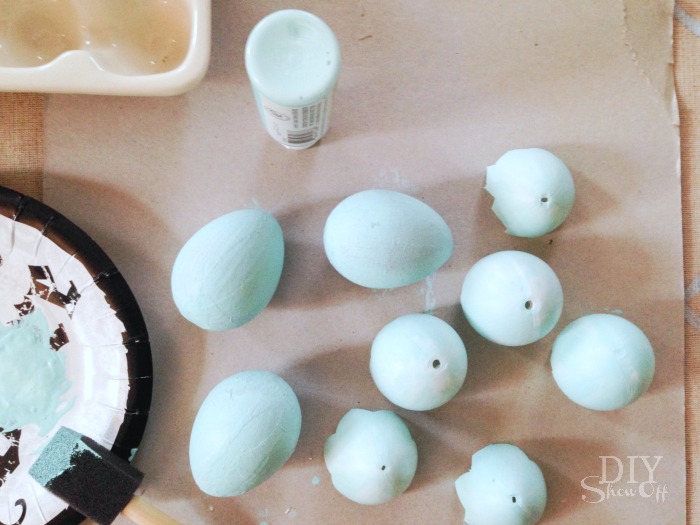
Color the outside of the eggshells with paint and let dry. 

Freshen up your home with spring decor! DIY tutorial for spring succulents arrangement! #michaelsmaker

This next step is messy. Apply dark paint to a short bristled paint brush. Using your finger to fan the bristles, splatter dark paint onto the outside of the eggshells. My brush had longer bristles, so I got more of a 1980’s splattered paint look but it’s okay! And again, you’ll make a mess. Brown paint isn’t pretty under your fingernails either. But it does wash off. Let paint speckles/splatters dry.

Freshen up your home with spring decor! DIY tutorial for spring succulents arrangement! #michaelsmaker

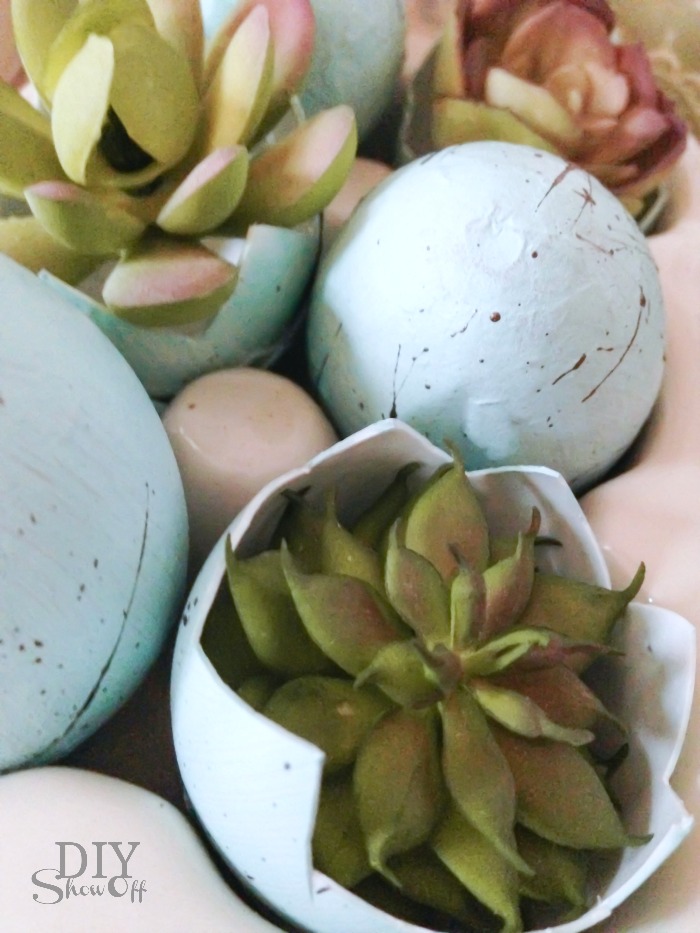
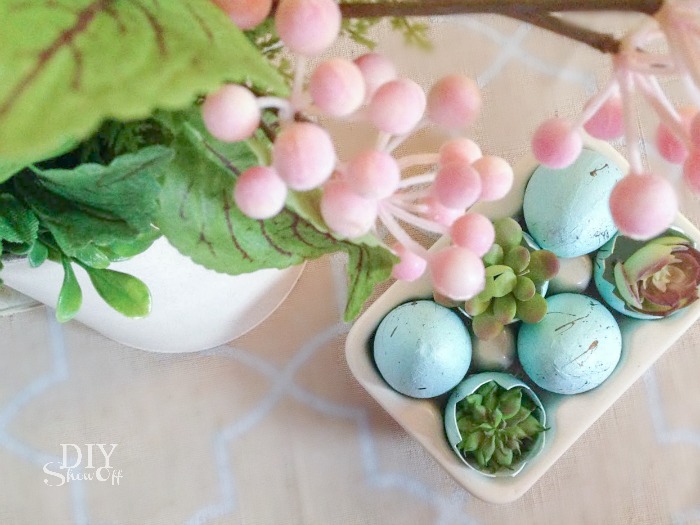
Then fill eggshells with succulents. Hot glue if desired. Place into the pretty ceramic egg crate or a nest. Tuck them in floral arrangements. Decorate for spring! So cute! 

Freshen up your home with spring decor! DIY tutorial for spring succulents arrangement! #michaelsmaker

Awe, look…newly hatched spring succulents! So proud!

Freshen up your home with spring decor! DIY tutorial for spring succulents arrangement! #michaelsmaker

Are you ready for spring? Time to freshen up your decor with spring florals and some new decorative accents! 

Freshen up your home with spring decor! DIY tutorial for spring succulents arrangement! #michaelsmakerFreshen up your home with spring decor! DIY tutorial for spring succulents arrangement! #michaelsmaker

Looking for more inspiration? Visit Michaels’ new Floral Market! It has over 500 new blooms (FIVE HUNDRED!) and freshly picked projects make this the prettiest spring ever! Swap out a few decor pieces, add a lovely floral arrangement. Completely transform your home for the fresh, new season.

Freshen up your home with spring decor! DIY tutorial for spring succulents arrangement! #michaelsmaker

Bonus Tip: Where to Style Your Spring Succulents


These little arrangements are perfect for a spring tablescape, a kitchen windowsill, a guest bathroom shelf, or tucked into a tray vignette. Grouping three together at varying heights creates an effortless seasonal focal point.

Looking for more spring DIY inspiration? Check out this DIY Spring decor round up. 

Personalized Magnetic Artwork Display


The Michaels’ Makers’ February challenge has an “express yourself” theme with a campaign called Made by Me, A to Z and it’s all about personalization, showcasing projects that take raw materials and transform them into something that’s completely personalized. The new Make Market line includes materials  from galvanized metal to distressed wood, acrylic, fabric and chalkboard! Something for everyone … or even everything for someone. There’s so crafting goodness to choose from, it’s hard to decide!

personalization challenge #michaelsmakers 


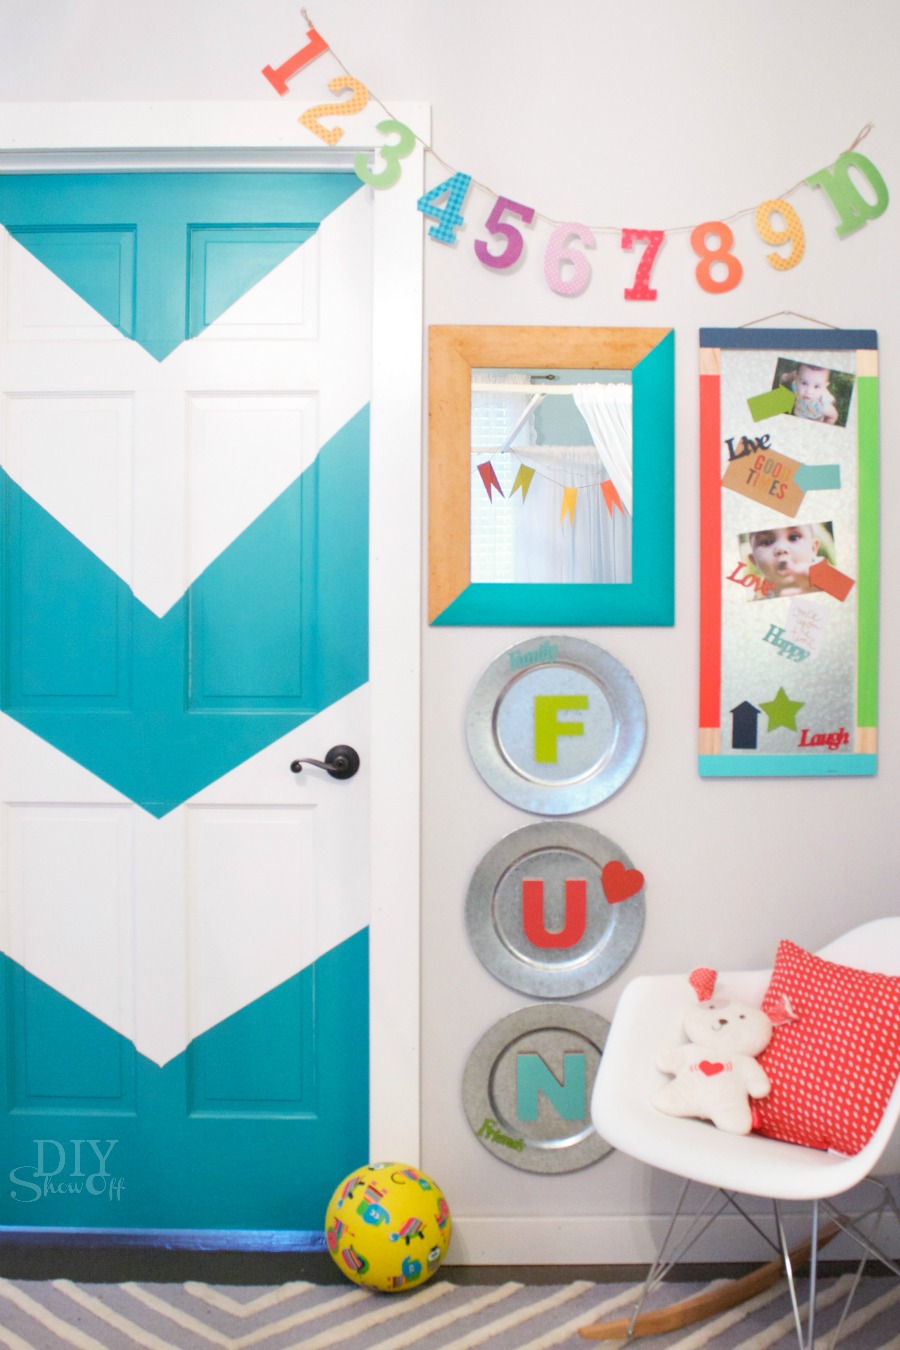
I treasure little one’s creations, artwork and photos so I decided to personalize a space in the nursery for displaying his art work and photos. 

magnetic art display #michaelsmakers @diyshowoff

Here’s what I snagged from the Alphabet Soup collection in the Make Market aisle at Michaels:

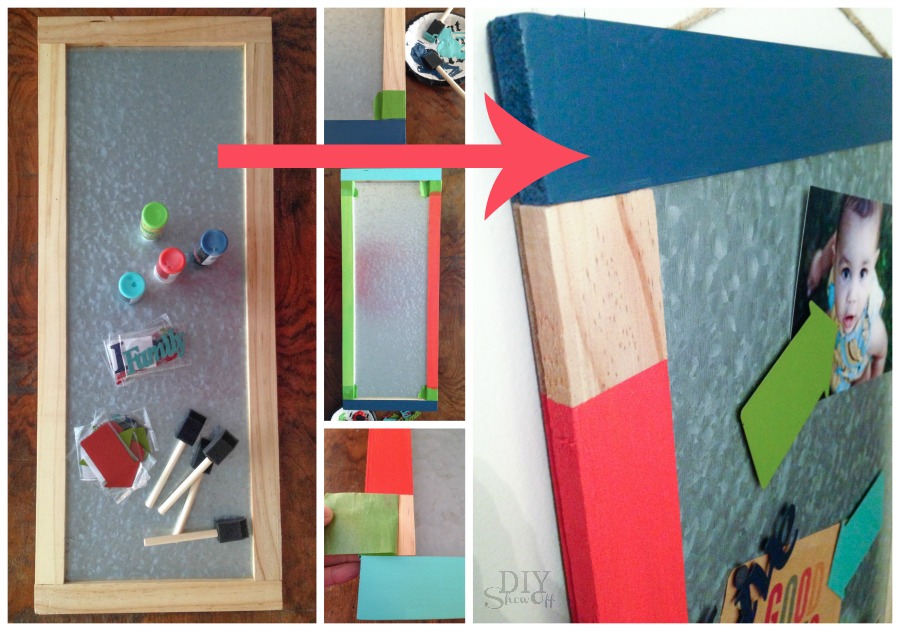
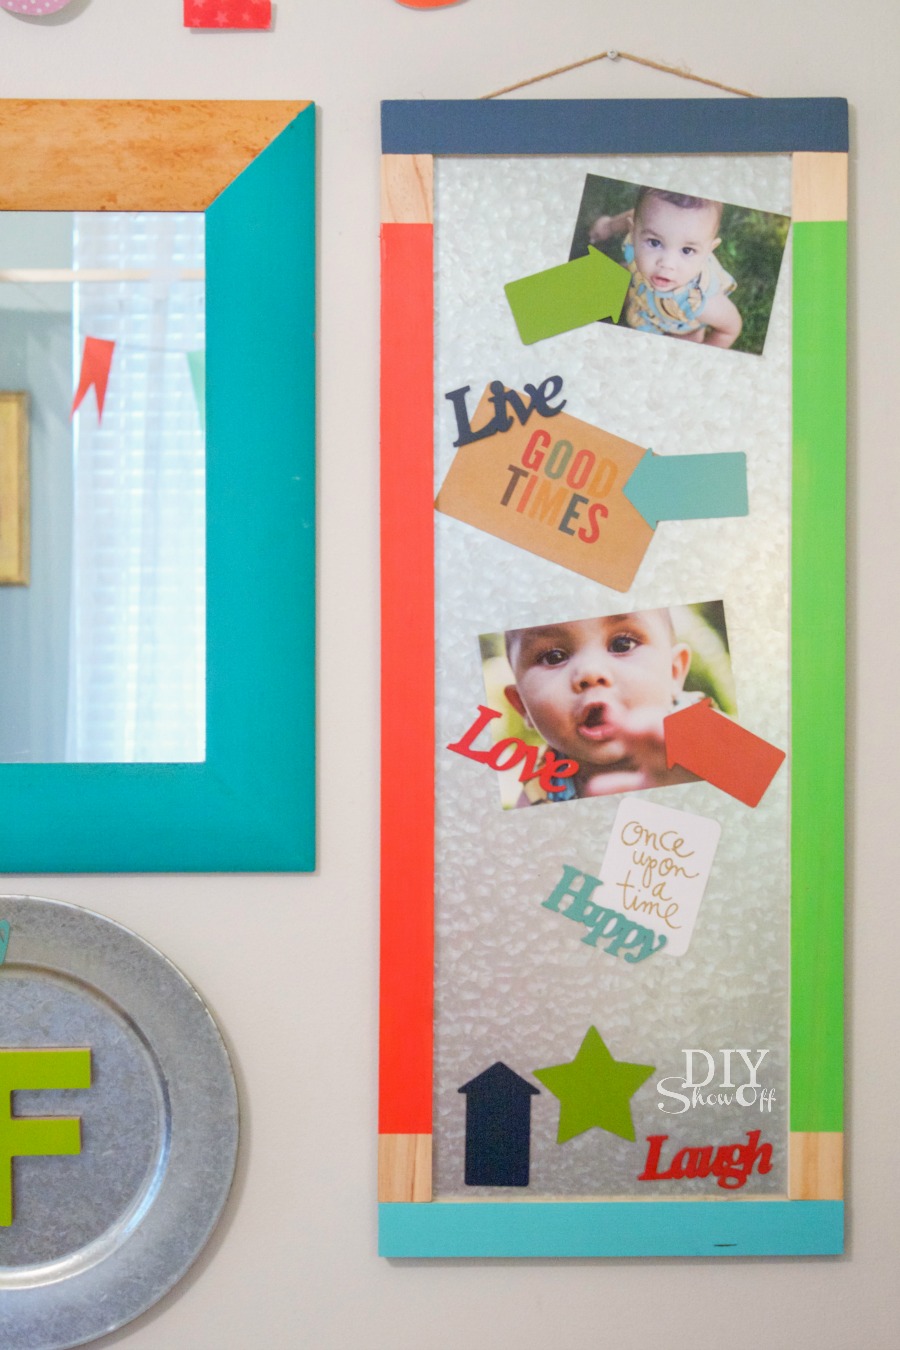
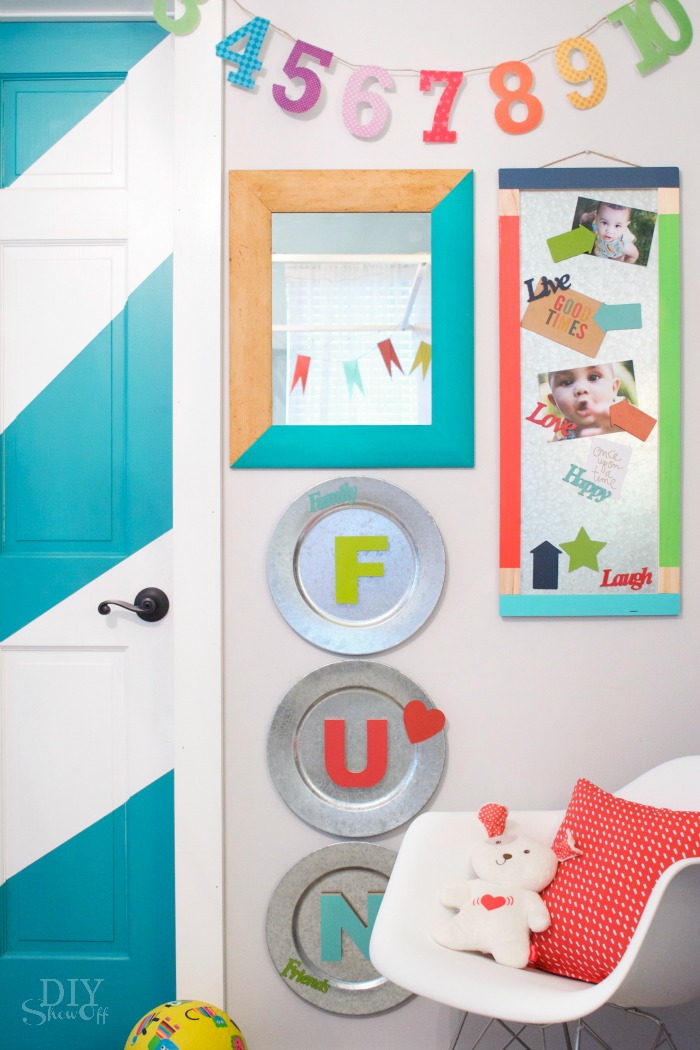
I personalized a galvanized magnetic memo board with vibrant paint colors to match the nursery decor…

magnetic art display #michaelsmakers @diyshowoff

the magnets are so cute!

magnetic art display #michaelsmakers @diyshowoff

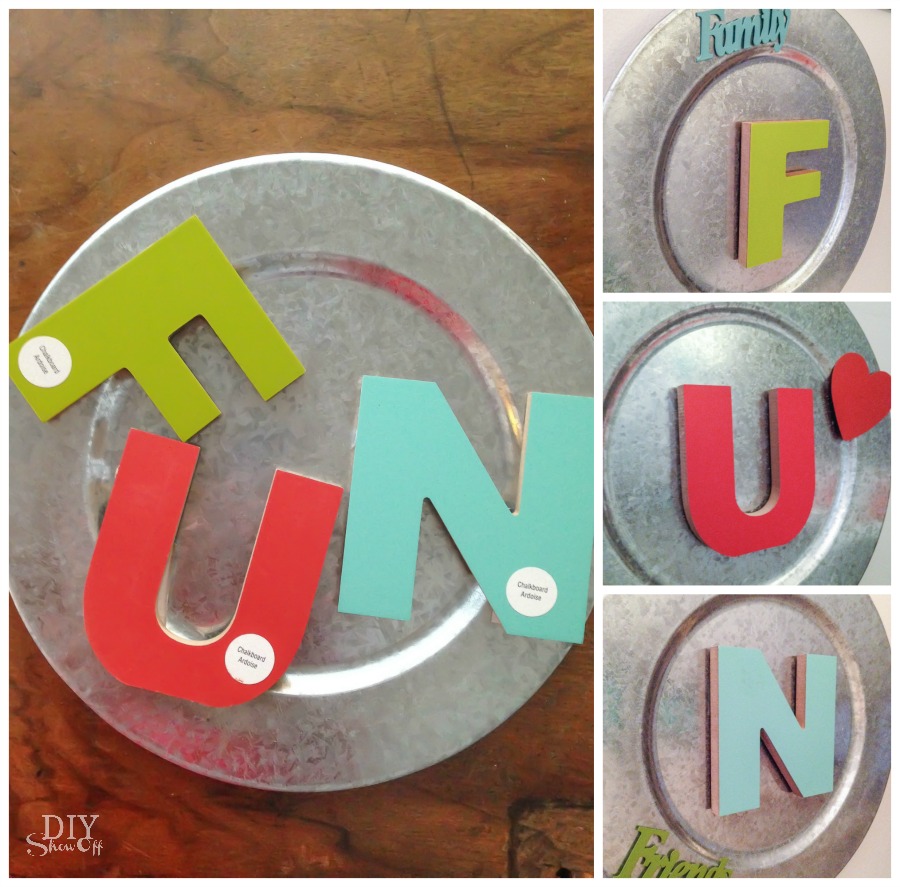
And added magnets to the back of F-U-N chalkboard letters for displaying on galvanized chargers/plates. These will work for magnetic play time in the future too. 

magnetic art display #michaelsmakers @diyshowoff

Cute, colorful, personal and custom to our nursery (future playroom)…

magnetic art display #michaelsmakers @diyshowoff

  • My favorite part about crafting is putting a personalized spin on a project. Whether it’s decorating with marquee lights or crafting an initial that represents your family name, Michaels has made it easy with their new Alphabet Soup by Make Market™ line of products. SO MANY DIFFERENT LETTERS! 
  • This collection of surfaces, letters, frames and more come in modern, eclectic or rustic styles. From natural and finished woods, to a variety of metals, resin and patterned styles, the possibilities are endless.
  • If you don’t know where to begin, you can always take a look at some of the fun projects on Michaels.com or the other 49 Makers’ ideas on The Glue String for to see how they personalized their crafts! Visit these fun projects for more inspiration (starting today at 11 a.m. EST): 

[inlinkz_linkup id=590007 noentry=1 mode=1]

DIY Duck Tape Trick or Treat bag tutorial and SpookDuckular Sweepstakes

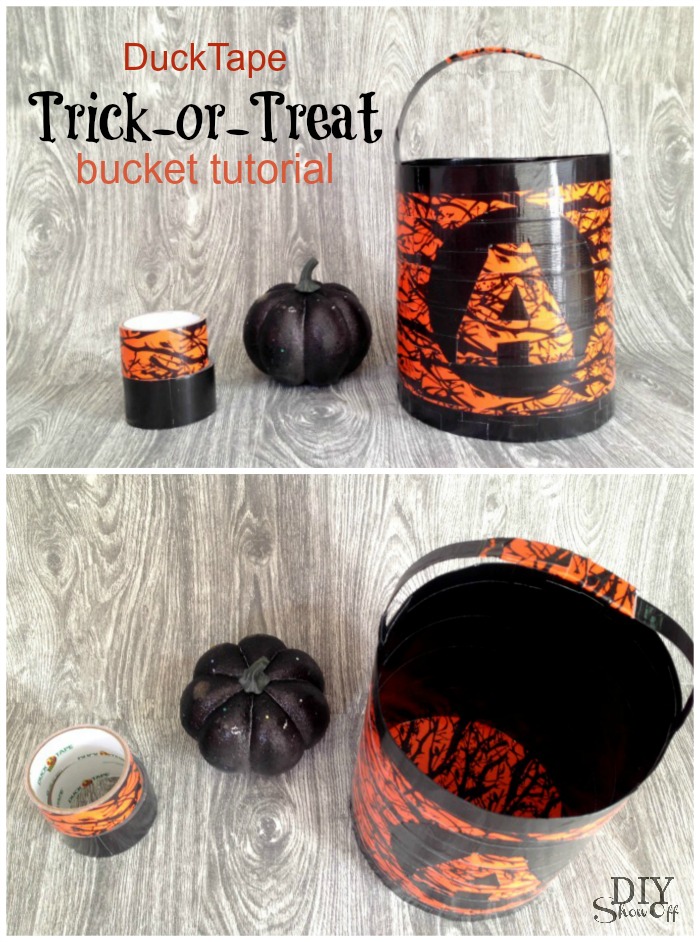
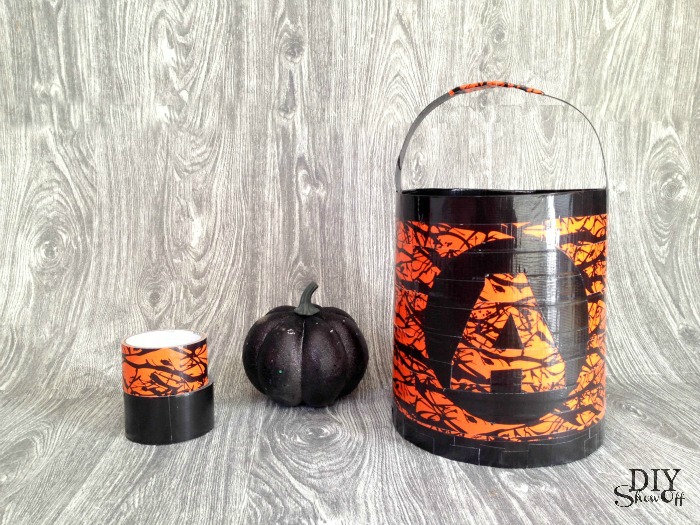
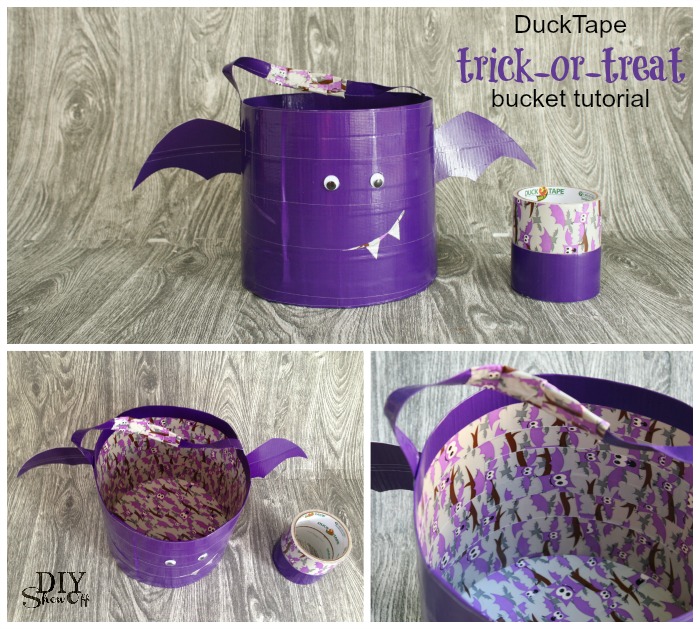
DIY Duck Tape Halloween Trick or Treat Bucket tutorial

DuckTape trick or treat bucket tutorial #halloween @diyshowoff #spookduckular

Supplies I used: 

DuckTape Trick or Treat bucket tutorial @diyshowoff  #halloween

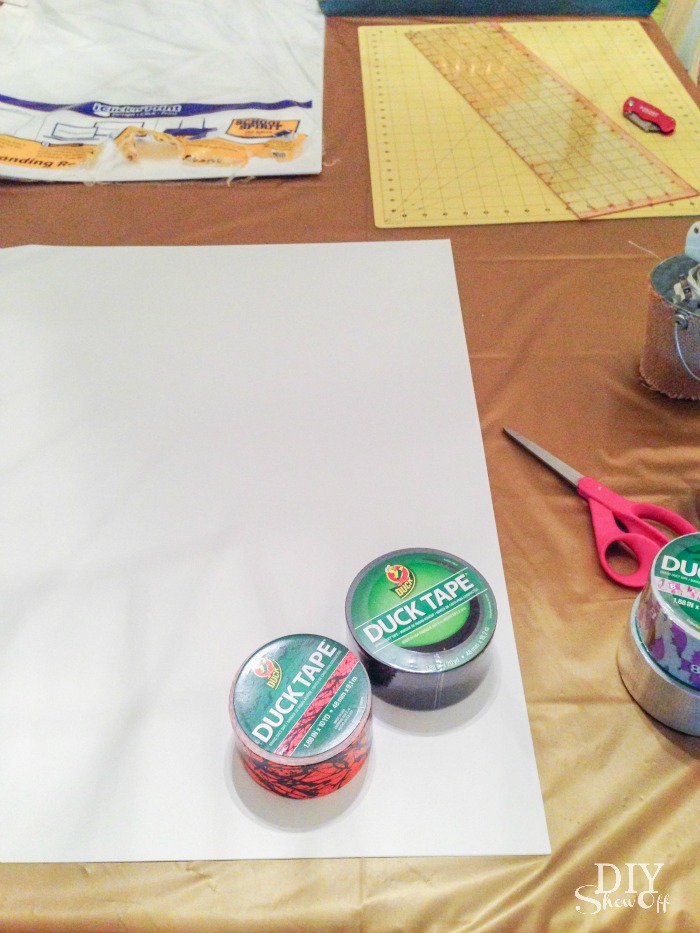
  • poster board or light weight card board
  • duct tape – fun check out the Halloween patterns
  • OR…I realized after the fact that the shape resembles a coffee can or paint can (and would provide more durability). This is a fun craft idea but GO grab some fun patterned DuckTape from Michaels and a clean empty paint can from the hardware store! 

Tools/extras: cutting matt, Xacto knife/box cutter, scissors, plate 

What I did: (this is what I did, but see note & recommendation under “supplies” above!)

DuckTape trick or treat bucket tutorial #halloween @diyshowoff #spookduckular

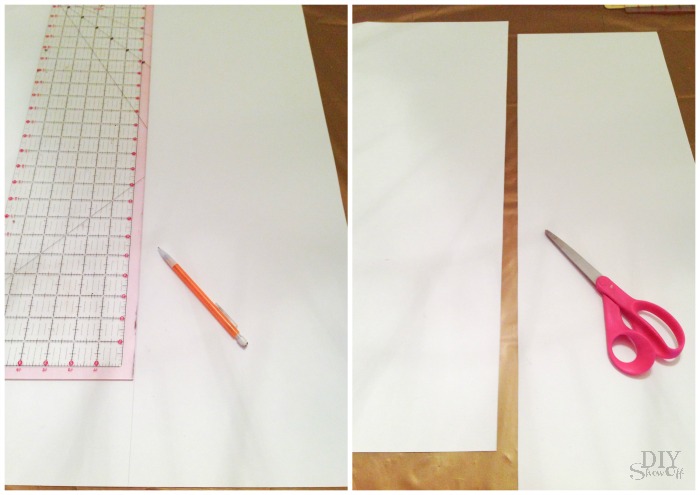
1. Decide depth/height of bucket and cut a strip the length of poster board.  

DuckTape Trick or Treat bucket tutorial @diyshowoff  #halloween

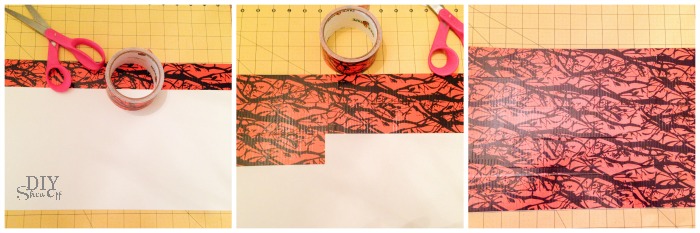
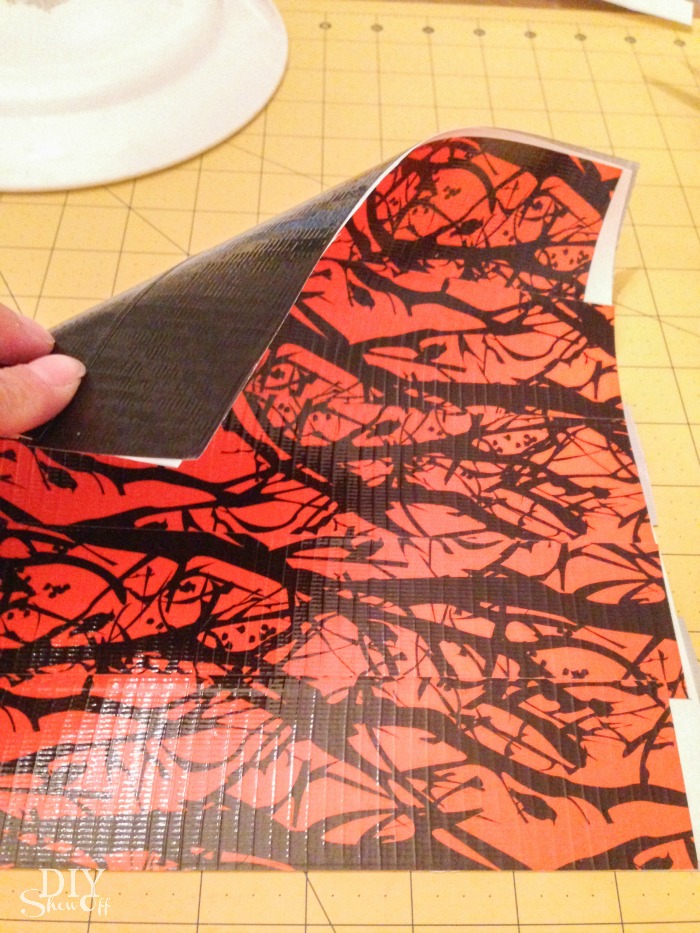
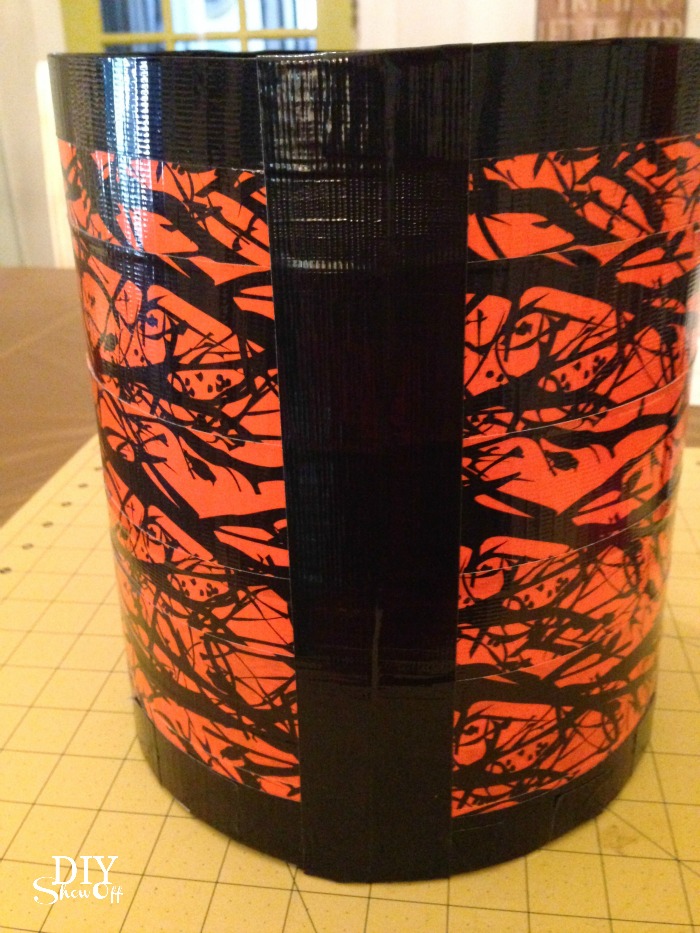
2. Place and overlap strips of duct tape to cover each side of the poster board. 

DuckTape Trick or Treat bucket tutorial @diyshowoff  #halloween

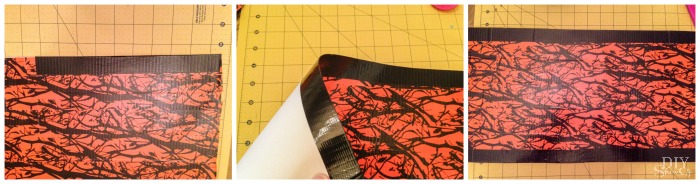
3. I folded over a ‘border’ at the top and bottom.

DuckTape Trick or Treat bucket tutorial @diyshowoff  #halloween


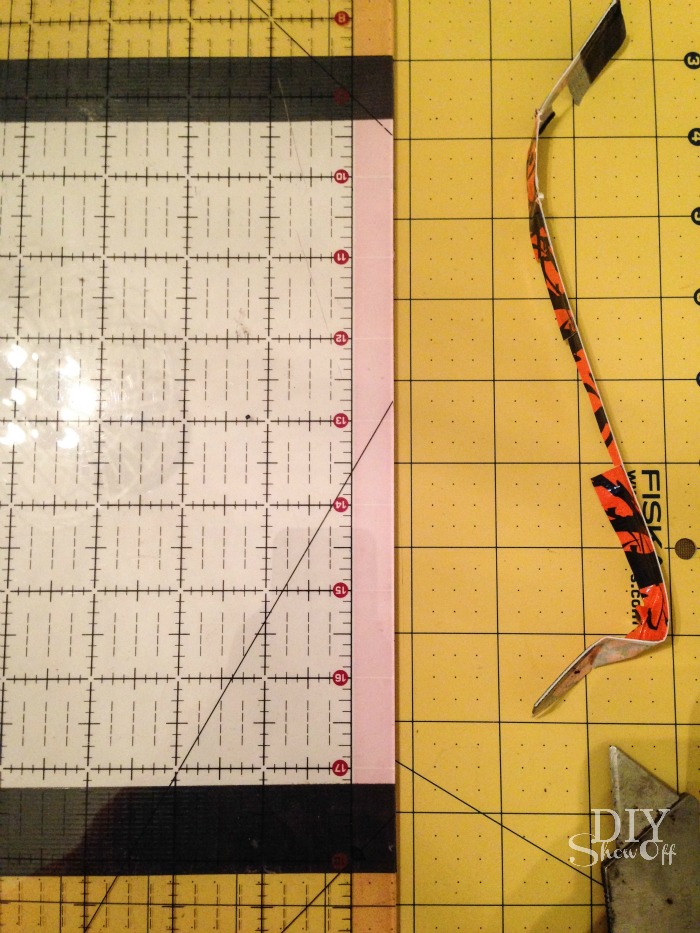
4. Trim short sides. Set aside.

DuckTape Trick or Treat bucket tutorial @diyshowoff  #halloween

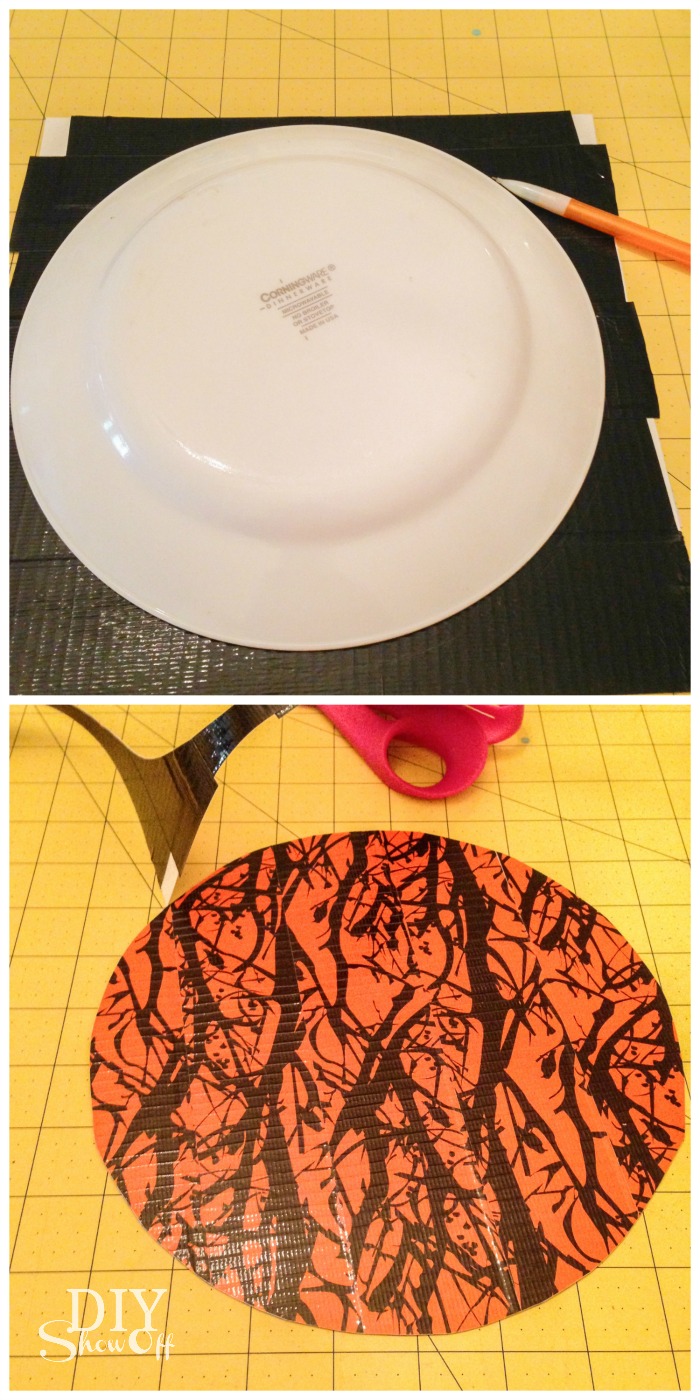
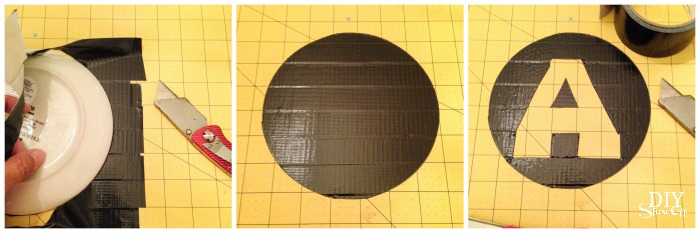
5. I used a salad plate for the size of my bucket. Cut a square of poster board just large enough for tracing the plate. Place and overlap strips of duct tape to each side. 

DuckTape Trick or Treat bucket tutorial @diyshowoff  #halloween

6. Trace plate and cut out circle. This is the bottom of the bucket. 

DuckTape Trick or Treat bucket tutorial @diyshowoff  #halloween

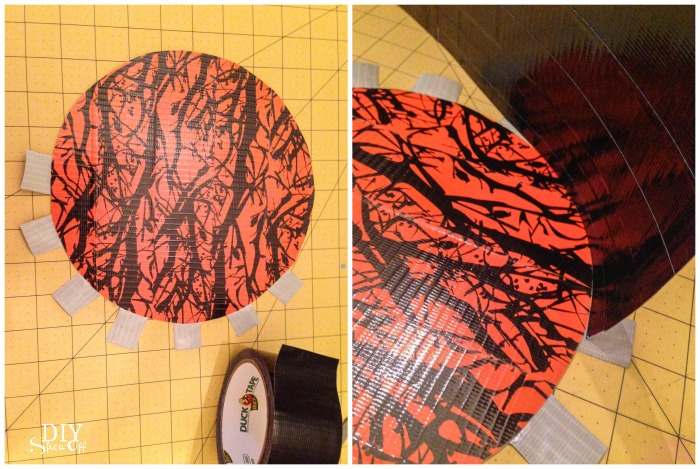
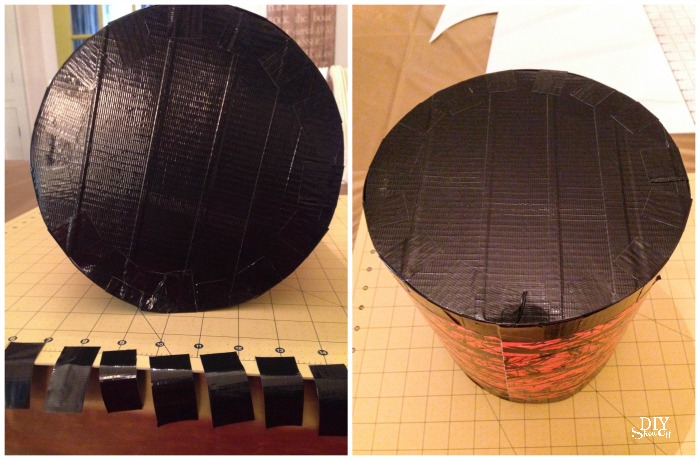
7. Using small pieces of duct tape, attach sides to the bottom.

DuckTape Trick or Treat bucket tutorial @diyshowoff  #halloweenDuckTape Trick or Treat bucket tutorial @diyshowoff  #halloween

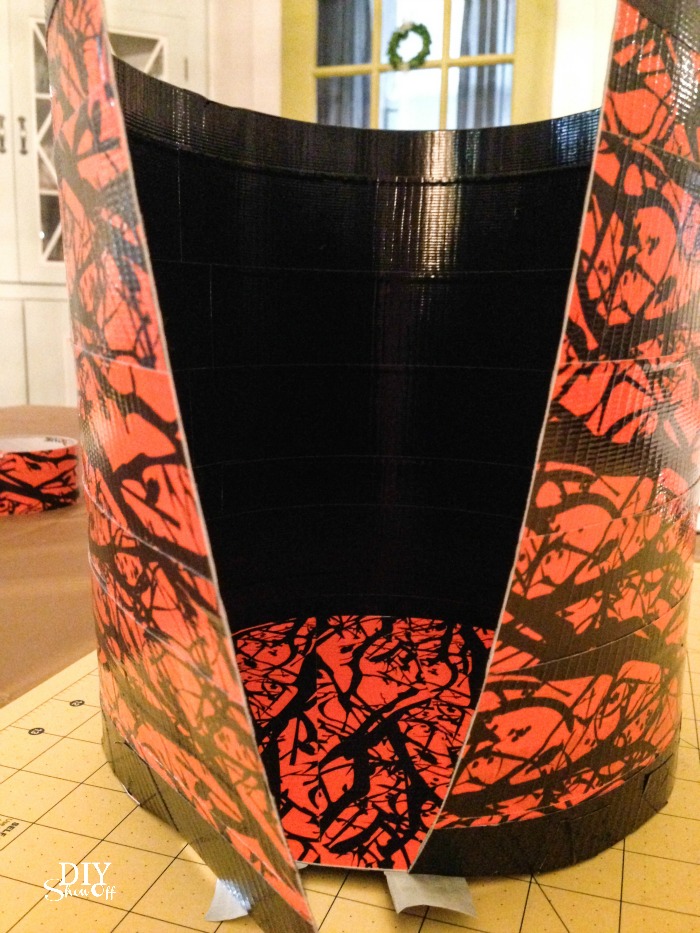
8. Use a strip of duct tape to ‘close’ the open side of the bucket. Cover with coordinating duct tape to camouflage seam if you wish. 

DuckTape Trick or Treat bucket tutorial @diyshowoff  #halloween

9. Reinforce bottom with more strips of duct tape.

DuckTape Trick or Treat bucket tutorial @diyshowoff  #halloween

10. Create an embellishment/sticker by overlapping duct tape, placing directly onto cutting matt. Cut out shape, etc. using an Xacto knife. Transfer to front of the bucket.

DuckTape Trick or Treat bucket tutorial @diyshowoff  #halloween

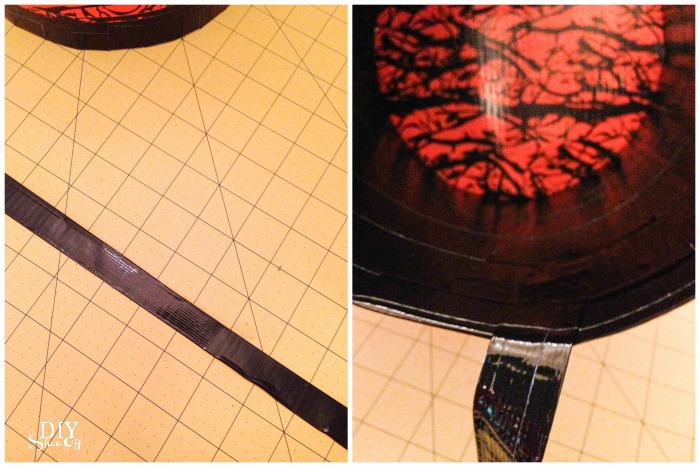
11. Handle is a strip of duct tape folded into thirds and secured with…more duct tape.

DuckTape Trick or Treat bucket tutorial @diyshowoff  #halloween

Ta-da! That was fun! 

DuckTape trick or treat bucket tutorial #halloween @diyshowoff #spookduckular

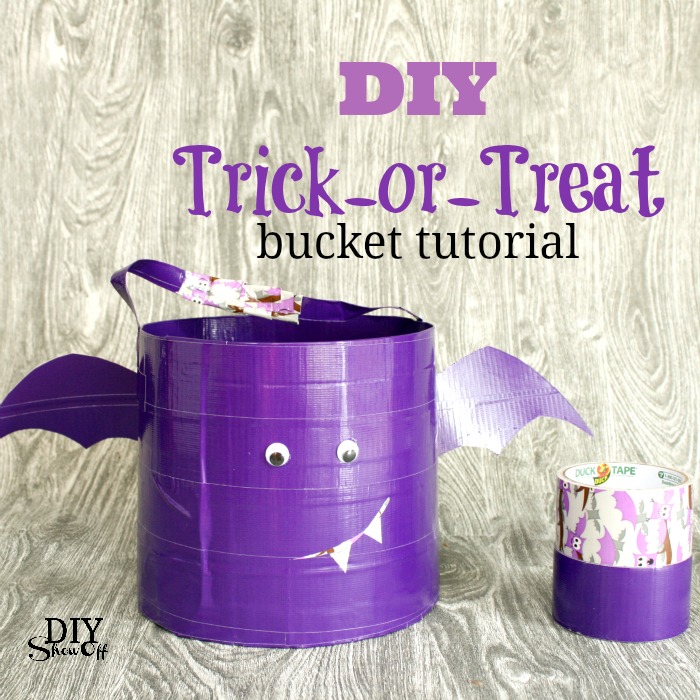
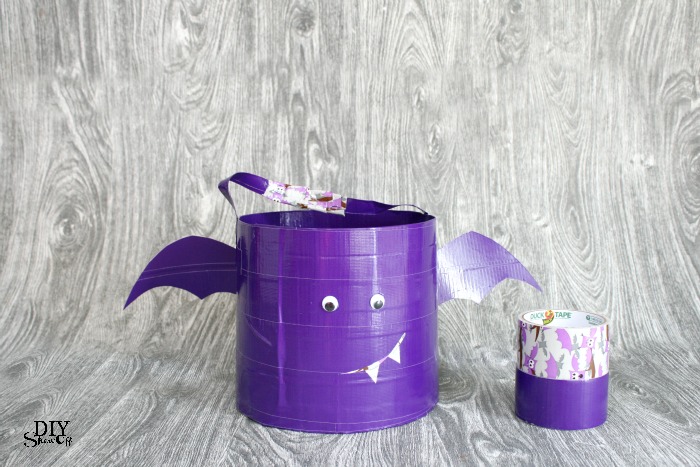
Get creative! Make more than one! My second one is a cute bat with googly eyes and wings. I love the interior Duck Tape design too. Next up on my DIY list is a monster design. So fun! 

DIY Duck Tape Trick or Treat bag tutorial and SpookDuckular Sweepstakes

spookduckular sweepstakes

Enter the SpookDuckular Sweepstakes! 

Decorate your trick-or-treat bag using duct tape, and then add an image of your creation to Pinterest. Submit your pin at SpookDuckular.com for a chance to win! Easy! 

Oh My Gosh! The Prizes: $100 Michaels gift card each week in October, with a Grand Prize drawing happening the last week for one $500 Michaels gift card! Woo hoo! 


Remaining Entry Periods:

  • Week 2: 10/05/15 – 10/11/15
  • Week 3: 10/12/15 – 10/18/15
  • Week 4: 10/19/15 – 10/25/15
  • Grand Prize: 09/28/15 – 10/31/15

Sweepstakes ends Oct, 31 2015. Good luck!!!

spookduckular sweepstakes

*I received compensation to share about this awesome SpookDuckular sweepstakes. Tutorial was optional. All thoughts, project tutorial and images are my own. 

DuckTape trick or treat bucket tutorial #halloween @diyshowoff #spookduckular

DIY Essential Oil Infused Fall Room Spray

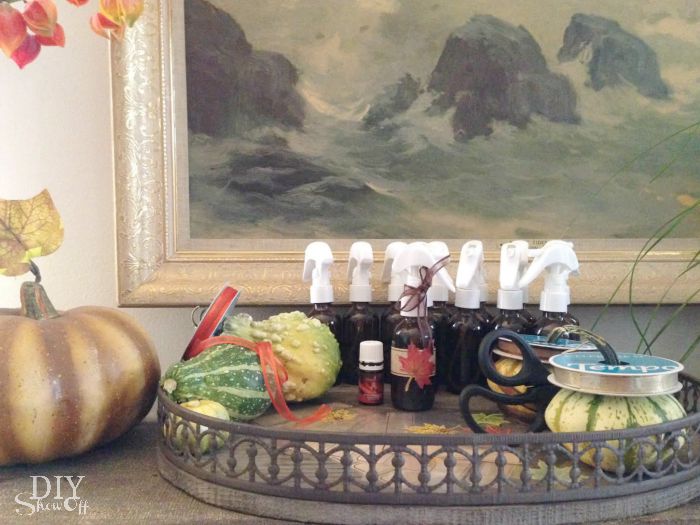
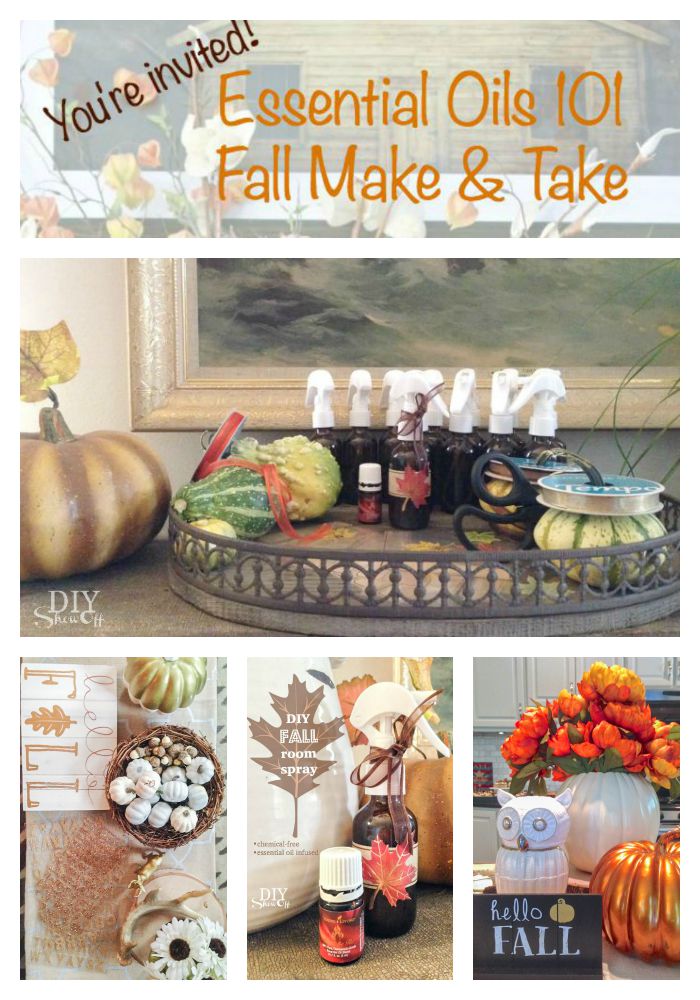
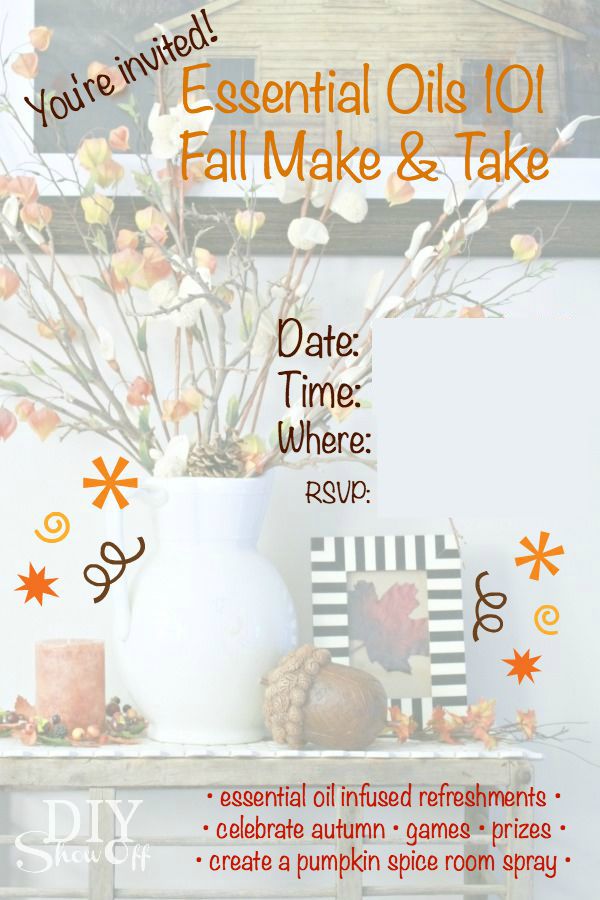
Last week I hosted a fun fall celebration for family and friends in my home and wanted to share a few ideas and recipes (great ideas for a fall essential oils 101 Make & take class). I used one of my own fall decor images to create an invitation for make up a Facebook invitation/event.

fall make & take @diyshowoff

Make & Take: a Make & Take is a term used for hosting an essential oils class where guests have the opportunity to make up an essential oil infused gift to take home with them, to sample the benefits of essential oils. My guests made up a fall room spray. 

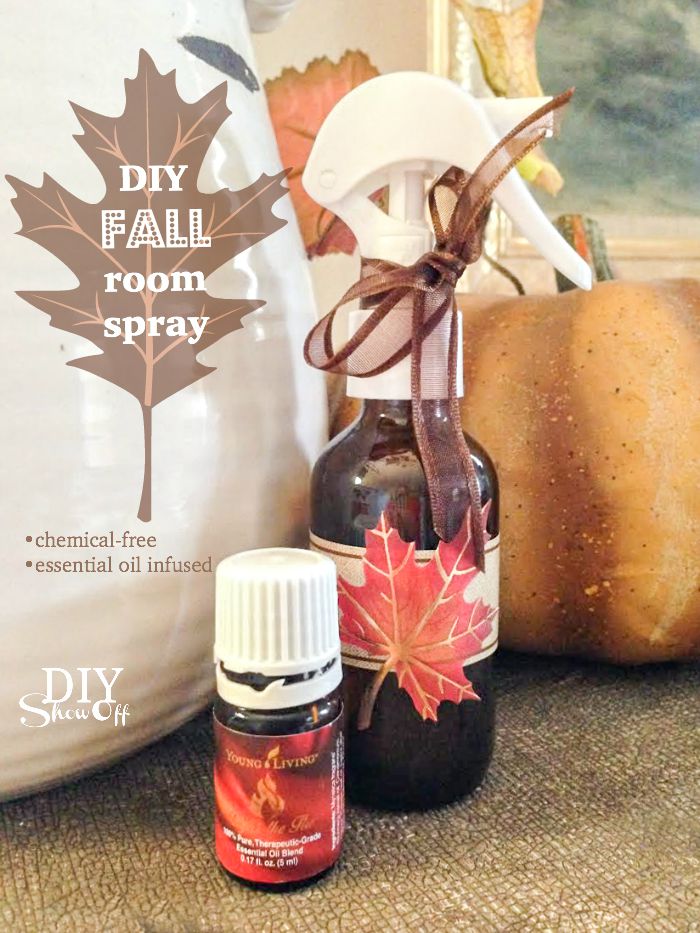
a DIY essential oil infused fall room spray recipe that's chemical free and smells amazing! @diyshowoff

Essential Oil Infused Room Spray

You’ll need:

  • 2 oz. spray bottles (I love THESE (affiliate link) – glass, fine mist and a lock, great price too)
  • Essential Oils (choose oils like Light the Fire essential oil or mix and match essential oils like cinnamon, clove, ginger, nutmeg)
  • epsom salt (helps keep the blend of oil and water mixed)
  • distilled water
  • labels/stickers/ribbon 

Directions:

Fill spray bottle with distilled water (fill to about 1/2 to 1 inch below the top). Add 5-7 drops of essential oil and a pinch of epsom salt. Embellish spray bottle with a label, fall sticker and ribbon, if desired. Easy!  

a DIY essential oil infused fall room spray recipe that's chemical free and smells amazing! @diyshowoff

a DIY essential oil infused fall room spray recipe that's chemical free and smells amazing! @diyshowoff

Light the Fire essential oil

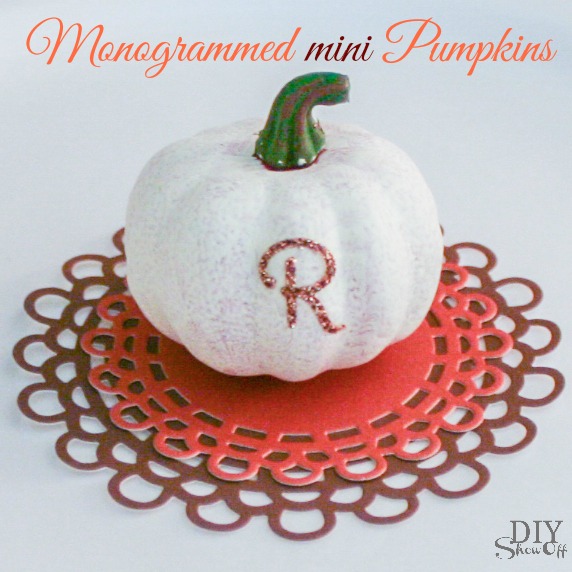
As an extra little something/thank you gift/party favor…we made up these cute easy DIY monogrammed mini pumpkins.

Monogrammed Mini Pumpkins tutorial @diyshowoff

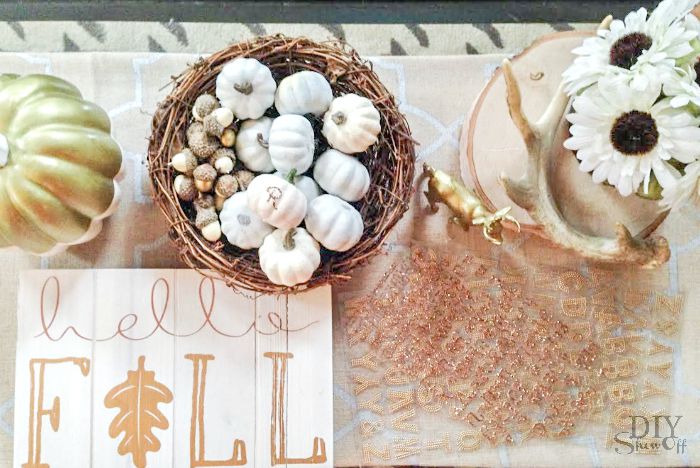
I created a ‘pumpkin patch’ for guests to pick a pumpkin to monogram with metallic stickers. 

monogrammed mini pumpkins favors DIY @diyshowoff

Pin for future reference: 

Fall Essential Oils Make & Take Ideas Part 1 @diyshowoff

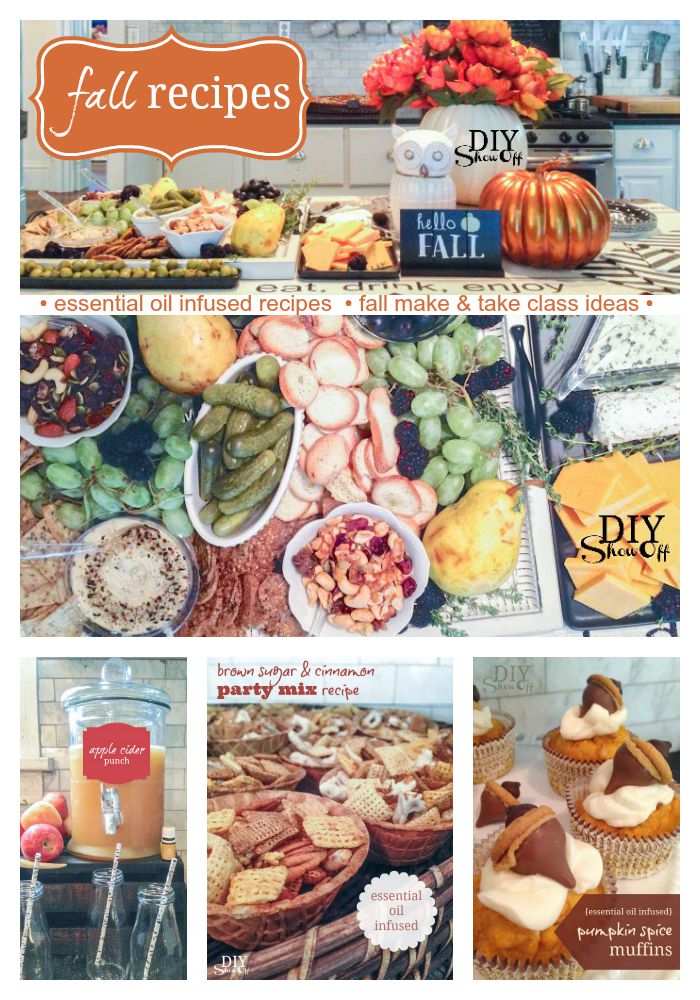
Get some delicious ideas for easy refreshments here:  essential oil infused recipes perfect for celebrating fall! Part 2:

fall recipes - essential oil infused make & take class ideas Part 2 @diyshowoff

Learn more about Young Living essential oils, my story and join me in creating a healthy chemical free home HERE. AND! Get the DIYShowOff welcome bundle for free from me personally! Extra gifts, loads of support. If there is one thing I regret, it’s waiting as long as I did to jump on board. It’s worth the investment as it’s motivated us to truly make healthier choices, sparking a new healthy lifestyle. What are you waiting for? 

diyshowoff young living essential oils member#1836762

[catablog_gallery id=”18863″ template=”gallery”]