DIY Project Parade and DIY Holiday Centerpieces

I was going back through previous Holiday Highlights parties and wanted to bring my centerpiece from 2009 back to life for those of you who might be new because I still love this simple DIY centerpiece…


I wanted a rustic/natural looking winter centerpiece for my new barn wood trestle table.

Materials are mostly things I already had:
  • Pine Wreath or pine clippings (I use a faux wreath and add real pine cuttings)
  • Candle
  • Glass vase or mason jar
  • Faux snow (the only thing I purchased but you could use epsom salts too)
  • Optional:  ornaments

I put together a centerpiece that turned out to be exactly what I was looking for.


To give the centerpiece a little more Christmas spirit. I added some ornaments and a mix of pine and juniper clippings to fill the room with a Christmas-pine scent. 🙂 Lots of pictures. I just love it.

1.


I‘m thinking of doing this again this year. I love the simplicity and natural elements. 

But I love 2. last year’s antique chicken feeder centerpiece too utilizing pine cuttings, candles, pinecones and an antique chicken feeder…(but it does serve a new purpose as a cook book library shelf).
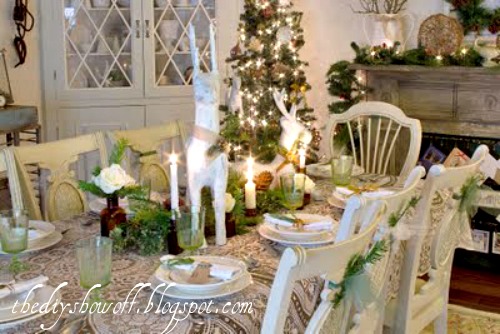
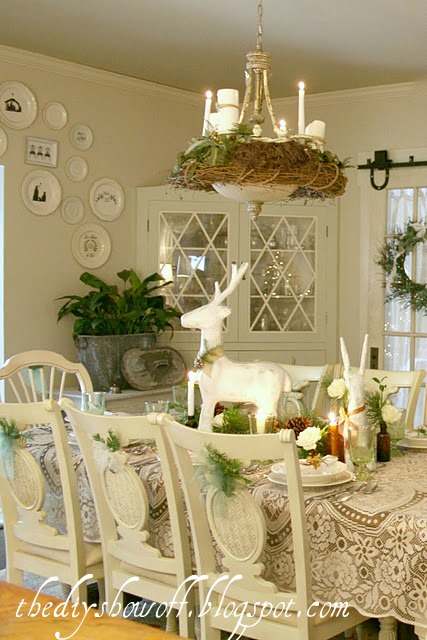
3. There’s also this creation from earlier this year when my Christmas centerpiece included reindeer on a bed of a mix of fresh/faux pines, candles and fresh roses in brown glass…

or 
4. Create something new!
What do you think?
Favorite DIY Centerpiece?

Let’s see what you’ve been up to!


The DIY Show Off

1. You must use the button above (ADD BUTTON HTML CODE FROM SIDE BAR TO YOUR POST) and link to this post to share the linky love. You post must be recent, shared at one DIY Project Parade only (not continuously) and be DIY related.

2.Include your name or blog name and project title. Add your permalink (not your blog url, but your DIY project post url). Feel free to link a Past Post, just invite your readers in a current post with a quick note.

3.Or email your link to thediyshowoff@gmail.com and I will add it for you.

4.If you notice your link has disappeared -please add the link back to The DIY Show Off to your post today, a button or a quick note to your readers about the party and try again! I love when everyone participates and readers check out everyone’s links, but I think the return favor of linking back is the nice thing to do so everyone plays fair and enjoys all of the projects and links. Also – this blog party is for DIY projects only. Links not related to DIY will be deleted. Please share your link one week only. 

5.  If reading this in an email, pop over to http://thediyshowoff.blogspot.com to see the inspiring DIY projects linked up!

6. If you have a Holiday link to share, feel free to link up to here too!

7.  NOW you can “like” the links!  What a fun idea!  Most liked links may be included in a post of DIY Project Parade highlights later in the week.

8.  Visit a few other links to make some new friends, get some creative ideas and feel free to leave me a comment. I’m likely sitting here on the computer and could use a happy distraction! 


Pin It

Joining the party here:

Songbird & Cottage Magpie

christmas-linky-parade-button-songbird   


Copper Penny Jar Candles

Today = rainy. Perfect. Here are my pennies I was saving for a rainy day!
I constructed some decorative candles for our patio.
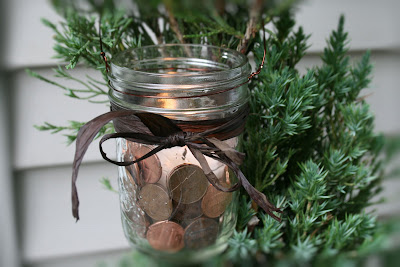
Our back patio will have copper/dark brown light fixtures (still a work in progress) and accessories. The grape arbor is also mostly an aged bronze color. I wanted to coordinate some romantic lighting and accessories. I love candles in canning and jelly jars and these are perfect. I love them!Look! A money tree! 🙂
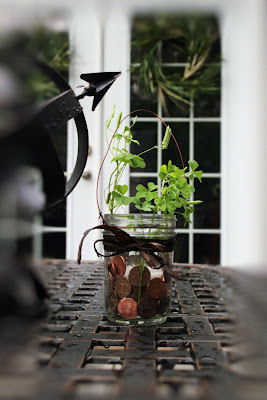
Tucked in amongst the herbs:
Use as a vase too!
Pretty and inexpensive. Total cost for 12 candles = $20. I bought new jelly jars, but if you found recycled ones…it’d be even cheaper.

Tutorial

Materials &  Tools:
Pennies
12 Small Canning or Jelly Jars (approx. $7 for 12 pack)
12 pack of votive candles in jars ($7.99
Raffia Ribbon (or any decorative ribbon) (mine was $2.49)
Wire ($2.99)
Wire Cutters
Scissors
Tape Measure

1.) Cut wire into about 21 inch pieces (x 12 for 12 candles)
2.) Wrap wire around lip of jar and one end twist to secure.
3.) Loop wire to the other side, slide under wire on lip and twist to secure.
Now you have a handle!
4.) Cut raffia ribbon about 30 inches.
5.) Tie around the jar. I doubled up for a fuller look and placed it lower on the jar. Snip ends to even up.
6.) Place votive inside and slide pennies between the glass votive and glass jar.
Ta-da: Pretty hanging copper penny lantern.
I also saved the box from the jars for easy storage. And you can skip the wire if you don’t need to hang them.

Oh…also, do you remember this 5th grade chemical reaction science project for cleaning pennies? It still works!

Add vinegar to a plastic or glass bowl with 2 tsp. of salt. Add dirty pennies. Stir. Rinse. Shiny new pennies!