DIY Project Parade

Well…it’s over.  If you celebrate, how was your Christmas?  We had a beautiful couple of days with family, friends, fun, lots of good food and thoughtful gifts.  I’m not anticipating a lot of participation in the DIY Project Parade this week, but it’s open if you’ve got something to show off.  
 The DIY Show Off
We were able to conquer another project in the kitchen. Just a small one but it makes a huge difference. I always consider lighting when doing a makeover and at the reveal, it’ll be a big in our ‘wow’ factor. Our kitchen has two areas, the original floor plan and an expansion where maybe there was a back porch at one time (although there is a basement underneath but it’s obvious by the walls that it was an original part of the kitchen). Anyway – there were two lights.  One ceiling light in the expansion which is where our French doors, refrigerator and pantry is and one over-the sink-light.  Nothing else.  
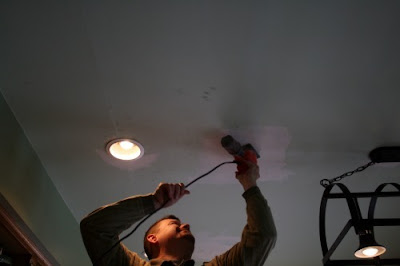
Mr. DIY and friend (thanks DJ!) installed some recess lighting along with the pot rack/light fixture (remember our $5 Habitat garage sale find?).  
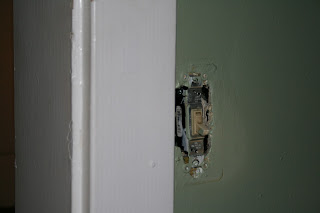
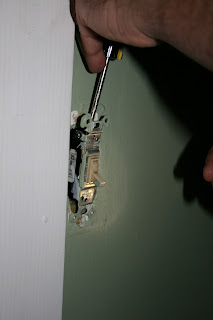
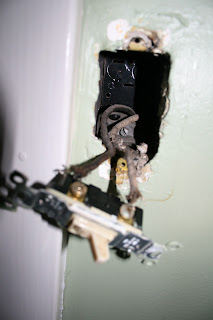
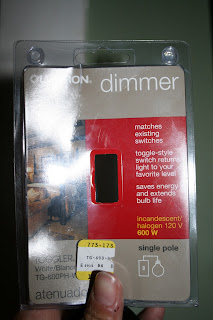
Thanks to our friends at True Value, we were able to install a dimmer to change the atmosphere at the touch of a slider.  Now we can have bright light when cooking and dimmer light when entertaining or very dim just to see and we’re using energy efficient bulbs so no difference in the electric bill.  
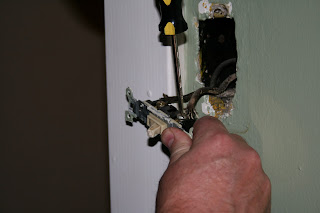
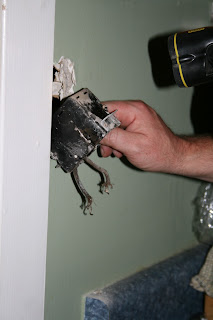
Here is the process in pictures.  It was a lot easier than I anticipated and looks like something even I can do (which is great news – because I want to change the builder grade beige switches to something newer that matches the new switchplates throughout the house some day).

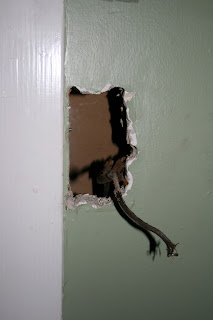
We also changed the junction box.  Something that didn’t need done but live and learn. So it’s being patched…

We’re painting so final look coming at the reveal!  🙂  Hopefully soon!  Kitchens take a lot longer than any other project we’ve tackled.  We’re behind schedule!

NEXT WEEK – SHARE YOUR 2010 RECAP of favorite/all DIY projects!

~*~*~*~
If your project is holiday related, please feel free to link up to the DIY Holiday Highlights party as well!
The DIY Show Off
If you’d like to link YOUR DIY project post to The DIY Show Off Project Parade:
1.You must use the button above and link to this post to share the linky love.
2.Include your name or blog name and project title. Add your permalink (not your blog url, but your DIY project post url). Feel free to link a Past Post, just invite your readers in a current post with a quick note.
3.Or email your link to thediyshowoff@gmail.com and I will add it for you.
4.If you notice your link has disappeared -please add the link back to The DIY Show Off to your post today, a button or a quick note to your readers about the party and try again! I love when everyone participates and readers check out everyone’s links, but I think the return favor of linking back is the nice thing to do so everyone plays fair and enjoys all of the projects and links. Also – this blog party is for DIY projects only. Links not related to DIY will be deleted.

*~*~*~*~*~*~*~*~*~*~*~*~*~*~*~*~*~*~*~
I was one of the bloggers selected by True Value to work on the DIY Squad. I have been compensated for my time commitment to the program as well as my writing about my experience. I have also been compensated for the materials needed for my DIY project. However, my opinions are entirely my own and I have not been paid to publi
sh positive comments.
~*~*~*~*~

DIY Project Parade and patching holes

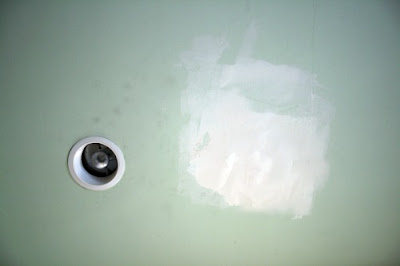
Mr. DIY installed recess lighting in our kitchen and one of the holes was put in the wrong spot.  No biggy.  Patching drywall is easier than it sounds. Please ignore the fingerprints. I always joke with Mr. DIY that he would not make it in a life of crime…he leave his prints everywhere!  Our ceiling is plaster and lathe.  We patch using drywall.

How to patch a hole:
1.  Insert a scrap piece of wood into the hole (for new drywall to attach to). If you’re patching a hole in the wall, you’ll need to add support or cut around the hole to a stud so that there is a way to support and attach a new piece.

2.  Screw the wood block into place.
3.  To get an idea of the shape/size of the hole, use a piece of paper to do a rough trace and cut small matching piece out of drywall (we have a lot of scraps).
4.  Secure the drywall into open hole using screws into the wood.
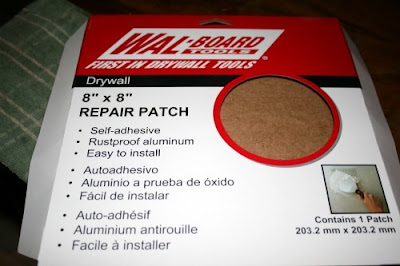
5.  Thanks to our friends at True Value, we used a drywall patch kit which consists of aluminum sticky mesh tape to help the drywall mud adhere.  
6.  Smooth on drywall mud (joint compound) in two even layers, allowing time to dry in between skim coats.
7.  Once dry, sand smooth.
8.  Apply a coat of primer and clean fingerprints if necessary. 
9.  Paint.
Can you tell where the mistaken hole was?  We can’t!
~*~*~*~

If your project is holiday related, please feel free to link up to the DIY Holiday Highlights party as well!
The DIY Show Off
If you’d like to link YOUR DIY project post to The DIY Show Off Project Parade:
1.You must use the button above and link to this post to share the linky love.
2.Include your name or blog name and project title. Add your permalink (not your blog url, but your DIY project post url). Feel free to link a Past Post, just invite your readers in a current post with a quick note.
3.Or email your link to thediyshowoff@gmail.com and I will add it for you.
4.If you notice your link has disappeared -please add the link back to The DIY Show Off to your post today, a button or a quick note to your readers about the party and try again! I love when everyone participates and readers check out everyone’s links, but I think the return favor of linking back is the nice thing to do so everyone plays fair and enjoys all of the projects and links. Also – this blog party is for DIY projects only. Links not related to DIY will be deleted.

*~*~*~*~*~*~*~*~*~*~*~*~*~*~*~*~*~*~*~
I was one of the bloggers selected by True Value to work on the DIY Squad. I have been compensated for my time commitment to the program as well as my writing about my experience. I have also been compensated for the materials needed for my DIY project. However, my opinions are entirely my own and I have not been paid to publish positive comments.
~*~*~*~*~

Once again…thank you for sharing our sorrow and comforting words for us during our loss of our doxie, Niski.  It means SO much to us!

Tomato Cage Christmas Tree and The DIY Project Parade

I know this is nothing new but I love this idea – a DIY Christmas tree using garland and a tomato cage.  I headed to my favorite local True Value for my supplies to make one for indoor use.  

  • Tomato cage.  Ask a store associate.  They should have them in the warehouse/storeroom since it’s not garden season.I got the largest they had. 
  • 3 – 9ft. lighted garland
  • Thick rubber band
To make the tree:
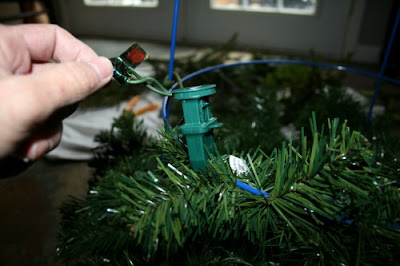
Using a rubber band, gather the “stakes” to make a tee-pee top and secure together (sorry for the bad picture! I must not have checked it before going to the next step…too late now!).
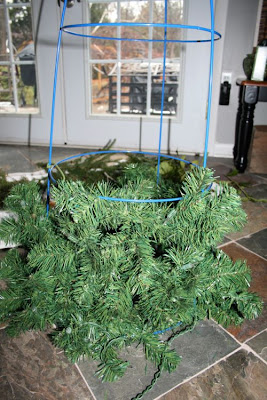
Starting at the bottom (with the plug end of the garland), start to wrap the bottom wire circle with the garland. Wrap a few branches here and there around the wire frame to secure.  
Working around the frame, continue wrapping.
When one garland ends, plug in another and continue wrapping to the top. 
Fluff.  If there are gaps, fill in by twisting branches around the frame or fluff branches to fill ‘holes’. 
All done!

We don’t have a live tree and I love the smell of pine. So I headed out to the backyard and clipped small pieces of real pine.
Just tuck them in open areas for a fuller ‘real’ look with pine scent! (Mine are only tucked but you can use floral wire to make things more secure if needed.)
Here it is all complete!  I love it!
Need more height?  
This works great for a base:
  • 5 gallon bucket
  • fabric
  • large rubber band
Take the handle off of the bucket.  
Stretch a rubber band around the top of the bucket.
Sit bucket in the center of a piece of fabric and tuck under the rubber band.
It’ll look like this:

Add a round tray (aluminum cookie tray or rattan works) and it’s the perfect base to add height to your tomato cage tree.  If you have an out of the way spot, it can just rest on top. Otherwise attach with wire into the holes were the handles were removed.  
You could also paint the bucket instead and fill with stones for weight to use outdoors.  The base was a little to high for my purposes so I didn’t end up using it…oops!
Again…my tomato cage Christmas tree:
~*~*~*~
If your project is holiday related, please feel free to link up to the DIY Holiday Highlights party as well!
The DIY Show Off
If you’d like to link YOUR DIY project post
to The DIY Show Off Project Parade:
1.You must use the button above and link to this post to share the linky love.
2.Include your name or blog name and project title. Add your permalink (not your blog url, but your DIY project post url). Feel free to link a Past Post, just invite your readers in a current post with a quick note.
3.Or email your link to thediyshowoff@gmail.com and I will add it for you.
4.If you notice your link has disappeared -please add the link back to The DIY Show Off to your post today, a button or a quick note to your readers about the party and try again! I love when everyone participates and readers check out everyone’s links, but I think the return favor of linking back is the nice thing to do so everyone plays fair and enjoys all of the projects and links. Also – this blog party is for DIY projects only. Links not related to DIY will be deleted.

*~*~*~*~*~*~*~*~*~*~*~*~*~*~*~*~*~*~*~
I was one of the bloggers selected by True Value to work on the DIY Squad. I have been compensated for my time commitment to the program as well as my writing about my experience. I have also been compensated for the materials needed for my DIY project. However, my opinions are entirely my own and I have not been paid to publish positive comments.
~*~*~*~*~