Painting a Bathroom Floor (a DIY painted rug)

A temporary bathroom floor makeover (temp likely meaning a few years) until bigger renovation with tile is in the budget can make a HUGE difference. Look at the transformation, using paint. I love it! I may never want to tile this floor!
When we bought our old farmhouse, there was carpet in the bathroom (gross!). So we immediately tore it out before moving in. But that’s as far as we got (so many projects, only so much $ and time). We have big plans for this bathroom. It sits between my office/guest room and the family room so even though there is a powder room on the first floor too, this bathroom gets used just as often by guests and family. It needed SOMETHING!
Before

I filled in the cracks/seams with wood filler.

Sanded. (It’s not completely smooth and perfect, but we were okay with imperfections. It is an old farmhouse, after all.) You could also lay down a fresh new base but we were cutting corners.
2 coats of Zinsser Primer

2 coats of Valspar Porch and Floor paint. I chose a color called Journey. It’s a nice dark chocolate brown.

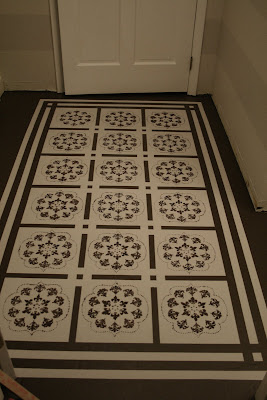
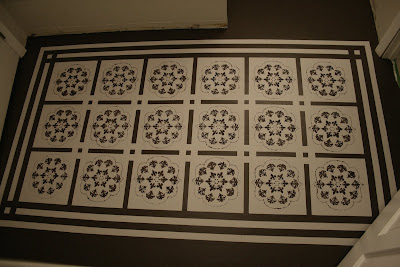
Then, a lot of measuring to create a painted rug base. I used Frog Tape. It is amazing and really cuts down on touch ups. Actually when I used it on the walls, NO touch ups were needed. I did need to do a bit with the floors though. Anyway, I also used the Frog Tape to create a border by covering up some of the base.
I painted my ‘rug’ color twice using Benjamin Moore (eggshell finish) in Smoke Embers.

Then immediately pulled off the tape, pulling away from the paint (some of the tape was completely covered though so fingers do get paint-y). I had newspaper laid out near by so I could throw the wet-painted tape on it (pushing into a garbage bag = bigger sticky mess).

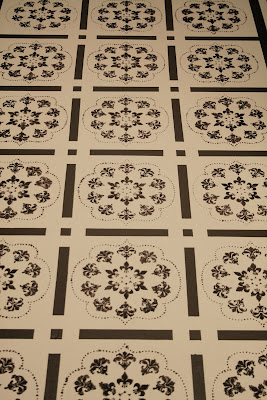
Once that was dry, I continued with measuring, taping and using a stencil to complete my design.

My big center area is 3 x6, so using a pencil, I drew a grid with 12″ squares in order to keep everything symmetrical. I learned that a Magic Eraser is quick and easy for erasing pencil! But, when all was said and done, most of the penciled area was covered by paint and what wasn
‘t, I painted over when doing my final touch ups. I considered using a chalk line, but intimidation got the better of me. I’ve never used one and with me being down on the floor…I was worried I’d smear it all.

I even painted over the gray area one time because despite drawing some ideas on paper, I didn’t like the first design. It’s just paint and it really doesn’t take too long. Right under this room is a wood stove, so the floor is warm and helps to speed up drying time.

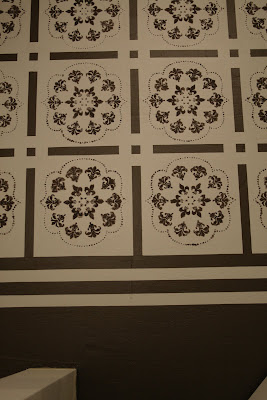
I did use acrylic craft paint for the stencil (that happens to match the dark brown perfectly) because it is thicker consistency than the brown floor paint I used. Also – my stenciled areas “bled” a little – anyone know how to get a perfect stencil? Anyway – it actually gave it more character and I like the effect of “fuzzy” edges with the stencil rather than “clean edges”. It really does give it more of a “rug-look”. And honestly – can you really tell? Not unless your nose is 6 inches from it. 🙂

(It’s not a pretty job – painter’s butt! And since I can’t stop once I get started, dark circles.)


Ta-da!

Next, a couple of coats of water-based polyurethane to seal and protect. I used Minwax Water Based Polyurethane. I’m applying 3 coats by using a brush along the border and against the wall and a foam roller for the rest of it. Now it’s waterproof and protected.


Last part coming up! Replacing the baseboard trim, re-installing the pedestal sink and then the fun part – decorating! I know everyone wouldn’t pair the striped walls with a doily-designed painted floor but the best part about decorating for yourself is doing what you love, right? I promise I won’t hang a polka-dotted shower curtain and crazy wall art. 😉
See DIY and bathroom progress in our
DIY farmhouse

Materials: {affiliate links}

Large Wall Damask Stencil Faux Mural Design #1015 5″ x 7 3/8″
Large Wall Damask Stencil Faux Mural Design #1012 9″ x 7 7/8″
FrogTape 1358463 Multi-Surface Painting Tape, Green, 0.94-Inch Wide by 60 Yards Long
Flower Stencil Zinnia Grande size Med – Reusable wall stencils better than wall decals
Shur-Line 4-Inch Foam Mini Roller Refills, 2-Pack #04940C
Minwax 63333 Satin Polycrylic Protective Finishes, 1 Quart

Painting Faucets (and painted floor progress!)

know most of you have seen this, but I thought I’d share my faucet project again. It’s one of my most popular projects and update: as of 2017, these are still holding up beautifully! 
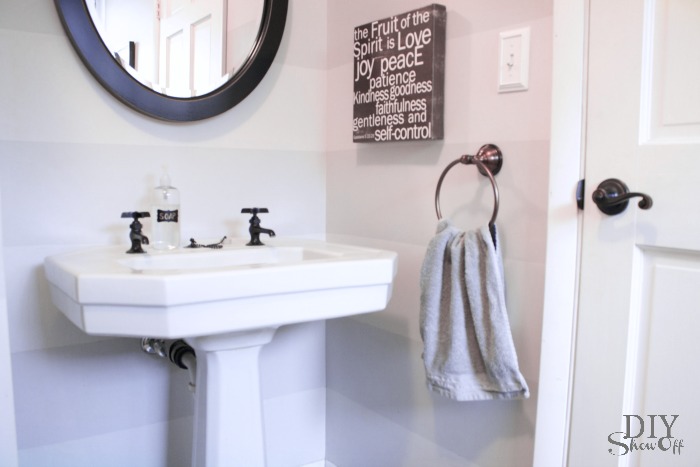
We’re keeping the pedestal sink. It’s pretty. It’s in like-new condition although I’m certain it is fairly old and I kind of like that it has a history. It stays until big dream-remodel occurs. However the faucets presented a dilemma. Look at the set up. One faucet for cold. A separate faucet for hot. Washing hands is a challenge. It requires a back and forth motion between faucets or hoping that the hot water isn’t instant. Or, using the stopper and filling the basin to get a sink full of warm water. I imagine original home owners used it that way. I looked to replace them…but I didn’t have any luck in finding separate hot/cold faucets. Now I’m kind of glad that I didn’t.

The old faucets are solid and silver. I’m guessing these things are old. I tried looking them up. They say “volverwine”. There is an old “Wolverine” brand. ? They’re heavy and the quality is awesome. I however want oil rubbed bronze to match other fixtures in the room. I decided that my old trusty favorite DIY magic transformation technique (spray painting) was the answer.
I
tested the process on a gold brassy door stop. I loved the results. This is my all time favorite spray painting project so far!

I sanded all surfaces of the faucets, drain and metal parts and chain for the plug. I used a 3M sanding block and even an emery board to get every single area. I made sure I got all areas nice and scuffed up.

(At this point…they looked beautiful and polished. I almost backed out but I felt like silver faucets and oil rubbed bronze everywhere else just didn’t “go together”. I found the courage to move on. I think it was when I dreamt of wearing brown boots with black pants.)

I washed and dried them and I taped off the areas I didn’t want painted and put the knobs in the “off” position so I wouldn’t gum up the opening/closing function.

I start by painting the underneath and sides. Each piece got a couple of lightly sprayed coats of Rustoelum Primer in “rust”. I let each coat dry at least 8 hours before applying another. Once the underside was done, I flipped and did the top and sides.

I used a piece of packing styrofoam to hold them upright.

I followed the same steps for the oil rubbed bronze spray paint. (Upside down and sides = light coats, then flip and top and sides = light coats). Once that was dry…


I used a high gloss lacquer and the same steps. It’s been drying for about a week. It’ll probably two weeks by the time all is said and done and ready for installation. Plenty of time to cure. The sink isn’t back in place but I can’t wait to see them!
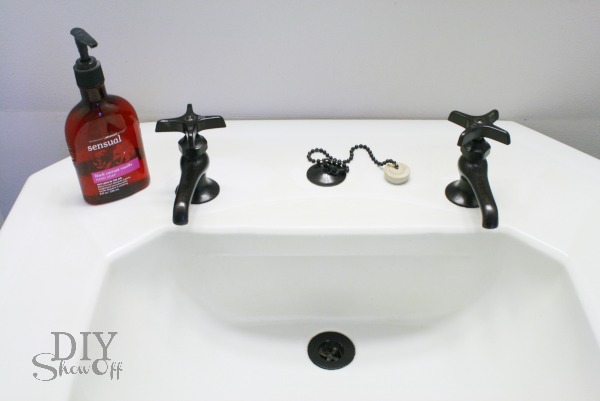
This piece was easier painted when hanging. After: Here is it against the porcelain: I LOVE how they turned out. What do you think? The finish is very hard and durable. The faucets open/close without any issues. And now they match the door knobs and light fixtures. I’m happy!
bathroom updates 

I used: Rustoleum Rusty Metal Primer Rustoleum Metallic Brilliant Metal Finish (oil rubbed bronze) Lacquer Hi-Gloss (for metal) I did at least two coats of the primer and ORB then quite a few of the lacquer. I stayed back about 9-12 inches to keep the spray even and to prevent runs. 

DIY painted faucets

Touch ups in 2013. 


DIY Transitional Projects

Sometimes it takes making a temporary change until the permanent change is in the budget to keep me from going insane. It’s the reason that I’m painting the plywood floor in the bathroom I’m working on. Rather than leave it bare ugly stained plywood until it’s time for marble tile, a fresh new painted floor is an inexpensive temporary fix. I love the look of painted floors and I can’t wait to see it myself. I’m hoping I have the chance to work on it over the next Justify Fullfew days.
Here is the before (currently)…yikes!

And here is just a little hint about part of what I have in mind, a little practice with primer. I’m hoping it works out the way I’m picturing it in my head.

So, when I saw Karli’s temporary countertop fix at RockyBella, it confirmed that temporary inexpensive fixes are worth it. Her countertops were ugly before (sorry Karli!) but now – they’re beautiful. Don’t you think?

Here is her post:

My kitchen counter tops are in a transitional stage. I plan to replace them one day soon with some tile or maybe even granite. I would like to tile the kitchen floor before we get to that project though. So to hold me over, I’ve taken on a little “ghetto fabulous” kitchen counter re-do. I shared with you how I did a test run with my little section of counter, in this post. I decided it was high time to get the rest of it finished. When I went back to the store where I originally bought the gray colored “stone” spray paint, I sadly found out the color had been discountinued. Whoops, what am I going to do now? One side of my kitchen is already done and “enviro teched” (clear shiney hard coat) over. I hunted around and around town for the same paint color, but I didn’t have any luck finding it. I picked out the closest thing to it. Once I got them next to reach other I realized it was definitely not close enough, I will have to re-do the first section I did. Oh Well.

Here is my step by step on how I painted my “stone” counter-tops.
BEFORE

AFTER
*Note: If you saw my first post on painting my counter tops you may be have noticed they are not as shiny as my first run at it. I have not completed the “glass shine” step yet. I will get to that explanation soon…

I taped off my sink and protected it with some plastic bags, as well as covering the cabinets in plastic. You will want to protect anything close because you are using spray paint inside….eeek. The cabinets above were not close enough to the spray so they were not covered, and they still stayed paint-less during the process.

I used Glidden’s Gripper primer in gray to coat the entire laminate counter top.

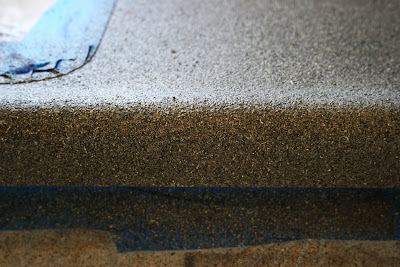
I popped the cap off the “stone” flecked spray paint, and gave it about three to four even coats. Since its spray paint I had to be very careful to keep the can at an equal distance from the counter the entire time. It is easy to get uneven circles that will make it obvious that you used a spray paint. Doing at least three coats will help to ensure that the application is even. I stayed about 8 inches away from the surface of the counter top.

I let it sit overnight to thoroughly dry. Then I got out a fine paint brush and some clear gloss polyurethane that I had left over from when I refinished our hardwood floors. This is the step where I COULD have used Envirotex to get a glassy look like I did on the other side of my kitchen. It would have been about $100 to do this step so I held off for another day. I will do that step very soon in the near future.
Envirotex was used on this section (above) to get a high gloss look. It is also much more protected and durable after using Envirotex.
This is how it looks with ONLY high gloss polyurethane, not Envirotex:

I did about 3 coats of the polyurethane, and let each coat dry for at least 4 hours before starting the next. I left the back-splash alone, just primed it. I plan to do a bead board back-splash soon.

So there you have it, my cheap little counter top re-do. Although its still not finished.

Thanks Karli! Your counter looks amazing! I wouldn’t be in a hurry to change it!

~~~~~~*~~~~~~~
The holidays are getting closer! I won’t even tell you how many days.
Have you seen the cute little skirt in the giveaway?
Guess what! Someone it going to win it!

Amanda & Katie from
Crafting in Laymon’s Terms


have generously donated this prize!

Adorable Lazy Day Skirt. It is made using the pattern by Oliver & S. The skirt is a 2T (11″ long) and made with Heather Bailey Pop Garden fabric. The skirt’s hem is made with bright green, satin ribbon and it has an elastic waist.

They have an etsy shop too!!

http://sisterlylovecards.etsy.com
Check out the the link above for the CUTEST skirts, tutus, onesies – perfect gifts!
~~~~~~~~~

The DIY Show Off

And a little reminder, please Click below to vote!
Once a day every day until 12/4.
THANK YOU x 100! I watch the # of votes every day!
Okay. I admit…maybe a few times every hour. I’m so thankful for your help!


See you Monday for the DIY Holiday Highlights!

~~~*~~~
Holy Cow! 100+ blogs!
Thanks to everyone for participating in the
DIY Show & Tell – your blog
!
I‘ll leave it open for a few days…feel free to join the party if you haven’t already and mingle with the others! I‘ll be socializing this weekend. Hope to see you at your place!