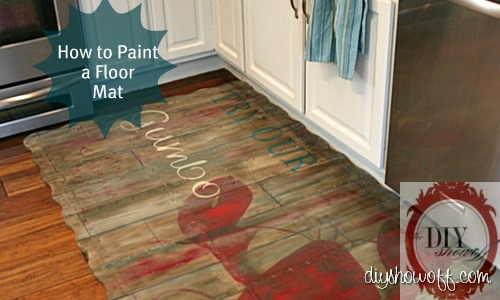
Painted Floor Mat Tutorial
My Inspiration: With a kitchen remodel nearly done, I’ve been looking for an accent rug for in front of the kitchen sink and stove area. I haven’t been able to find something I like but one I did spy several painted foam mats on Pinterest
Project Inspiration
please pin this image directly from Sarah.Wandering.
and knew it was a project I wanted to try. I considered a chevron pattern and even a floral one, but since the kitchen is Mr. DIY’s domain, I finally decided on a design that he would enjoy. I also wanted to incorporate red and turquoise and stumbled across this poster from Zazzle…
Style Inspiration
purchase poster here
My Painted Foam Playmat Tutorial
Materials I used:
- 2 sets of Edushape playmat tiles (with border)
- Gorilla Tape (or duct tape)
- Primer
- Base paint color (I used leftover interior latex in eggshell finish)
- Sharpie
- Pencil
- Glaze (dark gray/brown watered down paint)
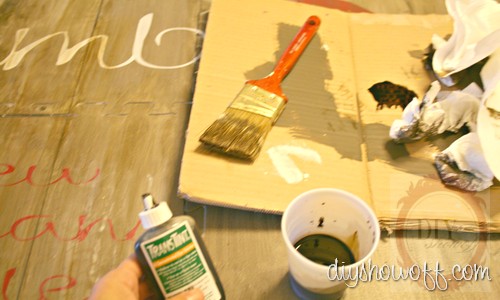
- Rockler TransTint dye (as another dark glaze)
- Craft paints watered down to create glaze (Deco Art): dark and light turquoise, red and white
- Minwax Polycrilic
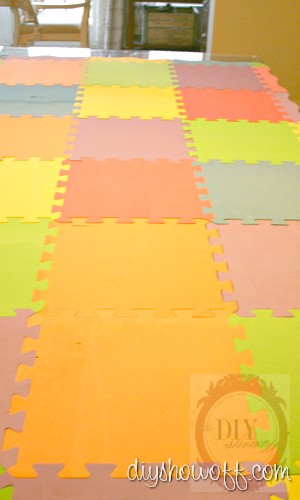
1. I started by putting together the puzzle pieces and used the dining room table as a work space (use a drop cloth to protect furniture).
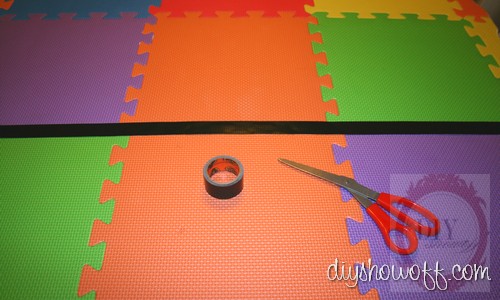
2. Next, I taped over the puzzle joints using Gorilla tape. This is the back side.
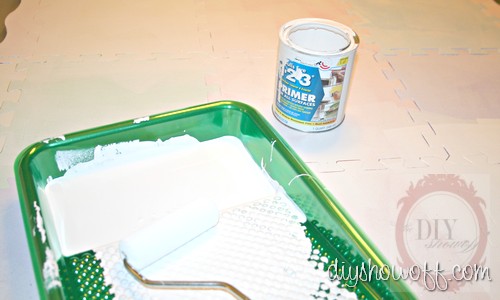
3. Flip and apply two coats of primer using a foam roller and allow to dry.
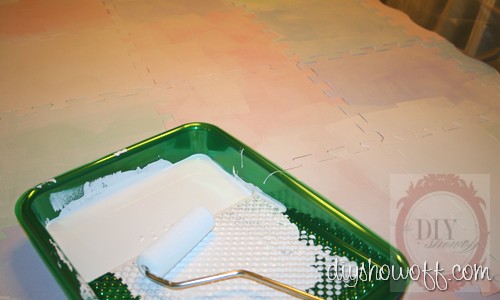
4. Roll on two coats of base color (I used gray), drying between coats.
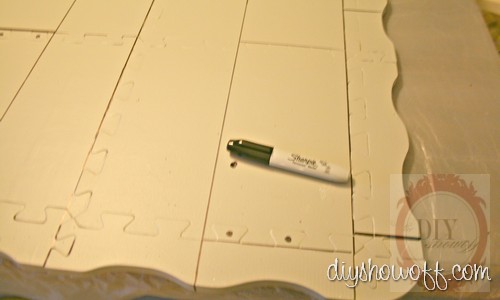
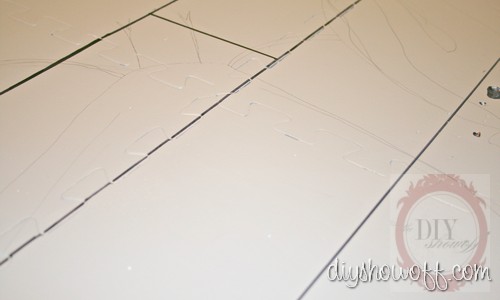
5. Using a yardstick and Sharpie, I created even “planks” (approximately 5 1/2 inches apart). If looking at the mat in a “landscape” view, planks are vertical. I randomly spaced lines for ‘cuts’. I also scribbled in the ‘craters’ in the foam to mimic knots.
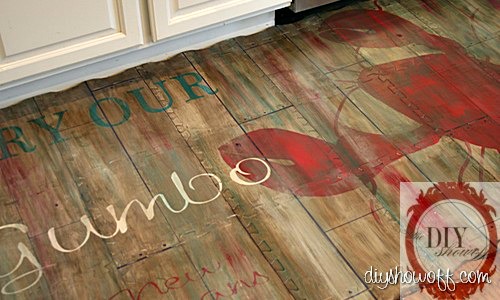
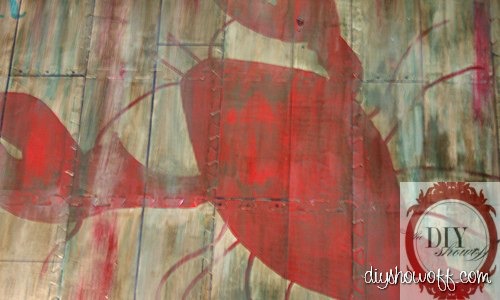
6. With a pencil and looking at the image I wanted to use, I drew a large lobster (correction: crawfish). No need to erase pencil marks where mistakes were made (this will be covered with ‘aging technique’). This was the hardest/scariest part – I’m not an artist!
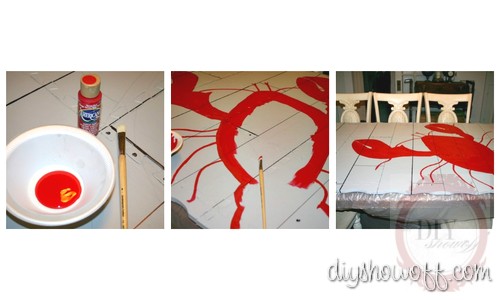
7. With my acrylic craft paint, I traced my pencil marks, outlined then filled in my crawfish with red craft paint. and let it dry.
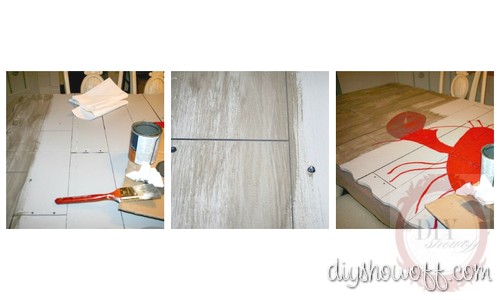
8. Next I used my dark glaze (watered down brown/gray paint) and working in “planked” sections, applied with a dry brush (dipping in glaze, then dabbing on paper towel/cardboard) and brushing long vertical strokes. In some places, I wiped or dabbed the glaze with a paper towel.
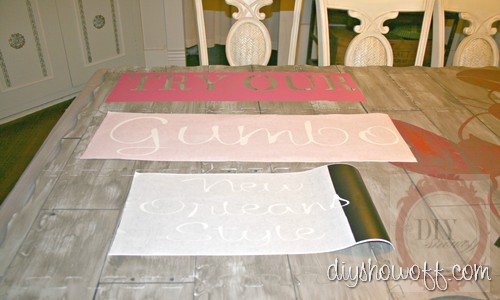
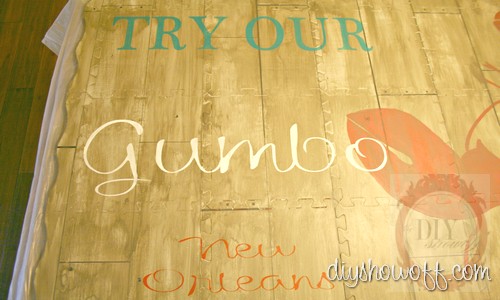
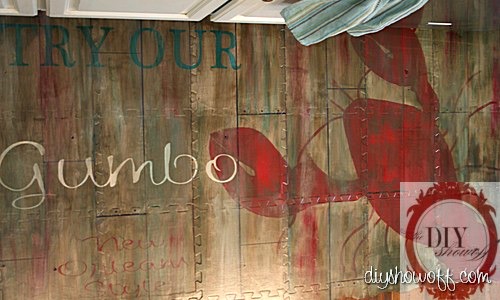
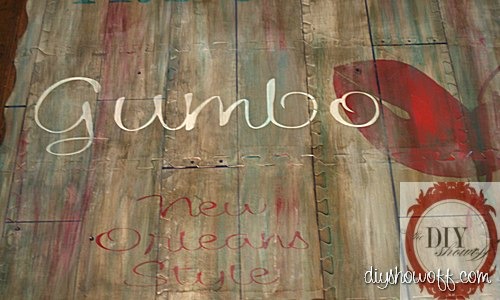
9. Using my Silhouette, I created vinyl stencils for the words “Try Our”, “Gumbo” and “New Orleans Style”. I applied the vinyl and rubbed down for a good seal. (If you don’t have a vinyl cutter, use letter stencils, freehand or shop Etsy for custom vinyl.)
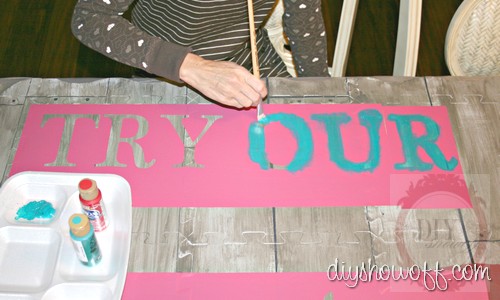
10. Using turquoise, white and red craft paints, I painted in my stenciled words, let dry then removed vinyl.
Aging technique:
11. Next I used my TransTint dye and working in “planked” sections, applied with a dry brush (dipping in glaze, then dabbing on paper towel/cardboard) and brushing long vertical strokes. In some places, I wiped or dabbed the glaze with a paper towel.
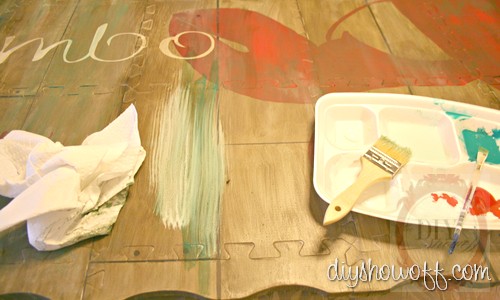
12. Next I brushed on red, light and dark turquoise and repeated step 11.
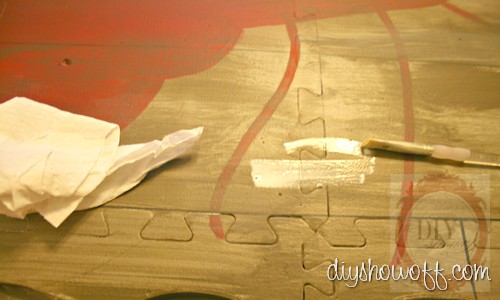
13. Once that was dry, I went over a few spots with a white glaze (white craft paint + water) to create lighter and darker distressing, following with a paper towel to ‘pat’ or wipe. Let dry.
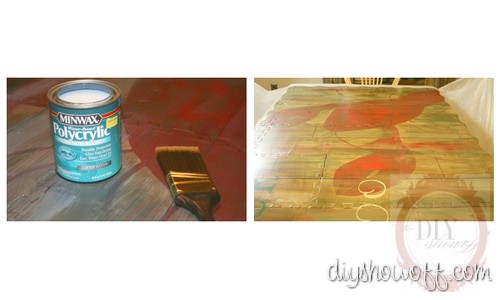
14. Last step was brushing on at least two coats of Polycrilic to protect it. The first coat went on vertical and the second horizontal. Allow to dry.
*All paints/glazes and Polycrilic dried super fast.
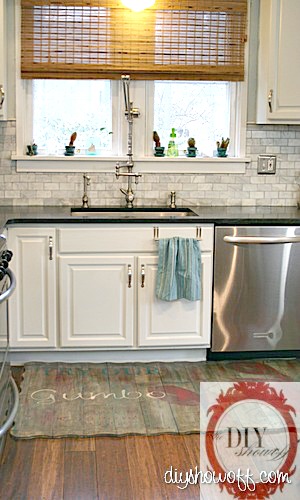
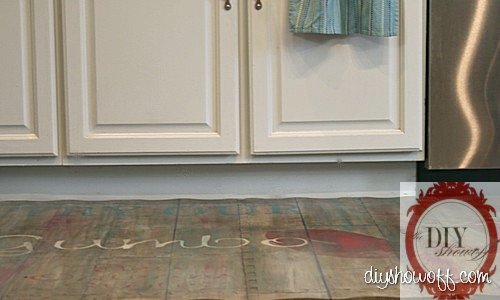
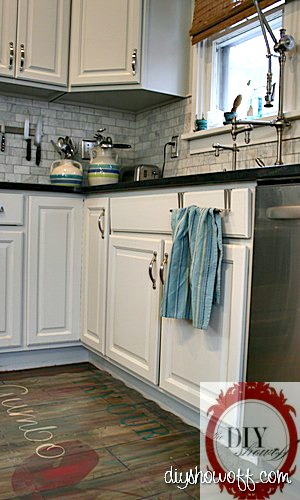
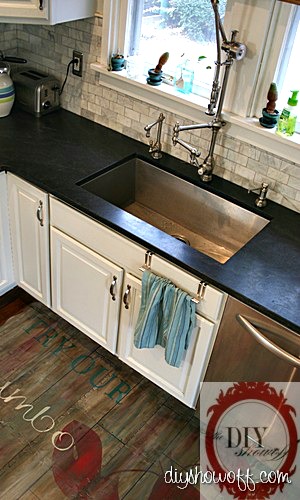
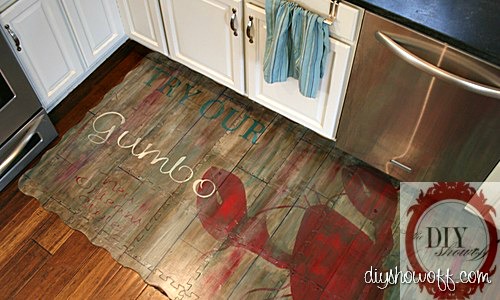
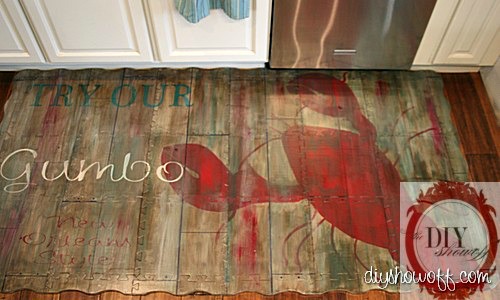
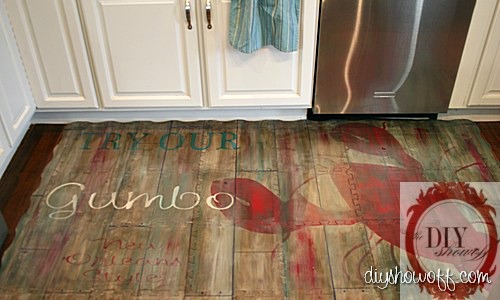
All done! Isn’t this super cute? We love it. It looks almost as good as the poster inspiration – like an aged, vintage restaurant sign. Fun!
Nice and cushy for the cook’s feet, easy to clean!
Lots more pictures…
Don’t have a floor to paint? This is a great option! Looking for an affordable HUGE canvas for some DIY art? This works! In fact, this is too cute for a kitchen floor mat, so you’ll be seeing it moved somewhere else by summer! 😉 I’d love to know what you think!
I’m linking up here too!
TaterTots & Jello
and








This is unbelievable! You are incredibly talented.
Miriam! Thank you so much for stopping by! I love that you took the time to comment! So good to ‘see’ you! Yes! This turned out so much better than I was anticipating! lol! Must share a peek on HomeTalk too! 😉
It’s officially a huge hit on Hometalk! I will share on facebook as well.
I just am in love with this!
Such a clever idea to use the foam mat pieces. Wonderfully done Roeshel.
Wow…that’s nuts… you’re so cool.
Unbelievable! This is awesome! You’re are certainly the smartest and most talented one! 🙂
Be a sweetie,
Shelia 🙂
Hi Roeshel,
I have been contemplating a painted mat for our sun room b/c my son will soon be crawling around, so I love the inspiration. Though, I’m not artistic at all, so I’ll have to figure out what to paint on it. Great idea to use the Silhouette for this, too!
I do love how the interlocking edges of the puzzle almost look like dovetail joints- especially with your “plank” treatment.
Thanks for sharing. It turned out great!
I bet you come up with something fabulous! There are so many ideas. I’m thinking of painting another for my nephew – the type with roads/etc. for his toy cars.
I cannot believe that came from foam mats! It is terrific and looks awesome – love it.
genius!
UGH!! I love this and JUST took a bunch of these mats to Goodwill! Curses! I’m so bummed. This is so cool, LOVE!
Thanks for some great ideas. I think a painted mat is in my future. Glad you are back! ~ Maureen
Clever, cute, creative…all those good things! Great project!
WOW!!!! You are amazingly talented! It is great where it is but I can also see it great anywhere you put it. Very nice job:)
Gorgeous! What a brilliant idea… need to keep my eyes open for those foam tiles at garage sales.
Amazing! Fabulous! Perfection!
WOW…this is gorgeous! I never would have thought to use the kids foam floor tiles like this! I’m so glad I saw this post! 😀
Love it! If I hadn’t read the whole post I never would have known it was foam mats! Looks amazing and must be nice of the feet!
This is amazing! I have been wanting to buy a rug or mat for our kitchen floor, but I may use your idea and just make one myself! Thanks for the inspiration =)
Wowzers! You are SO talented!!!! That looks amazing!
Wow! This looks amazing! Such a creative idea!
Hi Roeshel – Your painted floor mat is the coolest! I was going to get some of these interlocking mats to stand on while using my Longarm Quilting Machine but have held off because they just aren’t that prettty – but now I see the light! Thanks so much.
oh wow….. I’m so impressed. I’ve never thought about painting those ugly foam rugs before! I see them all the time at garage sales and will grab some for sure next time I come across them!
This is awesome!!! Great for tired chefs and much better looking than those plain gray and beige mats. Note to self: add to to-do list!
This is amazing!
WOW!!How absolutely creative.You are so talented.I had to remove the carpet in a small room and now I know how I want to cover it.I will put down a carpet pad before putting down the mats.Thank you so much for the instructions,they are complete and easy to follow that I think even I can do it.I’ve used mats to make play areas many times ,indoors and out.I never thought of painting them let alone how to do it right.Thank you again.
I just hit up your page from Infarrantly Creative’s Facebook post…Wow! This is amazing! That is talent. One question though, how sure are you of the seams staying together, or is it okay if the seams separate? It doesn’t seem to me that they will last long, but I’ve never really used the foam mats. Is the tape on the back super secure? Is junk going to get down in the groves? I guess that’s more than one question, but I’m curious because I really want to do something like this, and with my budget it has to last!
Thanks everyone! Hi Courtney! Thank you! My opinion/experience: Gorilla Tape holds really well (duct tape would also). Does it come apart? No. I’ve moved that thing around quite a bit without it coming apart. 2 layers of primer and 2 layers of paint and 2 coats of polycrilic (or seal it with even more!) keep the joints sealed…at least that’s how mine works. And if for some reason your mashed potatoes found their way smashed into a groove, remove the tape, pull apart the pieces, clean and reassemble. But from what I can tell, the coats of polycrilic really sealed the entire mat and it’s all easily cleaned. Hope this helps!
Other concerns I’ve heard: Setting furniture on it will ruin it. Yes. I imagine that would dent the mat. However, we’re using it in the kitchen without furniture. It’s a cushion for cooking. Maybe in time it would have indents from feet/wear down but kitchen rugs get worn too. ? Someone said it’d absorb germs. I’d argue less than a rug. It is sealed. It’s wipeable and able to be cleaned.
Thanks, good to know. I think I may try this in the future. I may even have almost all the paint already!
Germs!?!? geez people… if well sealed as you have clearly stated any germs could easily be cleaned as you would any other floor in your kitchen…… a mild bleach solution I doubt would hurt it. Now, you might have to reapply sealer every now and then since the cleaning might wear it down. 🙂
Lol! I know, Gracie. That was in response to negative Facebook comments. They’re originally made for children to climb on their hands and knees in play areas…they don’t absorb anything and there are no more germs than any other surface. And of course furniture would dent it. It’s not a flooring solution for under furniture legs. And honestly my cat hasn’t come near it with her claws and doesn’t chew on it. lol Now she does claw the area rug in the living room every once in a while….but everyone is entitled to an opinion. I get that it’s not for everyone, but we love it and I think it’s a fun alternative to a blah plain mat or kitchen rug that gets much dirtier. This actually turned out too cute that we’re saving it for something else. So looks like I might be making another one for the cook! 😉 You know my mantra – do what you love. And if others don’t like, I’m not twisting any arms. 😛
I’ve never thought of this, but what an amazing thing to do! I just had to pin one of your pictures. They’re really beautiful.
that is just amazing, I so love it! what a dramatic cushy rug. It is really stunning and I love love our creativity! way to go.
Adorable!! Well well done!
It’s a crawfish, though, not a lobster :-D.
I’m thinking I’m going to have to raid the nieces’ and nephews’ toyboxes and make one of these :).
haha! Thank you so much for the correction, Farmer’s City Wife! I guess that gives away my Western PA heritage. And actually, if I would have gave it more thought…duh! Thanks so much for letting me know! ::hides in embarrassment:: lol At least when I move it to it’s final location and reveal that transformation – I’ll be correct so thank you!
It depends on where you’re from… but that said since it says New Orleans and Gumbo… yeap… it’s a crawfish! Crawfish do look almost like a miniature lobster! a few little differences. 😉 YUMMY.. I’ll be having a crawfish boil this weekend down here in southern Louisiana!!!!!
I should have included a trip to New Orleans/LA in my research!!! Now that’d be a fun new way to do-it-yourself and blog about it! 🙂 Thanks again, ladies! I’m so ashamed of myself!
This is absolutely adorable! AND such an awesome job and idea!!! I wish I could think of different uses for things like you do! I think it would be awesome to make a really large one of these for a room where the floors look bad and need to hide! LOL!! You’ve def. got me thinking about what I could use this for!! THANKS for sharing!
awesome cool! I love ur awesome idea. Will try for my daddy’s leisure room on the floor. Maybe my kitchen floor?
I gotta check up on u several times to see any awesome cool ideas.
Love to do DIY projects on almost free stuffs.
Pingback: DIY Project Parade Linky Party | | DIY Show OffDIY Show Off
This is such a clever idea! You did a wonderful job on the rug. Pinning it. This is definitely a project for my to to list!!!
I really just can’t say how inspired I am by this!! I DETEST my linoleum kitchen floor and can’t afford to replace it. Rugs are a pain and don’t last but this, this could work to at least cover the majority of it! I really want to try this — just have to find an inspiration picture to get me started. Thanks so much for sharing your creativity with us!
Thanks, Lauren! I think it’s a fun solution (easy to clean and cush-y on the feet). Just know that it will dent over time from weight, but it’s a nice temporary solution and I agree…so much better than a ‘rug’. 🙂 I hope you’ll share the result. I know it’ll be fabulous and I want a peek! 😉
I can’t believe you actually drew that free hand. I thought you had Modge Podged the poster on. You did an incredible job. I like the idea of doing this in a small room to give the room visual interest in a place that otherwise goes unnoticed. LOVE!
Jazmine
keepitkrafty.blogspot.com
Wow..Wow…Wow! You did an amazing job!
Wow, this is just so cool! I’d be interested to know how the finish stands up to the cushioned material flexing. Thanks for sharing this great, in-depth tutorial and the products used. (Love your back-splash choice by the way!)
Love this idea! I assume you already had the foam mats? Do you know a good place to get them inexpensively? Is the foam easy to cut through to make custom shapes? Does the paint tend to peel off? I noticed there is a pretty significant edge; has it been a tripping hazard? Sorry for all the questions; I am just excited to make one myself!
Thanks, Lindsey. I got two packages from Target but here’s a Google search result for better prices: http://www.google.com/products/catalog?hl=en&q=playmat&bav=on.2,or.r_gc.r_pw.r_cp.r_qf.,cf.osb&biw=1280&bih=685&um=1&ie=UTF-8&tbm=shop&cid=3841162508303961323&sa=X&ei=cAleT5-1EsTo0QGoutjWDw&ved=0CLMBEPMCMAI
And with yard sale season coming up – I think that’s going to be cheap alternative too (if you can find them). 🙂
Thanks, Lindsey! No, I purchased the mats at Target. I didn’t cut through mine so I couldn’t tell you how that would go. It might be a little difficult with scissors (maybe better with an electric knife?). And I haven’t noticed a tripping hazard but this one turned out too pretty to use as the kitchen mat so we have different plans for it. And no – no peeling. I did two coats of primer so the paint adhered really well and it’s sealed twice (could do more coats) and it’s smooth but not peeling. I honestly can’t say about how it will hold up since we just completed it. There are others who’ve done it (one I linked to) and maybe they’d have more advice on the durability since it’s been a longer time frame. Sorry, I’m not much help yet. I just know that it did work out better than expected, the primer, paint and sealant look and feel durable (easy to clean) but for us, it’s not being used in a high traffic area. Change in plans! 😉 Hope this helps a little bit.
Thanks for the response! I really want to make one but would need it for a high traffic area!
Pingback: Painted Foam Kitchen Mat
This is absolutely AWESOME!!!!!!
wow! this is an amazing project. i just love the colors, the graphics and your kitchen!!
great resourcing of mat material…who would have thought?!
I absolutely love this & already thinking of a design I could paint! Thanks for an awesome tutorial with lots of great pics!!! Blessings!!
I love this! You are very talented, I want to make one too! I will keep this in the back of my mind then one day it will hit me, I will know what to paint on the mats!
Thank for sharing!
This looks really great! I can’t believe how you were able to make a foam mat look so awesome! 🙂
This is brilliant! I would never have thought to do this. I love the way it turned out!
Wow! This is such an amazing idea! I’m just in LOVE with it! I’m stopping by from Young House Love. Keep up the amazing projects!
Beautiful! The kids already have these mats, so I have a supply…
Currently, I use one as a place to kneel when giving baths. I never thought about painting it. Rubber Ducky, here I come!
This is fabulous! Can’t believe you made it out of a children’s play mat. Brilliant!
I would LOVE it if you would share it at a party I have going on at Project Queen! It started on Tuesday and ends on Sunday.
http://projectqueen.org/welcome-to-link-party-25-turning-the-daunting-into-the-do-able
Love your blog and I’m a follower.
The coolest idea!! It looks absolutely stunning!!!
Oh! Maya! Hi!
Thank so much! 🙂
Wow, what a great idea! I love the upcycle of the kids mats…and congrats on the freehand lobster…er, crawfish. 🙂
This is SO unbelievably awesome! I cannot believe what you did with the foam playmats that I loathe in my classroom each year. I have only ever painted small wooden signs so I can appreciate how much work it would have been to transform this but boy, it was worth it!
Amazing!!!
Claire
Thanks, Claire! There are so many possibilities. This one isn’t going on the floor now. lol Too much work. I think I’ll create more of a vintage farmhouse sign for the kitchen (I’ll be doing it again!) and this one is going on the wall at our barn patio (there’s a huge empty space and this is perfect for it). Thanks so much for stopping by and taking the time to comment! 🙂
Everytime I turn around – you blow me away with another great idea. Absolutely love it and I will be making a version of this! Thanks, Roeshel!
SHUT THE FRONT DOOR !! This is fantastic !! I just “found” you. I think your my new best friend. I think I will be “Stalking you”. In a fun way, though. Hope to try this like, yesterday. God Bless. Scott
I am linking to you for my Monday Project.
xo,
Cheri
Pingback: DIY painted foam playmat becomes wall art | | DIY Show Off ™DIY Show Off ™
Roeshel, this is crazy creative! Love it!
That is so cool. I have those kinds of mats in the basement for the kids. Never thought to bring them up to the kitchen. Well done!
I absolutely love, love, love this idea and am going to try to ‘rock’ one of these out for my galley kitchen (the linoleum is awful)! Thanks for the how-to-do, awesome!
Thanks, Jane! If you do paint a foam mat – I’d love to see it! Let me know if you have any questions! 🙂 So happy that you stopped by and took the time to leave a comment. Makes my day! 🙂
Pingback: DIY Show Off Kitchen Makeover | | DIY Show Off ™DIY Show Off ™
LOVE, LOVE, LOVE it!! (And SO gonna try it!)
Do you think you could use fabric on it instead of painting it and then apply several coats of polycrylic? I’d love to match a mat with my curtains.
HI Evie! I’m not sure. Sounds like a great DIY to try though! I’d probably start with a Mod Podge and decoupage the fabric to it then seal with with polycrylic. I’d love to see if it you give it a shot! Sounds like a great idea!
Oh!! That is fantastic. I want to try one for my farmhouse. Thanks for sharing how it’s done. I love yours! Who knew you could paint those mats?
Not the best picture of it but here’s my version of the play mat: http://thebfarm.blogspot.com/2012/07/b-farm-projects.html
Thanks for the inspiration! Loving mine and it’s holding up great for all who want to know.
This is fab! My husband is from New Orleans and I love this so much that I will have to try to create something similar. Thank you for the inspiration.
What a great idea. I’m thinking Christmas gifts. There are many possibilities. Thanks for the tutorial!!!
Did the paint ever end up cracking? I want to paint some mats but actually use them to stretch and play on. How do the mats feel, texture-wise, after they are painted? If used in the heat do you think they would become sticky? What type of primer did you use? and what type of sealant did you use?
Hi Ash. The mats are smooth. The paint didn’t crack but we aren’t using it as a mat right now. It was too pretty so I put in on the way in a covered outdoor area. lol And no, it doesn’t get sticky in the heat. It’s been over 100 degrees here and it’s fine. I just used regular primer (Zinsser maybe?) and sealed it with Minwax Polycrilic. Hope this helps, but I really can’t say how it holds up to using it as a mat. Perhaps one of the links from my inspiration would have a better answer for that. Good luck!
That is so creative! Amazing!!! Excellent job! I have some old playmats and want to add this to my project list. Thanks for sharing!
That is adorable. Great job! You say you are not an artist….I beg to differ!
I love this mat!! What a fun idea and I love how you even drew in the planks. I can’t wait to try this!! Thank you for sharing all the details- I would have totally forgotten to tape the back!! Not the best step to leave out!!! heehee 🙂 ~ Lori
Pingback: DIY Show Off HomeTalk Bloglight FeatureDIY Show Off ™ – DIY Decorating and Home Improvement Blog
The floor mat looks great!! I was wanting to know if you have had any problems with it cracking.
Thanks
Robin
Thanks, Robin. No, we personally have not had any issues with cracking.
I wondered how the paint has held up on the wonderful playmat DIY. How did you keep it from cracking?
Thank you
Diana…it’s held up just fine, however we are using it as wall art (I couldn’t let the “cook” ruin it…my husband). Perhaps the other links have updates on the durability for foot traffic.
Thanks!
that is so cute! and what a great idea. 🙂
Thanks, Katy!
Pingback: Upcycling Ideas for the Kitchen - DIY Inspired
I used white foam tiles to creat a car mat for my daughters to play on. I just drew on it with a black sharpie on the grooved side and the permanent marker is rubbing off the mat a little. I am trying to figure out a way to seal it … Do you think I need to prime it first? I would hate to have to start over 🙁
Your design turnout out so great! Just looking for advice, thanks.
I’d just try sealing, Lisa.
This is amazing! I’d never thought to paint these floor mats – I’m almost tempted to take our ABC mat out of storage and make it more “adult space” friendly!
http://thefabulousdesignfile.blogspot.com/2012/01/project-update-painted-floor-mat.html
Thanks for sharing, I LOVE it!!!!!
Thank you so much for sharing your tips. I am eager to do the flower chandelier and foam floor mat. I am happy to have found you!
Roeshel… wowza!! I see a copycat piece in my future… thank you so much for the inspiration!! One question… how did you go about cutting your fun edges? I searched the comments thinking someone may have already asked this… but didn’t see it anywhere. You’re the best!!! 🙂
Thanks, Candace! The edge pieces came with the foam puzzle mat I got: http://www.target.com/p/edushape-edu-tiles-play-mat-25-piece/-/A-11295527?ref=tgt_adv_XSG10001&AFID=Google_PLA_df&LNM=%7C11295527&CPNG=Toys&kpid=11295527&LID=PA&ci_src=17588969&ci_sku=11295527&gclid=COC_04n18bkCFZFFMgodA2QAUg
🙂
How has it held up? I really want to do something like this in my boys nursery but I was worried the paint might chip off. Did you have any wear issues? Is it in a high traffic area?
Hi! I actually ended up using mine as wall art since it was too pretty to be using in the kitchen. So, I can’t say on the durability of foot traffic. I know others have done it though so googling might help get some feedback. I will say it’s going on two years of hanging in an outdoor (covered) area in PA and hasn’t cracked or peeled with the weather. Good luck!
I love this sooo much! My sisters and I give each other multiple gifts at Christmas…”happies” that we have picked up throughout the year! We always try to include something that we have handmade. I think my sisters will be getting one of these for Christmas 2014! I am so glad I stumbled upon this in MARCH, so I will have plenty of time to complete two, one for each sister and of course, a third one….FOR ME! Thanks so much for such a detailed tutorial!!!
Leannne
I have been looking at this project since you did it and I am finally doing it! I am making one of these from some rescued 18″ foam mats. I am using porch and floor paint as a base color and will see how it actually holds up on the floor!
Good luck, Sharon! Remind me to take a look (if you blog about it). I want to see! 🙂
Very nice but won’t the paint come off?
Hi Bonnie! We’re using it as wall art in a covered outdoor area. It’s been displayed for about two years now and it’s still holding up well but I can’t speak for foot traffic.
Wow, I never would have guessed. New subscriber and I am loving your blog. I am seriously considering doing something very similar. Thanks so much for the post and asking all of the questions as well.
Love this!! What is the finish size (dimensions)?
It’s been while, Rhonie, so I’m not sure. My guess is around 3×5 ft.
Would you consider making one and selling it?
Hi Tami! Unfortunately, I’m not in the business of selling the things I make, just sharing how I made them. And I’m so not artistic! lol I’m flattered that you asked, though! Thank you so much! xo
Absolutely gorgeous. So clever 🙂
I love this idea! Hoping to buy some foam floor this week… just curious how has it held up to the high traffic kitchen area three years later?
Hi Danae! I apologize for the delayed response – after all the work that went in to creating this masterpiece (haha!), I didn’t have the heart to let my husband who’s the cook (messy messy!) stomp on it everyday. So it’s been hanging on a wall in a covered outdoor area for the past couple of years and holding up well there despite the elements. But, I can’t say how it holds up to every day foot traffic. Sorry about that!
I love the idea of the form floor mat. I am on my way to walmart brfore the kits are gone. LOVE LOVE LOVE.
Super Clever – and btw, you are an artist!!!! I’m want to try this too – thanks!
Hello,
I’m considering painting a large rubber mat in my home gym and can’t find any tutorials. How’s your foam mat holding up?
Hi Kinga! Since it turned out so well, we resorted to using the mat for art work instead. So I personally can’t speak about durability for foot traffic. Sorry I can’t be more helpful.
OMGosshhhhh!!!!!! This is so unbelievably GRAND I just can’t take it. You done such a wonderful job. I would never thought to paint the mat and certainly not just by eye that way but that totally works. I’m green with envy:) I love those aged signs too. CONGRATULATIONS, so glad it turned out so well for you and thanks for sharing!!!
This is too cool! I’m redoing my kitchen and can’t find a mat I like…until now !!! Thank you for the inspiration!
I love this! How has the paint held up? I would think it would crack and flake…
We decided to use it as “outdoor” wall art instead of using it for foot traffic. So I can’t vouch for dupability as a floor covering but there is absolutely no cracks or flaking from being hung on an outdoor wall (covered roof but open to elements/PA weather) for the past could of years! Surprisingly!
How did this hold up after walking on it for a while? It is beautiful! I would not want to harm it. The mat that I painted started flaking away after us. I am not sure that I had the right primer but I did put two coats.
It turned out that I didn’t have the heart to walk on it. haha! We’ve used it for outdoor (3 sided covered patio with roof) for the past couple of years (open to snow/etc.) and it’s held up. But I don’t have any experience with walking on it. Sorry I can’t be more helpful!
Thanks for sharing and the update on durability. I bought some of these at Costco a few years ago and they were so stinky I stored in garage. I think paint and sealing might help mask that so I’m giving this project a go.
A tip for others is to check what type of material used in the tiles. Mine are EVA and finished on one side, so I’m flipping to use the back, which is smoother and sealing with mod podge first before painting. Hopefully it will flex better and reduce cracking as I plan on foot traffic. Also recently almost all at big box stores are made from recycled rubber so may need a different paint product.
I love how your design stepped away from traditional flooring, although you made me homesick for New Orleans with that realistic gumbo mud bug pic☺
I really love the mat! Do you happen to make them to sell? I would love to order one if you would consider making one! Please contact me 5104696951!
Sorry, Darlene! I do not. I just share the steps I did to DIY. 🙂 Sorry I can’t be more helpful!
Very wonderful share, love it.
This is incredible. I have a ton of foam tiles that I’ve been wanting to upcycle but didn’t know how until now. I want to paint mine a solid color or maybe a simple design. I have some super specific questions about your materials. Many of the materials you mention come in a variety of “flavors” so I was hoping you could clarify, pretty please. I don’t care that much about brands but it would be helpful to know the types of primer, craft paint, rollers, brushes etc. thank you!! You’re brilliant!
Thanks, Lizz! It’s been years so I’m sorry I can’t be more specific or helpful!
How well did this stand up to the traffic and test of time?
Lisa, I wound up displaying it on an outdoor wall (it’s holding up there with no cracks/wear/etc.) so no experience with foot traffic. Sorry I can’t be more helpful! I feel like it would do well. It’s not peeling or flaking or anything after all this time but again, sorry!
im new to pintrest and love this idea i want to adapt this idea to use outside at the pool the concrete gets so hot , i thought this would make a great outdoor mat?rug.
What sort of primer did you use?
(I’m about to paint a 5m X 5m EVA foam puzzle mat).
Hi Donna, it was so long ago, I don’t really remember but the one photo shows Zinser. Hope that helps! Good luck!