Silhouette Heat Transfer Sewable Fabric Interfacing Tutorial and a Little Giveaway

I knew once I had a Silhouette machine, there would be endless creative possibilities.   Now the Silhouette machine cuts fabric!  Using scrap material, I made my daughter a doxie (Niski!) pillow.  
Here’s how I did it. 
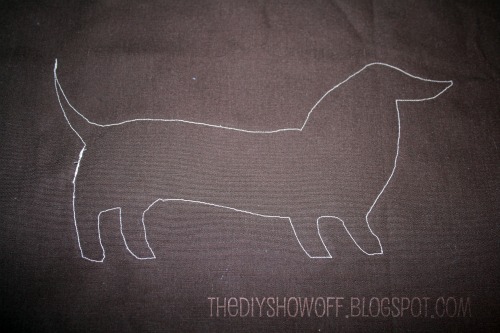
I hope to make my own pattern but until I figure out how to do that, I purchased a doxie shape from the Silhouette online store and sized it.  I did cut out some other shapes including an ear and some flowers for appliques as well. 
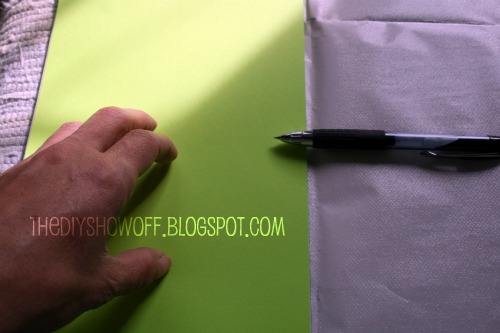
My doxie was approx. 6 x 9 inches long so using a piece of cardstock as a pattern, I cut a 6×9 piece of the heat transfer fabric interfacing.
Iron on to fabric (rough side of heat transfer interfacing paper to back side of fabric).
Cut out the 6×9 heat transfer paper fabric interfacing once it’s ironed (cooled) to the fabric.
I used my Silhouette cutting mat.  This will work best if your cutting mat isn’t very sticky (not new).  The heat transfer fabric interfacing paper backing sticks to the mat so I had to clean that off/peeling bits and pieces.  The other option would be to make sure your fabric is at least 8 inches wide going through the feed (so it doesn’t move around).  Stick the paper side to the mat, fabric side up.  I always stick to the right side.
Feed mat into the machine. (I always insert mat and vinyl on the third line from the left as the machine cuts closest to the right margin on projects shorter than 12″ unless you make adjustments in the software).
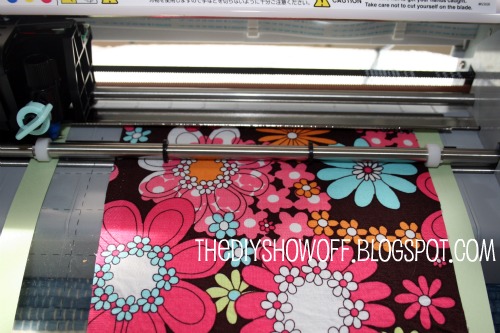
Change to the pink cutting tip. 
Send the image to the Silhouette for cutting.  My settings were 3 for speed and 33 (the highest) for thickness.
Cut image.
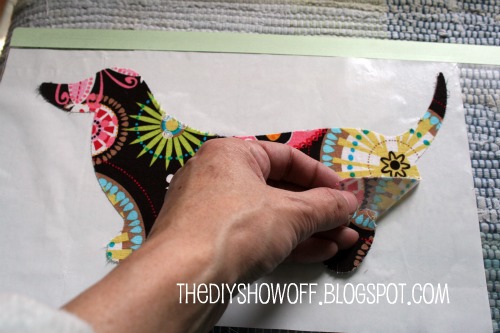
Unload and remove ‘negative’ fabric.
Lift up fabric doxie – instant iron on applique! How cool!
Iron fabric into place on 1 side of the right side of pillow to be sewn (or whatever you’re creating). 
Once it’s ironed on, it’s temporarily in place and ready to sew.  Sew close to the edge of the fabric applique. For rounding corners, make sure needle is down through fabric, lift foot and turn as needed. Lower foot and resume sewing. 

The back side will look like this:
Add extra iron ons for texture and depth, a button for an eye.
I got caught up in my project and didn’t photograph the remaining steps but I made a pillow cover.  Pin right sides together and sew three sides of the pillow cover.  Snip corners of fabric up to the seam. Turn right-side-out. Insert pillow and hand or machine sew the opening shut. 
Front Side:
Back Side:
So cute!  I’m not crazy about the shape of the dog (it seems a little distorted to me), but for first time test…it’s cute and my daughter loves it.
~*~*~*~
Now onto my Silhouette giveaway!  (This was so much fun last time I did it and I hope to share a picture of the previous winners’ projects soon…if they’re willing to ‘show off’.)  No machine giveaway this time…sorry! But I love sharing my Silhouette with you by helping you with your DIY project in the meantime!

Comment below what you’d want to make with a Silhouette machine.
Vinyl Art?
Labels?
Vinyl Lettering for a DIY sign?
Iron On?
Fabric Applique?
Scrapbook supplies?
A special card?

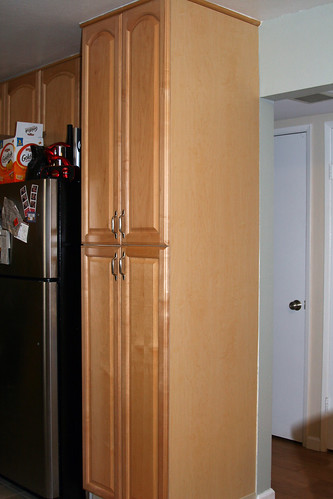
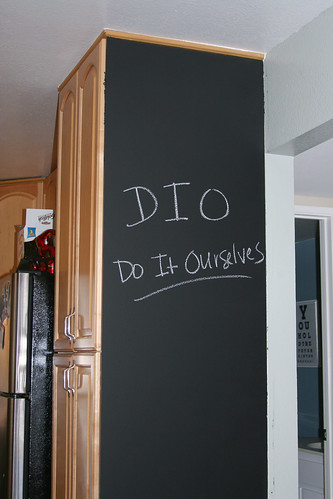
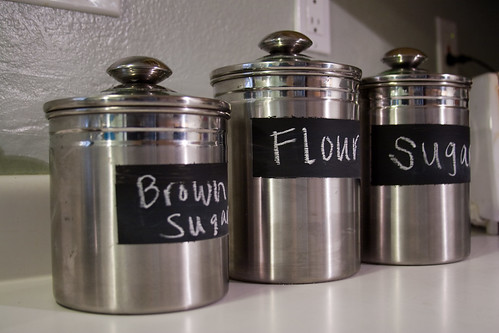
Here are the projects I’ve made using my Silhouette if you need some ideas:

1 comment/entry per person.
I will choose a handful of readers, based on my materials and ease of your project. 
I will be purchasing some more vinyl and images for the purpose of this giveaway.
Giveaway is open to US DIY Show Off readers/subscribers only. 
Comment now through Wed. 3/23 at midnight EST.
Winners must respond to winner announcement at the end of the week.

Good luck!

~*~*~*~
March Promotion for DIY Show Off readers:  Purchase a Silhouette SD, one of each fabric interfacing (clean cut & sewable) and a roll of white flocked heat transfer material for $229.  Also, readers that already have a Silhouette can get 25% off fabric interfacing. The March promotion will run from the 21st through the 27th.  
Use promo code “SHOWOFF” 


DIY Project Parade – Back Splash from start to finish

Back splash, back splash, back splash! It’s out of my system. I promise this is the last you’ll hear about it except for a link back to this tutorial at the kitchen reveal.  Here is our DIY back splash tutorial.  We finally finished installing our marble subway tile back splash. I’ve linked to the products we purchased.  This took us about a month of weekends (some of that time was spent doing some electrical work for under cabinet lighting and swapping out old beige outlets/switches for clean white ones along the way). 

Materials:
Venatino Polished Marble Tiles 12×12 mosaic, 5 Venatino Pencil Borders
OmniGrip Maximum Strength Adhesive
Tile Guard Natural Stone Penetrating Sealer
QuartzLock Grout – silver
Frog Tape
Caulk

Tools:
Tile saw
Trowel
Float
Putty knife
Bucket
Sponge
Bucket
Paper towels
Rags
Caulk gun
DAP Pro Caulk Tool Kit

Just because we all love a good before and after…here was our kitchen when we bought the house (cabinet painting tutorial)… ugly. All we did when we moved in was paint the walls green, insert new SS appliances and range hood then lived with it for 3 years until we just couldn’t take it anymore and we had a savings to get started on our dream kitchen (the dream where we have savings but the dream without winning the lottery)…
The above blue countertop (want it?) was replaced with honed Jet Mist granite…

(dark charcoal grey with random white veining)

Back Splash Tutorial:

1.  Apply caulk to gap where countertop meets the wall. I’m not sure why I didn’t get a picture of the caulking gun…but we did use one. (Just didn’t want you thinking it was magic, in case you were thinking so.)

2.  Use a DAP Pro Caulk Tools to make an even/straight line. Love this little blue plastic tool!

3.  Prep area.  Cover counter top or clean as you go. Protect the granite!

4.  Starting at the edge of the counter, decide how your tile will end.  We used a matching border from the countertop’s edge vertically and ended at the bottom of the end of the wall cabinet.  We mitered the joint where vertical meets horizontal.

5.  Apply border and tile with OmniGrip Adhesive using a trowel.  Coat the wall (can be done directly to drywall).  It’s pre-mixed so there’s no guessing on consistency and this product works really well for a back splash. 

Pardon the blurriness…DIY does not wait for camera battery to recharge. 
6.  To lessen breakage and crumbling when cutting (the vibration nearly pulverizes edges of the marble), we used Frog tape on cuts as well as to secure mosaic while cutting. 
Don’t forget your safety gear!

7.  Apply pressure to ‘set’ tiles in place.

Another shot of how we ended the tile on the countertop/cabinet edge.

8.   Let dry at least 2 days.

9.  Seal tiles using Tile Guard.  Wipe on with a rag.  It dries within seconds.

10.  After drying, prep area by covering countertops or clean as you go – dried grout will be hard to remove.

Have a bucket of water handy.

11.  Apply generous amount of Quartz Lock to the float using a putty knife.

Pre-mixed. Put the lid on and save leftover for a future project.

12.  Add grout to spaces between the tiles, filling every gap, working in small areas going to next step and starting again with the next area.  Smoosh it in the gaps.

13.  Using a well-wrung wet sponge, wipe in a diagonal motion (except when necessary against countertop and cabinets), wiping away grout from tile.  Grout should stay in the cracks and gaps, but be cleaned away from tiles.

14.  Rinse sponge.

15.  Repeat.

16.  Let dry.  Grout will hide imperfections/crumbled edges of marble tile.  Don’t stress with tiny chips. Grout will disguise them. We have an old farmhouse, so our motto is “imperfection adds character”. 

Before Grout:
After Grout:

Admire work!

Again, before when we bought our home in 2007…
to this…
A work in progress 2011…
Next on the list, one of these:
  • Tearing out existing pantry to make room for future stand alone fridge and freezer (which won’t happen by time of reveal, but saving for it).
  • Removing vinyl flooring – yipes!
  • Building a larger built-in pantry.  Original plans were for a table and open shelving.  Russ has decided he’d like it built in.  Not sure if it’ll be cabinetry or framed-out with doors. Still planning. 
  • Installing new wide plank hardwood or bamboo floors.  Still on the hunt for our perfect floor.
  • Painting ceiling and walls.  I think we’ve agreed on a color!
  • Framing a window and replacing French door frame with something more original looking.
  • Adding reclaimed barnwood to make a header in the middle of the room look like wooden beam.
  • Painting trim, freshening up old and primer/paint for new. 
  • Running electrical to new island.
  • Building an island. DIY? Maybe incorporating reclaimed barnwood.
  • Decorating!!!
~*~*~*~


Do you have a DIY project to show off this week?  I’d LOVE to see it!  Or please visit the links to get inspired!


The DIY Show Off


If you’d like to link YOUR DIY project post to The DIY Show Off Project Parade:

1.You must use the button above and link to this post to share the linky love.


2.Include your name or blog name and project title. Add your permalink (not your blog url, but your DIY project post url). Feel free to link a Past Post, just invite your readers in a current post with a quick note.

3.Or email your link to thediyshowoff@gmail.com and I will add it for you.


4.If you notice your link has disappeared -please add the link back to The DIY Show Off to your post today, a button or a quick note to your readers about the party and try again! I love when everyone participates and readers check out everyone’s links, but I think the return favor of linking back is the nice thing to do so everyone plays fair and enjoys all of the projects and links. Also – this blog party is for DIY projects only. Links not related to DIY will be deleted.


DIO – Do It Ourselves

A two person team are known as DIO’ers.  So cute.  DIO – Do It Ourselves. That’s the name of Lannie’s new blog and I look forward to seeing more from this  DIO duo. They’re awesome!

Here is their fireplace before:

BEFORE – 1970s faux lava stone
fireplace-tonybefore

AFTER – beautiful creamy white wooden fireplace surround and carrara marble tiles.
Fireplace-after

Get the details, more pictures and see exactly what they did at

Great chalkboard projects…

Cabinet before:
chalkboard-before
Cabinet after – so handy and fun:
chalkboard-after

See the original post at Chalk It Up 
canisters-after

Wingback chair before and after (I am SO eager to do this…it’s gorgeous every time I see it). I love Lannie’s choice of fabric!
Before…
  Wingbackbefore

After:
chairclose
Thanks so much for sharing your hard work and creativity, Lannie (and Tony)!  Great job on everything you’re doing!  

~*~*~*~
Happy Saturday!