When talented DIY’er Mandy at Vintage Revivals gave me the green light to show off anything I wanted at her site…I spent so much time going through her entire blog full of creative DIY projects. LOVE! She has a fun “Look What I Found” party on Fridays too and I haven’t shared my yard sale and thrift store finds in a long time. Woo hoo! Another reason to party!

Here are a few of my favorite posts but click above to check out more!
Isn’t this chandelier awesome? I love knock-off projects!
Remember this {post}? If not I will refresh your memory.
It all started with this:
A beautiful chandy from PB that was $300.00. I love it, dont you?
So I was on the hunt and found this:
I really liked how it was more curvy than the one from PB and I REALLY REALLY liked that she was only $20.00.
So I loaded up on a MASSIVE amount of supplies (tacky glue and Jute) and started doing this:
I started at the bottom of the chandelier. I put some glue down and wrapped up to where the arms started to come out. Because I wanted it to look clean I cut 5 pieces of jute (about 3 inches each) and glued them with their ends poking out against the arm (see picture) and then I just tied a small piece around it to hold them in place.
Then I started wrapping the base of the arms. I started in the middle right below the arm and wrapped down to the bottom:
Then I used the same technique that I did on the main part of the chandy. I cut 5 pieces and wrapped them all the way around so that each end was by the arm and tied it to hold it in place.
Once that was done I started wrapping the actual arm. Make sure that all of the wonky end pieces are tucked in when you start wrapping. Wrap all the way to the other end and make sure that all of those pieces are tucked in too.
This is what it will look like
Do that for each arm. Next you are going to wrap the top part of the lights. Put your glue on like this:
and start wrapping like Jay-Z. Ha ha ha I had to get a joke in there somewhere!
Go all the way to the end and then flip it over and carefully wrap the upper lip
Finish wrapping the whole body and your done!
INSTALLATION:
The chain and electrical cord were way to short on the chandy that I bought because the people who build our house are dumb, so we had to change them out. Court cut the wires and stripped them
Then he spliced them together and put a new chain on. Obviously you need to weave the wires and the chain blah blah blah. Put your ceiling plate on. And your installation hardware.
Screw them to the ceiling and connect them to the house wires. You should prob have an electrition do it unless your husband is as manly as mine and likes to do everything himself.
Screw on your ceiling plate and if nesscary attach a hook to center it on your table.
Your chandy should hang about 30 inches above your table top.
Then stand back and make sure that nothing catches on fire! And admire your handiness and the fact that you saved $270.00.
Total Cost Of This Treasure:
Chandelier $20.00
Cord, Chain, Ceiling Hook: $19.00
Jute: $1.89ish
Grand Total: $40.89
Pretty Sweet!
~*~*~*~
And one of my favorite decorating materials is tree branches.
Check out this creative art project!
I have yet to post a complete picture of my living room. I thought that I would post about the individual projects first and then do a post about everything collectively. So you’ve seen my yellow {end table} and my black and grey {wall} and my {chair}. My inspiration for this room are these beautiful trees.
I
love Quakies. They remind my of my childhood at our cabin. So this is what I based my colors on, Yellow, Black, White and Grey.
The wall behind my couch is ginorm. I have 12 ft ceilings and I have had the hardest time finding some kind of artwork that is cheap and huge. (Not a very friendly combo). In june I was at our family reunion in Cedar City, UT. My uncle lives in the middle of nowhere out there and every time we would drive past his house I would see these trees, so on our way home the last day I stopped on the side of the road and gathered some cut branches. I had no idea yet what I was going to do with them but I knew it would be cheap and cool. This is what I came up with…
I got 2 pieces of 4×4 subflooring wood from Homie Depots and had them cut each in half.
Cost: $6.00 a Piece ($12.00) but I only used 3 so I guess $9.00.
Then I mixed grey oops paint with water. After doing one board I hated it. It was to grey. So I added a bunch more water and some black tole paint swirled in to give it a little bit of dimension. I started out with a brush but gave up and used a sponge and covered each piece of wood.
Then I took one of my favorite products in the world Ralph Lauren Faux Glaze in Black Silk and brushed it on just the outer parts.
Then I rubbed rubbed rubbed. I did this twice to get the color level that I wanted.
This is what they looked like in the morning after they dried.
I took my Quakie branches and tried to Gorilla Epoxy them on. It didn’t work so I just ended up using finishing nails. That’s also how I mounted it to my wall.
See how much dimension they have? LOVE it!
I love how they are so organic looking.
Total Cost Of This Treasure:
Wood:$9.00
Everything else I had on hand
I just love being cheap!
~*~*~*~
Click the links below for more details on these awesome ideas:
Are you in love too? Thanks so much for sharing your DIY amazing-ness, Mandy!
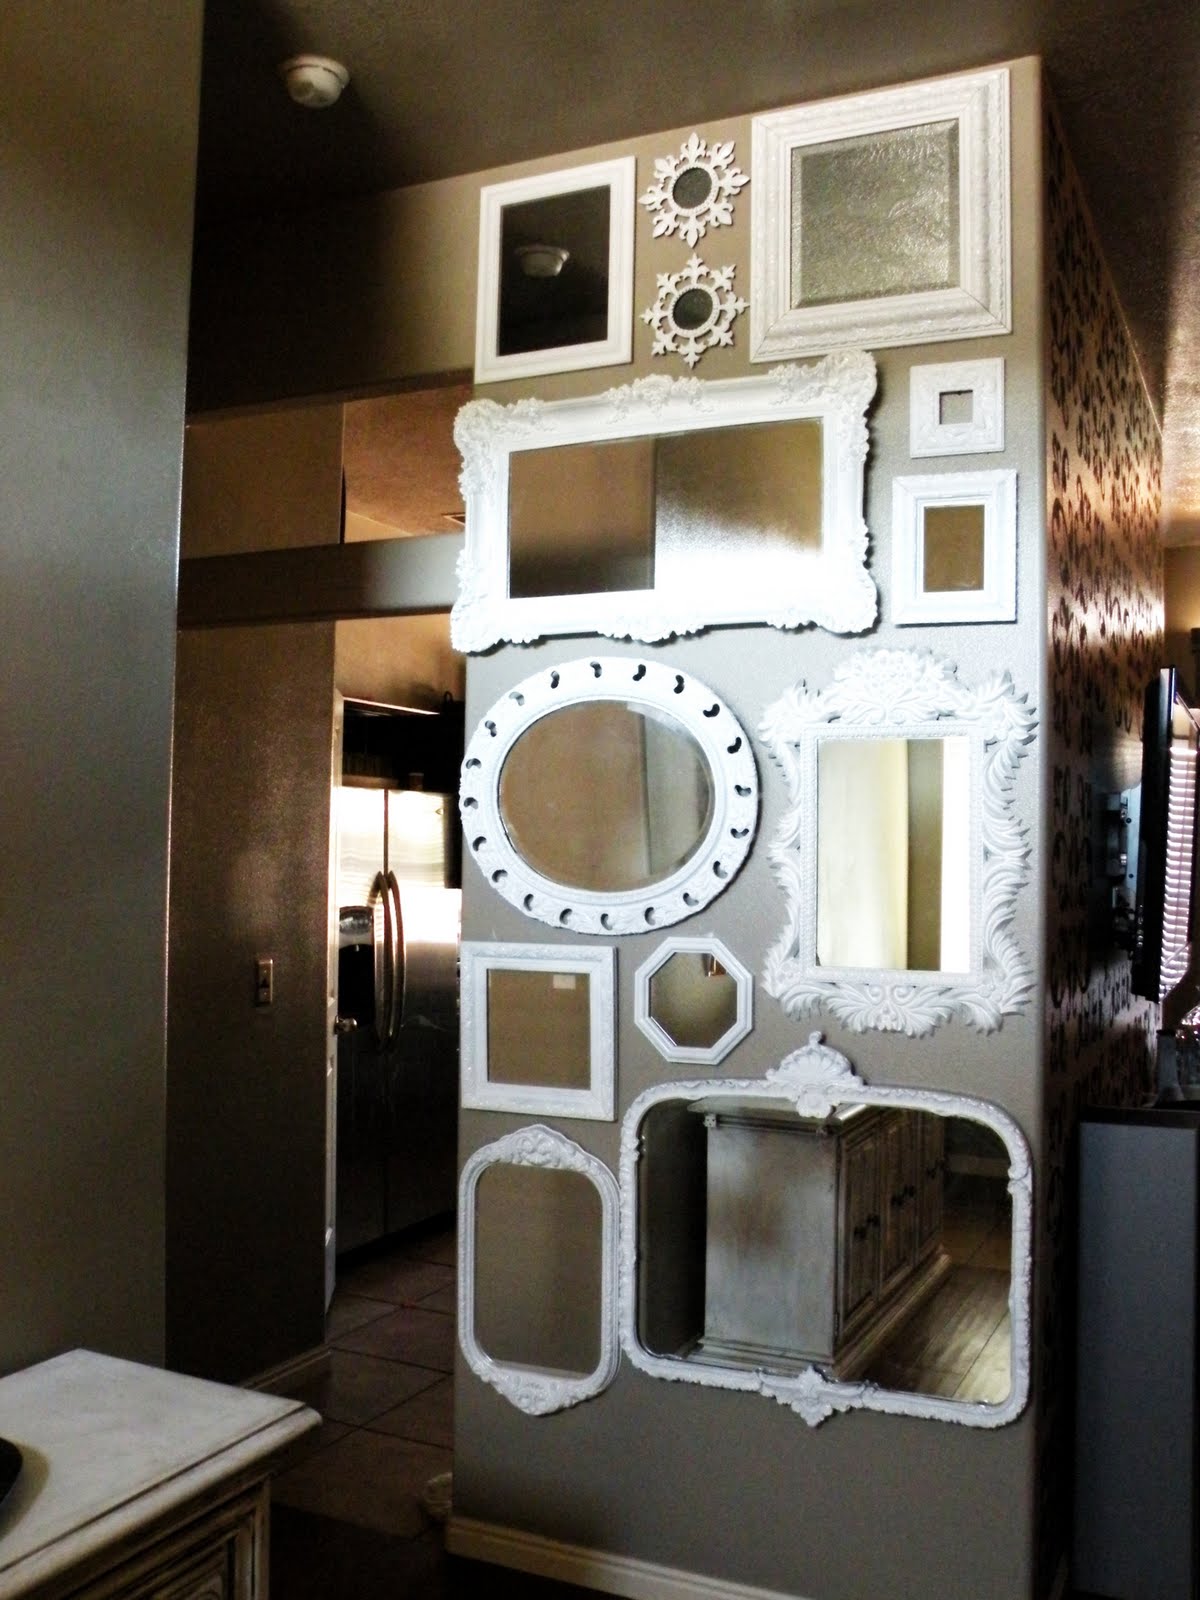
YOU DEFINITELY WANT TO VISIT VINTAGE REVIVALS TODAY FOR A CHANCE TO WIN an Anthropologie knock-off mirror!
Isn’t that it gorgeous? If I can’t win it, I’m definitely making one.
Please mention that you heard about it via
The DIY Show Off!
——————-
And!
Don’t forget to enter the Gorilla Glue Giveaway!
All you have to do is be a follower and comment!
If you love to DIY – I know you’ll LOVE this prize pack!
More details HERE as well as info on an upcoming DIY Club Inc. party!