


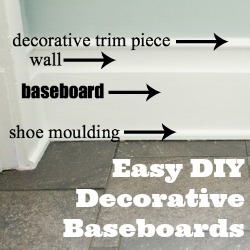
Family room DIY started with installing new baseboards (super easy tutorial) with bulky 1×5 boards…
and includes plans of beefing up the baseboards too. This project is sponsored by FrogTape. In an effort to “practice”, I choose to give it a trial run in our half bathroom.
The result: success!
Here’s what I did:
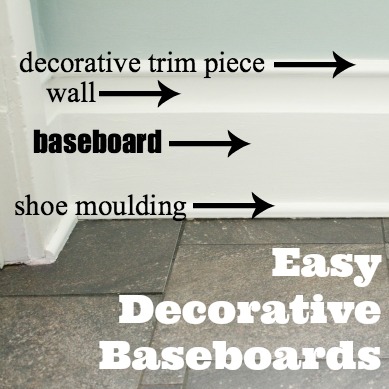
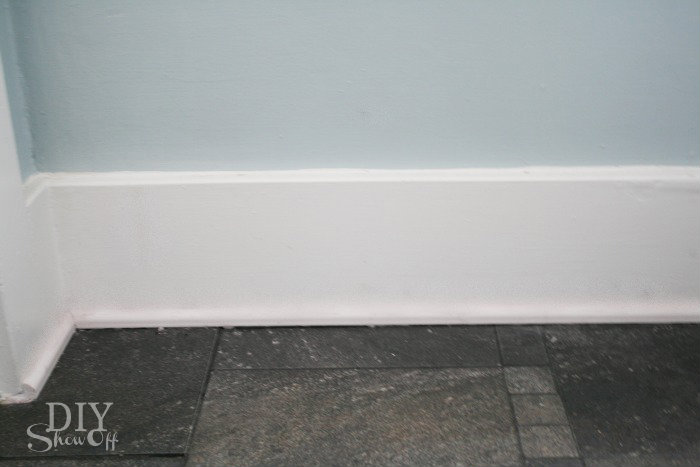
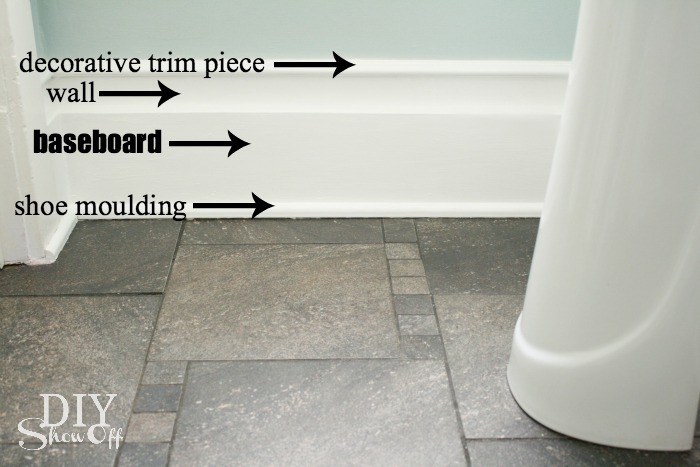
Before, baseboards are a nice chunky size with shoe moulding.
I measured each width and cut my skinny decorative trim to size (yes, tricky mitered cuts…you may want to purchase extra trim. Thankfully this skinny decorative stuff is inexpensive).
I used the spacing of my level to hold the trim in place. For a bigger room, I’d pencil a level line for leveling up trim while nailing into place.
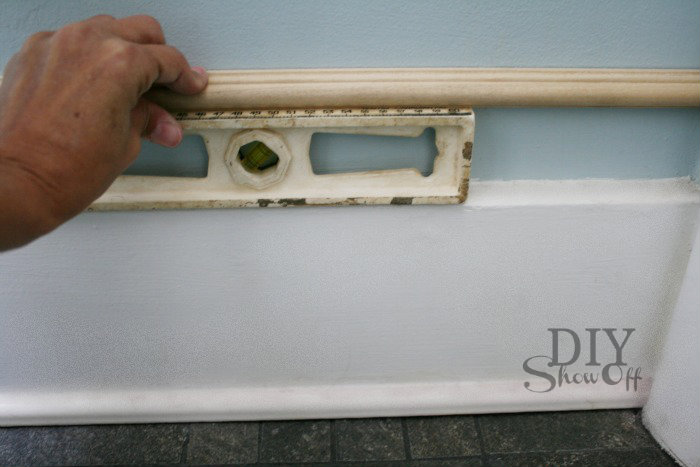
Using my nail gun and level, I nailed the trim into place.
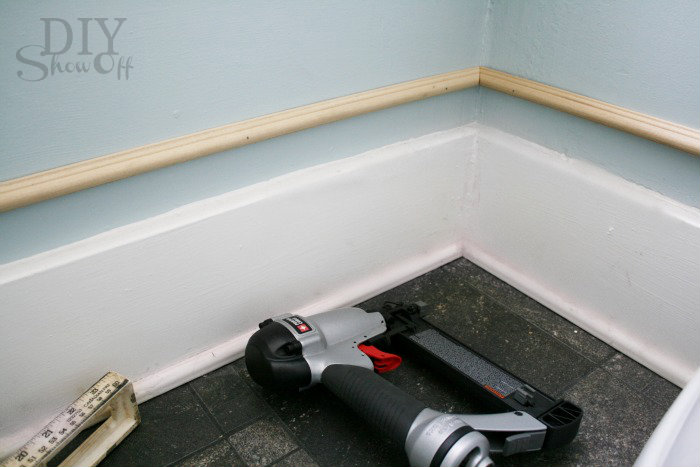
Then caulked the cracks using DAP paintable caulking. Tips for caulking trim:
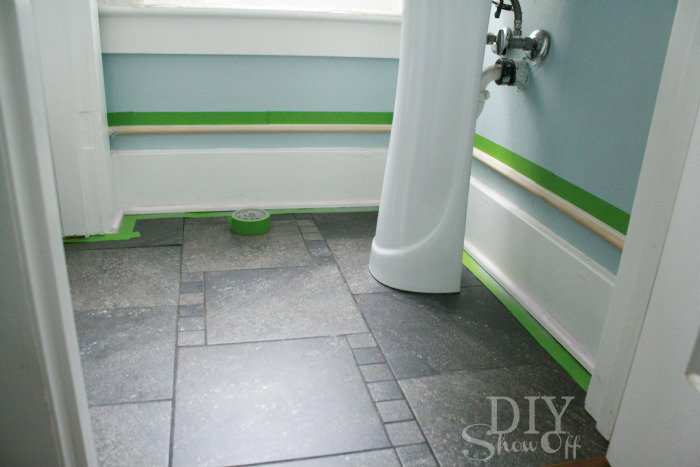
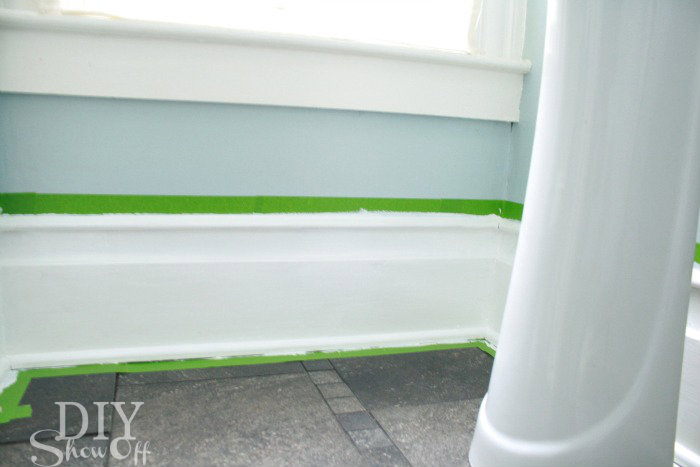
- Use FrogTape on the wall right next to the trim for a clean line.
- Dip finger in water and smooth caulk. Have paper towels on hand.
- Remove FrogTape before caulk dries. Then let caulk completely dry before painting.
After the caulk was dry, I reapplied FrogTape to the wall and to the floor, pressing down where the FrogTape would meet the paint line to activate the Paint Block Technology (keeps paint from seeping under the tape).
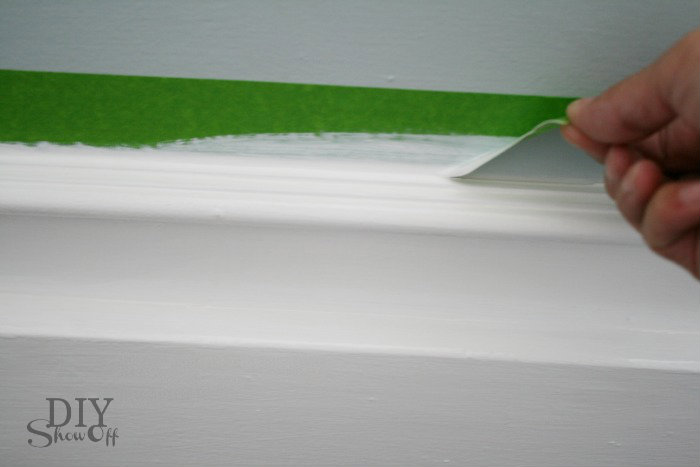
Paint baseboard, wall and new trim. I used a primer + paint. And did two coats.
Remove FrogTape by pulling away from the trim while the second coat of paint is still wet.
All done…beautiful thick easy baseboards with architectural detail.
Before:
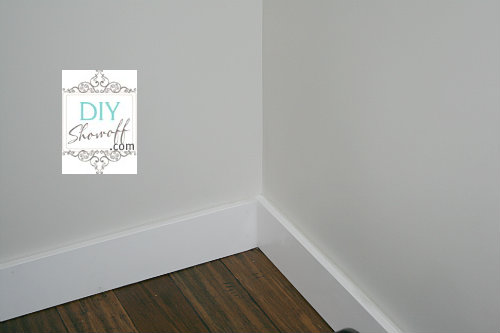
After: easy, cheap and gorgeous!
Definitely happening in the family room next…well, unless I decide to do a board and batten. DIY decisions, decisions. 🙂
Sharing at Domestically Speaking.
*This post is brought to you by FrogTape. FrogTape provided by Shurtech. The opinions are completely my own based on my own experience. For more FrogTape projects ideas, check out the FrogTape Blog Squad.
Looks amazing!
Turned out beautifully! Love it!
That looks really nice! Easy is always good too. Will need to remember this trick. Thx for sharing!
LOVE it! There is nothing I love more in homes then thick moldings! Awesome tutorial to get the look you want for a whole lot less, nice job!!
I like it.
I have a weird addiction to beautiful baseboard. I love what you did with your “cheat” old baseboard.
Jeesh, what a difference! I like that little trick of leaving wall space and painting it out as if it were moulding!
It looks great! I pinned something similar a while ago – I want to do this in our rental condo – it’s awesome to see it done and done well too. 🙂
Thanks, Lizzie! So good to “see” you! xoxo
Love the idea! We’ll probably be needing something like this in our new house. So thanks for the tutorial!
Loved this idea, but also loved the paint color. Do you have any details on the brand and color name.?
Do you mean the wall color, Sarah? It’s Benjamin Moore “smoke”. The trim color is DutchBoy Ultra White Trim/Cabinet paint.
What type of nail gun do you have? I’m considering doing my own baseboards in the basement (we have glued-on ugly vinyl crap currently), but don’t dare try it with a hammer and finish nails. Thanks for any advice!
The brand of our nail gun is Porter-Cable. Hope that helps. Good luck! Thanks for stopping by, Jen!
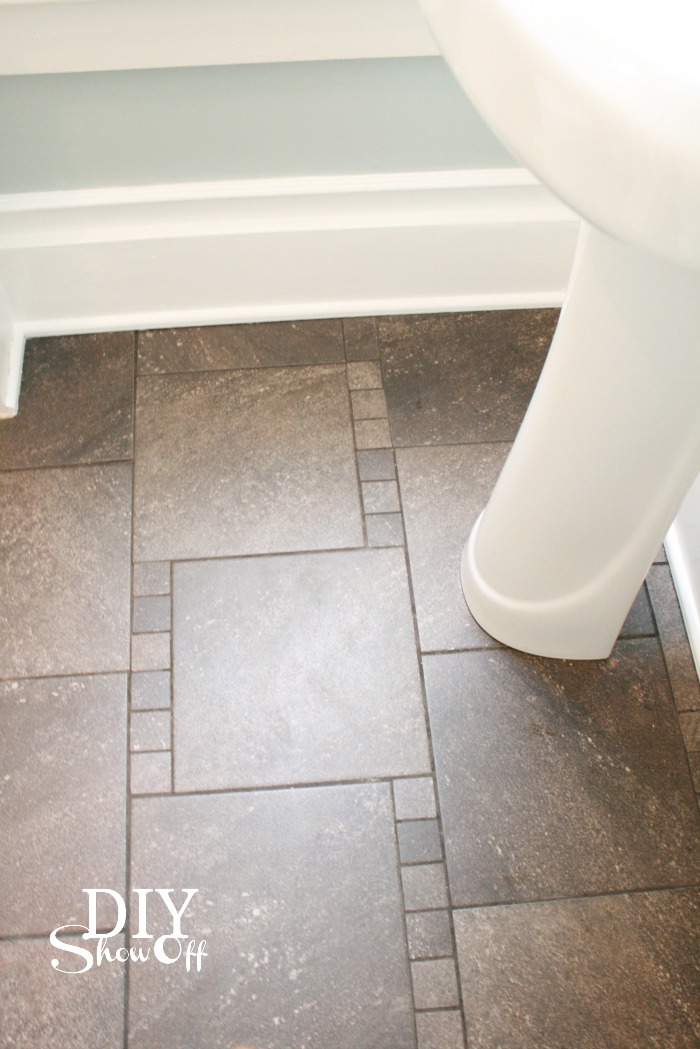
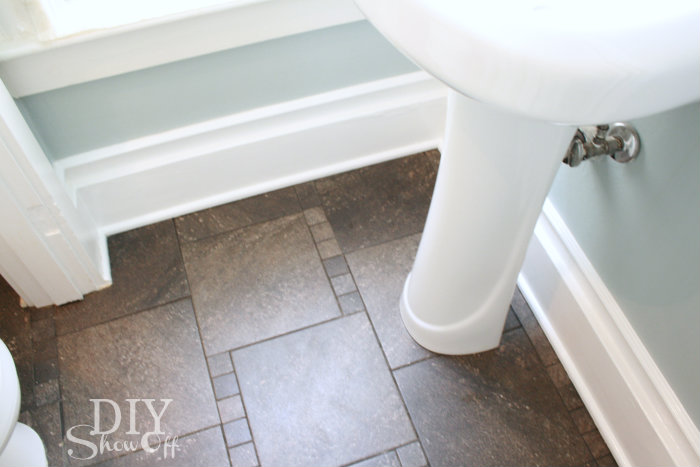
I love this! I’m also in love with your floor tile! Please tell me what it is/where you purchased it! I love your style!
Thanks, Mary! It’s from Best Tile. The name and a link to it is in this blog post: https://diyshowoff.com/2012/03/18/diy-project-parade-and-half-bathroom-before-and-after/#more-2806
Hope that helps! So glad you stopped by! xoxo
I’ve never thought of adding trim higher up the wall and making it look like all one piece. Thanks for the great idea!
I love the baseboard and it seems fairly easy. I was wondering if you could tell us the paint color of the walls as well. Thx
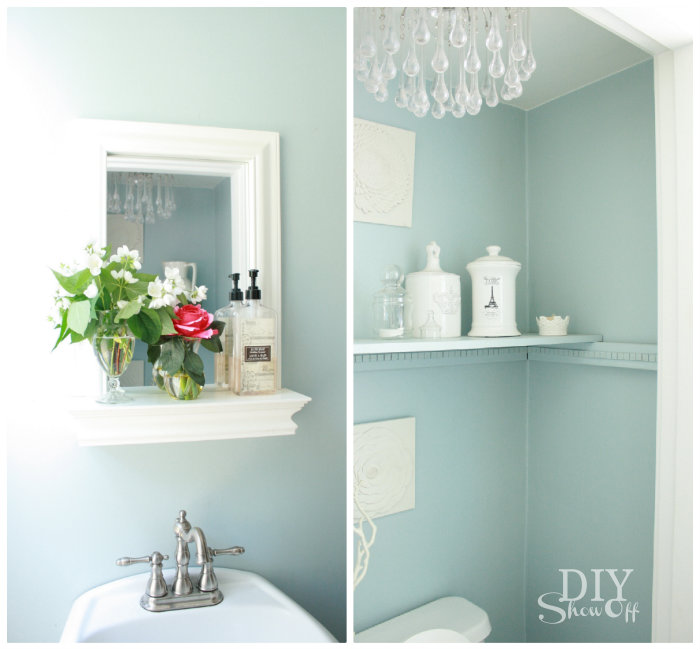
Thank-you for this diy. I came to see the details of the baseboards, but also appreciate the great shelf idea behind the toilet. 🙂
hello! quick maybe silly question but my client loves your floor tile and we are having a hell of a time finding one like this if you could point me in the directing of a brand that offered that size tile I would greatly appreciate it !
Hi Rachel,
I just went back to a previous post for the details. https://diyshowoff.com/2012/03/18/diy-project-parade-and-half-bathroom-before-and-after/#more-2806
Unfortunately it looks like it may be discontinued. The name of it was shore and Boca Chica from Best Tile but the link to the source is no longer valid. Sorry I can’t be more helpful…it’s just been quite a few years. Good luck!