When we first moved in, we had to remove previous owners’ carpet. There was so much work to be done (there still is), that I covered this floor with an area rug and we moved on to other more important projects. With out of town guests coming, I wanted to give this room a fresh new look. We painted a floor in our guest bathroom with amazing results, so I knew that painting the floor would be a great solution.
With the help of True Value, we came home with these materials: Zinsser 123 Bulls Eye Primer True Value’s Easy Care Paint (color = Ticker Tape (a beautiful medium turquoise), flat finish) Frog Tape (different widths will give you different results) Paint Tray Paint Brush (I recommend Purdy) Paint Rollers Minwax Polycrilic
For my participation with the DIY Club, I received these materials: Deco Art Acrylic Craft Paints (Porch and Patio Paint in Terra Cotta, Dazzling Metallics in Gold) Cutting Edge Stencils – Ikat Samarkand Dutch Boy Refresh paint (Fountain of Youth)
Other items needed: Sandpaper Paintable caulking or wood filler Pencil, ruler
(The guest bedroom painted floor where it meets the guest bathroom painted floor. See the tutorial I did 2 years ago on the bathroom floor for more tips/information: Painted Bathroom Floor Tutorial.)
Here is How I Did It:
PREP:
1. I removed the old baseboards. They lacked character. I wanted something more in line with the character of our home. I include more information on our baseboards in this tutorial as well.
2. At this point, filling cracks and nail holes and sanding is recommended for longer term plans but since this is a temporary solution for us, we didn’t invest the time or money in doing this step as we will be covering this floor in 6 to 18 months. (See details on filling cracks/sanding at painted bathroom floor for more information on this step.)
3. Make sure the floor is clean (sweep/wipe up sawdust/etc.).
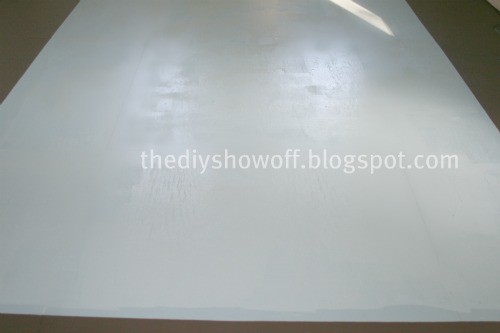
4. Apply a coat of primer to the floor. It’s best to do the edges first using a brush and use a roller for the center of the floor (utilizing a broom handle with roller is also easier on the knees). Don’t trap yourself in the room, plan ahead and paint in a far corner working your way towards the door, where you can escape while paint dries.
START:
1. Once primer is dry (if it’s applied), I used a yard stick and measured in from each wall. I came in 2 1/2 feet because I wanted a larger “area rug”. I marked my “area rug” with a Sharpie. (I originally came in 3 ft., but that made the “area rug” I was going to stencil 5×8. I changed my measurements to allow for closer to a 7 x 9 foot area rug.
2. Tape inside of the Sharpie line.
3. Smooth and seal tape using a credit card.
PAINTING SURROUNDING FLOOR:
Using a brush and porch and floor paint, paint from the outside perimeter of the room. Roll on paint from that edge to the tape. We used a dark brown.
Now onto the “area rug”. Using a Purdy paint brush and steady hand, I was able to paint the base color without taping onto the brown ‘floor’. I edged right next to the brown and filled in using a roller.
Using a tape measure from corner diagonally to corner, I marked the center of the ‘area rug’ in order to know where to start my stencil. I used the Ikat Samarkand stencil from cuttingedgestencils.com and Dutch Boy‘s Refresh (color = fountain of youth). Refresh paint has exceptional durability and zero VOC/Greenguard and is mildew resistant!
Place stencil in the center and work outwards. I used a foam roller. Apply paint to roller and roll onto paper towels until roller looks dry. Roll paint over stencil. Lift stencil. I keep working with the stencil. Using the guides on Cutting Edge Stencils’ stencil keeps the pattern consistent.
When center of ‘area rug’ is complete, I painted the border between the taped lines the same color.
Isn’t the stencil pattern gorgeous? I love it as it is (so soft and pretty) but decided to add color. Keep reading.
Let dry.
DETAIL:
The painted area rug in the bathroom is only two colors and I wanted to get a little more creative this time and coordinate the area rug with the room I was planning. I used paint from my craft stash including Deco Art Dazzling Metallic in gold and Deco Art Patio Paint in terra cotta.
I used the stencil and went over specific areas of the pattern, keeping it consistent. I used Dutch Boy Refresh (color = Lake Camplain) for the border. I also used the shorter stencil (which is included for stenciling the top of a wall). For the border, I found the center and worked left and right from there.
Baseboards before were cheap and scratched up. I like chunkier (and no miter cuts). I used 1x3s. I measured around the perimeter, cut, primed then painted and put them around the floor.
How to Paint a Floor video tutorial. (Please know in advance that I’m not a natural in front of the camera and I lack professional videography skills!) Sorry! Acting classes are on my bucket list! haha!
Speaking of True Value, I wanted to let you know about a great program that the True Value Foundation runs to support schools around the counter in need of a “makeover”. The program is called Painting a Brighter Future.
Schools in need of painting can seek out a local True Value store to sponsor them and they can apply for a grant. If they’re selected, the local True value store will supply and deliver pain tot he school, making this a wonderful opportunity for community involvement.
I was one of the bloggers selected by True Value to work on the DIY Squad. I have been compensated for my time commitment to the program as well as my writing about my experience. I have also been compensated for the materials needed for my DIY project. However, my opinions are entirely my own and I have not been paid to publish positive comments.
Wow! Love the painted rug! That's an awesome idea to hold over a floor until you have the means/time/money to really do what you want with it. Thanks for the tutorial!
I love it!! You did an awesome job! I painted a rug on my cement floor about 10 years ago. When people come over they will try and step up on the rug… It's quite funny, you'll see. I lso painted my bathroom floor as well, I used the paint you used. I also did the yucky tile around the shower but on that I used the textured spray paint. It really turned out great! I love your blog!
HA! I was totally like "Why is she talking about a painted floor then showing us a picture of a rug??" there for a minute. 😀 You fooled me! EXCELLENT job!!
You make me want to rip out my gross carpet and paint my floors!!! Thanks for linking up and I'm putting your gorgeous floor in the Spotlight this weekend.
Thank you so much for sharing this creative project! I have been thinking about what to do with a similar room / floor. So I wonder if the process would be the same for vinyl?
WHAT??? Holy FABULOUS!! I just painted my craft room floor last night….yours puts mine to shame! Wish I would have seen this before I started! I'm gonna have to link to this when I write my post!
This is AMAZING!!!! I so want to do this now..you make it look so easy. And the colors are perfection, some of my favorite color combos. Congrats on a job beautifully done. New to your blog, I am now a follower:-) xx
Hi there! Just found your blog and it’s awesome. You do very lovely work. On this painted floor, I’m curious what kind of flooring you are painting onto. It doesn’t look like hardwood. I have a couple rooms like I’d like to clear out the nasty carpet and paint a rug in. Thanks for the tutorial:) Jamie
The floors we painted were plywood subfloors. We just tore out previous owners nasty carpet and as a temporary fix, painted/stenciled the floor. (Temporary sometimes means years so it’s a pretty option!) Good luck! Let me know if you have any questions.


Wow! Love the painted rug! That's an awesome idea to hold over a floor until you have the means/time/money to really do what you want with it. Thanks for the tutorial!
Oh my GOD this is GEORGOUS!!! You have so much talent and patience, hon :):) Can you please come and do one of my floors for me??????
LOVE IT :):)
Holy smokes! I had to do a double take because I didn't realize you were talking about painting the rug! Amazing!
Holy cow! That is really beautiful! I have a question about the floor material itself? Is it just plyboard? Or subfloor?
You're so good at that!!
I'm in awe of you! Absolutely amazing.
Great tutorial! Love how it turned out! Thanks for sharing.
It looks amazing! Great instructions too! It must have taken a lot of patience to get such a beautiful result!
I love it!! You did an awesome job! I painted a rug on my cement floor about 10 years ago. When people come over they will try and step up on the rug… It's quite funny, you'll see. I lso painted my bathroom floor as well, I used the paint you used. I also did the yucky tile around the shower but on that I used the textured spray paint. It really turned out great! I love your blog!
Holy cow! This looks fantastic, really fantastic!
Just to let you know, I just gave you the versatile blogger award on my blog.
Thanks for all the creative ideas:)
Roeshel this is just amazing!!! Your creativity never ceases to amaze me!! And your tutorials are simply wonderful.
Thanks for all the inspiration
Susan
http://www.lifeondovehollow.blogspot.com
HA! I was totally like "Why is she talking about a painted floor then showing us a picture of a rug??" there for a minute. 😀 You fooled me! EXCELLENT job!!
Jaw dropping. Wow. So pretty… That takes talent and patiences.
This is amazing! Your "rug" is genius!
Hope you will Link up to Potpourri Friday again! Enjoyed having you last week!
Your painted floors turned out wonderful! I think I'd have a hard time covering it with something later, as it looks so great now. Just lovely!
You make me want to rip out my gross carpet and paint my floors!!! Thanks for linking up and I'm putting your gorgeous floor in the Spotlight this weekend.
Thank you so much for sharing this creative project! I have been thinking about what to do with a similar room / floor.
So I wonder if the process would be the same for vinyl?
I'm about to paint my bathroom floor. Thanks for the info! Love the inspiration I've gleamed looking at your "rug". AWESOME job!
Looks amazing, I just finished painting my closet sub floor.
OH-MY-GOSH!! This is JAW DROPPINGLY fabulous!!!
WHAT??? Holy FABULOUS!! I just painted my craft room floor last night….yours puts mine to shame! Wish I would have seen this before I started! I'm gonna have to link to this when I write my post!
Oh my! WOW! I want it NOW! That is it, I am SOOO doing it!
This is AMAZING!!!! I so want to do this now..you make it look so easy. And the colors are perfection, some of my favorite color combos. Congrats on a job beautifully done. New to your blog, I am now a follower:-) xx
Wow, thats incredible!! Im stopping by from Power of Paint… this really is awesome!
Thanks so much, Erika!
This is amazing!
Seriously….I found this over at power of paint and I had to pin it for inspiration later. Thank you so much for the tutorial.
blessings,
karianne
WOW! That looks amazing. I love the color scheme that you chose. Beautiful job.
Pingback: Subway Art Painted Floor Tutorial | | DIY Show OffDIY Show Off
This is awesome.
Hi there! Just found your blog and it’s awesome. You do very lovely work. On this painted floor, I’m curious what kind of flooring you are painting onto. It doesn’t look like hardwood. I have a couple rooms like I’d like to clear out the nasty carpet and paint a rug in. Thanks for the tutorial:) Jamie
Hi Jamie!
Thanks!
The floors we painted were plywood subfloors. We just tore out previous owners nasty carpet and as a temporary fix, painted/stenciled the floor. (Temporary sometimes means years so it’s a pretty option!) Good luck! Let me know if you have any questions.