


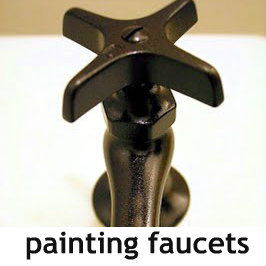


 The old faucets are solid and silver. I’m guessing these things are old. I tried looking them up. They say “volverwine”. There is an old “Wolverine” brand. ? They’re heavy and the quality is awesome. I however want oil rubbed bronze to match other fixtures in the room. I decided that my old trusty favorite DIY magic transformation technique (spray painting) was the answer.
I tested the process on a gold brassy door stop. I loved the results. This is my all time favorite spray painting project so far!

 (At this point…they looked beautiful and polished. I almost backed out but I felt like silver faucets and oil rubbed bronze everywhere else just didn’t “go together”. I found the courage to move on. I think it was when I dreamt of wearing brown boots with black pants.)
I washed and dried them and I taped off the areas I didn’t want painted and put the knobs in the “off” position so I wouldn’t gum up the opening/closing function.
 I start by painting the underneath and sides. Each piece got a couple of lightly sprayed coats of Rustoelum Primer in “rust”. I let each coat dry at least 8 hours before applying another. Once the underside was done, I flipped and did the top and sides.
 I used a piece of packing styrofoam to hold them upright.

 I followed the same steps for the oil rubbed bronze spray paint. (Upside down and sides = light coats, then flip and top and sides = light coats). Once that was dry…

I used a high gloss lacquer and the same steps. It’s been drying for about a week. It’ll probably two weeks by the time all is said and done and ready for installation. Plenty of time to cure. The sink isn’t back in place but I can’t wait to see them!
 This piece was easier painted when hanging.
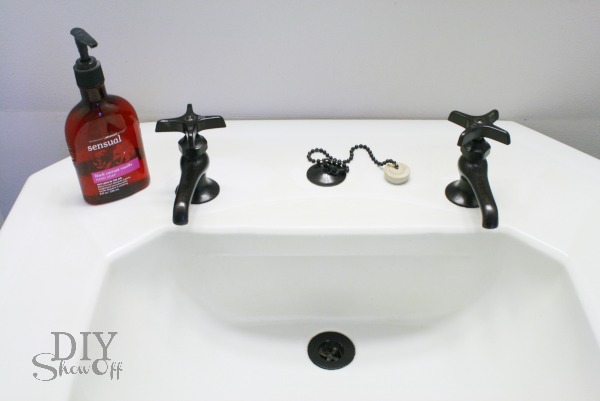
 After: Here is it against the porcelain: I LOVE how they turned out. What do you think? The finish is very hard and durable. The faucets open/close without any issues. And now they match the door knobs and light fixtures. I’m happy!
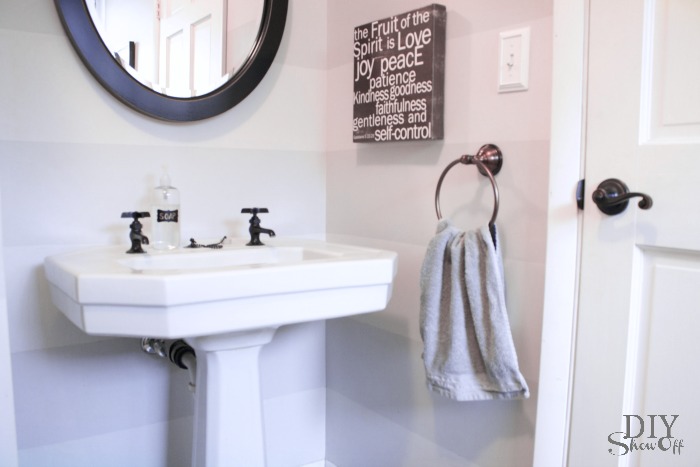
I used: Rustoleum Rusty Metal Primer Rustoleum Metallic Brilliant Metal Finish (oil rubbed bronze) Lacquer Hi-Gloss (for metal) I did at least two coats of the primer and ORB then quite a few of the lacquer. I stayed back about 9-12 inches to keep the spray even and to prevent runs.
Touch ups in 2013.
WOW, fantastic!!!!
Hugs,
Marsha
Awesome job!!! Fantastic result. I can't wait to see the faucets installed. Looks perfect! I did something similar on a brass light fixture. 150% improvement. Great work, DIY Showoff!
*Gasp* I LOVE the floor! I'm going to have to get some more details from you on those! We have stained concrete floors, {one of our DIY projects gone poo!} and they're lookin' really rough! This would be a perfect idea for a revamp!
OMG! I'm speechless! They are absolutely gorgeous! All the fixtures in my bathroom are a chrome/silver finish. I want to paint them with ORB, but can't find any where we live. I'm going to keep looking. Your faucet makes me want to find the paint that much quicker! Thanks for sharing!
Home Depot, Lowes, and Wal-mart all have ORB Rustolium!
How very pretty! Nicely done!
I love the floor!! Great job! I don't know if I could be that brave to do that.
Good luck on completing it before 2010!!
The faucets look wonderful! Good job! Your floor is beautiful too!
Very nice! I had no idea you could spray paint faucets! Seriously taking a sanding block to it would have run it, I would think. It looks awesome!
When I saw the title "painted faucets" I was intrigued! I have to say, I don't think the product should get too much of the credit, as I could have used the same stuff and got nowhere near the fantastic result you did! You really have done an outstanding job.
I am, right now, doing a mental scan of my house to see if I can use your floor idea anywhere :o)
Angex
yeah!!! If you could only see the smile on my face!!
I just spray painted all my lights and door knobs and scared to do the faucets!!
I know what I will be starting this weekend!! Thank you for sharing!
Awesome!!!!!
The faucets look great. Nice job.
Wow! That looks fantastic! Impressive! I want to do all my brass knobs. Now I'm excited!
WOW!! Your faucet is absolutely AMAZING!! Thanks for sharing the how to. I think I am going to try your idea on one of our old kitchen faucets. I had no idea this could be done. Great work!
It looks fabulous.
Cheri
Those faucets look awesome! Who knew? Good job, thanks so much for sharing. We just bought a fairly new house (5 yrs old), and the master bedroom faucets are just like that. I guess they were going for authenticity, but it does make it hard to wash your face!
Oh my goodness, those look amazing! I've thought about painting my door knobs witht the ORB paint, now I'm inspired!
What a cool idea. I think there will be a lot of people borrowing this one!
Aw, the floor looks fantastic!
Wow, the floor looks fantastic!
Oooohhh! (Did you hear that girlish squeal?!) Love the floor! Love A-MA-ZING!! I love it dark. Very chic. Can't wait to see the whole thing. You are my hero!
XO*T
We had those same faucets growing up! So hard to get "warm" water!! I just got used to using cold….I was little and usually got burned.
The faucets turned out awesome!! You did such a great job. Can't wait to see what you decide with the floor and to see it all finished
*hugs*deb
So glad I just found your blog! Another use for spray paint faucets!
Do you think the same would work for Gold doorknobs? The finished result is beautiful!!
Waisaths – I do think it would work for door knobs! In fact, the door stopper was gold/brass. It was my test piece and it turned out beautiful. Good luck!
Thanks for stopping by! 🙂
Roeshel
WOW! Is pretty much ALL I CAN SAY! Everything if BEAUTIFUL! I absolutely LOVE your blog!!!!!!!
Thanks, Wendy! Thank you for stopping by, taking the time to comment and making my day! 🙂
Curious – are the faucets still holding up? Thanks.
Teresa, yes – they are. I did notice a small flake off (probably a scratch) and fixed it with a permanent marker (lol!) but overall, they have been really durable…going on year 3. I do only clean them with a Lysol wipe though and it is a guest bathroom which doesn’t get a ton of use. If this is for a high traffic area, I wouldn’t recommend it. Good luck!
Wow! I am so glad you did this and shared it with us, I have been wanting to do this but was afraid it would be inadequate and start scratching and peeling.
I love how the faucets turned out. I just moved into a new house less than two week ago. Well, new to me anyway, it’s ten years old. I bought it because of the size and how week maintained it was. So very clean. One problem for me, it has shiny brass every where! All the door hinges, door knobs, even drawer pulls in the bathrooms and kitchen. I especially dislike the light fixtures in the bathrooms. I wonder if this paint would hold up to everyday use on the indoor doors? I think it would be worth it because new ones would be so expensive and I’d rather put my money into something else right now. Has anyone tried it and if so how was the results?
I’ve tried it, Judy. But only on a guest room closet door knob, so it doesn’t get a ton of every day use. Good luck!
I seem to having difficuty typing in the comment box. My question is whether anyone has tried to paint the supply hoses and turn off valves? I am going to try. Anyone have any suggestions?
I’ve never tried it, Trellis. Have you tried asking at Hometalk.com? It’s free to sign up and there are thousands of people (including professionals) who may be able to help. Good luck!
Looks good- are they still holding up ?
Pretty well, Penny. Those were done in 2009. Here’s a post on how they’re doing August 2013: https://diyshowoff.com/2013/08/13/painted-faucets/. Hope that helps!
Hi! I am thinking about spray painting mine too in chrome. After a while wetting and cleaning them, are they still the same? or do they fade? Thanks!
Mine are holding up REALLY well, Belle. After 5 years, there are two tiny chips that I plan to touch up but overall…I’ve never regretted my decision to do this.
Hello!!! They look fantastic very nice job
I want to ask which high gloss lacquer did you use?
beautiful work!
inspiring great work!
Great job, good tut (tutorial). That sink is beautiful, I would keep it as long as possible, especially if the house was older.