DIY Fabric Freshener

Do you love homemade products as much as I do? I feel like it has that luxury boutique vibe. Bonus: you know exactly what’s been added and personalize the ingredients to fit your own likes and preferences. With my goal to create a chemical free home, I switched to a laundry detergent without chemical and synthetic fragrances. I also use wool dryer balls in place of toxic dryer sheets. Then I saw a recipe for a fabric scent and fresh booster and adjusted it just a bit. 

DIY essential oil infused laundry fabric softener tutorial

What I used: (affiliate links for my exact products)

DIY essential oil infused laundry fabric softener tutorial

What I did:


Add all ingredients to stainless steel bowl and mix thoroughly with a stainless steel whisk. That’s it! How easy was that?! Transfer to glass or stainless steel container. *Note: Use stainless steel/ceramic/glass when using citrus essential oils. 

Usage: Add 2-3 scoops to laundry in the washing machine basin either before or after adding clothes then begin wash cycle.

DIY essential oil infused laundry fabric softener tutorial

Thoughts: The scent is super faint but fresh and subtle and laundry feels softer! 

DIY essential oil infused laundry fabric softener tutorial

“Loads of fun!”DIY essential oil infused laundry fabric softener tutorial

Adaptation from original recipe via Fun Easy Recipe.

Thieves Laundry Soap & Wool Dryer BallsDIY essential oil infused laundry fabric softener tutorial

Want to know more about essential oils and chemical free living?

Take a look —> HERE or comment below. 

Check out how you can join me in taking the first steps to creating a healthier lifestyle with Young Living Essential Oils at diyshowoff.com

Spring Floral Centerpiece

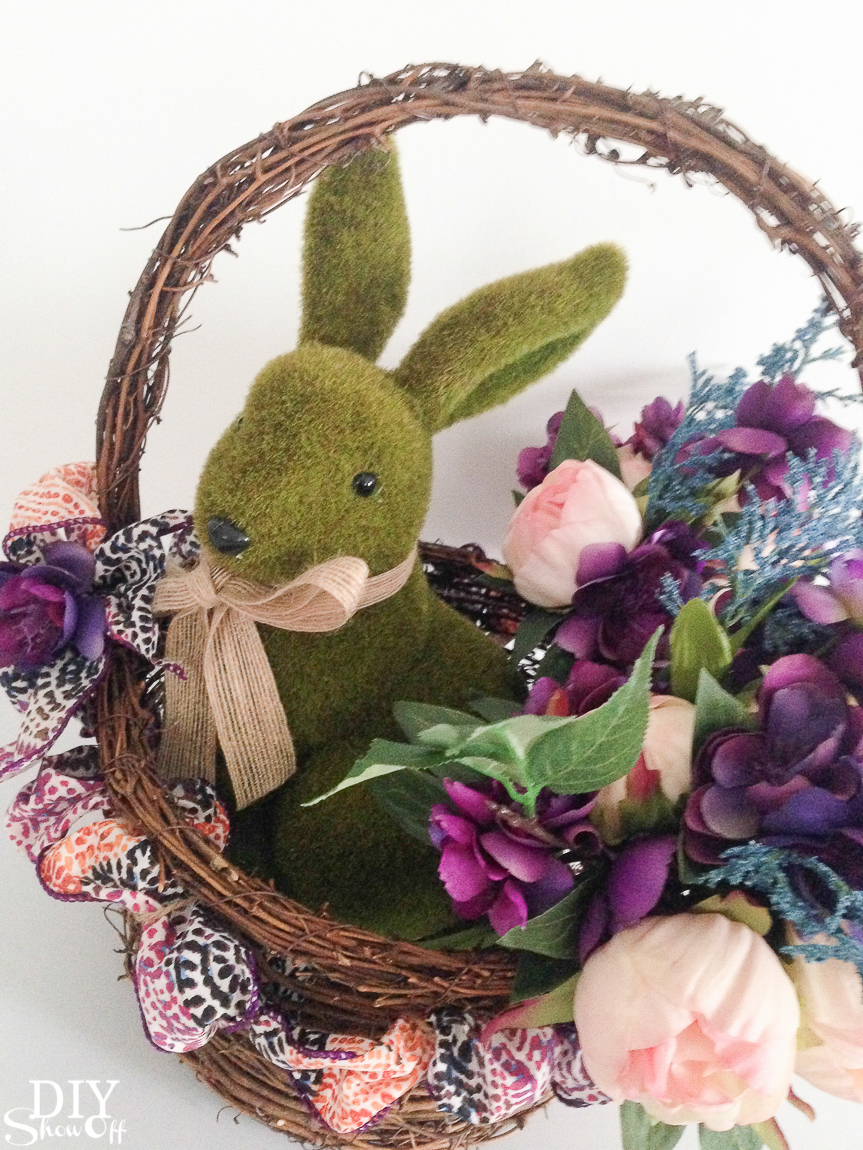
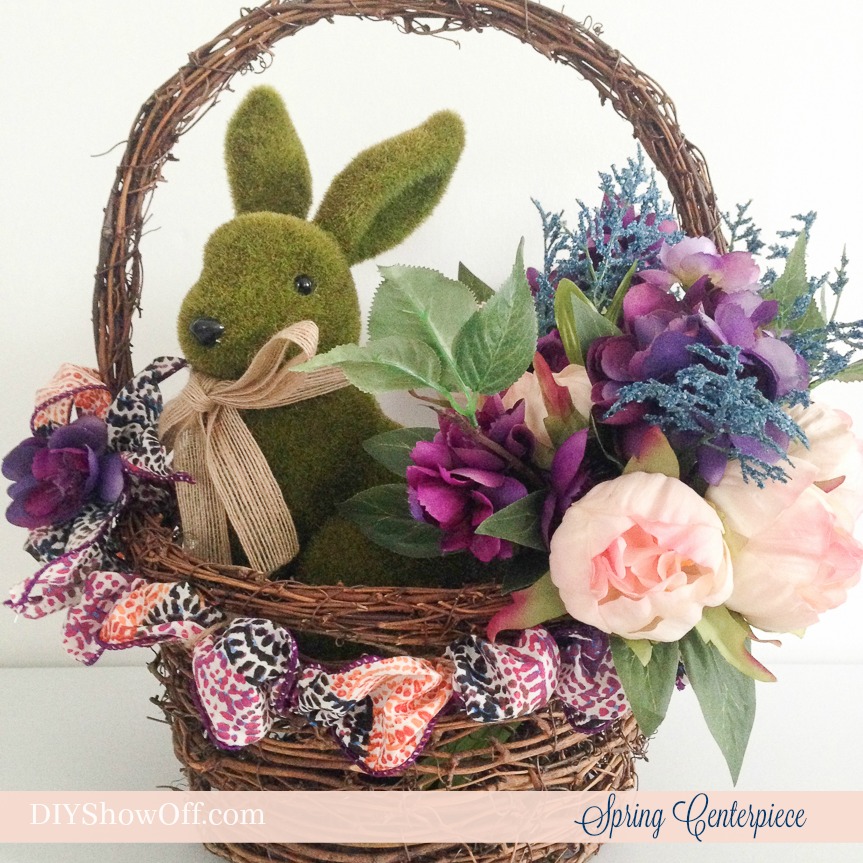
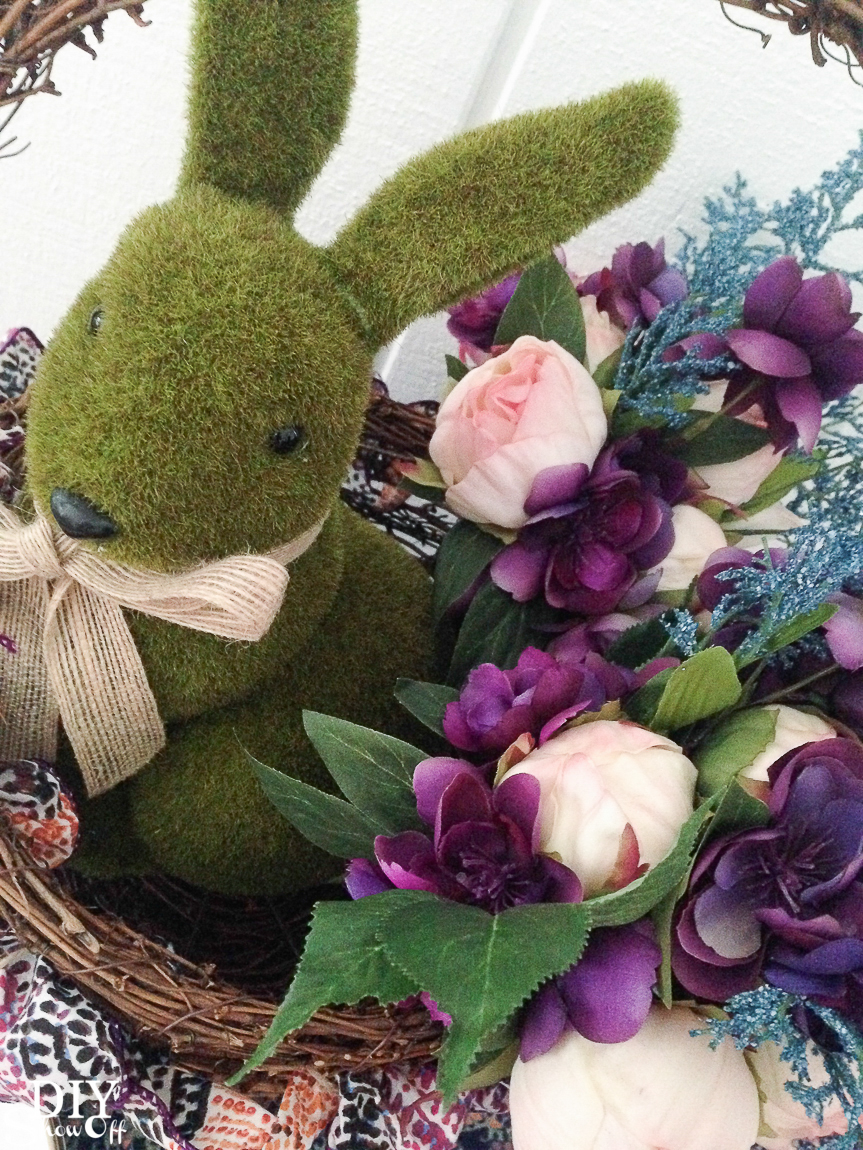
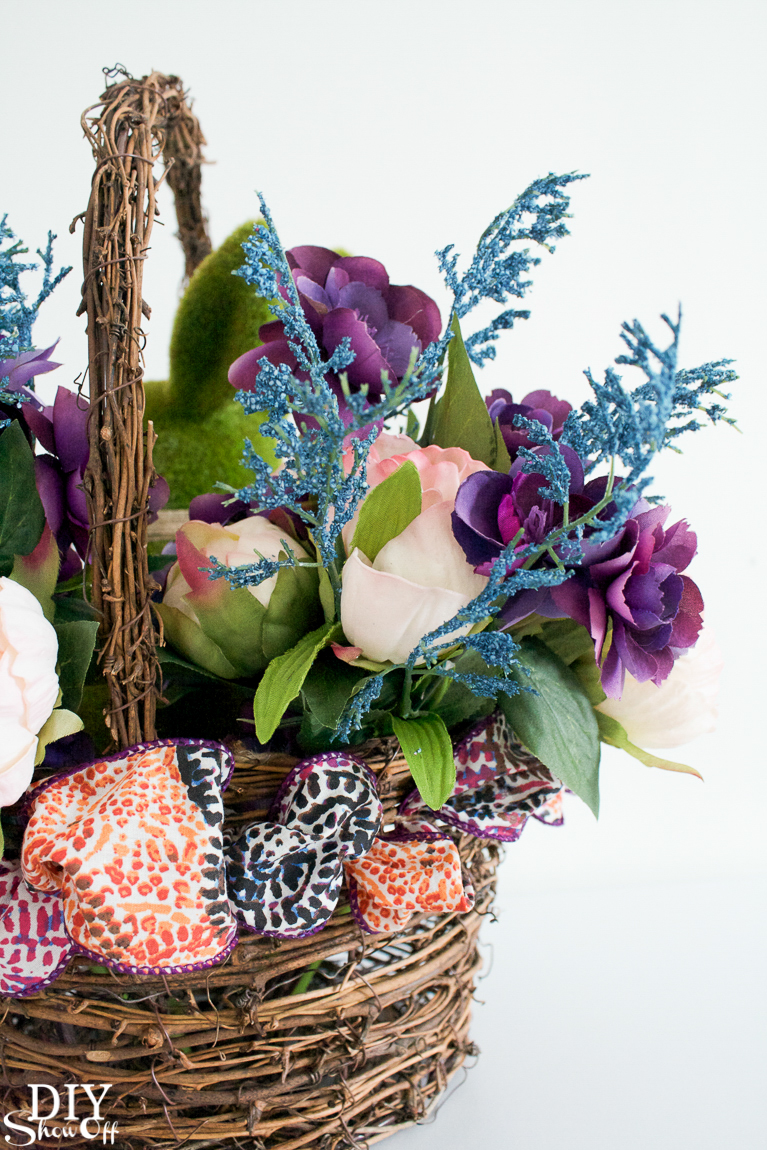
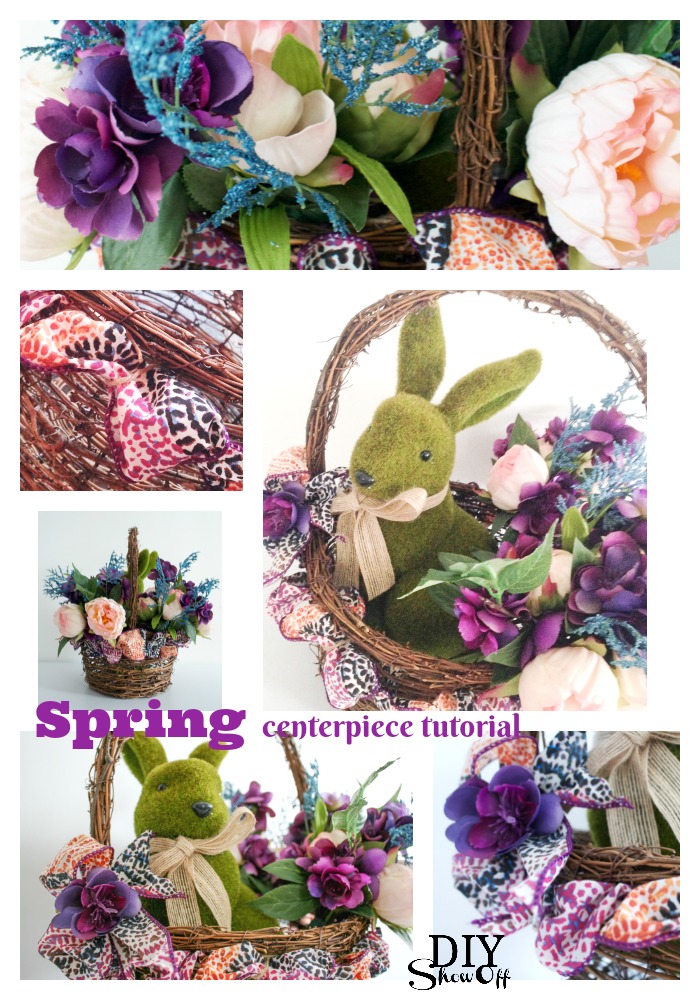
SPRING floral centerpiece? “What the heck, DIYShowOff?! It’s still winter!” I know. I know! But I’m not a fan ::whine:: so let me indulge in thinking ahead to warmer days, fresh air and specifically, a spring with no snow. Okay? Okay! haha! For real, my Michaels Maker Challenge for February is “spring florals” so let’s embrace that pretty theme by collecting inspiration for the next upcoming season, starting with this gorgeous spring centerpiece! My inspiration was a spring theme around this beautiful Indigo Luxe/Aria (Celebrate It) wired ribbon: blues/indigo and navy, purples/eggplant and plum, oranges with white. Not colors I’d normally coordinate but oh my – how pretty, you guys! Right? Hey, Mr. Moss bunny thinks so! Look at his content expression… 

So pretty! DIY spring floral centerpiece tutorial. Perfect for Easter too! #madewithmichaels @diyshowoff

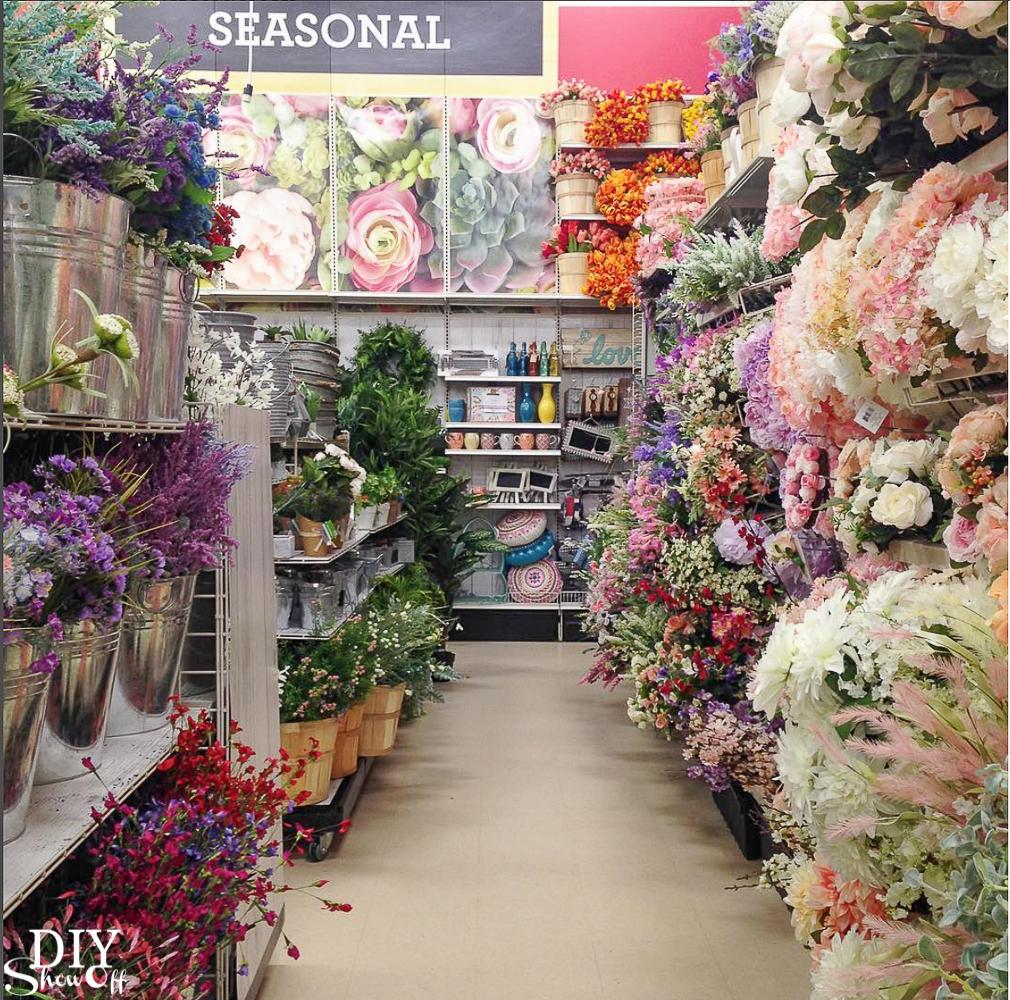
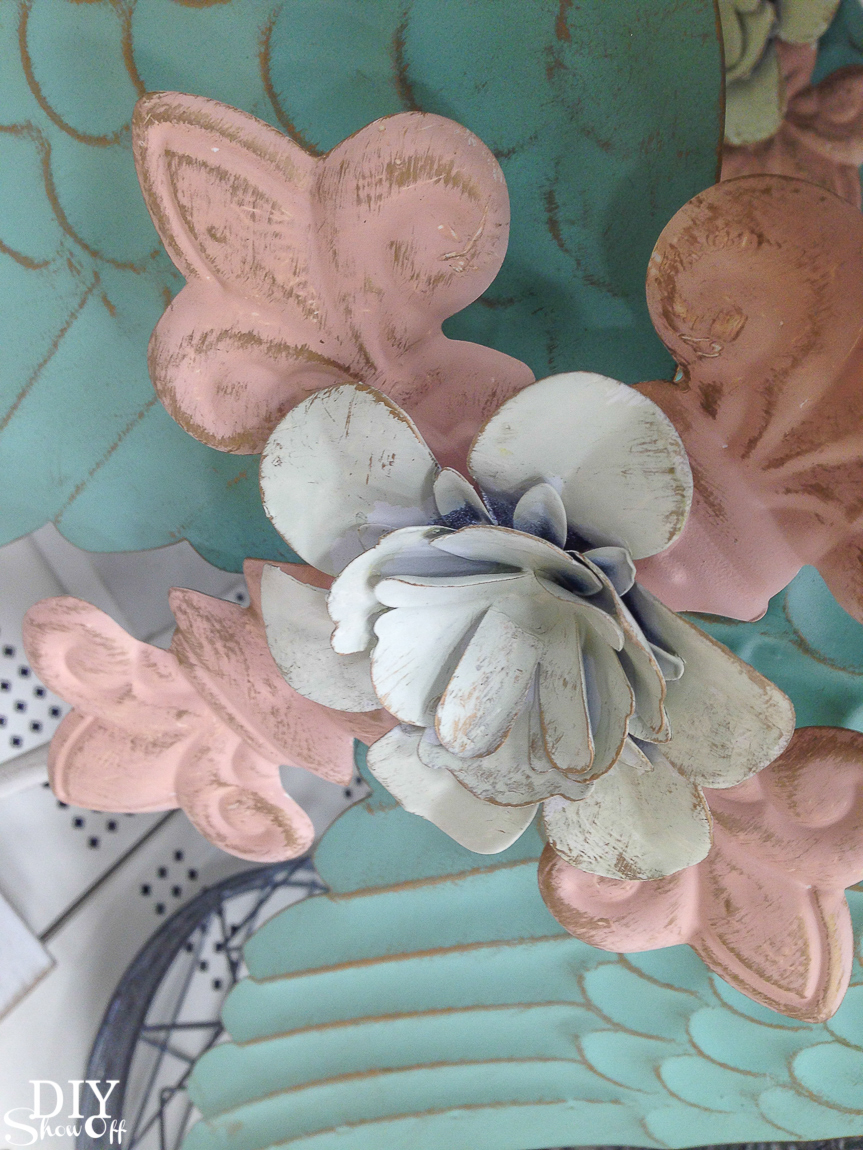
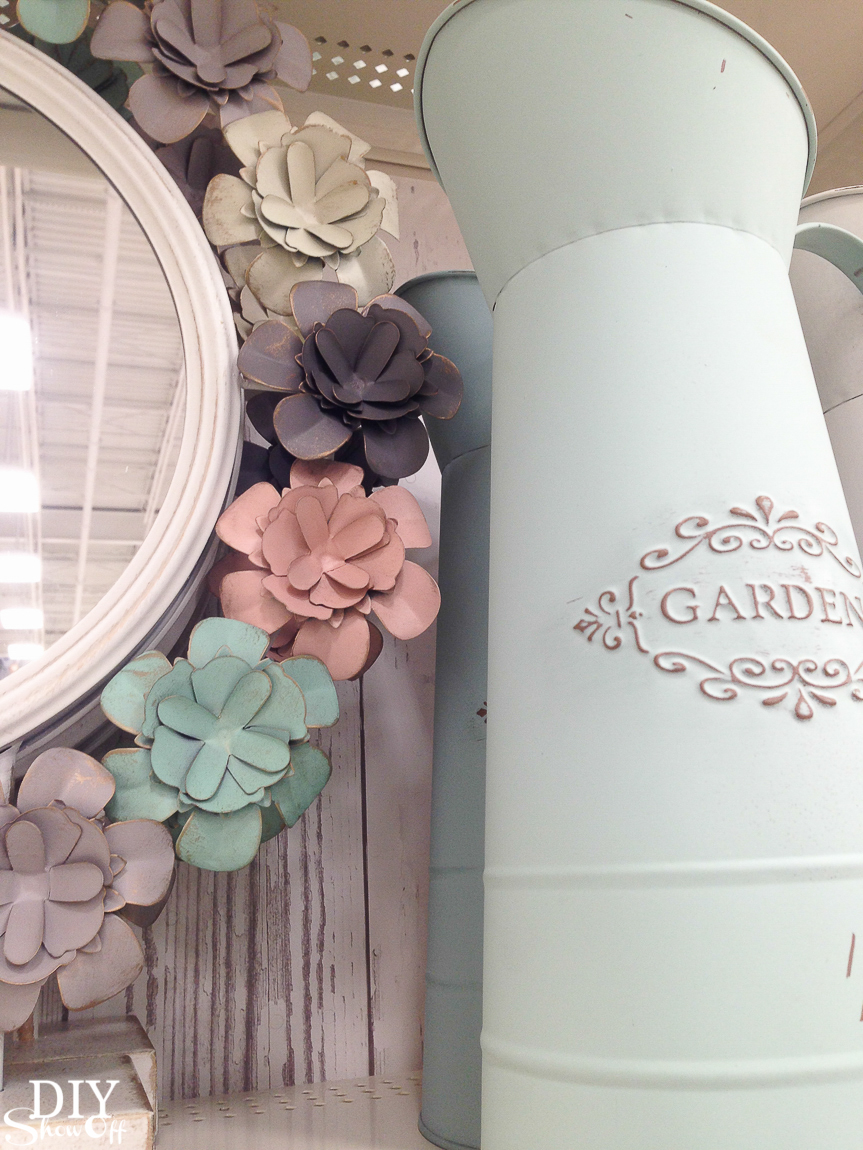
Okay, so it might be February, but there is a breath of fresh air, happy florals and spring in the aisles of Michaels Stores! Michaels has over 1,800 blooms & greenery in their new Flower Market, including trendy succulents and real-touch flowers. 

diy-spring-floral-centerpiece-tutorial-34 

spring floral centerpiece tutorial

So pretty! DIY spring floral centerpiece tutorial. Perfect for Easter too! #madewithmichaels @diyshowoff 

Materials I used: 

  • grapevine basket
  • moss bunny
  • wired ribbon (2 1/2 in. x 3 yards)
  • florals 
  • floral tape
  • optional: hot glue or twine
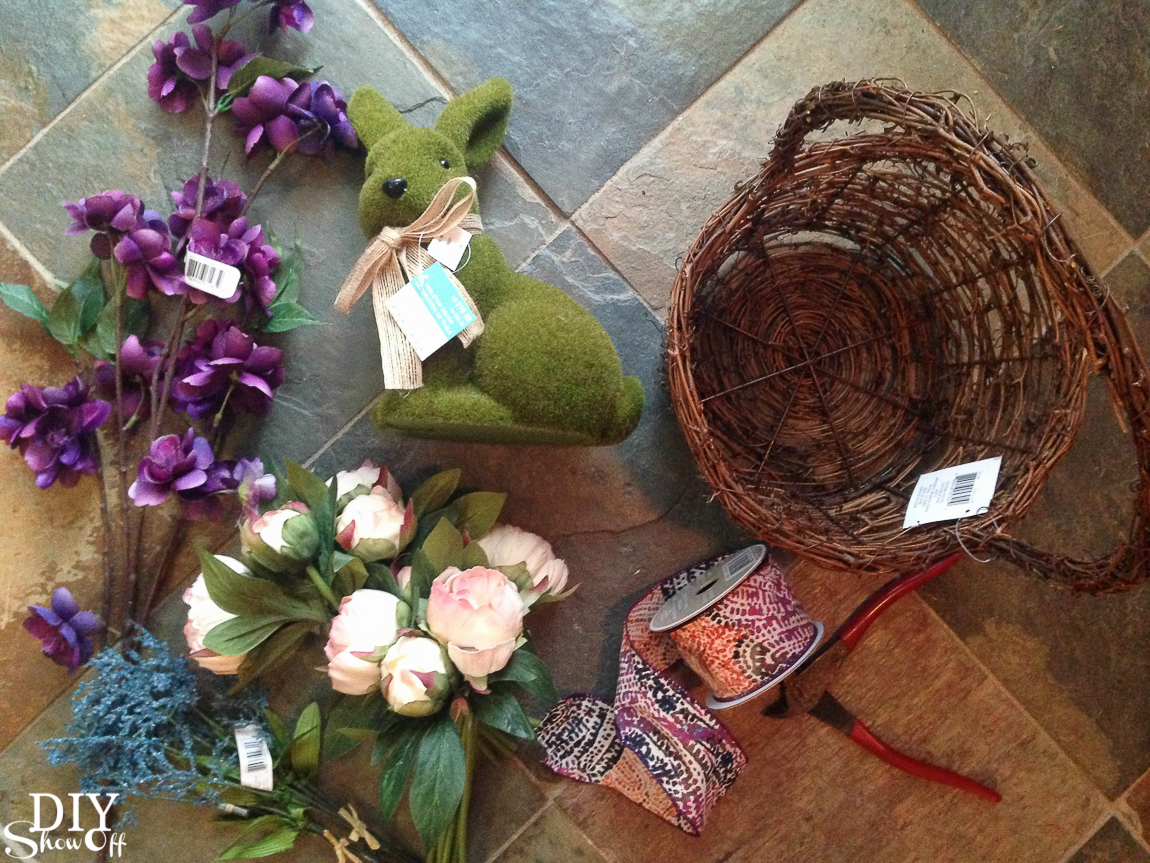
So pretty! DIY spring floral centerpiece tutorial. Perfect for Easter too! #madewithmichaels @diyshowoff

Tools: wire cutters

What I did: (Yes, in the event that you spy micro-fleece in the images below…I create in my pajamas. Doesn’t everyone?)

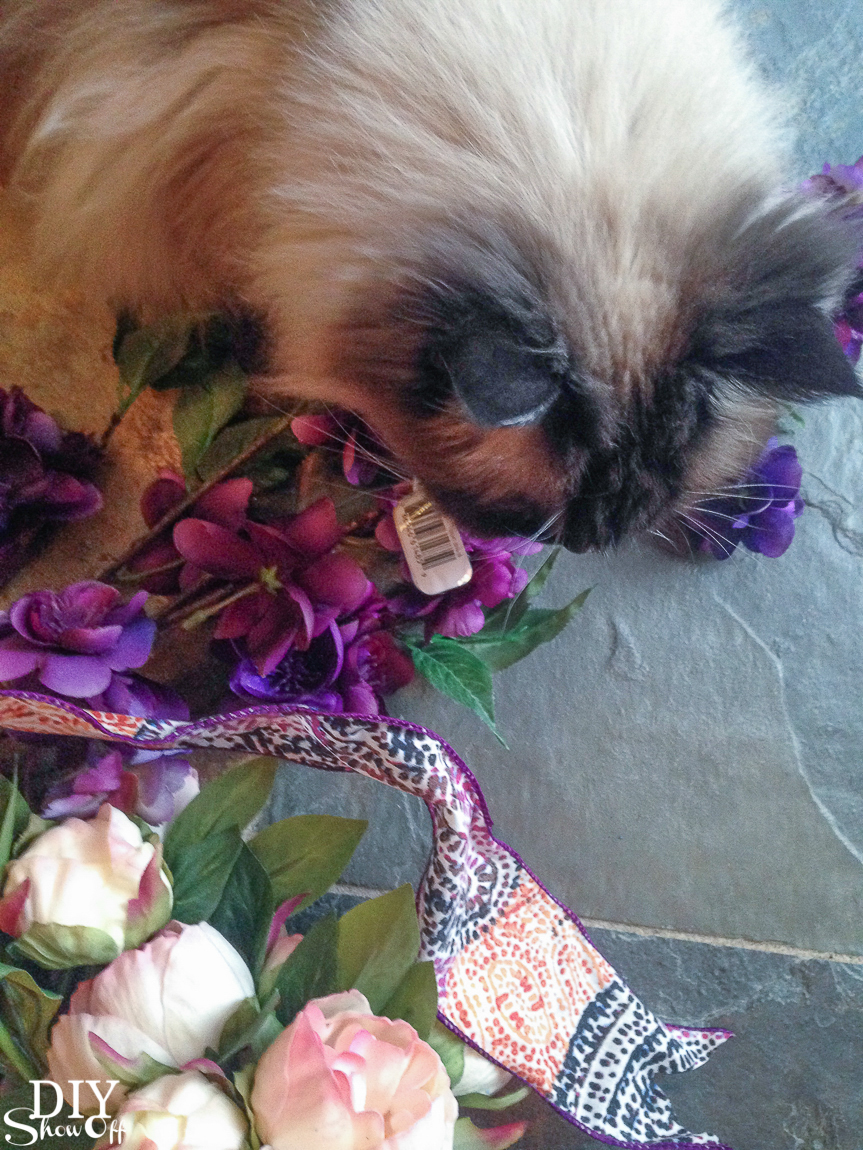
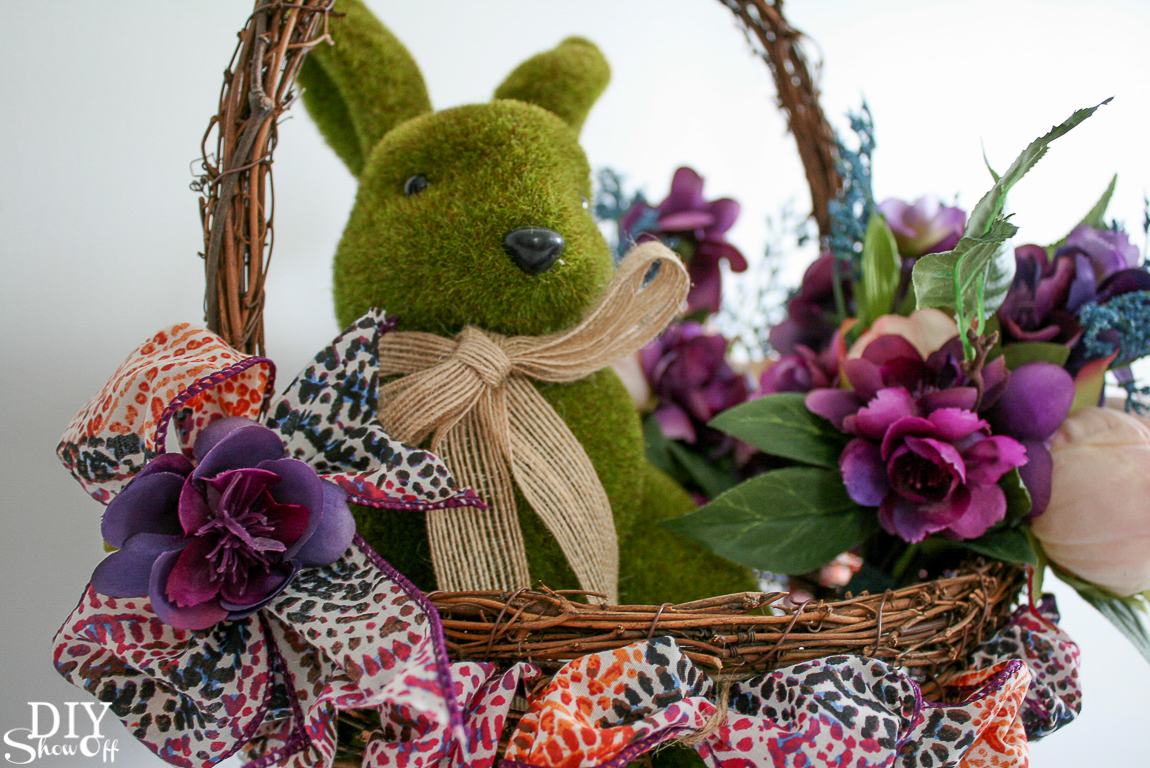
Unravel the ribbon, snip the ends to make them pretty. Get approval from the cat, then proceed to the next step.

So pretty! DIY spring floral centerpiece tutorial. Perfect for Easter too! #madewithmichaels @diyshowoff

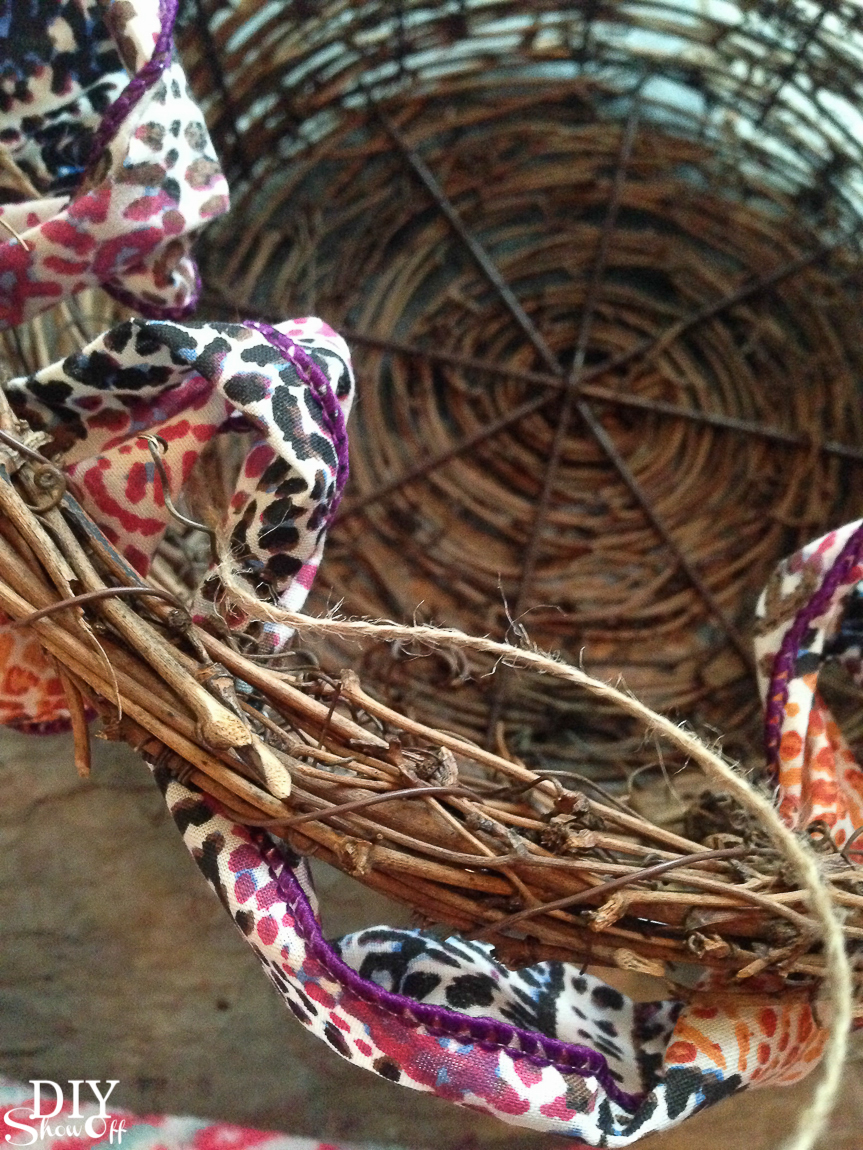
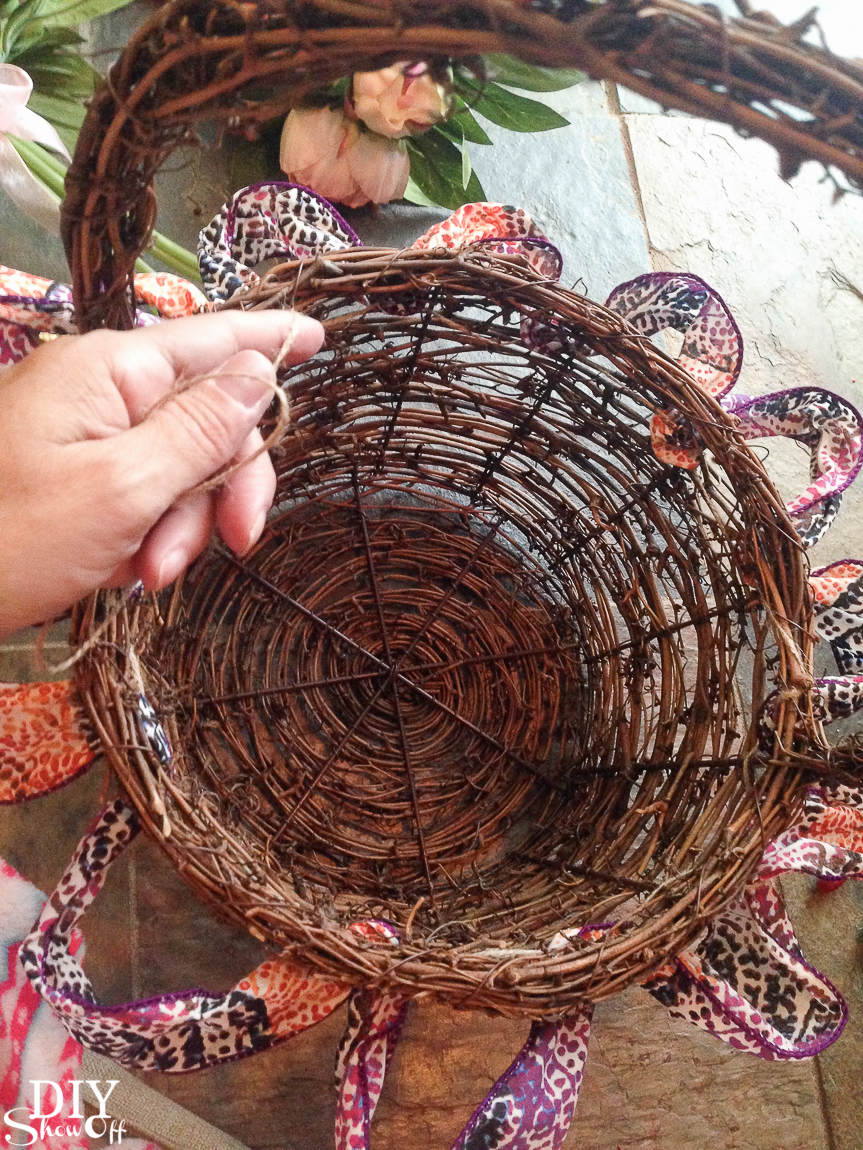
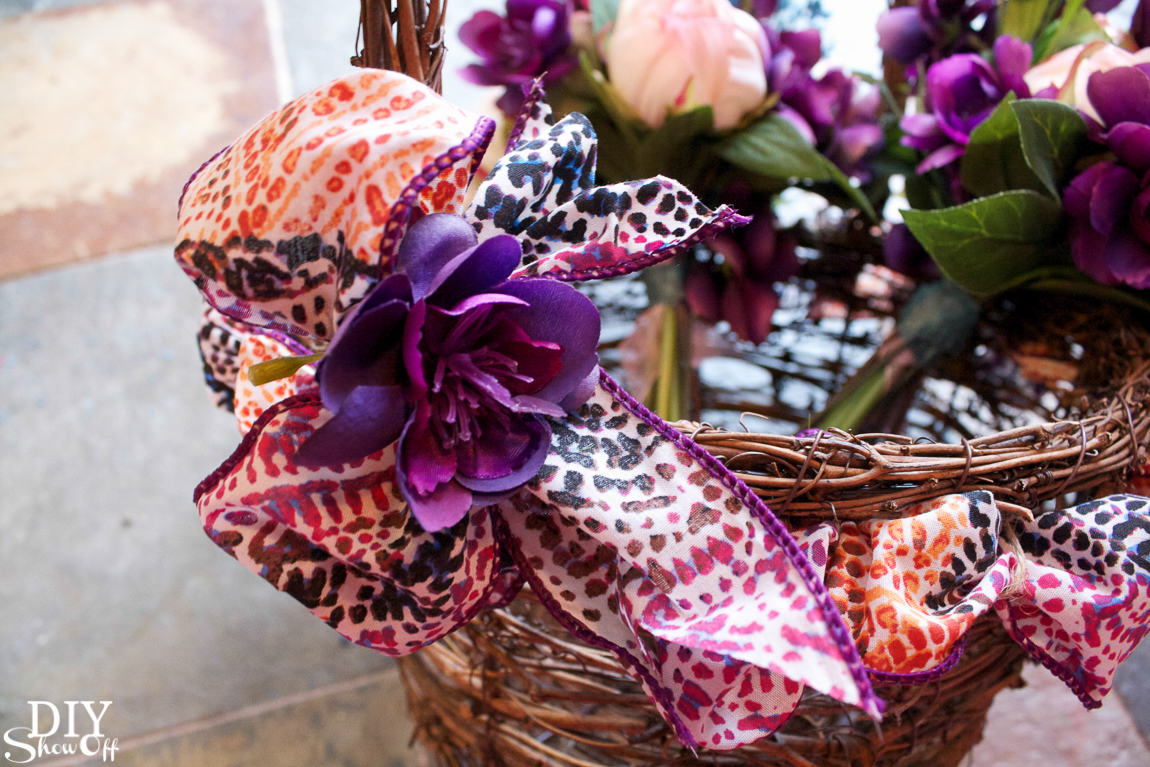
(I cut out a “v” in the ends of mine) and find the center of the ribbon. 

So pretty! DIY spring floral centerpiece tutorial. Perfect for Easter too! #madewithmichaels @diyshowoff

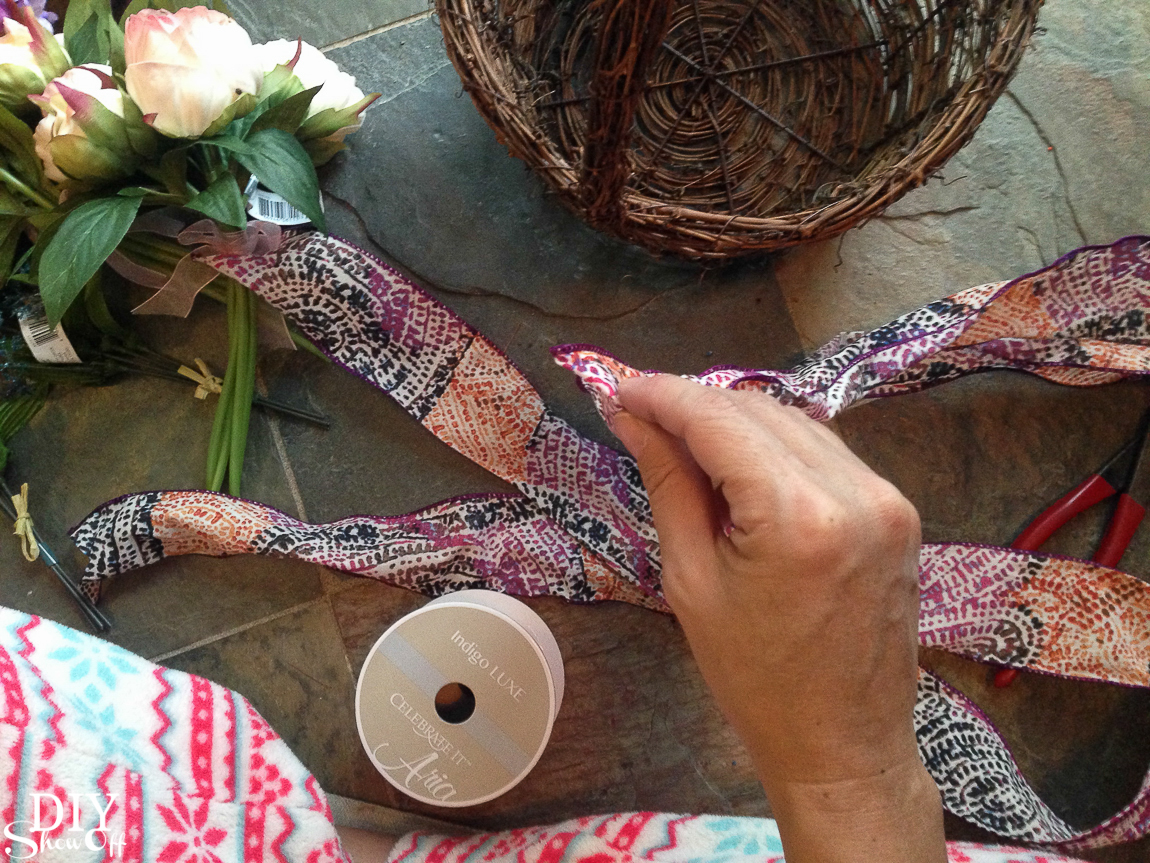
Starting at the spot where one side of the handle meets the basket, tuck the ribbon into the grapevine. 

So pretty! DIY spring floral centerpiece tutorial. Perfect for Easter too! #madewithmichaels @diyshowoffSo pretty! DIY spring floral centerpiece tutorial. Perfect for Easter too! #madewithmichaels @diyshowoff

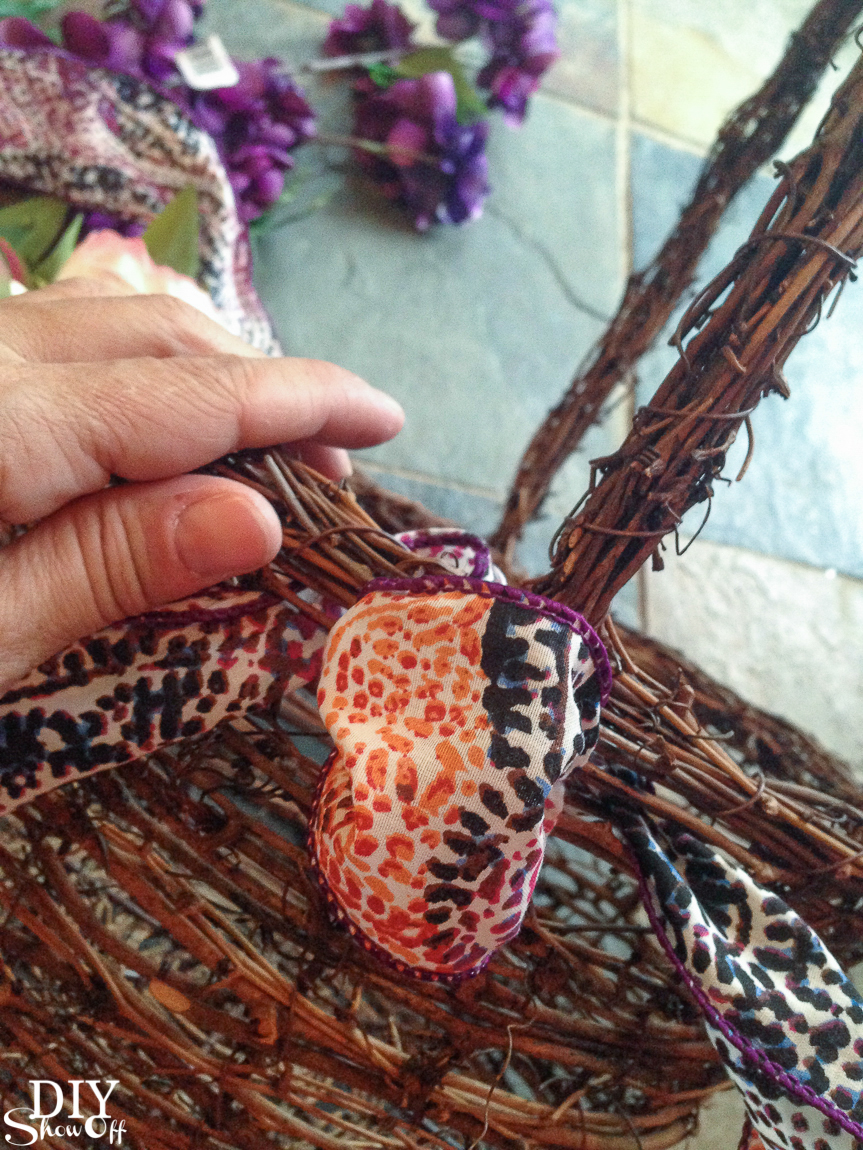
Repeat along each side, meeting at the other side where the handle meets the basket. 

So pretty! DIY spring floral centerpiece tutorial. Perfect for Easter too! #madewithmichaels @diyshowoff

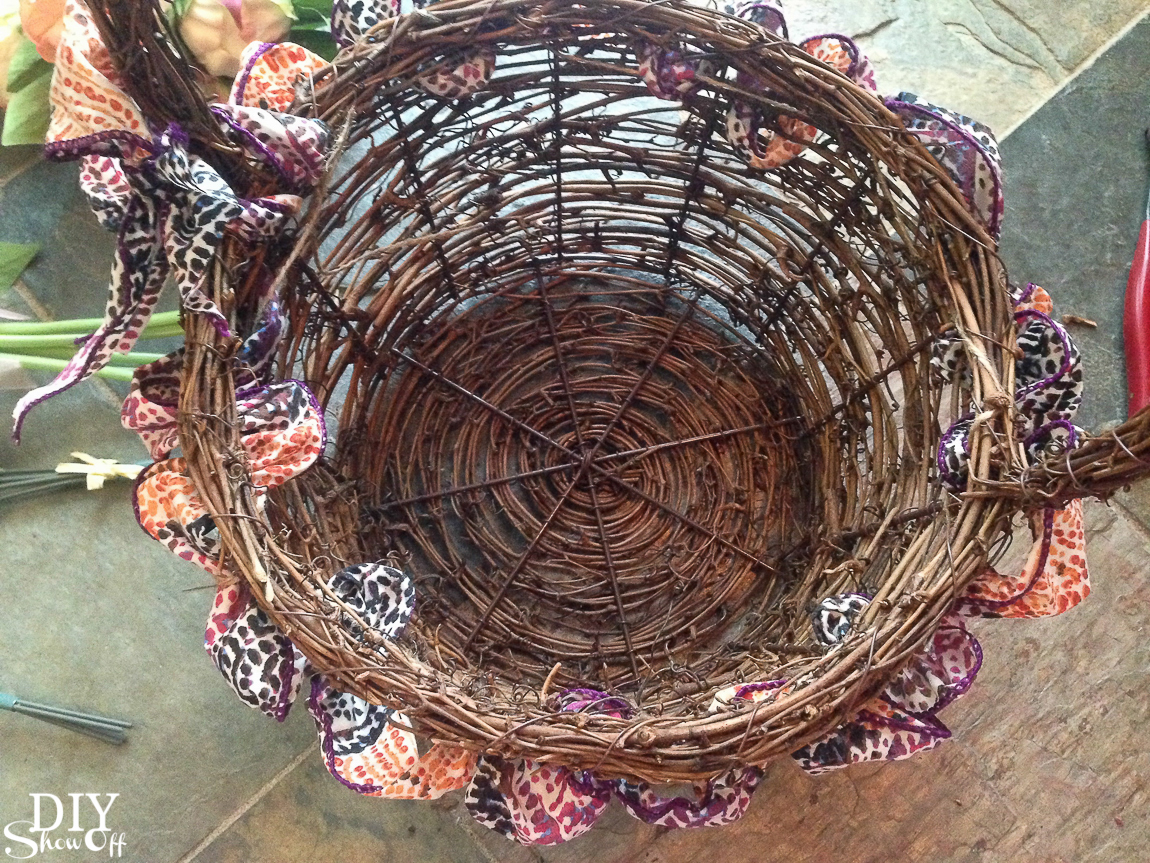
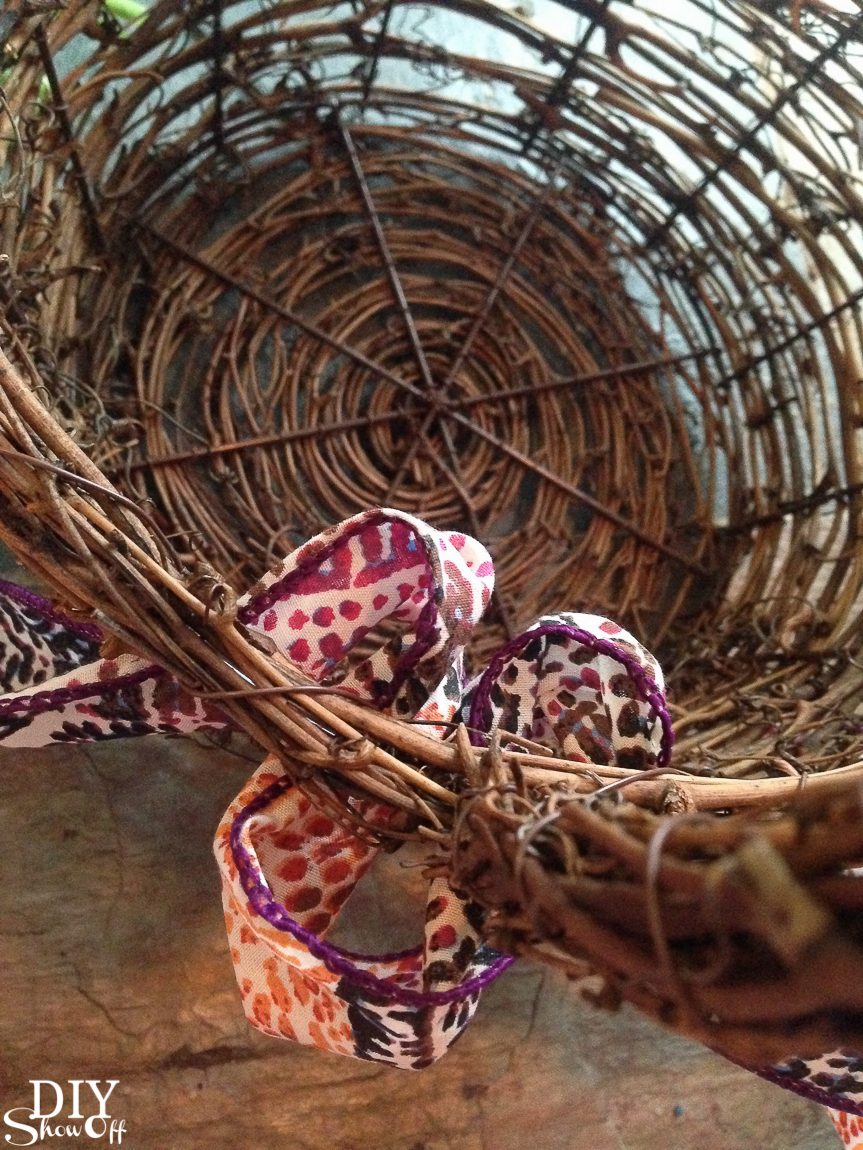
Secure ribbon to basket with hot glue or like me, simply weave twine in the ribbon loops inside the basket and tie. 

So pretty! DIY spring floral centerpiece tutorial. Perfect for Easter too! #madewithmichaels @diyshowoff So pretty! DIY spring floral centerpiece tutorial. Perfect for Easter too! #madewithmichaels @diyshowoff

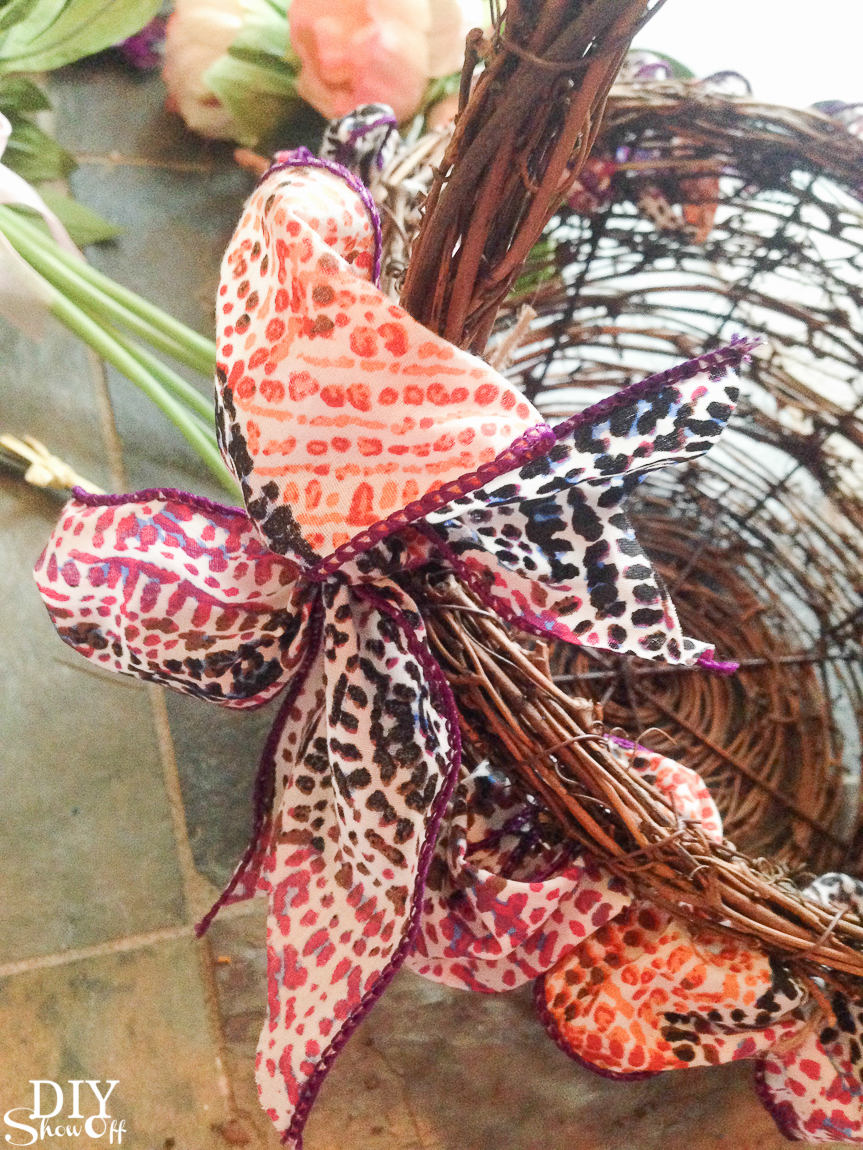
Tie a bow where the ends of the ribbon meet at the handle and embellish with a flower if desired. 

So pretty! DIY spring floral centerpiece tutorial. Perfect for Easter too! #madewithmichaels @diyshowoffSo pretty! DIY spring floral centerpiece tutorial. Perfect for Easter too! #madewithmichaels @diyshowoff

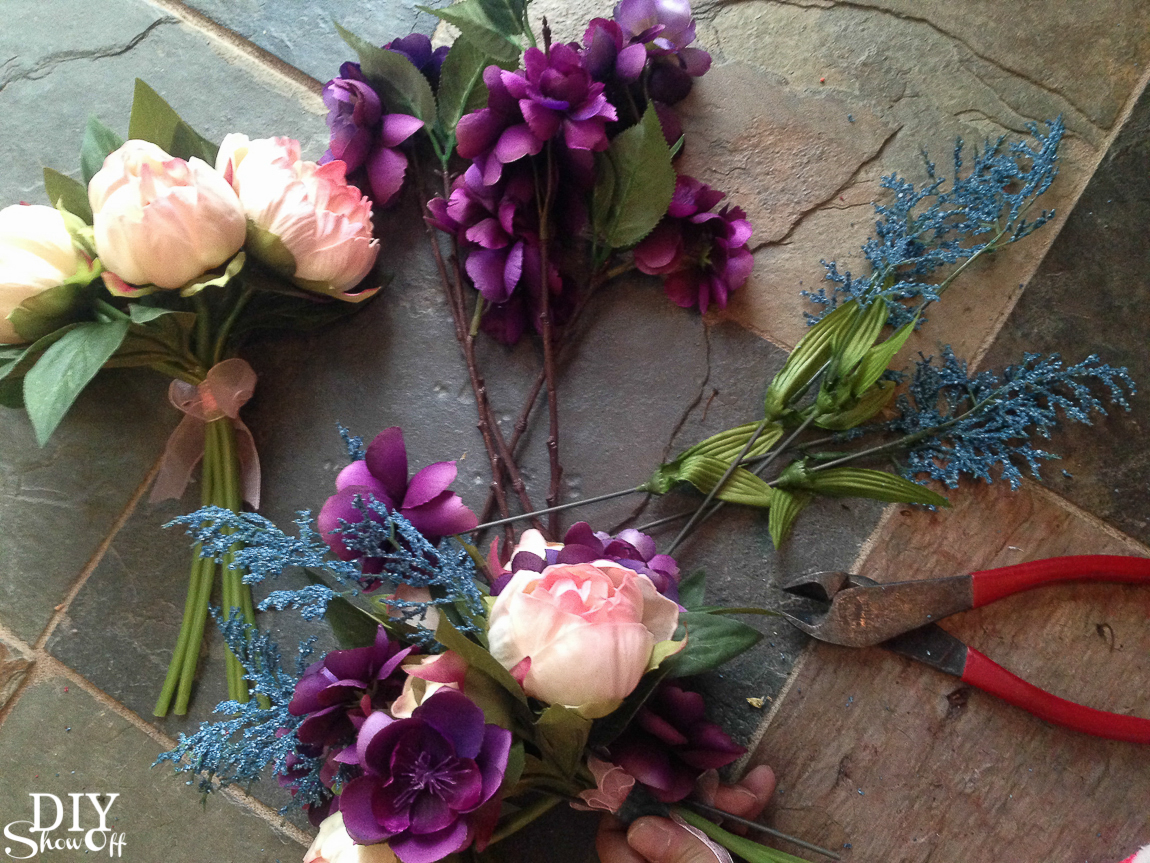
Using wire cutters, separate floral bundles. I have 2 pretty pre-assembled store-bought bouquets. I keep those intact and add more flowers to them for more color. Not shown: secure bouquets by winding floral tape (grab your decorative washi tape in a pinch) to bind stems. 

So pretty! DIY spring floral centerpiece tutorial. Perfect for Easter too! #madewithmichaels @diyshowoff So pretty! DIY spring floral centerpiece tutorial. Perfect for Easter too! #madewithmichaels @diyshowoff So pretty! DIY spring floral centerpiece tutorial. Perfect for Easter too! #madewithmichaels @diyshowoff

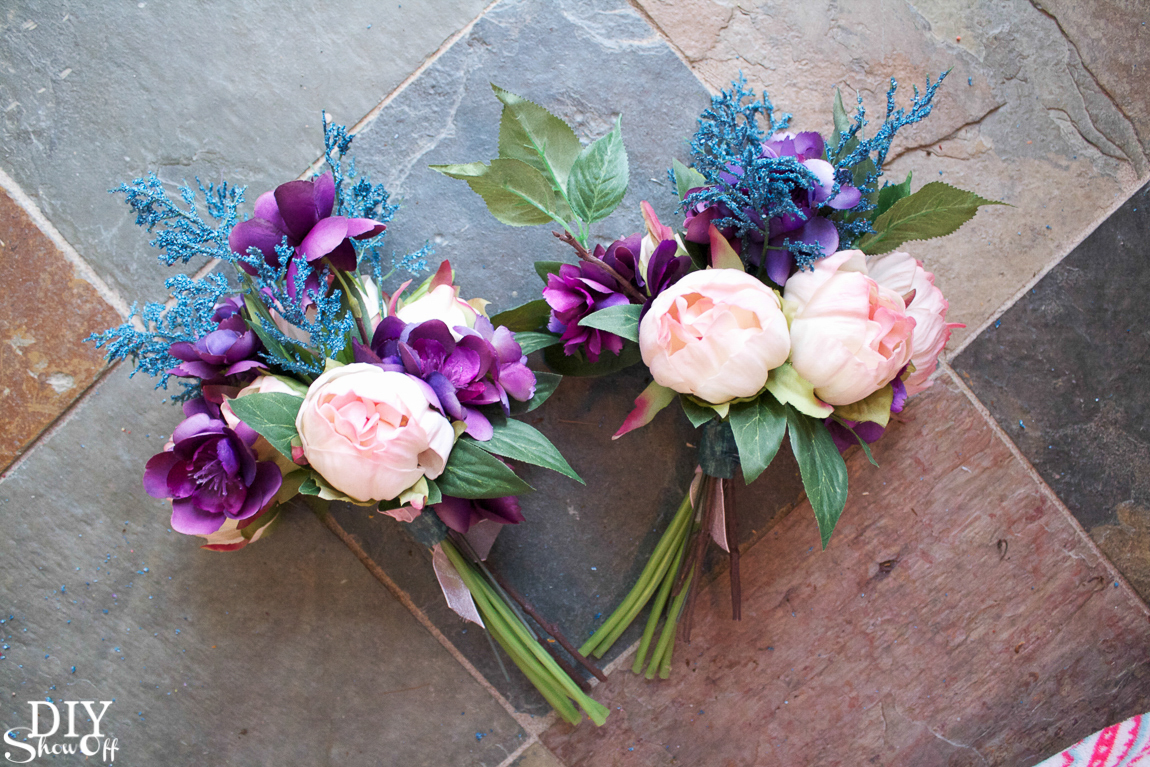
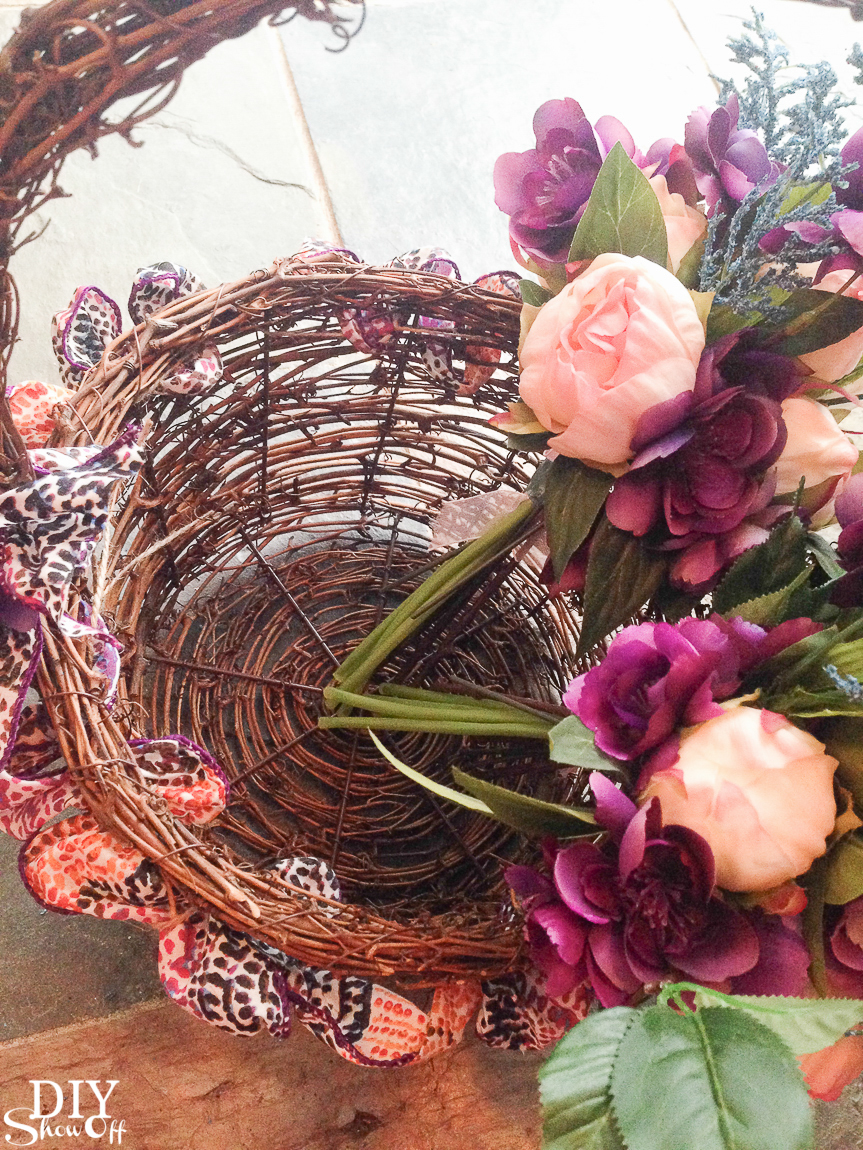
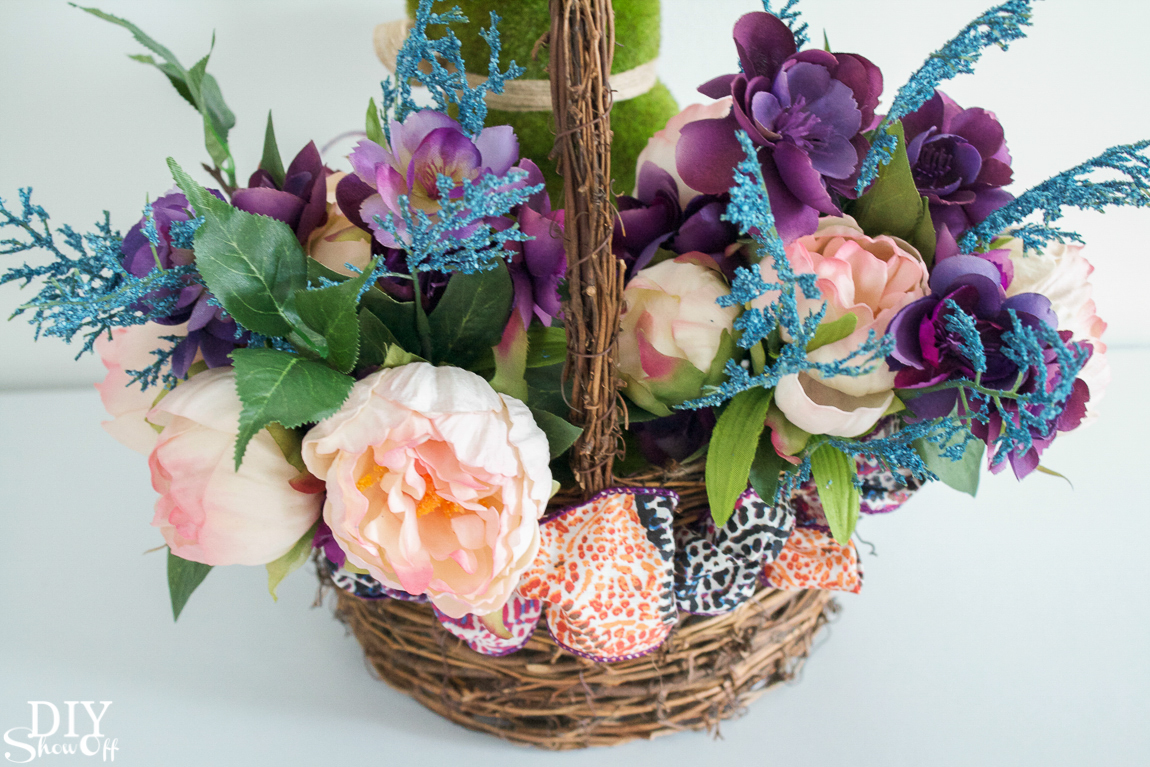
Then tuck bouquets inside of the basket. 

So pretty! DIY spring floral centerpiece tutorial. Perfect for Easter too! #madewithmichaels @diyshowoff

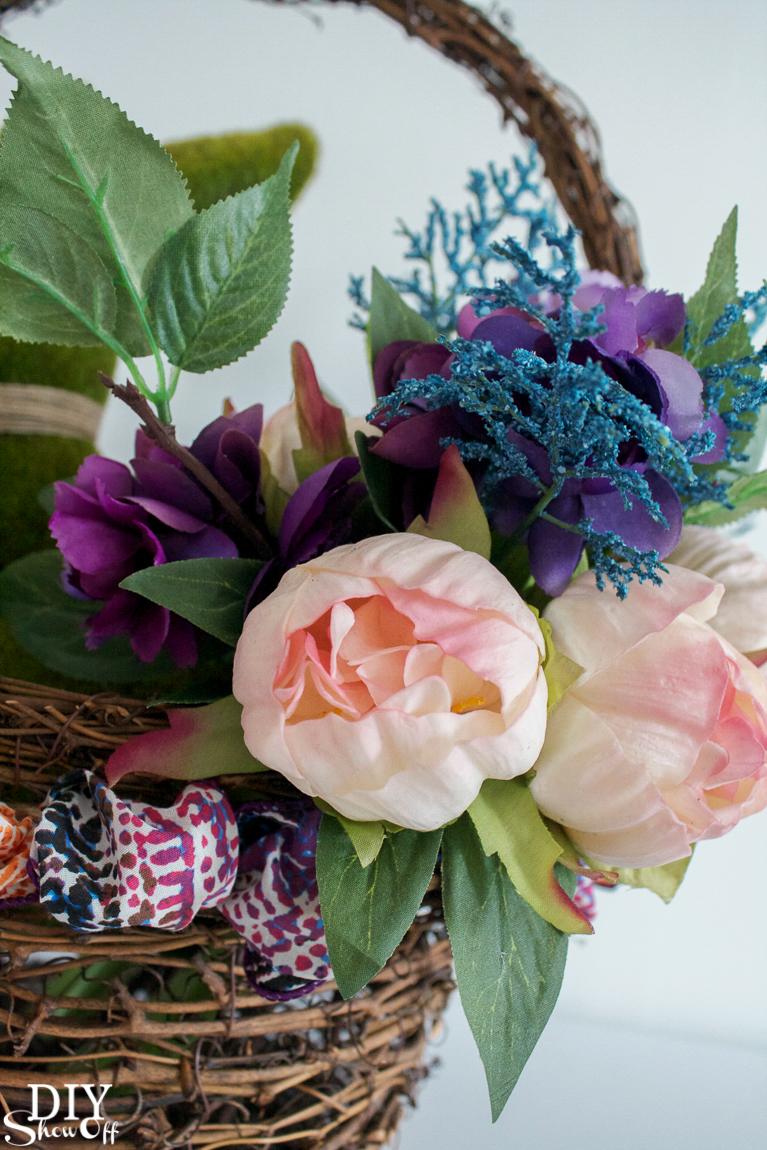
Nestle in a moss bunny…

So pretty! DIY spring floral centerpiece tutorial. Perfect for Easter too! #madewithmichaels @diyshowoff

Display on dining room or side table. Now it’s beginning to look like spring!

So pretty! DIY spring floral centerpiece tutorial. Perfect for Easter too! #madewithmichaels @diyshowoff

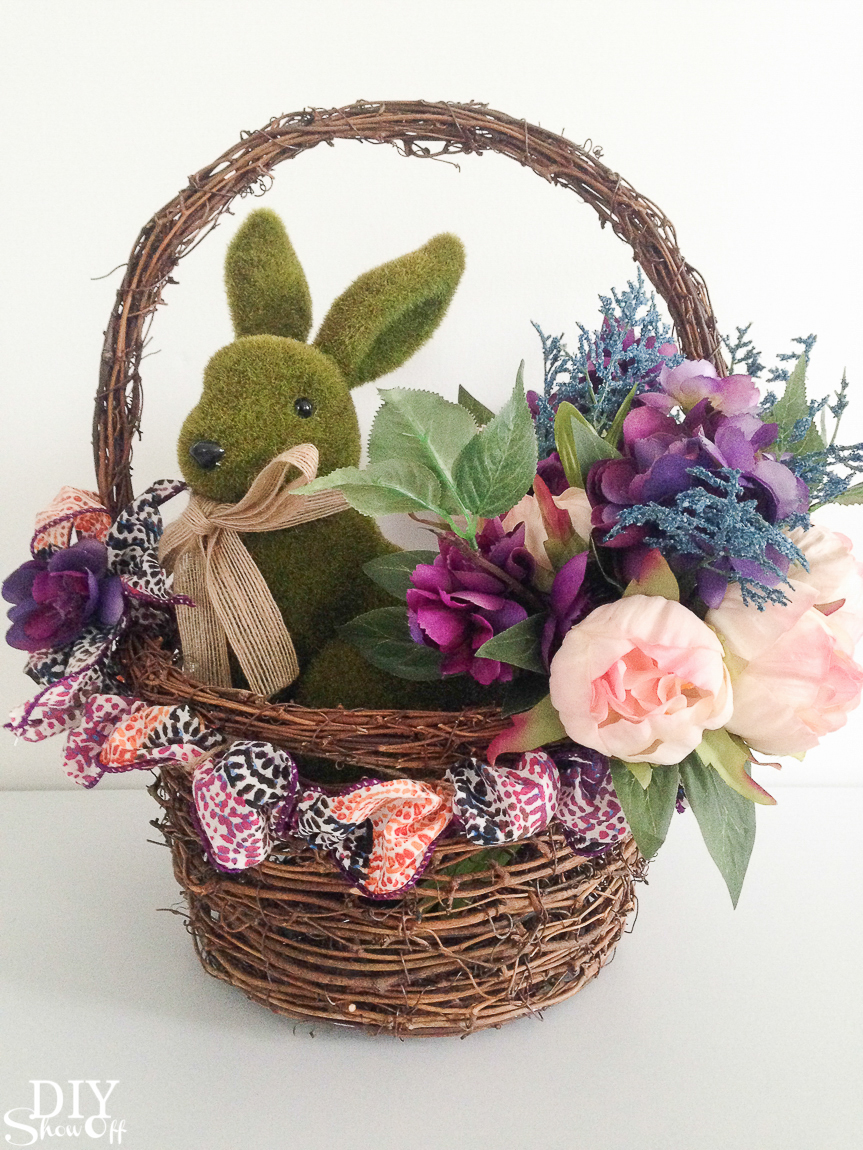
I think it’s the perfect decorative accent and spring centerpiece to display starting right after Valentine’s Day up until Memorial Day.

So pretty! DIY spring floral centerpiece tutorial. Perfect for Easter too! #madewithmichaels @diyshowoff

This smug moss bunny agrees. How about you?

So pretty! DIY spring floral centerpiece tutorial. Perfect for Easter too! #madewithmichaels @diyshowoff

Even the back side is looking good…

diy-spring-floral-centerpiece-tutorial-30

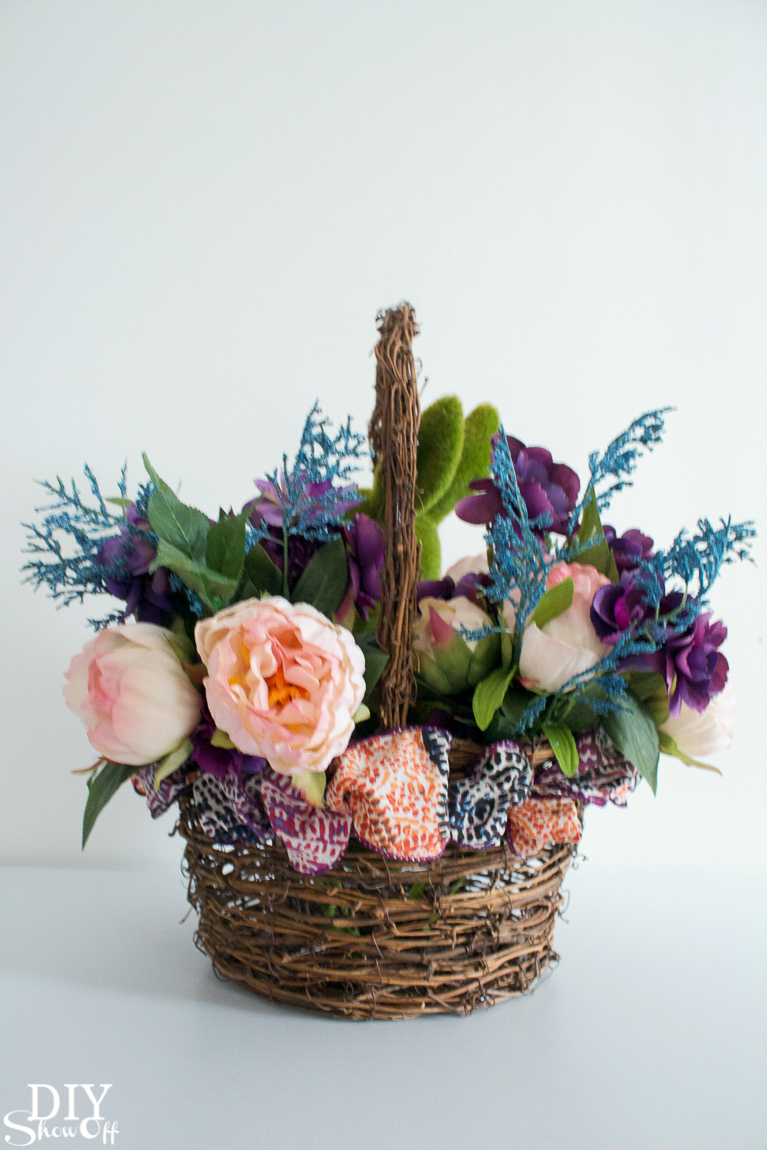
I’m loving the unexpected color assortment…

diy-spring-floral-centerpiece-tutorial-32 diy-spring-floral-centerpiece-tutorial-31 diy-spring-floral-centerpiece-tutorial-29

And know what else? I’m really tempted to head back to Michaels for all of this romantic spring decor to finishing the look. ::drool::

So pretty! DIY spring floral centerpiece tutorial. Perfect for Easter too! #madewithmichaels @diyshowoff So pretty! DIY spring floral centerpiece tutorial. Perfect for Easter too! #madewithmichaels @diyshowoff So pretty! DIY spring floral centerpiece tutorial. Perfect for Easter too! #madewithmichaels @diyshowoff So pretty! DIY spring floral centerpiece tutorial. Perfect for Easter too! #madewithmichaels @diyshowoff

Looking for more inspiration? Make sure you visit Michaels’ blog, The Glue String beginning today at 10 a.m. CST, to see the rest of the Michaels Makers’ spring floral project ideas.

 Loading InLinkz ...

Like this? Please pin it to your favorite Spring Pinterest board for future reference and then give it a shout out on social media if you’re so inclined. Sending you a BIG virtual thank you hug!

Happy almost-spring, friends!

spring floral centerpiece inspiration


DIY Vintage-Look NOEL Wall Art

‘Deck the halls with boughs of holly…fa-la-la-la-la-la”…well, I did that once. Holly is quite scratchy! Ouch! Guess what?! Hometalk.com and CountryLiving.com are hosting a Home for Christmas themed blog hop! Oh my Christmas! Time to belt out your favorite Christmas carols, top your cocoa with some marshmallows and to get inspired! Grab your slippers and get your pin-finger ready while you’re at it!

Home for Christmas

Once the Christmas tree was all decorated for the holidays,

birds and berries Christmas tree #michaelsmakers @diyshowoff Dream Tree Challenge  

I needed a little holiday cheer for above the mantel. The stormy beach portrait that’s there most of the rest of the year really wasn’t going to work.  So I decided on a “NOEL” idea for filling the empty space. Did you see the cute wooden circled monogram letters at Michaels? I knew I wanted to do something with them. This is the perfect project!

DIY NOEL Christmas wall art tutorial @diyshowoff

Materials I used: (I’ve included some affiliate links so you can find the supplies easily and to maybe add a little jingle to Santa’s wallet.Ty!)

  • extra large monogram wreath letters N – O – E – L 
  • craft paint and foam brushes (I chose berry red and forest moss)
  • paper towels
  • velcro picture hanging strips
  • TransTint dye (Note: a bit on the pricy side, but this dye is AWESOME! It’s water based so it’s not oily and makes for a gorgeous wood stain. Tip: Easiest clean up ever! Just let brush dry and hide styrofoam cup on a shelf in the basement/out of the way. Dye will evaporate. Simply add water and resume use on your next project!) That bottle is going to last YEARS! 
  • paint or chip brush

What I did: 

1. I gave each letter two coats of paint and let dry. Note: One coat/dry brushing would actually look fantastic too! I wish I was a little more carefree. One coat/dry brushing means step 4 is going to look WAY better…so adopt a technique as if you’d had an extra cup of eggnog. Tip: If hanging in a grid pattern and using two colors like I did, paint the N and L the same color and the O and E the same color to avoid one color on the left, one color on the right. Mix it up!  

DIY NOEL Christmas wall art tutorial @diyshowoff

2. Sand the edges, distress as desired. 

DIY NOEL Christmas wall art tutorial @diyshowoff

3. Next, add a drop or two of TransTint dye to water in a styrofoam cup, more TransTint dye for a darker tone if desired. TransTint dye WILL stain fingers and work surface. I recommend wearing gloves and protecting your work table with layers of newspaper or a tarp or old vinyl table cloth or if you live in a warmer climate (lucky you…make up the guest room for my impending arrival!), work outside.

DIY NOEL Christmas wall art tutorial @diyshowoff

4. Dip the brush into the TransTint dye, tapping excess from the brush. Randomly brush, fling, stipple, drip (get messy and creative – have fun!) the TransTint dye onto the painted wooden letters. Wipe away or dab with paper towels as needed. Sprinkle TransTint to create a  “dirty, worn, aged” finish. 

DIY NOEL Christmas wall art tutorial @diyshowoffDIY NOEL Christmas wall art tutorial @diyshowoff

5. Let dry TransTint dye dry overnight. 

6. Optional: Secure a small holiday wreath to the “O” with a ribbon for a touch of texture. 

DIY NOEL Christmas wall art tutorial @diyshowoff

7. Hang and display using velcro picture hangers. You might want to grab a level while you’re at it. 

DIY NOEL Christmas wall art tutorial @diyshowoff

I love the worn, aged finish. Vintage goodness! What do you think? 

DIY NOEL Christmas wall art tutorial @diyshowoff

See MORE holiday DIY and decorating inspiration from these sweet and talented HomeTalk friends:

 Loading InLinkz ...