Beverage Recipe Vinyl Decal

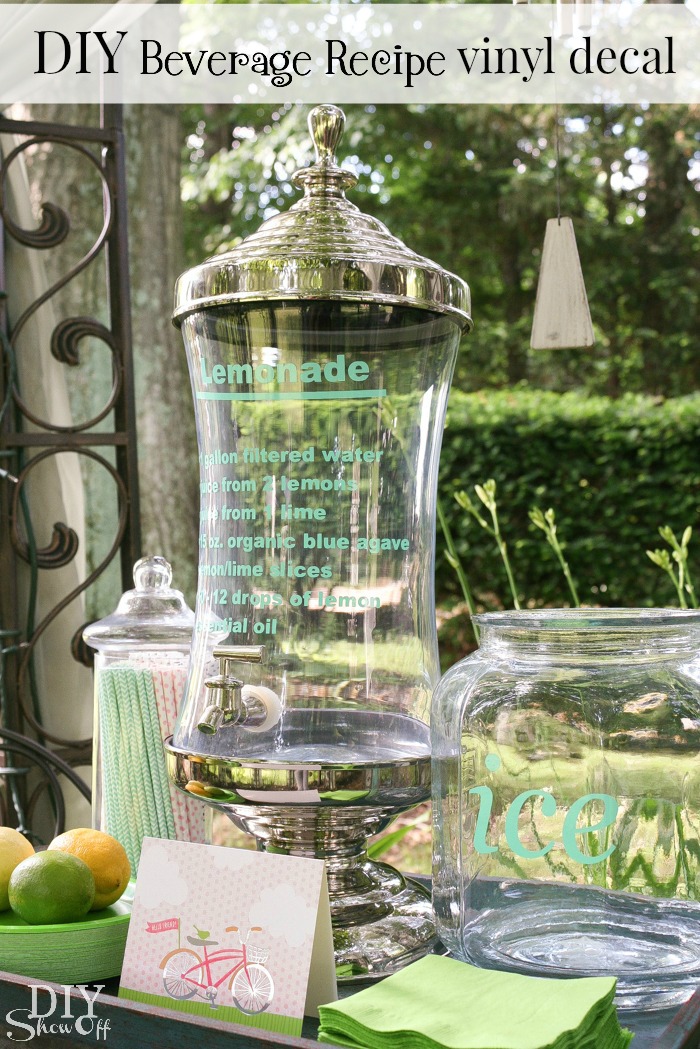
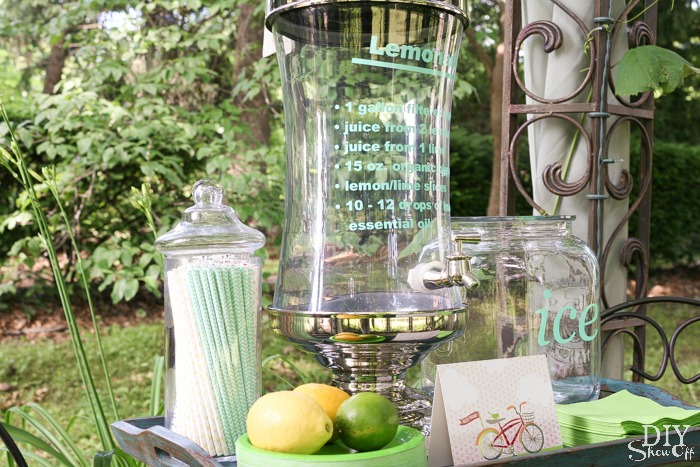
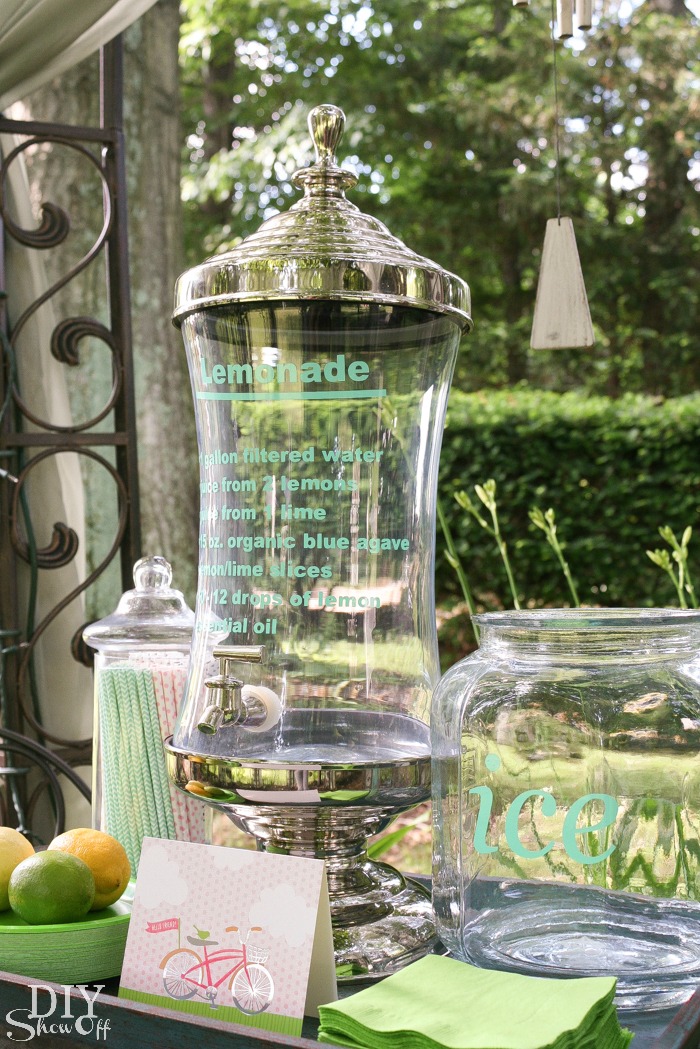
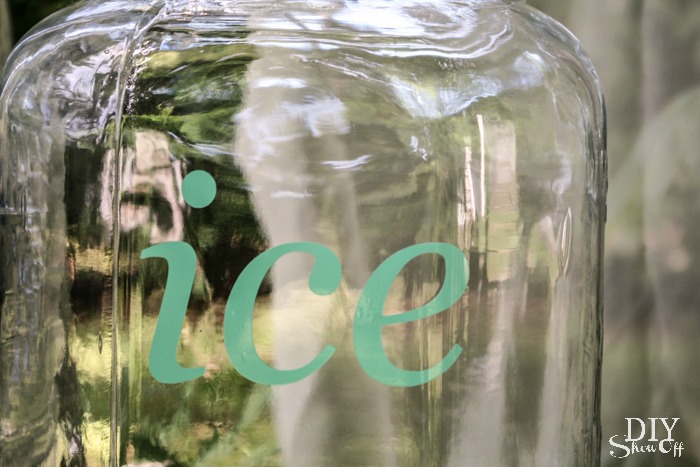
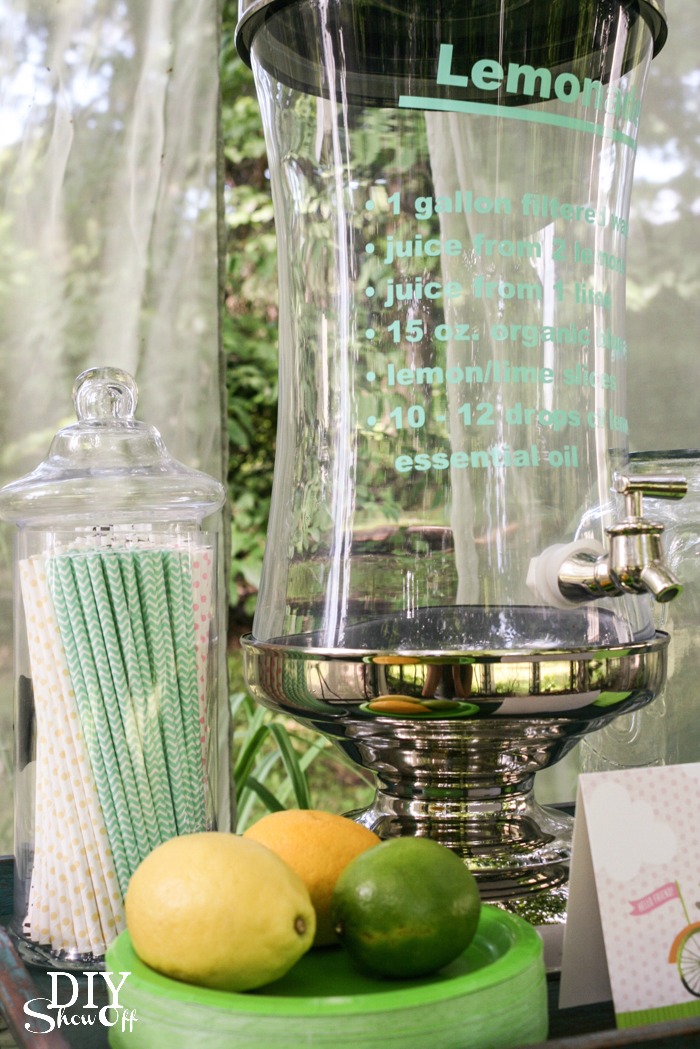
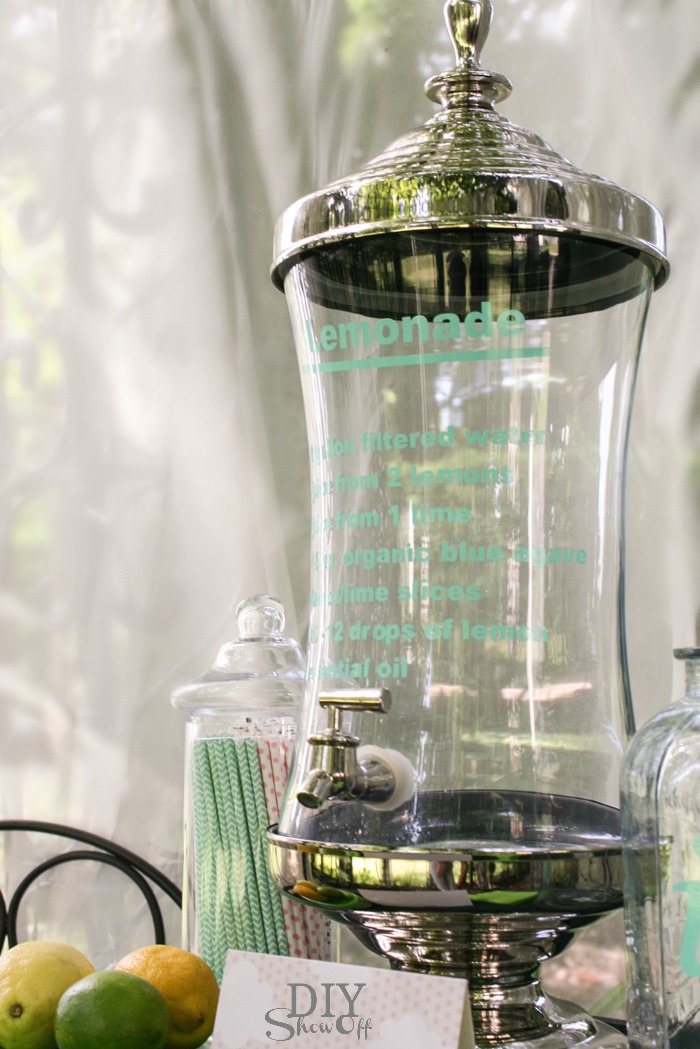
Summer time in our home = lots of entertaining and hauling out the fancy glass beverage server for homemade lemonade is a must. Labeling glass containers lets guests know exactly what they’re consuming.

Beverage Recipe Vinyl Decal Label Tutorial

DIY lemonade recipe vinyl decal on beverage glass

Materials:

  • Glass beverage server
  • Happy Crafters Glossy Adhesive Vinyl (mint)
  • Transfer paper

Tools Needed:

  • Vinyl cutter (I use a Silhouette Cameo)
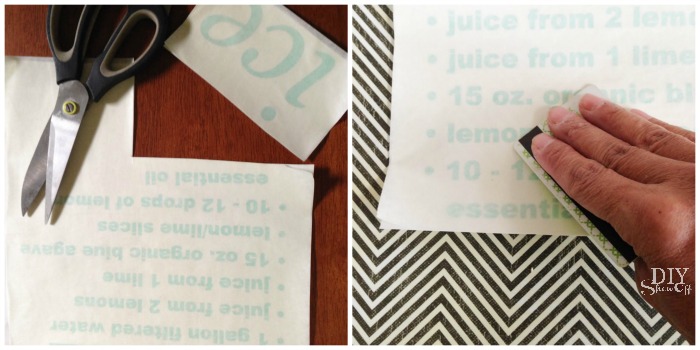
  • Scissors

What I did:

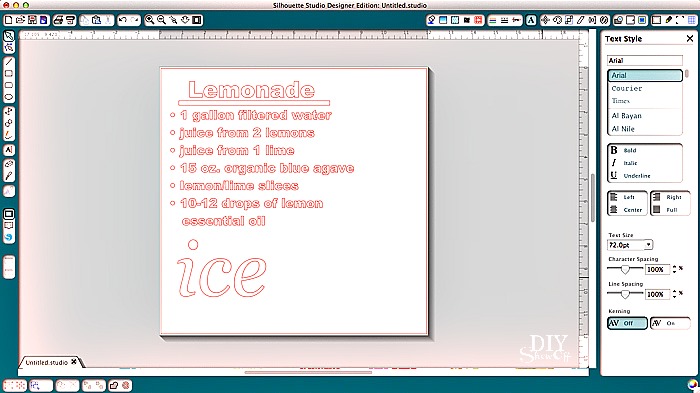
Open up Silhouette Studio Designer software. Choosing the font tool, write up a label. Simply the name of the beverage or ice. I included my lemonade recipe too. 

lemonade vinyl label tutorial

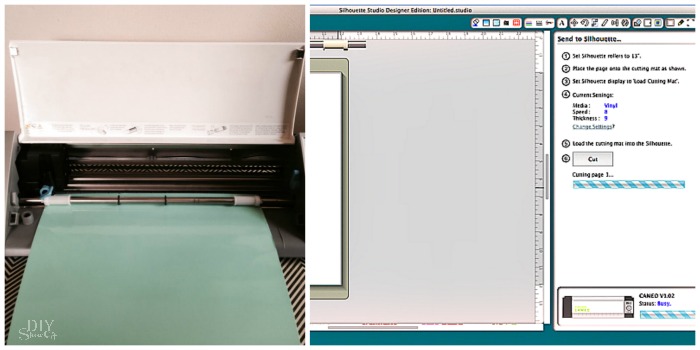
Load the vinyl, color side up into the machine. Adjust blade settings for adhesive vinyl and “send to cut”.

lemonade vinyl label tutorial

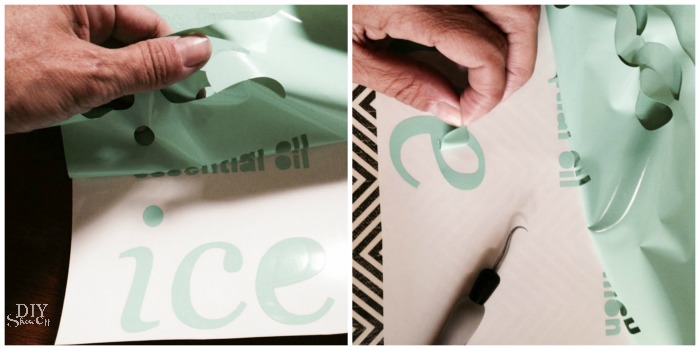
Unload vinyl, trim design if needed and weed away vinyl that isn’t a part of the design. 

lemonade /beverage vinyl label tutorial at diyshowoff.com

Apply transfer paper to the vinyl. Rub with a credit card. 

lemonade /beverage vinyl label tutorial at diyshowoff.com

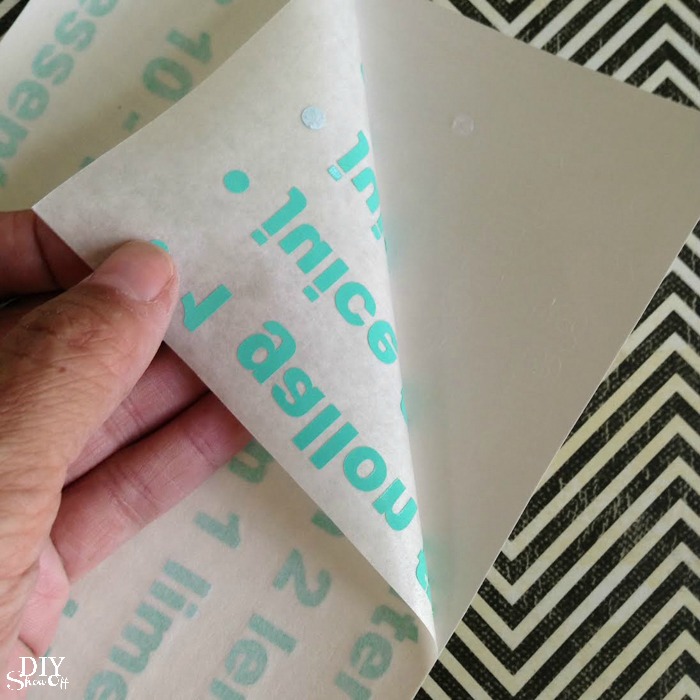
Peel away backing (vinyl will transfer, showing reverse on the transfer paper).

lemonade /beverage vinyl label tutorial at diyshowoff.com

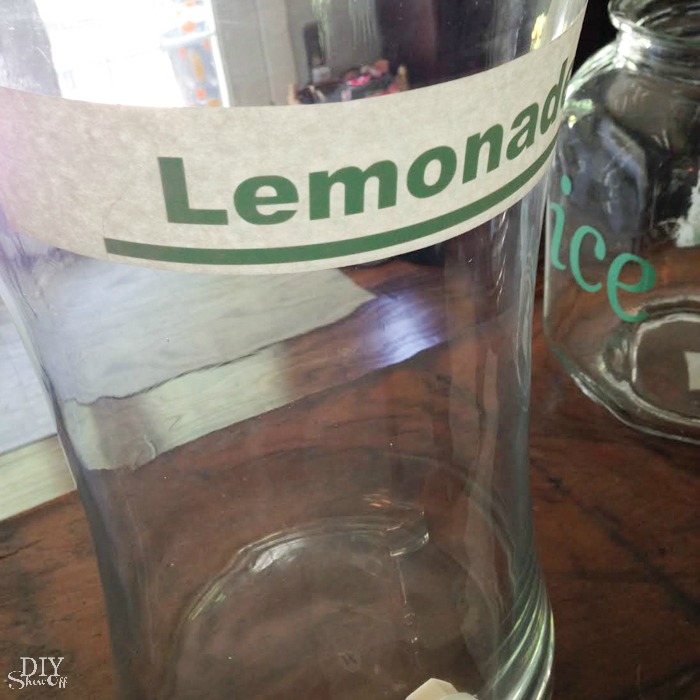
Place sticky side of the vinyl/transfer paper design to the glass. 

lemonade /beverage vinyl label tutorial at diyshowoff.com

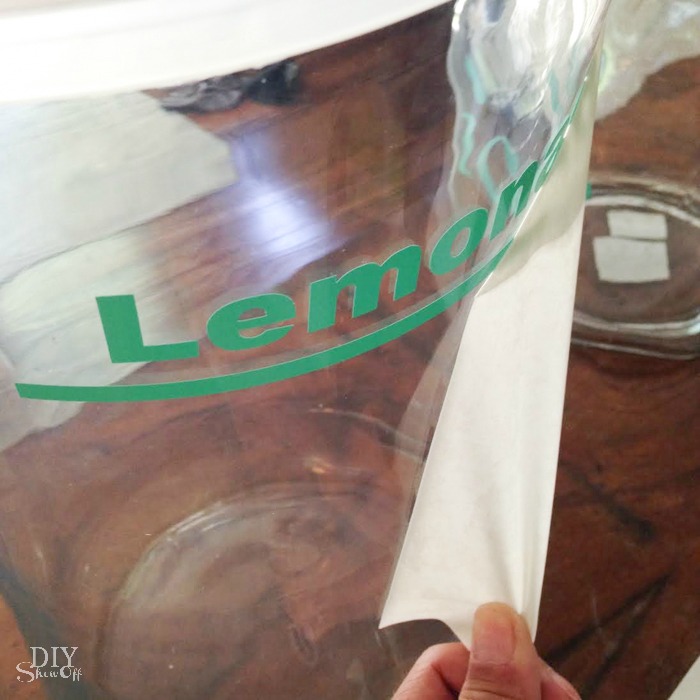
Rub with a credit card then peel away transfer paper. 

lemonade /beverage vinyl label tutorial at diyshowoff.com

Tip for curved surfaces: Stick the center of the decal first. Apply by working from the center point out. I found it easier to carefully tear the transfer paper on each end between text to avoid wrinkles. 

lemonade /beverage vinyl label tutorial at diyshowoff.com

Mix up your beverage recipe and serve!

DIY beverage containter vinyl label at diyshowoff.comDIY beverage containter vinyl label at diyshowoff.com

Party time!

DIY beverage containter vinyl label at diyshowoff.comDIY beverage containter vinyl label at diyshowoff.comDIY beverage containter vinyl label at diyshowoff.com
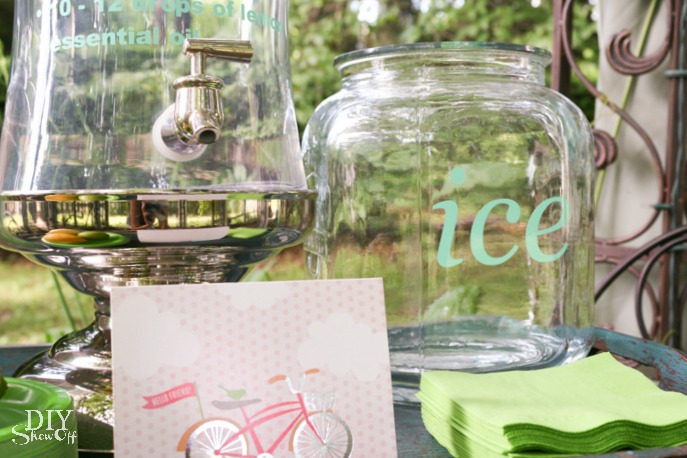
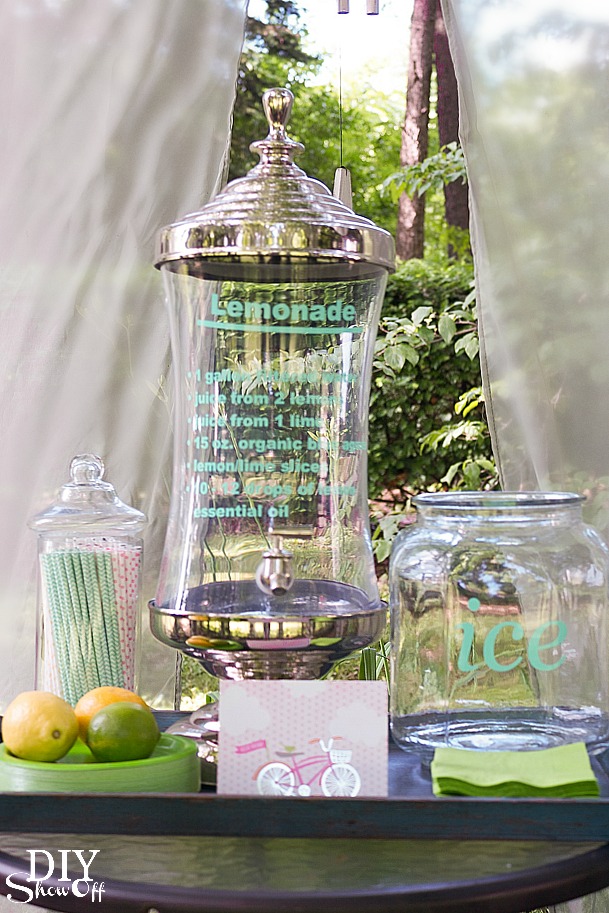
These glass containers are washed by hand. And I’ll simply peel off the vinyl lettering when if I want but I think it’s going to stay throughout the season. DIY beverage container vinyl label at diyshowoff.comThese glass containers are washed by hand. And I'll simply peel off the vinyl lettering when if I want but I think it's going to stay throughout the season. DIY vinyl decal for lemonade recipe

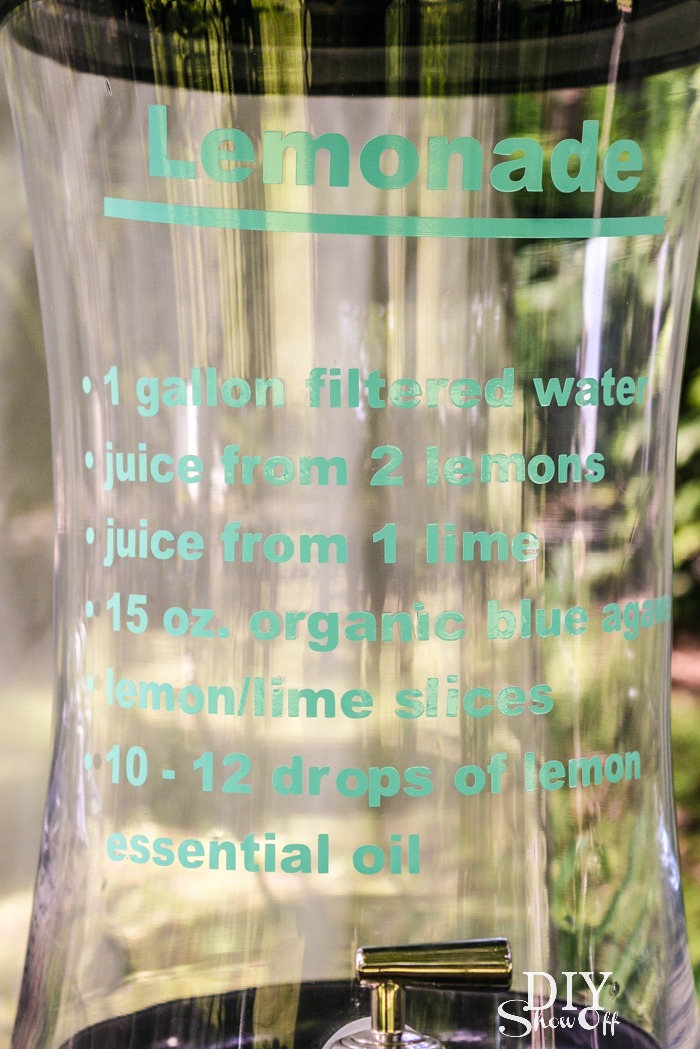
Visit The Shabby Creek Cottage for another fun summer vinyl project!

summer-mantel at The Shabby Creek Cottage

*This post is sponsored by Happy Crafters. Tutorial, experience and opinion is my own.  Check out all the supplies at Happy Crafters for inspiration for your next project. 

HClogopngsmall


DIY Table Markers for the 4th of July

We’re hosting a family picnic to celebrate Independence Day. This easy DIY adds a patriotic touch of red,white and blue to the 4th of July theme.

DIY 4th of July Picnic Buffet Table Markers

DIY red, white and blue table markers at diyshowoff.com

Gather up:

  • scrap wood (mine are 1 x 6 x about 10 inch pine, 2x4s or 4x4s would work too)
  • a few wooden stars
  • acrylic craft paint
  • FrogTape® Shape Tape™ (chevron)
  • chalkboard labels
  • hot glue

Tools needed:

  • sandpaper/sanding block
  • craft paint brushes
  • scissors
  • hot glue gun

DIY table marker tutorial at diyshowoff.com

What I did:

1. I sanded and cleaned up the wood scraps. 

DIY table marker tutorial at diyshowoff.com

2. Next, I gave each 2 coats of white paint and let dry. 

DIY table marker tutorial at diyshowoff.com

3. Once the white paint was dry, I applied FrogTape® Shape Tape™ (I used the chevron pattern) in three strips, starting with the top, then the bottom, then centering the third between the top and bottom. 

DIY table marker tutorial at diyshowoff.com

4. Using my thumbnail, I burnished the edges of the tape to activate the PaintBlock® Technology. 

DIY table marker tutorial at diyshowoff.com

5. Then just paint the area not covered by tape. I used a combination of red and blue. I did two coats.

DIY table marker tutorial at diyshowoff.com

6. Carefully remove the tape while the paint is still wet. 

DIY table marker tutorial at diyshowoff.com

7. I painted the wooden stars and let everything dry. 

DIY table marker tutorial at diyshowoff.com

8. I applied a small bit of hot glue to the back of each star and attach to the painted chevron wood background. 

DIY table marker tutorial at diyshowoff.com

9. I stuck on some chalkboard labels. 

DIY table marker tutorial at diyshowoff.com

Time to set the table! 

DIY table marker tutorial at diyshowoff.comDIY red, white and blue table markers at diyshowoff.com

FrogTape Blog Squad

Disclaimer: I received compensation to complete this project for using FrogTape® products. All opinions, projects and ideas are based on my own experience.

4th of July DIY Ideas

16 Patriotic 4th of July DIY highlights from That DIY Party at diyshowoff.com

There have been so many awesome 4th of July projects linked up to That DIY Party lately! So I gathered up a collection of 16 red, white and blue, creative patriotic ideas to “show off” for inspiration just in time for celebrating Independence Day! 

[Not a valid template] 

Do you have a creative patriotic DIY to share? Pop over to the weekly That DIY Party to link up and show off.

That DIY Party link party at diyshowoff.com