Tie Dye Party Fun

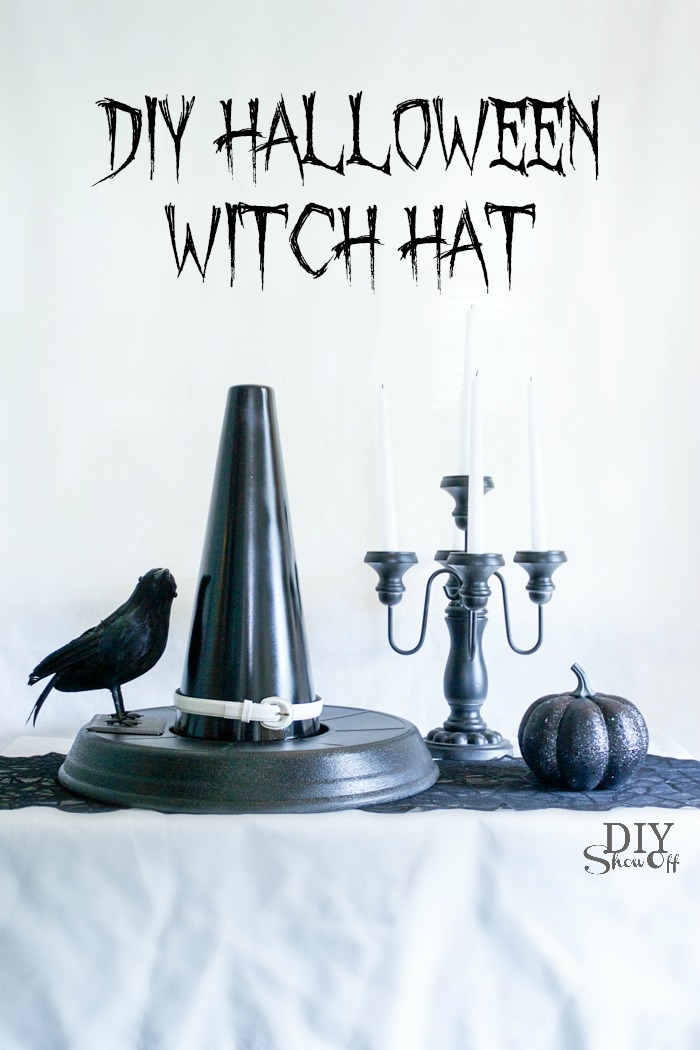
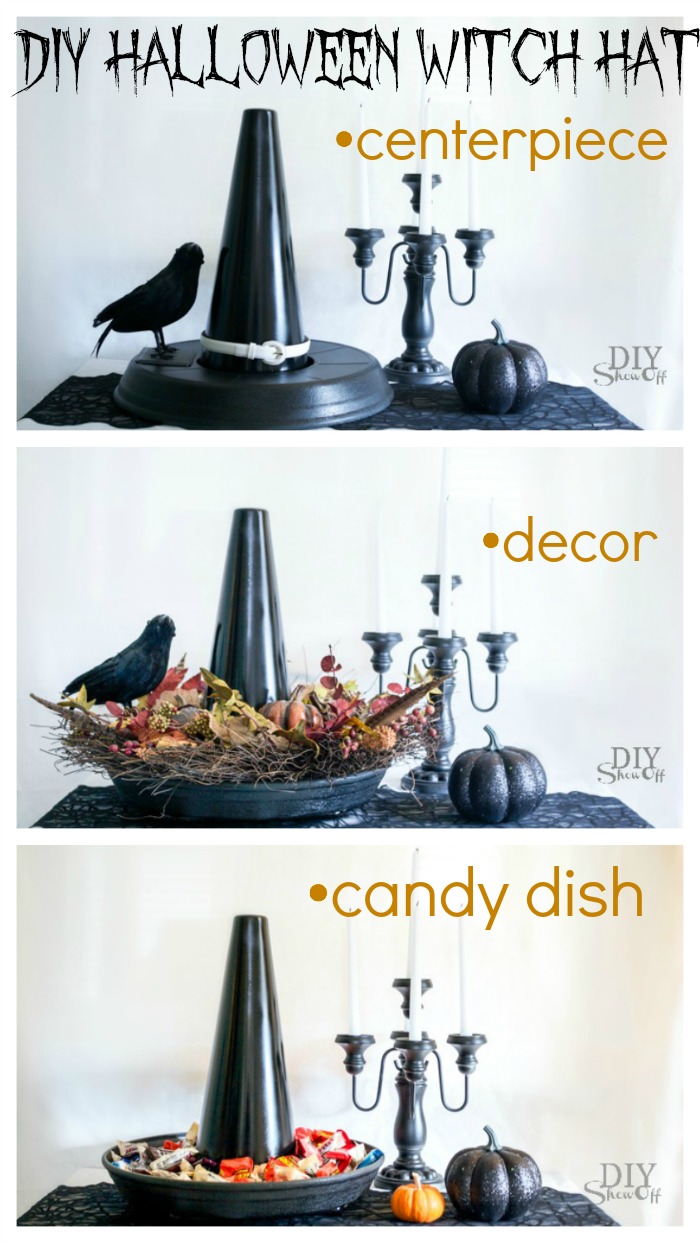
Celebrate the start of summer with snacks, sweets and some tie dye fun! 

Tie Dye Party invitation #tiedyeyoursummer @michaelsstores @diyshowoff

I had the opportunity to participate in trying out the Tulip One-Step Tie-Dye Party kit and cute FREE exclusive tie dye printables from Lillian Hope Designs. It’s summer time! I’m always up for hosting a fun themed event. Toss in tie dye, kids, a pretty day at the park and who can resist? To be perfectly honest, I’ve actually never tie dyed anything so I almost felt like one of the kids! 

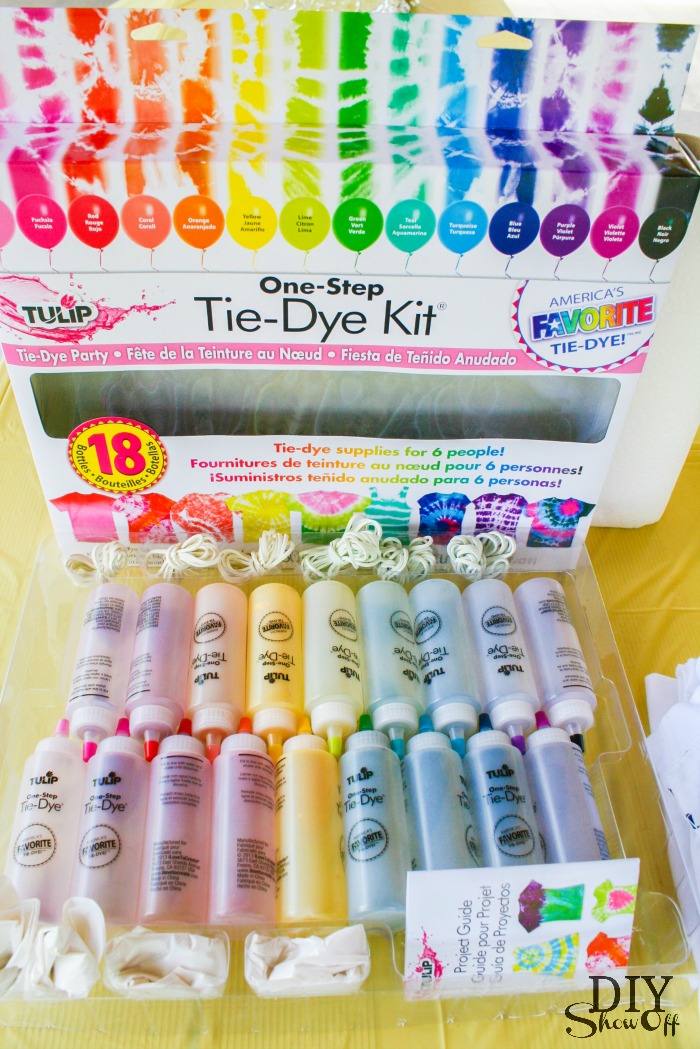
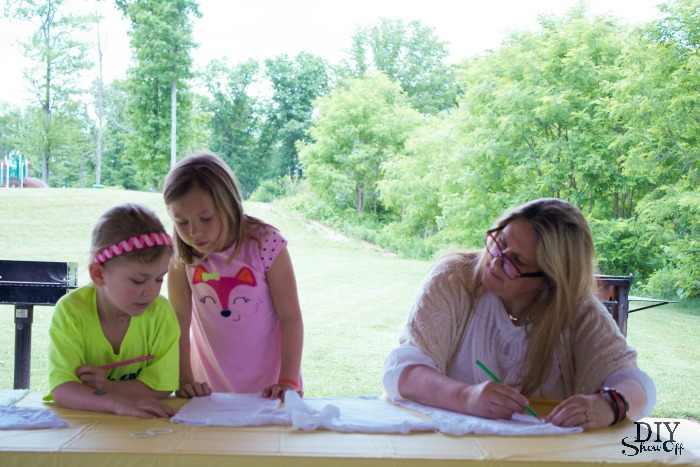
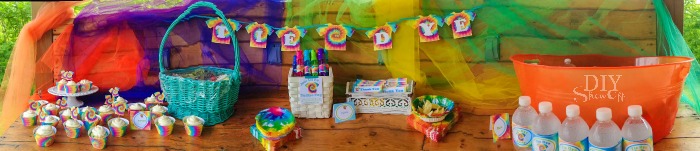
I partnered with Dana from Parties & Playdates to get a few kids together to kick off celebrating summer. With everything in the kit and free printables, it was easy to throw together a party. Everything needed to tie dye comes in the kit including 18 bottles of dye, 6 gloves, 6 t-shirts (kids large), plastic table cloth, 90 rubber bands and instructions for creating cool designs. And there a TON of cute tie dye themed party printables at TieDyeYourSummer.com. Here are just a few that we utilized: 

Invitations: personalize to “get this party started”!

Tie Dye Party invitation #tiedyeyoursummer @michaelsstores @diyshowoff

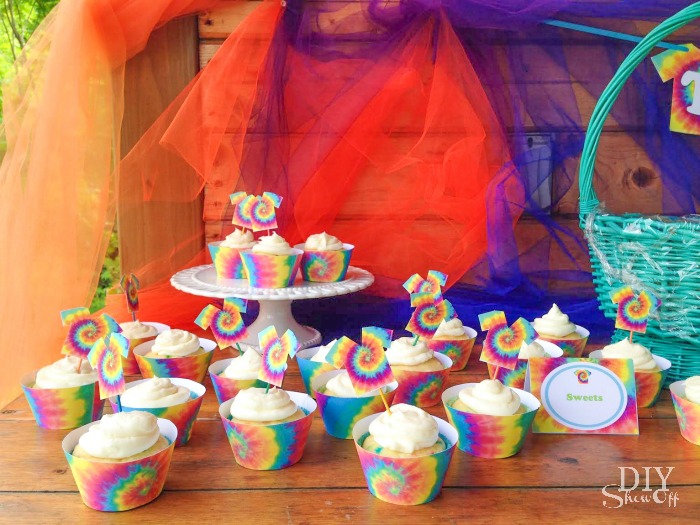
Cupcake wrappers and mini tie dyed-shirt cutouts: I served gluten free fun-fetti cupcakes with lemon buttercream frosting. We had organic veggies, dip and chips too. 

Tie Dye Party invitation #tiedyeyoursummer @michaelsstores @diyshowoff

Rectangle flags and sandwich/snack bag toppers: to coordinate bubble sticks and punch balloons favors. 

Tie Dye Party invitation #tiedyeyoursummer @michaelsstores @diyshowoff

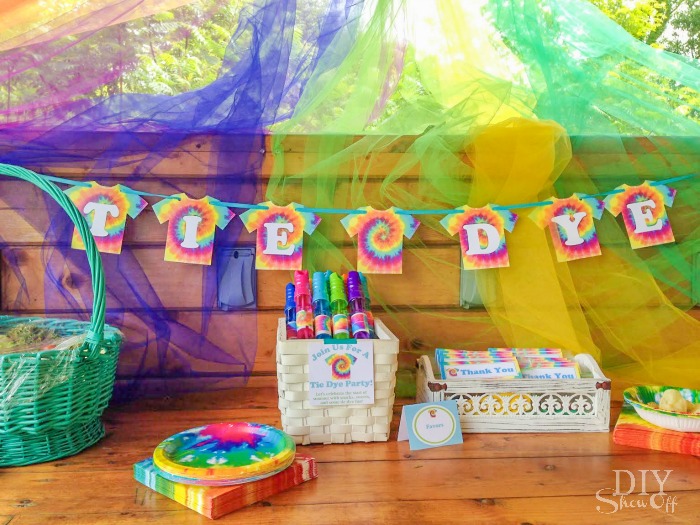
Party Banner and tent cards: print and assemble the cute banner, add some tulle to create a pretty backdrop. 

Tie Dye Party invitation #tiedyeyoursummer @michaelsstores @diyshowoff

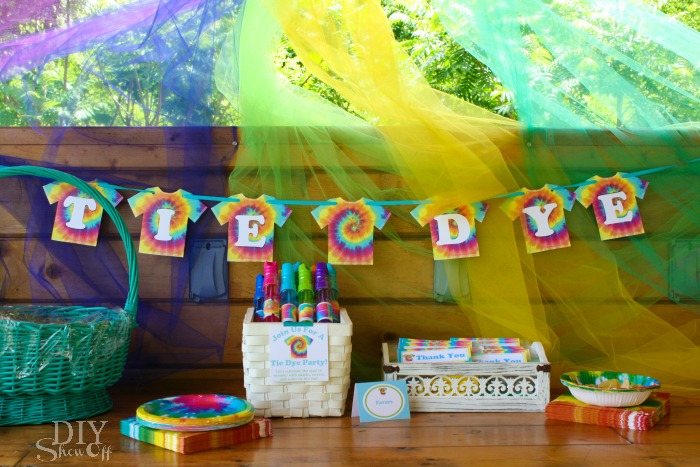
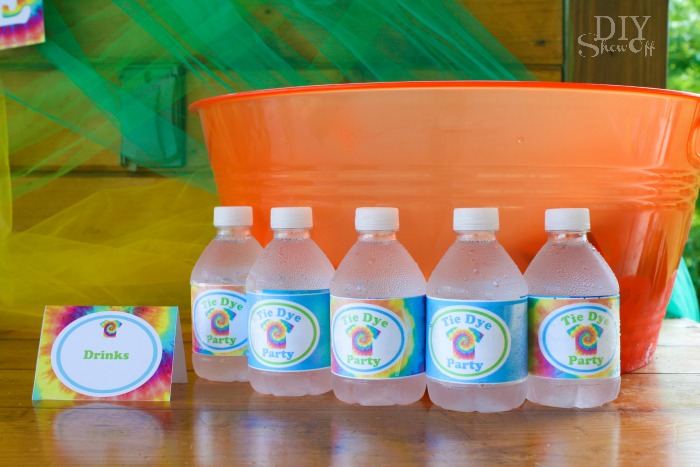
Water bottle labels: 

Tie Dye Party invitation #tiedyeyoursummer @michaelsstores @diyshowoff

{free tie dye party printables available at TieDyeYourSummer.com}

Tie Dye Party invitation #tiedyeyoursummer @michaelsstores @diyshowoff

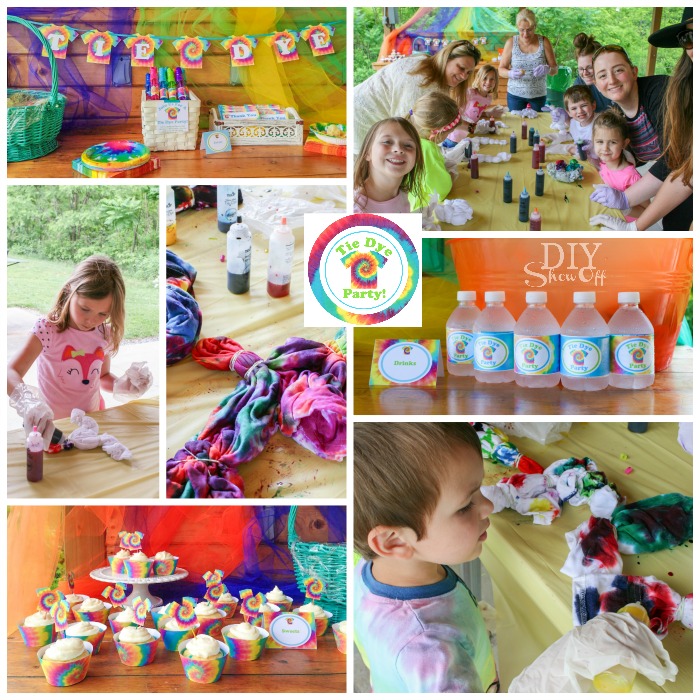
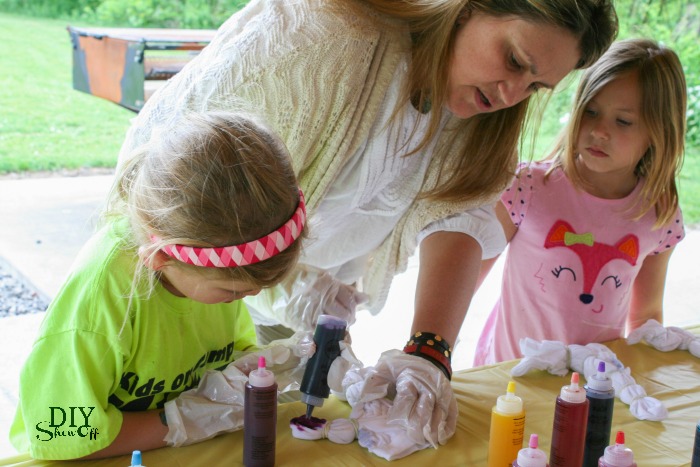
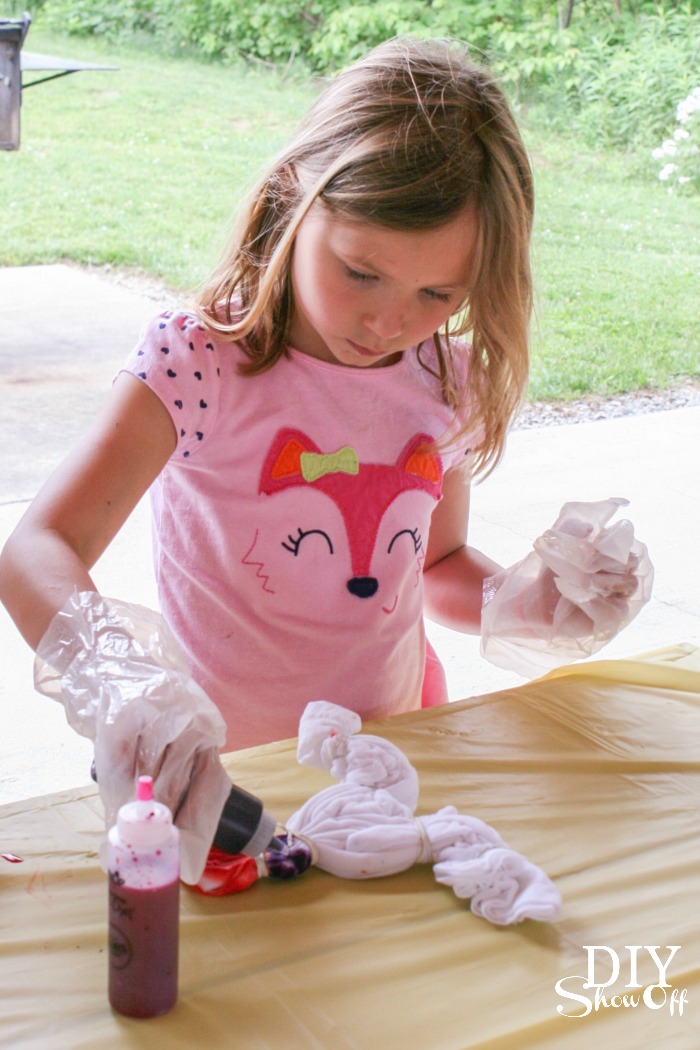
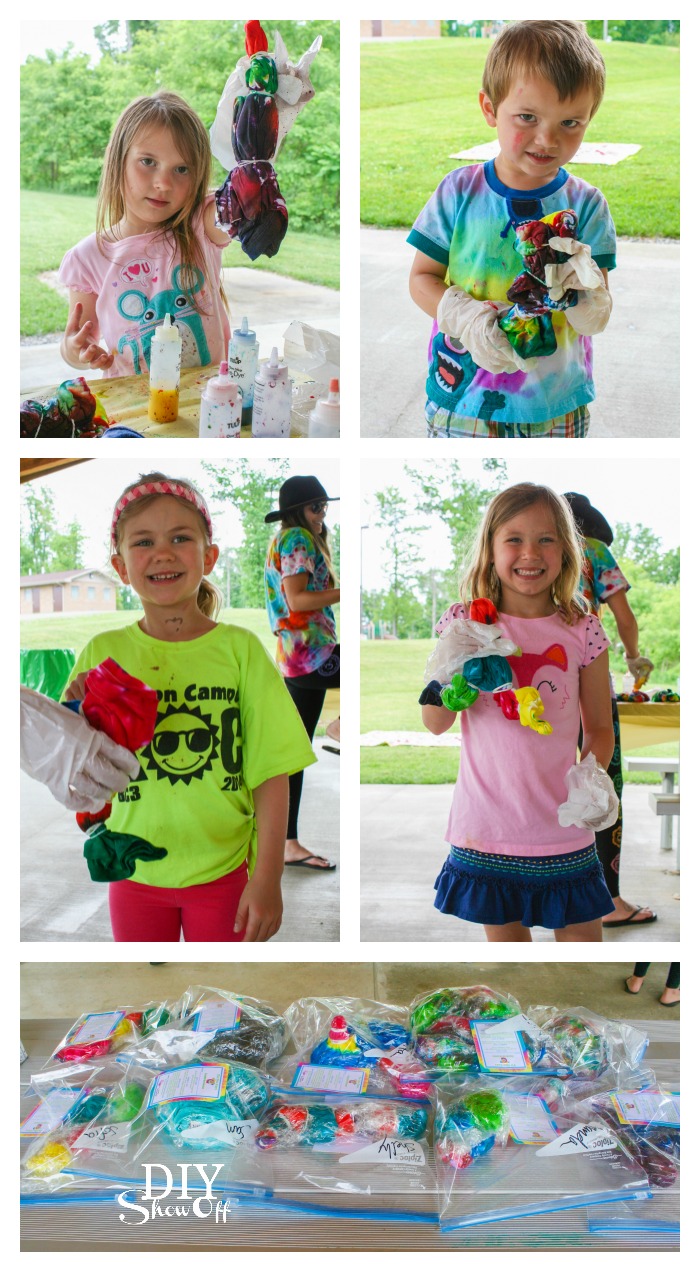
We gave guests the option of bringing their own dye-able item and kept the extra t-shirts from the kit on hand too. 45 minutes before the party began, I simply added water to the powdered dye in the bottles provided and shook them to mix. Instant tie dye party!

Tie Dye Party invitation #tiedyeyoursummer @michaelsstores @diyshowoff

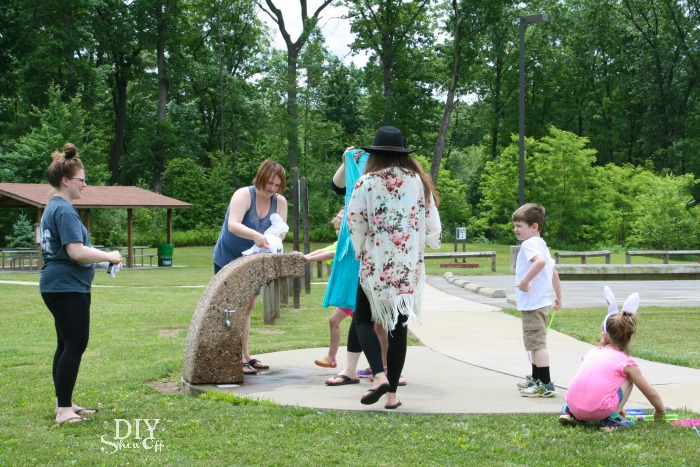
Tie dye can be accomplished with damp or dry shirts. Our guests started with dampening their shirts at the water fountain. 

Tie Dye Party invitation #tiedyeyoursummer @michaelsstores @diyshowoff

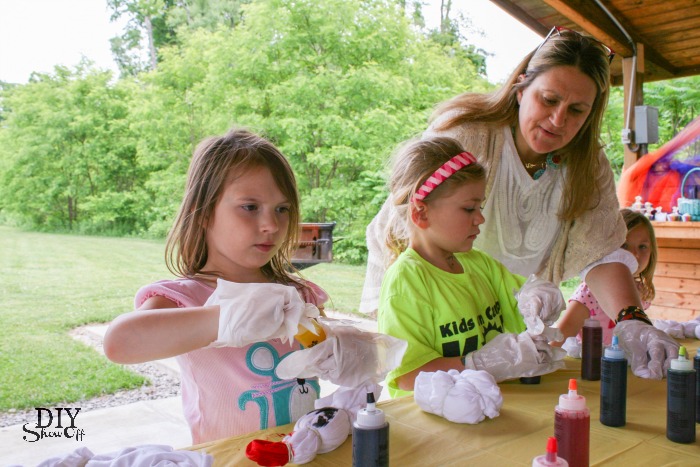
The kit includes instructions for creating spirals, sunbursts, stripes, ombre, crumple, bullseye, heart and more using the rubber bands included in the kit. 

Tie Dye Party invitation #tiedyeyoursummer @michaelsstores @diyshowoff

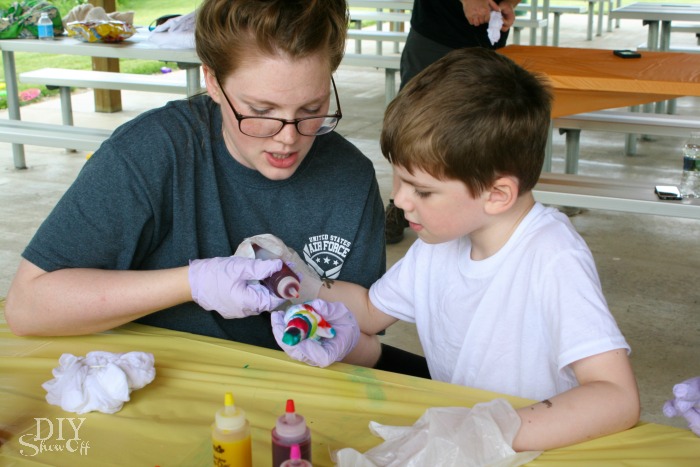
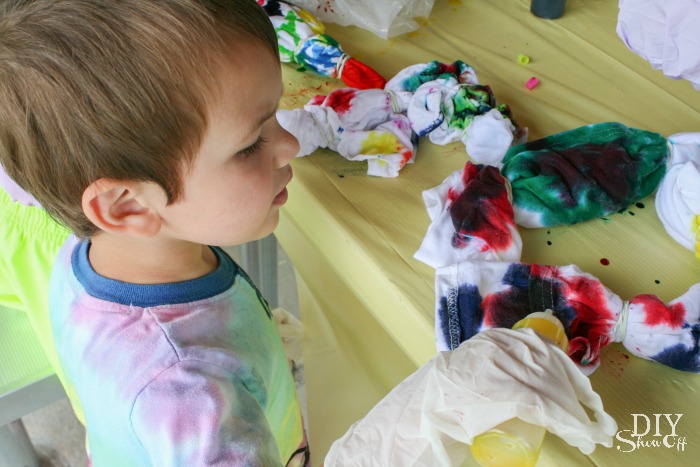
Wearing plastic gloves, everyone got creative with tie dying their shirts by applying different colors of dye to the fabric after rubber bands were placed.

Tie Dye Party invitation #tiedyeyoursummer @michaelsstores @diyshowoff Tie Dye Party invitation #tiedyeyoursummer @michaelsstores @diyshowoff Tie Dye Party invitation #tiedyeyoursummer @michaelsstores @diyshowoff Tie Dye Party invitation #tiedyeyoursummer @michaelsstores @diyshowoff Tie Dye Party invitation #tiedyeyoursummer @michaelsstores @diyshowoff Tie Dye Party invitation #tiedyeyoursummer @michaelsstores @diyshowoff

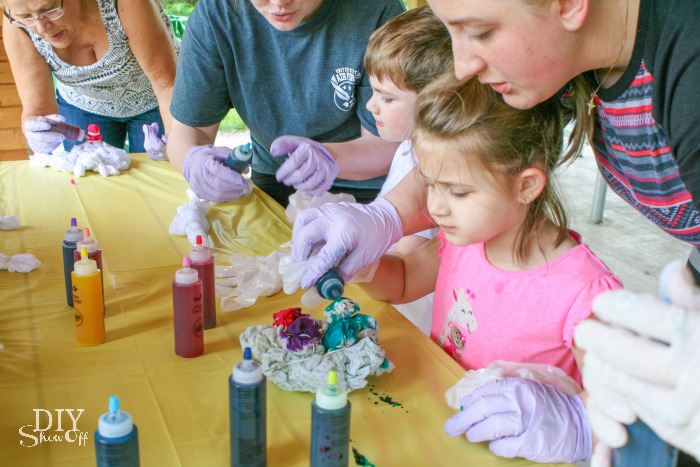
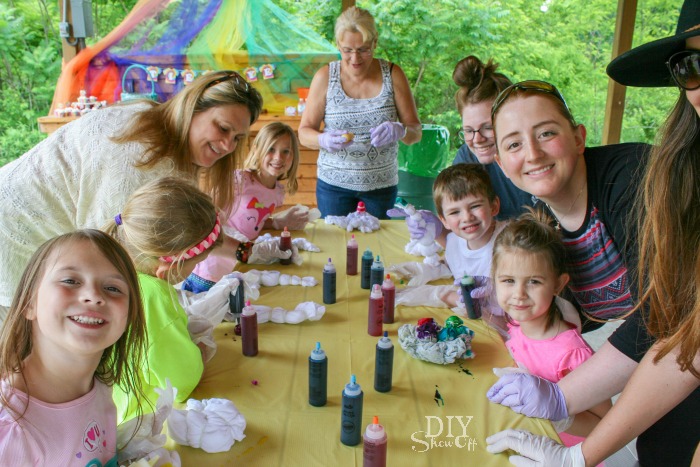
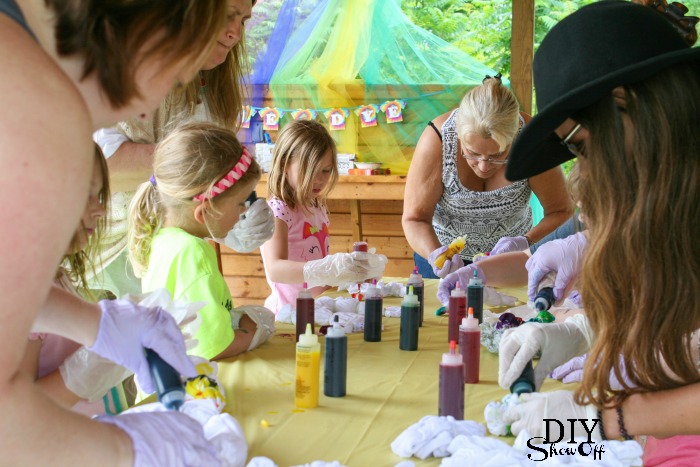
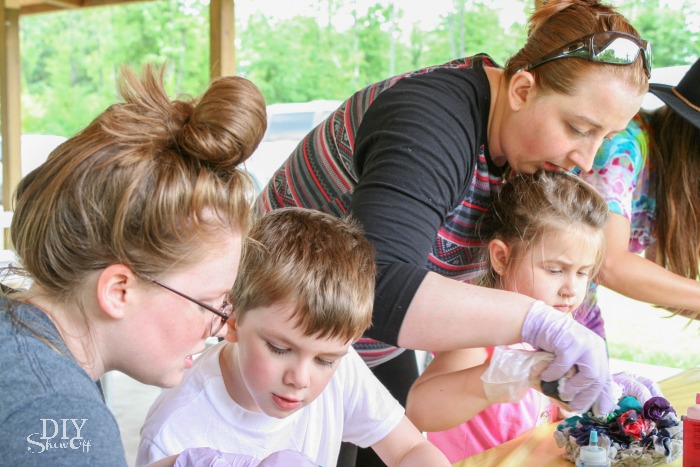
I loved watching the interaction, the intensity, the creativity. 
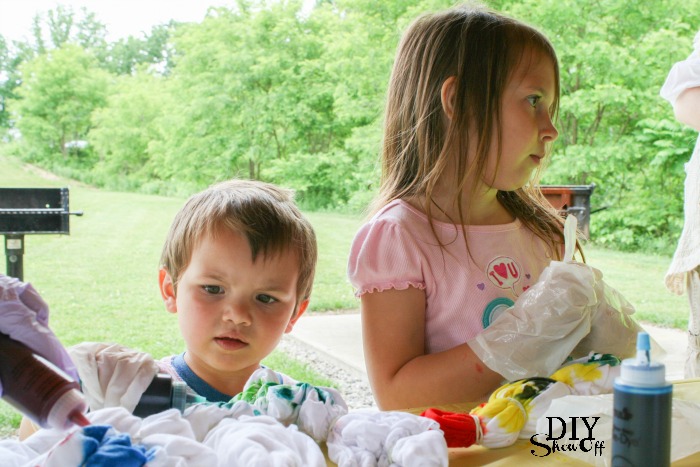
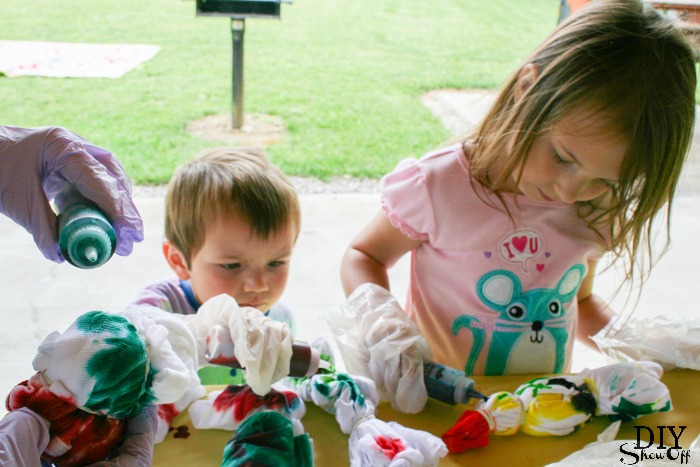
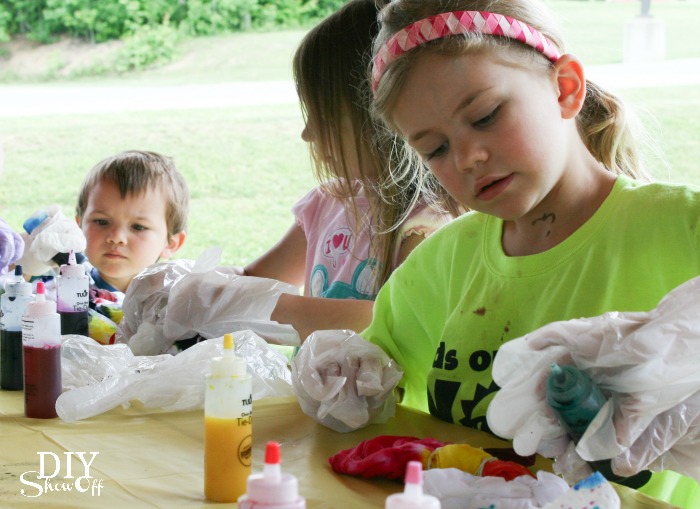
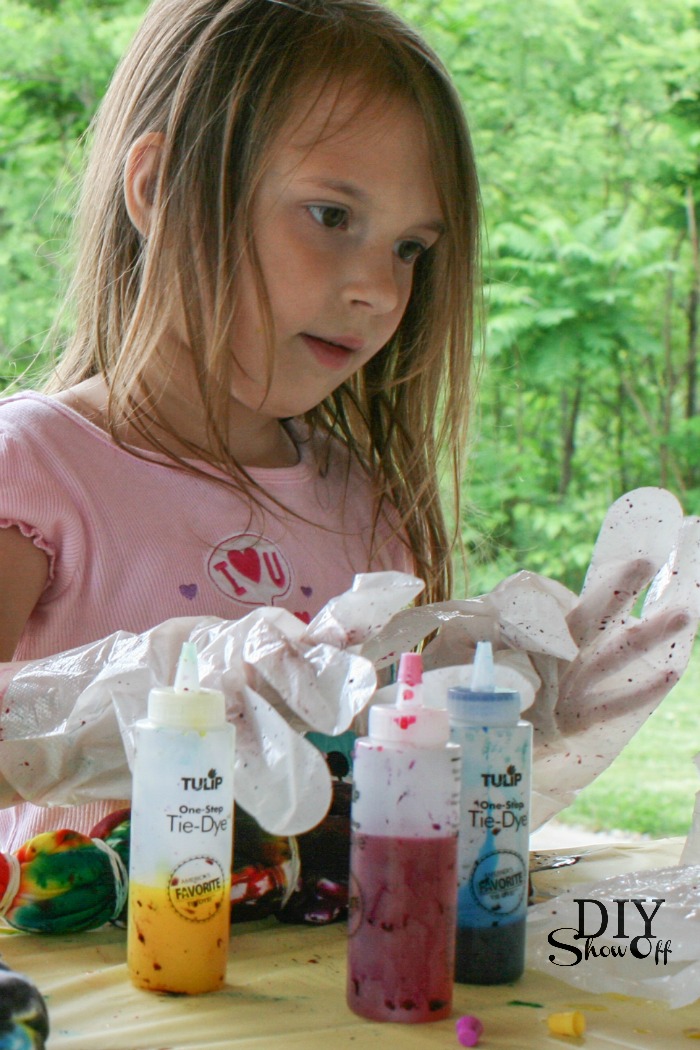
Tie Dye Party invitation #tiedyeyoursummer @michaelsstores @diyshowoff Tie Dye Party invitation #tiedyeyoursummer @michaelsstores @diyshowoff Tie Dye Party invitation #tiedyeyoursummer @michaelsstores @diyshowoff Tie Dye Party invitation #tiedyeyoursummer @michaelsstores @diyshowoff Tie Dye Party invitation #tiedyeyoursummer @michaelsstores @diyshowoff Tie Dye Party invitation #tiedyeyoursummer @michaelsstores @diyshowoff Tie Dye Party invitation #tiedyeyoursummer @michaelsstores @diyshowoff

18 vibrant colors.

Tie Dye Party #tiedyeyoursummer @michaelsstores @diyshowoff

So much fun! 

Then we wrapped the creations in plastic wrap and tossed them in a ziplock bag and attached a ‘wash and care’ printable: Let sit 6-8 hours or overnight for more vibrant colors. Rinse until excess dye is removed. Remove rubber bands. Wash and dry as instructed. 

Tie Dye Party #tiedyeyoursummer @michaelsstores @diyshowoff

I was surprised with how easy it was to pull together a party with the Tulip One-Step Kit and free printables. Set up and clean up were simple. With the exception of a few drips of red on the pavilion concrete (which faded fairly quickly), dye was contained to the plastic tablecloth, rolled up and easily discarded. Quick clean up! The kids? Not too bad. Be sure to instruct parents to dress children in old play clothes just in case. You remember: kool aid mustaches, bandaid stickies, half worn temporary tattoos, popcicle drips, dirty bare feet, grass stains and a bit of tie dye = summer time and being a kid! 
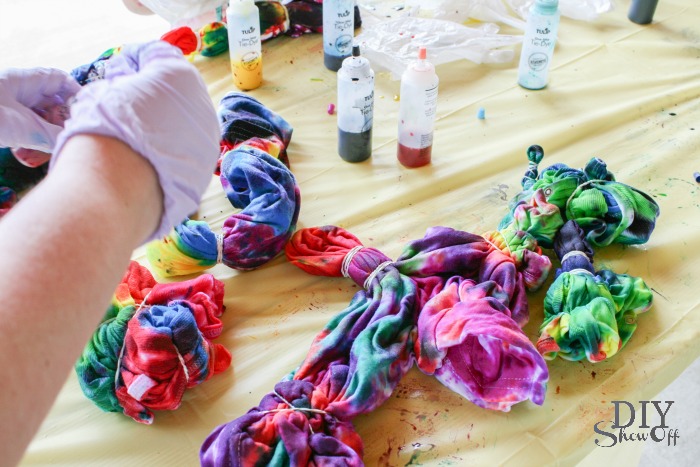
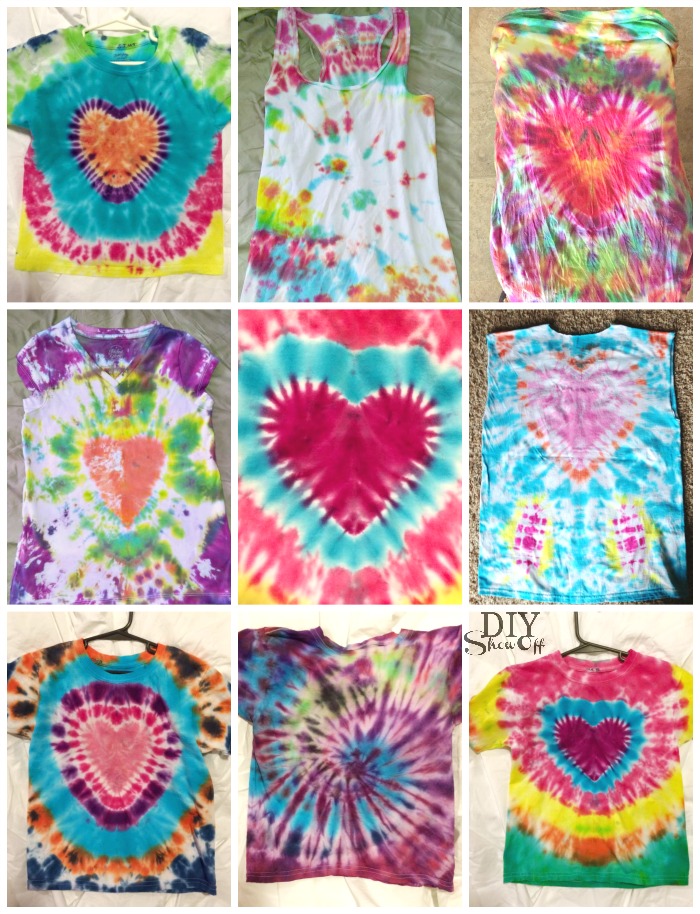
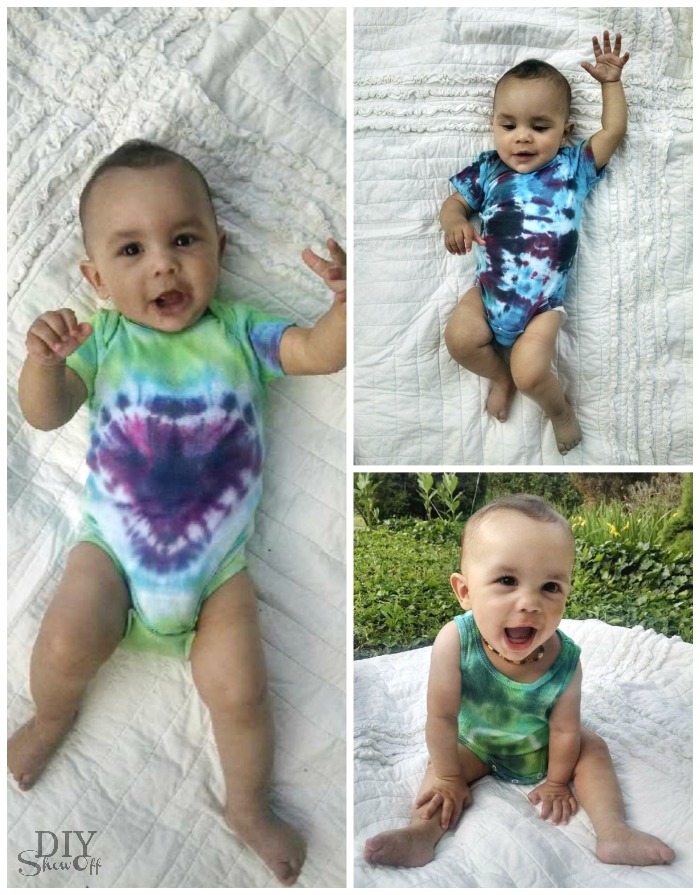
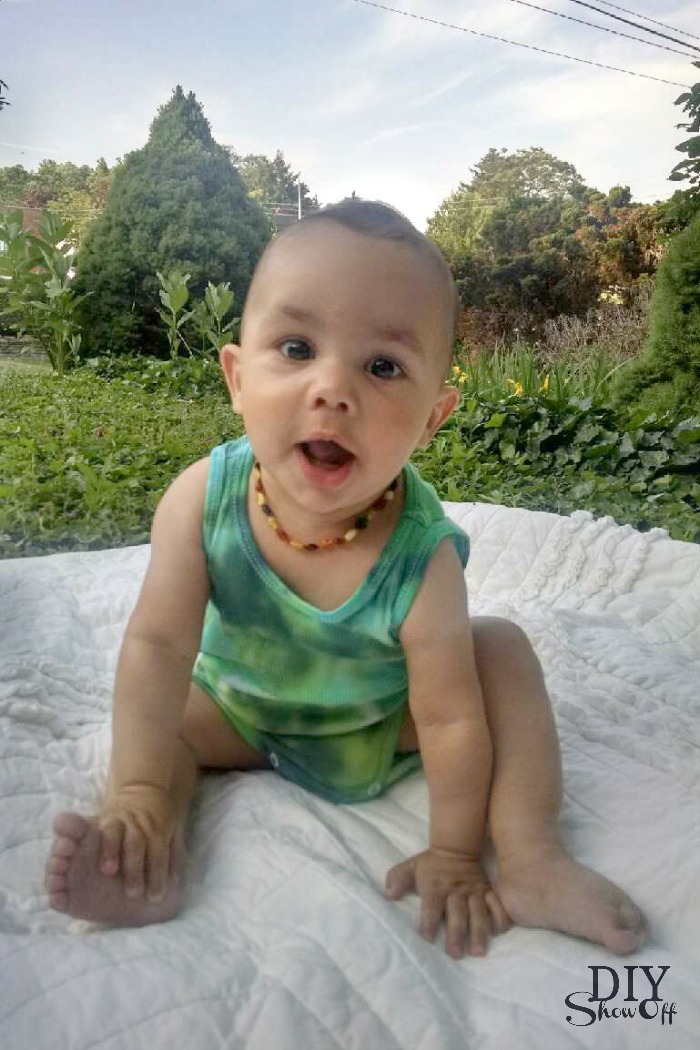
The results: 

lots of cute colorful tie dyed shirts…

Tie Dye Party #tiedyeyoursummer @michaelsstores @diyshowoff

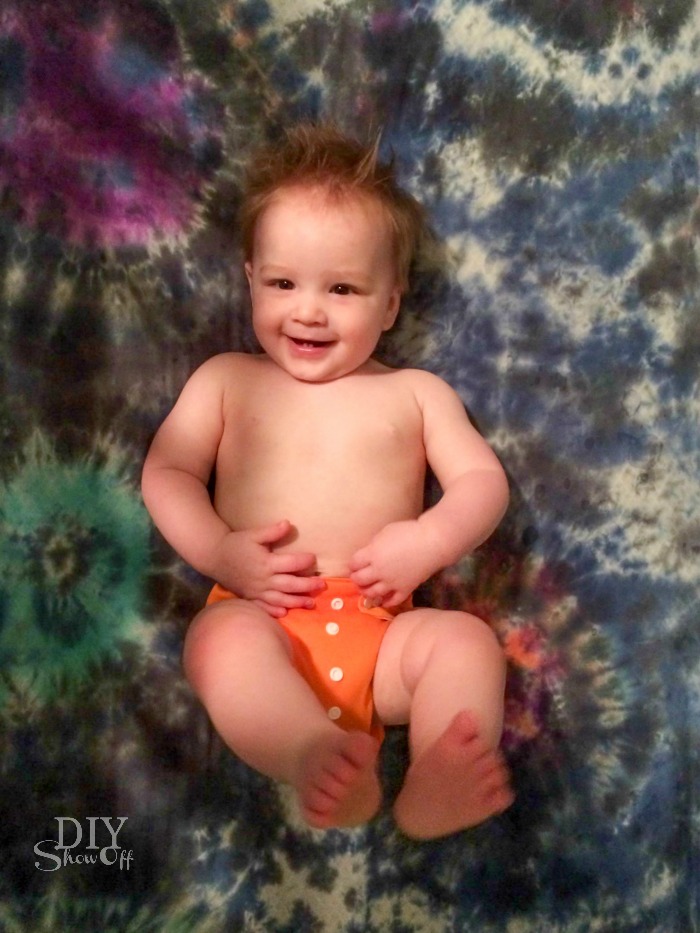
cool tie dyed onesies…

Tie Dye Party #tiedyeyoursummer @michaelsstores @diyshowoffTie Dye Party #tiedyeyoursummer @michaelsstores @diyshowoff 

Samantha’s awesome galaxy tie dyed crib sheet…

Tie Dye Party #tiedyeyoursummer @michaelsstores @diyshowoff

Host a tie dye party and share your creations using #tiedyeyoursummer @michaelsstores @diyshowoff. Have fun!

Tie Dye Party invitation #tiedyeyoursummer @michaelsstores @diyshowoff

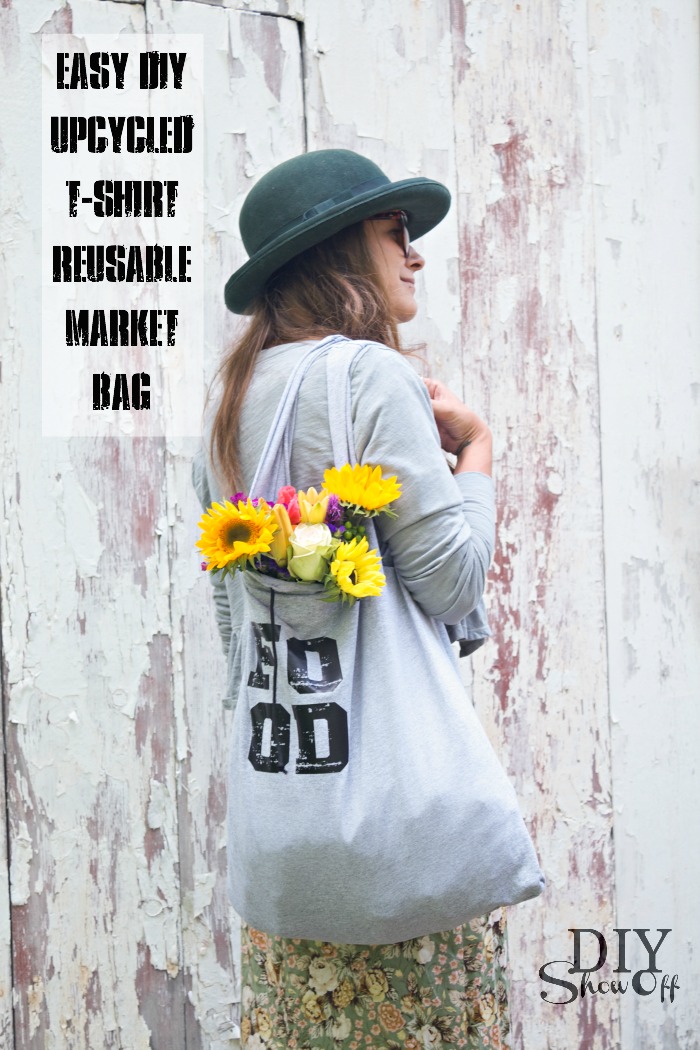
Those extra t-shirts? I’ll be making a few of these upcycled t-shirt reusable market bags in tie dye colors as gifts! Because co-hosting and manning the camera means I still haven’t ever tie dyed something myself. lol Next time for sure! 

easy DIY tshirt tote bag tutorial at diyshowoff.com

The tie dye kit is available at Michaels and several additional dye products are available on Michaels.com.  

CLICK.BUY. CREATE. Shop Michaels.com today!

Disclaimer: I received a free Tulip One-Step Tie-Dye kit in exchange for a review. All words and opinions are my own. No arm twisting required. 😉 

Round of applause and thank you for my co-host Dana from Parties & Playdates, my assistant, Evangeline from The Lunar Fae who taught the heart technique, Steve, Suzie and mom for their help and to all of my cute tie dye tutorial models!

Celebrate America Partyscape

 Celebrations Challenge #MichaelsMakers

It’s not often I’m way ahead of the game but when I am, it’s by more than three months. haha! As a part of the Michael’s Makers team, my final assignment came with a “Celebrate America” theme from the Celebrations campaign. Due in April. Yes, quite a bit early and especially since photos were actually due in March while there was still snow on the patio but it wouldn’t be a “challenge” otherwise, right? I had a blast decorating our dresser turned kitchen island in red, white & blue for a festive party. And hey, I’m happy to celebrate America any time of the year.  

red white and blue decorative accents @diyshowoff @michaelsmakers

Decoupaged USA letters

Supplies: Shop Home Decor and Floral at Michaels

  • wooden letters U, S, A
  • decoupage
  • red, white, blue designed scrapbook paper

red white and blue decorative accents @diyshowoff Celebrations Challenge #MichaelsMakers

What I did: Trace letters onto scrap book paper. Cut out scrap book paper shapes. Apply decoupage to wooden letter (works like a glue). Carefully line up scrapbook paper. Apply another layer of decoupage over top of the scrapbook paper to seal. Let dry and display. 

red white and blue decorative accents @diyshowoff @michaelsmakers

Add a few red, white and blue doilies to a burlap table runner for an inspired ‘firework’s look.

red white and blue decorative accents @diyshowoff @michaelsmakers

Red, white and blue straws and red and white polka dot cupcake liners add to the patriotic color theme. There are little American flags near the cash register. Add a red/blue topper to the cupcakes (I found red and blue keys). 

red white and blue decorative accents @diyshowoff @michaelsmakers

Red, white and blue star & mesh banner

Supplies:

  • red, burlap, blue wide mesh ribbon
  • star wire garland
  • twine or yarn

red white and blue decorative accents @diyshowoff @michaelsmakers

Tutorial:

  1. Cut a piece of twine the length you’d like your banner to be. Tie loops on the ends for hanging.
  2. Cut pieces of mesh to tie onto the twine. 
  3. Secure mesh with snips of star wire garland.
  4. Thread onto twine. 
  5. Repeat until your banner is full. Fluff and display.

red white and blue decorative accents @diyshowoff @michaelsmakers

Time to Celebrate! 

red white and blue decorative accents @diyshowoff @michaelsmakers

See more Celebrations posts from these Michaels Maker’s friends starting today at 11 a.m. EST:

Celebrations Challenge #MichaelsMakers

 Loading InLinkz ...

Michaels is celebrating every occasion this summer with gifts for Moms, Dads and teachers, and parties to celebrate birthdays, graduation, and the 4th of July!

·         As a toast to the last Michaels Makers post of the season, we created gifts, baked treats and threw parties for each of the six holidays this summer.

·         It’s never too early to get started on your next party or celebration – Michaels.com has more project ideas and instructions for you and your kids to make this year – check out projects for Mother’s Day Father’s Daygraduationbirthday and even summer. Let’s celebrate!   

red white and blue decorative accents @diyshowoff Celebrations Challenge #MichaelsMakers

Disclaimer: As a member of the Michael’s Makers blog team, I received a Michael’s gift card to complete this craft challenge. 

DIY Halloween Witch Hat Candy Dish Decor

This easy DIY Halloween project for the Lowe’s Creative Ideas October challenge has a few uses so I wasn’t sure what to call it. It’s … versatile. 

Witch Hat Halloween Candy Dish

DIY Witch Hat candy dish/serving tray tutorial @diyshwoff

or add chips/pretzels to use as a Halloween serving tray.

or add festive cupcakes for Halloween party display.

or add succulents, small fall flowers/plants to create a Halloween planter.

or a floral arrangement (just pop on a fall wreath) for Halloween decor.

DIY witch hat Halloween centerpiece tutorial

or simply flip the bottom to use as a Halloween Centerpiece

DIY Witch Hat Halloween decor tutorial @diyshwoff

Materials:

DIY Witch Hat candy dish/serving tray tutorial @diyshwoff

EASY tutorial:

1. Using a kitchen knife, we cut out a hole using the inner circle shown on the bottom of the large plastic plant saucer as guide.

DIY Witch Hat candy dish/serving tray tutorial @diyshwoff

2. Spray paint cone and saucer black. I did two coats on the cone, one coat on the already black plant saucer. Let dry.

DIY Witch Hat candy dish/serving tray tutorial @diyshwoff

That’s it! 

Carefully slide onto the cone. Right side up creates a ‘dish’. 

DIY Witch Hat candy dish/serving tray tutorial @diyshwoffDIY Witch Hat candy dish/serving tray tutorial @diyshwoff

Upside down creates a ‘ledge’. Add an old belt for a decorative touch.

DIY Witch Hat Halloween decor tutorial @diyshwoff


More ideas: attach faux fall flowers, leaves, spiders, etc. to create a Halloween centerpiece. Hide a vase filled with water under the cone and fill with tall flowers. Add succulents and display outside. Get creative!

DIY witch hat Halloween centerpiece tutorial

Fall LCI

I received a Lowe’s gift card to put towards this challenge. Opinion and above idea is 100% my own. More DIY ideas at Lowe’s Creative Ideas or follow Lowe’s on InstagramPinterest and sign up for the Creative Ideas magazine and app.

Halloween DIY @diyshowoff #lowescreator