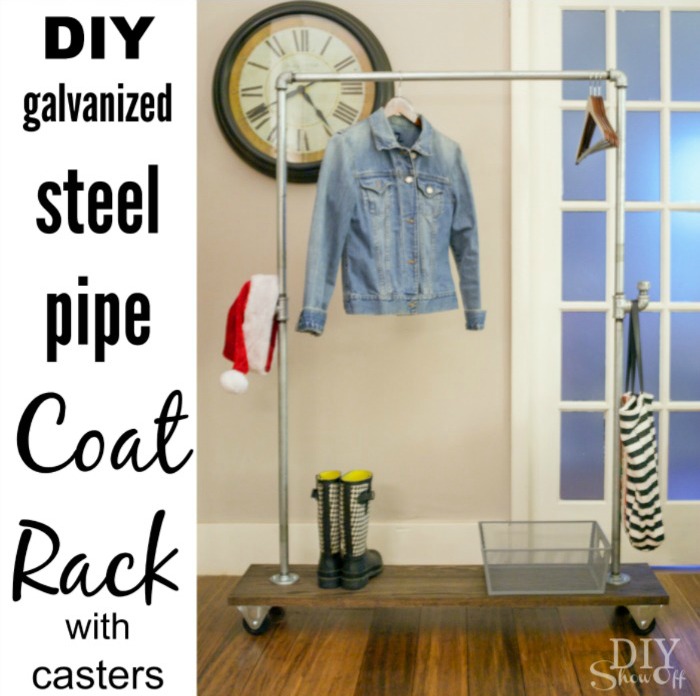
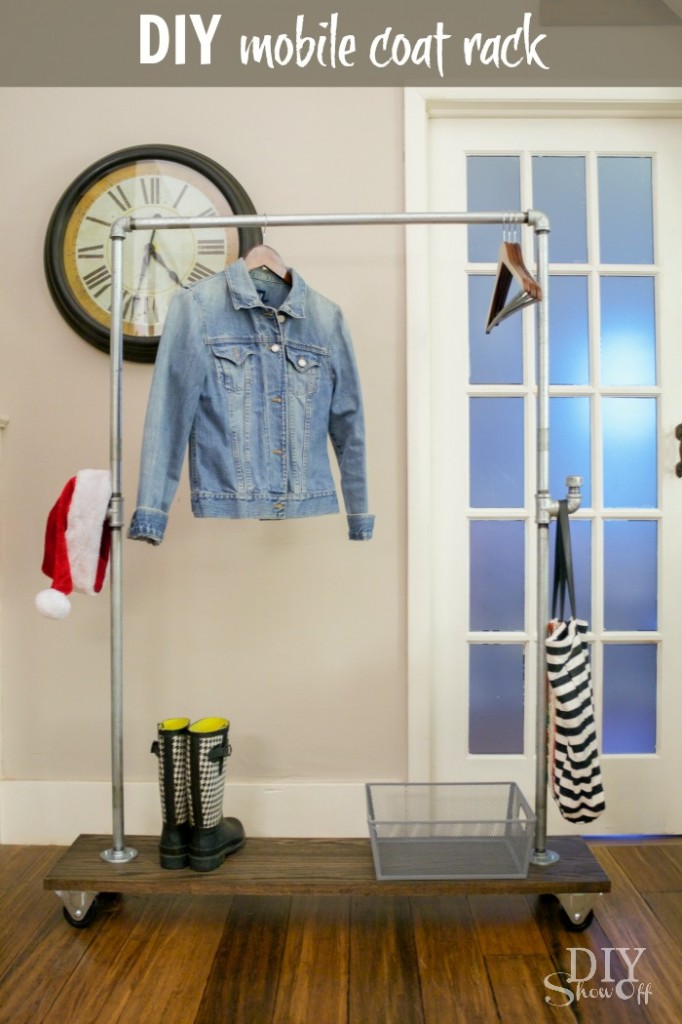
DIY Freestanding Mobile Pipe Coat Rack

Holiday season! That means some entertaining in our home, get-togethers with families, dinner parties (having a holiday open house today, in fact).  Time to get holiday guest ready! Did you ever notice that your own family fills up the coat closet (sometimes to the point of “avalanche!” when opening the door? Or is that just us?!)…and when guests arrive in colder months, coats are stored in the guest bedroom in a pile on a bed? Our solution: 

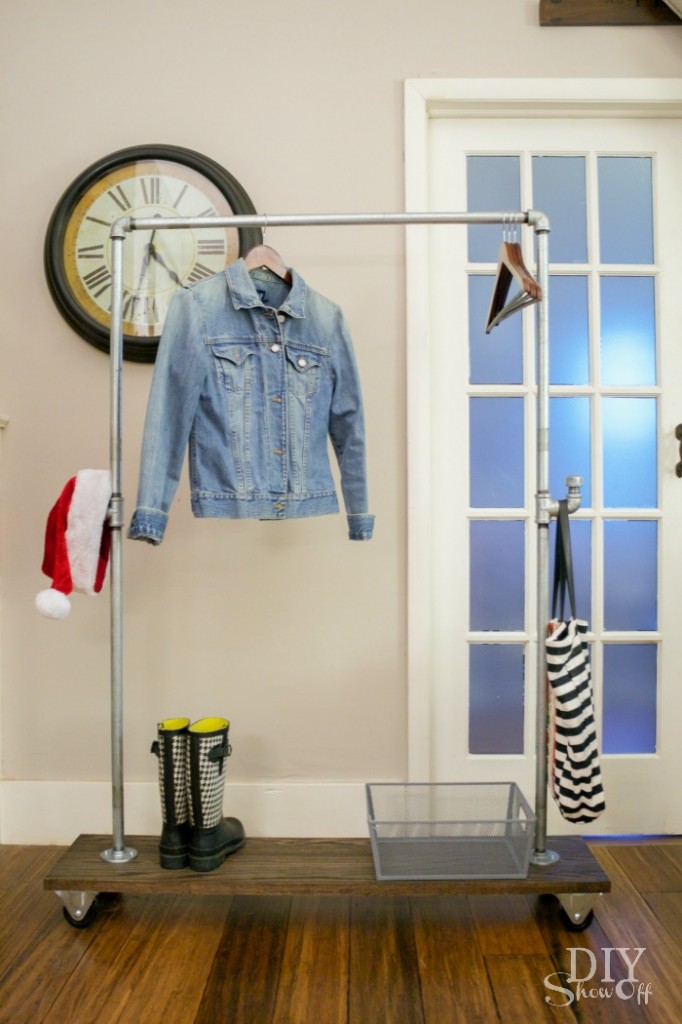
DIY galvanized pipe and wood mobile coat rack on casters @diyshowoff #lowescreator

A DIY moveable, mobile coat rack. I am so over the utility types that teeter, lean or fall over when filled up. Know what I mean? This industrial looking DIY coat rack is sturdy, not to mention adds a touch of rustic industrial style.

Materials I used:

  • (1) 48 inch stair tread (I used red oak but for a more budget friendly option, there was also pine)
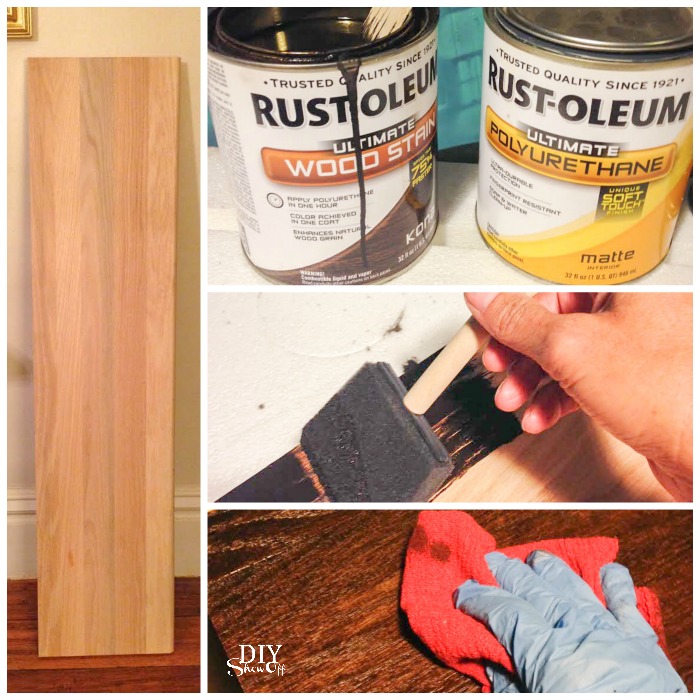
  • Rust-Oleum Ultimate Wood Stain (color is kona and ebony)
  • foam brush for applying stain, gloves & rags, paint brush for applying polyurethane
  • Rust-Oleum Polyurethane sealer (finish is satin)
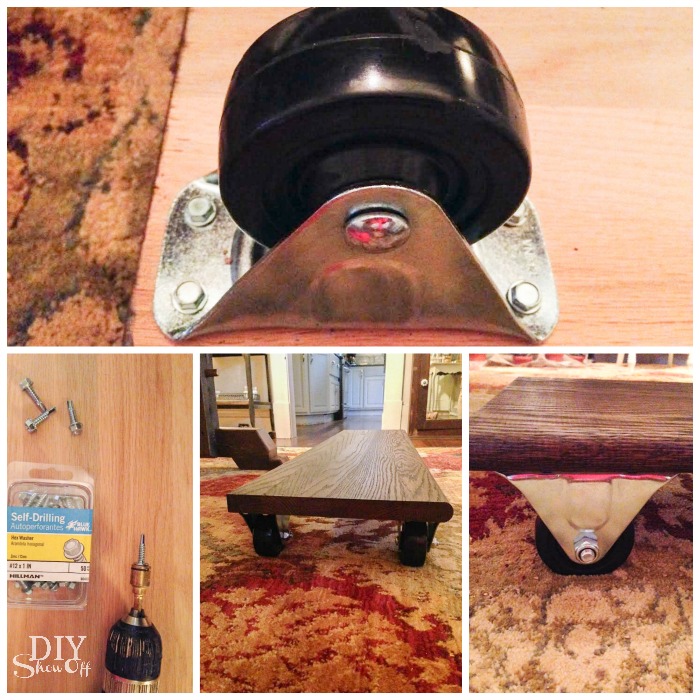
  • (4) heavy duty casters 
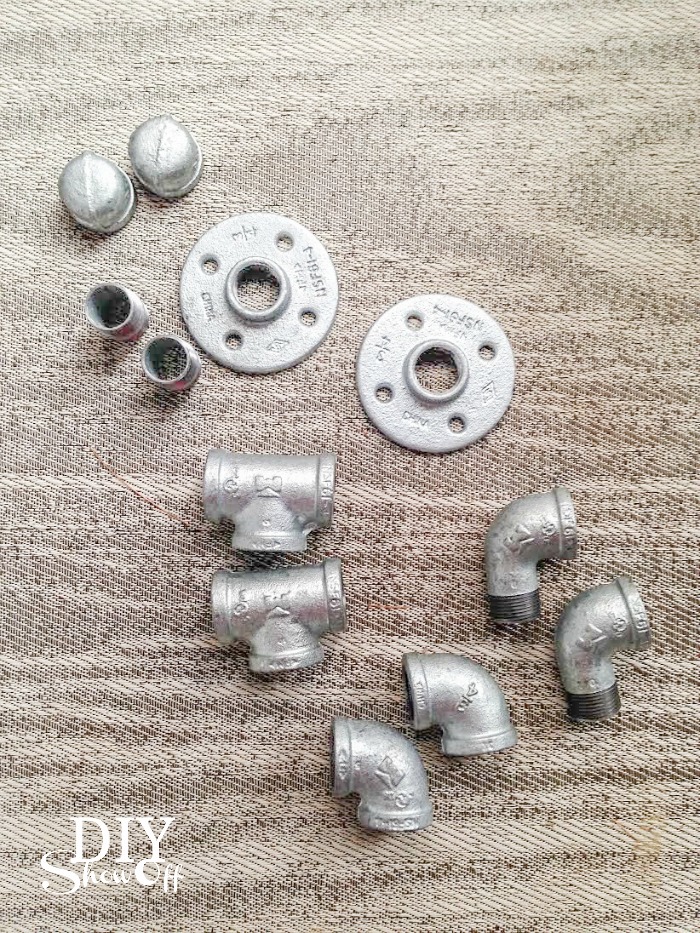
  • (2) 3/4″ flanges
  • (2) 24″ galvanized steel pipes
  • (2) 30″ galvanized pipes
  • (2) 3/4″ tee connectors
  • (2) 3/4″ nipple connectors
  • (2) 3/4″ 90 degree elbows
  • (2) 3/4″ 90 degree street elbows
  • (2) 3/4″ caps
  • (1) 36″ galvanized pipe
  • #12 1 inch hexagon washers (screws)

DIY galvanized pipe and wood mobile coat rack on casters @diyshowoff #lowescreatorDIY coat rack with galvanized steel pipe and casters @diyshowoff

What I did:

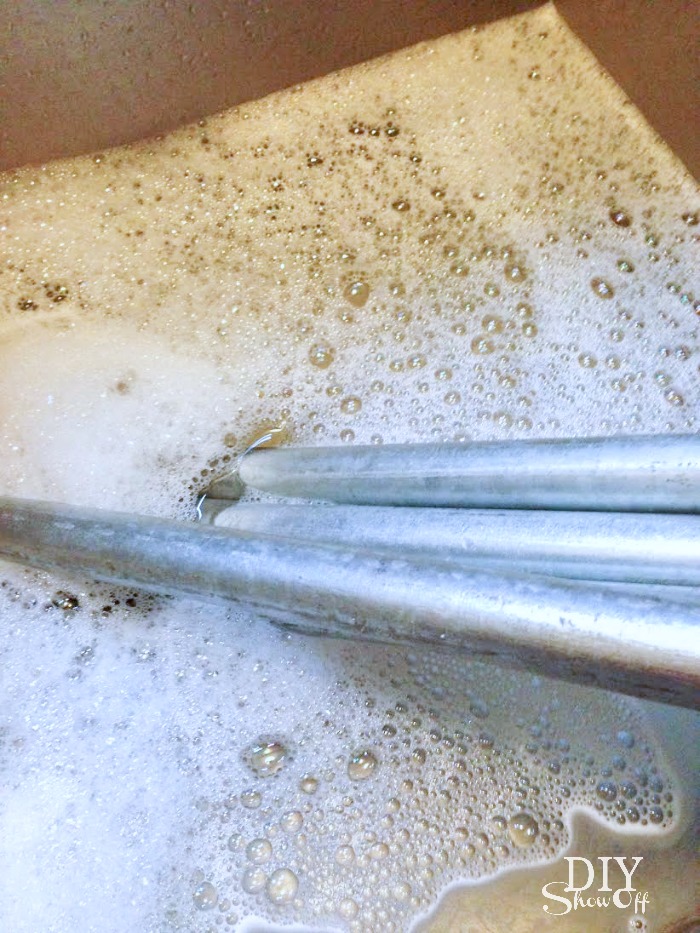
Soak the sticker parts of the galvanized pipes in hot soapy water. (It doesn’t take long.) Remove stickers. Dry pipes and set aside. 

DIY galvanized pipe and wood mobile coat rack on casters @diyshowoff #lowescreator

Finish the wood. Using the foam brush, I applied the wood stain (brush on in the same direction as the wood grain). Let sit for a few minutes then wipe away the excess with old rags. Unlike pine, the red oak wasn’t absorbing my favorite kona colored stain in as rich of a color so I also applied two coats of ebony in the same way to achieve a darker color. Stain then dries in about an hour. 

DIY galvanized pipe and wood mobile coat rack on casters @diyshowoff #lowescreator

After the stain was dry, I sealed the wood using a coat of polyurethane. Simply brush on (looks a bit milky when wet but dries clear). I let that dry overnight. 

I attached the four casters to the under (unfinished) side using the hexagon screws. Be careful with the screws on the cut side of the wood. Going too close to the edge may cause the wood to crack. 

DIY galvanized pipe and wood mobile coat rack on casters @diyshowoff #lowescreator

Flip right side up. Set aside the nipple connectors, two street elbows and the caps. 

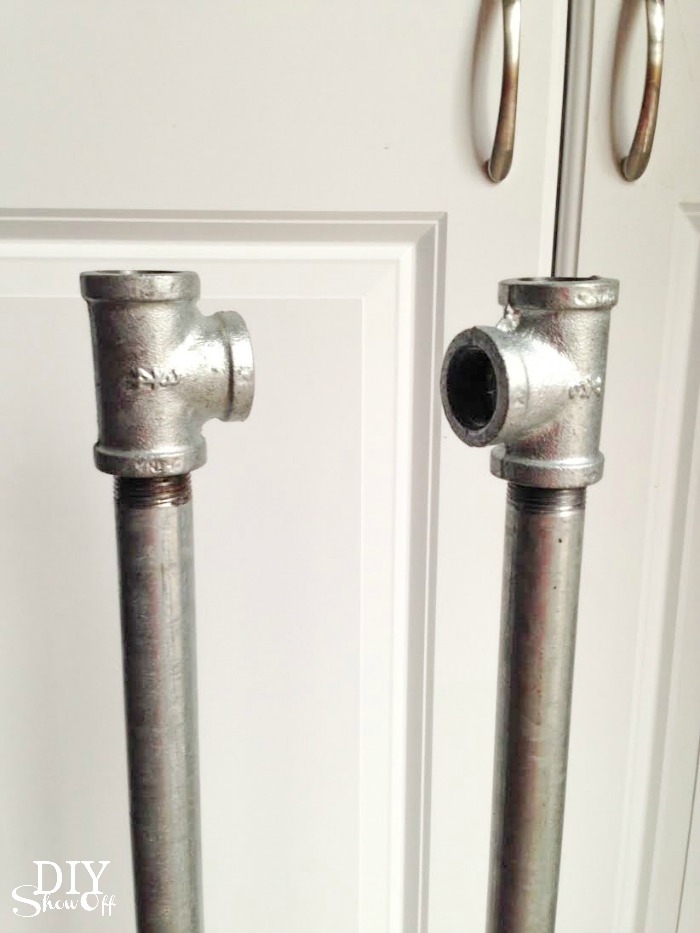
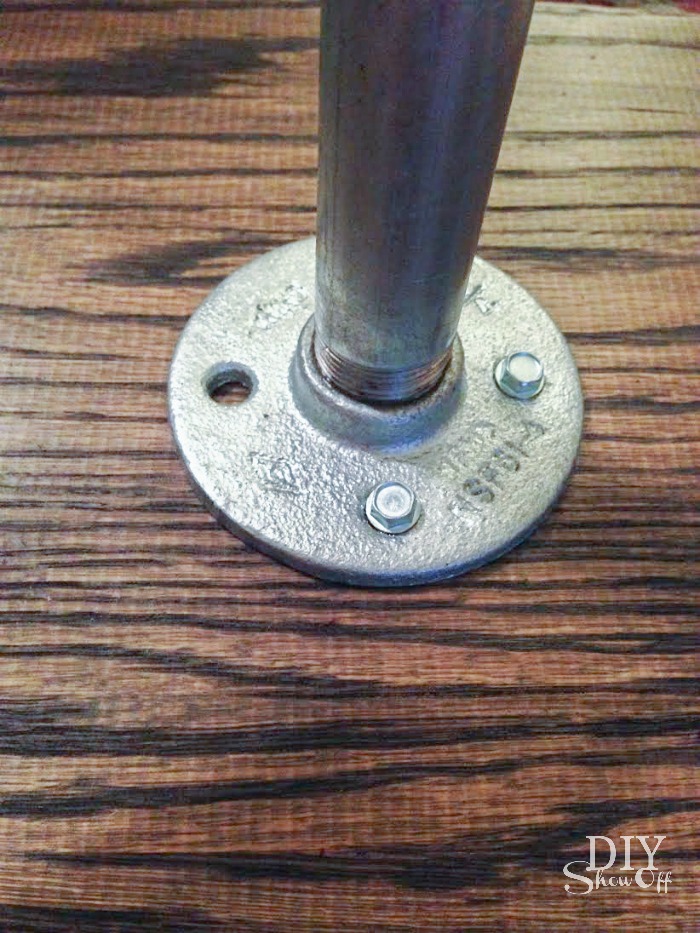
Next I assembled my pipe pieces. Starting with the flanges. Screw 30″ pipes into flanges.
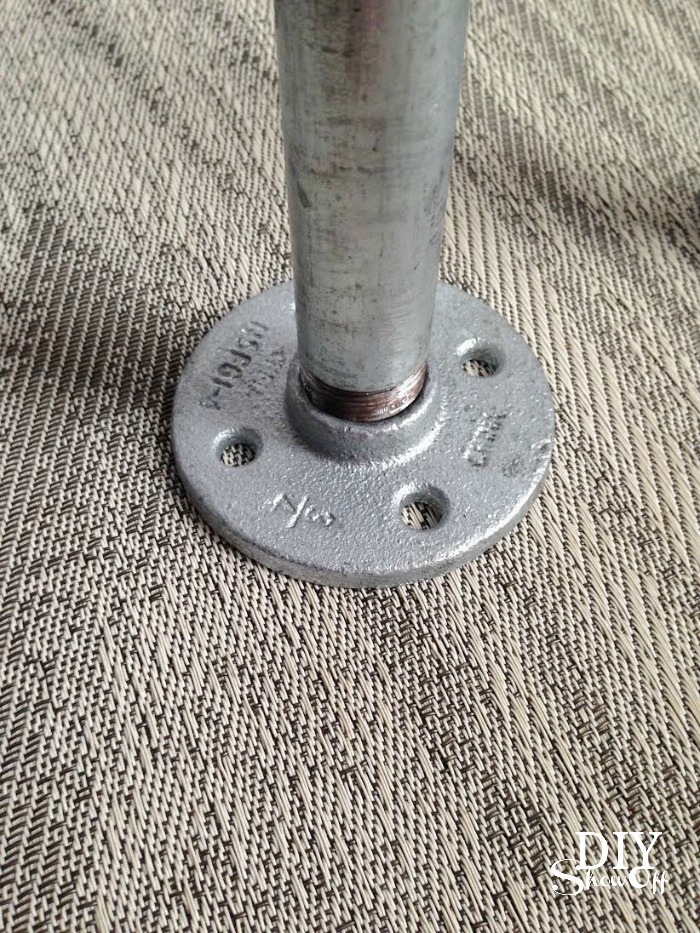
DIY galvanized pipe and wood mobile coat rack on casters @diyshowoff #lowescreatorThen add tees to the other end of each 30″ pipe.

DIY galvanized pipe and wood mobile coat rack on casters @diyshowoff #lowescreator


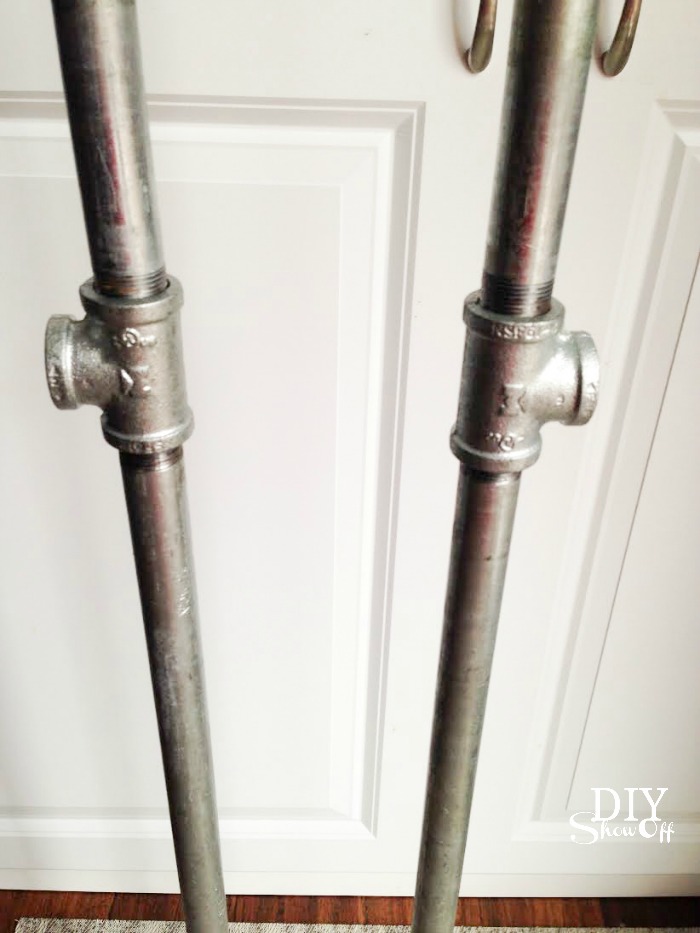
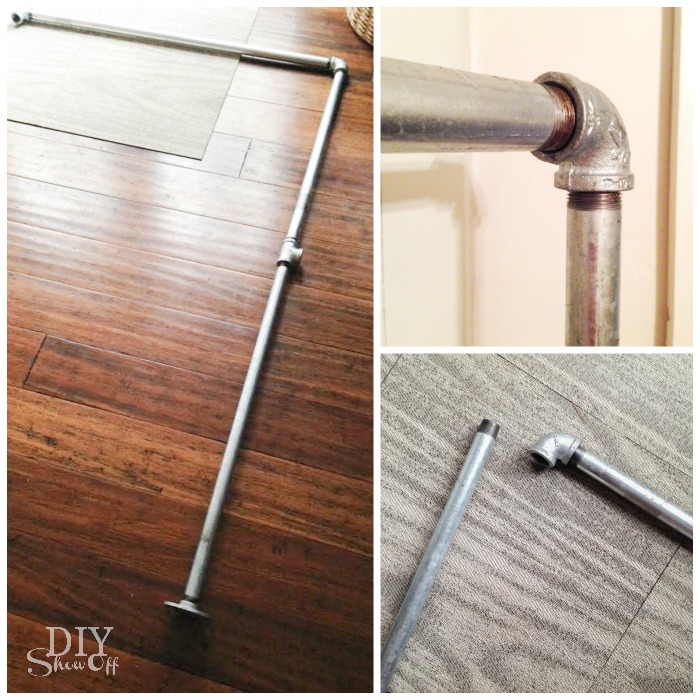
Then add the other 30″ pipe sections (one to each tee – you’ll have two poles at this point).

DIY galvanized pipe and wood mobile coat rack on casters @diyshowoff #lowescreator

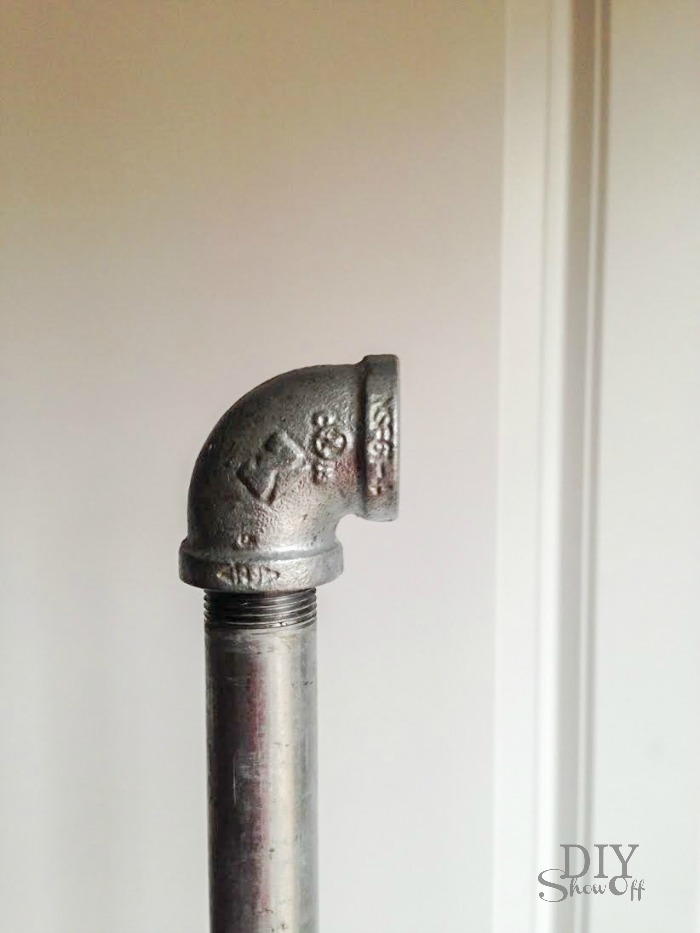
Add a 90 degree elbow to the top of one pole.

DIY galvanized pipe and wood mobile coat rack on casters @diyshowoff #lowescreator

Connect the 36″ galvanized pipe (center) piece. Add a 90 degree elbow to the end of the center pipe piece then add the other pole.  

DIY galvanized pipe and wood mobile coat rack on casters @diyshowoff #lowescreator

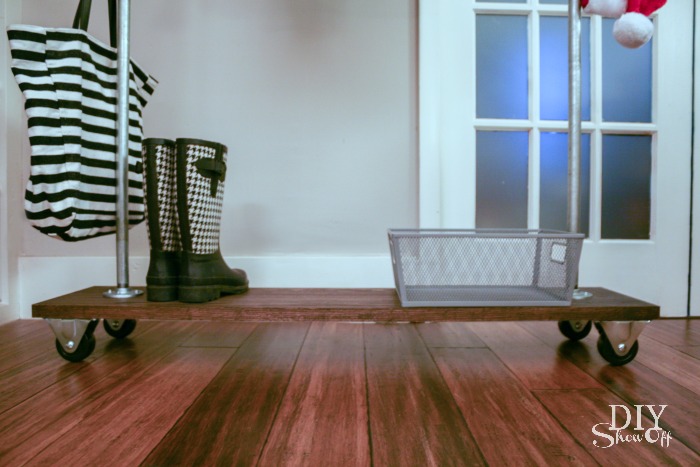
Place the pole-contraption onto the wood stair riser (I found the center by using a yard stick).  Attach flanges to the wood using the hex screws.

DIY galvanized pipe and wood mobile coat rack on casters @diyshowoff #lowescreator

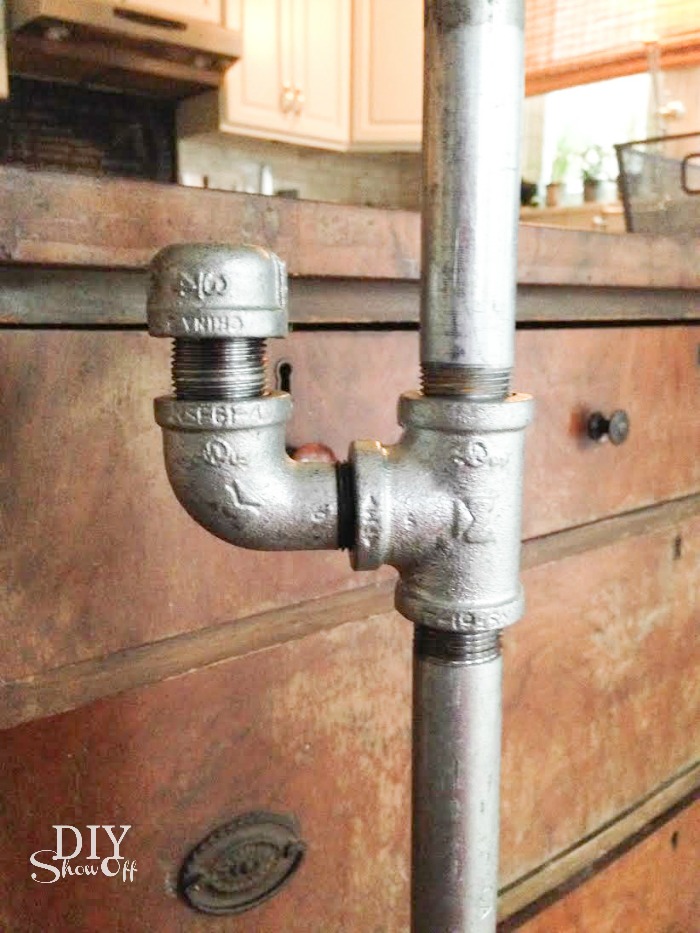
Add nipple connectors to the center tees, then elbows then caps. This creates a space for hanging purses, hats or scarves. 

DIY galvanized pipe and wood mobile coat rack on casters @diyshowoff #lowescreator

Now when we’re expecting guests, we can simply roll the coat rack near the door for hanging coats. Or use it as extra hanging space in a room without a closet (or one with a packed closet). Handy to have in the laundry room too! 

DIY galvanized pipe and wood mobile coat rack on casters @diyshowoff #lowescreatorDIY galvanized pipe and wood mobile coat rack on casters @diyshowoff #lowescreator

Store it in the basement, a closet, the laundry room, an office or guest room and then move near the door for parties and gatherings. Or if you have room, display near the front door entryway or mudroom area. 

DIY galvanized pipe and wood mobile coat rack on casters @diyshowoff #lowescreator 

DIYShowOff #lowescreator

I received a Lowe’s gift card to put towards this challenge. Opinion and above idea is 100% my own. More DIY ideas at Lowe’s Creative Ideas or follow Lowe’s on InstagramPinterest and sign up for the Creative Ideas magazine and app.

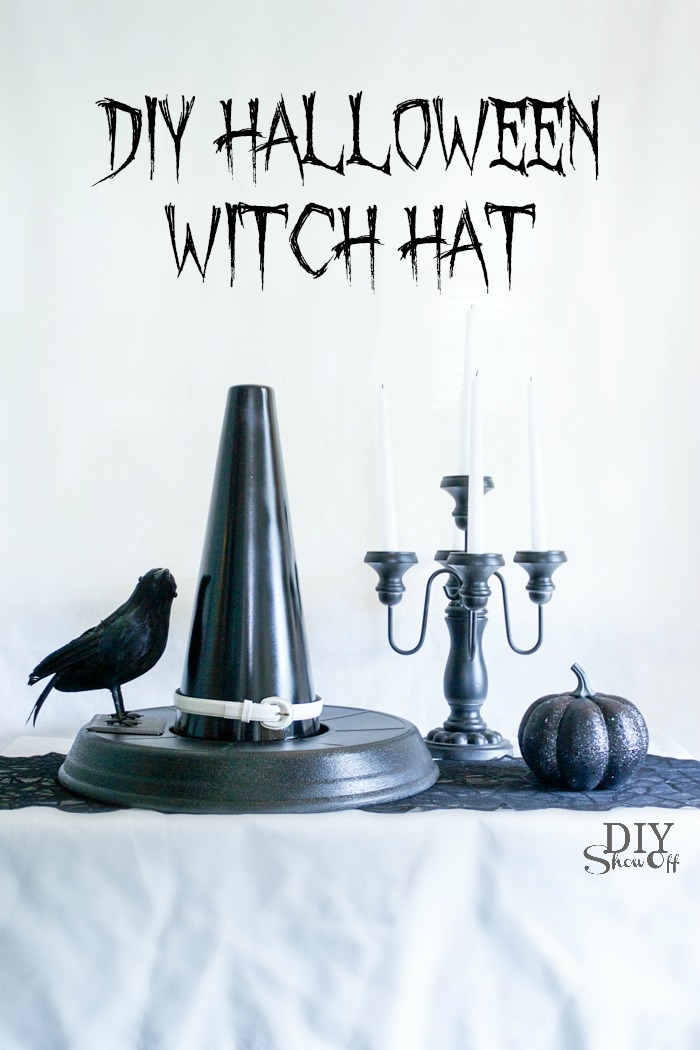
DIY Halloween Witch Hat Candy Dish Decor

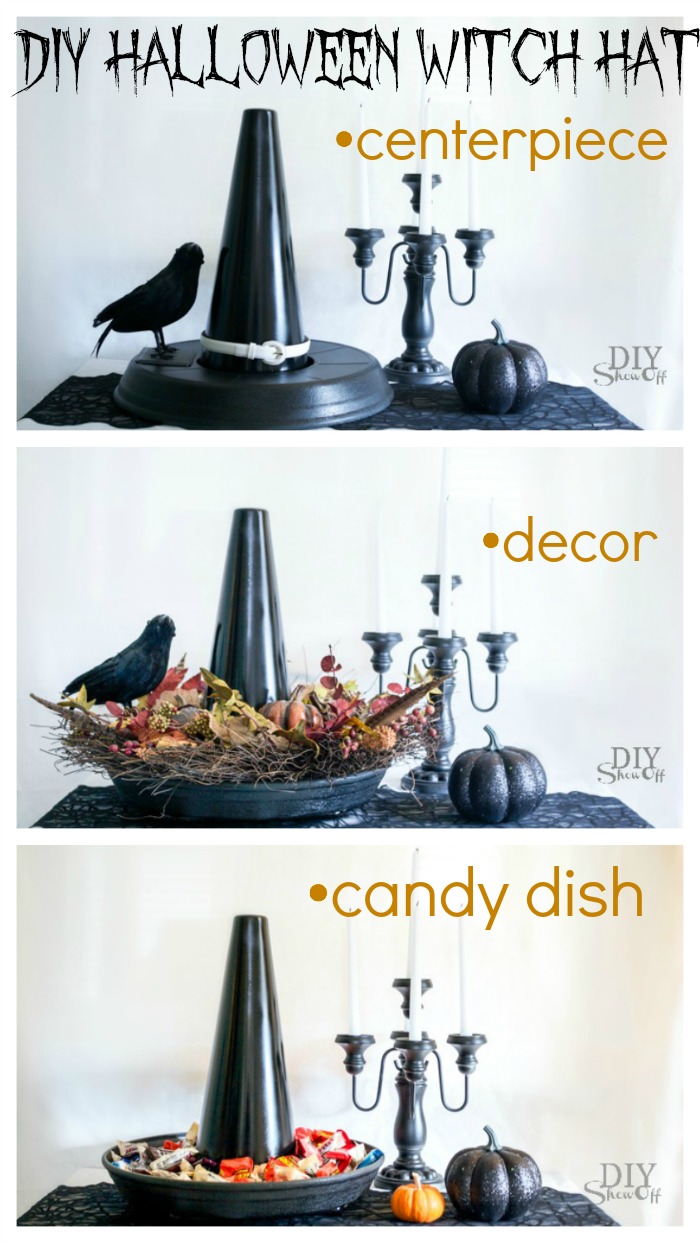
This easy DIY Halloween project for the Lowe’s Creative Ideas October challenge has a few uses so I wasn’t sure what to call it. It’s … versatile. 

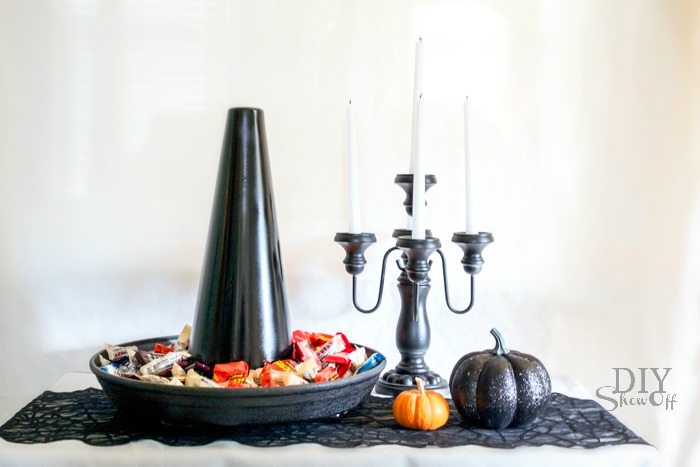
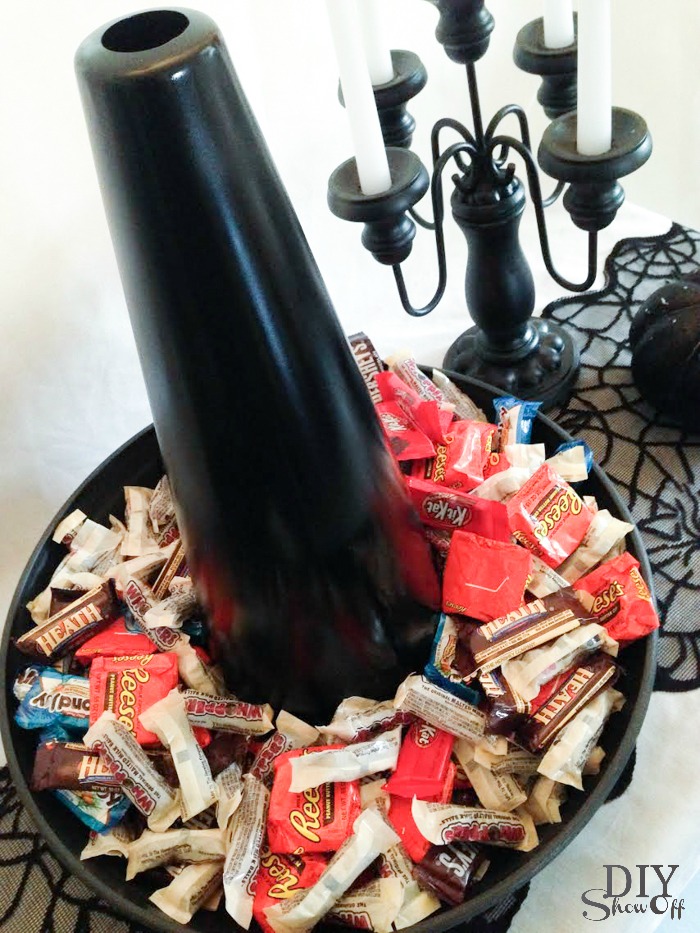
Witch Hat Halloween Candy Dish

DIY Witch Hat candy dish/serving tray tutorial @diyshwoff

or add chips/pretzels to use as a Halloween serving tray.

or add festive cupcakes for Halloween party display.

or add succulents, small fall flowers/plants to create a Halloween planter.

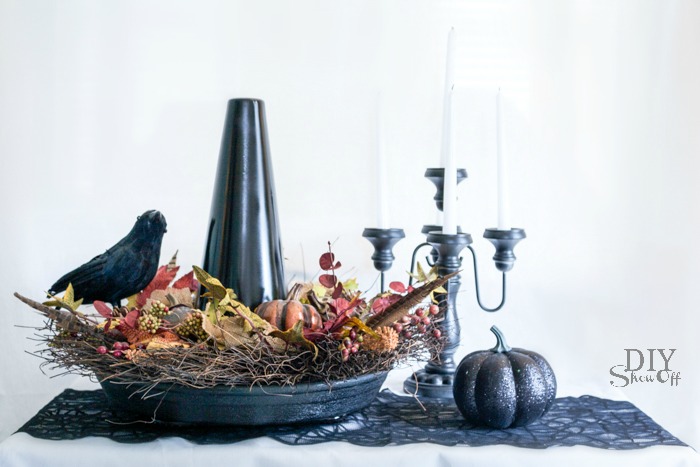
or a floral arrangement (just pop on a fall wreath) for Halloween decor.

DIY witch hat Halloween centerpiece tutorial

or simply flip the bottom to use as a Halloween Centerpiece

DIY Witch Hat Halloween decor tutorial @diyshwoff

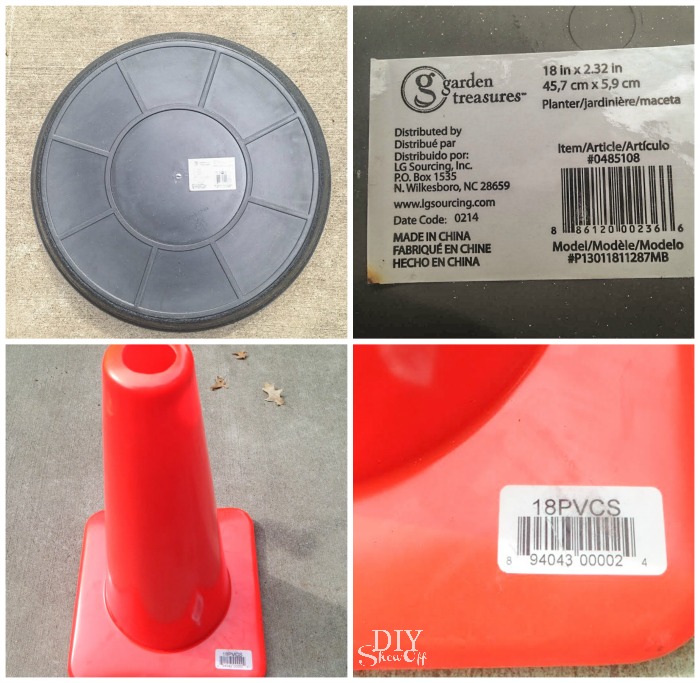
Materials:

DIY Witch Hat candy dish/serving tray tutorial @diyshwoff

EASY tutorial:

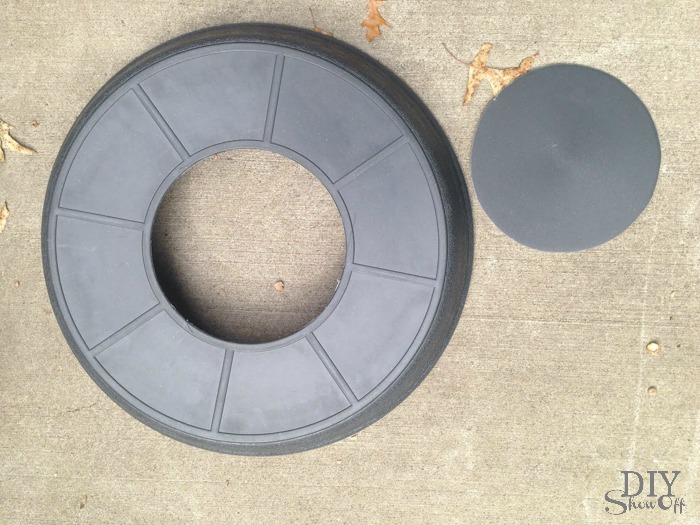
1. Using a kitchen knife, we cut out a hole using the inner circle shown on the bottom of the large plastic plant saucer as guide.

DIY Witch Hat candy dish/serving tray tutorial @diyshwoff

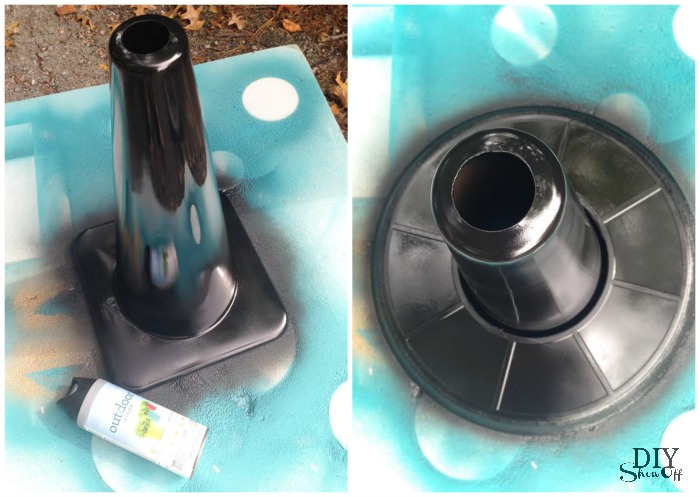
2. Spray paint cone and saucer black. I did two coats on the cone, one coat on the already black plant saucer. Let dry.

DIY Witch Hat candy dish/serving tray tutorial @diyshwoff

That’s it! 

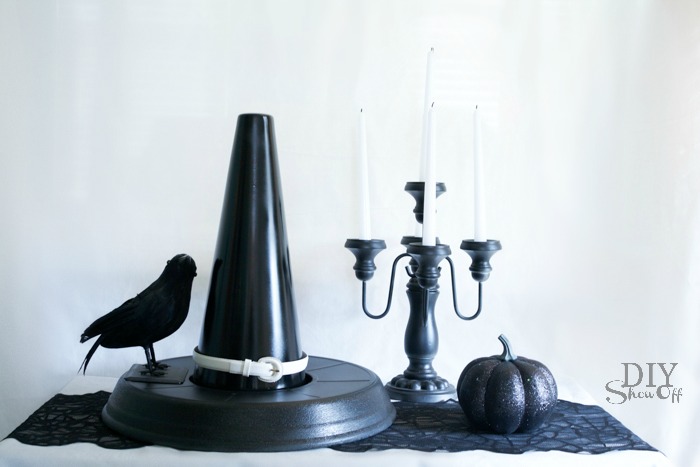
Carefully slide onto the cone. Right side up creates a ‘dish’. 

DIY Witch Hat candy dish/serving tray tutorial @diyshwoffDIY Witch Hat candy dish/serving tray tutorial @diyshwoff

Upside down creates a ‘ledge’. Add an old belt for a decorative touch.

DIY Witch Hat Halloween decor tutorial @diyshwoff


More ideas: attach faux fall flowers, leaves, spiders, etc. to create a Halloween centerpiece. Hide a vase filled with water under the cone and fill with tall flowers. Add succulents and display outside. Get creative!

DIY witch hat Halloween centerpiece tutorial

Fall LCI

I received a Lowe’s gift card to put towards this challenge. Opinion and above idea is 100% my own. More DIY ideas at Lowe’s Creative Ideas or follow Lowe’s on InstagramPinterest and sign up for the Creative Ideas magazine and app.

Halloween DIY @diyshowoff #lowescreator

{Hospital} Bedside Table Makeover

One of the Lowe’s Creative Ideas challenges for September is furniture makeover…

Hospital Bedside Table Makeover tutorial

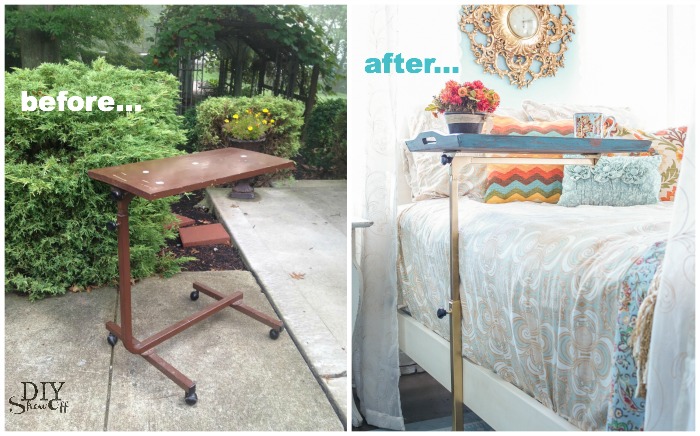
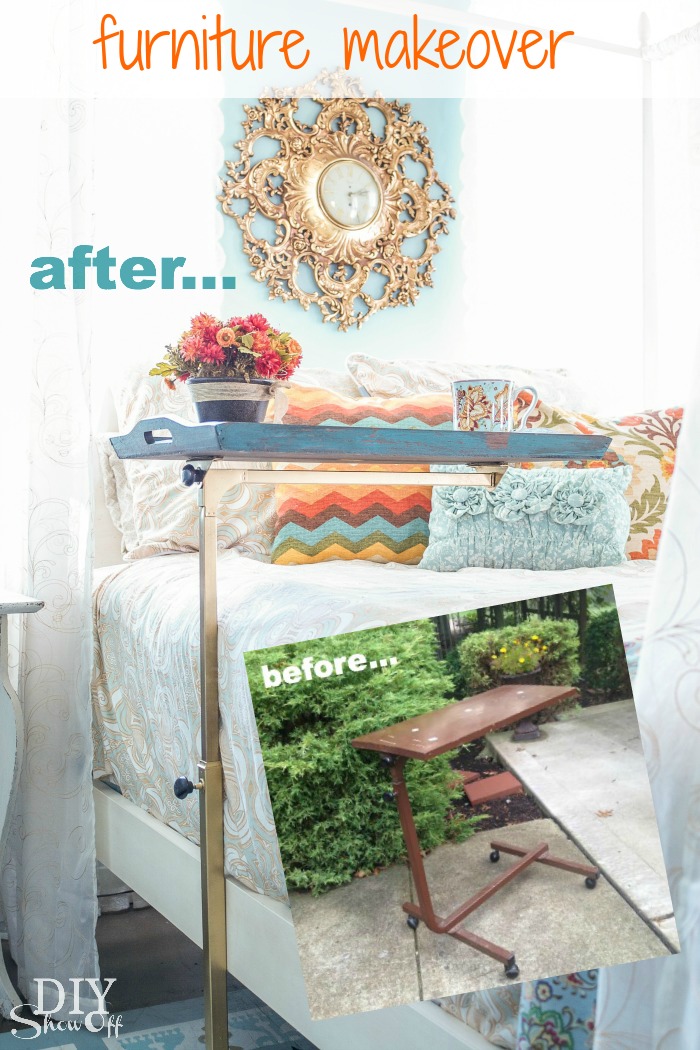
I just happened to score this little thrifty treasure from the thrift store…

hospital bedside table DIY makeover

for the low, low price of $3.99! A cute {hospital} bedside adjustable table in need of some TLC. 
I gave it a good cleaning then disassembled the parts. 

After taping off the casters, I gave it a few light sprays with a metallic gold spray paint. 

hospital bedside table DIY makeover

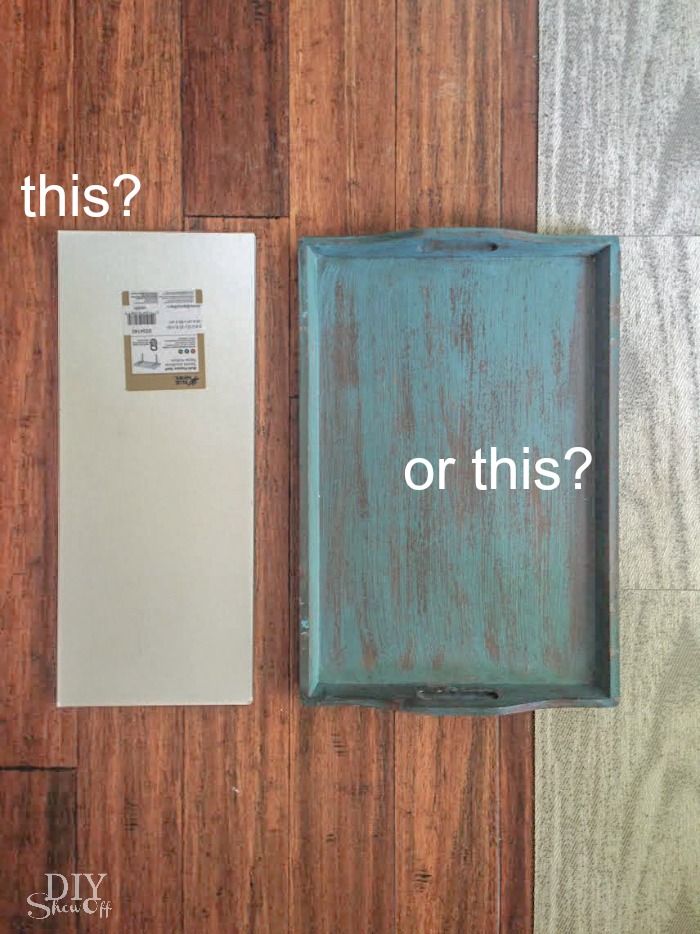
Once that was dry, I went back and forth on making a decision on the tray part. A shelf board would work. So would a serving tray. 

hospital bedside table DIY makeover

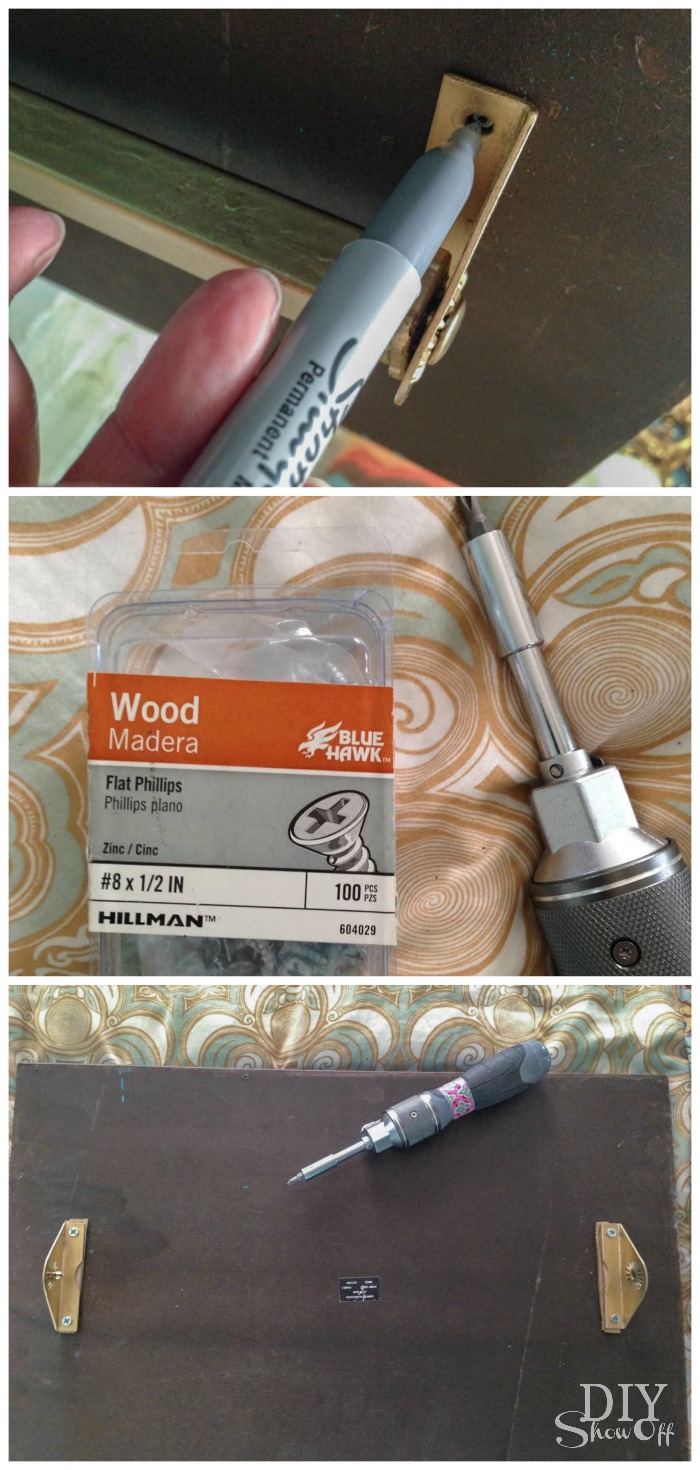
I went with the serving tray. I reassembled and used smaller wood screws to attach the tray to the frame. 

hospital bedside table DIY makeover 

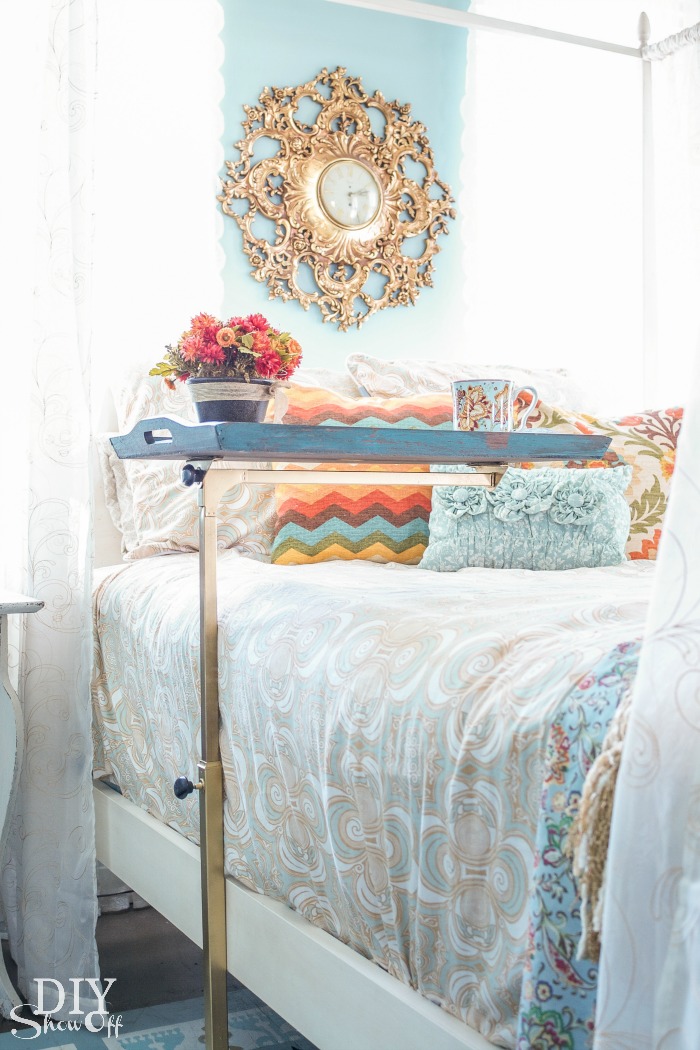
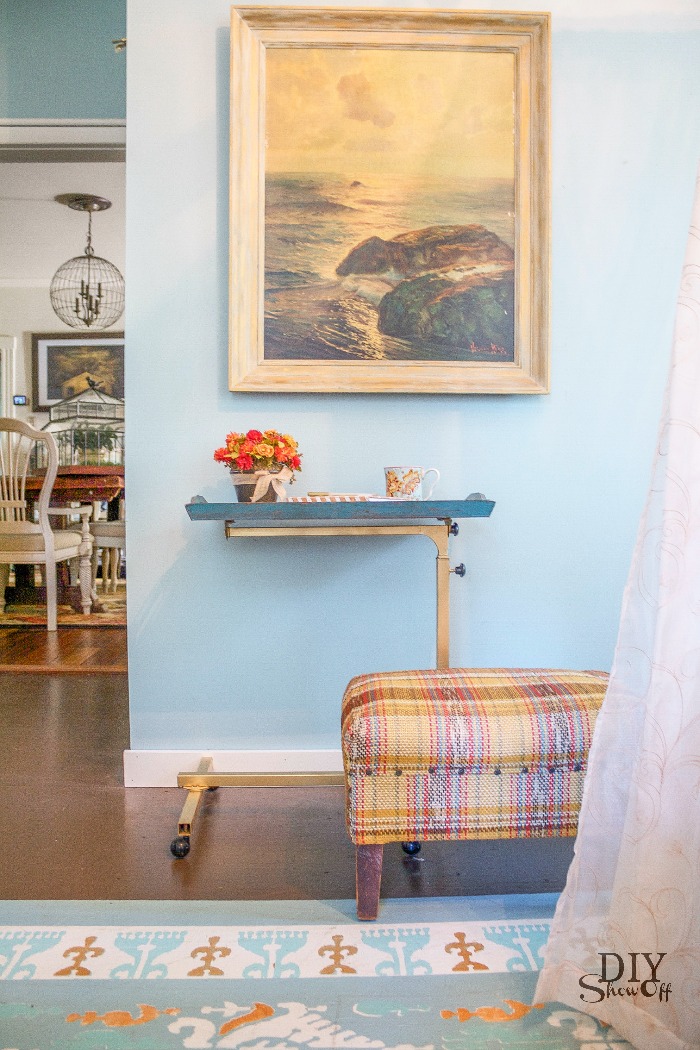
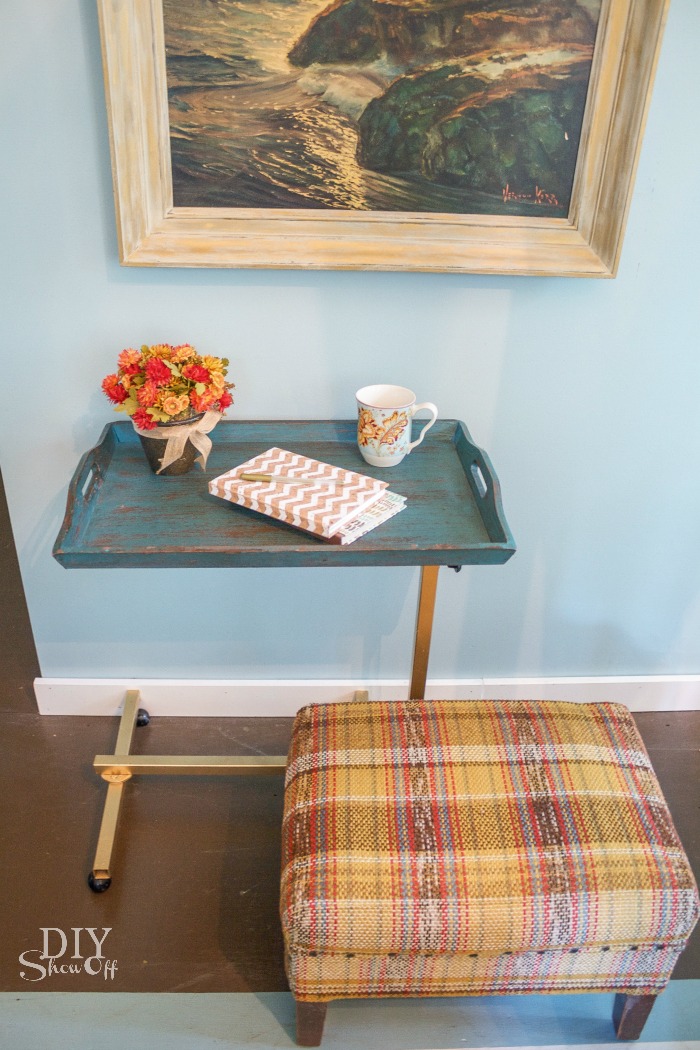
Now it’s a convenient bedside accessory…

Hospital Bedside Table Makeover tutorialHospital Bedside Table Makeover tutorial 

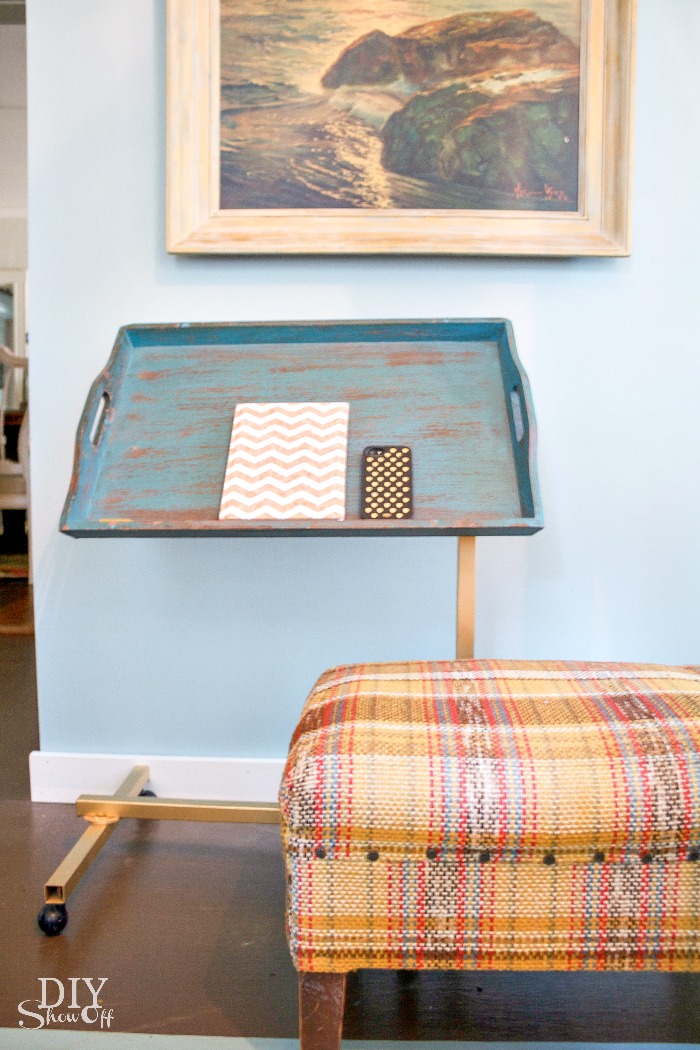
I liked that it has a lip since the tray tilts forward. Great for holding a book or tablet. 

Hospital Bedside Table Makeover tutorial

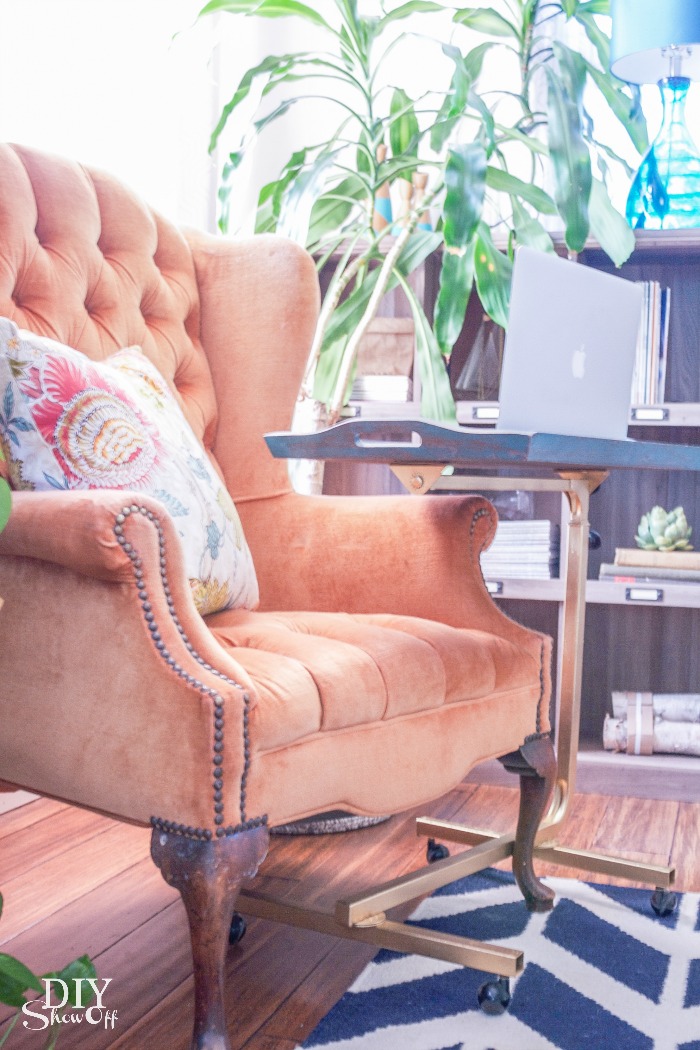
Adjust to the table top position for a portable desktop, breakfast in bed or bedside, chair side or couch side table.

Hospital Bedside Table Makeover tutorial

Makes for a pretty side table too…

Hospital Bedside Table Makeover tutorialHospital Bedside Table Makeover tutorial

What’s your latest thrift store, estate sale, flea market find? 

Hospital Bedside Table Makeover tutorial

Fall LCI

I received a Lowe’s gift card to put towards this challenge. Opinion and above idea is 100% my own. More DIY ideas at Lowe’s Creative Ideas or follow Lowe’s on Instagram, Pinterest and sign up for the Creative Ideas magazine and app.