Roomspiration – Kitchen Edition

Roomspiration Blog Hop

If you’ve been following the Roomspiration series, you’ve seen beautiful and inspiring do-it-yourself entryways, livingrooms, bathrooms, guest rooms, craft rooms, dining rooms, kids’ bedrooms, nurseries, master bedrooms, closets and nooks, laundry rooms and mud rooms and now…welcome to the Kitchen Edition. 


Welcome to our kitchen makeover!
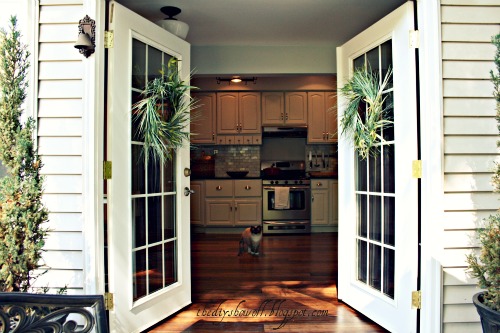
We’ve been working on remodeling our kitchen for almost a year and we’re almost done!  I had hoped to be completely ready for a true reveal but it’s still a work in progress. We’re still working on plans for the kitchen island, still have to finish baseboard trim, framing a window and the tin backsplash behind the stove but…take a look at how far we’ve come:

First thing we did was swap out single door…
Before

Now:  French doors
(sorry – it’s so bright, I can’t get a good picture)

When we bought our home the kitchen had orange-oak cabinets, blue laminate countertops, dirty white walls and old worn vinyl flooring.

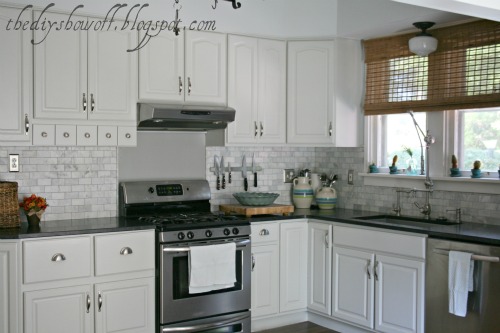
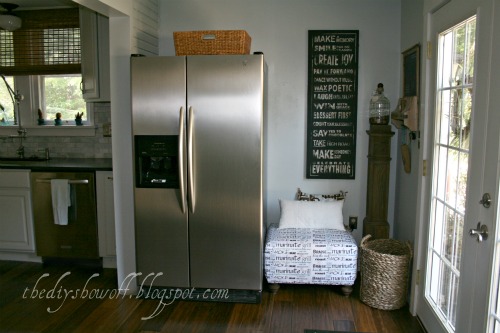
Now:


What we did:
  • Swapped out old single door for French doors
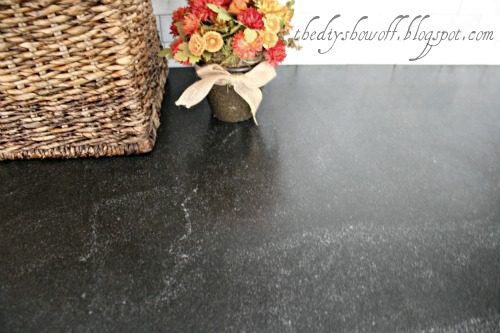
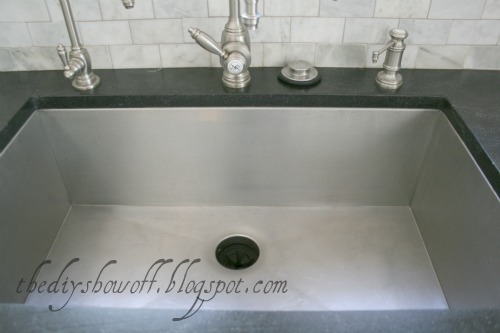
  • Granite countertops (Virginia Jet Mist)
(honed finish)
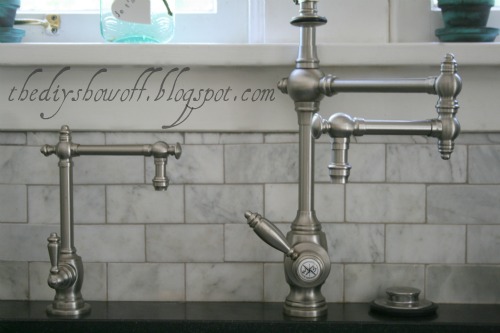
  • New instant hot water dispenser, articulating/sprayer and soap dispenser


  • Zero radius sink
Antique Distressed Java

  • Installed recess lighting, $5 thrift find – pot rack, new semi-flush mounts and dimmer switch.
  • Painted (True Value Easy Care Platinum/Color = Old Fashioned)
  • Pantry Door Clock tutorial


  • Entryway – this is where we enter our home for now. When we have a new front entry and when a new stand alone refrigerator and stand alone freezer are in the budget, this area will go away.  

(See the original house siding and where the kitchen was doubled in size sometime in the past by previous owners?)
  • Storage


Hopefully by the end of the year, it will be complete.  In the meantime, we love the changes we’ve made. 

Now it’s your turn to show off your kitchen!
Please follow these rules for joining in:
  1. Link up your kitchen below. If linking an old post, add the button to the most recent stating you’re participating in Roomspiration-Kitchens today or add it to your side bar for the next week. 
  2. All Roomspiration linky parties stay open through October 14th. 
  3. Follow the DIY Show Off and visit some of the links.
  4. Don’t forget! 
    Enter the $100 Better Homes & Gardens/WalMart gift card giveaway here!
  5. Copy and past the button code into your post or on your side bar to share Roomspiration – Kitchens with your readers.


Roomspiration Blog Hop


If reading through your email subscription, click here to link
up or visit all of the links to beautiful kitchens.


Here’s the full Roomspiration schedule:

I had so much fun getting to know these talented ladies and their beautiful homes:
abode love: a man\View Along the Way

  Involving Color
{ All Things Bright and Beautiful }  Touch of Gray

The Blooming Hydrangea  The Mustard Ceiling

 The DIY Show OffAs you can tell, it’s been a very busy week so I’ll be taking this beautiful warm, sunny Saturday off from blogging and see you Sunday at the DIY Project Parade. Enjoy the weekend!


Happy to make a new friend this week!  I’m joining the party at
http://cottageandvine.blogspot.com/< /span>
Redoux


Like it? Pin It!  🙂

DIY Project Parade and LOTS of Tweaks in the Kitchen

Hurray! Long 3 day weekends = catching up on small projects for us mixed in with picnics and family get togethers. I couldn’t decide whether to share this post or wait until the reveal but I just get so excited about finishing touches and progress that I HAVE to share with my blog friends.  🙂    
We’ve installed bamboo blinds in the kitchen…

The over-the-sink light fixture is being change as we speak (or type or you read)!
 This window will be getting a frame in the near future…
Mr. DIY LOVES the view of his other love (Big Green Egg).
~*~*~*~
We installed a magnetic strip to the backsplash. Not exactly “vintage/farmhouse” but the best part about owning a home is doing what you love, what works and compromising/mixing styles.  It makes for a great team. If Mr. DIY is happy, I’m happy.  The little touch of Ikea is okay with me. 

How to Hang Accessories on Tiled Backsplash:

IN THE GROUT, mark where screws need to be for hanging.  Use a level to keep things straight. 
Mr. DIY likes his knives and kitchen utensils within easy reach near the stove and cutting board. Enter:  The Grundtal (Ikea).  It’s magnetic.  
Breaking away for a minute:
He does the cooking.  For example we had ricotta/spinach/mushroom stuffed white fish wrapped in bacon this week.  I’ve told him he needs to start his own cooking blog. It was soooo good! This helps you to understand why compromising on decor in the kitchen to his liking and approval is important. When you get to eat like this often, your decorating tastes are a little more flexible.  🙂


Now back to the tutorial:
Drill into the grout line.
Add a ceramic anchor by tapping it in the drilled hole lightly…

Anchor in place…
Ready for screws…

Attach the magnet – carefully keep fingers away from the back of the magnet.  It’s VERY strong and you’ll get a pinch if your fingers are in the way!
Clean off fingerprints.  Bon Ami All Purpose Cleaner is great for cleaning stainless steel.
Utensils within easy reach!

Sharing here:
The Lettered Cottage
~*~*~*~
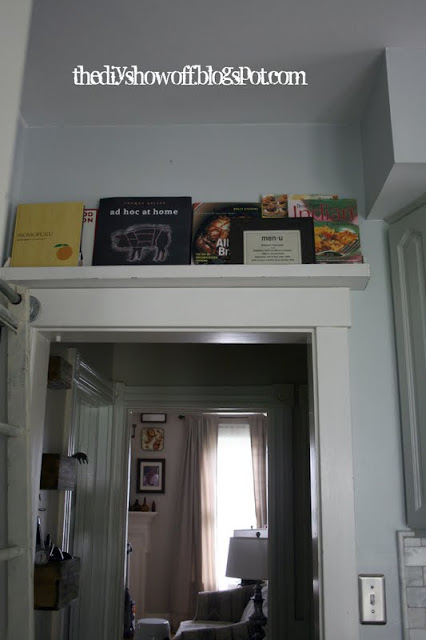
An old antique chicken feeder becomes a cook book ledge/shelf…
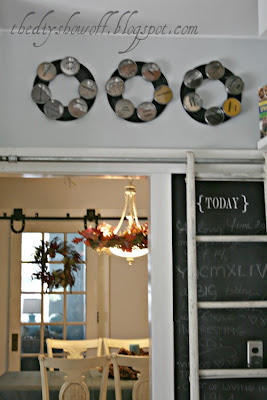
Now the sliding ladder reaches the spice loft and cook book library…
(Please pardon the mess in the dining room…kitchen renovation leads to a little chaos.)

Anticipating the floor coming next week!
Then the island, some built-ins, finishing touches and we’ll be finished!

It’s a lot of little DIY projects for one post but what do you think? Don’t you love productivity?
~*~*~*~

We also held a small get together/picnic yesterday – a couple of days without rain!  Woo hoo!!!  Doesn’t our patio look pretty and festive?

 Edited to join:
What have you been doing this holiday weekend?  


The DIY Show Off


If you’d like to link YOUR DIY project post to The DIY Show Off Project Parade:


1.You must use the button above (ADD BUTTON HTML CODE FROM SIDE BAR TO YOUR POST) and link to this post to share the linky love.

2.Include your name or blog name and project title. Add your permalink (not your blog url, but your DIY project post url). Feel free to link a Past Post, just invite your readers in a current post with a quick note.

3.Or email your link to thediyshowoff@gmail.com and I will add it for you.

4.If you notice your link has disappeared -please add the link back to The DIY Show Off to your post today, a button or a quick note to your readers about the party and try again! I love when everyone participates and readers check out everyone’s links, but I think the return favor of linking back is the nice thing to do so everyone plays fair and enjoys all of the projects and links. Also – this blog party is for DIY projects only. Links not related to DIY will be deleted.

~*~*~*~


Kitchen Progress and a "Help Me Decorate My Kitchen" Poll


I thought I’d get the painting done in one day.  I can usually knock out painting a room in 1/2 a day.  WRONG!  There is so much more cutting in and edging in our kitchen than a standard room.  I am sore. But I’m also happy!  One coat down.  One to go. 

I had the pleasure of trying True Value‘s Easy Care Platinum – Paint and Primer in One.  
The True Value in Slippery Rock, PA has awesome customer service!
I was skeptical.  I love my high priced paint and with redoing the kitchen, I was prepared to buy my favorite brand.  It’s a kitchen – one important room where paint quality really matters. Mr. DIY’s domain (“D” stands for disastrous. BEST FOOD/BEST Messes.)  But I figured I’d give it a try.  It’s just paint and if I didn’t like it, I’d tell you and re-paint.  However, I’m going to tell you that I was pleasantly surprised!  For an affordable $27.99 a gallon – this paint is amazing!

Old color:  Benjamin Moore “Palisades Park” eggshell finish (a pretty sage/pine color) but with the remodel, I wanted a completely new fresh look.  

New color:  Easy Care “Old Fashioned” satin finish (a light blue/gray that depending on the light, looks light blue-green or light blue-gray).  I LOVE the new color.  It looks beautiful with our newly painted cabinets, new Jet Mist granite and marble backsplash. It’s exactly what I wanted. It looked ‘white’ going on but dries darker to a beautiful shade of blue/gray. 

Coverage? These pictures are just the one coat. I could get away with one coat and call it “done”. Except there are a few spots where I must have been stretching the paint thin and the green shows through brush strokes so I will do a second coat just for the sake of doing 2 coats/knowing it’s 100% perfect.  Second coat goes faster than the first anyway, right?!


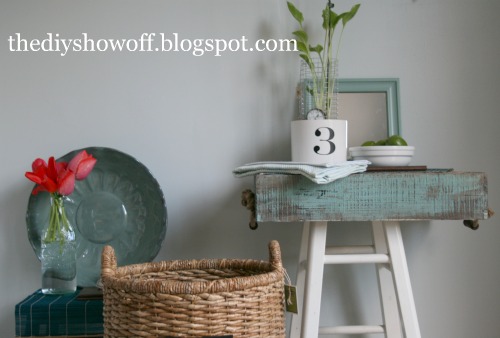
Isn’t it pretty?  It’s perfect for showing off some reclaimed barnwood going in the room and our new distressed medium-tone bamboo floors (coming in June). 

BEFORE
AFTER (Yes…small pantry closet is gone! So is the vinyl flooring!)
You can see the “Old Fashioned” wall color in the back ground of the pictures below.  So, now I’m choosing the overall feel and accent colors. I have a farmhouse style.  We’ve made up my mind but I’m curious to see what you think of the choices I created to choose from.  Please vote below for your favorite! (Click here if you’re reading in your reader or email if you’re interested in voting.)  I might be persuaded to change my mind.  I’m indecisive like that.   

Option 1 – Light Aqua/Blue & Green

Option 2 – Light Aqua/Red

Option 3 – BOTH!  Combine it all!
Option 4 – Neither. 
Something completely different. 
Which would you choose?  
Have you tried the Easy Care brand paint?  
What do you think? 
HAVE A WONDERFUL WEEKEND!