Hi Tech Entry Door

A month or so ago, I shared the plans with Pella Windows and Doors that mom has for the exterior entrance way to the house they’re completely remodeling inside and out.

Things are moving along with the home renovation and the latest is a cool hi tech Pella Windows and Doors entry door with Pella Insynctive Technology (also featured in the Better Homes & Gardens Innovation Home)!

Pella door after @diyshowoff

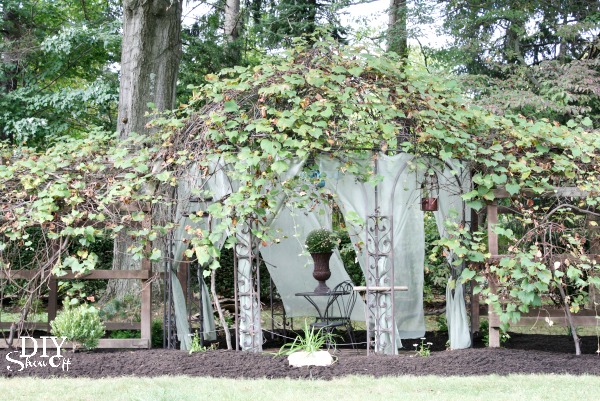
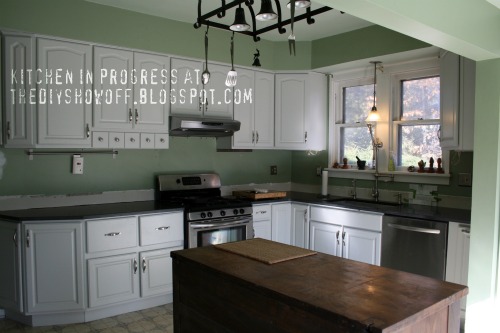
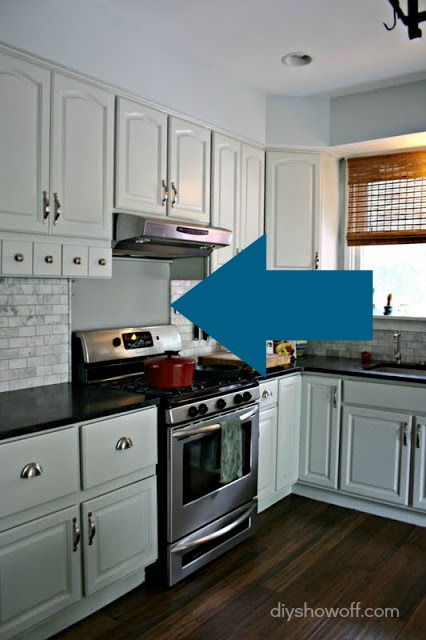
So much work is being completed on the inside – new electrical, plumbing, new walls, new floors, new everything! I can’t wait to show you! Exterior/outdoor/landscaping DIY will resume next spring. I love the board and batten siding! Wouldn’t it be beautiful in a lighter color? Their plans are to create a stone facade. That’ll be gorgeous too. The ugly carport/paved parking area will be transformed into a pergola and patio. But in the meantime, a beautiful new ‘smart’ entry door just couldn’t wait. Because this entrance (before) was anything but welcoming…

door before

Pella arrived to do the measurements and to confirm the door and accessories that my mom wanted. A quick simple visit and an appointment made for installation. Then Pella’s installation crew showed up and got to work. They handled everything from removing the old door and door jamb to installation of the gorgeous new door and accessories to installing trim to clean up. Professional, fast, friendly and quality work…

Pella door installation

…and a gorgeous entry door…

Pella door after @diyshowoff

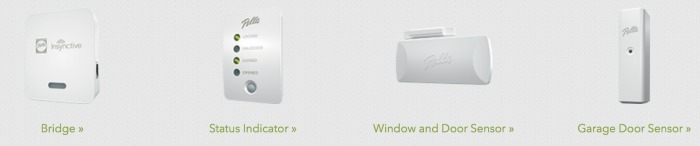
…with Insynctive technology. What is Insynctive technology? It’s a wireless system that monitors when the door is locked or unlocked, closed or opened. How handy is that? Smart! There’s a sensor in the door that connects wirelessly to a bridge home automation hub (which reads sensors on as many doors and windows as you wish to connect) adding extra security and peace of mind to the homeowner. They’re even considering the garage door sensors for several of their outbuildings. A status indicator is then displayed anywhere in the home. We’re thinking the bedroom is a good place…a quick glance before going to sleep to know if you’re all locked down without having to get back up to check the doors and windows. A Pella representative does the installation and provides education for how it all works.

Insynctive

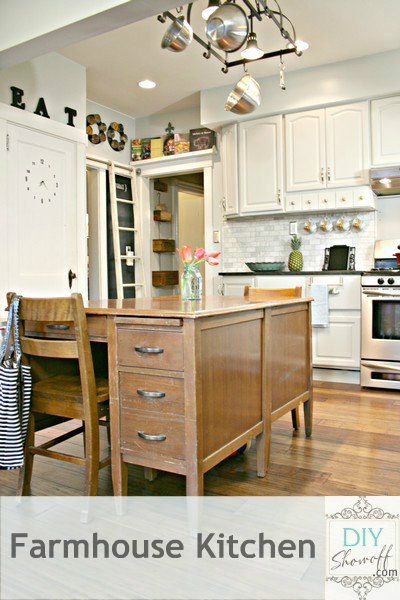
My mom and her husband are thrilled with the gorgeous Pella door that allows natural light to flood into what will be their kitchen, a beautiful warm welcome from the outside as well as the Insynctive technology that will provide convenience and extra security. Huge difference!

door before and after

Looking forward to how that gorgeous door is going to inspire a beautiful outdoor entryway in the near future!

Pella door after @diyshowoff

See more about Pella on Facebook, Twitter, Instagram and Pinterest.Learn more about Pella’s Insynctive technology here: http://insynctive.pella.com/

This is a sponsored project written by me on behalf of Pella Windows and Doors . The opinions and text are all mine.

DIYShowOff 2013 Project Recap

Always for looking at what’s NOT done with little to no regard to all that has been accomplished. Sound familiar? Well, this time of year, looking back at our DIY accomplishments reminds me…”Hey! We didn’t sit on our butts all of 2013!” Wow! What a year! Here’s a recap of some of my top DIY projects:

2013 DIYShowOff Recap

Wall Mounted Pallet Shelfdiy-pallet-shelf

Globe Light Fixture Coverglobe light cover

Patio Swing/Daybed Makeoverhow to add curtains to a patio swing

Free Standing Pallet Herb Gardenfree-standing-vertical-pallet-herb-garden

Not DIY…but in spring of 2013, we rescued Rosie, our Italian Greyhound. She’s such a sweetie and easily transitioned to life in a DIY homeCocoRosie - diyshowoff

She’s even inspired some DIY: 

DIY Dresser Drawer Dog BedDIY Dog Bed

Summer Home TourDIYShowOff Summer Home Tour

Covered Patio Transformationbarn party patio

Chandelier Planter Tutorialhow to make a chandelier planter

Giant LCR Dice GameDIY giant LCR dice game

Decorative Baseboard Trimeasy decorative baseboard tutorial

Tire Planter Tutorialtire flower planter tutorial

Stacked Ombre Flower PotsStacked Stenciled Ombre Flower Pots Tutorial

DIY Wire Cloche/Succulent GardenDIY wire succulent garden tutorial

DIY Removable Window Frame/ArtDIY Removable Decorative Window Frame Tutorial

DIY Map Triptych Wall ArtDIY wall art - map triptych tutorial

Recycled Brick Patio/Patiorecycled brick walkway

Grape Arbor Gazebo Makeovergrape arbor gazebo reveal

DIY Foldable Luggage Rack diy luggage rack

Family Room Before and Afterfamily room makeover before and after

Christmas Home TourDIYShowOff Christmas Home Tour 2013

Customizable/Interchangeable Monogrammed MirrorOne decorative accent - UNLIMITED LOOKS: DIY Interchangeable/Custom Monogrammed Mirror Tutorial

2012, 2011

DIYShowOff Project Gallery

DIYShowOff Home Tour

Sharing here:

2013 Year in Review Link Party

Best DIY Projects of 2013

Top 10 Projects of 2013

Coming soon in early 2014:

  • Open Pantry Before & After
  • Bathroom Makeover
  • Laundry Room Transformation

How to install a tiled backsplash

We’re finally shopping for tile for behind our stove area so I wanted to revisit how our kitchen has evolved and the tile we chose for our back splash as well as review the steps we took to install the tile. Our kitchen when we bought the house was outdated…

When we moved we only paint the walls green, inserted new SS appliances and range hood. We lived with it for 3 years then painted the cabinets and finally replaced the countertop with granite (Virginia Jet Mist). Working as time and budget allow sometimes mean waiting for the things we want.
tile-backsplash-tutorial
We had a savings to get started on our dream kitchen (the dream where we have savings but the dream without winning the lottery.
The back splash:

Materials:
Venatino Polished Marble Tiles 12×12 mosaic, 5 Venatino Pencil Borders
OmniGrip Maximum Strength Adhesive
Tile Guard Natural Stone Penetrating Sealer
QuartzLock Grout – silver
FrogTape
Caulk

Tools:
Tile saw
Trowel
Float
Putty knife
Bucket
Sponge
Bucket
Paper towels
Rags
Caulk gun
DAP Pro Caulk Tool Kit

Back Splash Tutorial:

1.  Apply caulk to gap where countertop meets the wall.

2.  We used a DAP Pro Caulk Tools to make an even/straight line, but a using your finger (and water) works just as well.

3.  Prep area.  Cover countertop or clean as you go to protect the counter top.

4.  Upper cabinets sit back further than the edge of the countertop. We wanted out backsplash to cover the entire area. We started at the edge of the counter for our backsplash. Decide how your tile edge will be finished.  We used a matching border from the countertop’s edge vertically and ended at the bottom of the end of the wall cabinet.  We mitered the joint where vertical meets horizontal.
5.  Apply border and tile with OmniGrip Adhesive using a trowel.  Coat the wall (can be done directly on drywall).  OmniGrip is pre-mixed so there’s no guessing on consistency and this product works really well for a back splash.
6.  To lessen breakage and crumbling when cutting (the vibration nearly pulverizes edges of the marble), we used FrogTape on cuts.

7.  Apply pressure to ‘set’ tiles in place.

Another shot of how we ended the tile on the countertop/cabinet edge.

8.   Let dry at least 2 days.

9.  Seal tiles using Tile Guard.  Wipe on with a rag.  It dries within seconds.

10.  After drying, prep area by covering countertops or clean as you go – dried grout {We chose Quartz Lock in a darker gray} will be hard to remove.

Have a bucket of water handy.

11.  Apply generous amount of Quartz Lock to the float using a putty knife.

Quartz Lock is pre-mixed. We cover with a plastic grocery bag, then the lid with a tight seal and save leftover for a future project.
12.  Add grout to spaces between the tiles, filling every gap, working in small areas going to next step and starting again with the next area.  Smoosh it in the gaps.
13.  Using a well-wrung wet sponge, wipe in a diagonal motion (except when necessary against countertop and cabinets), wiping away grout from tile.  Grout should stay in the cracks and gaps, but be cleaned away from tiles.

14.  Rinse sponge.

15.  Repeat.

16.  Let dry.  Grout will hide imperfections/crumbled edges of marble tile.  Don’t stress with tiny chips. Grout will disguise them. We have an old farmhouse, so our motto is “imperfection adds character”.
Before Grout:
After Grout:
Kitchen before:
Kitchen after:
We’re thinking of stainless steel tiles for behind the stove but I haven’t decided on the pattern or shape of tiles yet.
stainless-steel-tile
We just calculated that we’ll be in our house 7 years this summer. And we’re ready to put the finishing touches on the kitchen. About time, right?  We’ll be removing the cabinets above the stove to install a proper vent. It means losing those two cupboards but more on a pantry coming soon too. What do you think?
tile-kitchen
I think the chef’s dream stove/range is on that ‘winning the lottery’ dream kitchen and he’ll have to make do with what we have but it’s functional. Sorry, Mr. DIY.
See more about our kitchen makeover at our Home Tour
DIY Show Off farmhouse kitchen makeover
Similar products for this project:
Star Quartz Quartz Lock 2 Ug Tile Grout-Birch 18lb bucket
Carrara Marble Italian White Bianco Carrera 3×6 Marble Subway Tile Honed
Custom Building Products TLOSQT-3 TileLab OneStep Cleaner and Resealer
Frog Tape 82021 Pro Painters Masking Tape, 1-1/2-Inch by 60-Yards, Green
Pro Caulk Complete Caulking Kit (As Seen On TV)
Goldblatt G02391 1/4-Inch By 3/8-Inch By 1/4-Inch Square Notch Trowel With Plastic Handle
TBC Margin Trowel Float 6″x 2-1/2″ Professional Gum Rubber Face Bonder to Foam Rubber Pad. Speciality Grout Float Designed for Hard to Reach Areas. Narrow Width & Offset Handle Allow Work Under Toe-Kick Space Under Cabinets and Small Areas. Float 11″
SKIL 3540-02 4.2-Amp 7-Inch Wet Tile SawThis is a sponsored post brought to you by FrogTape. The opinions are completely my own based on my own experience. FrogTape Blog Squad