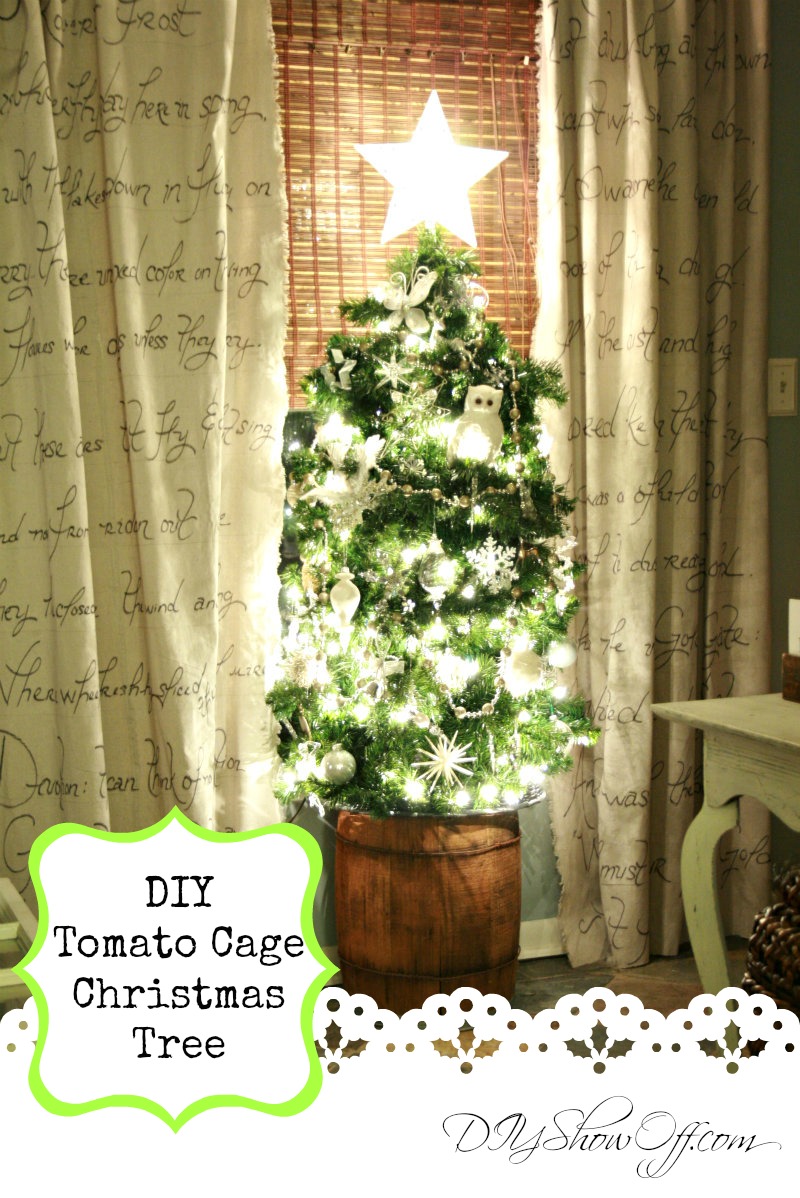
DIY Tomato Cage Christmas Tree

Bringing back an oldie but goody.
{scroll down to see all 4 of my Christmas trees}
A couple of years ago, I made a lighted tomato cage tree – a DIY Christmas tree using lighted garland and a tomato cage. I was able to find everything I needed at my local True Value Hardware.
DIY Tomato Cage Christmas tree
Materials: 
  • Tomato cage.  Ask a store associate.  They should have them in the warehouse/storeroom since it’s not garden season.I got the largest they had.
  • 3 – 9ft. lighted garland
  • Thick rubber band
To make the tree:
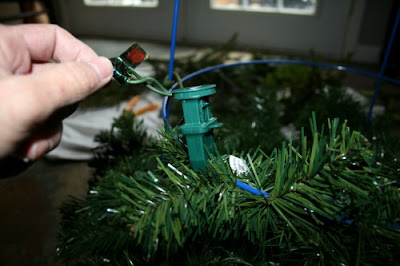
Using a rubber band, gather the “stakes” to make a tee-pee top and secure together (sorry for the bad picture! I didn’t check it before going to the next step…too late now!).
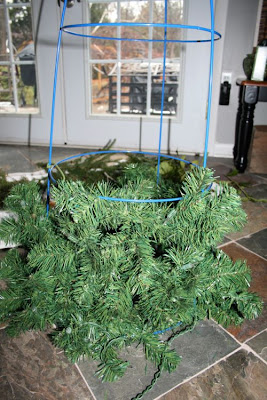
Starting at the bottom (with the plug end of the garland), start to wrap the bottom wire circle with the garland. Wrap a few branches here and there around the wire frame to secure.
Working around the frame, continue wrapping.
When one garland ends, plug in another and continue wrapping to the top.
Fluff.  If there are gaps, fill in by twisting branches around the frame or fluff branches to fill ‘holes’.
All done! We don’t have a live tree and I love the smell of pine. So I headed out to the backyard and clipped small pieces of different real pine.
Just tuck them in open areas for a fuller ‘real’ look with pine scent! (Mine are only tucked but you can use floral wire to make things more secure if needed.) I do this closer to the holiday since there’s no way to water the fresh sprigs or add only when entertaining.
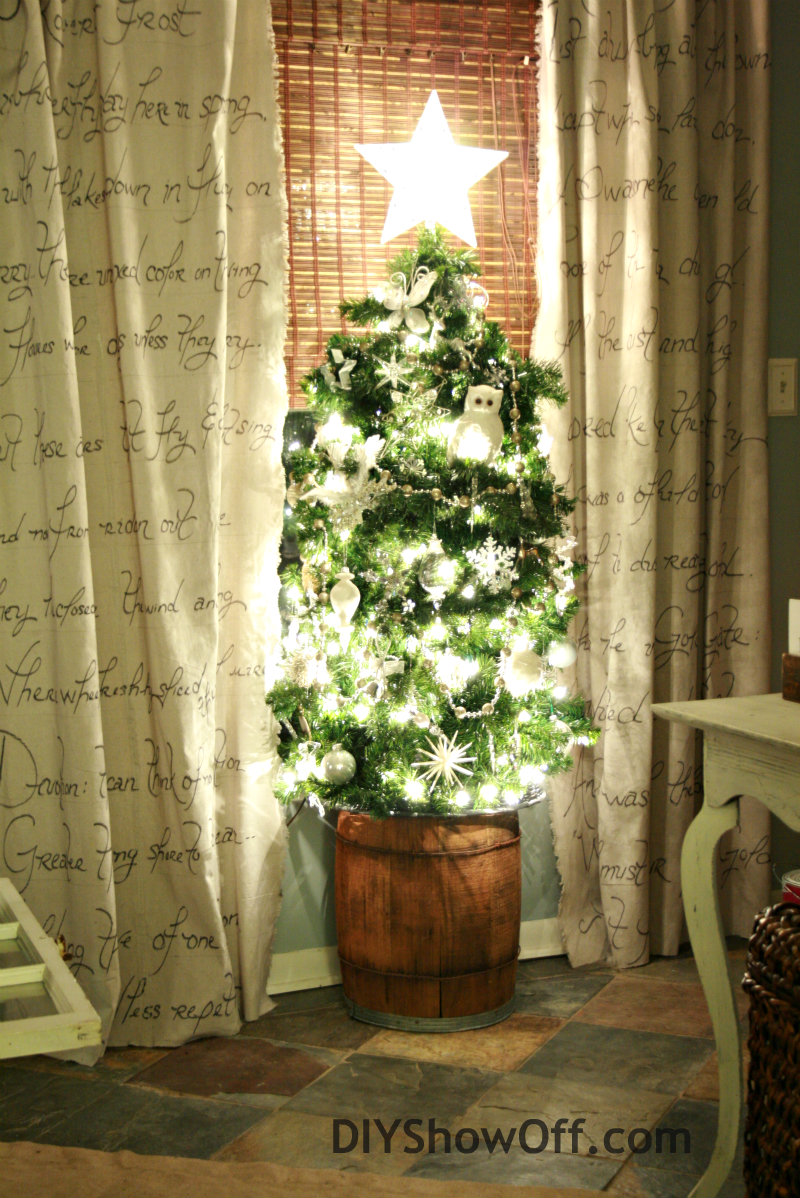
Need more height?  {This year I used an old small barrel}
DIY tomato cage Christmas tree tutorial
Or this also works great for a base:
  • 5 gallon bucket
  • fabric
  • large rubber band
Take the handle off of the bucket.
Stretch a rubber band around the top of the bucket.
Sit bucket in the center of a piece of fabric and tuck under the rubber band.
It’ll look like this:
 Add a round tray (aluminum cookie tray or rattan works) and it’s the perfect base to add height to your tomato cage tree.  If you have an out of the way spot, it can just rest on top. Otherwise attach with wire into the holes were the handles were removed.
You could also paint the bucket instead and fill with stones for weight to use outdoors.  The base was a little to high for my purposes so I didn’t end up using it…oops!
My tomato cage Christmas tree in 2010:
 This year…
 DIY tomato cage Christmas tree tutorial
Have you assembled your own tomato cage Christmas tree? They’re beautiful for outdoor entryways too!
3 more OF MY CHRISTMAS TREES
 colorful eclectic Christmas
DIYShowOff Christmas Tree
{tips for decorating your Christmas tree – can you tell lights are strung vertically? I create a faux root ball to give our 7.5′ tree another foot of height.}
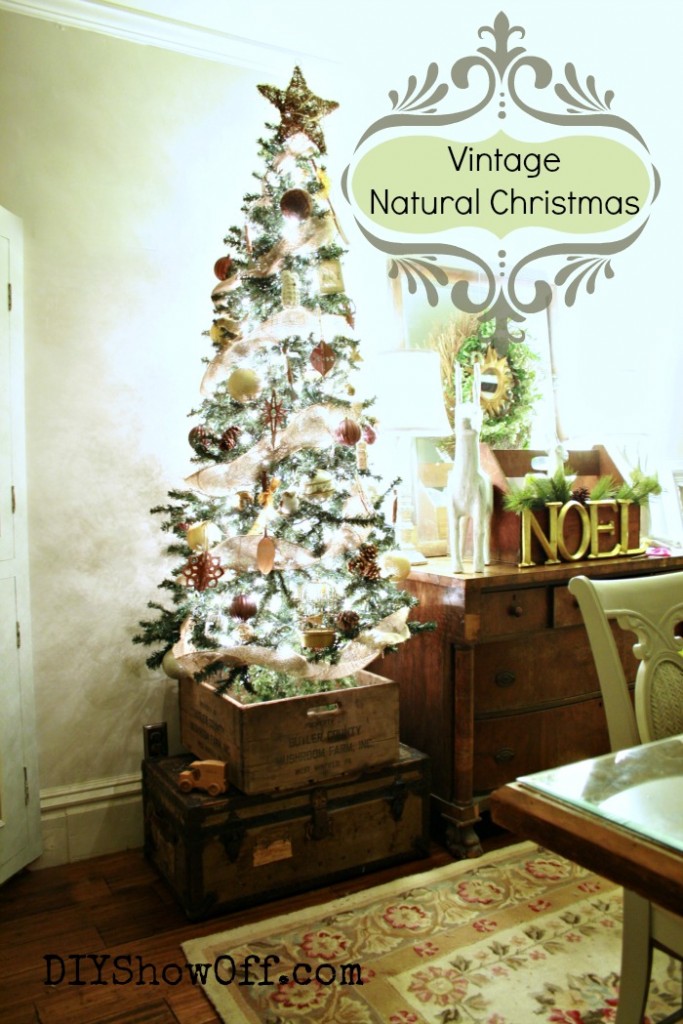
vintage natural Christmas

For even MORE Christmas tree inspiration…

Christmas Tree Contestimage

We were chosen by True Value to be one of the members of the 2012 DIY Squad. I have been compensated for the materials needed for my DIY projects. However, the thoughts and opinions expressed are completely honest and my own. I have not been paid to publish positive comments and no one has twisted my arm to participate. 


Facebook
DIY Show Off - FacebookDIY Show Off - TwitterDIY Show Off - PinterestDIY Show Off - FeedDIY Show Off - HomeTalkDIY Show Off - G+

Chevron Reindeer Games sign tutorial

DIY Chevron Reindeer Games Sign 
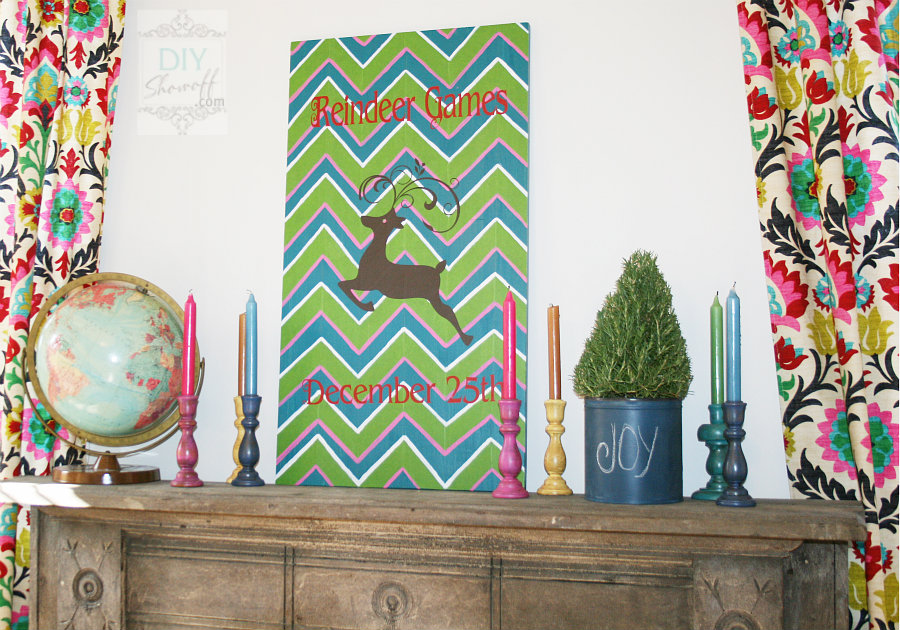
DIY colorful Christmas chevron reindeer games sign

It’s officially time for Christmas decorating in our home! I know! By blogging standards, I’m late to the game. With a family room makeover in progress, it’s at a point where plans for completion can be put on hold until after the holidays and I can still decorate that room to be pretty once I put away the ladder and some tools. I really loved the chevron garden sign I made for summer {here}. I decided I wanted to create a fun colorful Christmas sign incorporating some of the fun colors in the fabric I chose for the curtains.

Remember the tabletop I replaced on the kitchen bar for the apartment? {If not, you can see my post on my DIY wood plank kitchen bar top.} Time to recycle it! I knew it’d be a great material for a DIY sign one of these days. Tabletop to holiday decoration. Why not? To prep for making a sign, I scuffed up the finish with sandpaper and gave it a coat of left over teal paint and let it dry. I’ll call it my “canvas”.

This is what the top looked like before:
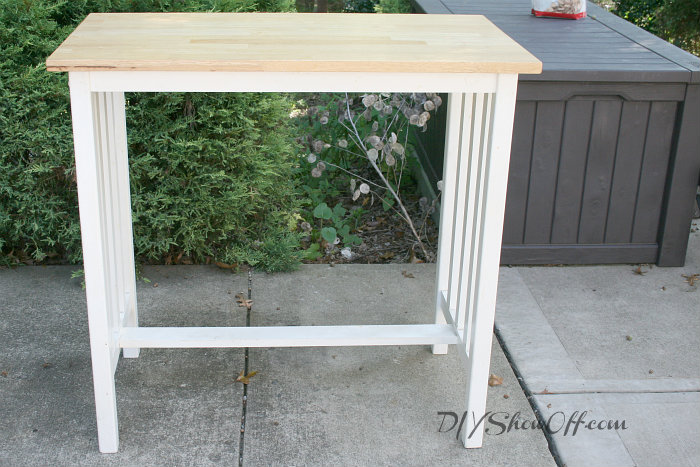
kitchen island before

Tips for creating a chevron pattern using FrogTape:

It’s hard to explain how to create a chevron pattern words/pictures {next time I’ll do a video} but some tips:

My first row is measured. 5″ strips of FrogTape.
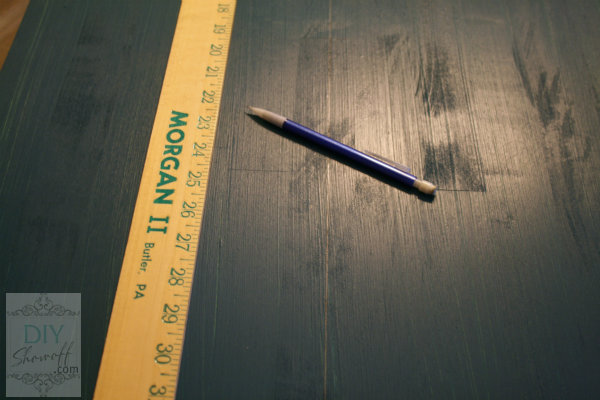
DIY chevron Christmas Reindeer Games sign

Depending on how it would line up, I creased the edges of the tape (non-sticky side) to create a line for cutting.
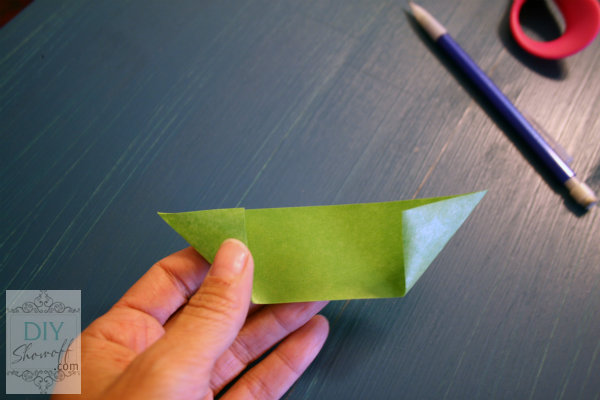
DIY chevron Christmas Reindeer Games sign

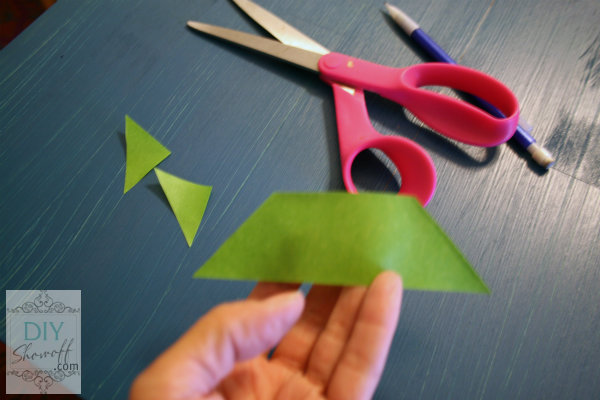
Cut on fold.

DIY chevron Christmas Reindeer Games sign

I placed the angled side on my center pencil line and cut the bottom flush with the bottom of the canvas and smoothed it into place.
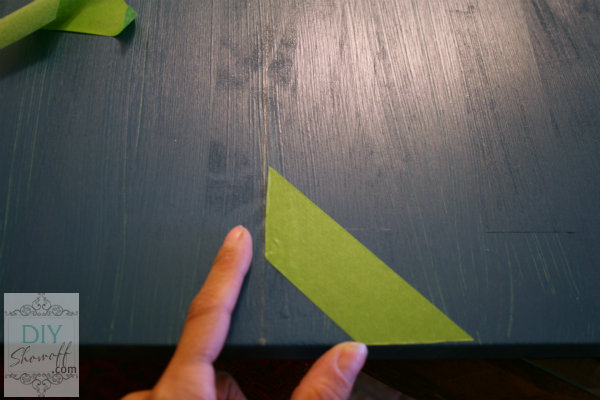
DIY chevron Christmas Reindeer Games sign tutorial

I drew vertical lines with my pencil from the peaks and “v’s” of my first chevron row.
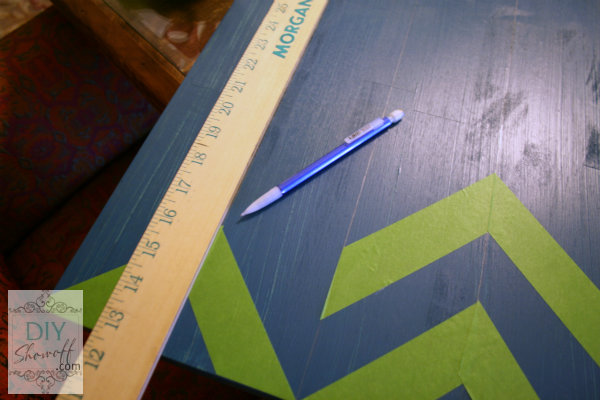
DIY chevron Christmas Reindeer Games sign tutorial

Once my first line was in place, I used a piece of FrogTape for spacing, I worked from the center out by placing another longer piece of tape angled from the center pencil line down to the right pencil line.
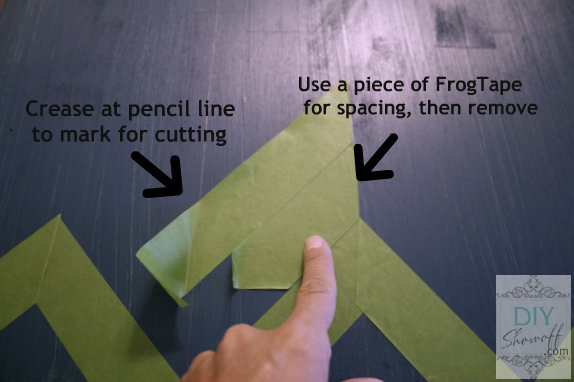
DIY chevron Christmas Reindeer Games sign tutorial

Then I pulled up a corner and folded it on the pencil line so I would know where to cut. Most of the time, the pencil transferred to the sticky side of the tape, creating a cutting guide.

DIY chevron Christmas Reindeer Games sign tutorial

I repeated those steps until I reached the top and finished.

I used pink and white craft paint to add more color.
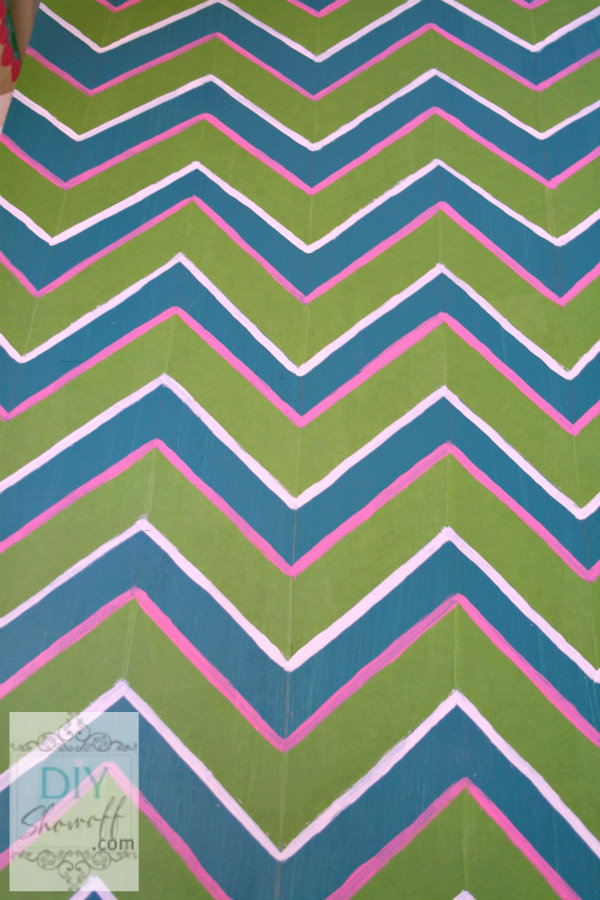
DIY chevron Christmas Reindeer Games sign tutorial

My plan was to paint the blue area showing green and peel away the FrogTape, but I decided to keep the FrogTape in place. {Paint colors: Benjamin Moore Pacific, DecoArt Pretty in Pink “Hope Pink” and Americana Warm White, Green is FrogTape}

Using my Silhouette Cameo, I chose a reindeer from the online store and my Cameo cut it out {brown vinyl}. I created my letters for “Reindeer Games December 25th” using the software and chose the premium dark red vinyl and LDI Fancy Font. I peeled away the negative vinyl (the parts that are not the design) and applied my transfer paper. I made sure the transfer paper was secure by rubbing with a credit card.
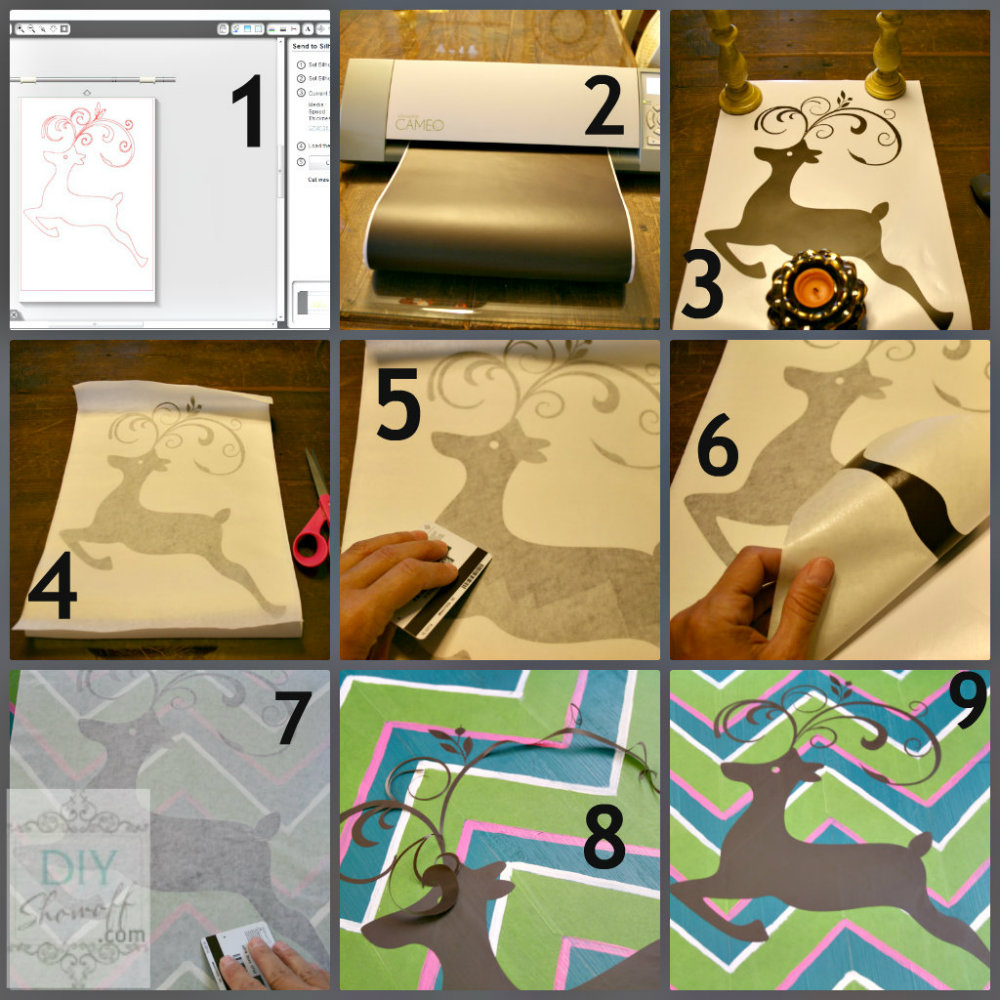
DIY chevron Christmas Reindeer Games sign tutorial

Peel away the backing {the vinyl is transferred to the tacky transfer paper} and place on canvas. Rub the design with a credit card to get it to stick and peel away the transfer paper. In my case, all of the design wasn’t transferring, so I had to be careful and some of my reindeer was applied just as I would a sticker.

I followed the same steps for my lettering, however, knowing that the transfer paper was tricky for my project, I chose to use Delicate Surface FrogTape (the yellow tape) to help transfer my letters. This worked a little easier than applying by hand like stickers and kept my lettering evenly spaced and level.
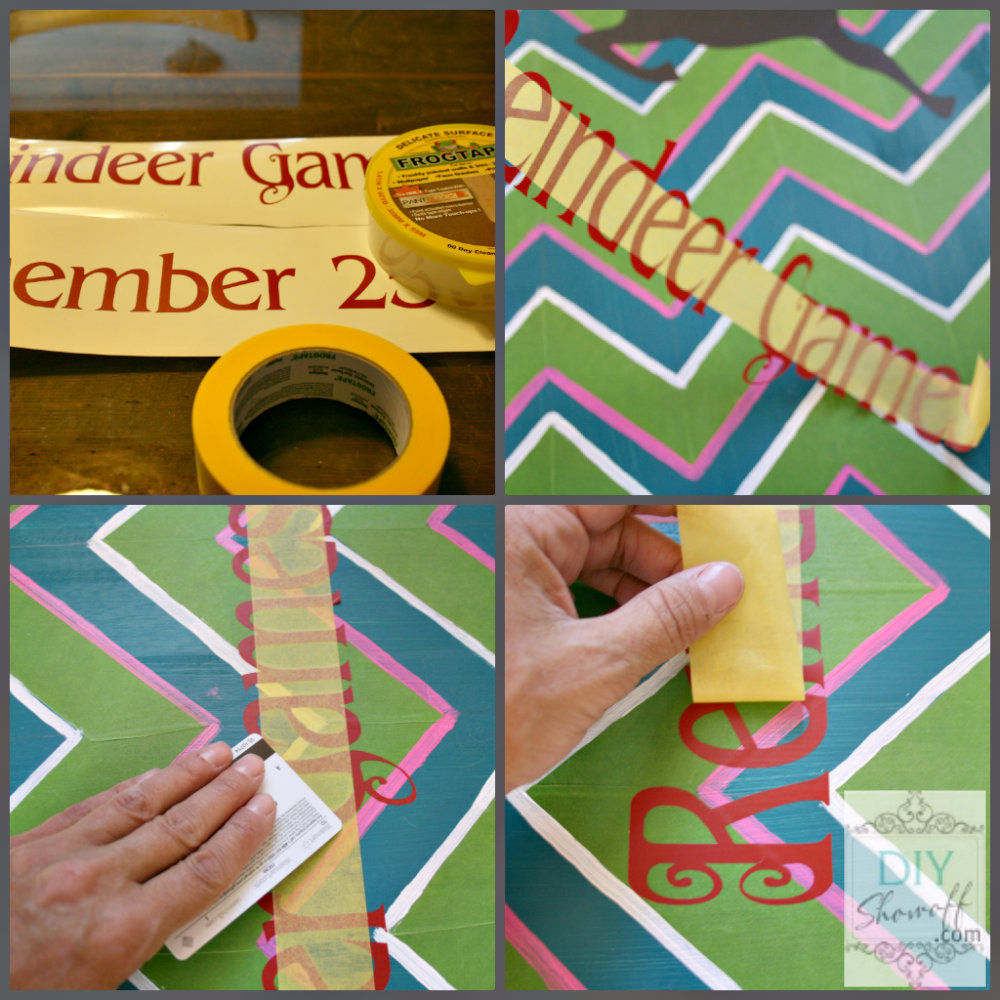
DIY chevron Christmas Reindeer Games sign tutorial

I haven’t had time yet, but since I have FrogTape and vinyl on my sign, I’m going to seal everything with a coat or two of ModPodge. Ta-da!

Colorful Christmas DIY reindeer sign tutorialNon-traditional. Colorful. Fun. I love it. It fits in perfectly with my eclectic colorful family room.
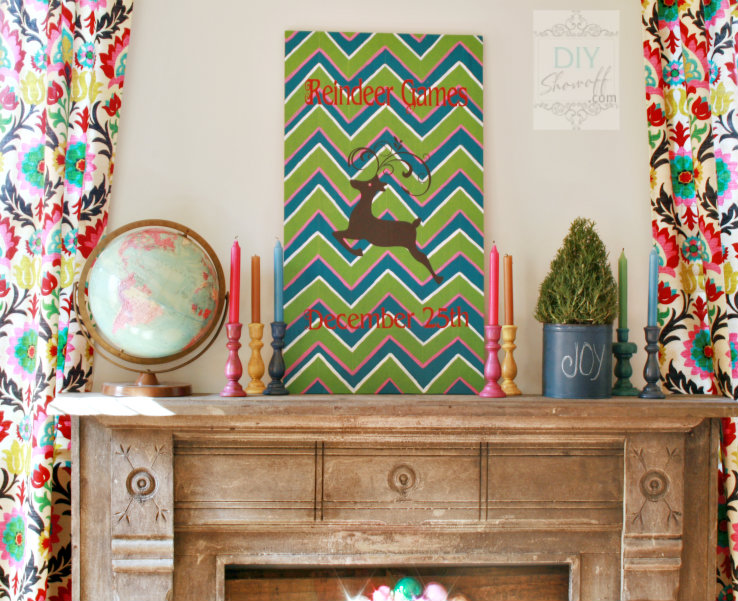
DIY chevron Christmas Reindeer Games sign

What do you think? I just sort of quickly staged for photos so I could share this today. I’ll be re-arranging, re-decorating. In fact, this mantel is even moving to another wall. More on the family room renovation and Christmas decorating coming soon.
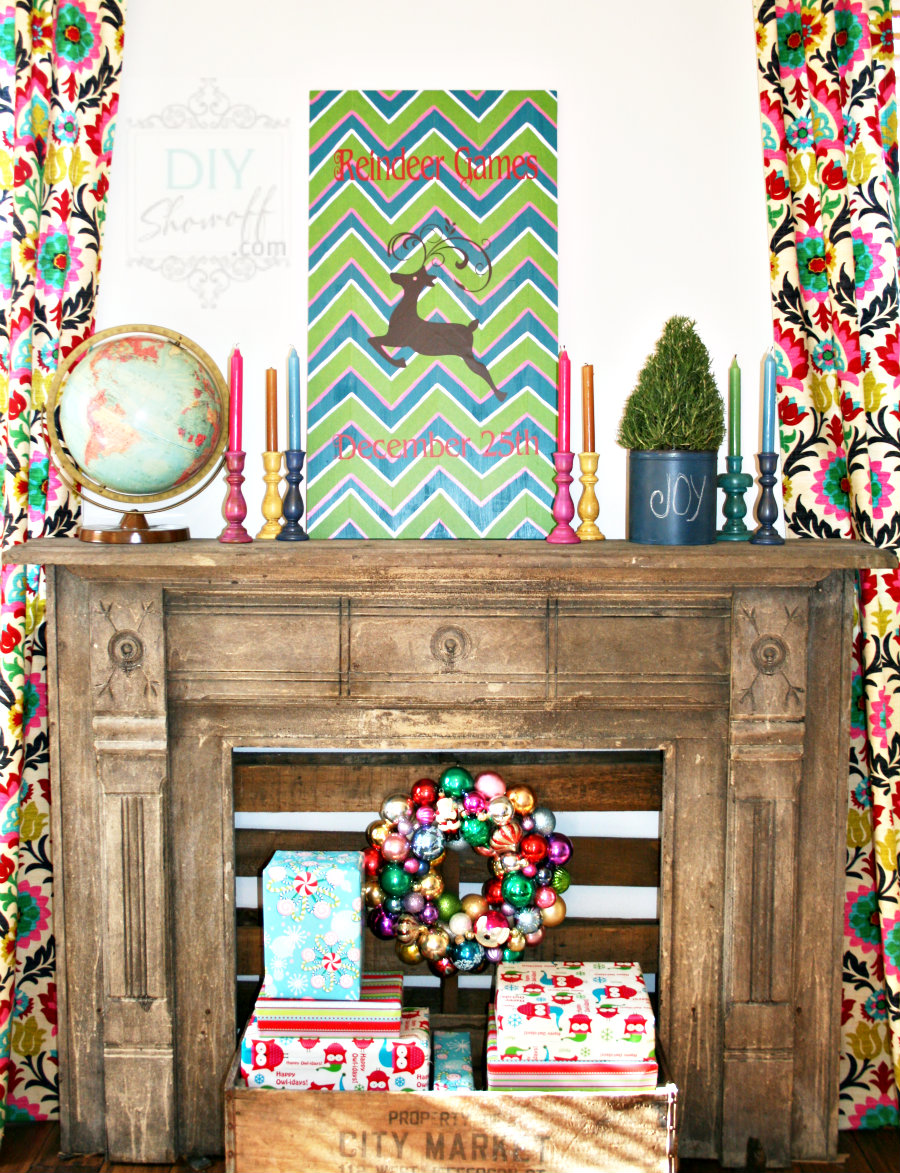
colorful Christmas decor

I will attach a saw tooth hanger to the back and hang and rearrange but…I wanted to get this done to share and to tell you something important:


*I was not compensated for my review but I did receive vinyl and I participate in the Silhouette America affiliate program and will earn a percentage of sales when you use the code “SHOWOFF” for your purchase. This is a sponsored post brought to you by FrogTape. The opinions are completely my own based on my experience. Results may vary. 

FrogTape Blog Squad

Party time:

52 Mantels

DIY Show Off DIY Holiday Highlightsshabby creek cottageThe Shabby NestWeekend Bloggy Readingchristmas-linky-parade-button-songbirdHome Stories A2Z

Songbird & Cottage Magpie


DIY Holiday Highlights ~ My Home for the Holidays

By now, our homes are probably all decorated and ready, right? Time to show it off!
 
And if not – why not?!  Maybe you’re like me and decided that spending 10 days lazing in a tropical environment sounded like a better plan so if your Christmas tree this year is all decked out with lights only (and a few that aren’t working)…it’s okay. Rationalize it. There’s only 4 more days until Christmas. Christmas is peaceful and about family. You know that going to the dark spidery recesses of the basement, messing up the semi-organization to find ornaments will induce stress.  So let it be. Rejoice. Bellow out a Christmas tune and admire what you’ve done. Christmas memories aren’t made from perfection. Years from now, we’ll be laughing and joking…”remember that year our poor tree only had lights because you were too sun-baked to trek down a light of stairs, battle cobwebs and destroy the basement looking for our collection of meaningful ornaments only to pack it all back up a week later?”  More likely:  No one will notice or remember.  So, if you’ve had other things going on, you’ve been working hard or different priorities…it’s okay.  It’s Christmas. I’m just thankful that you’re here.
 
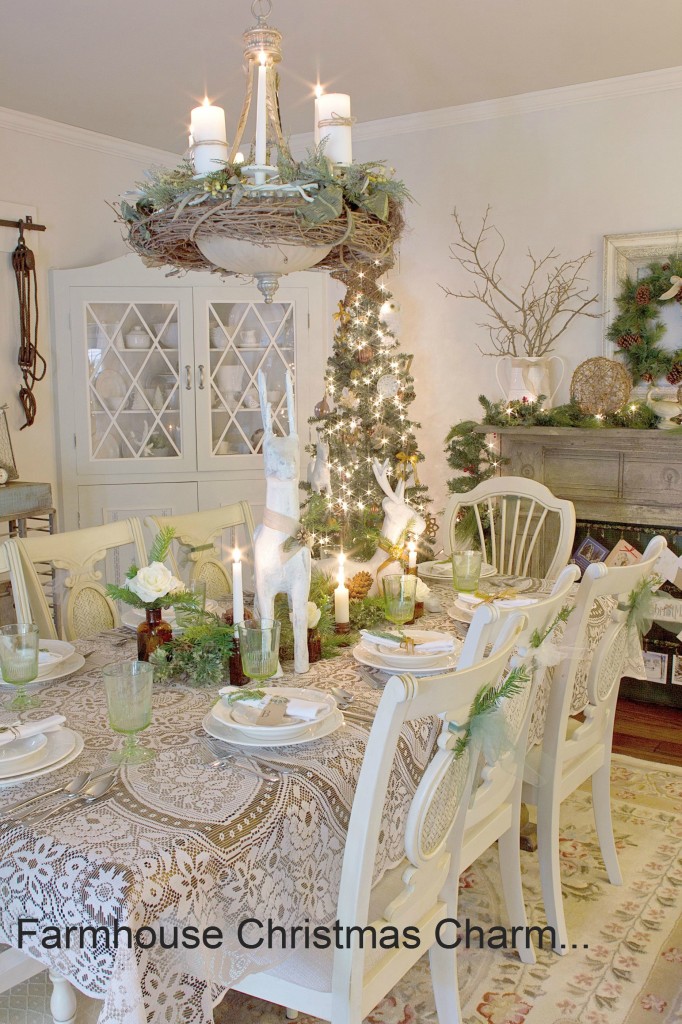
Our Christmas decorating was toned down a bit this year all around. More natural, more DIY, less commercial. What is commercial…is from my collection purchased in past years or recent from thrift stores. I’d offer you a cup of cocoa and some Christmas cookies if I could.  Let’s take a tour of a home that’s ‘just good enough’ for the holidays. Looks festive. And if you squint, it might even look clean. It might even look completed.  Here we go…

white Christmas 


DIY Christmas centerpiece


Sitting Room


I‘d love to see your home all dressed up for the holidays! Ready or not – be real. And if you are ready and your home looks like a Better Home and Gardens holiday article – all the more reason to share! Go ahead, brag. You’re super woman and I want you to get some recognition for all of your had work! Then take a few minutes (or hours) to visit the links to drool over celebrate beautiful holiday homes…
 
 
  • You must use the button above in your blog post or side bar to share the linky love.
  • Add your permalink (not your blog url, but your holiday project post url which is the web address that goes directly to your holiday project blog post, not your blog address). Feel free to link a Past Post, just be sure add the DIY Holiday Highlights button to your side bar.
  • Or email your link to thediyshowoff@gmail.c
    om and I will add it for you.
  • If you notice your link has disappeared please check the content of your post. Is it holiday related? Add the link back to The DIY Show Off to your post today with a quick note to your readers about the party and try again!

Pin It