DIY Fall Festival linky party

DIY FALL FESTIVAL

It’s that time of year {already?!}. Wait! Where did summer go so fast? I can’t believe it, but it’s time for the 3rd annual weekly FALL linky party open Wednesdays through Fridays starting today and ending…well, somewhere around Thanksgiving.

I thought I’d kick off this year by sharing a few of my favorite of my own past fall projects…and maybe a review because I’m day and night up to my eyeballs in an apartment renovation so about the only fall project I’ve completed is falling into bed each night. But, previous years, here is what I did and this year. I have some fun ideas that I can’t wait to get to. Might even take a few hours off from apartment decorating to get to an autumn inspired DIY. Ahem…in the meantime, I present to you, Fall….

Fall fabric wreath tutorial

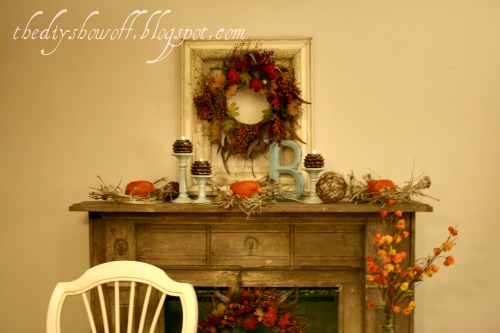
Last year’s autumn with a touch of blue

Dress up a candle with twine and faux leaf…

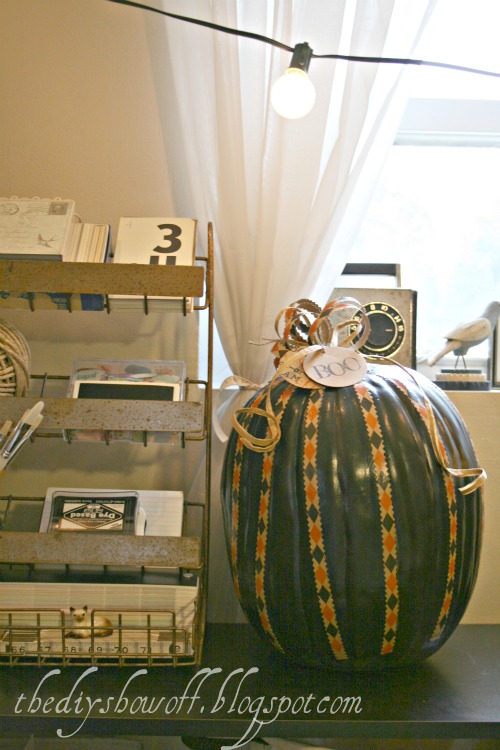
Decoupaged Pumpkins
and letters…

Baby girl’s first day of college is today. I swear she just started kindergarten not too long ago. So while the summer flew by for me, so did the past YEARS! She celebrates with an end of fall birthday and last year, I put together a small

fall themed dinner party

I’m not sure where summer went but I’m still holding on for a few more weeks of summer myself even though I notice chilly mornings and shorter days. I just wasn’t in mom’s pool nearly enough {apartment renovation take #1078}. Are you getting ready? Are you ready?! My favorite things about fall? Spicy fall scents like cinnamon and pumpkin. Wearing sweaters and boots. Warm and cozy throws. I just need another few weeks to work up to it. 😉
DIY Show Off Fall Festival Party
<div align="center"><a href="https://diyshowoff.com/category/holidays-seasonal/fall-festival/" title="DIY Show Off Fall Festival Party" target="_blank"><img src="https://i899.photobucket.com/albums/ac195/Roeshel/DIYFALLFESTIVAL.jpg" alt="DIY Show Off Fall Festival Party" style="border:none;" /></a></div>
  • Link YOUR NEW FALL DO-IT-YOURSELF projects only please! If linking an old project, please reintroduce in a Fall 2012 post to share.
  • Please link back to the party in your post using the coded button above or the link to this post.
  • By linking up you give permission to be a favorite fall DIY feature {with a link back your site}.
  • I will share links to your post on Facebook, Twitter, G+ and Pinterest. Feel free to do the same!


Autumn is Approaching! (Fall Craft Project)

What a great idea and I am loving ALL of the inspiration. I’m not quite ready for fall, but what a lovely way to prepare myself. Head over and check out all of the fall fun!


Here’s my post:

I know. I know. It’s a little early….
I don’t know what your weather is like, but here in PA, it’s beginning to feel a lot like Autumn. It’s still August for goodness sake! But chillier temps (currently 59 degrees!) and a trip to Michael’s where Halloween and fall have already been on display for a few weeks = autumn on the brain. (I didn’t procrastinate this year!)


(Note: I AM NOT ready for the summer to end just yet…where’d it go?)

Last fall my daughter and I got crafty and I decided to make it a tradition. I’ll share that project with you next month some time but now for Met Monday hosted by Susan at Between Naps on the Porch, I want to show you what we did this weekend.

Remember my house number flower pots? Well, soon those flowers are going to flower-heaven as fall frost gets closer, right? Then what? Well…introducing my House Number Funkins (faux pumpkins) with glow in the dark glittered numbers (which look so cool glowing but photographing in the dark is a little tricky):

I haven’t put them out yet. I’m not quite ready to say good bye to summer and my petunias are still soaking up the last of summer but I’ll be all ready when it’s time.

Here’s what I did.1. In Microsoft Word, I enlarged my house numbers in a font I liked. (heavy heap). I printed them on old card stock.

2. Then I cut out the numbers to create stencils.
3. I traced them onto my pumpkins. Using the actual number instead of stencil worked a little better since it’s not a flat surface. (I didn’t take a before picture…but this is pretty much what it looked like before. You’ve seen a faux pumpkin…kind of boring and plain.)
4. I painted them using metallic craft paint. This took a couple of coats. Fun project in front of a movie since it’s time consuming and repetitive. I just did stripes on mine with house numbers since they’ll mostly only be seen from the road.
5. After the paint was dry, I used a cheap, small paint brush to apply glue to the numbers.
6. Then I poured on Martha Stewart’s glow-in-the-dark glitter.
(Nestie friends – D&R Halloween Nightmare II – Return of the Glitter Pumpkins)


My daughter painted this one:

That’s as far as I got today. But I will also:7. Spray a protective coat of matte lacquer over my pumpkins and the glittered numbers for outdoor durability.
8. Cut a hole in the top so that I can add sand or rocks to give them weight (to prevent blowing away when it’s windy). That’s it. I’m really happy with how they turned out and can’t wait to update this little area about the 2nd week of September. They will go here:

Summer
Fall
Watch for details next week relating to
The DIY Show Off – Autumn DIY Fest!

~~~~~~~~~~~~~~~~~~~~~~~~~~~~~~~~~~~~~~~~~~~~~~